phil Dean Posted July 29, 2023 Report Share Posted July 29, 2023 Ref the gear box socket, I got mine from TRGB not cheap it looks like a Torx socket, they suggested I buy a new plug which I did and used it but the old plug didnt look to bad. Like the ramp, Is it hydraulic, Ive been looking at the mandraulic version from AJ Autos, but seen mixed revues about them. The guy who painted my Avenger has one and says I can borrow it for a try out which I might do, but like the look of yours. Quote Link to post Share on other sites
Jase Posted July 29, 2023 Author Report Share Posted July 29, 2023 6 hours ago, phil Dean said: Ref the gear box socket, I got mine from TRGB not cheap it looks like a Torx socket, they suggested I buy a new plug which I did and used it but the old plug didnt look to bad. Like the ramp, Is it hydraulic, Ive been looking at the mandraulic version from AJ Autos, but seen mixed revues about them. The guy who painted my Avenger has one and says I can borrow it for a try out which I might do, but like the look of yours. I found an old brake adjuster and filed it out to size, worked perfectly then, the plug is fine, just a challenge removing. Yes, the ramp is superb, I was going to go for the smaller scissor jack that had arms that swung out but wanted something a little more solid, still have the axle stands under it though just incase (old school) It makes life much easier. Quote Link to post Share on other sites
Jase Posted August 13, 2023 Author Report Share Posted August 13, 2023 School boy error, I put EP90 in my gearbox just ordered some dynolite, will take the car for a run later this week and change when warm. Quote Link to post Share on other sites
RogerH Posted August 13, 2023 Report Share Posted August 13, 2023 As has been posted many owners get along happily with EP90 type oils. I prefer Penrite GB40 (but that is my thing) Have you noticed that Dynolite does not have a GL rating !! Roger Quote Link to post Share on other sites
Jase Posted September 1, 2023 Author Report Share Posted September 1, 2023 Completed the gearbox oil change today EP90 replaced with the correct Dynolite, tappets reset (a few were tight) and I'm hoping oil leak cured. Also (by chance) noticed the vacuum pipe was getting caught in the throttle linkage of the front carb, been doing this since I've had the car which is probably why my idling was out. Also replaced the rear wheel studs. Need to test drive now with the new spin on oil filter, new petrol tank and fully serviced. Quote Link to post Share on other sites
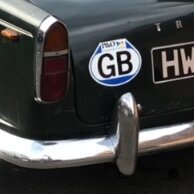
Jase Posted February 11 Author Report Share Posted February 11 Picked up a new old stock petrol cap today, seller said it would also fit TR4A, it is the screw type. On further research it looks like recommended up to a TR3. However I can see that if I cut down my joining hose to the petrol tank I can fit the nut in place in the tube and then screw the cap in place. Is this fine to do? Would hate not to use it as it is currently the only piece of perfect chrome on my car Quote Link to post Share on other sites
Jase Posted February 15 Author Report Share Posted February 15 The shiniest bits on my car, NOS petrol cap and tank in place for the summer. Quote Link to post Share on other sites
Jase Posted February 15 Author Report Share Posted February 15 All serviced, new wheel studs waiting for some sun Quote Link to post Share on other sites
Lebro Posted February 15 Report Share Posted February 15 Sunny here today Bob Quote Link to post Share on other sites
Jase Posted February 15 Author Report Share Posted February 15 5 hours ago, Lebro said: Sunny here today Bob I wish it was in Wales Quote Link to post Share on other sites
Jase Posted February 17 Author Report Share Posted February 17 Looking at a reconditioned/rebuild at some point. Any recommendations for suppliers of engines within a reasonable budget I've looked at rebuilding myself but would like some type of warranty with the engine and the reassurance it is done properly. I don't want to be messing about and having the car off the road for too long. My engine runs fine but could do with a refresh. Quote Link to post Share on other sites
rcreweread Posted February 17 Report Share Posted February 17 39 minutes ago, Jase said: Looking at a reconditioned/rebuild at some point. Any recommendations for suppliers of engines within a reasonable budget I've looked at rebuilding myself but would like some type of warranty with the engine and the reassurance it is done properly. I don't want to be messing about and having the car off the road for too long. My engine runs fine but could do with a refresh. Jason - how far are you prepared to travel? Is East Anglia too far? Cheers Rich Quote Link to post Share on other sites
Jase Posted February 17 Author Report Share Posted February 17 5 hours ago, rcreweread said: Jason - how far are you prepared to travel? Is East Anglia too far? Cheers Rich I'm happy to ship my engine anywhere on a pallet or exchange. Quote Link to post Share on other sites
harrytr5 Posted February 20 Report Share Posted February 20 On 2/17/2024 at 3:41 PM, Jase said: I'm happy to ship my engine anywhere on a pallet or exchange. Try Classic and Modern engine services, Bracknell. A years guarantee but three month turn around Quote Link to post Share on other sites
Jase Posted February 23 Author Report Share Posted February 23 A bit more work completed on Mabel. Bonnet removed and underseal slowly scraped off: Quote Link to post Share on other sites
Jase Posted February 23 Author Report Share Posted February 23 Good to see high quality 1980’s bonnet repairs. I was hoping for just a few little pin holes but it got bigger fair play though, the filler lasted more than 40 years. Now to cut out all of the rot and do it properly. Quote Link to post Share on other sites
Jase Posted February 23 Author Report Share Posted February 23 Few more. Do people drill out the spot welds for the centre strengther so you can paint behind? Quote Link to post Share on other sites
stuart Posted February 24 Report Share Posted February 24 12 hours ago, Jase said: Few more. Do people drill out the spot welds for the centre strengther so you can paint behind? You could but then what about welding it back again? I usually make sure theres enough Bondarust blown in under and a bit of primer then when painting it blow in under with a small touch up gun and then paint the bonnet as normal. That repair on the front of the bonnet is typical as the water gets in and has nowhere to go, good candidate to plate and lead fill, dont forget to fit the bonnet re-enforcing plates at the back to stop the cracking. I do have patterns if you need them. Stuart. Quote Link to post Share on other sites
Jase Posted February 24 Author Report Share Posted February 24 3 hours ago, stuart said: You could but then what about welding it back again? I usually make sure theres enough Bondarust blown in under and a bit of primer then when painting it blow in under with a small touch up gun and then paint the bonnet as normal. That repair on the front of the bonnet is typical as the water gets in and has nowhere to go, good candidate to plate and lead fill, dont forget to fit the bonnet re-enforcing plates at the back to stop the cracking. I do have patterns if you need them. Stuart. Thanks Stuart, I was going to ask about the reinforcement pieces. If I could have the pattern that would be fantastic. Picked up some paint removal discs today so going to strip the bonnet down tomorrow. Quote Link to post Share on other sites
Jase Posted February 25 Author Report Share Posted February 25 slowly getting there: Quote Link to post Share on other sites
Jase Posted February 25 Author Report Share Posted February 25 That’s hard work Quote Link to post Share on other sites
Bfg Posted February 27 Report Share Posted February 27 well done Jase. Now to put it all back on again Quote Link to post Share on other sites
Jase Posted February 28 Author Report Share Posted February 28 On 2/27/2024 at 3:50 PM, Bfg said: well done Jase. Now to put it all back on again on a bit of a mission now, bought an electric drill for a bit more power to keep at the most difficult bits for removal. Just wondering what primer would you use on this? Etch or Zinc? Followed with high build and then need to decide if I'm going to change the colour back to original - Conider or stick with the BRG, always liked Brooklands Green or go with Primrose Yellow??? If I do change to a different colour I will probably paint the inside in the new colour and hit the outside with BRG to keep me going until I can paint the whole car. Should be fun Quote Link to post Share on other sites
Bfg Posted February 29 Report Share Posted February 29 (edited) Hi Jase, I'm trying a rattle-can 1k epoxy primer just now, see images below. I've used it on the steel sides of my Daimler's radiator and have repainted its heater box with it. The paint's colour is like red-oxide and coverage is good. The paint sticks well to wire brush cleaned metal, but the black rattle-can spray paint I've used is easily scratched, leaving the reddish colour showing through, but that may be because I applied it straight onto the dry epoxy primer rather than keying it with fine emery paper. I really ought to test another piece with rubbing down between primer and finished paint coats.. and then leaving the test piece outside through the wet spring weather. Regarding final colour, I'd go with what you like best, balanced with what you feel looks great on a TR4. It's worthwhile remembering that the original colour was a customer choice, and from a very limited range ..and now you are the paying customer.! Again I've been focused on my Daimler and decided not to stick with its original silver grey colour, nor the black it was subsequently repainted in. Both colours though went well with the car's ox-blood red leather seats, interior trim and carpets. I started by looking at dozens of internet photos showing the car (Jaguar-Daimler compact saloons of the '60's) and then eliminated those which I didn't think would compliment my car very bold red interior. I then decided which tone (light or dark) to exclude, because light shows up panel gap deficiencies. And dark colours because they show the dirt n' dust too much (for my country lane driving). Also as I've matured ..yeah okay 'got old' , my eyes have more difficulty seeing into dark corners ..like in the engine bay. So I chose a light colour but not too light. I even ruled out the most common colour of the car, which on the Daimler V8 saloon seems to be a lovely light blue metallic. It might not be, but of course it's more about what one sees (notices most) rather than what is. Surprising even myself I've chosen to paint the Daimler gold (aka opalescent beige ). Jaguar-Daimler's opalescent golden sand of the period was spec'd with the red seats, and it looks very nice ..on a posh saloon car. However.. me being me I wasn't sure, in fact I was almost certain the colour wasn't exactly what I was looking for. This sorta stems from when I restored one of my Sunbeam motorcycle. It's an opalescent silver bike from the 1950's. ...one of the very first to have metallic paint. I had removed its rear light housing to find unbleached / non-yellowed original paint, and it looked too bluish-silver. Over the period of 60+ years the exposed silver had yellowed. That yellowed-silver colour looks right on a bike of that vintage, whereas previously hidden bluish silver looked far too modern. I had paint mixed to the yellowed-silver (a light nickel colour) and was / am delighted with the choice. It looks befittingly 'classic'. So it was with my choosing a new colour for the Daimler. What might have looked great in 1968 sort of looks odd in 2024 ( yep I know, but as a former designer I still have to live with myself !). What sense is there in spending all that money ..and full resprays are expensive ! , and then not be quite happy with the final colour ! ? I went to the paint supplier in Colchester, and from colour names and sample cards, I selected five colours of gold to be mixed as 100ml samples. My friend Mathew has sprayed these onto Triumph Spitfire door panels. And just this Monday i drove up to Norfolk to make my final selection. . . The first two I rejected were both Jaguar colours. One was the aforementioned 'opalescent golden sand' ..which i thought would still look good on an F-type., and the other was like a tarnished copper colour, which I thought would look fabulous on an XK120 or a Triumph TR2. Now shortlisted to three colours / tones to choose from . . . In the sun, laid down, and then stood up, turned different angles to the sun, seen when cloudy, and again when placed in the shade next to a dark grey car. Reflected colours, like blue skies and fresh green grass, can really effect the final effect. The sample mixes of paint cost £40, in addition to the (common) primer and clear coat, plus my friend Mathew's time in painting them for me (he supplied the old door panels). As my father used to say ; 'you're big enough & ugly enough to make your own decisions' and so I made my choice according to what I feel will look good on the curves of this particular car, with those red seats and the walnut dashboard. There's no right nor wrong. It's simply the customer's own choice. When driving Katie around I've noted that the very sight of her on the roads is appreciated by onlookers. The Daimler is a wholly different lady, which is being dressed for the ball. To reiterate.. I'd say to you 'chose what you like best, on that particular car'. Pete Edited February 29 by Bfg Quote Link to post Share on other sites
stuart Posted February 29 Report Share Posted February 29 I would Bondarust as a first couple of coats for rust protection (Factory did the same with what was available back then) then 2k prime and then paint. Up to you on the colour change Stuart. Quote Link to post Share on other sites

Recommended Posts
Join the conversation
You can post now and register later. If you have an account, sign in now to post with your account.