Steves_TR6 Posted January 4, 2014 Report Share Posted January 4, 2014 Being as the weather continues to be pants I'm doing a quick refurb on my dash and instruments. The dash is original Teak, and quite faded The instruments all work but they are all in need of at least a good clean, and possibly re 'whitening' inside. So today I removed the dash, very easy job took about an hour and a half. Then I stripped everything off the dash, and was very pleased to find it in surprisingly good condition. Spurred on by the success I took the faces off all the instruments, and cleaned the interiors. The four small gauges came up a treat! Tacho and speedo need a coat of white paint before they go back together. Next I plan to sand the dash to see what condition the veneer is in below the 40 year old finish. I may then refinish it or renew the veneer. Quote Link to post Share on other sites
Steves_TR6 Posted January 4, 2014 Author Report Share Posted January 4, 2014 And here's the dash...... Quote Link to post Share on other sites
Bodiam Posted January 4, 2014 Report Share Posted January 4, 2014 Hi, Steve, That's my next job, good to see how well your small gauges have come up and how quickly you managed the work. Will be interested to see what you have to do to restore the dash, condition looks similar to mine. Kind regards, John Quote Link to post Share on other sites
Steves_TR6 Posted January 4, 2014 Author Report Share Posted January 4, 2014 Thanks John. I'm planning on sanding the dash tomorrow, then probably polishing it for a natural teak look. Should this not work out then I'll try re-veneering it....... The instruments really came up well, I took them apart and just cleaned the faces with Autoglym Instant Show Shine polish. Shall post an update tomorrow if I get time :-) Quote Link to post Share on other sites
Bodiam Posted January 4, 2014 Report Share Posted January 4, 2014 Thanks, Steve, Look forward to seeing how you get on. John Quote Link to post Share on other sites
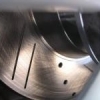
Steves_TR6 Posted January 5, 2014 Author Report Share Posted January 5, 2014 (edited) This morning I fired up the heating in the garage ready to sand the dash and paint the tacho and speedo innards. The 'varnish' on the dash looked ok but upon close inspection had parted company with the teak veneer in several places. Sanding to a good surface I went right through the veneer in places before I got to a surface I was happy with, in retrospect perhaps I should have used some form of chemical stripper before/instead of sanding? In any case I shall now move to option two, re veneering the existing dash ! I've ordered some iron on teak veneer, plenty so as to be able to practice! I'm confident of applying the veneer but cutting all the holes out is daunting..... On to the tacho and speedo, these cleaned up a treat with a light wire brushing by dremel, and then painted up well with white primer. I was going to use Hammerite smoothe, but the local auto shop recommended primer and they've been right before so primer it was! When the primer is dry I'll reassemble the instruments, then midweek I shall practice veneering. Watch this space ....... Edited January 5, 2014 by SDerbyshire Quote Link to post Share on other sites
Steves_TR6 Posted January 5, 2014 Author Report Share Posted January 5, 2014 And here are the instrument innards all pained up, note the masking on the green lamp covers and also on the outside. Quote Link to post Share on other sites
len1 Posted January 5, 2014 Report Share Posted January 5, 2014 hi I have recently taken my dash out with the intention of re veneering it, but once it was out I had bigger trouble. The ply had de laminated, being a joiner I decided I couldn't possibly buy one and set about making a new one ! A bit time consuming but its come out well and I have also veneered it with burr walnut , its now ready for lacquer. I too wondered about trimming the veneer , the best way I could see was to cut as much as you can and then to sand it back, not sure about the iron on as I stuck the whole veneer on with pva but am pretty sure it will work just as good ! Good luck its well worth the trouble Len Quote Link to post Share on other sites
stuart Posted January 5, 2014 Report Share Posted January 5, 2014 Use a scalpel to cut the veneer and change the blades often.. Stuart. Quote Link to post Share on other sites
Percy TR6 Posted January 5, 2014 Report Share Posted January 5, 2014 Hmmmm.......not sure if your posts inspire me or ignite my insecurities! This is a job which is on my to-do list but I haven't plucked up the courage to pull the dash apart yet. I had the speedo refurbished by John Ostick at JDO last year and since it came back it has been embarrassing the rest of the instruments. The tacho has recently started playing up so it will be off to John too, very soon. However, spurred on by your posts I think I am going to have to take the plunge and see if I can't remove the dash, tidy it up and tidy up the other instruments a bit too. Nothing ventured as they say! Steve Quote Link to post Share on other sites
Steves_TR6 Posted January 5, 2014 Author Report Share Posted January 5, 2014 Give it a go Steve, the instruments clean up a treat! As for veneering the dash........ Watch this space! ( off to buy scalpels, thanks Stuart) Quote Link to post Share on other sites
wheeler Posted January 5, 2014 Report Share Posted January 5, 2014 Good instrument refurbish info here http://www.74tr6.com/gauges.htm Quote Link to post Share on other sites
Tomtr250 Posted January 6, 2014 Report Share Posted January 6, 2014 Steve Stuart is right about the scalples, should be easy to do using the existing cut outs but make sure the edges around the holes have good adhesion, you are right about chemical stripping this would probably have saved the veneer. The veneer is very thin and easy to go through so lght sanding (by hand) only I've recently ventured down this route with my friends 4A dash and after stripping I tried to laquer it with copious coats of laquer from a rattle can, waste of time! you can't get any "depth" in the finish so in the end I used two pack laquer ...........fantastic!! This is the only bit of advice I can offer ......................... use two pack laquer!! Good luck Tom Quote Link to post Share on other sites
sperry14 Posted January 6, 2014 Report Share Posted January 6, 2014 Afternoon all... currently in the process of re veneering the dash on my 4A , followed the steps in the web site link here... http://www.crookedspireclassic.co.uk/page14.html has taken a while , however , first class job... just in the final stages of applying the laquer ( 2 pack) ... dials were cut out using a scalpel, no problem at all....... Quote Link to post Share on other sites
marki Posted January 6, 2014 Report Share Posted January 6, 2014 Hi all Very interested in this as I've just handed my dash over to the veneering Gus today, he said he wouldn't cut out the gauges and leave that bit to me. When cutting them out are you from the front or back ? And what did you do with the screw holes ? Just redrill them and let the screws pull the veneer in. The cost to sand reveneer and sand again was £55 not bad I thought. Cheers Mark. Quote Link to post Share on other sites
Tomtr250 Posted January 6, 2014 Report Share Posted January 6, 2014 Mark Cut from the front and relieve the dash around the screws Tom Quote Link to post Share on other sites
Steves_TR6 Posted January 7, 2014 Author Report Share Posted January 7, 2014 Hoping the veneer arrives today so I can have a practice on a spare bit of wood, which I have drilled large holes in to simulate dials! In the meantime the instruments are back together and looking great! Quote Link to post Share on other sites
TR NIALL Posted January 7, 2014 Report Share Posted January 7, 2014 Hoping the veneer arrives today so I can have a practice on a spare bit of wood, which I have drilled large holes in to simulate dials!In the meantime the instruments are back together and looking great
Recommended Posts
Join the conversation
You can post now and register later. If you have an account, sign in now to post with your account.