Steves_TR6 Posted April 27, 2019 Report Share Posted April 27, 2019 The screen frame on my tr6 is a little tatty looking in places, and it’s showing up the rest of the car now! so i’m thinking of repainting the visible satin black paint. thought i would remove the riveted on silver coloured hood attachment plate, remove the tired door window seals, sand, mask, prime carefully and spray using Tough Black questions : the riveted on hood attachment plate, is this just riveted on or should i expect it to be stuck/sealed? which door rubbers should i go for, there seem to be ‘thick’ and ‘thin’ available from moss? any other difficulties with this ‘easy job’ ?? steve Quote Link to post Share on other sites
stuart Posted April 27, 2019 Report Share Posted April 27, 2019 (edited) Have a very good look at the outer lower corners of your frame as likely as not it will be rotted out in which case remove and repair is the only thing to do, if not the the finisher should have some sealant under it though it will probably be rock hard by now, replace with non setting windscreen sealer, the two types of rubber seal (The ones that go up the "A" post and up the forward edge of the frame) are determined by how close your window glass fits to the frame and you should determine that when you remove your old ones. Stuart. Edited April 27, 2019 by stuart Quote Link to post Share on other sites
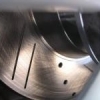
Steves_TR6 Posted April 27, 2019 Author Report Share Posted April 27, 2019 (edited) Well that went well! easily drilled out the rivets and eased off the capping, the mastic was still flexible so i woder if it had been off before? tapped the old rivet remains through the holes with a small nail and hammer, a couple needed help with a mini grinder here is what i’m left with :-) Ready for extensive masking, sanding, priming, paint look out for the jext exciting episode ..... steve Edited June 16, 2019 by Steves_TR6 Quote Link to post Share on other sites
jerrytr5 Posted April 27, 2019 Report Share Posted April 27, 2019 Run some electrical wire under the screen rubber to hold it away from the frame so you can mask the rubber and get paint under the edge. When you remove the wire the rubber will cover the new painted edge. Otherwise it could look a bit of a mess. Jerry Quote Link to post Share on other sites
Steves_TR6 Posted April 28, 2019 Author Report Share Posted April 28, 2019 10 hours ago, jerrytr5 said: Run some electrical wire under the screen rubber to hold it away from the frame so you can mask the rubber and get paint under the edge. When you remove the wire the rubber will cover the new painted edge. Otherwise it could look a bit of a mess. Jerry Thanks Jerry, sounds like a good idea ! Quote Link to post Share on other sites
Steves_TR6 Posted April 28, 2019 Author Report Share Posted April 28, 2019 16 hours ago, stuart said: Have a very good look at the outer lower corners of your frame as likely as not it will be rotted out in which case remove and repair is the only thing to do, if not the the finisher should have some sealant under it though it will probably be rock hard by now, replace with non setting windscreen sealer, the two types of rubber seal (The ones that go up the "A" post and up the forward edge of the frame) are determined by how close your window glass fits to the frame and you should determine that when you remove your old ones. Stuart. Thanks Stuart a cursory examination and the frame looks solid, i’ll check again i’ll also keep the old seals for comparison, the drivers side is certainly close to the frame steve Quote Link to post Share on other sites
BlueTR3A-5EKT Posted April 28, 2019 Report Share Posted April 28, 2019 (edited) That looks like you have the thick sponge seal up the screen side (620913) not the thin smaller rubber tadpole (620403) Stuart please confirm. As I know the stuff has changed from OE sizes over the years. Alan Wadley would always demand the smaller seal when he fitted these seals to ensure the glass did not get pushed about. Peter W Edited April 28, 2019 by BlueTR3A-5EKT Quote Link to post Share on other sites
Steves_TR6 Posted April 28, 2019 Author Report Share Posted April 28, 2019 Update ! after more trim removal, cleaning, sanding,cleaning, masking, more masking and yet more masking..... primer ! just need to buy some Tough Black in Satin and this nice easy job will be done. i believe the original finish would have been matt, but i prefer satin and this will match the back of the car. thanks for the tips, especially the wire tip Jerry as that worked excellently for windscreen and bottom seal steve Quote Link to post Share on other sites
stuart Posted April 29, 2019 Report Share Posted April 29, 2019 23 hours ago, BlueTR3A-5EKT said: That looks like you have the thick sponge seal up the screen side (620913) not the thin smaller rubber tadpole (620403) Stuart please confirm. As I know the stuff has changed from OE sizes over the years. Alan Wadley would always demand the smaller seal when he fitted these seals to ensure the glass did not get pushed about. Peter W I normally fit the smaller ones if I have done a major rebuild on the shell i.e. floors/sills/inner sills but I have had to fit the larger ones on some customers cars where they have had unknown rebuilds. Stuart. Quote Link to post Share on other sites
Steves_TR6 Posted April 29, 2019 Author Report Share Posted April 29, 2019 Thanks Peter and Stuart black paint is on and masking off, looking good ! i’m unsure what the seal should look loke/do there is the ‘furlflex’ seal all around the door edge and up the a pillar, then this secondary seal down the a pillar to about the hinge area. what is the purpose of this second seal, shouldnt the window seal against the furlflex? TIA ! steve Quote Link to post Share on other sites
jerrytr5 Posted April 29, 2019 Report Share Posted April 29, 2019 I think it probably directs the water down the A post, otherwise it would drip on to your knee. Jerry Quote Link to post Share on other sites
Steves_TR6 Posted April 29, 2019 Author Report Share Posted April 29, 2019 (edited) Finished, and chuffed with the result. thanks again for the tips :-) steve Edited June 16, 2019 by Steves_TR6 Quote Link to post Share on other sites
Mark69 Posted April 29, 2019 Report Share Posted April 29, 2019 So you should be,lovely job. Fancy doing mine. Quote Link to post Share on other sites
Steves_TR6 Posted April 29, 2019 Author Report Share Posted April 29, 2019 55 minutes ago, Mark69 said: So you should be,lovely job. Fancy doing mine. Was a fun job, but no i can’t see me making a living this way ! Quote Link to post Share on other sites
SeanF Posted April 29, 2019 Report Share Posted April 29, 2019 Nice job Steve. Quote Link to post Share on other sites
stuart Posted April 30, 2019 Report Share Posted April 30, 2019 Dont forget the sealant under the capping strip when you put it back, including a little circle of it round each rivet too. Stuart. Quote Link to post Share on other sites
Steves_TR6 Posted April 30, 2019 Author Report Share Posted April 30, 2019 1 hour ago, stuart said: Dont forget the sealant under the capping strip when you put it back, including a little circle of it round each rivet too. Stuart. Thanks for the reminder Stuart! the passenger window leading edge lines up parallel with the a frame, but the drivers one is much closer to the frame at the top. is this simple to adjust Stuart? steve Quote Link to post Share on other sites
Kevo_6 Posted April 30, 2019 Report Share Posted April 30, 2019 Looks like a great job you’ve done there Steve, well done. With a bit of luck I hope to get out to the garage and do a few jobs on mine soon. Quote Link to post Share on other sites
stuart Posted April 30, 2019 Report Share Posted April 30, 2019 59 minutes ago, Steves_TR6 said: Thanks for the reminder Stuart! the passenger window leading edge lines up parallel with the a frame, but the drivers one is much closer to the frame at the top. is this simple to adjust Stuart? steve The adjustment of the mounting bolts for the winder mechanism (Item 79 x7off) will be your first port of call and check the glass is fitted in its carrier bracket correctly (Item62). Also with the hood up check the height stop (Item 90) is adjusted correctly too.https://www.moss-europe.co.uk/shop-by-model/triumph/tr5-6/body-chassis/doors-fittings/doors-fittings-tr5-6.html Stuart. Quote Link to post Share on other sites
Richard71 Posted April 30, 2019 Report Share Posted April 30, 2019 19 hours ago, Steves_TR6 said: Finished, and chuffed with the result. thanks again for the tips :-) steve Hi Steve, What did you use to adhere those seals to the frame & "A" posts? I've yet to fit mine. BTW, really nice job! Quote Link to post Share on other sites
Steves_TR6 Posted April 30, 2019 Author Report Share Posted April 30, 2019 2 hours ago, stuart said: The adjustment of the mounting bolts for the winder mechanism (Item 79 x7off) will be your first port of call and check the glass is fitted in its carrier bracket correctly (Item62). Also with the hood up check the height stop (Item 90) is adjusted correctly too.https://www.moss-europe.co.uk/shop-by-model/triumph/tr5-6/body-chassis/doors-fittings/doors-fittings-tr5-6.html Stuart. Thanks Stuart i’ve stripped off the door card ready to ‘adjust’, might have time tomorrow Richard, i’ve not affixed the strips yet the seals you see are the furlflex ones that grip the seam. steve Quote Link to post Share on other sites
stuart Posted April 30, 2019 Report Share Posted April 30, 2019 (edited) This is what I use for any glue jobs including those rubber "P" Shaped "A" Post seals https://www.woolies-trim.co.uk/product/1263/heat-resistant-adhesive FWIW clean the back of the seal with some quality sprit wipe and scuff with a scotch pad to obtain the best adhesion. Stuart. Edited April 30, 2019 by stuart Quote Link to post Share on other sites
Steves_TR6 Posted May 1, 2019 Author Report Share Posted May 1, 2019 Before heading into london for work today it ocurred to me that the issue might actually be the windscreen frame not being straight careful measuring to fixed points, the hood mountings, indicates that the drivers side a pillar top is 5-7mm further back than the passenger a pillar so i’d like to adjust the frame a few mm i appreciate the hood will be tighter but think this will be ok how do i adjust the windscreen frame?, and is it a good idea or am i opening a can of (tin) worms ? steve Quote Link to post Share on other sites
stuart Posted May 1, 2019 Report Share Posted May 1, 2019 You can adjust as that amount there is probably scope for you would need to slacken completely the three bolts across the front of the dash and then slacken the two bolt through the "A" post the last wing fixing bolt and the one behind then also slacken the one bolt on the inside of the frame fixing bracket under the dash and then push the top corner of the frame forward the required amount and then retighten. I tend to use a bit of wood and a jack to get it held in position then tighten the frame mounting bolts first then the last three across the front. Do be aware that you may then struggle to get your hood frame catch in that side so dont overdo it. Stuart. Quote Link to post Share on other sites
Steves_TR6 Posted May 1, 2019 Author Report Share Posted May 1, 2019 1 hour ago, stuart said: You can adjust as that amount there is probably scope for you would need to slacken completely the three bolts across the front of the dash and then slacken the two bolt through the "A" post the last wing fixing bolt and the one behind then also slacken the one bolt on the inside of the frame fixing bracket under the dash and then push the top corner of the frame forward the required amount and then retighten. I tend to use a bit of wood and a jack to get it held in position then tighten the frame mounting bolts first then the last three across the front. Do be aware that you may then struggle to get your hood frame catch in that side so dont overdo it. Stuart. Thanks Stuart. i shall give it a go and report back :-) steve Quote Link to post Share on other sites

Recommended Posts
Join the conversation
You can post now and register later. If you have an account, sign in now to post with your account.