foster461 Posted August 23, 2008 Report Share Posted August 23, 2008 get bentley manual - they explain step by step That plug should be pried out although you dont have to remove it to remove the float chamber as far as I know. I think it is just a drain plug. Re the Bentley book, this is THE book and there is a PDF version available from several sources. A link was posted just the other day in this thread: http://www.tr-register.co.uk/forums/index....st&p=102003 There is no better source of technical info than this manual. Stan Quote Link to post Share on other sites
dixiechopshop Posted August 23, 2008 Author Report Share Posted August 23, 2008 Thanks again but it was a threaded in plug with holes in it. you may of been able to remove the chamber without removing it but it made it easier. there was a ton of resin tn the bowl ( more than Ive ever seen) so Im gonna do the other carb too. but since Ive reinstalled the carb Im getting a sit or sputter of gas from the other carb. Maybe did I nit realighen the linkage correctly? uh kinda lost. Quote Link to post Share on other sites
dixiechopshop Posted August 23, 2008 Author Report Share Posted August 23, 2008 oh and sorry I didnt mean to be annomyus (sp) my name is Jeff Hershey. you guys have been wonderful and cant even believe the amount of knowledge Ive gained from you.Im not much of a club guy but with the loyalty of the Tr world Ive seen may reconsidder. the first owner of this car was the late Guy ledbetter. An amazing man. My personal hero. If you ever had known him you would know why. Again thanks fellas. Quote Link to post Share on other sites
foster461 Posted August 23, 2008 Report Share Posted August 23, 2008 Thanks again but it was a threaded in plug with holes in it. you may of been able to remove the chamber without removing it but it made it easier. there was a ton of resin tn the bowl ( more than Ive ever seen) so Im gonna do the other carb too. but since Ive reinstalled the carb Im getting a sit or sputter of gas from the other carb. Maybe did I nit realighen the linkage correctly? uh kinda lost. Jeff, I think there were a couple of different designs for how that plug fits.. If these carbs had been sitting with gas in them for an extended time there is a good chance that the carbs are gummed up and need taking apart and cleaning. There is not much to them but emptying and cleaning the float chambers, checking the floats for leaks, check that the shut of valve is working and that the float level is set up is a good start. There is a bit of a learning curve with these carbs just as with everything else but they are fundamentally very simple, especially the early version on the 250. Once you have them back on the car they will need balancing. Stan Quote Link to post Share on other sites
foster461 Posted August 24, 2008 Report Share Posted August 24, 2008 Stan,Alright Ive tried the easy fix listed in the rebuilding instructions you linked me to,but no luck. The carb wont leak at idle but after its given some gas it starts. So Ive siked myself up and are going to try to remove the carb and correctly fix the problem. My sons birthday is next weekend and my dad will be over. I know he would be thrilled to take a ride in the 250(maybe drive) so I might try just soaking the valve,as Im not sure If I could get a new one in time. As far as the float chamber gasket, got any Ideas? I know its gonna need replacing. Can you get these parts fairly comonly?like local part houses.( I know thats a dumb question but kinda reaching here.) Also do you or anybody know any sites that kinda have any do's and donts of TR restoration. I wanna restore it correctly but add some custom flare. Nothing dramatic, just things like maybe a birds eye maple dash and shaving the front bumper mounts. Would that be sacreligous to the TR community?( sorry my spelling is horrid) Coincidentally there is a picture of a bumperless TR5 on the front cover of the next issue of TR Action. This is a mod to the TR4/TR5/TR250 body that I have seen several times before and it suits this body shape well I think with the lamp bar and the big round lamps. http://www.tr-register.co.uk/Images/TR_Latest_issue.jpg Here's another example, this one a TR4 from the 2007 VTR national in Valley Forge. This was a very striking car, very nicely done. http://i38.photobucket.com/albums/e119/fos...%202007/TR4.jpg Stan Quote Link to post Share on other sites
dixiechopshop Posted August 24, 2008 Author Report Share Posted August 24, 2008 Wow that reg tr5 is really nice. I was considering changing the color of mine to a red cause all of the red ones Ive seen look so good. Were there diffrent types of the hard top center section? I ask because the one on my car is textured. I like the look of the smooth ones better. It seems to flow with the rest of the car better. Quote Link to post Share on other sites
foster461 Posted August 25, 2008 Report Share Posted August 25, 2008 Wow that reg tr5 is really nice. I was considering changing the color of mine to a red cause all of the red ones Ive seen look so good. Were there diffrent types of the hard top center section? I ask because the one on my car is textured. I like the look of the smooth ones better. It seems to flow with the rest of the car better. TR's look great in red and the problem is that if you go to any Triumph event you will be part of the 50% red car contingent as it was a very popular color. There is an argument that says the car came with a particular paint and trim with a plate on the B post to verify that and you should just stick with that to keep things in sync. I ignored that option with only slight regret as by 1974 the USA TR6 had been rendered into a cartoon of its original form so I was in the mood for drastic remodelling that went some way beyond changing the color. My current favorite for the TR6 and the TR250/TR5 is blue with silver stripe for the TR250. Here is an example: http://www.6-pack.org/sixpack//images/stor.../brucemoxon.jpg Not sure about the surrey top finish options, hopefully someone will volunteer that detail. Stan Quote Link to post Share on other sites
BrianC Posted August 25, 2008 Report Share Posted August 25, 2008 I'm sure no Surreys were originally supplied with 'textured' finish. Covering with vinyl was done by some later owners as a quick/cheap fix for a dented Surrey roof (they are easily damaged in storage). If you strip it to restore the standard paint finish, be prepared for some filling or light panel beating. Not sure whether it's easier on steel or alloy, but will probably require a professional to shrink any lumps and bumps. either way. The smallest blemish will stand out like asore thumb as the meatl Surrey is an eyecatching feature of the TR4-5 range. BTW: I know the Surrey is actually only the soft top, but most people also refer to the metal version as a Surrey to distinguish it from a full, conventional hard-top. Quote Link to post Share on other sites
stuart Posted August 25, 2008 Report Share Posted August 25, 2008 (edited) One of the Devon group members has the solid roof section on his 5 (Royal Blue) covered with dark blue Mohair and I think it looks absolutely stunning and really suits the car. From a distance it looks like the best fitting surrey soft section (as lets face it they never fit well) that you have ever seen. Stuart. Edited August 25, 2008 by stuart Quote Link to post Share on other sites
dixiechopshop Posted August 26, 2008 Author Report Share Posted August 26, 2008 The top may have been recovered, I never really looked that close at it. The car has been painted once before. I believe the original color was white but the rear section of the glass was at one time red( Ive noticed from some chipping white paint.I ve also noticed some diffrence in the stripes on these cars. Who ever repainthe the one on my car left a bit to be desired, Uneven lines and such. My question is is the stripe supposed to be straight or have a dip in the middle of the hood. Quote Link to post Share on other sites
foster461 Posted August 26, 2008 Report Share Posted August 26, 2008 The top may have been recovered, I never really looked that close at it. The car has been painted once before. I believe the original color was white but the rear section of the glass was at one time red( Ive noticed from some chipping white paint.I ve also noticed some diffrence in the stripes on these cars. Who ever repainthe the one on my car left a bit to be desired, Uneven lines and such. My question is is the stripe supposed to be straight or have a dip in the middle of the hood. I'm pretty sure the stripe runs straight across the bonnet. It follows the contours of course but I dont recall anything other than straight. Take a look at this car from Sal Vespertino http://www.6-pack.org/sixpack//images/stor...lvespertino.jpg Moss has a painting guide that is free, Not sure if it can be downloaded or if you have to ask for it and they will mail it to you. Part number 601-390 When a TR250 is painted, it is very difficult to authentically reproduce the painted stripes on the hood. As a result, many TR250s are now lacking their identifying stripes. The original stripes were painted with a reflective light silver paint (We advise care in selecting a paint which is chemically compatible with the paint used on the rest of the body). We do offer an instruction sheet on how to reconstruct the stripes. With your next order, ask for #601-390, which will be sent to you free of charge. This striping was not used on TR5 models. Quote Link to post Share on other sites
dixiechopshop Posted August 27, 2008 Author Report Share Posted August 27, 2008 Stan thats also a great looking TR. I Have a method of reproducing stripes that works great. In fact I sometimes use it rather than doing hand pin striping. The paint currently on my car was definatly a budget job. There is a lot of overspray and the rear glass was not preped correctly af all. I also believe that the orginal color was more of a cream because the underside of the deck lid seems to have never been touched and the paint maintained it self well. The only badge Ive noticed was on the driver side front wheel well (under the bonnet). But the only thing you can make out is the actual stamped 68. Oh yeah I guess the roof was recovered but that part was done well. It will be challgening to return it to a slick finish. Quote Link to post Share on other sites
foster461 Posted August 27, 2008 Report Share Posted August 27, 2008 Stan thats also a great looking TR. I Have a method of reproducing stripes that works great. In fact I sometimes use it rather than doing hand pin striping. The paint currently on my car was definatly a budget job. There is a lot of overspray and the rear glass was not preped correctly af all. I also believe that the orginal color was more of a cream because the underside of the deck lid seems to have never been touched and the paint maintained it self well. The only badge Ive noticed was on the driver side front wheel well (under the bonnet). But the only thing you can make out is the actual stamped 68. Oh yeah I guess the roof was recovered but that part was done well. It will be challgening to return it to a slick finish. Jeff, not sure where the TR250 has its identifying plates. Moss says: Vehicle Number Location top of LH wheel arch Body Number Location RH firewall But perhaps you dont have the paint and trim codes stamped onto an ID plate like the TR6 does (plate on B post). If it just had an external respray perhaps an area behind the trim or under the dash or carpet will reveal the original color. You can see the full color chart here: http://www.6-pack.org/spaw/PaintandTrim.htm White and Jasmine Yellow are the two colors down at the lighter end of the spectrum. I think both look good on the TR5/250 body Stan Quote Link to post Share on other sites
johnny250 Posted August 27, 2008 Report Share Posted August 27, 2008 (edited) oops! Edited August 27, 2008 by johnny250 Quote Link to post Share on other sites
johnny250 Posted August 27, 2008 Report Share Posted August 27, 2008 Stan thats also a great looking TR. I Have a method of reproducing stripes that works great. In fact I sometimes use it rather than doing hand pin striping. The paint currently on my car was definatly a budget job. There is a lot of overspray and the rear glass was not preped correctly af all. I also believe that the orginal color was more of a cream because the underside of the deck lid seems to have never been touched and the paint maintained it self well. The only badge Ive noticed was on the driver side front wheel well (under the bonnet). But the only thing you can make out is the actual stamped 68. Oh yeah I guess the roof was recovered but that part was done well. It will be challgening to return it to a slick finish. yep thats where the plate should be.....if 68 is the paint code then it was 'slate grey'...never seen one of those though?! john Quote Link to post Share on other sites
foster461 Posted August 27, 2008 Report Share Posted August 27, 2008 Stan thats also a great looking TR. I Have a method of reproducing stripes that works great. In fact I sometimes use it rather than doing hand pin striping. The paint currently on my car was definatly a budget job. There is a lot of overspray and the rear glass was not preped correctly af all. I also believe that the orginal color was more of a cream because the underside of the deck lid seems to have never been touched and the paint maintained it self well. The only badge Ive noticed was on the driver side front wheel well (under the bonnet). But the only thing you can make out is the actual stamped 68. Oh yeah I guess the roof was recovered but that part was done well. It will be challgening to return it to a slick finish. Do you think you could get a good quality close up picture of the plate on the wheel arch ?. 68 would be an unusual paint code for a TR. 65 would be the closest numerically but that would be Emerald Green.. Stan Quote Link to post Share on other sites
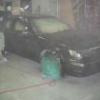
dixiechopshop Posted August 27, 2008 Author Report Share Posted August 27, 2008 Sorry guys I meant the stamped number was 1968. Actually apl 1968. Ill get a close up pic though.the plate on the rh firewall reads 6433cc. Ithink the paint is the yellow color.Or was. http://s305.photobucket.com/albums/nn219/d...roject%20TR250/ Quote Link to post Share on other sites
foster461 Posted August 27, 2008 Report Share Posted August 27, 2008 Sorry guys I meant the stamped number was 1968. Actually apl 1968. Ill get a close up pic though.the plate on the rh firewall reads 6433cc. Ithink the paint is the yellow color.Or was.http://s305.photobucket.com/albums/nn219/d...roject%20TR250/ Cool. So the original paint code is 19 which is New White and it looks like the trim code is 11 - Black. Stan Quote Link to post Share on other sites
foster461 Posted September 7, 2008 Report Share Posted September 7, 2008 I'm pretty sure the stripe runs straight across the bonnet. It follows the contours of course but I dont recall anything other than straight. Take a look at this car from Sal Vespertino http://www.6-pack.org/sixpack//images/stor...lvespertino.jpg Moss has a painting guide that is free, Not sure if it can be downloaded or if you have to ask for it and they will mail it to you. Part number 601-390 When a TR250 is painted, it is very difficult to authentically reproduce the painted stripes on the hood. As a result, many TR250s are now lacking their identifying stripes. The original stripes were painted with a reflective light silver paint (We advise care in selecting a paint which is chemically compatible with the paint used on the rest of the body). We do offer an instruction sheet on how to reconstruct the stripes. With your next order, ask for #601-390, which will be sent to you free of charge. This striping was not used on TR5 models. I need to correct my assertion that the stripe runs straight across the bonnet. I was at a show today (CT Triumph in Manchester, CT, thanks guys - great show) and got a good look at a few TR250's and I would say the stripe follows the shape of the bonnet edge and you can see that in this picture: http://i38.photobucket.com/albums/e119/fos...R250-stripe.jpg The stripe does have a subtle point in it and seems to be parallel with the the leading edge of the bonnet. Stan Quote Link to post Share on other sites
Tom Fremont Posted September 8, 2008 Report Share Posted September 8, 2008 (edited) Here's another for reference - not parallel to front edge but almost. This was positioned according to TRF's template. http://i400.photobucket.com/albums/pp84/im...15L9-6-8056.jpg Edited September 8, 2008 by Tom Fremont Quote Link to post Share on other sites
dixiechopshop Posted September 10, 2008 Author Report Share Posted September 10, 2008 yeah guys, thats what I thought It was supposed to look like. Ive seen some that looked straighter than others, possible just bad pics. ANd I still got to say that red looks great! Quote Link to post Share on other sites
Tom Fremont Posted September 10, 2008 Report Share Posted September 10, 2008 ANd I still got to say that red looks great! OK, then take this: http://i400.photobucket.com/albums/pp84/im...15L9-6-8012.jpg Quote Link to post Share on other sites
dixiechopshop Posted September 11, 2008 Author Report Share Posted September 11, 2008 Thats good looking paint! I got a ways to go befor even bothering myself over color, and Ive never really been a big fan of red, but on thais car it just seems to fit. Quote Link to post Share on other sites

Recommended Posts
Join the conversation
You can post now and register later. If you have an account, sign in now to post with your account.