Graze Posted April 16, 2017 Report Share Posted April 16, 2017 (edited) I need some advice I have to change the gearbox top cover on my newly fitted overdrive gearbox. Seems the original selector top cover from my gearbox had the switch location in the wrong spot (on the RH side opposite the reverse lights switch) meaning I had the luxury of overdrive on all 5 gears (reverse too if I had been silly enough to try it) So never having pulled one of these off before is there any special tricks to removing the selector & forks & fitting the new one? Its being done in the car just to make it interesting! all help appreciated Graeme Edited April 16, 2017 by Graze Quote Link to post Share on other sites
RogerH Posted April 16, 2017 Report Share Posted April 16, 2017 Hi Tony, have a look here http://www.buckeyetriumphs.org/technical/Gearbox/GearboxCover/GearboxCover.htm Taking the cover off thew car is easy. The three selector forks are held in with a taper lock screw and quite often they break when undoing. A 4 or 8 sides socket should be used. If you need to remove the rods, then you will need to remove the dent balls that the rods lock against. On a 4/4A they have caps that are usually screwed in. On the 6 they are like little core plugs. Once removed the rods can be withdrawn. Remove the outer rods first and the centre rod last. Remember catch the balls etc that create the interlock. The incorrect switch hole can be blanked off. A new switch holed put in the correct place - 3/4 the gear on the left looking from above. The thread size for the switch is unknown but people are using 16mm x 2mm it sort of works. The correct size is 5/8 dia x 13TPI - it does exist as a common thread. Roger Quote Link to post Share on other sites
Graze Posted April 16, 2017 Author Report Share Posted April 16, 2017 Thanks Roger Appreciated Graze Quote Link to post Share on other sites
MichaelH Posted April 17, 2017 Report Share Posted April 17, 2017 The little square head taper lock screws can be loosened by using a brake adjustment spanner which generally has two sizes of square "holes" one of which I found exactly fits the taper lock screw square heads Just though to share that with you and others as it helped me when I was replacing the rubber grommets on the selector rods (trying to stop leaks eventually solved by adding a big vent to to the top) Quote Link to post Share on other sites
RogerH Posted April 17, 2017 Report Share Posted April 17, 2017 Hi Michael/Graeme, regarding the rubber seals on the selector rods. Mine were leaking quite badly. Somebody on here suggest using Q-seals (Quad seals) These are like O-rings but have a cross section like a four leaf clover. The depth of the counter bore where the seal are positioned is much deeper than the gauge of the O ring and so can float about. In theory this shouldn;t matter but it does. Use some sprt of packer to keep the rings in place. The o-rings have a number like 112. The Q-seal is something like 4112 or Q112 Various suppliers around the world. in the UK I used MayDay seals. Roger Quote Link to post Share on other sites
Graze Posted April 17, 2017 Author Report Share Posted April 17, 2017 Thanks Michael/Roger Seems my 3rd/4th selector fork on the replacement is badly worn so I will need to pull the current one off the car and hopefully it will be in better shape and can be re-used Graeme Quote Link to post Share on other sites
Graze Posted April 25, 2017 Author Report Share Posted April 25, 2017 Roger thanks for the advice & link to buckeye removed, stripped, switch threads tapped into the cover - will have O'drive on 2nd, 3rd, 4th cover painted & ready to re-install It was a relatively easy job & I had lots of help from someone who knew what they were doing next challenge will be the wiring to the switches I know that i need to wire the two switches to each other & to ground off one side, then the column switch has two wires - yellow/ green to switches & then to solenoid?, where do I wre the other one to get the power? where do i take the power from & connect it to - do i need a relay J type overdrive advice appreciated Graze Quote Link to post Share on other sites
RogerH Posted April 25, 2017 Report Share Posted April 25, 2017 (edited) Hi Graeme, have a look here for a '72 TR6 I'm sure it is J type. http://www.advanceautowire.com/tr2506.pdf Roger Edited April 25, 2017 by RogerH Quote Link to post Share on other sites
Graze Posted April 25, 2017 Author Report Share Posted April 25, 2017 thanks again Roger should be able to sort it from there Graeme Quote Link to post Share on other sites
stuart Posted April 25, 2017 Report Share Posted April 25, 2017 Roger thanks for the advice & link to buckeye removed, stripped, switch threads tapped into the cover - will have O'drive on 2nd, 3rd, 4th cover painted & ready to re-install It was a relatively easy job & I had lots of help from someone who knew what they were doing next challenge will be the wiring to the switches I know that i need to wire the two switches to each other & to ground off one side, then the column switch has two wires - yellow/ green to switches & then to solenoid?, where do I wre the other one to get the power? where do i take the power from & connect it to - do i need a relay J type overdrive advice appreciated Graze Why is the rear housing fitted upside down? Stuart. Quote Link to post Share on other sites
TR 2100 Posted April 25, 2017 Report Share Posted April 25, 2017 (edited) Why is the rear housing fitted upside down? Stuart. So obvious, really. But it was Stuart that spotted it. Amazing it's possible - better to remember Sod's law. AlanR Edited April 25, 2017 by TR 2100 Quote Link to post Share on other sites
TR 2100 Posted April 25, 2017 Report Share Posted April 25, 2017 (edited) See above Edited April 25, 2017 by TR 2100 Quote Link to post Share on other sites
Graze Posted April 26, 2017 Author Report Share Posted April 26, 2017 (edited) Why is the rear housing fitted upside down? Stuart. Well that is a good question? shortage of TR experts still alive here thats the way I got it back from the guy who refurbed it & i didnt know any better seems to work ok - is there any long term consequence requiring me to pull it all apart & re install (or do I just leave it till next time I need to pull it out?) Graeme Edited April 26, 2017 by Graze Quote Link to post Share on other sites
TR 2100 Posted April 26, 2017 Report Share Posted April 26, 2017 The machined surface, facing upwards, is supposed to sit on top of a rubber mounting. Rubber mounting has two bolts through the gearbox There is a plate that sits on the chassis. So - how is your gearbox fixed to the chassis? AlanR Quote Link to post Share on other sites
Graze Posted April 26, 2017 Author Report Share Posted April 26, 2017 Interestingly Alan its a J type and has a bracket botled to the chassis which sits across under the back of the o'drive with a rubber mount and an L shaped bracket which is bolted to the back of the overdrive cover - all as its meant to be I'm sure Also my cover has two bolt holes on the underside too -- but not used due to the bracket Graze Quote Link to post Share on other sites
TR NIALL Posted April 26, 2017 Report Share Posted April 26, 2017 Why is the rear housing fitted upside down? Stuart. That's Weird as the Angle Drive is in the right position. Quote Link to post Share on other sites
stuart Posted April 26, 2017 Report Share Posted April 26, 2017 This exploded diagram shows the rear of the casing and it certainly looks from your picture that yours is fitted upside down so Im wondering where the rear mounting bracket is bolted to, can you get us a picture please? http://www.moss-europe.co.uk/shop-by-model/triumph/tr5-6/clutch-transmission-drivetrain/overdrives-components/163e52.html Stuart. Quote Link to post Share on other sites
stuart Posted April 26, 2017 Report Share Posted April 26, 2017 That's Weird as the Angle Drive is in the right position. Im wondering if its a Volvo rear casing perhaps? Stuart. Quote Link to post Share on other sites
stuart Posted April 26, 2017 Report Share Posted April 26, 2017 This is what it normally looks like. Stuart. Quote Link to post Share on other sites
Lebro Posted April 26, 2017 Report Share Posted April 26, 2017 You could have warned us to put sun glasses on before opening that photo Stuart Bob. Quote Link to post Share on other sites
stuart Posted April 26, 2017 Report Share Posted April 26, 2017 You could have warned us to put sun glasses on before opening that photo Stuart Bob. Ha ha sorry it is a bit bright! Stuart. Quote Link to post Share on other sites
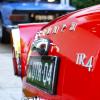
Graze Posted April 26, 2017 Author Report Share Posted April 26, 2017 Stuart photo now attached to previous post cooking dinner got in the way entirely possible its a volvo unit - purchased from the US Graeme Quote Link to post Share on other sites
stuart Posted April 26, 2017 Report Share Posted April 26, 2017 Interesting bracket, Moss seem to sell them to convert "J" type boxes to "A" type chassis mounts but it still doesnt explain why the housing seems to have the mount on the top but the speedo drive out the correct way. Stuart. Quote Link to post Share on other sites

Recommended Posts
Join the conversation
You can post now and register later. If you have an account, sign in now to post with your account.