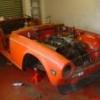
ChrisHump Posted October 15, 2009 Report Share Posted October 15, 2009 As a progressing welder ventures on through the unknown throwing constant concern, bordering on obsession towards shut lines and gaps he thinks the door gaps are to wide, so does my dad but I dont. After scouring the internet for prime examples to study the door gaps we are struggling to find any decent pictures to comfort our thoughts. I was wondering if any of you would kindly take some detailed close ups of the gaps running at the rear and front of the doors, strange request but without seeing other cars it is difficult to come to a conclusion. A bit of background so far, we are currentley replacing every panel bar the floor section above the axle. We have so far replaced nearside floor and sill (inner and outer), front nearside inner wing, front valence, front offside inner wing and working our way around. We have repeatedley fitted up various panels like wings and doors to check for alignment and so far so good. The drivers door (new) was fitted back on last night and my dad and the welder believe the gaps either side to be to wide, if the gap towards the front were to be any closer to the front wing then the door would catch the wing right on the swage line, so I personally think it couldnt be moved forward. The gaps are wide enough to fit the tip of my little finger in, not even half way up my nail. I understand this to be a rough guide but this is equal on both the front and the back. I'm pretty sure the quest for perfection, which is a task within itself on a TR, is clouding judgement which I can understand to a certain degree. Maybe a more relaxed approach is needed or is that when mistakes are made.... Thanks in advance for any advice or pictures. Chris. Quote Link to post Share on other sites
Kevin Warrington Posted October 15, 2009 Report Share Posted October 15, 2009 As I needed to go out to the garage to put my vernier gauge back in the tool chest, I made some measurements. Drivers door front, top 4mm, bottom 4mm Drivers door rear, top 2mm, bottom 2mm Passengers door front, top 4mm, bottom 4mm Passengers door rear, top 3mm, bottom 3mm This car had a total nut and bolt rebuild a long time ago with new old stock panels hung unto a heritage bodyshell. I also has a look at my 2000, which is an original car, never been rebuilt, restored or welded and is thus as it left Canley in 1972. Door gaps are similar all round. Hope this helps Kevin Quote Link to post Share on other sites
Alec Pringle Posted October 15, 2009 Report Share Posted October 15, 2009 Hi Chris, "Mind the gap" was probably not exactly a clarion call on the Triumph assembly line. Triumph panelwork fitted where it touched, or not, as the case may be . . . . Bear in mind this was a relatively low cost sports car, made in the days when too many 'workers' (I use the term loosely) at BL didn't give a b*gg*r. The gap between Monday morning, Friday afternoon, and the time between in terms of standards and attitudes was arguably minimalist. Nowadays there is the additional factor of reproduction panels following a similar design philosophy, but more so. Closely fitting panelwork and perfect shut lines are the prerogative of 21st Century German cars, and not of 1970s Coventry's finest, I'm afraid. Don't get too obsessional about unattainable perfection, it's a TR, made for go not show . . . . Cheers, Alec Quote Link to post Share on other sites
ChrisHump Posted October 15, 2009 Author Report Share Posted October 15, 2009 As I needed to go out to the garage to put my vernier gauge back in the tool chest, I made some measurements. Drivers door front, top 4mm, bottom 4mm Drivers door rear, top 2mm, bottom 2mm Passengers door front, top 4mm, bottom 4mm Passengers door rear, top 3mm, bottom 3mm This car had a total nut and bolt rebuild a long time ago with new old stock panels hung unto a heritage bodyshell. I also has a look at my 2000, which is an original car, never been rebuilt, restored or welded and is thus as it left Canley in 1972. Door gaps are similar all round. Hope this helps Kevin ''As I needed to go out to the garage to put my vernier gauge back in the tool chest, I made some measurements.'' Love it ! Thanks Kevin, you have been most helpful. Quote Link to post Share on other sites
ChrisHump Posted October 15, 2009 Author Report Share Posted October 15, 2009 Hi Chris, "Mind the gap" was probably not exactly a clarion call on the Triumph assembly line. Triumph panelwork fitted where it touched, or not, as the case may be . . . . Bear in mind this was a relatively low cost sports car, made in the days when too many 'workers' (I use the term loosely) at BL didn't give a b*gg*r. The gap between Monday morning, Friday afternoon, and the time between in terms of standards and attitudes was arguably minimalist. Nowadays there is the additional factor of reproduction panels following a similar design philosophy, but more so. Closely fitting panelwork and perfect shut lines are the prerogative of 21st Century German cars, and not of 1970s Coventry's finest, I'm afraid. Don't get too obsessional about unattainable perfection, it's a TR, made for go not show . . . . Cheers, Alec Hi Alec, I have told him this over and over again but the obsessive disease of the welder is taking control ! In fact I cant wait to show him your post, how true it actually is. I believe as long as he is happy with it and gets to enjoy it thats all that matters, he has never been one for bodywork more ''engine'' that is his forte hence the welder being draughted in. What annoys me the most is he is fully aware of the panel fitment issues having owned two in his youth ! Thanks for your contribution and im sure it will put some spring back in his step. Cheers Chris Quote Link to post Share on other sites
Pogo Posted October 15, 2009 Report Share Posted October 15, 2009 When the body lads put mine back together, they called me in because they were concerned with the larger than expected gaps. They were used to rebuilding new BMWs, Porsches, Ferraris etc. I went over and was pretty chuffed with the gaps that they had got. We did fiddle around a bit to get them better. I'm sure that they are not as good as some TR6s, but I was OK with them. Roger Quote Link to post Share on other sites
Gordon Bayley Posted October 16, 2009 Report Share Posted October 16, 2009 When the body lads put mine back together, they called me in because they were concerned with the larger than expected gaps. They were used to rebuilding new BMWs, Porsches, Ferraris etc. I went over and was pretty chuffed with the gaps that they had got. We did fiddle around a bit to get them better. I'm sure that they are not as good as some TR6s, but I was OK with them. Roger Hi pogo Your car looks very good to me , I nealy mistook it for mine Cheers G Quote Link to post Share on other sites
Kevin Warrington Posted October 16, 2009 Report Share Posted October 16, 2009 ''As I needed to go out to the garage to put my vernier gauge back in the tool chest, I made some measurements.'' Love it ! Thanks Kevin, you have been most helpful. Mind you, I should add that the vernier gauge is one of those really cheap ones (I think it cost all of a pound!) but incredibly useful for measurements if a high degree of accuracy isn't required. The "tool chest" is the big red box at one end of the garage underneath all the other junk and the vernier had been left on my desk in the study after being used earlier in the day to measure up some pipe work as part of an emergency plumbing repair. Kevin Quote Link to post Share on other sites
Pogo Posted October 16, 2009 Report Share Posted October 16, 2009 Hi pogoYour car looks very good to me , I nealy mistook it for mine Cheers G Thanks Gordon. Was it when you saw my superior washer/wiper switches that you realised it was mine? Roger Quote Link to post Share on other sites
stuart Posted October 16, 2009 Report Share Posted October 16, 2009 It is possible to narrow the gaps by lead filling the edges of the wings/doors to suit. To get the front door edge gap closer you can carefully grind of some of the folded over rear lip of the wing skin on the inside right where the swage line is as this is quite often not folded tightly and on the edge of the swage line of the door at the very front end its possible to body file it round a little as well. this will allow the door to open without fouling with a lot tighter gap. The rear edge of the door/ wing gap does often need work especially on repro rear wings as they are too short at the top. Heres one I did earlier. Stuart. Quote Link to post Share on other sites
88V8 Posted October 16, 2009 Report Share Posted October 16, 2009 (edited) You're not going to get any sensible answers. You'll only hear from those whose cars have been primped and preened so they more like limos than TRs. (Or, I should say as I see he's beaten me to it, restored by perfectionists like Stuart). The series of Dave Gleeds articles in TRaction... he mentioned the door gaps when new... very comforting. Vernier ? Vernier ? ... More likely measured with the end of a cucumber In a garage near me, there's a car, I happened to measure the gaps: N/s rear bott 4mm top 6mm : front 5 & 6mm O/s rear bott 5mm top 8mm : front 5 & 8mm The top measurement is wooly, as the curve of the doors only passingly follows the curve of the wings. Ivor Edited October 16, 2009 by 88V8 Quote Link to post Share on other sites
dykins Posted October 16, 2009 Report Share Posted October 16, 2009 Ivor I like your stainless steel sill covers - are they a cut down Stag jobbie? ... or from an MGB? Regards Peter Quote Link to post Share on other sites
88V8 Posted October 16, 2009 Report Share Posted October 16, 2009 I like your stainless steel sill covers - are they a cut down Stag jobbie? ... or from an MGB? Errm. Fitted by PO who was not forthcoming. The ends were a bit ragged so cut down Stag could be a good assessment. Ivor Quote Link to post Share on other sites
Ragtag Posted October 16, 2009 Report Share Posted October 16, 2009 Thanks in advance for any advice or pictures. I'd do you a picture of my door gaps but but I can't find a wide angle lens However....... You can't see them from the driver's seat! Quote Link to post Share on other sites
ChrisHump Posted October 17, 2009 Author Report Share Posted October 17, 2009 I'd do you a picture of my door gaps but but I can't find a wide angle lens However....... You can't see them from the driver's seat! Thats hilarious !! Thanks everyone for your help, having shown my dad these various posts I think reality has set in ! I think once you start one of these projects it is hard not to become obsessional about these relativley minor issues. I will try and get some pictures uploaded soon. Thanks again guys. Quote Link to post Share on other sites
Eyetee Posted October 17, 2009 Report Share Posted October 17, 2009 Make them as good as is resonable possible Quote Link to post Share on other sites

Recommended Posts
Join the conversation
You can post now and register later. If you have an account, sign in now to post with your account.