MilesA Posted June 3, 2013 Report Share Posted June 3, 2013 As part of an increasingly challenging mini project to mount a useful wing mirror on the 3A, I would like to use one of the screws in the stanchion to secure a wing mirror base plate. I obviously need a longer-than-standard screw to accommodate the depth of the base plate but the usual suspects do not detail the thread size of the screw. Can anyone help so that I can source a replacement screw to cut to the desired length? Also, do the threaded holes in the tenon plate between the stanchion and the windscreen go all the way through the tenon plate or are they 'closed' (I have never dismantled the windscreen)? If the holes are 'open' I am concerned that if I do not cut the replacement screw short enough, I risk putting pressure on the windscreen glass and cracking it. As I said, an increasingly challenging mini project... Many thanks - Miles PS I am going to all this trouble after very nearly totalling the car by pulling out in front of an overtaking car in my blind spot when the roof was up and sidescreens on in lashing rain - a rare(?) occurrence but it did rather unnerve me Quote Link to post Share on other sites
Ian Vincent Posted June 4, 2013 Report Share Posted June 4, 2013 Miles, If you are referring to the three small chrome plated screws that go through the stanchion and tenon plate into the chrome frame around the glass, they are 10/32 UNF according to Stuart (who seems to be the fount of all knowledge on matters TR) but I have cleaned the threads out with a 2BA tap and bought 2BA replacements from Namrick. Note, these screws don't just go all the way through the tenon plate, they go all the way through the screen frame into little steel blocks inside the frame (which are also drilled right through), and if they were too long would hit the screen and crack it. You need to measure carefully. Rgds Ian Quote Link to post Share on other sites
Ian Vincent Posted June 4, 2013 Report Share Posted June 4, 2013 Hi Miles, I meant to add, have you looked at using a Harley Davidson wing mirror? I picked up a pair on ebay for £35, they have a chromed threaded stalk that matches the size of the screws that hold the screen stanchion to the body on a post 60k TR3a. Rgds Ian Quote Link to post Share on other sites
Graham Harris Posted June 4, 2013 Report Share Posted June 4, 2013 Go to www.tr-register.com.au , look in for sale pan down to rearview mirror all you need to do is take out one staunchon screw to fit Quote Link to post Share on other sites
stuart Posted June 4, 2013 Report Share Posted June 4, 2013 If you hold the mirror against the stanchion and then use a depth gauge through the holes so it just contacts the glass then you can work out the correct length of screw required. 10/32 is correct but as Ian has done you can re-tap to 2Ba without doing damage. Stuart. Quote Link to post Share on other sites
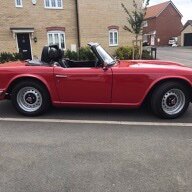
MilesA Posted June 4, 2013 Author Report Share Posted June 4, 2013 Thanks everyone - reliable and responsive as ever. Ian and Stuart, thanks for the technical details. Ian and Graham - yes, your solution would be much easier and more attractive but as you can see below a PO had, for some inexplicable reason, installed wing mirrors on each door. The N/S one cannot be seen when driving and the one on the driver's door is pretty useless top down and completely useless with sidescreens. Given their position, your solutions will not work on my car unfortunately, so stanchion it has to be. I appreciate there is a risk that with a 3rd mirror on the stanchion the car will look like a 1960's Lambretta, but it will have to do so until I can bring myself to have the door mirrors removed, doors patched, filled and resprayed... Miles Quote Link to post Share on other sites

Recommended Posts
Join the conversation
You can post now and register later. If you have an account, sign in now to post with your account.