It has been a while since I added any content to this section. While the main part of the 1960 TR3a project was completed in 2016, as we all know, restoration projects are never complete and I still had a list of things to take care of. This project ran for 6 years, 2010 to 2016 and once I had the car insured, registered and through the state inspection I really could not mentally face pulling things apart to deal with issues that I should have taken care of at the time or re-do things that I wish I had done different.
However having enjoyed driving the TR3a for the last few years and with the pandemic keeping us all home more I decided it was time to tackle a few tasks.
An interesting observation when doing a complete frame-up restoration is that sometimes you are not starting with a complete unmolested car and you don’t know what you don’t know. So it was with me and the TR3 rear trim panel, the one that is in front of the fuel tank.
Before I get into that however let me digress and talk about holes. When I was restoring the tub I filled in dozens of holes in various places that I knew should not be there. I could tell a factory hole from a hole made later just from the shape of the hole. The factory holes were round with smooth edges, the holes from previous owner were not and in some cases had been made with a sharp punch or a self tapping sheet metal screw. I filled every hole but apparently left two sets of holes in front of the fuel tank that looked like factory holes even though I had no idea at the time what they were for.
Now back to the plot. In May 2015 as I was fitting the interior trim I realized that there was nothing securing the rear trim panel at the bottom. At the top the trim panel fits into some metal tabs but there was no bracket to attach it to at the bottom. I asked about this in the sidescreen forum:
There it was revealed that there should be two brackets just in front of the fuel tank.
I had bigger fish to fry in 2015 and promptly forgot about that discussion. I shoved in the trim panel and wedged it between the wheel arches and hoped that it would stay there. It didn’t. So a few days ago I went back to the forum thread that I started in 2015 and decided I should remove the rear trim panel, pull up the carpet and underlay and figure out where to drill some holes and mount two brackets.
Removing the trim panel was easy since it was not attached and what did I find when I lifted the carpet but two factory holes that I had not filled and were obviously where the original bracket should have been. There was a pair just like it on the other side. How about that.

I had some 1 ½ x 1 ½ inch aluminum angle iron so I fabricated a couple of brackets and attached them using the factory holes using some stainless screws and nuts. Since I had a lot of floor covering, the 1 ½ inch bracket was just enough to clear the carpet and give me enough bracket to attach the trim.

The trim panel even had two holes in it for the fixing screws. I just poked a punch through the vinyl and through the hole in the panel to mark where the screw hole needed to be on the brackets.

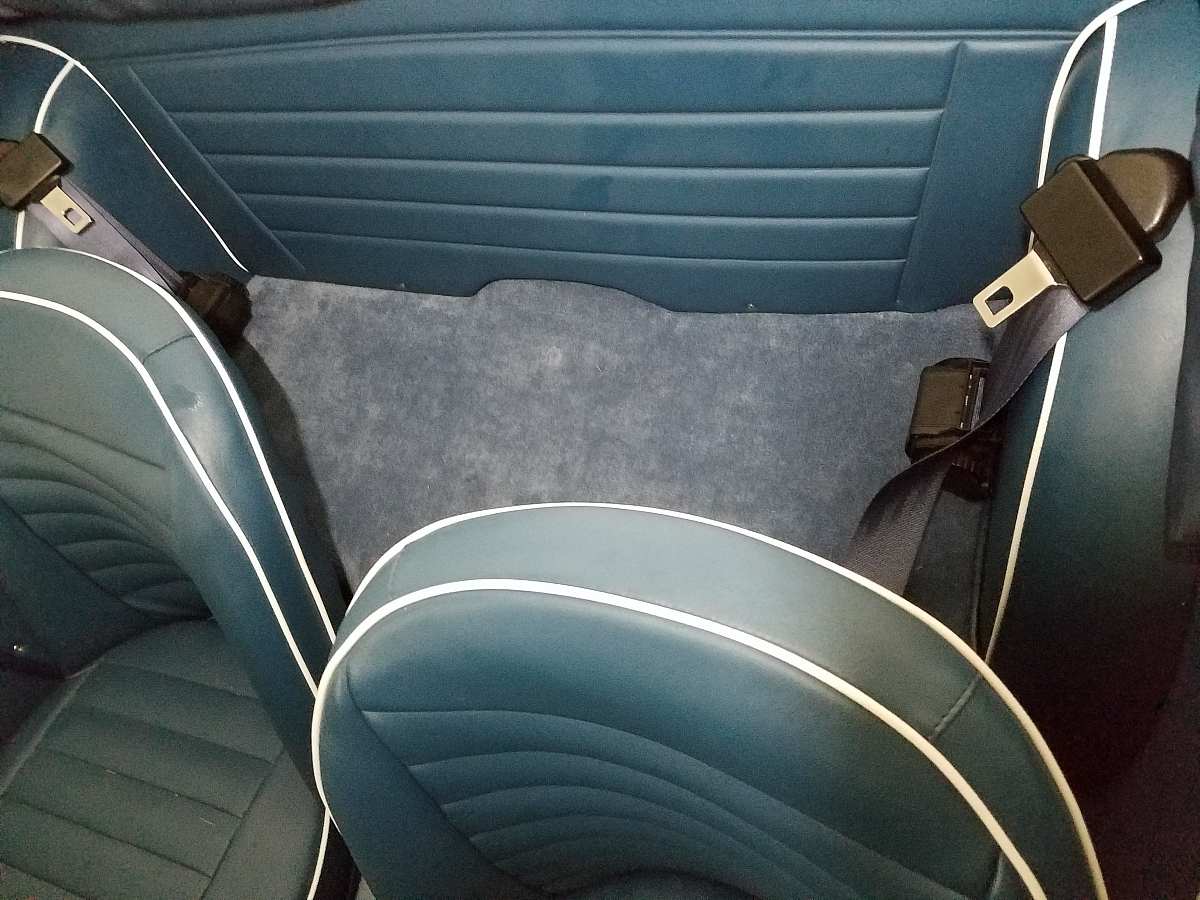
With the brackets drilled for the screws it was a simple operation to attach the rear trim and this time securing it top and bottom.
The title picture shows the final installed rear trim.
Other projects in the pipeline are retrofitting a pusher electric fan to assist with summer cooling. I should have done this during the restoration and I have no idea why I did not. I did install a bung in the radiator for a fan switch but for some reason stopped there. Again thanks to the forum I learned that a 12 inch pusher fan can be installed without removing the front apron so this is on my to-do list. When I tackle the fan I also plan to raise the engine using shims on top of the engine mounts to align the engine with the hand crank hole in the radiator.
I had delayed installing the glove because I thought I would be trying to adjust the bonnet and the hinges are behind the glove box. I have resigned myself to living with the bonnet the way it is and I need that glove box so installing that is also on the project list.
I also have a factory hardtop and all the pieces need to finish it and install it. Great help from the forum here also especially Ian Smith for finding a source for reproduction cantrails.
More about those projects later.