In addition to the normal hand tools, when undertaking a project of this magnitude and duration there are a few additional tools that will make the project more enjoyable and keep things moving because you can do more at home in your own garage. There will still be items that you need to farm out to a commercial shop such as media blasting a chassis but with just a small investment, many tasks can be handled by you.
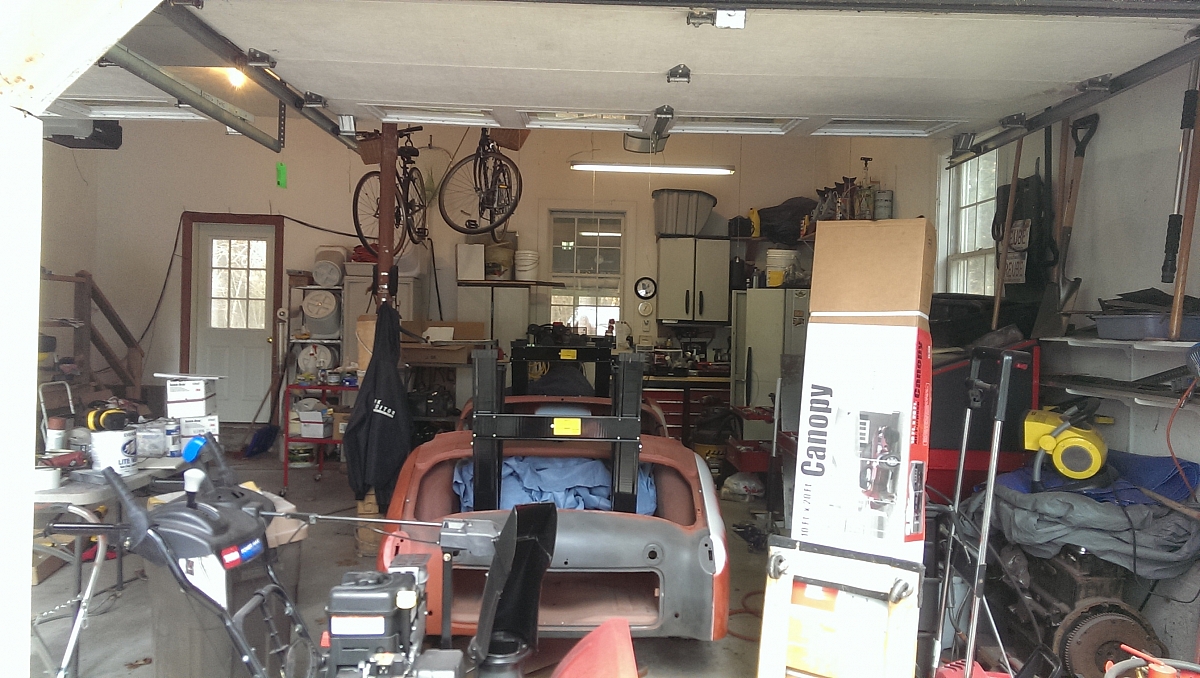
For this project I was confined to one bay of a standard two car garage and as you can see from the header image there is not a lot of room especially when you have to share it with a snow blower but these tools plus my workbench and rolling tool cabinets somehow all fit. You will see in a later post how I managed when the tub was separated from the chassis.
Below are the main tools that I use on a regular basis. Most if not all of these will continue to be useful after this project is complete.
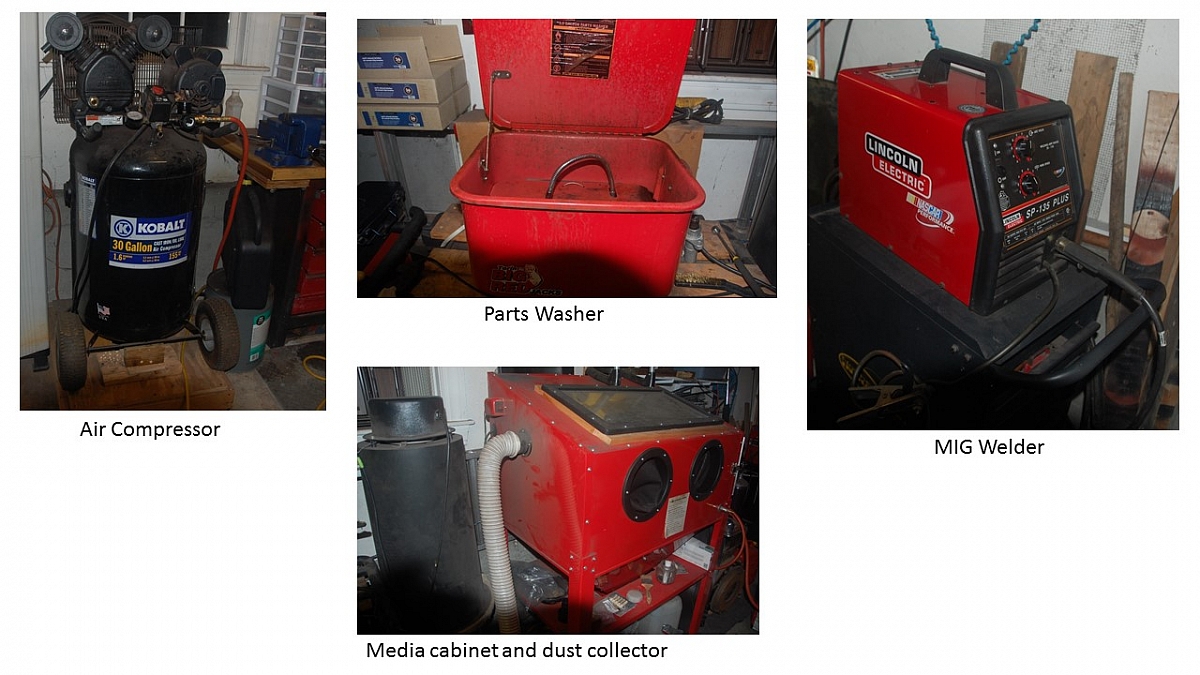
My air compressor is a 30 gallon 1.6HP unit that I would consider to be the smallest practical size for a project like this. I would have bought a bigger compressor but did not have the space and did not want to have a 60 gal 5HP compressor after this project was over.
The 30 gallon 1.6HP compressor has run my air tools, blast cabinet, a pressure blaster (not shown) and is adequate for a small touch up paint gun that is more than capable of painting TR3 panels or a TR3 chassis.
My air compressor is raised because there is an automatic water drain installed at the bottom of the tank. Each time the compressor shuts off the drain opens to release any water.
The small parts washer has been great for cleaning up small parts.
The media cabinet and dust collector were low cost units. The cabinet is actually a good size and reasonable quality but the innards of it (the lamp, pick up tube and gun) were garbage. I bought better quality equivalents from TPtools that cost me as much as the original cabinet (around US $120 on sale at Harbor Freight) but they have worked flawlessly for several years. For in-cabinet lighting I added two small outdoor floodlights. I also modified the viewing window to make it easier to clean and change the glass and the protective film. The cabinet originally had a plastic frame attached to it with nuts and bolts. This was slow and fiddly to remove. Now I have a wooden frame bolted to the cabinet and the plastic frame of the viewing window attaches with wood screws so it is quick to remove and install it.
There is no way to do a restoration project like this without a welder and while gas or Tig would both be options, the MIG welder is inexpensive and has a much easier learning curve. I use C25 gas which is 75% Argon and 25% Co2. My Lincoln welder has variable output and wire speed and once I had calibrated it for the 18guage steel I rarely have to change it.
Since I do not have a spot welder I used plug welds wherever a spot weld was called for including welding cage nuts to panels. I found that for me, a 3/8 inch hole was a good size and if I made the hole any smaller, I ran the risk of filling the hole before I got penetration into the metal below.