

John McCormack
-
Content Count
1,362 -
Joined
-
Last visited
Content Type
Profiles
Forums
Calendar
Posts posted by John McCormack
-
-
I had this problem. The lever the cable operates can get stiff with little use. My car had been little used for 20 or so years. The lever wouldn't return to its normal off position. The engine would run so rich the car would cut out and not start. I had to push the lever home by hand to start and drive.
I used INOX lubricant sprayed liberally down between the block and MU where the lever hinges and worked the lever backwards and forwards by hand for about 10 minutes. It now moves smoothly.
A solid cable will make it hard to move manually so remove the cable connection and it should move smoothly and lightly. An advantage of the solid cable is it will push the lever all the way home if it is a bit stiff.
-
What did you end up using for piping in the end John?
Stuart.
For the core I used the rubber tubing that holds the fly screen in a screen door. It was the right diameter and shaped well. I then found a marine supply place and they had a marine fabric in a nice red.
It isn't possible to get an exact match so I went for a colour that provides a bit of contrast. It seems to have worked well.
-
Mechanical repair = spanners and thorough approach. Skill helps but with a decent workshop manual most people can build an engine (farming out grinding just as a most workshops will.
Body repair = Skill and time consuming.
Cost of repair and value are not a linear relationship. You can spend thousands and thousands on a car but even when finished but that doesn't mean you will recoup the costs. Some don't quite come to terms with the concept that they bought a £10k car, spent another £20k and it's isn't worth £30k.
Always buy a car with the best body you can find as that's where the money will go. Engines, gearboxes, suspension all have finite costs because you can simply replace the bits in the end with spanners, sockets and screwdrivers. Rusty tubs and panels are not so easy as many of the available parts will need fettling to get them to fit and may take as much time as cutting out and welding in new metal.
Couldn't agree more. Nearly anybody can do mechanicals, brakes, steering, suspension etc. Achieving a good standard of bodywork let alone an excellent standard is beyond the vast majority of us.
I am restoring a long door TR2 which I bought with the body already largely restored with new floors and good panel alignment and gaps.
It still ended up costing me $25,000 (Oz $$s) just for the body work to Concours standard. And that was cheap as they spent 320 hours on it, it should have been $32,000 but he stuck with his quote.
A mate had a body shop do a full restoration on the body of his TR2. Over $50,000 Oz. Just for the body to an excellent road going standard.
A TR6 body is a lot more complex than a TR2.
The only reason I am restoring a TR2 is because the long door cars are very rare, especially down here, and it will give me a great deal of personal satisfaction to create a fine example.
It helps they fetch very good money.
Always buy an excellent body car, the mechanicals are easy to do.

-
My Bosch pump started a high pitch whine, or more accurately a very loud squeal, as I arrived home this afternoon. It might have been the same sound as with this thread.
The car ran fine for the couple of hundred metres to home. I turned the ignition off, restarted it straight away and no squeal.
The car was fitted with a Bosch pump before I bought it nearly 2 years ago. The car has only done about 60,000 miles all up and only 10,000 in the last 20 years so the pump isn't very old. There has been no change to the fuel system for 12-15 months and about 4000km of driving.
I checked the filters etc and all is clear, no leaks and fuel is flowing normally. The tank is 3/4 full with 98 octane.
I took it for a 5km test drive which included a hard run to 4500rpm in 2nd, cruised at 70km/h and idled at lights. No dramas at all.
I haven't experienced this one before. Anybody else had a Bosch pump start squealing and then come good when the ignition is turned off?
-
Cheaper to pay what looks like a high price for an excellent car than buy a basket case and restore it.
My preference was to pay a reasonable price for a very nice original car, with new paint that looked very nice, but that I could drive every day. I would be too nervous driving an excellent car in traffic or giving it a nudge on open roads.
-
The new diff pinion seal and replacement drivers side axle went in last Thursday. The CV joint in the axle he pulled out was quite stiff when rotated compared to the replacement axle.
Of interest, the pinion seal he had just put in had disintegrated. The rubber had separated from the metal.
This morning I took her for a run on the same 90km there and 90km back route I was on when the pinion seal failed and the vibration was really evident. Mainly down the freeway south of Sydney.
There was no vibration today, even when I tried to put load on the axles on the same bends and bumps. I still need to take it for a fast run on a winding road to complete the test, which I will do on Wednesday weather permitting.
It seems the CV joint was the culprit.
And it was a great blast on a cool clear morning. I cruised at 110-115km/h with one very brief burst to 130 or so.
-
The cross cable needs to be very carefully adjusted as the reason that the internal locks were deleted was their propensity to only work on the right hand one and not pull the left one, hence why a lot of people fit a second pull down the left side. The run is different in the pictures as some have been replaced with different length cables I would imagine.
FWIW if the left catch failed then the only way to get the bonnet open was to remove the left hand headlight bowl to gain access.
The bracket is only 18SWG so would be pretty easy to make I would have thought.
Stuart.
Thanks again Stuart. I have just made a pattern on paper which is pretty close. I can make a few out of cardboard until I get the right shape.
I just went out to the car and removed the left hand head light. I couldn't grab the mechanism but I can reach the cross cable and, while I didn't try it, I could pull it down which should release the bonnet on that side if needed.
I was interested in these photos of the early TR2 engine bay. While I have a short door TR2 which I have owned since 1976 that I can use as a comparison, I am not sure of the originality of its engine bay details nor what changes were made when they changed from long to short door.
If you have any shots that you know, or reasonably believe, are of original engine bays I would really appreciate it if you could post them, or send them to me by message.
-
Here you go John this from TS 2 and others
Stuart.
Excellent. I have been looking for something similar to the short door TR2 bracket. Now I know what I am looking for I will go through the boxes of stuff again.
It looks beyond me to make one so if I can't get a 2nd hand one it looks like a job for a tradesman.
I see two routes for the bonnet release cable that goes across to the opposite side of the car. One is pretty straight and goes under the radiator extension and top radiator hose, the other appears to go in a curve towards the radiator. Mine is currently the former, anybody know which is correct or did it change during the production run? My car is TS3732O.
-
My project long door TR2 is missing the bracket that attaches to the front apron for the hood support.
Anybody have one I could buy, or can post some photos showing the item and how it is bolted to to the apron I will get one made.
Thank you -
If its still soft enough for any marks to be made into it like that I would be very worried and I certainly wouldnt put a cover over it. The only paint I know that would still be that soft is Synthetic and I wouldnt have thought anyone was still painting cars in that even on the other side of the world.
Stuart.
My mistake. The marks are just on the surface and come off with a light polish. I spoke to the painter and he assures me it is ok to reassemble, I won't damage the paint unless I do something silly, which I expect I will during the numerous jobs to be done.
-
These axles and hubs are supplied complete and assembled.
The only jobs to be done are:
1. Replace the diff flanges with the ones supplied.
2. Bolt the axle in place on the flange with the spline through the hub carrier.
3. Fit the hub to the hub carrier on the axle spline and tighten the 6 nuts.
4. Install the big nut on the axle and tighten.
As far as I can see there is no special equipment or knowledge needed.
-
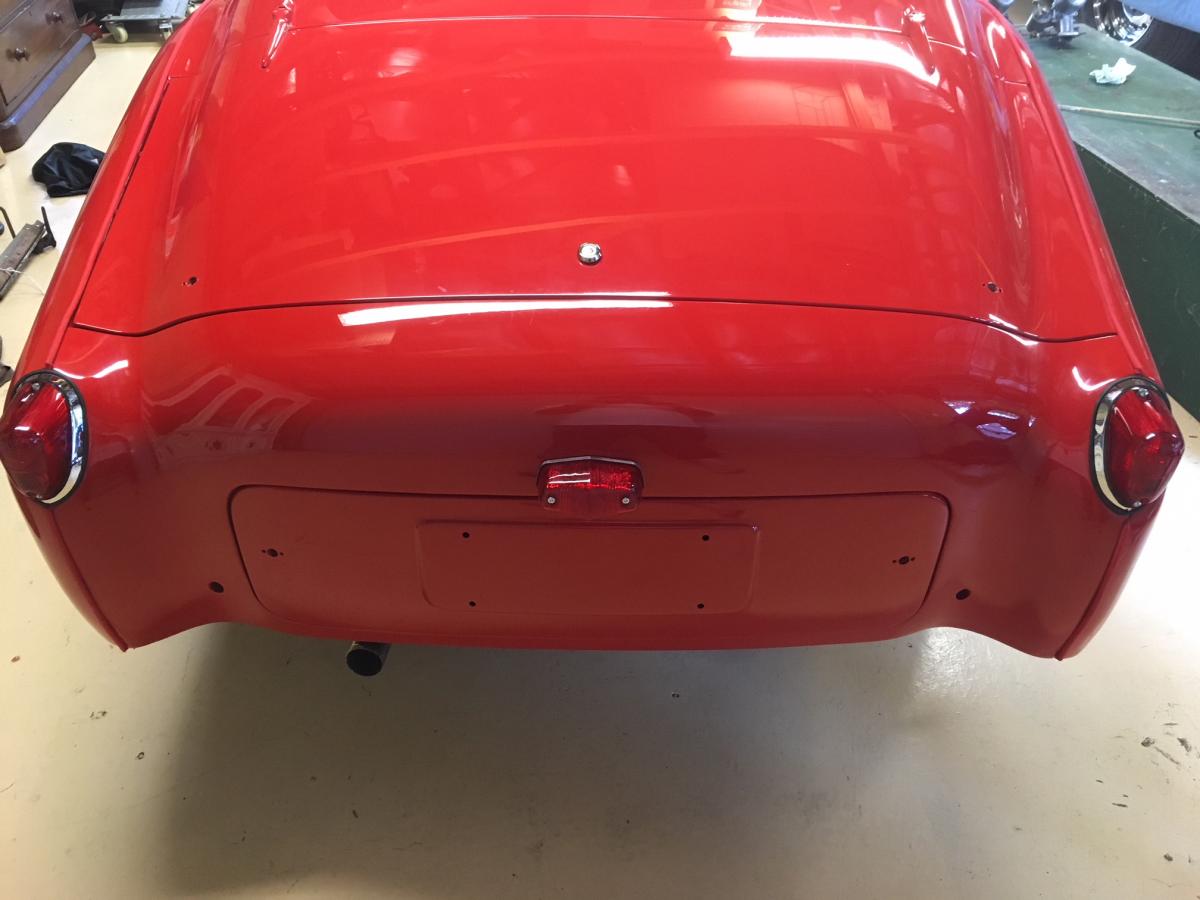
The first bits, tail lights and boot lock, have gone back on the car.
The paint is still very soft and even a light finger nail leaves a mark. These will buff out in the final buff but I don't want to cause any major damage so will stop at this point. I believe it will need 2-3 months for the paint to properly harden up.
We are travelling from late July until Late October so it will stay under a soft cover in the garage until we get back in November.
I will continue with acquiring parts and restoring original bits in the meantime.
No hurry!
-
Whatever you do, John, no matter how early the car or your concern for originality, do not swap the 60s for 48s. 48s are not really up to the job, and l'd even argue that they are not safe for long-term, serious road use. 60s are, and they look great, while still not OTT.
As Don says, a 48 will do as a 'space-saver' spare for short-term, get-you-home use.
Tim.
I agree. 48 spokes if I get them would be used purely for display to represent the car as it was when it left the factory. As the 60s do look the part, I am in no hurry to spend $$ on 48s.
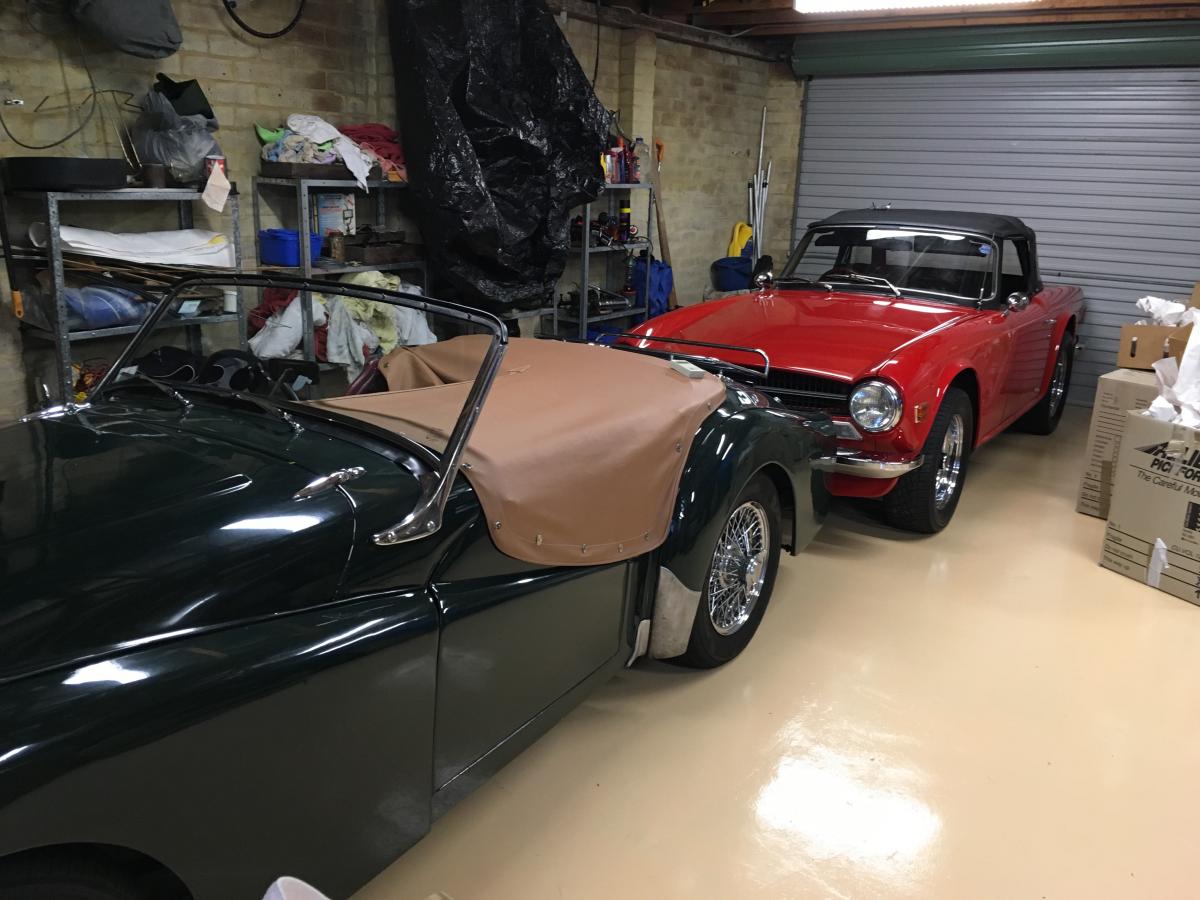
My other TR2, the BRG one in the photo above, had 48 spokes for 35 years and broken spokes were a regular problem. It now has chrome 60 spokes with 165-80 tyres, and a 48 with a 155/15 for the spare.
That car is my daily driver and covers many miles each year around Sydney and on long trips. Last October it did 3,000 miles over 3 weeks for our National meet in Tasmania. This year it has done a few 300 mile weekend trips and will do another 2500 miles for the National meet in Adelaide. And it goes to the shops, sailing club and everything else. The 60 spoke wheels haven't had any maintenance or problems.
The red long door TR2 is not intended to be a regularly driven car, it will be used but not for long tours or in the wet.
I bought the long door purely because it is an original Australian delivered long door TR2 that had a well restored body tub giving me the basis to build a superb example of a rare TR2.
It will probably be sold soon after it is finished, I can't justify having two TR2s and a TR6.
-
This video interview was pretty interesting as well:
https://www.youtube.com/watch?v=809Cuv4TjnQ#action=share
Cheers
Dan
I couldn't sleep at night with that in the backyard.
-
Another point I should have perhaps made clearer in my initial post was the 'slightly' overheating was some 3 hours before the stalling took place. Up until that point I'd probably driven over 40 miles with no problems whatsoever!
Could it be the coil?
If you have points it is very likely the condensor.
Modern ones fail regularly, I carry a few in my TR2 and tend to replace them every year or two.
When they fail the car can be hard to start, miss terribly, no power and engine stalls. All this interspersed sometimes with running ok for a few seconds.
They often fail when they are hot.
If you have electronic ignition it is very likely the coil. Similar symptoms to the condensor.
-

Looks great.
And look at all that space to work in !!
Envy of that Luxury
Good luck and enjoy.
HOh were it so. The long door will be turned sideways and squeezed in in front of where it is to fit the family car in behind.
The other side of the garage has our other two TRs.
-
Looks nice, John.
How many spokes on those wire wheels? Looks like a lot more than an early TR2 would have had.
They are 60s Don. Came with the car, and have 595 Roadspeed tyres fitted.
I am looking for a set of 48 spokes but not with a great deal of enthusiasm. The 60s look the part and I have a set of 5 original steel wheels with hubcaps that will be shod with radials for driving on.
If I can get a set of 48s in suitable condition, or get new ones for a reasonable price, I will transfer the Roadspeeds to them and use them for show only. I'll then sell the 60 spokers.
I have to get it assembled first and do more significant items like replace the high port head and carbies with a low port and 1 1/2"SUs.
-
The body work is superb with thanks to Darryl Carthew of The Classic Factory, Smithfield.
The plan is to build it over the next 15 months or so! First will be the brake and clutch hydraulics, lights, brightwork and wiring loom. Upholstery, carpets next then weather equipment.
It would be good to have it back on the road by the end of 2019.
-
The pressure dropped from 80 psi cold to 50 psi hot
if the oil pressure stayed around there the engine is going to be ok. A TR6 engine holds a lot of oil and it isn't likely it lost all of it through the rocker cover/head joint unless you drove a long long way. The engine would have been quite rattley before it ran out of oil.
-
I have CDD CV shafts and the big nuts are tightened to 210lbs. No vibrations
best Bill
Thanks Bill. These ones are specified to 105lbs so when I fitted them that is what I used. The mechanic also tightened them when he was working on it so I expect they are tight.
Any play in the hubs will manifest itself by vibration at speed all the time. This only vibrates when the axle is under load.
It is possible that the nuts might be tight but there is play due to poor manufacture although there is no detectable play in the wheel or hub.
I will leave it to the mechanic now, the pinion seal needs to be replaced so he can sort it out when he has it apart.
-
Swap the axles left to right....see if the vibration is on the passenger side. Then you know for sure.
I didn't do this because I was thinking the axles are specific to each side. They aren't, it is only the diff flange that is specific to each side.
It definitely would help resolve the issue but is a time consuming bit of stuffing around when the mechanic and I are pretty confident it is the axle. He has to take the diff out to fix the pinion seal so I rang him first.
He said don't worry about it, that he will sort it when he gets it in the workshop.
If I didn't have the option of leaving it to the mechanic, I would definitely remove the axle and if I couldn't find a problem with it out of the car swap them over.
-
Bearing housing not sufficiently tight fit in hub (alloy ?) and it's turning ?
Mick Richards
Good points. All 6 studs and bolts are tight. The big nut that holds the hub to the axle is tightened to 105 lbs as specified. There is no play in the wheel at all.
Again, if this area did have any play it would be noticeable at any speed over say 80 km/h. It only occurs when the axle is under load.
It is because I can't find any abnormalities in these areas, and the mechanic who provided them has also had to fit them when he did the diff mounts, that I believe it to to be the CV joint in the axle.
-
That sounds very much like a hub bearing or end float problem. Were the CV shafts supplied with new hubs ?
Mick Richards
Yep, all new from the wheel to the diff; hub, axle and nuts and bolts. There is no bearing or axle play. I expect if it was play in these areas the vibration would be constant and you would hear it.
These axles are Nissan based, made in Brisbane and distributed Australia wide through Triumph specialist shops. I understand they were modelled on the Goodparts ones because freight from the US is so high.
If it is the axle causing the vibration then I suspect it is a one off problem. I will know when the replacement axle goes on.
-
Two types of injector.
One has a "needle" projecting from the nozzle. Pull on that with fingernails (not pliers!) To release and vent air.
Second has no "needle". That needs tapping.
John
Thank you. Always learning something new.
I was taught to gently tap the needle, didn't know it could be pulled out a bit.


Ignition issues/misfire/starting
in TR2/3/3A/3B Forum
Posted
+1. Having driven TRs for over 40 years the condensor is the usual culprit. Then the coil.
It is very unlikely to be fuel with those symptoms.
It could be the ignition switch although when I have had them fail the engine just won't go.