

Don H.
-
Content Count
4,870 -
Joined
-
Last visited
Content Type
Profiles
Forums
Calendar
Posts posted by Don H.
-
-
Stuart, the black brackets are exactly as they came off my windscreen, including paint finish and screws. As close as I could I matched the cut to the original rubber seal.
Where TR3B rules are concerned, I always say there really are no rules...
-
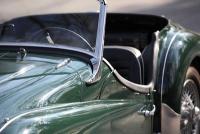
Best of luck with your installation, Pete. Here are a couple of images of the seal on my car's windscreen as I finished the job on the bench. Not the most exciting thing to photograph, but it'll give you an idea of fit. You'll also see the curve into the scuttle, to make fit tighter, when it's oriented the right way.
You'll also see where I put some strip caulk (dum-dum in US vernacular) in the stanchion groove where it seemed to have some originally.


Don
PS: Along the lines of replacement parts that don't fit right, here is an image of the new windscreen mounting machine screws from Moss USA along side my originals. The difference in head diameter of >1mm meant the new ones didn't fit right into the recess on the stanchion. These went back and my originals went in.

-
My TR3B got a windscreen-to-body seal from The Roadster Factory a couple of weeks ago. Yes, a little bit of time spent with a dull pokey tool to get the T-section seated, but really not that problematic. The seal has molded into it the small word "REAR" at the center of the backside of the seal to help prevent confusion during installation.
I was pretty happy with the result. As good as my original, I'd judge. (Note, that doesn't mean perfect -- still a tiny gap where the stanchion meets body.).
Don
-
The switch has only two positions -- power on and power off. It's a surprisingly heavy switch, and seems pretty well made. A nice Lucas lion logo molded into the center of the black "OFF" knob. (I have a NOS positive pole version here in front of me.)
Lucas made two versions of the switch, depending on which ground the system used. SSB104 for positive ground, with "+" die cast into the battery end clamp, and SSB105 for negative ground.
These were in production up until a few years ago -- might still be around as deadstock some places, and they show up on eBay pretty regularly often in the $50-80 range. The Roadster Factory has both positive and negative pole versions in their catalog today at $170.
Regards,
Don
1962 TR3B TSF202L
(running again in the last month after thirty years off the road!)
-
Mark Macy rebuilt the engine for my TR3B, and I've had the chance to see the Offenhauser valve covers in person at his shop. They're a beautifully finished piece of alloy. I think you're going to be delighted, Menno.
Don
-
Thanks for those images, Tom -- I've been looking for someone who's done exactly what you've done. The Dunlops look fantastic on your car. They do suit the sidescreen TRs better, IMHO.
Don
1962 TR3B TSF202L
-
Long door TR2s had glovebox doors just like other sidescreen TRs.
-
A *very* knowledgeable friend (probably known to many of you) here in the US thinks it's the real deal. The contemporary aftermarket grilles may have been tube-based.
Don
1962 TR3B TSF202L
-
Update to my earlier post...
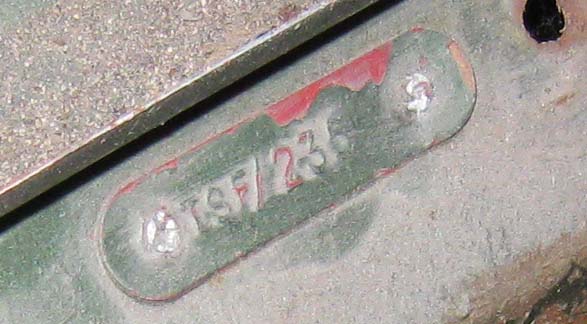
The body number on my TR3B, TSF 202L, is TSF/235, not 236 as I mistyped above. It has engine number TSF 52E, by the way.
-
My TR3B, TSF 202L, has a body number plate painted original Signal Red, riveted in place, reading TSF/236

Screen to body seal
in TR2/3/3A/3B Forum
Posted
The photo of the cut edge above may look like I left a few mm open between the seal and the stanchion plate -- that really wasn't the case when it was held down by the plate. It was flush with the plate, just like the old one I removed.
Here's what my windscreen seal (and the black-painted steel brackets in place at the corners) looked like when I retrieved (maybe rescued?) my windscreen from the barn I parked the project in for twenty years. It definitely needed the new seal.