

BlueTR3A-5EKT
-
Content Count
9,766 -
Joined
-
Last visited
Content Type
Profiles
Forums
Calendar
Posts posted by BlueTR3A-5EKT
-
-
Remember too
It is not the size of the wand, but the way you wave it.
Peter W
-
-
It is my experience that the carbs need 'one flat' each richer for winter driving.
Yes, Stuart is right about swapping thermostats for warmer opening ones in the winter. This is something I did for years when the TR was my everyday transport to and from C&B in Richmond.
Cheers
Peter W
PS You could always search for a NOS factory accessory radiator blind - They did exist, C&B had one in their samples stores.
-
Early cars had a dipstick, which I guess worked as a breather too. (3 sychro gearboxes)
TR6 I know has a small hole drilled in the top cover to breath through (my TR has a Stag box with TR6 top cover and TR6 A type O/D) and from this I would guess that later TRs, as in non dipstick in the gearbox type, would all have a similar breather hole in the top cover.
My overdrive A type unit also have a breather screwed into it.
So yes, I think there ought to be a breather somewhere in your gearbox casing.
I stand by to be contradicted......
Cheers
Peter W
-
So what is wrong with it?
I am sure we can work together with you to supply some guidance/help/advice.
These cars are for driving not polishing. I have worked with spares for years and never found a part number for a plinth.
Cheers
Peter W
-
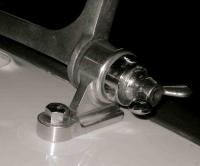
Before he grinds it be sure you can get the bearings that will be needed for the proposed new size - Pain having to grind it a second time as the 0.020" only were available from your prefered stockist!
These are INCH sizes, be sure your machinist understands such quaint measurements.
Cheers
Peter W
-
Hi There
Buy the KIT GHK1144 which includes one bearing and both the seals for £43.85 incld VAT from Moss
It is cheaper than buying the bearing on its own from them and will give you the seals that are needed. ( This is a trick I learnt working for C&B 20 years ago - it is the rear wheel bearing kit for a Dogomite Sprint, same as TR3 Girling.
Cheers
Peter W
-
Connecting the alternator main charging wire direct to the battery is an excellent idea but you will get odd information and needle swings from your ammeter. The ammeter will tend to shew a continuous charge as the amps flow from the charging input of the alternator at the battery into the car circuit where the demand is.
On TR2-3-3A-3B - I have not looked at the standard circuit for TR4-4A
Cheers
Peter W
-
Please read this before you let the bloke with the 50 ton press loose on your axle shaft.
http://www.tr-register.co.uk/forums/index.php?showtopic=30671&hl=churchill&fromsearch=1
PM me if he bends the flange as I have a spare Girling shaft and hub that have been split
Peter W
-
Hi Tage
Just be sure that when you put the gearbox back in that you put the two 3/8" (10mm) diameter shank/dowel bolts (pt no 132872) in the right places first before tightening or fitting any other bolts.
They should be a push fit in their correct holes in the gear case and engine backplate. (try them before you put the gearbox back in) If you leave them till last you will have to loosen all the other fixings to get them in - or smash them in with a big hammer and damage the aluminium gear case holes, rendering the tolerance fit for alignment useless!
The dowel bolts are important as they align the gear box to the engine, making the clutch,flywheel and crank assy concentric to the gearbox first motion shaft.
Cheers
Peter W
-
The orig end clamp for HS6 choke wire is into a trunnion with a locking screw (assy pt no AUE34 found on almost all HS type carbs)
For my money it works very well.
What have you got fitted?
Peter W
-
Robin TR6.
This is the speed calculator chart from Minty Lamp - http://www.mintylamb.co.uk/gearspeed/
It is an excellent calculator, access it and put in whatever axle/tyre/gearbox combinations you fancy.
Use and enjoy.
It says you will be doing 43.7 mph at 2500 rpm with a 4.1 axle and with a 3.45 axle you will be doing 51.9 mph.
1716 rpm will have you doing 30 mph in 4th gear using the 4.1
Cheers
Peter W
-
Is this company any use to you in Italy?
Anglo Parts srl
Via Alessandro Volta 2, I-31050 Villorba (TV)
Tel.
+39 0422 321 500 • Fax +39 0422 321 470 • email= sales.treviso@angloparts.com
Aperto: lunedì - venerdì: 9.30 alle 12.30 e dalle 14.30 alle 18.00
http://www.anglopart...bout/show/italy
Peter W
-
V posts not screwing into new trunnions is an issue I raised with a supplier a couple of years ago. My NOS trunions fit new posts perfectly, the repro bound up 2 turns in.
The old argument of the threads are undersize to take up the wear of old V posts was offered.
At C&B we had the thread in the trunnion re-tapped after the steel pin had been fitted as the fitting of the pin distorted the trunnion thread. This was in line with the old factory drawing requirements that were being worked to. I guess the latest manufacturer knows better.
Another issue is the poor clinching of the grease cap and the incorrect size thread in said cap for a grease nipple.
Having taps of the correct sizes I removed the grease caps on my repro trunnions, re-tapped the thread in the trunnion and in the grease cap. The re-tapped trunnion thread is a great fit on NEW v posts but would be sloppy on used ones. I re-fitted the grease cap in the trunnion with silver solder to be sure it will not pop out or leak when the assembly is greased or oiled in service.
Regards
Peter W
-
Just to reinforce something here.
All the PI owners go for a relay kit to power their boot mounted fuel pumps so they get full battery voltage at the pump.
Do the same with your headlamps and you will notice the difference in brightness. Also ensure the earth connectors are in top condition. The relay kit will protect the master control and dip switches from high current that may damage them.
A relay kit is available from Moss and other TR specialists or Autosparks see http://www.autosparks.co.uk/product_info.php?products_id=5041 which is the VW van headlamp relay kit.
Cheers
Peter W
-
This is how I did my seat rails in 1990 (exactly as they came when brand new in 1958). The lever for locking the slide rails to the fixed rails should have the lever almost touching the doors (on both sides). It appears to me that the photo above is not correct.
Also, many will advise that you cut away the carpet where the fixed rails are secured to the floor pans. DON'T DO THIS !!! If you do, the seat will never slide as it should. The bottom of the seat pan will catch in the carpet.
...cut the carpet and then you can do what MG at Abingdon did to rectify the non sliding seat problem - bolt a strip of wood between the seat runner and the floor to fill up the space where the carpet was cut out. It does mean you can get the carpets out when soaked without having to remove the seats though. Perhaps that is a hint on how leaky their weather equipment was. Their sewing shop also had the challenge of welting the edge of the cut outs to neaten up the carpet.
Peter W
-
Bedford TK lorry are the same
Peter W
-
I did a very good re crackle paint job on my TR3 instrument panel, mirror and screen support using the black crackle paint Moss sell.
The only issue is 'cooking' them in the oven to get the crackle finish. This would be impossible if you have can not remove the items from your car.
I tried crackle paint without doing the heating process and the finish was poor bordering on why did I bother.
I then read the instructions and sought the advice from a friend who had done the same job a week or two previously. Shake the can, use an oven, were his top tips.
Just use the domestic oven to preheat then cook (tech term 'Stove') the items when the kitchen custodian is out as the smell is a bit overpowering!
Get a spare metal wire grid to support the items on then transfer to and from the painting zone and kitchen is easier. - Stops having to scrape crackle finish paint off the the oven shelves and finger marks in the paint.
Cheers
Peter W
-
-
I agree with Kiwifrog
Looks a lot like an aftermarket TR4 to me. Could also be Spitfire 4 &/or Spitfire MkII.
Does the front edge that would be above the windscreen have 3 strips of metal in it? - If so and they have been folded, they too are aftermarket as the OE were spring steel. There should also be a strip of steel up the back edge of the side windows if it is TR4.
Sewing and welting quality is poor but if you can not get one, it is terrific as it would keep the rain out.
Cheers
Peter W
-
TR Man,
Cheap and Spares certainly can go in the same sentence assuming you only want the same stuff from everyone without any investment in reintroduced or remanufactured items.
At times, like this heater supplier, there is genuinely a route to an adaptable item for our cars. I know I have done enough of it over the years when functionality over originality is preferred. Be aware though that not every TR owner is capable of creating fitting kits and adaptors to make bits from other cars work on their TR.
TR's do not exist in the same volume as the MG range and the 'race to the bottom' (less my owner's club discount) attitude to spares purchase by the MG world has brought about some truly nasty items. Aftermarket MGF leather seat cover kits where allegedly the dye ran when they got wet was perhaps one of the most awful. The leather used was described to me by a representative of one of the world's biggest curriers as 'skin dyed cheap Italian hand bag leather, not designed to be sat on'.
Years ago we at C&B could not work out how a certain scouse MG specialist was undercutting the price of our TR4A to 6 front suspension bush kits. We were losing trade sales at a high rate and were pressured to review our suppliers and pricing.
I ordered one kit from the scousers and discovered you got only half the items you needed to do the job and none of the parts were to Original Specification. Most importantly their supplied big trunnion bolt (OE 139835) was something you could buy at the local iron mongers to hold your garden fence up, not the high tensile steel fastener with a tolerance ground shank and special short threaded section we had remade and supplied in our kit! Very good on price poor on quality. So when your parts from 'Blogs the Cheapest Specialist' and it is junk you say, "Glad I did not pay 50% more for the one from a real TR dealer" Trouble is you are left with a sour taste and probably go out and buy a Ford Fiesta.
The general public is too trusting of adverts - Years ago every week in the Exchange and Mart there was an advert for 'Factory made sports car car sets - £9.99'
C&B's German trade customer demanded we reduced our carpet set price from £29. to match the ones he had seen advertised or we lost his business. He duly ordered a set of Factory made carpets for a TR and was pleased when he received £9.99 worth of flock sprayed foam rubber sheeting cut vaguely to fit the footwells of a TR (the giveaway was the one part number to fit all TRs from 2-6) He kept a piece of that carpet set to demonstrate the quality of the items he would supply.
As the 'pile it high sell it cheap' trader may tell you, " these parts are for selling not fitting"
On a different tack. Years ago the compiler of The TR Register Spares News, one Pete Buckles, did a price comparison of the TR spares he sold to then current car spares. one item - TR brake pads were £8.00, Ford Sierra were £27.00, the list went on in favour of TR spares pricing against Euro Boxes. Has any one done a similar modern comparison?
Cheers
Peter W
-
Try this for a starter - Guessing you are in the UK and want 7" without sidelamp holes
http://www.holden.co.uk/displayproduct.asp?sg=&pgCode=&sgName=&pgName=&agCode=&agName=&pCode=010.278
Cheers
Peter W
-
see this thread on Speedi Sleeve
http://www.tr-register.co.uk/forums/index.php?showtopic=30979
Peter W
-
Nice to see.
Is the horn push with the shield badge genuine for the car....
I have a NOS horn push assembly with such a badge in my garage - Never did figure out where it came from
- If it is correct for such a rare car as a factory competition TR, does any one out there want to buy it to complete their restoration/fake? -
Any ideas Alec?
Peter W
Tonneau cover - zips?
in TR2/3/3A/3B Forum
Posted · Edited by BlueTR3A-5EKT
Viv,
I have a genuine NOS fawn early TR tonneau that does not have the flaps at the turn down for the 1/4 panel.
I think the flapped type tonneau came in at TS41743 (according to parts book when the sail eyelets get mentioned). Remember also that one LAD peg on the 1/4 panel moved upwards to clear the Dzus type sidescreen back edge when they were incorporated. Soft tops and hood stick covers also got a new part number then.
I have never seen a genuine/NOS tonneau with the side zips. My brother has one from Car Hood Co circa 1970.
Oxted Trimming ( http://www.oxtedgroup.co.uk/ ) had patterns to produce the later flapped type tonneau, hood, and hood stick cover - I have them all on my TR3A.
Cheers
Peter W