

BlueTR3A-5EKT
-
Content Count
9,845 -
Joined
-
Last visited
Content Type
Profiles
Forums
Calendar
Posts posted by BlueTR3A-5EKT
-
-
I bought the Revotek from Moss on the advice of Pete Cox, who talks a great deal of sense. I don't have any other fan, but it came with a superb fitting kit and it does the job, so why look for a more complicated solution.
Ash
The issue with the Moss Revotek is that its shroud is very close to the front crank bolt if you do not change to a narrow belt kit. ie keep your starting handle option.
This can be got round easily if you cut away part of the lower plastic shroud with a hack saw.
Bin There... Done That 4 years ago. - I can send you a photo if you want to PM me you email adress.
The kit works a treat but sucks a lot of amps when on - so I went to an alternator as the dynamo did not cope in night time London traffic when the fan and lights are on.
Cheers
Peter W
-
Ordered the switch on Sunday night from Jersey Royal's/Stuart's web link supplier and it arrived today. UK£ 7.50 delivered! 15 mins to fit of which most were adjusting it to get the 'off' position set correctly with the pedal at rest position.
The switch had the right Lucar terminals, was round metal bodied and came with the two lock nuts to fit. There are bargains out there still. Item was made in Italy and spec'd for BMW fitment.
Thanks again
Peter W
-
The web thingy looks just like the alignment details and instructions you used to get in Wipac Quadoptic headlamp boxes.
For RH Steering the extra splodge of light above the horizontal lamp centre line, when on dip beam, is to the left of each lamp's vertical centre line. Simple!
My local car park still has the chalk marks on the wall where I aligned my TR's lamps one evening. Use a blanket to cover each lamp as you adjust the other, to stop any light scatter across from the other lamp not being adjusted. Keep the engine running unless you are certain your battery is OK.
Cheers
Peter W
-
I agree.
It is even easier for you Don with LHD as the factory built your car with the steering wheel on the wrong side and no column to bash the exhaust against!
UK RHD cars - I agree with Stuart, but you may need an assistant to hold things back as you you scrape the old gasket off the head and manifold faces.
Cheers
Peter W
-
Do not get too excited about pulling the temperature bulb/sender from the thermo housing and testing it, unless you know it will remove easily. Even then, the capillary unit things are notoriously fragile, and expensive to repair.
I bought a digital infra red thermometer from Maplin for under 20 quid a while back to check precisely the problem you mention. (this was inspired by watching the British Gas heating system mender test the outlet water temp from a hot water tap after renewing the boiler heat exchanger)
Just get the engine running, read the temp on the car's gauge, point the infra red thingy at the cylinder head and read the temp, they should match. - For me it worked a treat and proved the reading of my gauge and the one on a friend's TR.
Cheers
Peter W
-
Thanks for the thread Stuart.
Just had a BMW driver shout that my brake lights dont work, soI have ordered one of the BMW type switches to replace the failed hydraulic one on my TR3.
Just need to make up a twin wire loom extension to get it all to work. - now where did I put that NOS LHD TR5 loom, so I can cannibalise it.
Cheers
Peter W
PS My TR3 has TR4A master cyls.
-
Peter,
Thanks for your tips.
I just lost the opportunity to go with a small alternator.
The repair job on the alternator is on its course and it is going to cost me about the same of a new alternator. Well may be adding the latte job it would have cost a bit more.
Stupid decision but these things happens here and there. I will be able to do a better follow up on any repair job by the time I will be retired.
Regards,
Reinaldo
Reinaldo
Glad to read all is going in the right direction.
Cheers
Peter W
-
I would also suggest a 1/8"/4mm hole in the bypass 'plug' to allow the water pump to bleed any air when refilling the system.
I have even gone to the extent of fitting a 1/8" BSP vent plug in the top of my TR3 thermo housing to allow for water system bleeding.
Cheers
Peter W
-
Hi Stan,
The things I will say and I am sure you have thought of are - the hole locations must be far enough forward from the dash trim roll so the bracket does not touch it and far enough back from the screen so the screen rubber does not touch the bolt head. (when the full windscreen is refitted)
If it were me I would put the first (inner) hole in the original position, then measure the assembled leg distance centres of the repro aero screens (120 mm I think but check!), and pop in the second.
You could always use double sided tape to get the things in what looks and feels like the right place before attacking with a drill.
With my latest batch of brackets I reduced their overall length to give more clearance from the trim roll. Earlier ones were 1/2" longer.
If you need more ideas or any dimensions PM me.
Cheers
Peter W
PS Note to anyone interested in buying the brackets - I have only 8 cars sets of the brackets left for sale (10may2012)
The price is still UK£40.00 plus postage.
UK postage costs rose considerably on 1st May and are as follows.
UK 2nd class £3.00
UK 2nd class signed for £4.00
Europe not signed for £3.95
Europe signed for £9.00
Non Europe (USA Austr NZ etc) not signed for £4.95
Non Europe (USA Austr NZ etc) signed for £10.00
The items are insured for under £50.00 only
-
Seems whatever I try this engine now diesels at every shut down.
Here is where I'm at.
On the advise of a TR specialist I had the previously in skimmed head skimmed by 40 thou. This made the inlet valve overhang very thin, so following the advice of the specialist I ground the combustion chamber sides verticle on this area. I then fitted a solid copper gasket, adapted to the new combustion chamber first, to avoid any hot spots.
Then I set the static timing and tblhe carbs as per the manual.
On shut down the car diesels really badly. I can stop it by either dragging the clutch slightly or by opening the throttle completely. Niether of which is ideal.
I've tried adjusting the timing and even with severely retared timing it still does it. Reset the static timing and tried adjusting the mixture. Rich or lean makes no difference.
What else could it be? I didnt have this problem at all until I tried to fit that infernal electronic ignition unit. But now even with the refitted point it still diesels.
I'm wondering if maybe the dizzy is just the wrong curve for the engine or maybe the heat off the tubular manifold is having some sort of effect.
I've even tried switching to a different brand of high octane fuel. My last resort will be to try and source a new cylinder head that hasn't been skimmed but mine has only had 40 off and is hardy high compression!!
Any suggestions?
Paul
Having cut away the combustion chamber and the gasket to match did you taper the liner top edge to match the gasket/combustion chamber?
Could be the top edge of the liner becoming the hot spot.
Cheers
Peter W
-
Yes the TR4A-5 two speed wiper is normal speed and slow, rather than the TR6 normal and fast
You will need - Dash Switch (4 terminal), Loom with plug to fit motor, Wheel boxes, complete motor and internal drive gear with crank arm.
Your existing rack is OK.
The tubes I do not know about. - probably OK
If you do go this way your working genuine TR5 wiper switch, wheel boxes and wiper motor can probably be sold to fund the entire project......
If it were me I'd go and find -
MGB that was equipped with the round bodied wiper motor (after 1970) and has the right wheel boxes. Also MGRV8.(not too many in the breakers yet) This opens up the host of MG breakers and ebay touts to you as a supplier. Try MG Services Heathrow . http://stores.ebay.c...vices-Heathrow. Email Ron about your need and if he has a soft top rubber bumper MGB wiper mechanism complete. Be sure to mention you want two speed.
A 1990's classic Mini or Land Rover Defender or London Taxi cab all used the same motor as did Spitfire/GT6/Tri 2000/2.5 but not the same wheel boxes.
Let us know how you get on if you progress this project.
Cheers
Peter W
E&OE
-
Moss Europe offer a kit too
-
Not as far as I know Andy? but I would guess they could run
Posted Yesterday, 05:44 PM
Is EFI even legal on historic racers?
-
- 0
Andy Thompson
Perth WA
Mk1 2.5 PI club motorsport modded
1972 Stag
1970 Mk2 PI Estate
1965 1300 Herald on Dellorto's much moded
http://triumphwestoz.blogspot.com/
'Yes' if they are French and competing in CLM.........
Discuss.
-
-
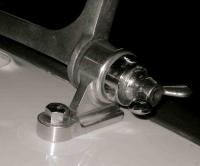
Most important thing to know is the diameter of the spigot of the hub diameter and get the right sized seal to fit it!
There are two different sized diameter hub spigot seal areas on TR2/3 Lockheed axle drive flanges. The change is detailed at TS 5555.
My TR2 is TS 5297 and has different sized seals left to right.
Enjoy
Peter W
-
Rod,
1, Black/Green
2, Green
3,Black.
Hope that works for you.
Steve
Rod the above from Steve is correct.
To recap
Term 1 on motor is green/black that connects to the switch then from the switch to earth
Term 2 on motor is solid green and is fused ignition controlled supply
Term 3 on motor is solid black to earth
These colours are as my TR3A is wired with a new Autosparks loom.
Get it wrong and you lunch the loom!
Cheers
Peter W
PS When refitting looms I was taught to attach a single strand of wire (stripped out of multi strand cable) from the battery to the earth cable so it burns out like a fuse, should you short or wire anything incorrectly. Saved a few looms for me over the years.
-
Hi,
I run a 40 Amp NipponDenso alternator too, the Kubota sort. It's coupled with a small pulley kit. Very small, lightweight (2.3 kg), no failure in 7 years so far. I strongly recommend.
Check here:
http://www.vicic.com...vdi10351201.htm
Badfrog
Getting the old alternator out may involve minimum removal of the air filters, or maximum the carbs from the manifold. Other option as the car is LHD. Drop the front exhaust off and lower through the gap.
Yes that is the Alternator - I use one on my TR3 also. Try Suzuki Swift in a wreckers yard.
Works a treat once you have the additional wire from the ignition to power it. The plug to connect it is available in UK too.
I modified the pulley from the dynamo to fit (simple job on the lathe) so I did not need the narrow belt kit.
My brother bought one from Racetorations without pulley and I did the same job for him.
Fitting requires a bit of thinking to get the thing in the right place - Racetorations sell a kit.
Cheers
Peter W
-
Using the TR4 wiring diag as you have a self parking single speed wiper motor is very wise.
The diag in the Factory TR2/3 manual is for non self parking TR2/3 cars only. The correct wiring diag is in the 'Handy Hints and Tips' TR3A handbook only.
This link should help for diagram
http://www.advanceautowire.com/tr24a.pdf
or
http://www.scribd.co...R3-TR4-and-TR4a
You must earth the motor or the self park will not work
Cheers
Peter W
-
+ n for AutoSparks
They built me a loom for my TR3 with additional bits of wiring, electric fan & reverse lights.
I also bought a proper bullet crimping tool from them to do mods and repairs neatly.
Cheers
Peter W
-
What throws me here is that Triumph Competition Dept went to Lucas PI instead of multi weber set up for the saloon rally cars as they could get the same power but with better economy out of the 2500 cc engine.
Any other comments on this?
Cheers
Peter W
-
The once commercially available kit from SU Butec to convert 2.5 PI to Carbs used the HS4 carbs not the HS6.
HS6 arrived with the 2500TC and 2500S cars from 1975.
HS6 carbs bolt to the TR250/6 carb inlet manifold replacing directly the originally used Zenith CD175 strong burp carbs.
Enjoy the needle hunt....
Messrs Cox & Buckles used to sell pairs of HS6 carbs that required a biassed needle, so they got SM needles produced with the biassed retaining sleeve fitted. (I still have a pair lurking in the garage somewhere.)
Cheers
Peter W
-
Steel tube becoming 'unbonded' from the main bush is par for the course - even with genuine items.
The welding should hold all the metal in the right place now and stop all the clonking.
Cheers
Peter W
-
One additional detail I noticed on TS2 (compared to my own 1958 TR3A) was that the rubber seal across the top of the windscreen frame on TS2 is very thin and almost flat whereas the new one I installed in 1990 when I did my restoration, the round "tubular" part all the way across is larger and quite fat. This means that repro seals over the years are now sold with this seal very thin and do not seal as well as the original ones or like the one I bought and installed 22 years ago.
That is correct for TR2 originality.
The later seal has an additional bit of rubber that lips back over the edge of the screen frame top. Easy to make a TR2 one from the later one - apply sharp knife.
Cheers
Peter W
And yes, if you want the genuine rotting cabbage smell of classic cars - drive in the rain with your wool carpeted TR then leave unattended in the garage for a week.
-
The strips should be spring steel and riveted in the flap or they migrate. The correct rivet type is what the trim trade call 'smash together rivets' or snaps and caps. Moss supply these as part nos 565756 and 563032. They are still listed at 25 p each item. They are in the TR5/6 catalogue on the Surrey Top page. I am not sure of what they supply being 100% - order one pair and have a look. To fit you literally fit together and hit with a hammer while the other side is supported on a smooth metal plate. I use a lead or brass block.
I developed and re patterned weather equipment 35 years ago for TR2-3-4 and Surrey top, so know how close to original I demanded in product, fit and finish. Oxted trimming <<http://www.oxtedgroup.co.uk/>>used to supply the Surrey fabrics and these correct rivets were included as well as the hook and elastic. No doubt the bean counters of the major TR spares stockists have now got involved and removed such useful original frippery, and sourced away from high quality suppliers. Funny how the best quality product is demanded but the ownership still bray about how cheap they want to get something, without thought for quality or compromise. All too MG for words really.....
Cheers
Peter W
-
As you have described this post as Trunnions (again), I think you have answered your own question.
See this thread http://www.tr-register.co.uk/forums/index.php?showtopic=34414
No, I would not expect there to be any obvious movement between the trunnion and V post when new.
The WSM tells us that the V post thread <<Clearance on effective diameter when screwed into part no. 200438 (trunnion) to be 0.002" to 0.008">> That is not a lot of wobble.
Trunnion pins - if they have glass hard threads do not buy. If you do get them pushed into your old trunnion the thread may well distort. I have just had a quote to remake a TR trunnion tap from an American company as strangely I could not find a UK co willing to quote. The price of $92.07 is a good strting point if the register is considering adding such an item to its 'Loan Tools' stock.
QUOTE
The following is our quotation:
(1) qty. Our P/N 48846
13/16-10 H4 4 Flute Bottoming Tap (for tapping part of the way thru, then backing out)
$92.07 each
Delivery: 2-3 work days to manufacture
_____________________________________________-
(1) qty. Our P/N 48845
13/16-10 H4 4 Flute Plug Tap (for tapping all the way thru a part)
$92.07 each
Delivery: 2- 3 work days to manufacture
*Note: We only recommend tapping twice the diameter of the tap, which for this size is 1 5/8". No guarantee, no return for tapping a depth of 2".
*NOTE: DELIVERY TIMES are as of quote date and may vary on date of placed order. QUOTES ARE VALID FOR 30 DAYS. WE ACCEPT VISA, MASTERCARD, AMERICAN EXPRESS, OR DISCOVER. WE DO NOT ACCEPT WIRE TRANSFERS OR PAYPAL. TAPCO RESERVES THE RIGHT TO OVER OR UNDERSHIP BY 10% ON SPECIALS. THERE WILL BE A 10% EXTRA FEE ADDED FOR EXACT QUANTITY REQUESTS. SPECIAL MANUFACTURED ITEMS IN PRODUCTION WILL NOT BE CANCELLED. CANCELLATION FEES MAY APPLY IN SOME INSTANCES.
Regards,
Julie Nelson
Tapco USA, Inc.
5605 Pike Road
Loves Park, Illinois 61111
U.S.A.
Toll Free Ph: 800-827-7787, Direct: 815-877-4039
Toll Free Fax: 800-827-6343, Direct 815-877-6143
REQUEST-------------------------1) Custom Made Taps and DiesSelected Options=Please fill out as much Information as possibleNeed = TAPIf Tap, Style = BottomingIf Die, Style = Chasing threadsType = Thru HoleDepth of hole if known = 2 inchesMaterial = brassSize/description = 13/16 NC * 10 tpiClass of Fit = tightOriginating Page----------------Message From Sender-------------------The tap is to clear a brass suspension trunnion thread that fit to a front suspension steering king pin on a classic 1950's car. The thread form the swivel part of the steering and must be a tight but running fit.
cleaning head, valve guide movement
in TR6 Forum
Posted
I am thrown here over the single spring issue.
The maker of your car used single springs on cylinder heads fitted after CC/CP 75000 up to CR/CR1 then went to doubles again. I know they existed as I have just sold a v good cylinder head of this very type.
The original single spring probably also allowed sustained high revs and reduce cam lobe load. It must also be noted that the exhaust vale dropped in diameter at this point too. I would guess another of the limiting factors on the engines at high revs was points spring 'bounce'. Try using the original Cooper S spec 32 ozs points set instead, if you still use a points distributor and are heavily into high revving. Lot of money for a set of points compared to basic ones, but hey, it is only every 3 thousand miles; or once a year in a lot of our cases.
http://www.minispares.com/Product.aspx?ty=pb&pid=32662&title=
I have always thought the stronger points spring an improvement for 6 cyls as the points have to lift and close 50% more than a 4 cyl for each distributor rotation. (4 and 6 cyls use the same points except the TR2 and TR7 of course) Discuss.
Does any one ever try what was original or do they just re invent the wheel?
Cheers
Peter W