

BlueTR3A-5EKT
-
Content Count
9,844 -
Joined
-
Last visited
Content Type
Profiles
Forums
Calendar
Posts posted by BlueTR3A-5EKT
-
-
On 3/20/2024 at 8:29 AM, Z320 said:
If suitable this is a good offer
The question is whether the fork end is wide enough to ensure the push rod operates in a direct axis with the cylinder piston.
I know on my car I had Glen at Protek widen the fork ends to ensure the push rod were on axis with the pistons.
-
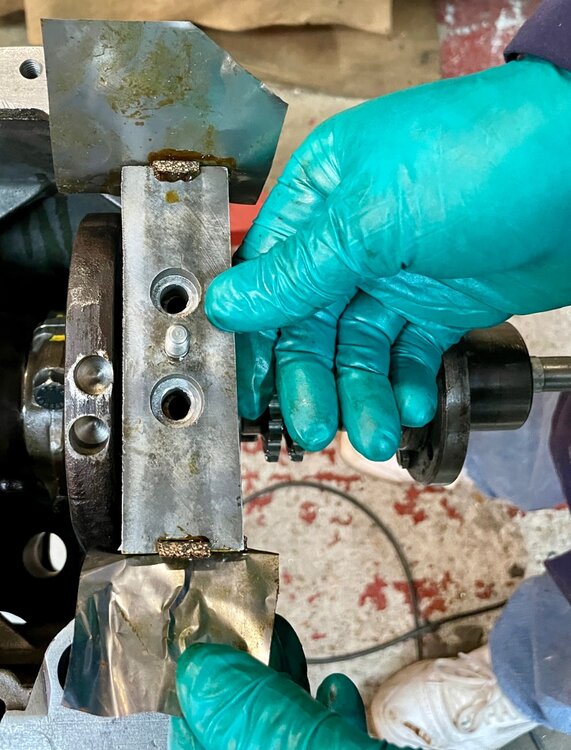
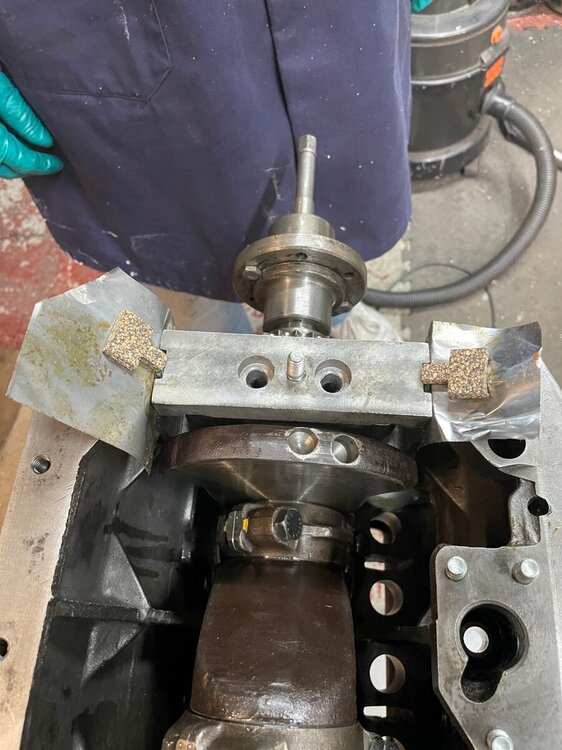
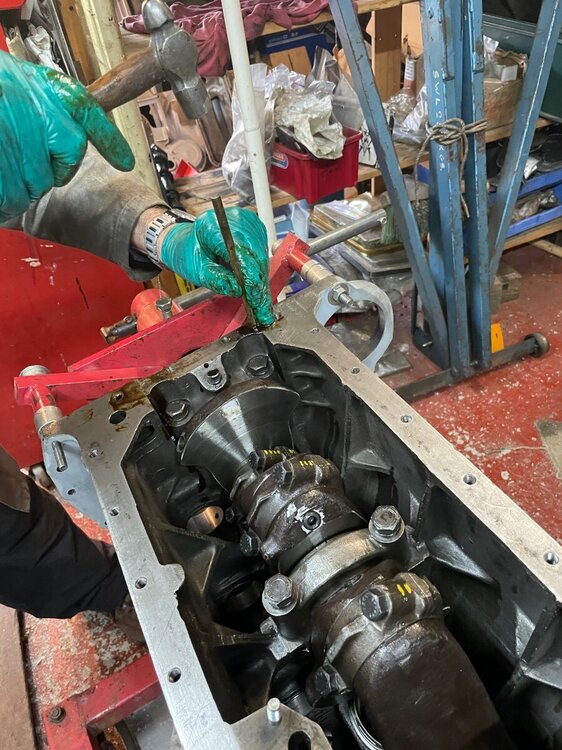
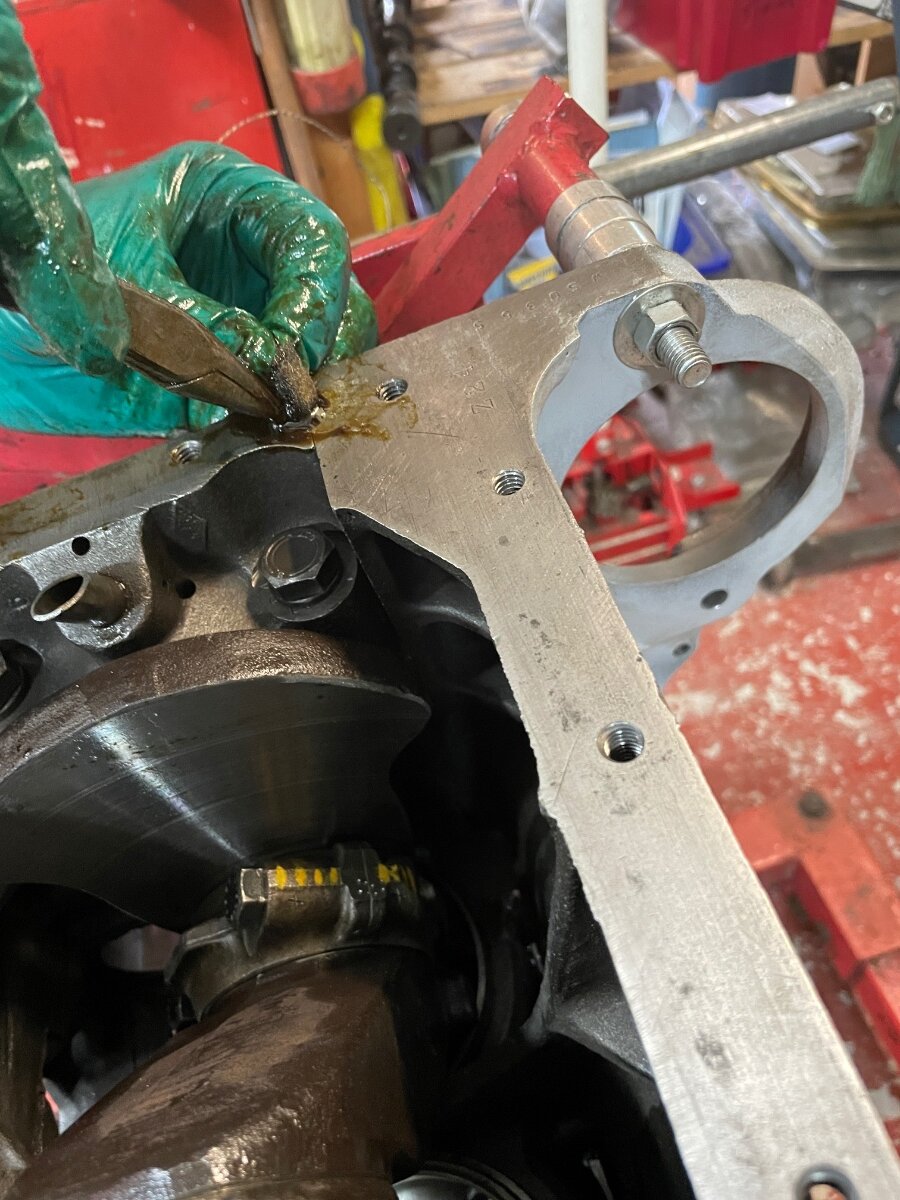
Sealing front and rear of crank case
involving shim steel sheet, odd shaped punch, bits of cork and felt, tube of Well-Seal.

-
This is a PPS file. It may not load. Works fine on my ancient iMac with MS Office.
-
4 hours ago, Rocketman said:
I am going to fit an oil catch tank to the inner wing of my 3A. I will need to make one of these fittings to push into the hole in the side of the block with a AN10 thread on it. Not a problem to turn one on the lathe with a thread on but does anyone know the diameter of the hole in the block where it pushes into?
I will run a second tube to a mounting on the side of the rocker cover using black braided nylon tubing with AN10 fittings.
This will hopefully provide better breathing to the engine especially the top as that has a tiny hole in the cap and hopefully prevent extra oil being put onto the road.
This set up should make a neat installation and nice little project for the weekend
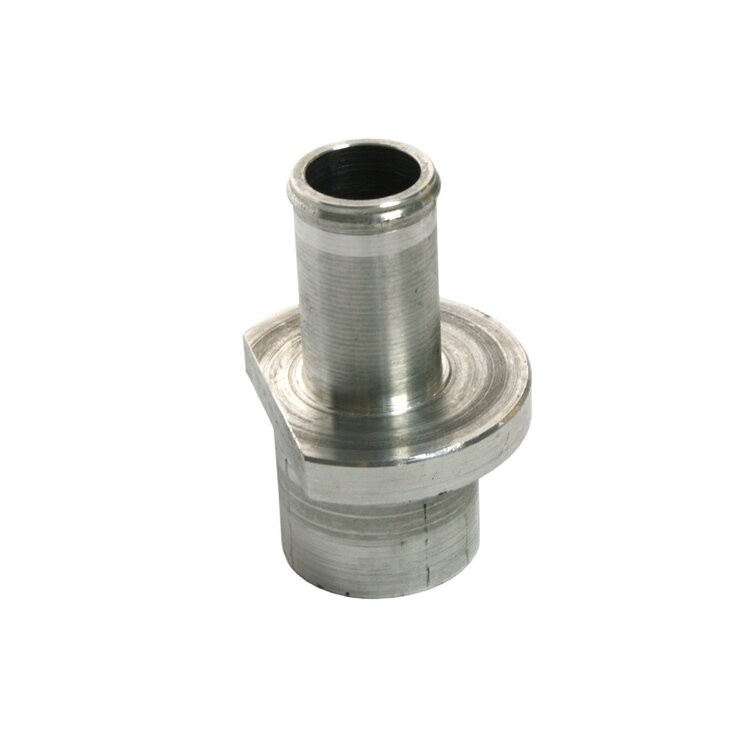


Does your engine currently have the snorkel type breather pipe fitted in the side of the block? If not be prepared for a bit of a game in removing the core plug that is in the hole that you want to place the breather in.
-
-
7 minutes ago, james christie said:
The splined arms have a little spring which is supposed to clip under the splined part on the shaft. If the splines on the arms and the spindle seem to work fairly efficiently - although they do wear - this is not the case of the clip which is useless and barely holds the two together.
I plan a belt and braces operation using blue Loctite to hold the splined buts together together with the Pete Wigglesworth wiring arrangement to stop them flying apart at the wrong moment.
I should then be prepared for summer
james
You say the clip is useless. I suspect you are struggling with repro arms as the genuine l(Lucas?) ones I have feature a good spring clip that retains the arm to the wheel box once the clip engages in the unsplined part of the wheel box stem. We used to get Tex arms that had a screw fitting that when tightened moved a crescent shaped lock into the unsplined groove. Those arms could only be removed if the screw was loosened.
This could become a ‘show and tell’ article if I go digging in the garage.One thing I do recall is that the collet fit arms on TR2/A30 etc were continually coming loose. You always knew when one arm came loose or worse still, fell off the wheel box shaft….the other wiper would speed up from its lethargic crawl across the rain soaked screen to a casual meander.
-
No 10 unf with 32 tpi. AKA. 10-32 UNF
-
6 minutes ago, dpb said:
HI Peter
thanks for the detail. I will likely get to the testing tomorrow or Thursday, grandson sitting today.
Regards
Dave
====
Just one addition to the assessment tests. Check there is end float on the armature in the casing. You should be able to move the armature axially by a small amount (upto 1mm or 0.040”). This is adjusted by a screw and lock nut on some motors and by a screw only on others. If in doubt slacken it half a turn and recheck. If it is tight the armature will not rotate easily if at all. I test by shaking the motor. You can hear the armature moving and being stopped by the limit screw.
-
45 minutes ago, Paul Hogan said:
No Peter. I don't have a TARDIS , although I wish we could all go back in time when there was none of this woke **** around! The emoji I wanted to use was a thinking head because in my usual fashion I was posting a potential hand grenade on the future of the TRR for people to mull over.
Hoges
How about photographing the thing you want to use crop to size and inserting that?

-
Have you bought a TARDIS Hoges and gone back to being a teenager?
QuoteWTF are they supposed to signify? I just spotted the smiley face at the top rh of the options bar. I have also pressed all the other symbols and cannot work out what some of them actually do.
Is this an age thing?


-
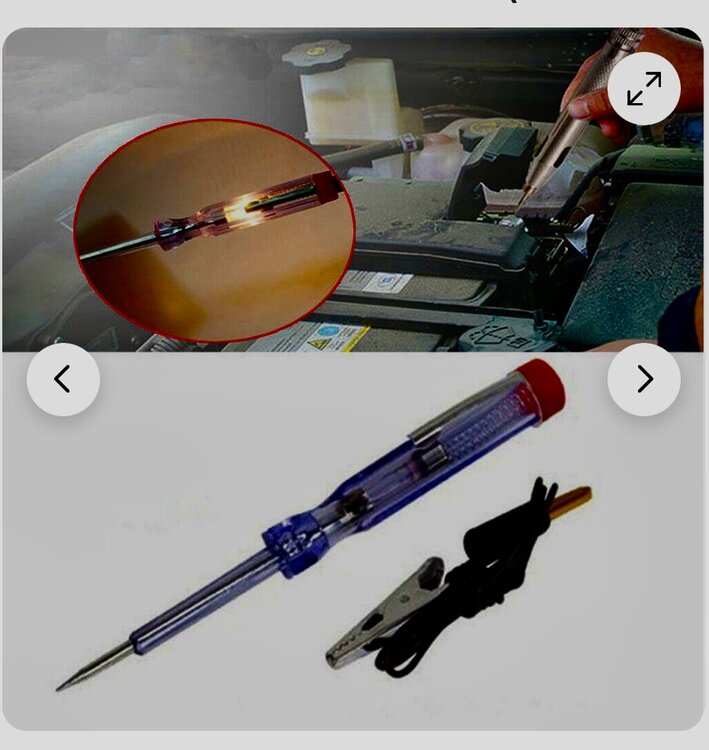
The alternator looks like a Lucas ACR type.
As Rob has said use a bulb and wire for simple continuity test. The ohmmeter is probably too sensitive
Get one of these
-
Remove the motor from the mounting bracket, remove the drive rack. Turn the motor over and remove the C clip holding the driven gear into the gearbox housing. Lift out the gear. Try to rotate the worm drive of the armature end with your fingers. Not easy but it should rotate. Apply power to the two terminals, plus have the earth connected if you want. The motor should work. If not loosen 1/2 turn each the slotted screws on the brush end cover. Re apply power. Still no go?
Take the cover off that is over the brushes by undoing the two slotted screws completely . Smell the inside of the motor. If is smells burnt or ‘hot’ you have cooked either the fields or the armature. That does not mean they are scrap, but the insulation may be compromised.
This may be because the armature was mot spinning freely in the casing after it was assembled - a common problem
being able to turn the armature with the brush end cover only means the gearbox end bearing is not seized.
The armature must be supported at both ends. Try reassembly and applying power again. You say the brushes are good. That is meaning the black carbon bites are rubbing on the commutator there is not short circuit from the brush gear to the motor case.
If still not go but you continue to have the high current discharge the motor needs internal attention.
-
11 hours ago, Richardtr3a said:
Thanks to the forum for the help and advice. Today I was looking through my old papers and found my old Service Instruction Manual with additional TR3 Supplement. There was a wiring diagram and all the wires are identified by numbers and there is a list explaining the link with colour and number.
A few minutes reading the manual and the diagram and my wiring problems are all sorted out.
The forum is a very useful supply of help and advice.
Thanks Richard & B
That wiring diagram in the big red book is not completely correct for your car Richard. The notable problem is that there are only two wires going to the wiper motor. That is a non self parking wiper motor as used on TR2-3. You have a self parking wiper motor with 3 wires. The wiring diagram for your car can be found in the glove box sized booklet Handy Hints. Aka drivers hand book.
online here. http://www.advanceautowire.com/tr24a.pdf
-
30 minutes ago, multipletriumphsinner said:
Sounds like Chinns in Coventry?
No Adwest Engineering at Woolley, Did use Dowty for a few items but they had a greedy tooling ownership policy, that RR got really caught out by.
-
-
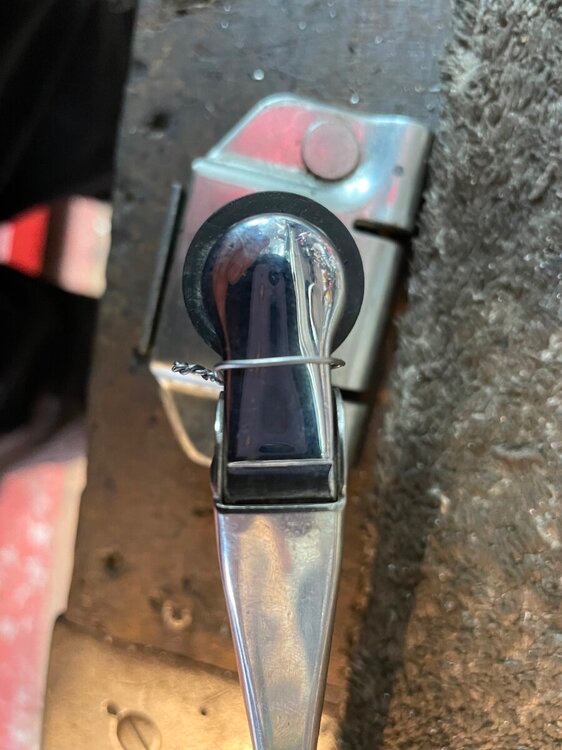
Could be rubbish wiper arms of course…….Roger has had this problem I think and proposed pink ribbon to tie the things on. I went for stainless steel wire locking. A more engineering based solution.

-
55 minutes ago, Spit_2.5PI said:
I spoke to someone at BMH in 2009 about the possibility of a Spitfire shell. It wouldn't happen he said, as there were some key sections where they didn't have the tooling and the car was still plentiful and cheap. The conversation strayed onto the BMH TR6 shell which hadn't long ended then. He said that likewise some of the tooling had been scrapped years before - my impression was that this was during Leyland or Austin-Rover days, not by BMH. In order to do the TR6 shells they had some "Rubber Tooling" made up which was far cheaper, gave acceptable results but had a limited life. A few hundred panels and the tooling deteriorates, and this had determined how many complete shells they had done.
Cheers, Richard
That is correct about the tooling BMH used. A lot of parts were genuine old stock from Leyland, that no tooling existed for when the project was started, other parts were Cox & Buckles kirksite form tools run through a big rubber press, that press is now scrap, plus C&B drop hammer tooling, that was retooled.
Heritage Pressings supplied a vast amount of odd brackets and fittings ( wiring loom tags, L brackets for trim boards etc) for the TR 6 shell. They closed down when BMH was homologated into one factory at Witney. By that time they were in discussion with SteelCraft. BMH were looking to move all their original factory production punch and die press tool sets from the North of England press facility to a more convenient press shop nearer Witney. The rest as they say is history….. Couple into this the work to secure and move the Classic Mini tooling, jigs and fixtures before some get rich quick merchant sold it all from Birmingham for scrap. -
That looks like an A type overdrive for a TR and should fit your 1970 CC chassis without modifications. You will need the electrical circuit, a control switch relay and cables. It looks like the isolator switched on the gearbox remote are present. Check it has a switch for the reversing lights.
As Harry says get it looked at before installing.
Could be tears if you get it installed only to find the lay gear bearings have worn through.
-
Not an original feature.
However….if there is not a similar earthing cable between the body/chassis and the engine that one will do. It is the electrical return for the starter motor power and the ignition and charging circuits.
If it is not there the choke cable becomes the earth return cable causing all manner of issues.
-
4 hours ago, Ian Vincent said:
I use Loctite 270 for critical applications. You can undo it but you need a big spanner and then clean the threads afterwards. It is also oil and grease tolerant.
Rgds Ian
Thank you Ian and Andy.
Ian = That was the type/spec of Loctite I was expecting to use too. Getting to bits was my concern without having to resort to heat and the adhesive being temperature and oil tolerant.
Regarding ‘do it dry’ as Andy has mentioned I think I agree but as i am dispensing with the lock tabs and am using original plain bolts i want to have a sensation of it ‘not falling out’. I have read the TR250/5/6 spec and that has no mention of thread locking, just that they are stretch type bolts which must be renewed and tightened to a specific torque. I understand the method and action of stretch bolts having used them to assemble Maxspeeding rods with ARP bolts. With those I use a bolt stretch gauge to get the specified elongation.
-
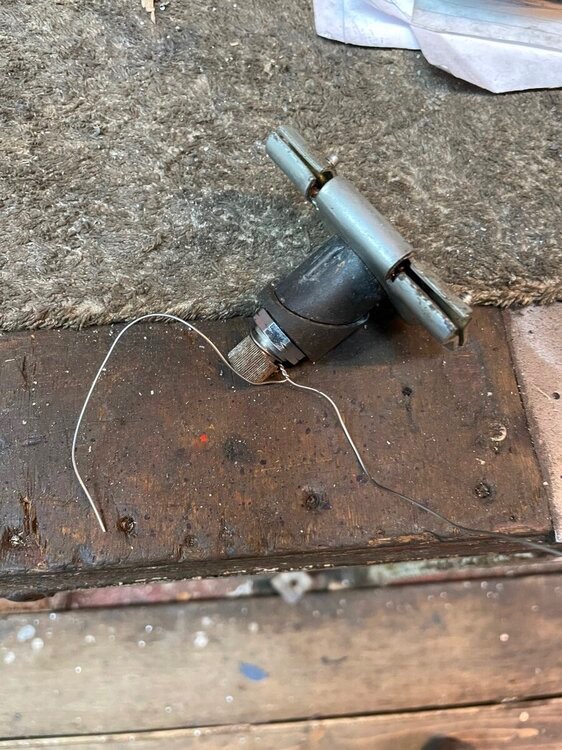
Before you remove the starter assembly…….
Remove the solenoid cover plate, take out the contact disc and clean it and the terminals inside that it makes contact with.
Here is a blow by blow ‘how to’ after the sales pics.
You can clean it on the car.
I have done this job of cleaning the contacts on the car a couple of times and it has fixed a non working starter without the need to remove from car.
-
Here is a petrol tap described as for 10 mm hose. I would check that is the bore of the hose to fit the barbed ends of the tap.
All you will need is a screw in adaptor with 1/2" unf thread and a barbed 10 mm stem. Then join with a length of 10 mm ethanol proof hose.
-
Which Loctite for big ends?
As the title says.My Loctite bottle is run out and I need to replace it. I cannot read the spec on the bottle.
What is the recommendation for securing the big end bolts in TR con rods as I have thrown the lock tabs in the bin.
My red bottle has run out. I have never tested this stuff for ease of undoing.I have a bottle of blue non branded and am nervous I have trialed it on a nut and bolt and it does hold and creates a resistance to unscrewing once the locking torque is broken.
I have looked at the Loctite web pages and they say blue is easy to undo red for secured fasteners that will need heat to undo.
There must be a grade of red Loctite that is stronger than blue and able to undo without resort to heat.
Some one will want to undo these big ends so I am loath to use an adhesive that will need heat to remove the fasteners
Real world advice please.
Thanks
Peter W
PS from Uncle Jack’s engine building tips.
Rods
1. If you are using stock rods, limit your rpm’s to 6000. Throw away the locking plates. Clean all the holes and bolts with lacquer thinner. Apply red Loctite to the bolts and tighten to factory torque. Research by leading companies has shown that the sheet metal locking plates are the least effective means of retaining thread fasteners, while Loctite is the most effective.
https://tonydrews.com/uncle_jacks_engine_building_tips.htm
-
On 3/13/2024 at 7:27 PM, Paulfc said:
Thanks all for the responses.
I think I’ll look to replace the tank outlet and see if I can come up with an arrangement not dissimilar Harry’s above (thanks Kenrow). Please, can anyone advise me as to what the specification of the original outlet (part no. 151204) is.
Many thanks
The pipe is 5/16 external diameter. It has an double sided olive to seal it gripped by the olive nut into a counterbore in the tank fitting The primary bore Ii to the tank through the fitting is 5/16” clearance so a 5/16 pipe can pass through. The olive nut is 1/2” unf thread.
view is of NOS original Triumph samples.
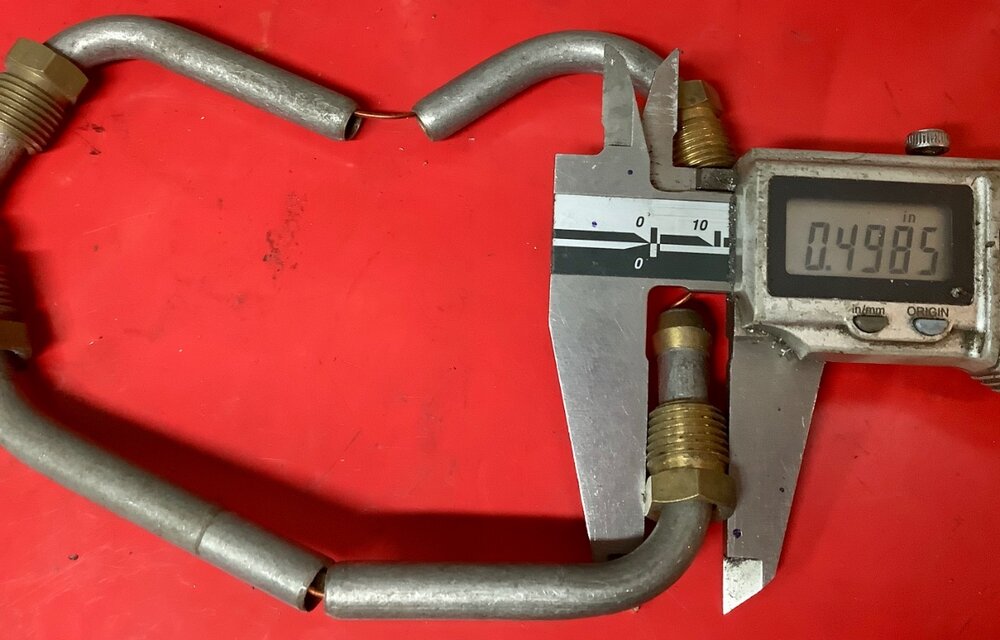


Early TR 4
in TR4/4A Forum
Posted · Edited by BlueTR3A-5EKT
Bit like the Spanish registered TR7 booked into our workshop once for a full service…..with a Ford engine and gearbox fitted. The mechanic working on the car noticed the points would not fit.