

M. Pied Lourd
-
Content Count
231 -
Joined
-
Last visited
Content Type
Profiles
Forums
Calendar
Posts posted by M. Pied Lourd
-
-
Thanks Hamish!
Part 1 is up…seat deconstruction…
Cheers,
Tush
-
Thank You for all the replies, much appreciated.
I’ll be stripping the back cover off after work this evening to see how that looks…as mentioned, the covers come off fairly easily…I’m passing these along to another local TR3A owner who will be using them for patterns to make his own coverings vs buying a kit like I did..
Cheers,
Tush
-
Hi All,
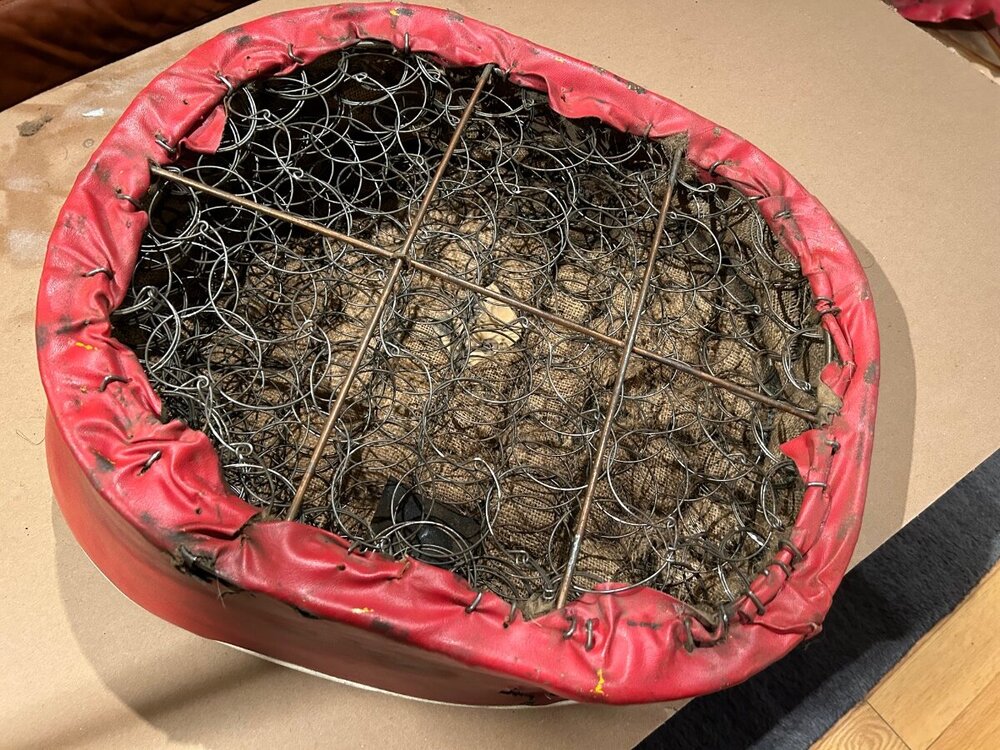
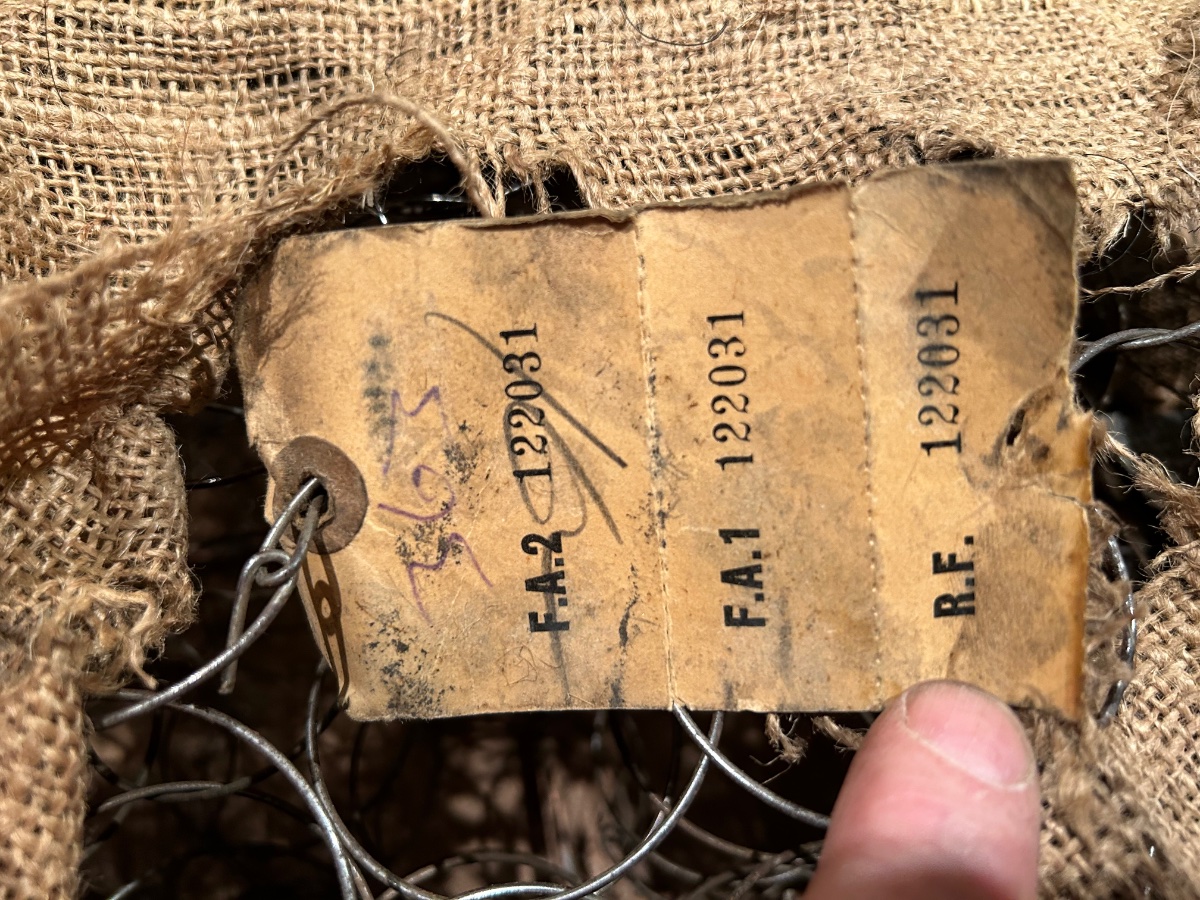
Just in the process of recovering some seats for my 59 TR3A. I stripped the bases down to the springs this evening and was curious to know if my seat springs are originals or reproductions….they do have a cool old paper tag on them…here are a few photos for reference.
Cheers,
Tush

-
Has the intake manifold been removed with the carburetors? The reason I am asking is that I have seen the intake manifold hang up on the mounting studs in the block and not sit flush against the head....this creates a huge vacuum leak and the car will not start. So, if the intake manifold was removed, id have a look to make sure that it was installed properly.
Cheers
Tush
-
Mines CP52627O and has the key in the centre.
Apparently changed around Comm # CP52786 in early 1971.
Cheers,
Tush
-
Hi John,
I think it was the thrust washers. Everything else looked fine internally except for the ridge on the crank due to the out of spec end float.
Cheers,
Tush
-
Hi All,
For Anyone that may be interested, I tore down the Engine of my newly acquired 1970 TR6 PI to see what the internals looked like after sitting since 1984...It was taken off the road due to a bad "engine sound", so we try to find out what it was....
It is a long one so grab a cup of tea (or a beer, or several)....
Cheers
Tush
-
4 hours ago, Paul Hill said:
Looking forward to watching you do this one Tush. How is Les by the way and what became of his green TR6. He is a funny bloke
Paul
Hi Paul, yes Les is a character to be sure! His project is on hold unfortunately….I actually asked him if he wanted to part with it as it has a good chassis…sounds like he wants to keep it although I’ve no idea when it will ever get done. I told Les that I’d help him along the way, but I also mentioned that I wouldn’t be doing the dirty work like stripping, cleaning and painting parts….maybe he will get motivated when I start to work on this 70……
Cheers
Tush
-
Excellent Stuart! Thanks for the Photos.
Cheers,
Tush
-
6 hours ago, John Morrison said:
+1
spent many a happy hour following these expoits
John
Thanks John, most appreciated. I’m going to try and up my game a bit and have invested in a better camera set up, wireless microphone(s), and tripods. I’ll try and show a bit more of the work along the way ( the important bits anyway). I have new video editing software as well that I’m slowly figuring out….
Cheers,
Tush
-
5 hours ago, TonyC said:
David,
Based on what you know now, will the TR6PI project be more or less of a challenge than the TR250, remembering that the latter looked 'not too bad' before you started to strip it, and look how that turned out for you. Maybe with the 6 - what you see is what you actually get this time. Can't wait to see how 'good' the chassis is bearing in mind your comments already and Elin's video of many moons ago where he stripped a 6 and promptly folded the chassis in quarters so it would fit in the skip! Get the 3 done and out of the way so we can become immersed in your upcoming challenge. Looking forward to it. Good luck and we're here to help if there is anything that we know and you don't, which might be a bit of a stretch.
TonyC
Hi Tony, I guess the biggest difference between the 250 and this 6, is that I’m not expecting much from the 6

I knew that there were some issues with the 250 going into the project that could be seen, but once the paint came off and the wings were stripped from the tub, it was a whole new ball game….You are correct, I can see more of what is needed on the 6. Most areas, I’ve dealt with doing similar repairs in the past….some will be all new. For example, I believe the 6 will need a whole new inner and outer rear valance…not something I’ve done before ( done a 3A but that won’t be much help
") )
)
The chassis I’m not holding out much hope for….I’ll keep an eye out for something more useable in the meantime.
Great to have a resource like this to help me out if (when) I get stuck!
Cheers,
Tush
-
Hi All,
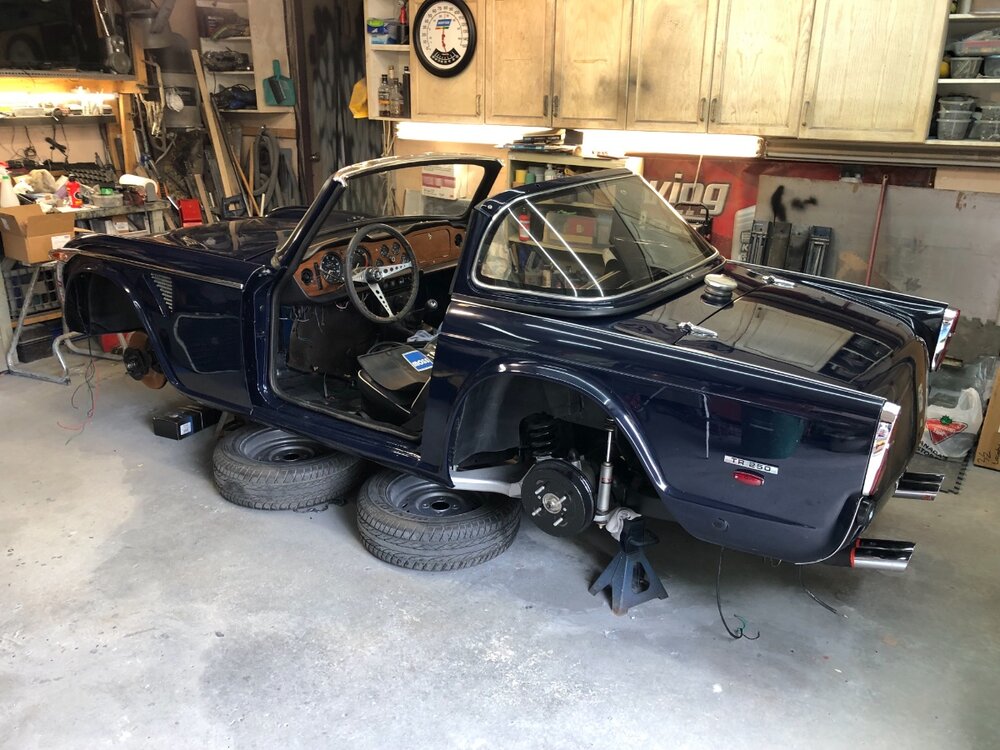
Just thought I’d drop a post in here as I’ll probably need to bend an ear or two once I start the restoration of my newly acquired, 1970 Triumph TR6 PI. I’m located just North of Toronto, Ontario, Canada. As You can imagine, a Home Market, RHD TR6 is quite a rarity over here…I was surprised to find one! It’s pretty rough, but I like a good challenge. I’ve restored a few TR’s in the past and most recently completed a 68 TR250. I’m looking forward to starting on the TR6 hopefully in the not too distant future. I have a 59 TR3A project to complete before then….
I’ve posted a couple videos to my YouTube Channel if you are interested in taking a look at it….
Cheers,
Tush
-
You can use a little strip of fuzzy sided Velcro to cover the strip and protect your top.
Cheers,
Tush
-
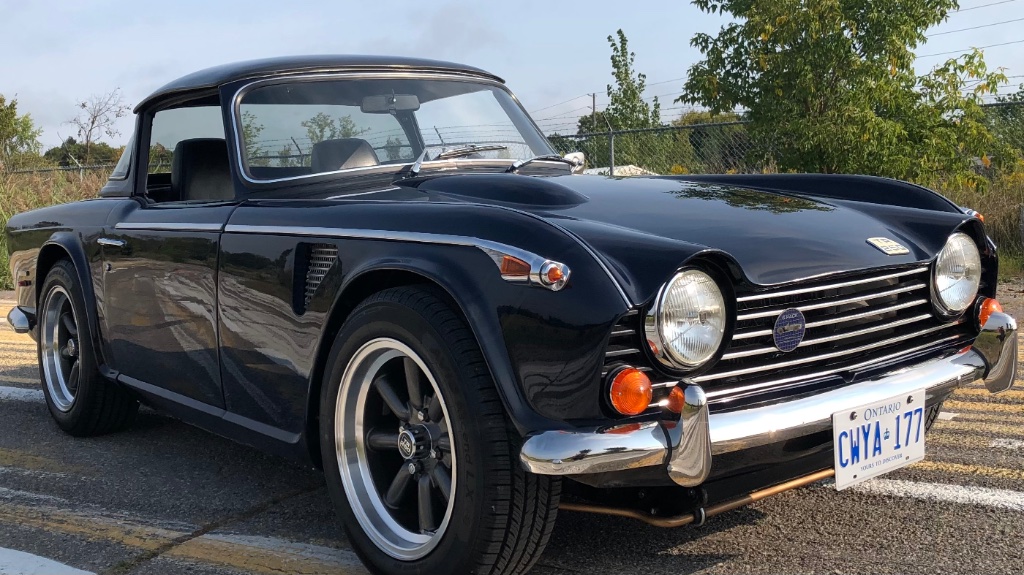
Good Luck with your restoration David. I’m just coming to the end of my TR250 restoration. It’s been fun.
Cheers,
Tush
-
Check your connections at the rear of the ignition switch.
Cheers,
Tush
-
Fantastic Tim, congratulations! I’m hoping to follow in your footsteps before the end of Summer.
Cheers,
Tush
-
3 hours ago, Hamish said:
Well done chef ( are you still Chef ???)
great to see you on here again.
HYes I am Hamish
Cheers,
Tush
-
Hi Richard,
Don’t know if this helps, but just completed them recently on my TR250 ( same as the 6).
About the 20 minute mark of this video.
Cheers,
Tush
-
-
-
If you are looking for something to try, you can try Nightwatch Blue, Chrysler DB9.
Cheers,
Tush
-
I was hoping you would jump in here Tom
Good to see you.
Cheers
Tush
-
Lincoln Easy Mig 140 running C25 Gas does everything I want it to do on any TR that I have worked on.
Cheers
Tush
-
Hi Peter,
What other mods do you have? Cam? Headwork? Exhaust etc.
Cheers
Tush


Seat Springs…Original or Not?
in TR2/3/3A/3B Forum
Posted · Edited by M. Pied Lourd
Thought I’d close this thread out with a video update…seats are done…not perfect, but much better than they were….
Cheers,
Tush