

Motorsport Mickey
-
Content Count
6,783 -
Joined
-
Last visited
Content Type
Profiles
Forums
Calendar
Posts posted by Motorsport Mickey
-
-
Yes Tony has his hardtop stainless finishing trims on show. Excellent finish and certainly look like they'll fit nicely (need to try to confirm) I didn't buy one but if I needed one I would buy no hesitation.
I was talking with Tony and he described the 3 trial fits to jigs needed to measure and then bend to the correct shape. Labour intensive work by a skilled coachman.
Mick Richards
-
55 minutes ago, Trev Good said:
Even back in the 80s/90s when I was on the committee of the local steam fair in Bucks, we paid the traction engine entries to garner support. All other entries were given rally plaques and other goodies, not often seen these days.
As one of my best friends was the finance committee member, we often talked about the surprising profit the fair made....30/40 years ago, the show took £40,000+ with a 25% profit margin. A float taken for the next year and the rest given to a local hospice.
Taking 1985 as a sample, with a pound from then worth £38 today, I suppose that's not enough incentive for today's show teams

Trev,
Pre internet and on line selling era.
Today the specialist parts suppliers move 90% of their wares through on line selling, and the extra costs for setting up for an International TR show, running 3 days takes their main outlets to be placed upon life support only for the week previous, whilst the previous days to the show they run a shuttle service taking stocks to the show area, and they have to pay their staff double wages to work the weekend and pay out for digs for them also.
Have you seen what the Autojumble area is like these days at events ? maybe a dozen stalls whereby in the glory days of the 80s and 90s there would be 3 or 4 ROWS of stalls with owners bringing in part cars for sale and their "to be disposed of" piles of
junk...valuable restoration parts ! The cash input from these sources and many others have been mopped up by the internet, I'm not blaming anybody, it's progress...well it's the way the world's gone anyway.I used to go to Antiques fairs up and down the country as a Sunday fun day out. Donnington used to hire out their "International exhibition centre" to the Antiques fair owners 2 or 3 times a year, last time I went was about 20 years ago...they are no more. The stall owners even then complained of paying £60 for a 8 foot long stall and how would they get their money back when counting for moving their stock and attending in a car with the wife sitting at the back eating salad out of a plastic box and a plastic cup of weak tea. Well they all got what they wanted, now they move stock on via e bay and any number of other auction sites, it's a business where they just take the money and see nobody. Half of their customers after a few years had become friends and they see them no more, just take their money from their website if their erstwhile customer/friend can manage to find them on the internet. Sad innit, and nothing can be done about it, it's the way of today's world.
Mick Richards
-
Hi Dave,
Very slowly at present, we were due to go on a Panama holiday early December but we had injections for Covid, Flu and the Pneumonia jab within a week in November and Margaret has been very unwell with reactions. So the cruise went down the pan with her very dizzy and her blood tests showed up a few abnormal readings which we think are the results of the cocktail of of injections. Currently I'm head cook and bottle washer, so time is stretched and we are on weekly doctor/hospital./Scan visits, I'm
surehope that all will shortly settle and I can progress a little further.Your rebuild seems to be coming on well again.
regards Mick Richards
-
Dave,
Slight correction to your prose..."one end oversize 3/8” unf to fit into the trailing arm and other end 5/16” unf ". The trailing arm thread end is actually 3/8"UNC which fits in the 5/16th dia stripped or drilled to that dia holes.
Mick Richards
-
Nearly Peter,
The studs are not 1/4" they are 5/16".UNF thread both ends. The repair back to standard is to use 5/16UNF Helicoils, this means drilling the holes out to the tapping size for a 5/16th UNF Helicoil which is 0.328 thou tapping size.
Now these studs are drilled and tapped into alloy blocks which abut the trailing arm central hole dia, unfortunately these blocks were made by the apprentice (a YTS probably) who set the position in the mould for the blocks to be formed. He had only had the job 3 weeks, and he was drunk when he came back from lunch
 so the block positions can be variable,
  and I've seen numerous trailing arms where the hub studs have broken through the side wall of the trailing arm hole.
Now when the studs strip out of the trailing arm, the 5/16th thread pulling out leaves the hole as 5/16th Dia,...that's handy ! .312 thou Dia is the tapping dia for a 3/8th UNC tap, so just tap the hole 3/8th UNC. So my suggestion is keep more material in the trailing arm (I know it's only 16 thou on the dia, but every little helps prevent the stud breaking through) and either buy 3/8" UNC - 5/16" UNF staggered studs and use standard 5/16" UNF nuts, or use 3/8" UNC cap head bolts with the hubs drilled out from 5/16th to 3/8th (my choice). It's what the racing lads do.
Mick Richards
-
Gotta do this...Roger err Roger.
Mick Richards
-
1 minute ago, marki said:
Hi.
Where does the too long come into it ?
cheers Mark
It doesn't, I think (guessing here) that when a screen fitter (or yourself) fits a screen the first job is fit the seal to the screen, and the fit of it suggests it's too long by being somewhat sloppy. (years since I did one).
I think a fitter (I think this is what Stuart gets at) may be tempted to cut the length, to fit it snugly around the screen, which then counter intuitively doesn't provide enough rubber to reach deep into the forward corners of the rear backlight (as per photo above by Rob) which then leaks. The Moss rubber backlight seal is the correct length as supplied.
Mick Richards
-
1 minute ago, marki said:
Will the excess seal be around the sharp bends when installing ?
There isn't any excess, it needs everything it's got to get into those tight forward corners.
Mick Richards
-
Keith, it may be useful if you post the item number on e bay for the specs you've tried. I'm looking to buy a pair myslf and even if I choose another set and post their number we can have comparisons between the choices as tom which may work satisfactorily.
Mick Richards
-
Serves them right if it's renamed the Porg Arms.
Mick Richards
-
AAahhh Marco,
A truthfull man with clever friends.
Mick Richards
-
1 hour ago, Z320 said:
Btw,
did I tell here what my friend Jochen asked ME when I asked him about the need for an anti roll bar?
I'll bite,...tell me....tell me. Knowing how sensible yourself and Jochen are I'm full of curiosity.
Mick Richards
-
23 minutes ago, RogerH said:
Yes. But usually a fair walk to the halls/.
Roger
Yeah, don’t forget a backpack or a small folding trolley. If you buy something unplanned that’s weighs 10-15kg you’ll need muscles in your spit carrying it to the car.
Mick Richards
-
Yep, that’s an original tapered Mills pin, showing it’s larger dia towards you… hopeless !
Undo the carb linkage and then the accelerator shaft housing holding the bearing, and the throttle pedal bracketry inside the car.
See if you can get to it from the engine side, I think you’ll struggle but if you can get it to point more into the engine compartment so it points front to back you may be able to get to it and drill it out from there.Mick Richards
-
Loose sparks are fine, but as with any covering (other than a concrete base) I place a plywood protection panel a couple of feet square in the line of sparks if they have any force in them. Welding spatter I'm not sure off but anything will submit to a cherry red piece of metal landing on it, it's the price you pay for comfort and ease of cleaning, at least the squares can be lifted and changed in position or replaced if damaged.
Mick Richards
-
It's easily identified Bob, if it won't come out when it's hit from on top, it's that blasted tapered pin version. If it does drift out then somebody has already changed it for a C type pin and thank goodness for that.
Mick Richards
-
1 hour ago, greasemonkey said:
Mick - Aren't Mills pins the parallel hardened steel pins with a longitudinal split and a chamfer on each end ? They're made from spring steel & rely on their compression in the hole to secure.
Phil.
Nope...damn things are softish metal (that's why they shear), which are tapered and in the original build where they connect the accelerator pedal rod which travels horizontal from drivers footwell into the engine compartment, they have to be accessed vertically UPWARDS to remove. Miserably because they are tapered, and you can only access the wide end of the taper it means they are impossible (well I never worked out how to do it) to remove when fitted and joining the rod and linkage together. Drill out and fit a parallel pin.
When I bought Trevor the TR my TR4 back in 1973 from Manchester it sheared it's pin after about 5 miles driving and I had to butcher the radio wiring to get a piece of wire long enough to pass from the drivers seat through the bulkhead and onto the carb linkage operating it by hand. A long journey across to Nottinghamshire in the dead of night, the throttle was pretty much an "on off" switch due to the return spring pressures.
As you describe the parallel pins are called C pins ...cos it's their shape when looked at from the end, are hardened and can be driven out from above when you want to split the horizontal throttle rod from carb linkage rod. If I bought another TR it's the first thing I'd check had been "upgraded", not an easy get around at the side of the road.
Mick Richards
-
The Mills pins are torture. A tapered pin, they are originally fitted from on top with the large diameter of the taper obviously being on top,’ and you can beat them in.
When they shear there is normally a faff to get access to it, and some disassembling normally results. Take advantage and drill the sheared Mills pin out through the shaft and housing with a suitable drill, (parallel,... I think I used 3mm) and then replace the pin with a C pin which is harder and doesn’t shear in use. Also being parallel if needing to be stripped later, you can just drive it out from on top, and then replace it again from on top.Mick Richards
-
"Have recently changed to 165/80s on 5" alloys, using 29 front & rear as suggested by Tony Sheach, but too early to comment further other than that my speedo now reads correctly because the overall diameter of the wheel is slightly larger (and as it was in 1962)."
... good suggestion, monitor it and see.
"I have removed the only anti roll bar from the front of my car and adopted 24 front and 30 psi rear using 165\80x15 tyres on 5 1/2” rims. My logic was that I need the front to break away first not the rear. "
...good logic, monitor it and see.
Shows what a mares nest tyre pressures are ! Almost all the TRs on the road these days are different too each other in specification of Springs, shock absorbers and anti roll bars whether at each end, one end or not at all. Why would anybody think that the tyres on all these different cars should be at the same pressure. ? These cars are no longer factory spec showroom condition, and the tyre pressures should evolve to match that.
More thoughts for you, anti roll bars control the roll of the car by stiffening the across car weight transfer, whether at the front or the rear, this trades off grip and changes the handling making it better from one end of the car to the other. This is good, making handling better means the car can be driven faster, (even if still within the speed limits and safely) cornering better and being able to place the car more accurately on the road.
As a rule of thumb if you drive your car too fast into a corner the manufacturers want it to understeer...(turn the wheel and the car goes straight on) it's safer, and doesn't require any skilful driver input, eventually the car will scrub off the excess speed at the tyres and the steering input will be answered. Whereas any specification that makes the car "tail happy" (oversteer) is avoided, it normally causing cars to spin out into unforgiving scenery or oncoming traffic, a source of law suits claiming unsafe cars. As a given, a solitary front anti roll bar will change the manufacturer ...understeer, into UNDERSTEER, it causing tyre patch deformation on the outside front wheel by weight transfer to worsen, and lose the tyres grip.
Those of you in front of my typing will now be saying ...aha what controls the tyre deformation of the carcass, ? ...tyre pressure. So a crude short cut to better handling would be increase the front tyres in increments of 2 lbs until the carcass stiffens enough not to deform and give enough grip to answer the steering. Alternatively by worsening the rear axle tyres grip (it's grip is exceeding the fronts, hence causing the understeer) more tyre deformation can be caused by removing tyre pressure by increments of 2 lbs, worsening the grip at the rear and handing it back to the front axle. Ideally we fit anti roll bars to front and rear, and by varying the thickness of the anti roll bar, or it's activatiing arm length, (longer is weaker, shorter stronger), we tune the cars handling so that driving through the corner the car can be driven on the throttle, only then are we limited by the tyres.
Now when many of us started racing we soon found that standard road tyres would likely be pumped up on track work to maybe 40 lbs or thereabout, this helped stiffen the carcass and prevent rolling the tyres off the wheels (possible) and also we could crudely "tune" the handling of the car by balancing the front to rear end grip...which is all what handling is on a car. However tyres and their compounds do not give of their best grip at all pressures, too hard and the tyres instead of slightly deforming and gripping, become concrete like and just roll the tyre material off the surface, loosing grip. As said above, too soft and rolling off the rim and tyre deformation occurs, and grip is lost, so the "Goldlocks" area for temperature gives the best uniform grip in use, and is avidly searched for. When practicing for the race, tyre temperatures taken swiftly will show how the suspension and tyres are working, too hot on the tyres outside edge (the tyre tucking under and the pressure is low, too high in the middle and the pressure is too high, a uniform (within 2 or 3 degrees) temp across the tyre and ! ...please can I have some more porridge !
Now driving on the road should be careful and not cause danger to anybody, but finding out what pressures work best by experimentation, will give you the most satisfaction for the drive, and crudely placing the back of your hand against the tyre tread across the width gives an indication (humans are supposed to be able to judge within about a 1/2 degree on comparison tests) as too whether the tyre has about even temps across it.
Mick Richards
-
I’ve never seen the steel hardtops with welded, riveted or in ANY way secured hoop stalks, because that’s what they are.
Although they deflect when individual and not connected to the cross hoops and material. When those items are attached and the inner roof covering stressed and stretched from end to end and across the roof, the edifice becomes resilient to pressure without presenting individual resistant points. Just as it needs.Mick Richards
-
Sorry John, thought I'd already said Happy Birthday but rereading through your felicitations mine isn't there,
so have another one (even if late) Happy Birthday.
Mick Richards
-
26 minutes ago, Tim T said:
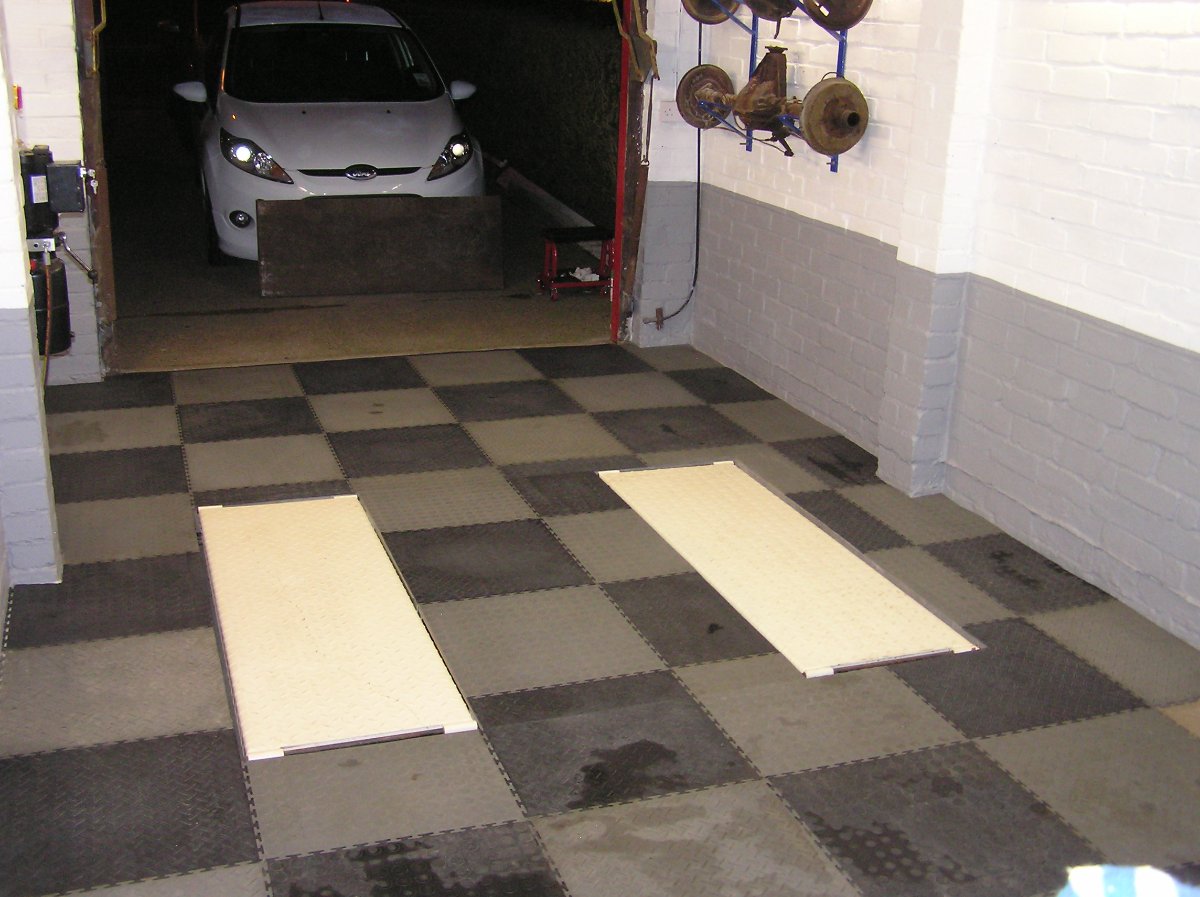
Currently thinking of interlocking pvc tiles, but they are not cheap.
Any suggestions gratefully received!
Thanks,Tim
Yeah, that's what I bought
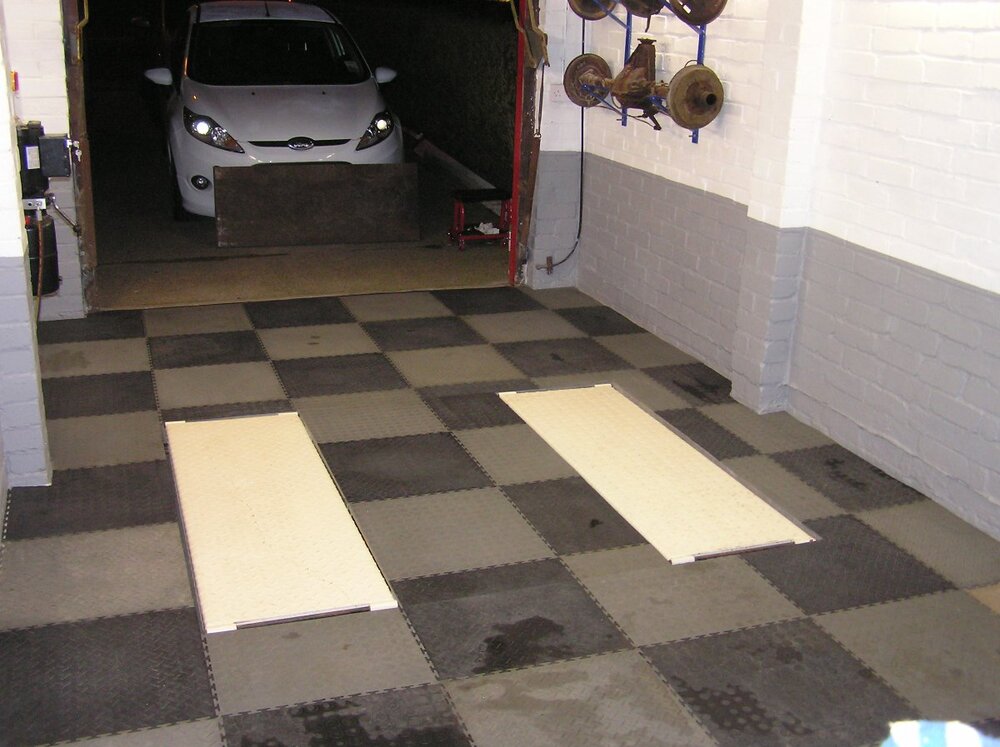
Easy to clean in situ, and if you have a bigger spill just lift the individual or group of tiles wipe off and then replace in position. About 5mm thick they stand having a trolley jack with car lifted on them without marking.
I bought mine from one of the car shows I attended at the NEC, a lot of the car appliance come tools and parts suppliers have them down on their stands as part of their display, this makes them second hand and they need replacing every few shows to keep pristine. I agreed to visit their stand after 4:30pm as they were packing up and lifted the tiles with them and used one of their trollies to take them to my car. Cost me under £250 for a bit more than twice the amount of tiles you can see in the photo, about 110 in total, they don't wear out and are clean and warmer than concrete to lie on. What else can you put in your garage that makes it look good, warmer and cleaner for less than £2.30 each.
Mick Richards
-
" I won't do it a second time."... so that's your decision made.
I'm open to any ideas.
After you've opened up the sump hole to allow the drill and tap to pass through it to remake the thread Tie a length of fishing line to the helicoil tang and carefully wind the helicoil into the block and when fully inserted use long nose pliers (if small enough) to reach into and break the tang off and withdraw it. If the hole is to small for your pliers, use a screwdriver and press down onto the helicoil tang and snap it off and withdraw it with the fishing line. If it doesn't work you still have the sump removal you can do.
Mick Richards
-
Happy birthday Wayne.
Mick Richards
TR3a throttle pedal pin replacement
in TR2/3/3A/3B Forum
Posted · Edited by Motorsport Mickey
Hi Steve,
So that little puller was fitted upside down onto the linkage housing and with the knob underneath then wound it up and it pushed the Mills pin (spit) out from underneath") great result. I'm off to Halfords to buy the tool.
great result. I'm off to Halfords to buy the tool.
Mick Richards