

.jpg.9be48781ad688313f831c248c0fceb04.jpg)
PaulR
-
Content Count
100 -
Joined
-
Last visited
Content Type
Profiles
Forums
Calendar
Posts posted by PaulR
-
-
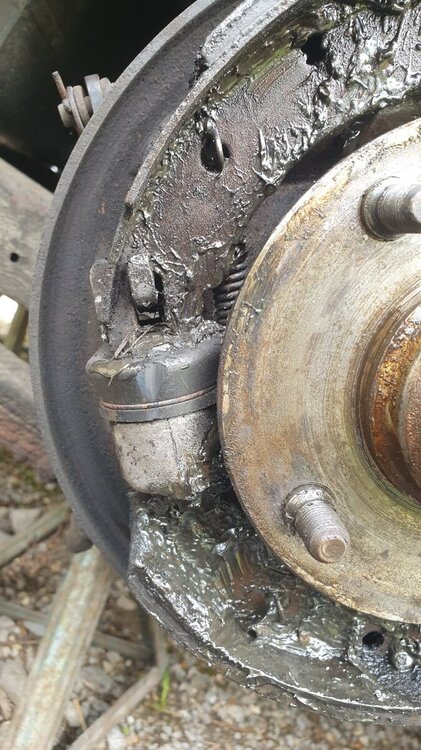
Was carrying out a few checks prior to Drive It Day and found quite a large quantity of grease (see photo, although I have wiped some away) over the brake shoes. Can only assume it has come from the hub but never having taken the rear hub apart I don't know where the seals would be. Anybody got any ideas where it has come from & what I need to do?
Thx in advance
Paul
-
Update
Finally success
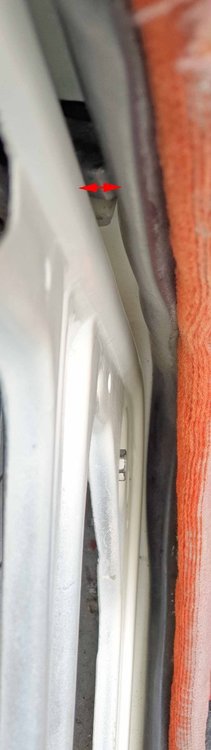
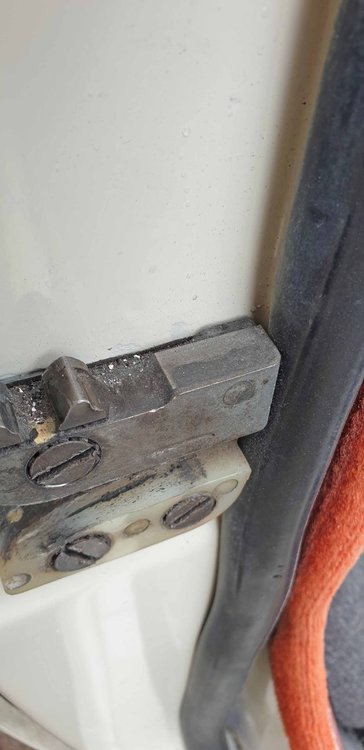
The door seal rubber was preventing the door closing sufficiently for the second 'clack'
By moving the door forward on the hinges it reduced the pressure on the seal & hey presto
Thx to all for their comments
-
Hi All
Thx for your input
The door alignment is fine. It will close in an acceptable position
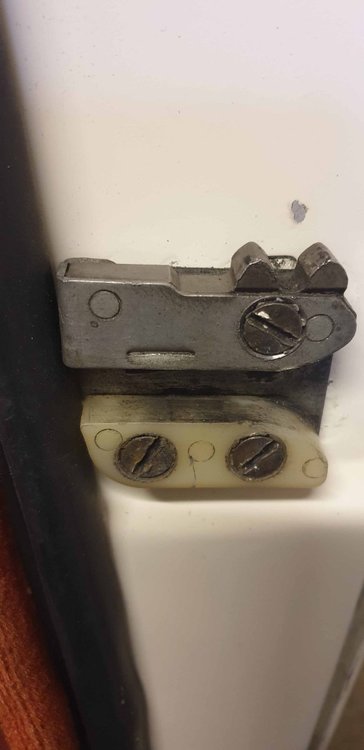
The issue is that the cog/striker plate won't hold it in that position
I'm going to try and get into the rotary lock mechanism and see what I find
Paul
-
Another afternoon spent trying to improve the closing of the door without success
Reading Efuentes post he talks about 2 clacks. I can only get one no matter where the striker is positioned
There does seem to be some slack in the cog on the door, could this be the reason and is there anything that can be done about it
Hers's hoping
Paul
-
Hi Richard
This is the n/s but both sides have the same problem
Paul


-
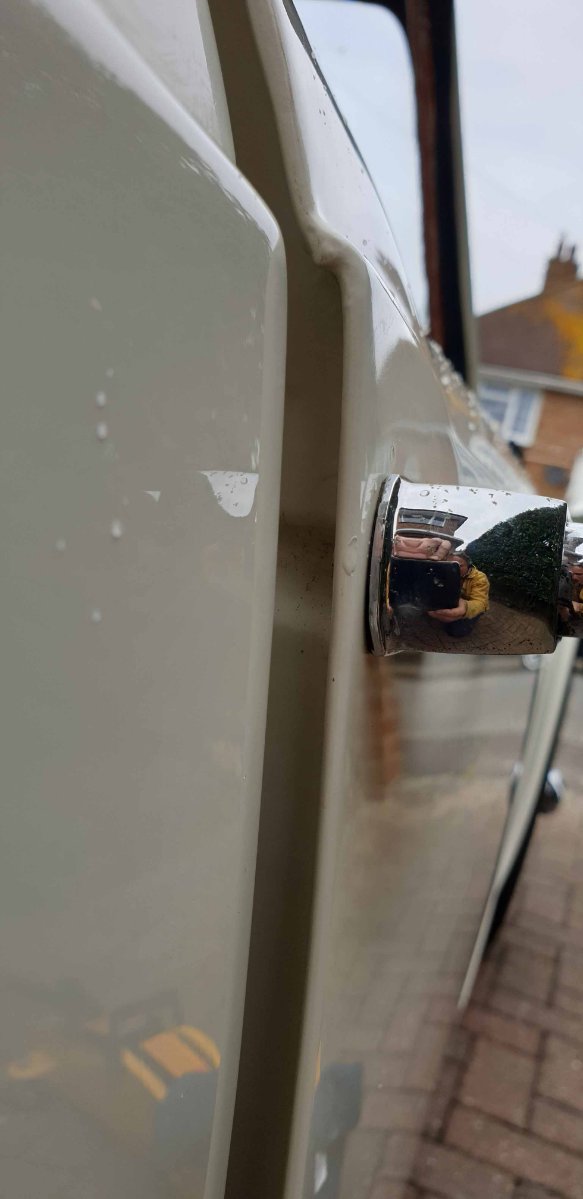
Due to quite a lot of movement in all of them I decided to ream & replace the door pins in all 4 door hinges. This worked very well, Hoorah!!
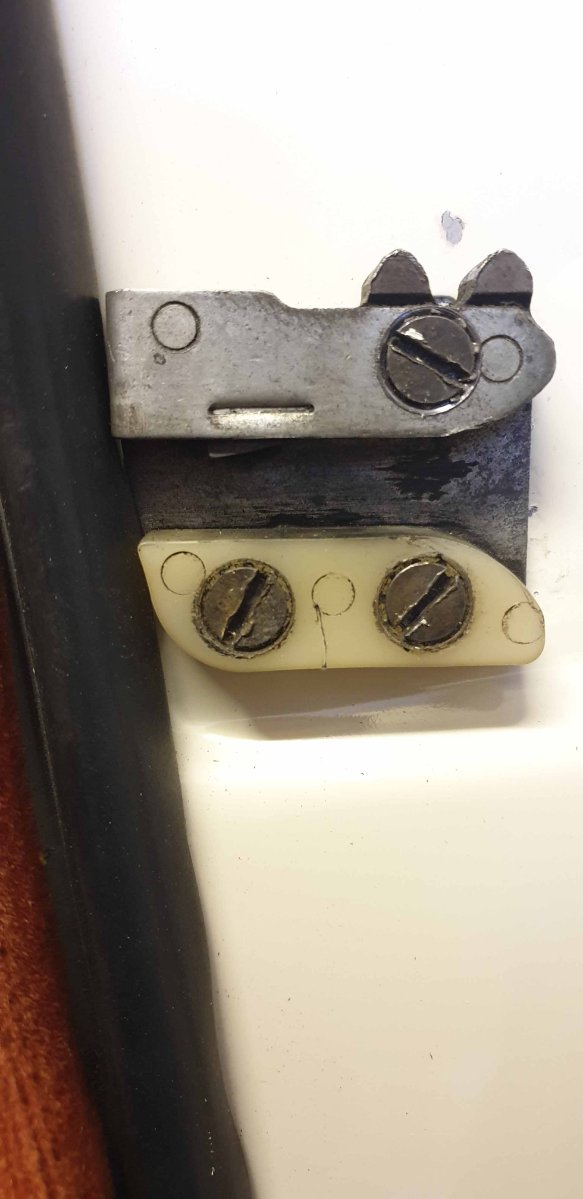
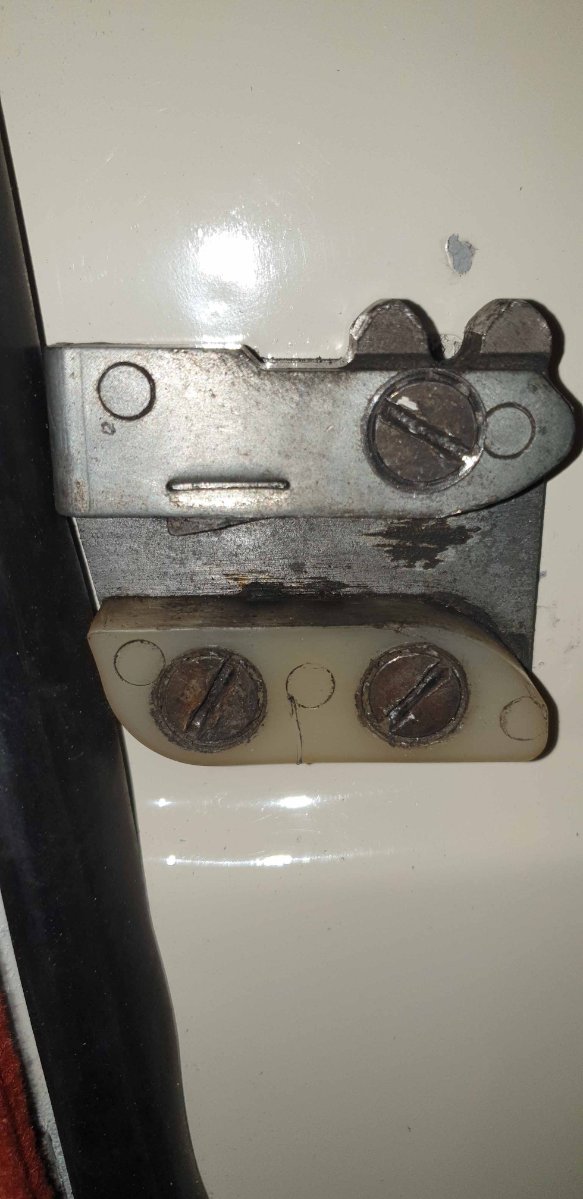
However on refitting the doors I cannot now get them to close sufficiently. (see photos)
This applies to both doors
The Door Lock Striker is at it's most inboard position. I have also tried them at the most outboard position in the hope that the toothed wheel on the door may click twice, no dice!!
I have tried adjusting the hinges in the door & A post but can't get it right
Am I missing a trick & if not any suggestions for a door 'guru' in West Sussex
many Thx
Paul

-
Update
Huge Thx to David Ferry who very kindly was able to send me the front end of a wing that a local welder did a fine job of attaching. Now just need to do some fettling.

-
As the rest of the wing is in good shape I like David's idea of cutting the front off an existing wing
Dave I hope that I have sent you a message through the forum, although I have never one that before so hope you get it
-
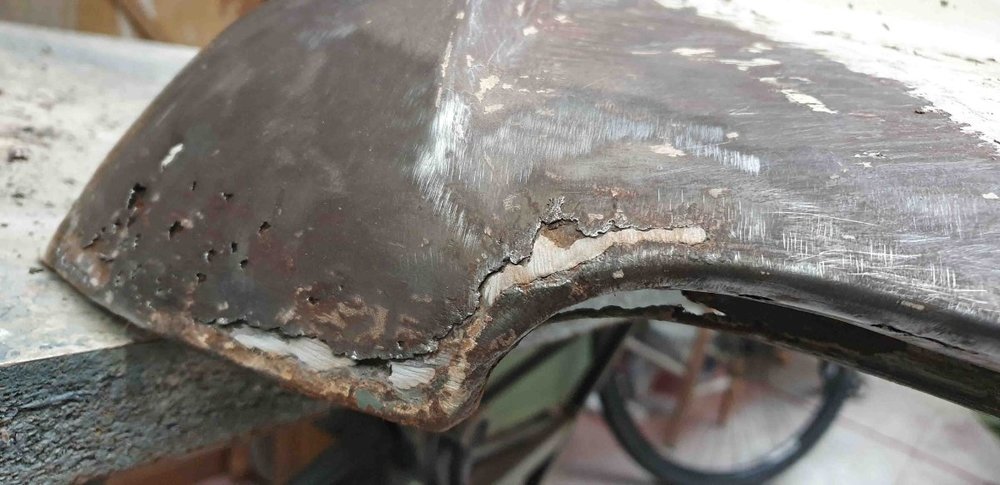
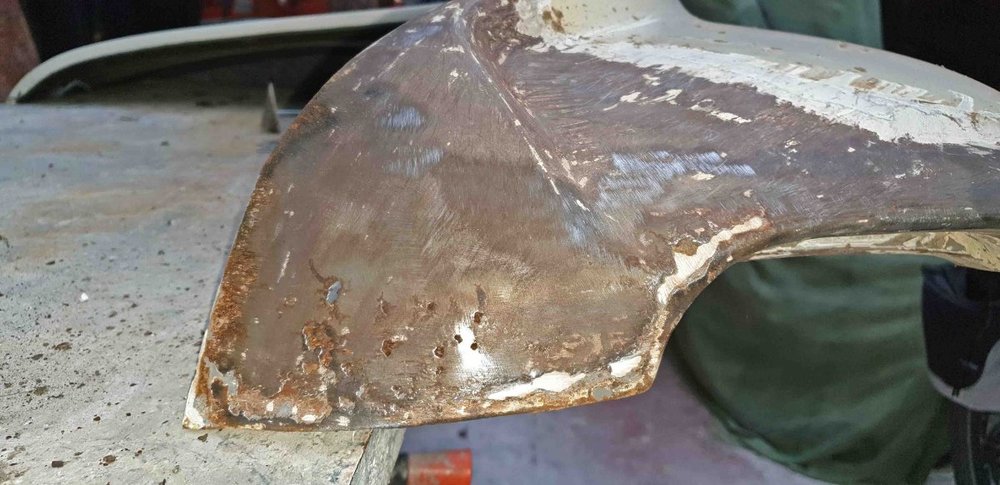
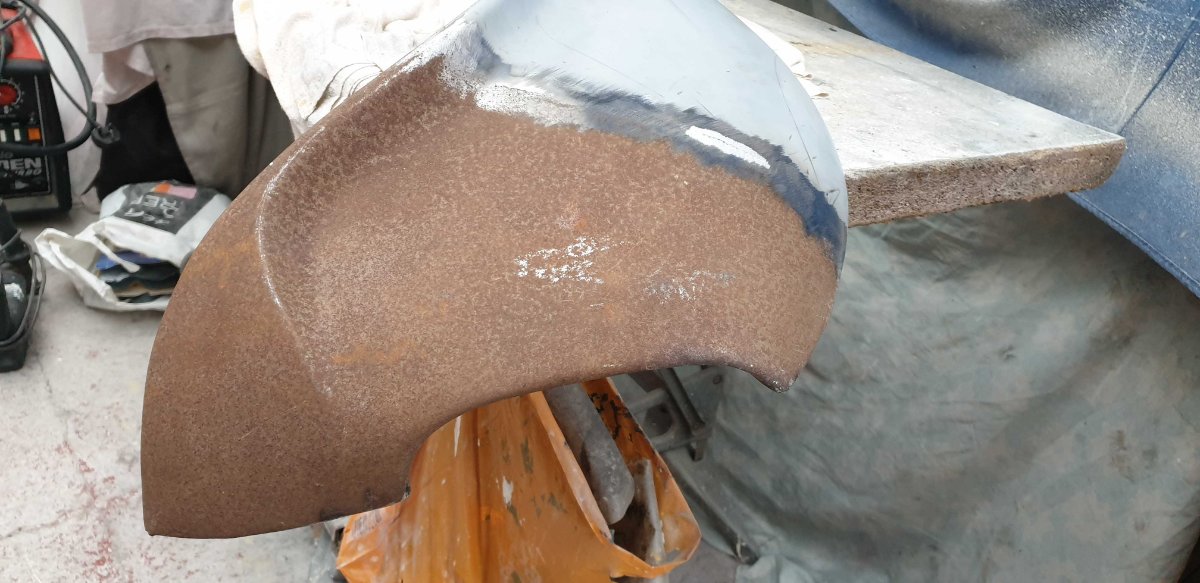
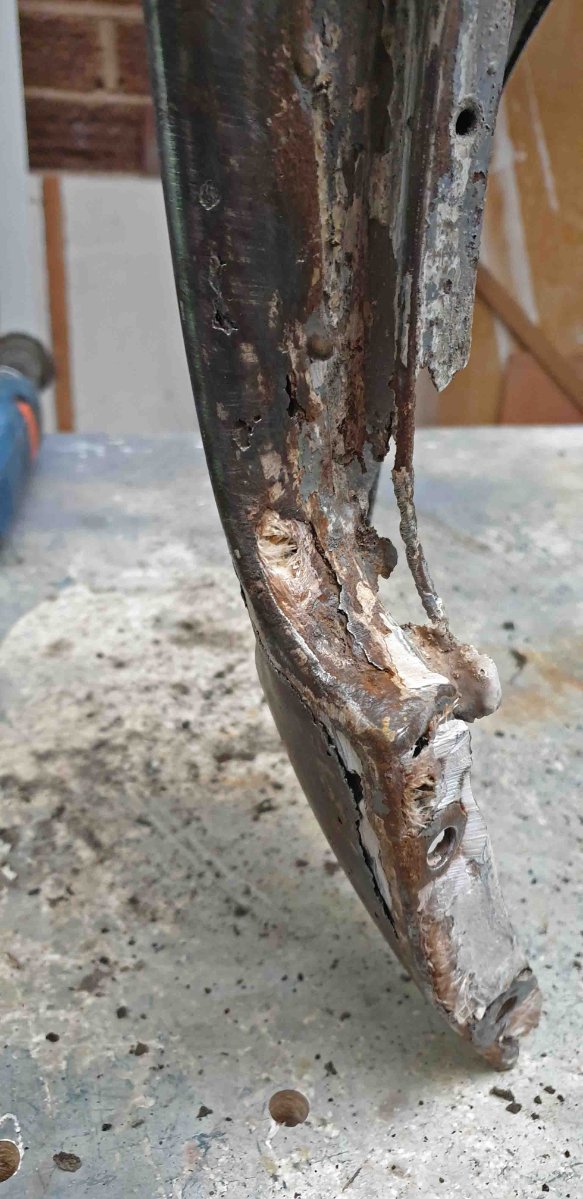
The current situation provides an opportunity to re-visit my 14 year old fibreglass & filler repair to the front of my o/s front wing. It held up really well & I had forgotten how bad the wing was - see photos. Now wanting to do a repair in metal rather than filler. Does anyone make a repair panel for this area & if not has anyone got any suggestions
Many Thx in advance
Paul

-
Having got an alternator & thin belt conversion my ammeter is redundant. I would like to convert it into a clock keeping the Jaeger logo to match. Has anyone done this or got any suggestions? I'm happy to scan & print the logo on a black background but not sure where top find a mechanism. Thx
-
I recently posted ( 3 weeks ago) how the ballast resistor on my Lumenition ignition had failed & I replaced the coil with a Lucas gold one and did away with the resistor
All was fine until today, when she died. After a bit of diagnostics the lucas coil has failed (It wasn't that old). I'm now thinking that I may have too high an output form the alternator that has burnt out the ballast resistor and now a perfectly good coil.
Any suggestions as to my next step please.
-
Thx Steve
That's what I was hoping to hear
Paul
-
Hi
A very nice AA man got me on my way again today by diagnosing that the 1.5 ohm ballast resistor on my magnatronic ignition had failed. I had a spare lucas coil which we fitted, by passing the resistor and all seems fine. I was never a fan of the bloody great resistor anyway so am wondering if anyone has any views on running on the current setup.
-
As Stuart suggested it was a stuck o/s calliper
Managed to free it off but the question is why would it decide to stick halfway through a journey
Hmmmmmmmmmmmm!!!!
-
I'm with Roger on his logic but can't think how changing the rear shoes would affect the front brakes
I also agree with Stuart that a seized o/s calliper would explain the results but what would cause a calliper to seize that had been performing perfectly?
-
Always had quite a lot of travel in the brake pedal so recently replaced the rear shoes. This seemed to make things much better
Was out for a run in the sun yesterday when the brake pedal became very firm with very little travel and a huge pull to left when applied.
With more pressure applied n/s front would lock up completely. Clearly something has affected the brake balance fairly majorly
I was planning on taking the car to our agm tomorrow so only have tonight to sort it.
Can anyone give me any suggestions as to where to start
Thx
Paul
-
Hi Kevin
Please can you tell me how to book
Rgds
Paul
-
In case anyone experiences the same problems it was all due to end float. None between 2nd & 3rd bushes and loads on the 1st gear bush
At least thats what I hope as haven't driven her yet
-
Problem found
Quite obvious after the event
I had managed to bend the end of the output shaft when hitting it with a hammer to remove the rear gbox case bearing
Lesson learned
-
Hi Guys
Thx for the responses
I haven't rebuilt the O/D and it was fine before reassembly
I guess off it comes again
Anyone got any suggestions for keeping the 2 parts of the O/D that the Gbox output shaft slides into aligned as it was a real pig
Thx
Paul -
Just reassembled the gbox with all the new bits and all seemed to go well, however trying to turn the flange on the end of the overdrive ( that connects to the propshaft) by hand is almost impossible. Is this normal
Attaching a power drill to the clutch end of the input shaft and sliding the reverse gear into mesh enables the output flange to turn as expected, so all seems to work, I'm just concerned about the amount of effort to turn it by hand
Opinions please
Paul
-
Hi All
Just about to begin the rebuilding of my '64 TR4 Overdrive Gearbox and want to replace the rear seal which I believe to be at the end of the O/D casing
My question is whether I have to dismantle the O/D to do this or if I can prise it out without dismantling.
The O/D works perfectly and so I am reluctant to dismantle.
Any thoughts please
Paul
-
Thanks all for the prompt responses especially Graeme's link which I will pour over tonight
Rgds
Paul
-
2-3 years ago I had a problem with my 64 TR4 jumping out of second gear when not under load. After reading the forum and dismantling the Gbox I found the second gear 'Top Hat' bush was sheared. This was duly replaced and all was well with the world.
Until recently.
Same problem has re-occured.
Just had the box out and low and behold 'Top Hat' bush has sheared again.
Now thinking that sheared bush was effect rather than cause. All the rest of the innards appear fine, no missing teeth or wear marks.
However the rear gearbox mount has done its usual trick and disintegrated, could this be the cause?
Anyone got any suggestions what I should check before replacing the bush and refitting
Also whats the answer to the gbox mount, this will be the 3rd one since I 've had the car
Thanks in advance
Paul


Grease in Rear Brake Drum
in TR4/4A Forum
Posted
Hi All
Thx for the replies
The car is a 4 not 4a so has solid axle
Hopefully over enthusiastic grease gun as otherwise sounds a bit of a 'mare
Only appeared on the off side
Have cleaned it all out so will give her a run on DiD and check after