


ianc
-
Content Count
5,982 -
Joined
-
Last visited
Content Type
Profiles
Forums
Calendar
Posts posted by ianc
-
-
I am sure that Tim and PeterW are correct that for the TR4A the order at the rear is reversed. Now, having looked in the Parts Manual for that model, I can see that they are correct.
At the NEC Show in November 2016, I purchased four automatic bleed valves from Automec for total of £12. A bargain - but it seems that they no longer make/supply them and, despite my comprehensive location list of all the parts in my garage, I have not found them.
They are quite small and must be hiding from me, which is very annoying as I intended to fit them later this year!
Ian Cornish
-
BTW, Bob meant Jubilee clips.
Ian Cornish
-
Peter: the standard procedure is to start with the furthest away, so surely the sequence is: L Rear, Right Rear, Left Front, Right Front.
Clearly, this is the sequence which Andy and I have been using for decades, and my Workshop Manual states that one should start with the wheel cylinder furthest from the master cylinder, finishing with wheel cylinder nearest the master cylinder.
Because the WSM was written for Great Britain, it refers to Nearside and Offside - terms which I dislike and never use.
Ian Cornish
-
A few years ago, the sun visors in my 1962 TR4 started shedding dust on my knees every time I flipped them down in order to use them. After a while I realised the source of the dust - the inside of the visor held some sort of foam rubber padding, which had disintegrated.
I removed each visor, smashed the foam into minute pieces and shook all of it out through the hole through which the rod passes.
I put each unpadded visor back on the bar, and replaced the assembly.
No more dust on knees now! The lack of padding doesn't worry me.
Ian Cornish
-
The Works' TR4 Rally cars were equipped with the RB340 regulator, and I managed to find the instructions in 1970.
To set the current regulator of the RB340, one needs the special tool which appears on page 19 (I have one somewhere here!).
I seem to recall that one requires an Avometer reading to 20 amps, and the operation must be performed rapidly because everything warms up and disturbs the setting(s).
Ian Cornish
-
Rare as hen's teeth or rocking horse droppings!
Ian Cornish
-
Find the wire which goes to the horn button, disconnect it and then connect it to a switch mounted wherever suits you. If wire not long enough, solder or crimp an extension, making sure that it cannot accidentally earth itself!
From the other side of the switch, run a wire to earth - the screw connections on the hood covering the switches for trafficators or overdrive switch should provide a convenient earth.
The photo is of my 2 switches on the right of the column - the upper is for logic overdrive (needs movement of just a very few millimetres in any direction), the lower is for the horn.
The pair are mounted on a short length of perforated steel strip, which one can find at Wickes or a motorist's shop.
Ian Cornish
-
Rob is correct - the alternator needs to pass air internally from front to back in order to stop it overheating, and, in addition, some heat will be lost from its casing to passing air.
Ian Cornish
-
Heatshield: on the Works' TR4 Rally cars, the Comps Dept fitted a heatshield to protect the dynamo from the 4-branch exhaust, and it was still in place when I bought 4VC in 1969.
When Revington re-built the car for me in 1990-1993, I asked him to fit an alternator, and used the type fitted to the TR7 (LRA101, quite bulky by modern standards and not a large rating, about 34 amps). The heatshield was re-fitted.
When, a few years later, Neil acquired 6VC, he fitted an alternator, but not a heatshield - and he cooked his alternator. He made a copy of the shield from 4VC for his second alternator.
A heatshield is easy to make from a sheet of aluminium or an old tin can, and costs almost nothing - so why take the risk of ruining an alternator?
Ian Cornish
-
I believe Revington can supply a heat shield, as well as alternator, mountings & narrow belt conversion.
Ian Cornish
-
Correct, Tim, so here's the story.
Gordon Birtwistle, Triumph's test driver, bought the car in early 1964, when the other 3 were being prepared to sail across the Atlantic for the 1964 Shell 4000 Rally.
At some point, the car was stolen from Gordon's home, driven south and pranged, so needed new bonnet, grille and front valance. As Gordon had access to Triumph's parts, he fitted the then current parts: a TR4A bonnet, valance and grille. To avoid having to fit lamps on the wings, Gordon modified the sidelamp fixings in the grille so as to accept "Morris Minor" type side/flasher lamps. And the 4A bonnet uses a 4A globe badge.
Graham Robson always badgered me about reverting to TR parts and wire wheels (horrible things, which I replaced with TR6 steel wheels in 1970), but it's my car and it's all part of its history.
Ian Cornish
-
At the Sherborne Castle event on Sunday, a lady took great interest in the Triumph Globe badge on the bonnet of my TR4 (I won't bore you with the story behind this).
When she had taken photos, I asked her why, and she said the badge was a brilliant design, and design was her "thing". I pointed out that the badge was very faded, but that didn't worry her at all - it was the design which mattered.
Ian Cornish
-
Only reading these numerous and very kind messages this morning as I was at the Sherborne Castle classic meeting all day yesterday - apart from a few showers, it was a very enjoyable event, with Wayne doing a splendid job, especially in regaling the public with a history of Triumph from 1923, and introducing the individual cars and their owners.
On leaving, I decided to take a different route home to Thame, heading for Devizes and the A4 for Marlborough and Hungerford - roads I know well because I was born and brought up in Bath. However, no sooner had my SatNav taken me off the A30 than I was hit a monumental downpour, which continued unabated until I was passing Didcot on the A34. I came off the A34 at Abingdon and the rain had stopped by then, leaving the run from there to Thame free of falling rain (just damp roads). Apart from northwest Italy. where I worked a lot in the 1970s, I don't think I have ever suffered such heavy and prolonged rain - but over there, I was in a Fiat 127, not a TR4! Yesterday, I had to open the bonnet and turn on my heater tap, as the car was misting up inside. Despite the inundation, the TR never missed a beat, but the inside was somewhat damp!
Shortly after arriving home, the phone rang and I was greeted by Alex, Sarah and the 3 grandchildren singing "Happy Birthday, Granddad" - that was super.
I can confirm that Maddy and I will be at Shepton Mallet and at Kop Hill, so hope to see many of you there.
Thanks once again,
Ian Cornish
BTW, Powder Blue is most definitely the best colour for a TR4, confirmed by numerous admirers at Silverstone, Sherborne and elsewhere.
-
Stuart - I trust you have informed the maker/supplier of the radiator in order that they may correct the design before others suffer this problem.
Like Peter, I am very impressed by the strength of that top hose.
Ian Cornish
-
And Prime Minister Wilson being given a guided tour by Stokes, I think.
Ian Cornish
-
When the valve malfunctions, it can hold sufficient pressure in the front brakes to cause the discs pads to overheat and produce smoke - as happened to my Disc-equipped TR2 in the 1960s.
Best to dismantle the valve, remove its inside parts, reassemble and refit. This avoids having to modify the pipework.
Ian Cornish
-
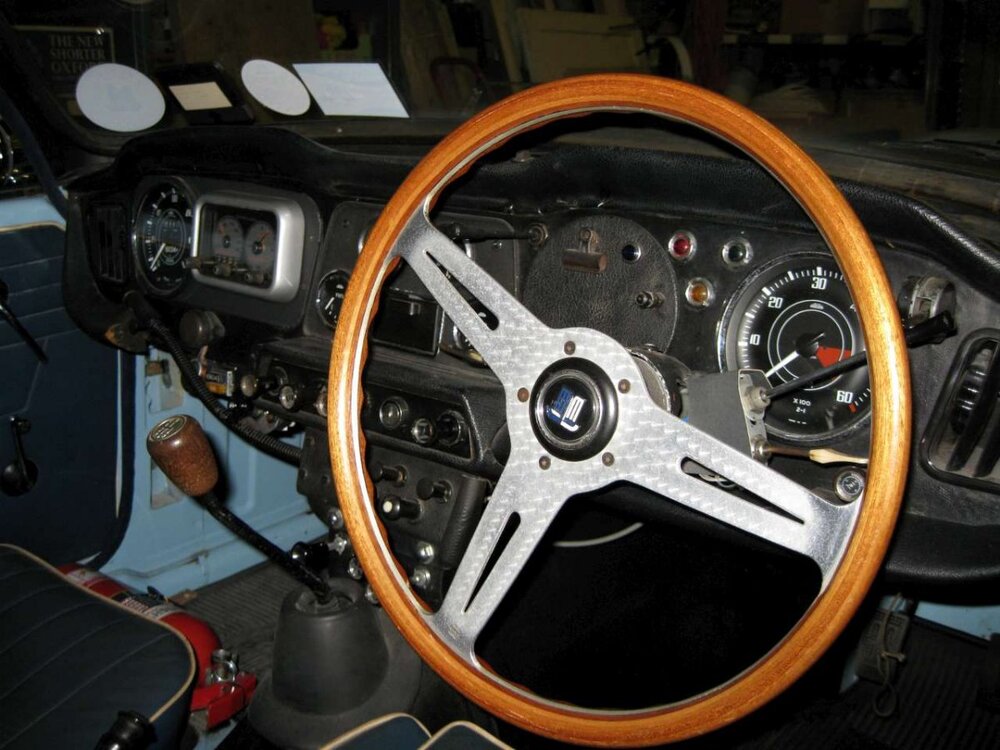
On my TR4 with woodrim wheel, I gave up decades ago with horn blowing or not as it wished.
As the Comps Dept didn't fit the long wand overdrive switch to the Works' TR4s (they used the TR2/3 overdrive switch mounted on the dash), I mounted a lever switch on the righthand side of the steering column to operate the horn.
And when I installed Revington's logic overdrive, with a small piece of bracketry, I managed to fit this switch alongside the horn switch, but at a different angle of dangle.
Ian Cornish
-
Like Bob, I have a diaphragm clutch, but still have the return spring fitted because Revington TR fitted the return spring when the clutch was changed to TR6 diaphragm type in the re-build in 1992.
Ian Cornish
-
Rather than using Loctite, I use a centre punch to put 3 dings, at 120 degrees apart, where the edge of the nut meets the column.
This old technique tends to stop the nut vibrating loose, but does not stop one removing it with the appropriate socket when necessary.
Ian Cornish
-
Clearly, those beasts know a good mootor when they see one.
Sorry!
Ian Cornish
-
Or you can purchase from Revington RTR3634-AK, which is a shaft with universal joints welded to each end.
Hence, at each end, only one 5/16" UNF clamp bolt, nut & washers (included with column).
Ian Cornish
-
A splendid event with super weather (always helps), location, food and cars.
As one might expect, people enjoying themselves and each other's company - excellent.
Let's hope that at Shepton Mallet in August, we see similar scenes.
Ian Cornish
-
With such a long neck to the filler, I am surprised that there is no extra bracing to reduce the chance of failure where the neck joins the header tank - the place where most leaks seem to occur.
Ian Cornish
-
In 1998, Revington sold me a silicon rocker gasket (code IM91), which was produced being by an American whom I met at the IWE. However, it is no longer listed by Revington.
It worked well, but now I have an alloy rocker cover produced by Tony Sheach - this has its gasket sitting in a groove in the casting, and the filler and the cast holding down nuts each have a silicon rubber seal. Because all exits are sealed, it requires a breather tube from one of the 2 screwed outlets along the side (the other being sealed).
Ian Cornish

Anyone bought 165x80xR15 tyres recently
in General TR Technical
Posted
After discussion with Tony Sheach, both of us have purchased a set of Michelin XZX 165 R15, fitted on 5" alloys.
This will restore my gearing (rpm per 1000 rpm) to what it was when I purchased 4VC in 1969.
The 195s which I have been using for 30 years on TR6 5.5" steel rims have meant that I had to use more rpm at a given speed because the overall diameter is smaller - and manoeuvring at low speed has been much harder work.
Cannot yet report on how the car feels as have only just fitted the Michelins and the first run will be to Shepton Mallet on Friday.
Ian Cornish