

Brian Eldred
-
Content Count
197 -
Joined
-
Last visited
Content Type
Profiles
Forums
Calendar
Posts posted by Brian Eldred
-
-
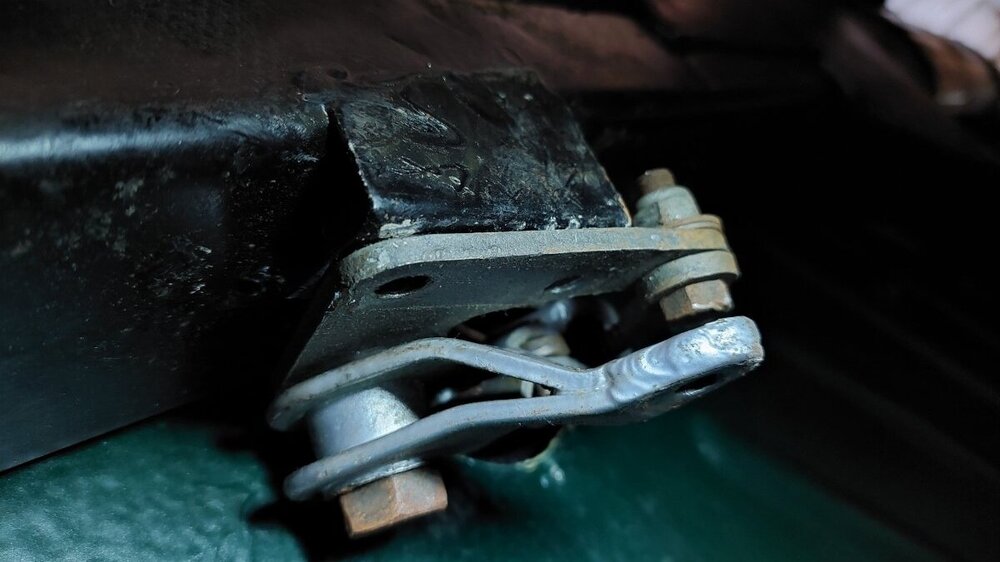
Bob, you were right, the pivot bolt goes through the plate, screws into a lug in the chassis, and goes right through. The lock nut goes on the inside of the chassis but in my case was absent, just as well because it's impossible to access with the exhaust pipe in place. Moss diagram is not very clear.
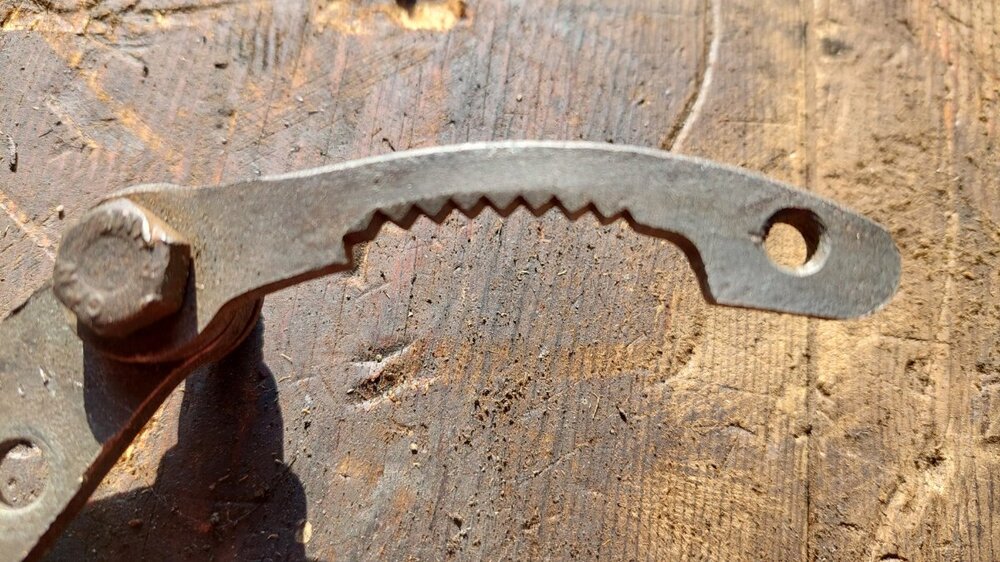
I've managed to extract the ratchet with much fiddling about and it looks OK? I can't figure out how to dismantle any further - the button doesn't come out far enough to remove it from the rod. Perhaps I'll just apply some grease and put it back.
Also don't know what the hole in the end of the ratchet is for?
Brian
-
16 minutes ago, Lebro said:
The big bolt (item 22 in diagram) goes right into the chassis, & will need to be undone.
Bob
Ah, I thought that just bolted to the plate, secured with nut 23 (which looks awkward to get to!). I will give it a go.
Thanks, Brian
-
Good afternoon,
I'm trying to remove the handbrake lever on my TR2 as it won't hold on - suspect old solidified grease (other ideas welcome!). I've undone the two bolts that mount the plate to the chassis bracket but it won't budge. What am I missing?
Thanks, Brian
-
52 minutes ago, stillp said:
Every time I see the title of this thread I think it must refer to one of those strange Northern sports, like black pudding tossing or worm wrangling.

Pete
Eee tha's reet Pete. We take t'wheel up to top of Ilkley Moor then roll it all t'way down, balancing it like, to t'river Wharfe where we wash all t'muck off t'tyre like
-
Thanks Ian,
I've now found a place a bit closer to home - Knaresborough Tyres. They were recommended by a nearby restorer Pool Lane Classics, who use them for all their tyres and have fitted to many wire wheels. They are quite happy fitting customer supplied tyres too.
I'm now trying to decide which tyres - narrowed it down to Vredensteins or Blockleys, about the same price. I guess its sensible to replace the tubes too, and I've read that Blockley tubes are good.
Brian
-
The Motorist at Sherburn doesn't have the kit. They recommend Longstone Tyres, who as well as being rather a long way away are v expensive compared with Camskills (Vredenstein Sport Classic at £163 v £116.) By the way when did tyre prices go up so much? I bought the same Vredensteins for my other car in 2015 for £63 each.
Elsey Tyres at Malton don't either, but says they use a standard inner cone and a rubber outer cone that locates on the spokes (??) and have fitted and balanced lots of wire wheels including for customers of Malton Coachworks. That's where I had the other set fitted in 2015 and they have been fine since.
Brian
-
OK I'm convinced! I kind of was anyway, just surprised at what the MoT guy said.
To return to the topic, I'll call The Motorist at Sherburn on Monday. If no go I remember a place in Malton that was recommended by Malton Coachworks.
-
32 minutes ago, RobH said:
It isn't visible cracking you need to worry about Brian - its lack of grip because the rubber has aged and gone hard, and possible internal degradation which might become evident if you drive any distance on them.
Good luck with explaining your thinking to your insurance company if you are involved in an accident.
Hi Rob,
That's what I thought too. So how come an MoT tester thinks differently? The rubber doesn't 'feel' any harder than much newer tyres on my other car.
-
Thanks Keith, I hadn't thought of them.
As it happens, yesterday I took the car in to my local garage, who are experienced with classics, for an 'MoT-type check'. First time on the road, apart from a couple of runs round the block, since 1973 I believe. The mechanic that tested it said the tyres were fine, despite being around 23 years old. Firestone F560s. There's no visible degradation apart from some fine cracks between the treads, which he said weren't a problem. It probably helped that the car has been stored in a dry garage on wheel skids since they were fitted in 1997.
I assumed I'd have to change them, but since I don't intend going very far or very fast for a while I'm inclined to leave them on for now.
-
1 hour ago, Lebro said:
Two observations.
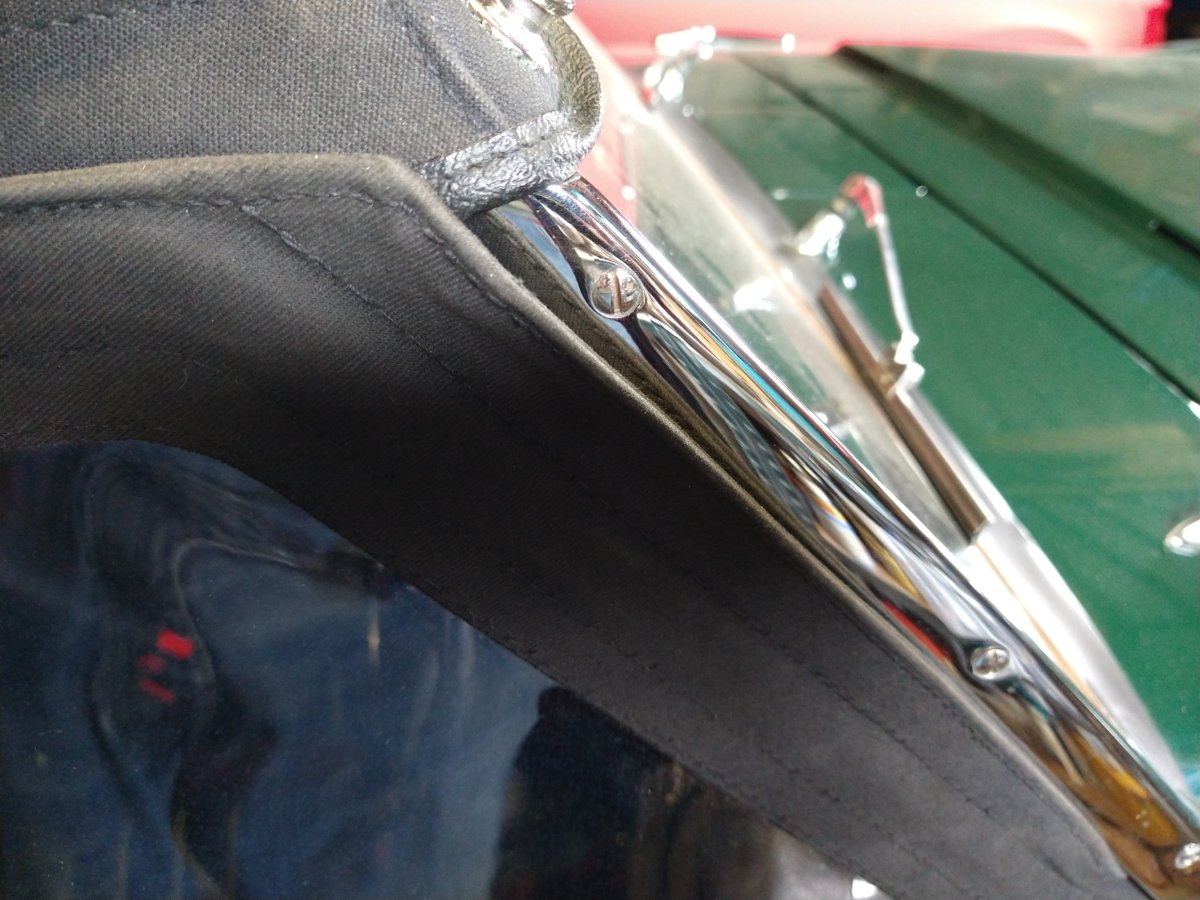
The front edge of the sidescreen is not parallel to the stanchion, I think the rear of it needs to go up. The top of the sidescreen should guide it's self into the groove as you shut the door.
It looks to me that the hood is too blame for the rear not lining up.
Bob.
Hi Bob,
The flap on the front edge of the sidescreen is actually a bit wider at the top than the bottom. If I lift the rear any more I'll get less of the top under the hood flap. I think I will have to live with it unless and until I can alter the hood and the front bracket.
Brian
-
1 hour ago, Rodbr said:
Hi Brian,
I think you meed to go still further down with the front lower section and the rear should lift. You need the front flap in as far as it will go and fully in not crimped up at the nose.
So down further and forward as mucjh as you can. The flap sometimes need to be worked in to keep the shape.
A bit like this
Hi Rod,
As I said I can't get the front to go any lower as the bracket is sitting on the door cap. It would take some cutting and welding of the bracket to get it any lower.
-
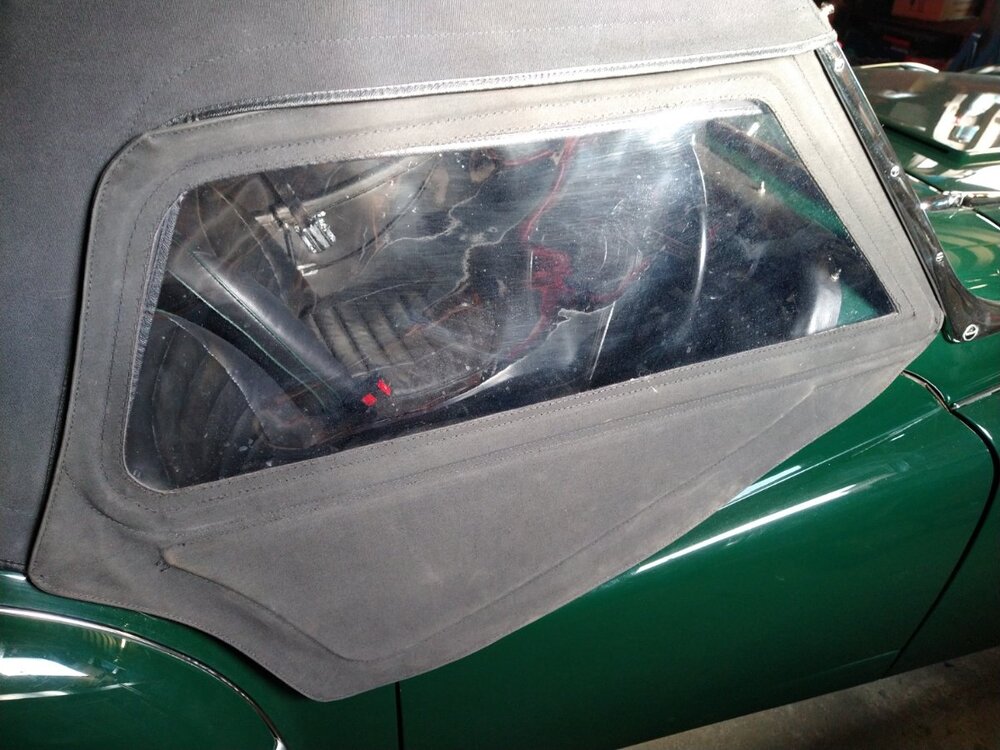
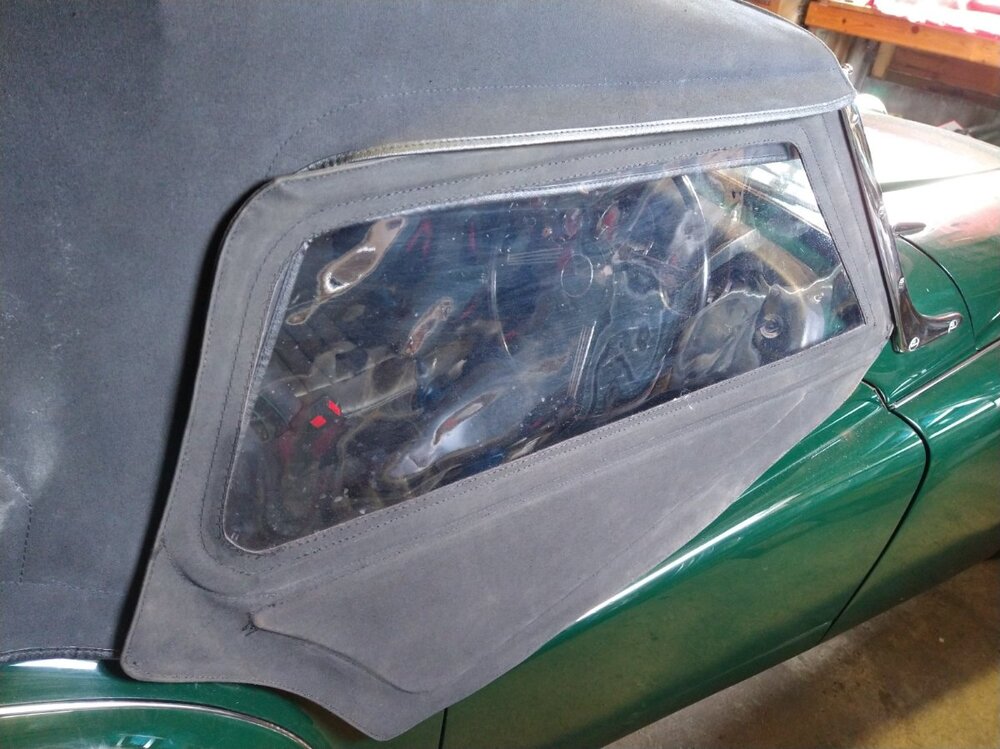
This is as good as I could get it. The front won't go any lower as the bracket is sitting on the door capping, and the screen won't go any further forward. In fact when I close the door, the front edge of the screen won't engage in the slot in the stanchion by itself as it catches slightly on the stanchion as the door shuts, so I guess it even needs to go back a bit.
On the rear bracket, I'm going to have to drill a 3rd hole in the wedge to get it to sit low enough. I've lowered the socket as far as it will go without having to drill through metal - they both now sit about 1/2" below the edge of the door card.
As far as the rear corner goes, I think modifying the hood flap will be the only answer. I'll try the other side and see how that goes, but its looking much the same so far.
Brian
-
I found this, which has some good pictures at the end of the last page https://www.britishcarforum.com/community/threads/back-to-tr3-sidescreens.81211/page-5
It looks like the screen goes further into the stanchion slot at the bottom than the top, and only a little way into the hood flap. Much more fiddling about to do

-
1 hour ago, stuart said:
The slot in the stanchion is for the sidescreen to slot into when you shut the door, The rear may not match with the hood as there are often different interpretations of that part of the aperture.Looks like you need to go down a bit and forwards to get a better fit. This s often why you find lots of previous holes in the wood that the sockets screw into!
Stuart.
Thanks Stuart. What I don't get is that the sidescreen won't slot into the stanchion at the top when I shut the door until the top corner is tucked under the hood flap. I can poke it in from outside the car, but not from inside!
I guess I'll have to live with the misfit at the rear as its not going to move that far forwards.
Brian
-
Good afternoon,
I know this subject has been covered many times, but I still have some problems I can't find answers to!
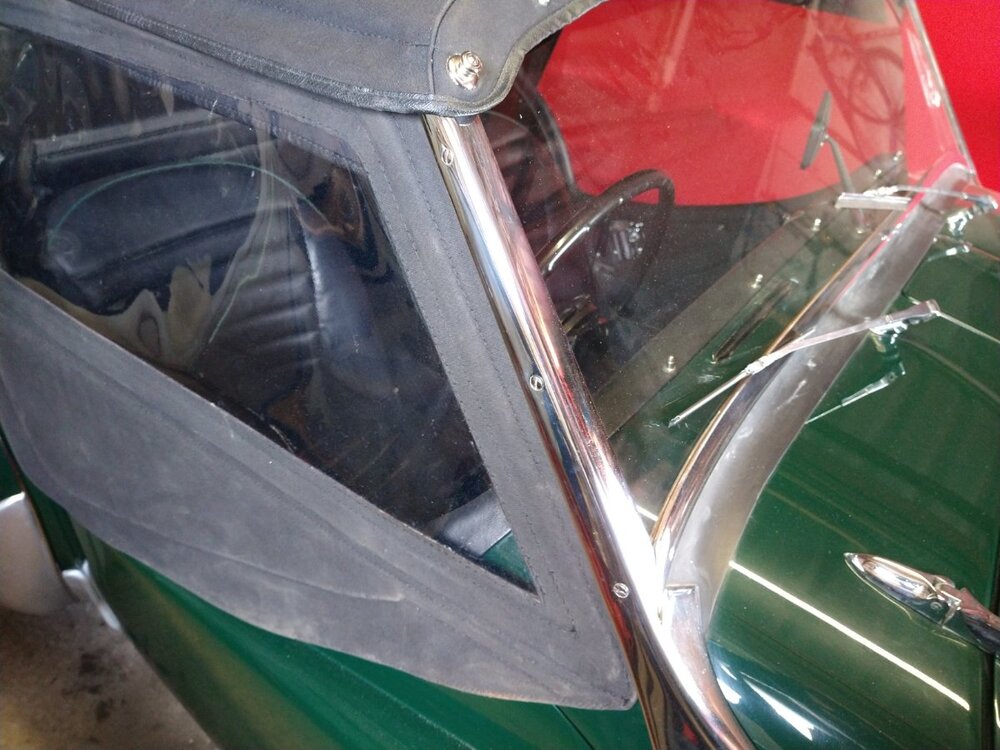
I've spent several hours bending the brackets and frames and trial fitting the drivers side screen until It's pretty close I think, as pics below. The forward socket seems to be in the right place, but the rear one was too high and is at present unfixed. Before I screw it in place, some questions:
1. The side screen won't tuck into the hood flap at the rear, it would need to go about 2cm further forward. Is this just a poorly fitted hood?
2. Does the location of the front seam of the screen in the stanchion channel look about right?
3. Is it supposed to slot into that channel by itself when you shut the door? The corner of the hood stops it doing that. I can't see how you can slot it in from inside the car?
Any advice much appreciated!
Brian

-
10 hours ago, AndrewMAshton said:
C&S Tyres Middlesbrough, the owner races a TR4, a very satisfied customer, cheers, Andrew
Thanks Andrew, rather a long way from Wetherby but if I get stuck....
I think its been said before but it would be handy if we could put together a list of fitters that have the kit.
-
10 hours ago, Deggers said:
Hi Brian,
Can't help with a tyre fitter, but if you're planning to run with wires for the foreseeable, MWS stock a balancing cone set.
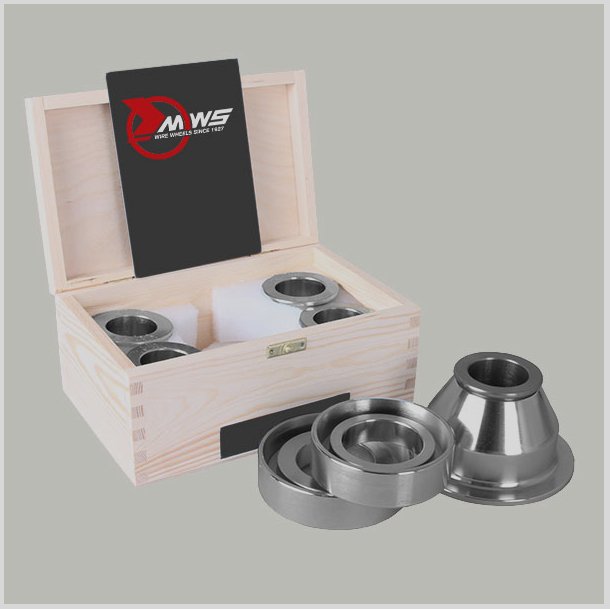
Here's a link : MWS Kabal Tool
And a guide to wire wheel balancing : MWS Balancing
Good luck,
Cheers, Deggers
These look like the job, but at £216 a bit expensive for what may be a one-off job? My other TR has wires, and I've only had them balanced once in 8 years...
-
Good afternoon. I need to change the tyres on my TR2 (unused but 24 years old!). Can anyone recommend a tyre fitter in the East Leeds/Harrogate/York area that has the necessary cones to balance wire wheels properly?
Thanks, Brian
-
To use as spare, cosmetic condition not too important. Ideally with useable tyre.
-
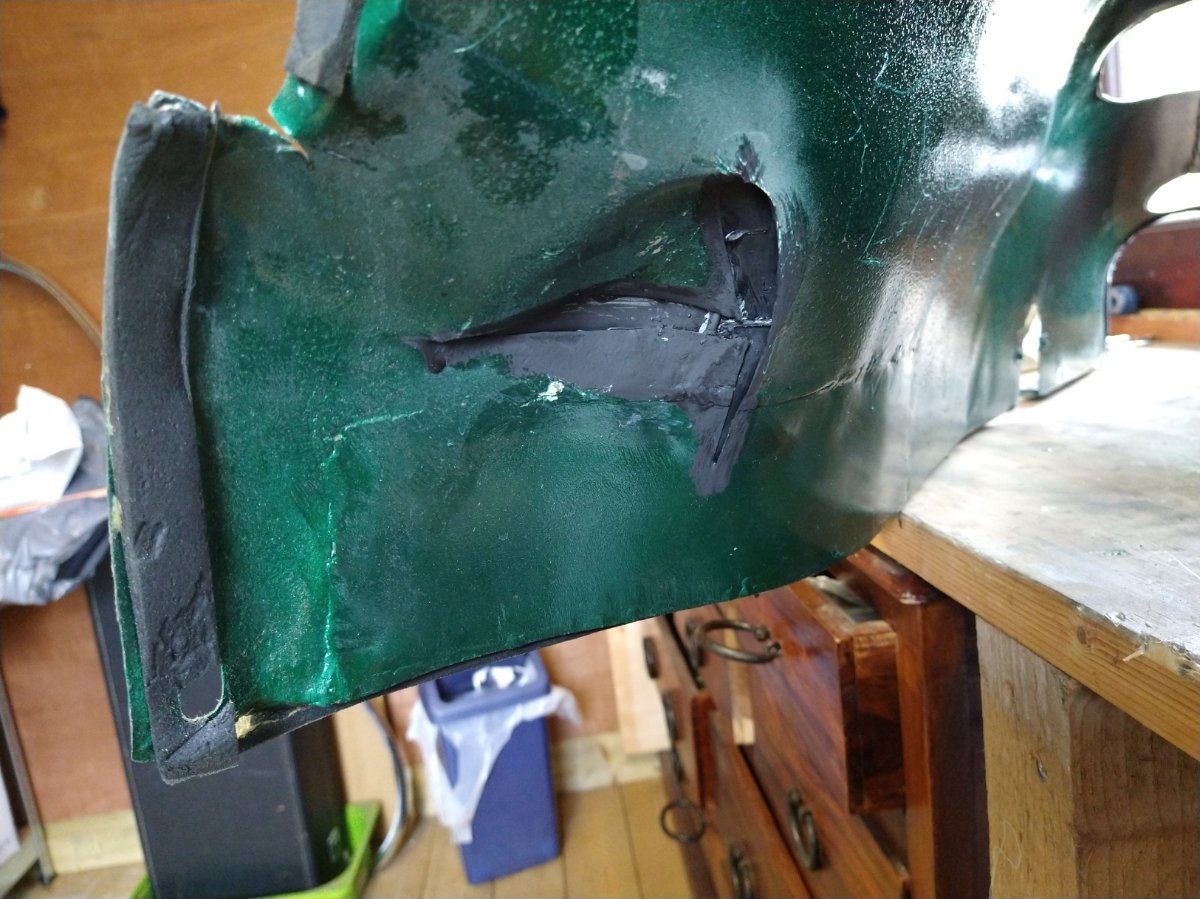
Sorted at last - I made some cuts and bends until it fitted, fabricated some patches and stuck them on with JB Weld to save me getting annoyed with myself trying to weld with my ancient MIG welder. The cover is now back on the car. David thanks for the offer anyway!
I spoke to a helpful chap called Adam at Moss tech dept. in January about the problems with the bracket kit and I'm going to email him with my findings.
Brian

-
23 minutes ago, Lebro said:
I also have a saloon box in my '3, & am using the original 1955 gearbox cover with no modifications ?
Bob.
Hmm, not sure how? Mine hits the starter bulge with the flange an inch off the floor.
Revington list 3 different types for the 2-3A (second hand only). They will supply one in aluminium for £786.01

-
Ian/Stuart, yes I think that's the way to go. My welding skills are not great but at least it won't be visible. Out with the hacksaw tomorrow...
-
25 minutes ago, stuart said:
Dont think you could stretch it that far, probably easier to cut it across the bulge and let a piece in.
Stuart.
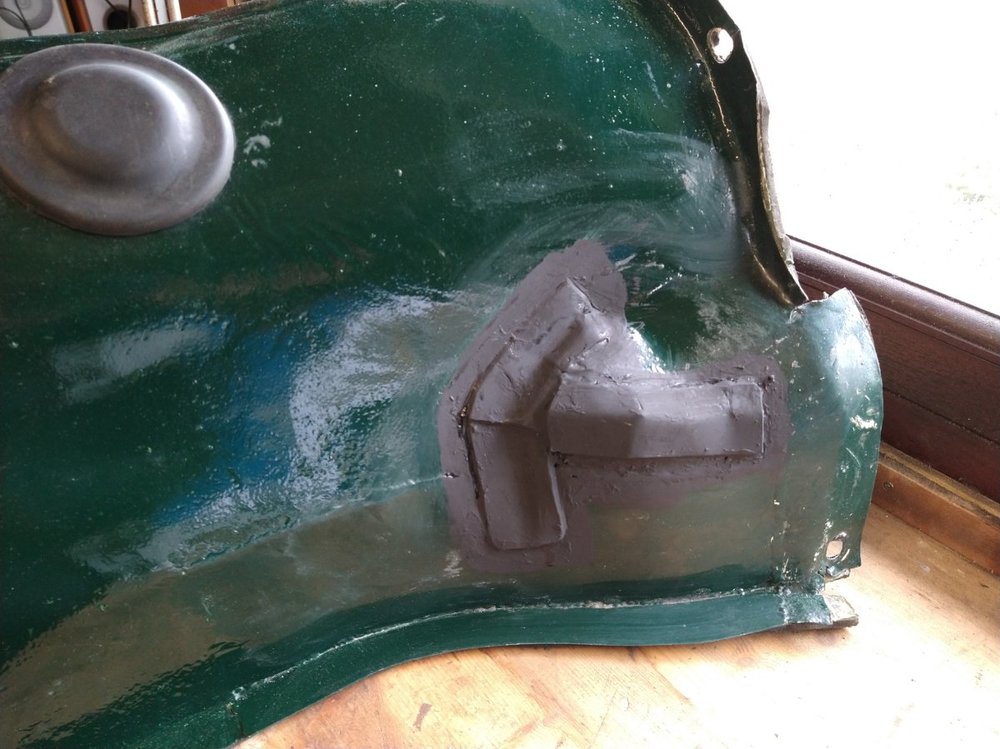
It looks like I have the choice of butchering my existing cover or getting a later replacement which would probably have to be fibreglass. Rimmers have a fibreglass TR4-5 one in their sale which they say is also a replacement for all the earlier steel versions. It would be a shame to chop mine as it's in really good nick, painted body colour inside and out. Don't know if there's a demand for original covers? Decisions...

-
31 minutes ago, qkingston said:
Hi Brian, From your pictures, the modification of the mounting plate to accommodate the solenoid looks v similar to mine; it concerns me slightly that a fair amount of material has to be removed from the LHS of the bracket; not ideal?
Rgds
David
Hi David, I didn't remove a lot, should be OK. Of course if Moss modified the bracket so it recessed less into the chassis by 8mm, it would both increase clearance on the solenoid and obviate the need for spacers.
Brian


Handbrake lever removal
in TR2/3/3A/3B Forum
Posted
I had removed the pawl pin, and with a bit more fiddling about I got it pushed in far enough to remove the button and the rest of the gubbins. The pawl was fitted the wrong way round! I surprised it ever worked at all...
I've ground the pawl to make it a bit more pointy, put it all back together and it's functioning as it should now. One job ticked off the list..
Thanks for your help Bob,
Brian