


SteveB21
-
Content Count
187 -
Joined
-
Last visited
Content Type
Profiles
Forums
Calendar
Posts posted by SteveB21
-
-
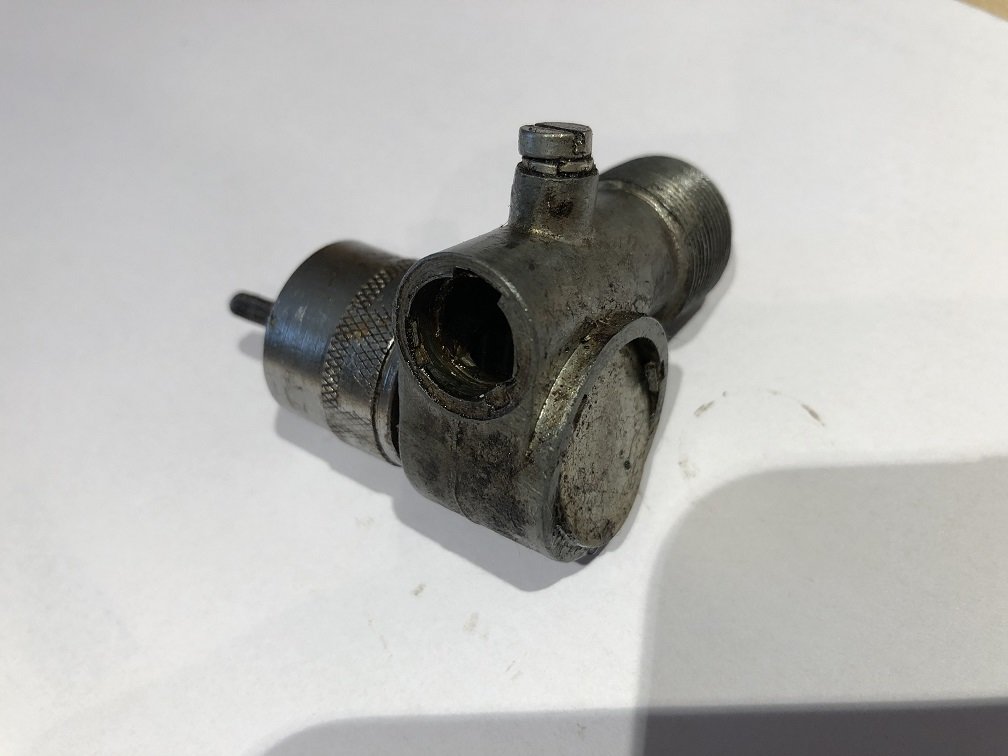
Here's a picture of a failed angle drive for you - came off my 6 just over a month ago....
Hopefully your issue & fix is as obvious and straightforward!
Cheers
Steve

-
David
You also have Rees Bros in Aldershot and Crown Classics in St Margarets Twickenham.
Cheers
Steve
-
-
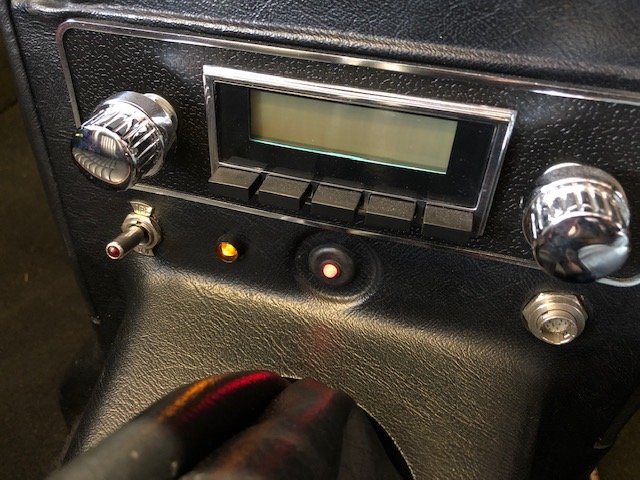
Mine is fitted under the dash, under the tacho, with the LED warning light fitted into the H frame - see photo (it is the orange light between the fan override switch and my immobiliser LED. If I recall correctly, you can access the instructions from the eBay ad.
Cheers
Steve
-
-
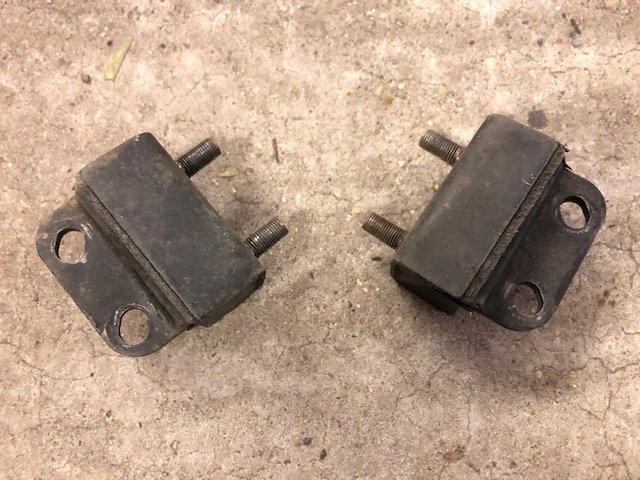
Mystery solved - I rang Revington (the supplier). The slots are there because the mounts are supplied for other cars (Stag, TR7) as well as the TR6, so the slots give some flexibility in mounting if required - there is no "wrong" way to fit so long as the engine doesn't foul the chassis / bonnet , etc. I just fitted my new ones with slots vertical and all's well.
Cheers
Steve
-
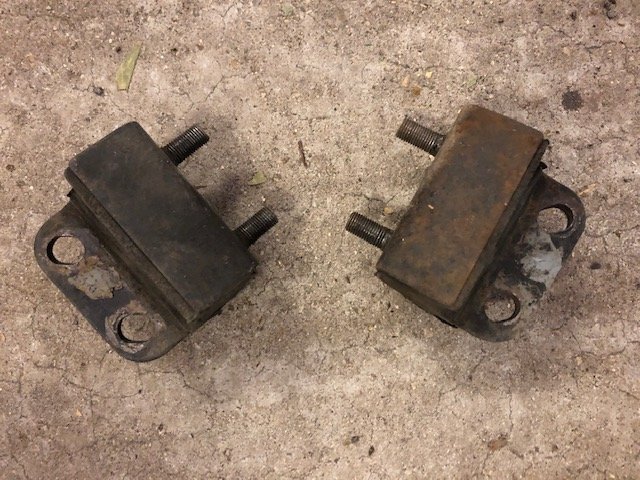
As Nick says, the holes are slightly oval / slotted in a vertical direction, as they came off the car, but I'm wondering if the new ones should really be mounted with the slots horizontal as Andrew suggests - as per this photo...
Cheers
Steve
-
Hi Kevin
+1 for stainless steel wheel nuts.
Also, be aware that the repro small springs for the small spigots on the back of the plastic embellisher may actually have too small an ID to fit! I eventually got a batch from Revington that fitted.
Cheers
Steve
-
Hi all
Is there a right and wrong way for the slots on the engine mounts? Attached picture showing my old “soggy” mounts arranged as they came off, with mounting slots vertical. Is this correct, so I should put my new mounts on the same way, with slots going vertically?
Many Thanks
Steve
-
Thanks Andrew - ended up ordering from Revington anyway as my local source was out of stock!
Cheers
Steve
-
Hi
I am looking to replace the old engine mounts on my '6. Given all the concerns about poor rubber quality, does anyone have any recommendations on supplier, or are they all the same quality / from same source?
Thanks in advance
Steve
-
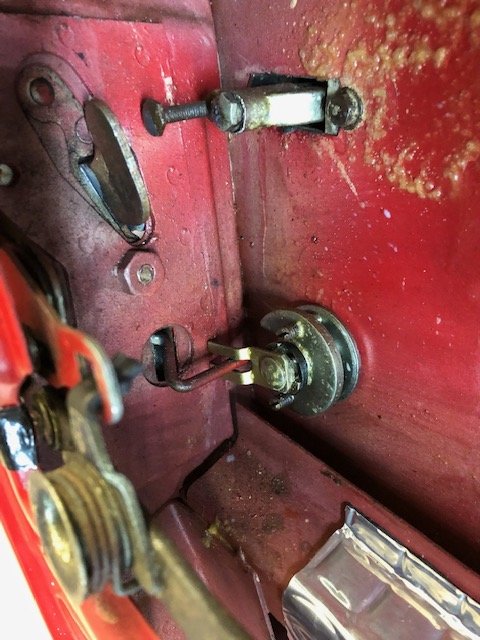
Hi Graeme
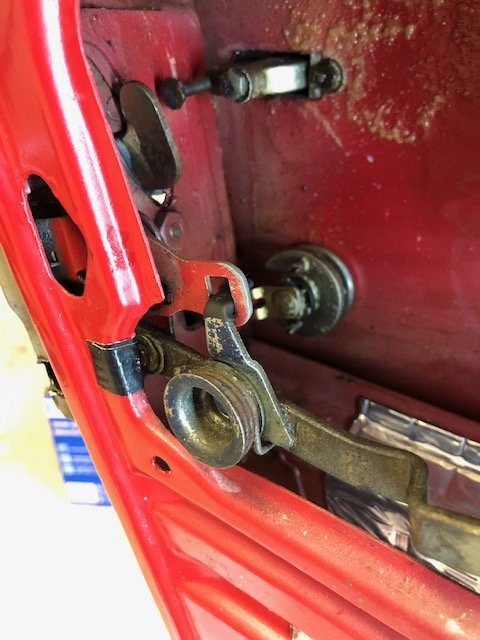
Hope these help - they show the mechanism with the door open and unlocked.
Cheers
Steve

-
Hi Graeme
I’m afraid I don’t have any suggestions but I do have the door trim off and window channels out at the moment so can get some photos of the mechanism if that helps.
Cheers
Steve
-
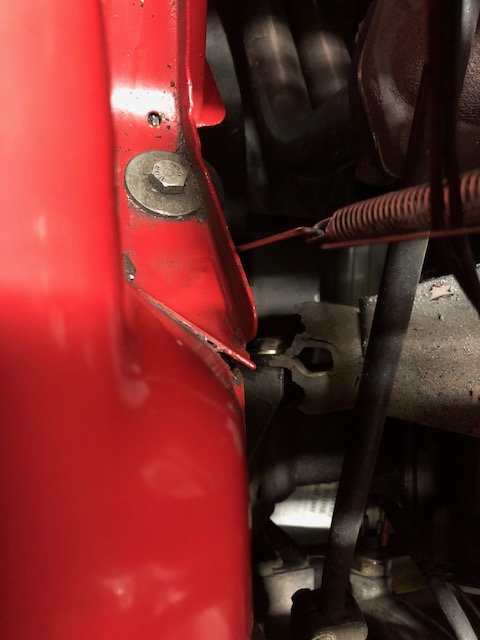
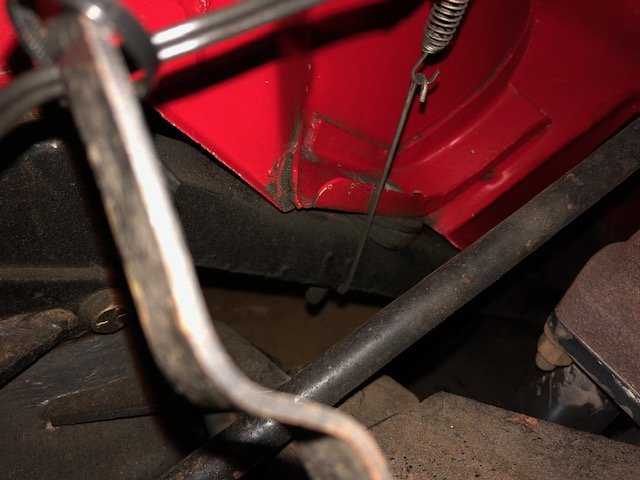
Hi guys
Here are a couple of pictures showing the wire and spring on my 1972 CP car - as James says above, you wouldn't think it would stay there, but it does!
I got the hook wire from Revington nearly 4 years ago, part number 149785 LINK WIRE TR5-6 for the princely sum of £1.16 plus p&p, but I'm sure you can easily make your own.
Cheers
Steve
-
Hi Mark - not particularly - so long as it doesn’t leak! I think I may be sorted with an original bottle. Will let you know.
Cheers
Steve
-
Thanks Mark & Andrew
I'm heading down the route of checking with the used OE suppliers as you suggest Andrew.
Cheers
Steve
-
Hi all
I have just tried fitting an original washer pump assembly (the one with the Bakelite motor cover) to a new repro square washer bottle, only to find the new washer bottle neck, at 90mm diameter, is about 2mm too small for the pump assembly lid, making it too loose to stay on properly. Has anyone else come across this problem - do I now need to find an original square washer bottle or are there new washer bottles out there that are a better fit, with a circa. 92mm diameter neck?
Thanks
Steve
-
26F / 30R with Continental CT22 165/80 R15 tyres works for me. The "brown book" states 22F / 26R for "all conditions" and 28F / 32R for "high speed".
Cheers
Steve
-
I swapped my 195 tyres for 165s a couple of years ago - one of the best “upgrades” I’ve done. Well worth it.
Steve
-
A very useful thread as I'm looking to do something similar. I have a related question - what's the best way to clean-up and restore the rubber (I assume?) doughnut - will a standard rubber/vinyl cleaner from Autoglym or similar do the trick?
Thanks
Steve
-
Just to add to the debate - I see from my email today that Car Builder Solutions (no affiliation) now stock full replacement Wipac style 7" LED headlamps...
Cheers
Steve
-
Thanks All
I had found one of those links, but not the other. I will be interested to hear how you get on Waldi as my voltmeter is not yet at the top of my "to-do" list! Gives my time to butcher an old screwdriver in preparation.
Cheers
Steve
-
Hi Phil
i just saw your post and wondered if you could provide any guidance on calibration of a smiths voltmeter as mine is reading low (confirmed with 2 different multimeters).
Many Thanks
Steve
-
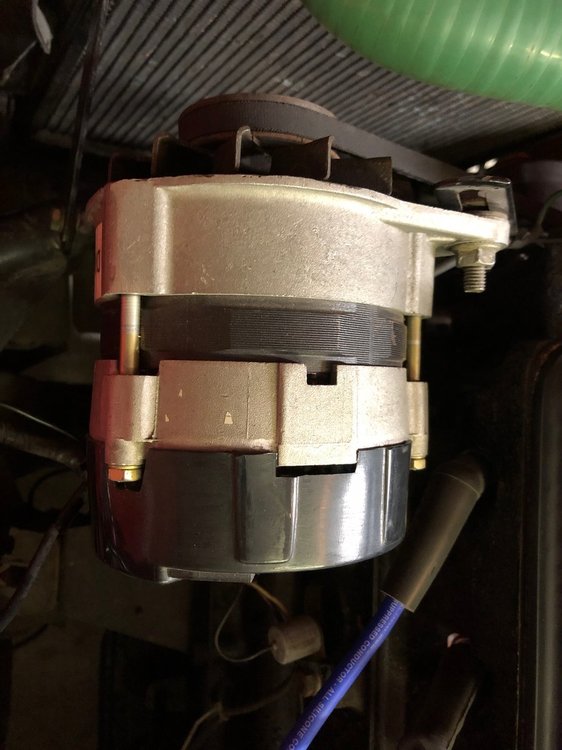
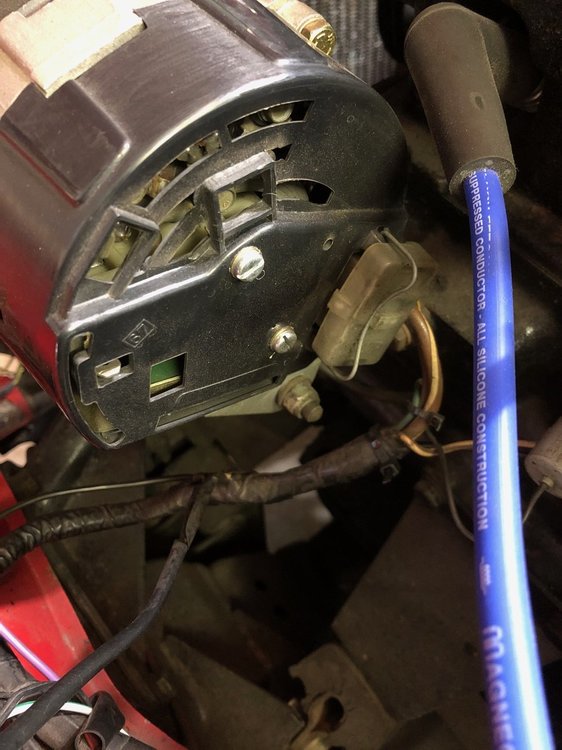
Hi
I need some help identifying the alternator fitted to my TR6 by a PO as I try and track down some electrical gremlins - please see attached photos. It has a sticker labelled "DMA 4458" on it, plus the numbers 612 000 08 on the front face. It is approx. 12cm long (exc. pulley & fan) and approx. 11.5cm diameter. A search on DMA 4458 doesn't yield anything useful and I can find pictures of both 35A and 45A alternators with the 612 000 08 number on the front face...
Thanks in advance!
Steve

New ring spanner for A type overdrive
in TR6 Forum
Posted
Well, new to me anyway...
I've been making do with a crescent shaped spanner for my overdrive sump drain plug, getting grazed knuckles in the process, but I recently found out Moss now do a proper ring spanner (part number 521814T) - hopefully makes life that bit easier! Comparison photo attached.
Cheers
Steve