


NCS_TR3A
-
Content Count
165 -
Joined
-
Last visited
Content Type
Profiles
Forums
Calendar
Posts posted by NCS_TR3A
-
-
On 2/21/2021 at 9:56 AM, Ralph Whitaker said:
Be warned, read about removing the tapered pins first.
I wonder if this is a problem that affects later cars without a dipstick more than early ones with a dipstick. I was thinking maybe the gearbox requires a small breather to prevent pressure build up as the gearbox warms up and the early type may have vented round the cork seal on the dipstick, later boxes use the only available escape route past the seals on the selector rods.
Ralph
Hi Ralf,
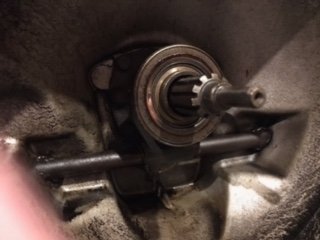
Thanks for the warning. I've read quite a lot over the last few days. I've taken the taper pin out on the clutch fork to allow me to change the front oil seal and the release bearing. I'm struggling a little with the selector shaft. The heads of the tapered pins ar 5/16. There are no holes in mine and therefore no wires. How have people loosened these, I get that a brake spanner fits but I don't physically have room to get the spanner in. Is there something I'm missing? Is there anything I can do to reduce the chance of the pin snapping? I can see the risk I just haven't read anything that tells me how to reduce it.
Thanks,
Neil
-
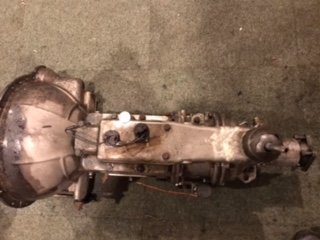
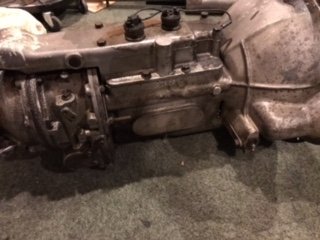
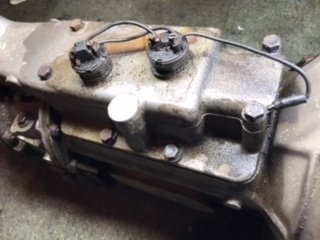
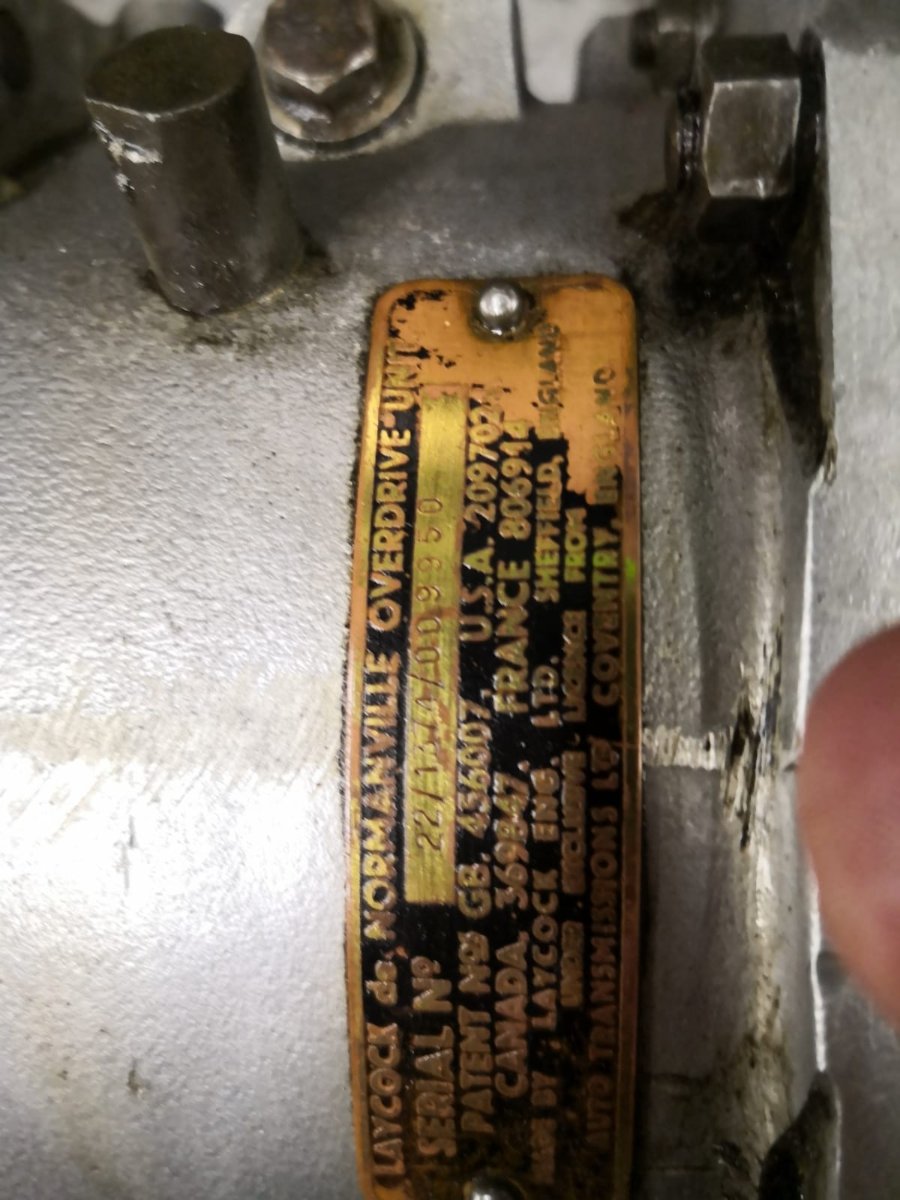
In the process of cleaning it up its pretty obvious that oil is coming out the selector shafts and so I took the top off which allowed me to take the photo of the overdrive plate. I read the number as 22/1374/009950.

I'm now reading the manual to see what seals there are on the select shafts. Having fun in lockdown
Neil
-
I'm obviously going to be out on my own with this one but I use 30psi all round and get a good wear pattern. If I'm honest I went up to 30psi thinking steering would be a bit lighter. I don't drive it that hard so cannot say if its really changed handling as such.
Neil
-
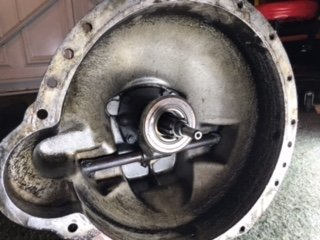
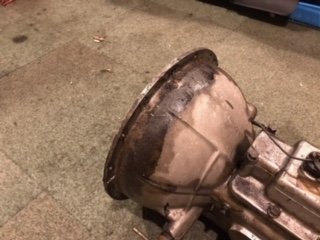
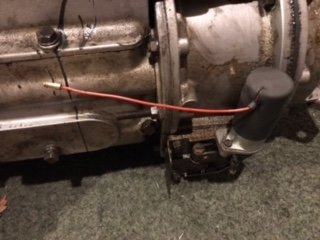
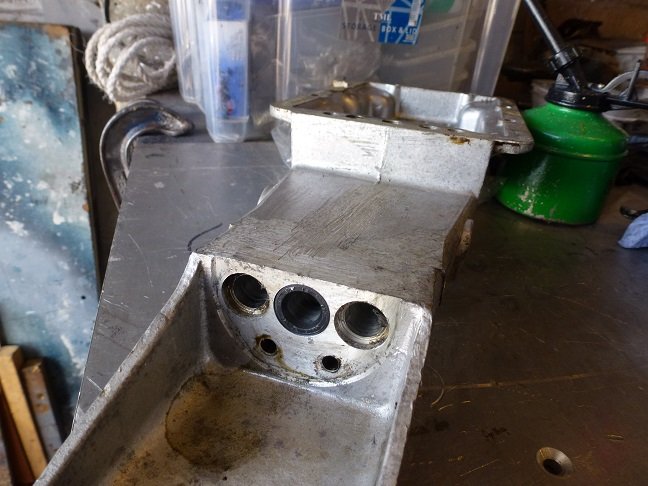
OK after taking the gearbox off I've now removed the flywheel and this is the picture -
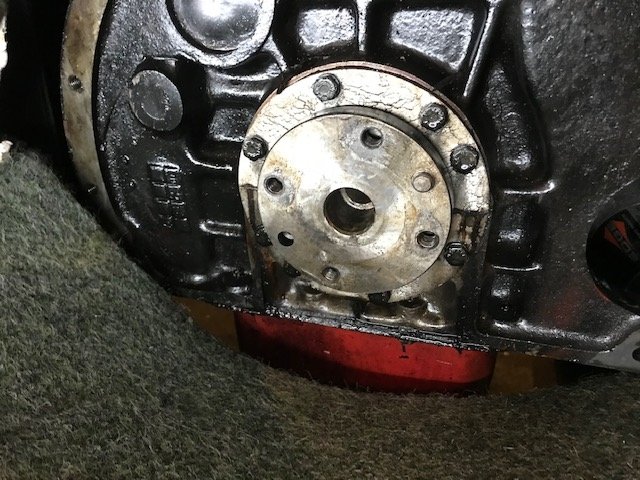
Clearly the seal is leaking. Actually a little surprised to see oil coming from where the two scroll half's join. Potentially how sealant used when fitting them. I now need to think how I'm going to get the engine out. I do have an RSJ across the roof and block and tackle but it would need the car to move rather than the engine and hoist moving around. Not that easy to push etc so will think about it before committing to a method.
Neil
-
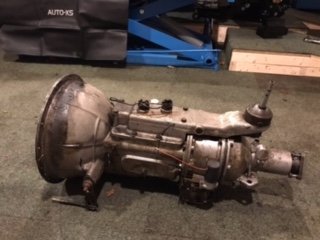
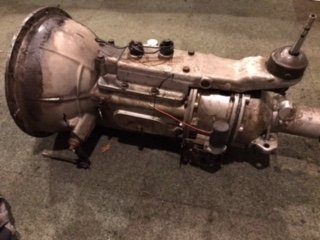
Hi,
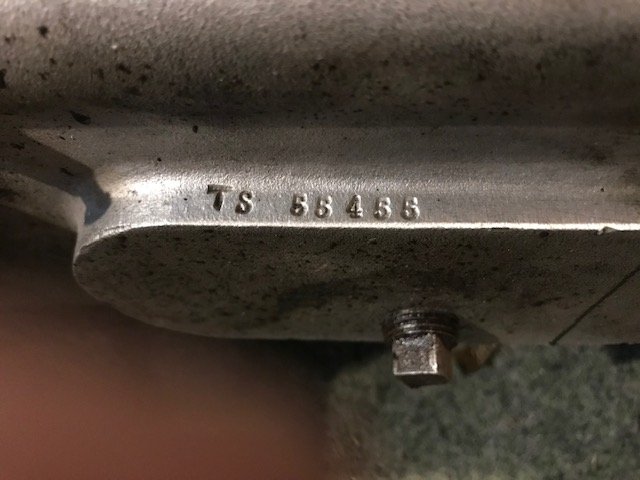
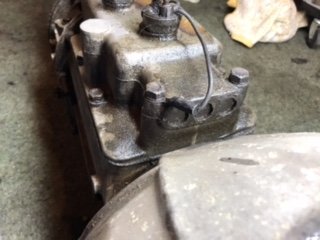
I've taken these photos -
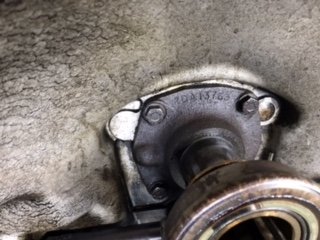
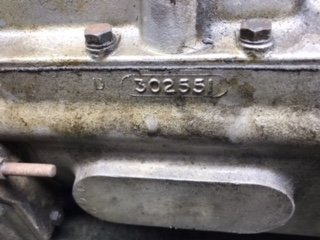
Gearbox is TS55455
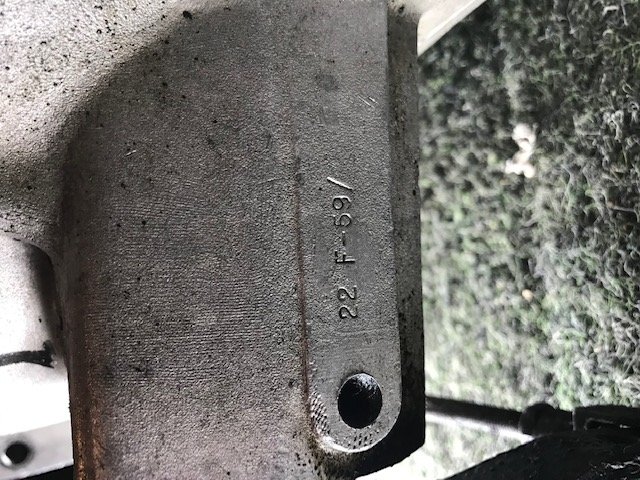
Date stamp? Is 22 F - 59/. Is that week 22 in 59?
And unfortunately the plate on the overdrive is below the gear shift and I cannot read it, or ami looking in the wrong place?
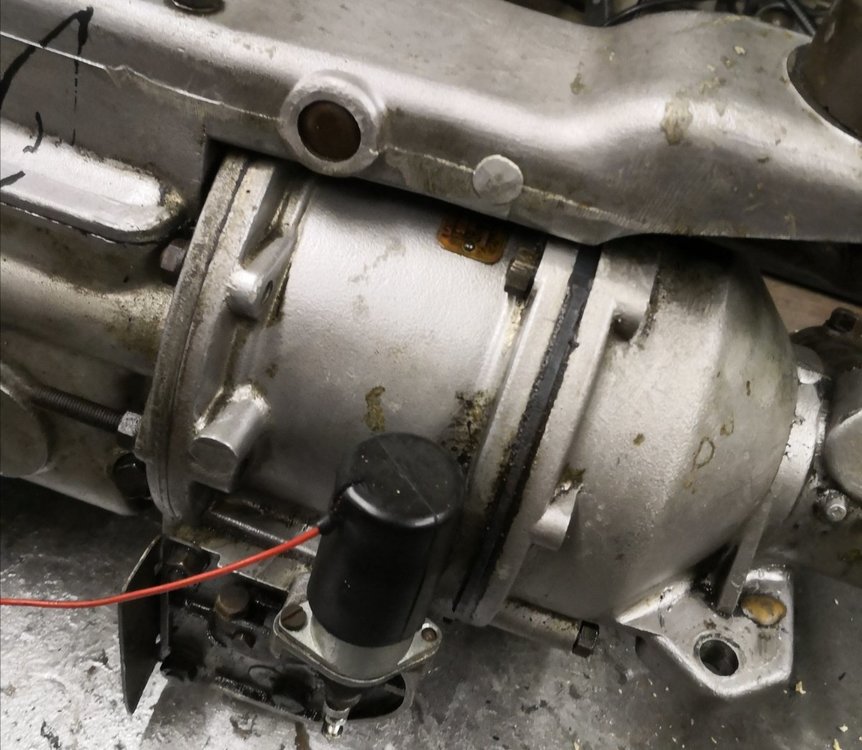
Just starting to clean it up and make some decisions on which seals ans gaskets to change.
-
OK, nothing major here really. Having finished changing the diff seal and gasket and checking out the prop shaft (ended up changing both UJs as one felt like it was failing) I've moved on to the gearbox mount which has collapsed. Decided to take the tunnel out to do this and ended up. With the gearbox out. Feel the engine is coming out next to be honest as I want to change engine mounts and front crank seal (and if brave enough the rear Crank seal).
The gear box has a good smear of oil pretty much every where. Its clear I've had a leak from the rocker cover cork seal. The gearbox worked really well with no issues other than a slight noise from the clutch release bearing when pressed (and I can feel that now that the gearbox is off). I really don't want to get into a gearbox rebuild but I would be interested in which seals can be changed without getting into taking gears out etc.
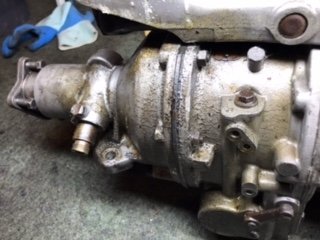
Oh and can anyone identify the gearbox and OD type. It's not the original one that was in the car, it wasn't an OD car originally but I think it's still a TR3 box.
-
Good work, is this snorkel a push fit, never taken it out. Do these things block up or not really an issue when fitted?
Neil
-
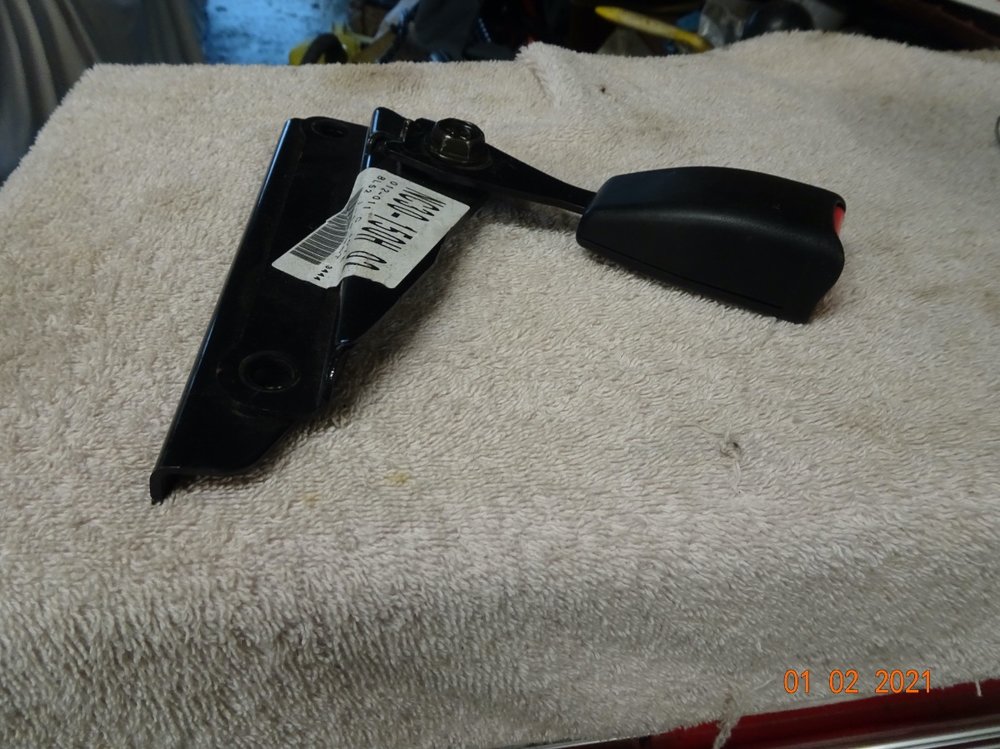
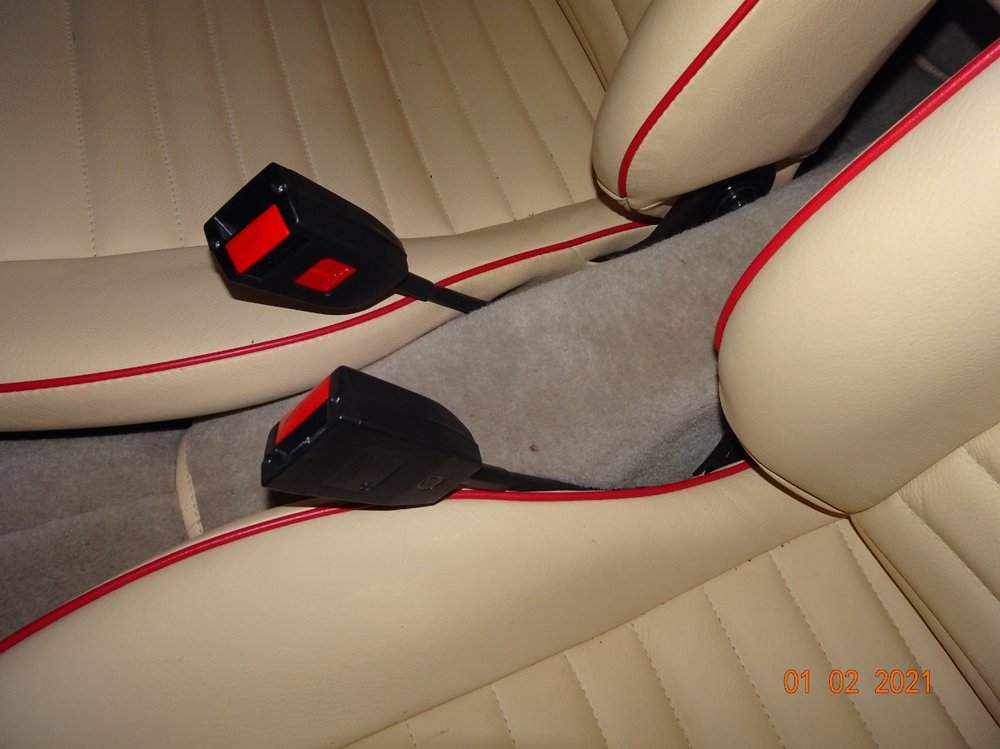
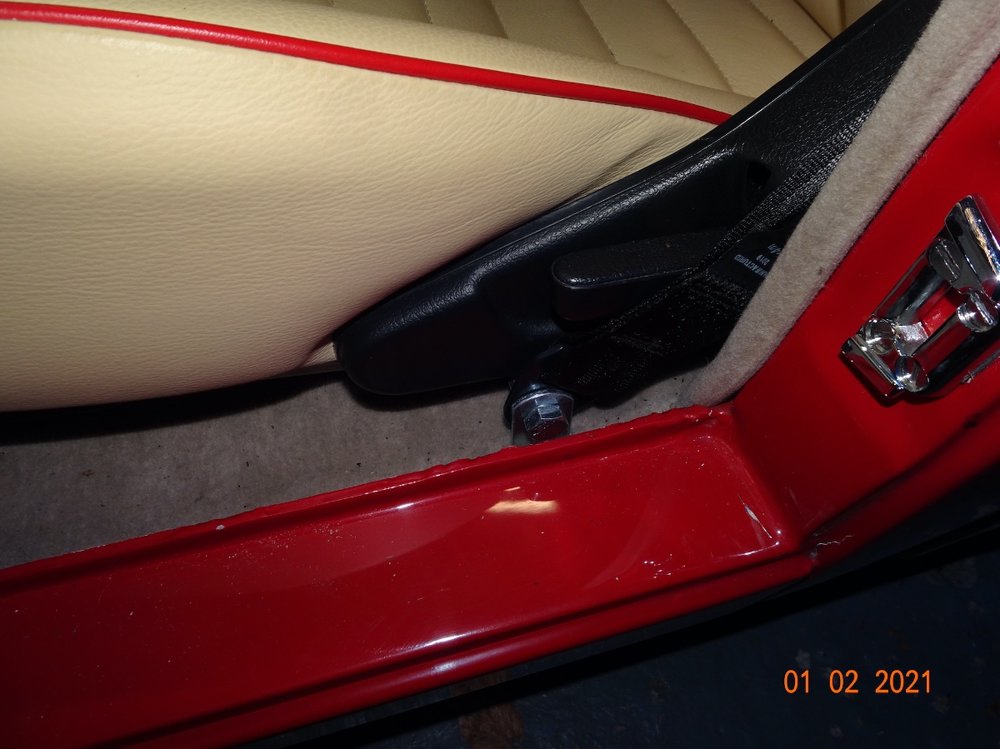
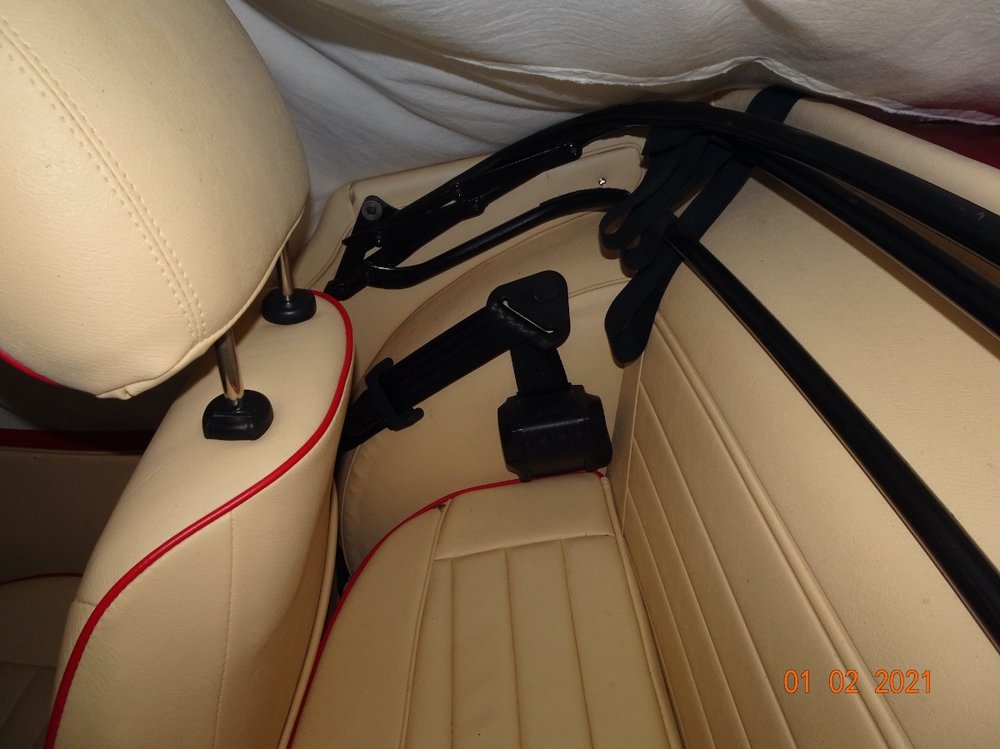
29 minutes ago, DesNoble said:
Yes I cut the seatbelt mounting off but I cut it right back at the runner so I doesn't show, see attached photo. The seat belts were a real act of smoke and mirrors as there was only mm to spare. Points to note, I used the long centre fixing point. The floor mounting should be three or four inches forward of the "B" post according to the seatbelt manufacturer sand I placed my inertia reals above the rear seat, originally I was going to try and place them below but it just didn't seem worthwhile.
The picture of the centre mounting shows the slight pinching of the prop tunnel. Actually it's not as noticeable as this in real life.
Des.
Very, very nice. I do like those.
Neil
-
49 minutes ago, Motorsport Mickey said:
Come come lads...a little parrellel thought process gets past many obstacles. Puncture on the front ? drive the car up the kerb on the punctured side it is...another "4 of clearance gained. No handy kerb ? check for small boulder in the soft verge you can use under the punctured wheel or a thickish tree branch, or the missus's cherry cake (ducks), or dig out a small area on the soft verge and place the electric scissor in it with a magazine under it (they are on a widish foot anyway).

There's many ways to gain height, but you don't need it with an electric jack using 165 tyres, it will go under neath the TR chassis height.
Mick Richards
Mick, understand we're you are coming from, and have had a fair few get me home episodes in my life but only one I the TR which was a wiring issue. Whilst there is always a solution to be found on the hop the more prepared you are the easier it is. But get the message. Thanks for the photo of the electric jack, doe look like it goes low and given Robs confirmation it does sound like a good solution if you have the space in the wheel compartment, or boot.
Neil
-
1 hour ago, RobH said:
Yes they do. I had a rear-tyre puncture the year before last and the jack did go low enough. I'm not sure about a front puncture though. You would have to jack somewhere rear of the wheel I think, particularly if you have a front roll-bar.
Thanks Rob. I might well consider this myself then.
Neil
-
I know this may sound obvious to the members on here but remember you need a jack that can fit when you have a flat tyre (that's the main reason you will be using outside of your garage). These cars are low, and with a flat tyre they are really low. I use (or have) a scissor Jack in the tyre compartment for this reason. I'm not convinced the electric ones would go low enough but have not checked.
In the garage a low entry trolley jack from SGS engineering covers the job. Although I've just treated myself to a car scissor lift which is saving my back from getting up and down. 50th present in lock down
Neil
-
If you can weld, weld a stud to the plug. Place a socket over the stud that's bigger than core plug diameter and then a washer on top of the socket and with a spanner tighten a nut on this and it should pull the core plug out. I wouldn't expect it would take much to pull out under these conditions.
My only consern would be setting oil on fire so an electric welder is better than gas but still be careful. If the pug is thick you may be able to drill and tap it and do the same.
Neil
-
13 minutes ago, Motorsport Mickey said:
"so I don't see it as a huge job to get the gearbox of on one these."
Aha...you fell into the trap. it's often getting the b u g g e r back in that's the problem, lining up the splines witrh the clutch plate and being able to rotate the gearbox or overdrive drive flange in 4th gear to "fidget" the splines around whilst pushing it in with your feet normally does the job.
Mick Richards
I cannot remember it being a problem, but I think there was two of us present then as well. Me and my dad so probably had the hand to lift, push and rotate as it went back in. Certainly there are several jobs we're thts extra pair of hands make it far easier. Can certainly relate to hands and feet being used on some jobs.
-
On 26/01/2021 at 5:40 PM, RogerH said:
This was Fireman Tom's picture of his 3A with the wheels
Roger
They are nice. Haven't seen those before.
Neil
-
3 minutes ago, Motorsport Mickey said:
Gearbox out, from inside the car.
Mick Richards
Yes, most my experience is on minis. Bare shell rebuilds, ended up with a metro turbo in having to cut bulkhead and reweld to get the turbo in. Changed the brakes along with it, and changed the diff to get it right for smaller road wheels. Felt fast but not in reality by modern standards.
I have had the gearbox out in the TR, I was probably 15 years younger when I did it. But I'm only 50 now and I have a helpful 22 year old who would be involved so I don't see it as a huge job to get the gearbox of on one these.
Neil
-
8 hours ago, RogerH said:
Hi Neil,
All good info above. Bob explains clearly the vision I had in mind. It can be done but a great deal of effort.
As Pete states check that the rocker cover seal is not leaking down the back of the head.
I normally take the engine AND gearbox out together. I find that the GB + OD are too awkward these days. Let the hoist take the strain.
The Australian fix for a leaky crank rear seal http://www.tr-register.com.au/Files/technical/scrollseal.htm
you still need the GB OUT and the flywheel OFF - is it worth it.
With the GB out it may be worth looking at the gear selector rod 'O' rings - they tend to leak
One upgrade that has worked is to use 'Q' seals - they have a cross section like a four leaf clover
Or open out the counter bore where the 'O' rings live and fit a 3/4" lip seal
Also on the centre selector rod you will see a very small drill hole at the end where the gear stick locates. Fill this with epoxy glue - it is a leak source.
Roger

Roger, that's really interesting and I might give that a go with a view that if it doesn't work I can plan to take the engine out. The leak is really small and whilst I'd kind of like to have the experience of delving into the bottom end of an engine it kind of feels I have more to lose than gain.
Neil
-
8 hours ago, Lebro said:
Or a leaky core plug behind the camshaft, or a leaky oil gallery plug, or a leaky front gearbox seal
Must admit whilst I've looked before I wasn't aware of the core plug behind the camshaft or the oil gallary plug. Can these be fixed with the engine in if these are part of the problem
Neil
-
6 hours ago, Lebro said:
Just do it !!
You would say that with your skills
")
I've done a lot on cars but I've never rebuilt an engine or gearbox. Swapped then, changed several head gaskets etc. But no Pistons out (OK I've done a few lawnmowers but they don't count). It's a scary leap.
Neil
-
Gents,
Thanks for the replies. I've no major issue taking off the front apron, done this before with no major consern. I'm slowly going around the car changing rubber parts as they have been in for 27 years. So engine mounts and gearbox mount are on the cards as well. The only thing that puts fear up me it taking the crank off a perfectly running engine for a small oil leak. I'm pretty sure it is the rear oils seal as I've been through this before. It's not a big leak and everything else seems dry. I've had the gearbox off before to look for leaks and at that time I deduced it was rear Crank so just put it all back together.
Given what I have (want) to do it feels like engine out would be the right thing to do. I just need to consider if I have the confidence to strip the bottom end of engine. At the end of the day its just nuts and bolts but it's just the confidence to do it.
I do have a spare engine so I can have a look at to determine the risk in me taking on this. Bob, your thread on your engine rebuild has both impressed but made me fear the work (even though this isn't a rebuild). It's truly and excellent thread. Christian, thanks for the explication, I now understand and accept if I take this on its a case of doing it the right way, no short cuts.
It feels like do it as part of the other changes or live with the leak, which I could do....... But I have lock down itchy feet.
Thanks all,
Neil
-
Thanks Roger, that makes total sense. And oops on the Karl Marx, comment. Different chap all together.
Neil
-
Ralph,
Main thing is she's OK. Everything else is something you learn. Had a similar experiences
(1) with my sons first car (but not as bad). It lost 2 nuts (or bolts as they were on that car) and two remained on, one loose. The car was new to us and whilst I'd serviced it we hadn't had the wheels off.
(2) on the TR3 itself. My farther used to drive it. I think we've had it 27 years now. I got a call to say the front wheel had come off in the early days of ownership. Everyone was OK and actually I was surprised the car was in reasonable condition (disk had a flat spot from hitting ground and stopping but wing OK ect) the four nuts that hold the spline hib on had come off. We had no. Idea at the time that the splines were bolted to standard studs.
(3) A friend at college once lost a wheel on his mini. He had just got out the car park so low speed. It's had wide wheels on. When he went back to the parking spot there were three wheel nuts on the floor. It looks like someone had removed them on purpose. Possibly to have the wheels for themselves or possibly because someone didn't like him. I doubt the latter as he was/ is such a nice guy. But you never know.
So clearly I haven't lived and learnt now I read the above, but main thing is everyone is safe and well.
Neil
-
Hi, I'm looking for some advice. I'm working through jobs on the TR3A through lock down. Not a great deal to do at weekends. I took the propshaft off to change the seal on the diff, have found some grinding on one UJ so changing both so I don't end up doing the a year later.
I've been thinking about the rear Crank seal which has the usual smallish leak. Been like this for years and I'm not at a point I want to take the engine out for this. Although I plan to change the front crank seal and the engine mounts so would be part way there. The thought of removing it and taking the crank out just seems a step too far for things to fill the days in lock down. I'm a little confused and struggle to understand why the upgraded Karl Marx rear seal cannot be fitted with the crank still in and therefore the engine in situ with the gearbox removed. I'm thinking that taking the box out (which I've done before) is relatively easy.
Am I dreaming, do you really need to take the crank out to fit this and use the tool? It's not much of a leak so I can live with it if it really is an engine out job but would welcome experience. I have looked in the search facility which I seem to struggle with but I haven't found anything that confirms this cannot be done.
Neil
-
11 hours ago, Ian Vincent said:
There is a third option Richard, buy yourself a cheap bench drill.
I bought one a few years ago on a whim (a late night bid on ebay!) and have found it to be one of the most useful tools in my workshop.
Rgds Ian
Just really to add, I did it on a cheap bench drill. I also soldered in the pins, which I'm sure some would frown on but it's a belt and braces approach. One way on understanding if this is the issue is by looking at how much play there is with the idle adjuster. If the screw is nearly all the way out then it's going to mean the arm is lower (closer to the cam) than it could be. If I'm honest, Ralfs photo shows this to some degree. In my case it was slightly worse than this on one of them. I really would try to get this bit right and then work from there. It made the car so much easier to get right, idle speed and mixture. I always struggled with this. But the offer to make and send some cams is there if you want to see if there is just enough room to make work at the agle you already have.
Oh and if someone has more experience please feel free to contradict me and give the best advise. I'm happy to learn also.
Neil
-
7 hours ago, Richardtr3a said:
I am experimenting with my SU H6 settings and I need a second hand fast idle cam. I can not understand why my cam will not fit in the correct place. The adjusting screw and the lever prevent it fitting.
I plan to use my file and hacksaw but would like a used part to experiment with. Is there more than one cam. My carbs were rebuilt a few years ago and otherwise work really well.
Please see the wanted section where I have posted.
Thanks
Richard & B.
Richard,
I don't have a spare because I've filed down the one I had doing something similar to you. I'm actually on the look out for a original as well. However they are quite easy to make, I have a few home made ones. I'm more than happy to make you one and send it to you and you can file it to match your original or into any other shape you want. Having gone down this route I found that the issue was with the position the arm had been connected to the butterfiy spindle. The hole was drilled in the wrong position and the arm was lower than it was meant to be. I ended up rebuilding the carbs and filling new butterfly spindles and fitting the arm at ther right angle and then all works, apart from I filled down the cam, so made one myself.
Let me know if you want me to send you a home made one which you can use for experiments. But it's worth looking at the angle of the arm coming of the butterfly spindle.
Note I'm not an expert, just a self taught mechanic so my solution may not be fit for thr problem you have.
Neil


TR3A Weather Gear
in TR2/3/3A/3B Forum
Posted
Hi John,
Interesting. I've got lift the dot and doesn't cause me an issue, but now you have written this I can see the merits of tenax in this position.
One thing the remember is to fit the hood and cover for periods to stop them shrinking. They can be a pig to fit if they have not been on for a while. I'm sure a little heat would help but I've always just about managed.
Neil