-
Content Count
1,212 -
Joined
-
Last visited
Content Type
Profiles
Forums
Calendar
Posts posted by MilesA
-
-
If you are lucky, it could be that the input cables have come adrift from the switch. Sometimes the screw which holds them in place loosens - used to happen from time to time on my 3A’s ignition switch. As you will find out, it’s a bit of a rats nest of cables behind the instrument dash.
Good luck.
Miles
-
Just to complete this thread for the benefit of others who may need to do this.
As predicted, I had to remove the Speedo. Removing the lower air vent was also necessary to create space. In fact, pulling the speedo out of the dash and moving it to one side was enough to get my hand and a small spanner behind the dash to undo/remove the bolt securing the upper clamp to the brace to the top of the dash. Once the top clamp was disconnected from the brace everything was easy. I easily fitted all the cables in the metal ‘gutter’ and repositioned it under/on the column. This included the additional cable from a column mounted dip switch I want which again was much more easy to locate in the gutter. I fitted the missing clip under the upper clamp and was easily able to align the upper and lower clamps. The bottom of the brace has an extended hole for the securing bolt with the upper clamp which allows it to align with the upper clamp as it is secured to the lower. So I put the bolt through the brace and upper clamp but did not tighten it as I tightened the two clamps together. Then I tightened the brace bolt. Then reinstalled the Speedo and the air vent. Job done. Very satisfying and all switches work.
Thanks allMiles
-
Following the need to replace my failed headlamp switch (see my other thread), I was able to inspect fully the steering column set up.
Stuart was correct: the clip which should be located under the upper clamp was missing as was the ‘H’ brace between the clamp closest to the dash and the one securing the column to the bulkhead.Having replaced the missing clip (thanks Conrad) in the upper clamp, the steering column is now rock solid and no longer swivels. So thanks all.
I was not able to install the missing H brace (again, thanks Conrad) because the bolts from the two clamps do not quite line up with the holes in the brace. It is marginal and I suspect loosening all 4 off will be sufficient. Unfortunately, with a tiny lock up and seats in place I simply cannot get at the front clamp bolts on the bulkhead. So I will drive the car for the rest of the summer until I can blag use of a larger garage in the winter to get at the front clamp.
So thanks again. Another problem created by previous hands on the car resolved by Forum users.
Miles
-
A bit of a curate’s egg for me; some good parts, some less so. As noted, the formal aspects were more limited than previous events but that may have been dictated by the available facilities.
There is an element of attendees making the most of the event. Chatting to owners from all over the country and beyond who one has never met before and discussing their cars and experiences (special thanks to Graeme from the London Group for sharing information on his 6) is a big plus for me.
I managed to volunteer for the first time, working on the gate Saturday morning with Rod and Waldi. I really enjoyed myself and the early morning banter with visitors; hope I didn’t irritate too many people!
Overall, I would much rather have been present than not. And we’ll done to management for having sorted next year at Malvern and with other Classic marques. Already in the diary!
Miles
-
16 hours ago, Lebro said:
My hood also does not have a "flap" initially I had LDT fasteners on the screen top, & anything over 50 in hard rain, & water would migrate over the screen, & onto my legs. I now have Tenex fasteners, & it is now dry, they pull the fabric tighter onto the rubber seal.
Bob
My hood was already very tight but bowed between the LTDs. My solution was to glue dense foam strips between each LTD on the hood which were compressed against the flat chrome of the screen surround when the hood was put on. Largely effective but not ideal as hood fitting had to be careful and the odd foam strip had to be re secured from time to time.
Miles
-
I stay in east Portsmouth each year for the Members Meeting. I usually encounter a long queue on the route in via the Rolls Royce facility. This year I switched on Waze which monitors traffic conditions. On Sunday morning it took me around the quiet outskirts of Chichester and in via Lavant village without delay. Just a thought
Likewise good to meet and chat at the Forum meet Ian along with others not previously spoken to.
Miles
-
Of course, I should have written...
"...in terms of water ingress on
themy 3A, there was very little difference whether the hood was up or not when raining..."! Due almost exclusively to a mohair hood, without a flap on the windscreen edge.Miles
-
As someone who has recently transitioned from a 3A (which rarely had the hood up) to a 6, I will try and test this theory.
I would observe though that in terms of water ingress on the 3A, there was very little difference whether the hood was up or not when raining...
Miles
-
38 minutes ago, Ian Vincent said:
I'd like to add my thanks to Niall for tidying up the arrangements and bringing the sticky labels - I assume it was Niall.
However, I there a reason why we couldn't have a forum meet up start at say 1pm on the Saturday next time and then participants could decide whether they wanted to spend the rest of the afternoon chatting or go back out and get involved in the other activities.
Rgds Ian
Ian
’Traditionally’ the Forum meet during my time in the Register has taken place mid/late afternoon on the Saturday. Niall and I (independently) proposed 4pm, hoping it would not clash with formal events and allowing people time to disperse for BBQ preparation and other evening entertainments.
As we did not yesterday canvass a fixed time for the Forum meet in future as I had threatened, what do people think about a 1:00pm Saturday meet next year as opposed to 4:00pm? Personally, as long as the first hour does not clash with anything formally organised, I am relaxed about 1:00pm if that is the preferred time. If we can reach some sort of consensus, we might also get the time and place published in next years programme!
Miles
-
Come on. Own up the rest of you!
Great turn out. More than anticipated! Thanks to all for making the effort. As ever, not enough time to chat to everyone - there is always the Forum! Thanks to Niall for recalling those stalwarts of past years.
Miles
-
John. For a number of years we have gathered at The Farmhouse, Burrfields Road - a Hungry Horse pub. Large car park, beer, straightforward food and 10 minutes drive to the ferry.
Miles
-
On 8/3/2023 at 5:39 PM, phil Dean said:
To be honest I am underwhelmed with the brightness of the LED lights. What I had not thought about was the warning lights I wired into the Avenger were very bright maybe to bright the Avenger had a roof but the TR doesn't or mostly doesn't have a roof on and out in it today in sunshine and rain
 the Fan warning light is barely visible I might have to rethink this again.
Phil.
Phil
Same issue re modest brightness when I wired an O/D warning light into my 3A. Used a green lamp holder and a white LED. Underwhelming. Swapped for a green LED. Way brighter even when roof down. Worth a try.
Miles
-
On 8/6/2023 at 9:57 AM, Misfit said:
I understand that Bob so should the management determine a day and time for forum members to meet up and add it to a schedule, or when TR@70 was announced months ago would it have been an idea for one of the regular attendees to suggest and agree a time and make the request prior to the schedule being produced.
I guess that this may make me even more unpopular, sometimes I wonder do we need to accept some responsibility.
Hi Derek
It has been some years since the Forum Meet was included in the official schedule because I can recall proposing the time/place for Stratford on the Forum as I did last Saturday for this coming weekend. I think that I (and subsequently Niall) was taking responsibility.
I have no idea how the time and place was previously agreed when it was formally included on the official schedule. Personally, I would be happy for it to be included as a standing item in future years at 16:00 in the beer tent (as that seems to suit most folk) so long as it does not clash with any other events. That way it becomes embedded as would be a reminder-announcement shortly beforehand from Wayne or whoever. If necessary, we can take a poll amongst attendees on Saturday.
So I hope that you and plenty of other Forum users are able to make it on Saturday afternoon. Between us, Niall and I will have a mountain of stickers for name badges!
Finally, like Brian and Waldi I have volunteered a few hours to help out. The last time I looked I was the only one on the gate 08:30 to 11:00 on Saturday so it’s going to be a b****y slow entry for many unless a few more join me.
Miles
-
-
-
Thanks Andy and Stuart for confirming the way forward.
It’s all very tight and not just under the dash; the garage is only 8’ wide!
I’ll try without removing the clocks but suspect they’re coming out (but not until next week now); a new skill. Every day is a school day with these cars!
Miles
-
So an update in case others attempt this and a further problem I have encountered.
I followed Stuart's advice:
- removed the screw that goes through the clamp on the cable cover
- slackened the bolts between the rearward upper and lower column clamps
- pulled the rear clamp of the cable cover off the steering column
- I had to remove the lower column clamp (it is also attached to the rear of the metal dash) because the lip on the front of the cable clamp prevented it being pulled down and so out from under the dash
- pulled the cable cover downwards and backwards to remove it
- cut off the bullet connectors from the old switch cables and pulled the cables out of the steering column metal cowl.
- I taped up the ends of the cables of the new switch and by holding the overdrive and indicator cables to one side was able to thread the new cables through the opening in the metal cowl relatively easily
- by feel, laid the cables as flat as possible on the inside of the cable cover
- bracing my legs under the steering wheel I raised it as far as I could and by feel threaded the cable cover back through the dash
- checked that all cables were inside the cover and not pinched between it and the dash
- clicked the clamp on the other end of the cover bar onto the steering column
- I then wiggled the lower clamp back onto the threads protruding from the dash and tightened it flat against the dash with the two nuts
PROBLEM!
- the lower and upper clamps no longer align - the upper clamp, which is braced against the dash, now sits about 1/8" closer to the dash and the bolt holes for joining the clamps no longer align
- tried force and levers of various kind but cannot prise the upper clamp forward. Equally, having slackened off the two nuts holding the lower clamp to the dash could not tilt it back at all. Given the bolts and nuts securing the upper and lower clamps look new and that there is an indent on the lower lip of the rear of the metal dash, I think someone else has experienced this problem
- looking at diagrams, I think I need to slacken off the bottom of the brace where it attaches to the upper clamp. Pretty sure I can not do that just fiddling under the dash.
- Looks like I need to remove the revcounter and possibly the speedo from the dash. Those knurled nuts look pretty inaccessible though.
So....any thoughts on the way forward chaps?
Looks like my long weekend in the TR may be scuppered but I do want to get it ready for the IWE if only so that I can collect a missing spring clamp that goes under the upper clamp (and go through this whole palaver again)!
PS I do have functioning lights now. There is a bit of a tale about the new switch I purchased yesterday morning from M**S but I will save that until I get the steering secured!
As ever, many thanks for your thoughts
Miles
-
Ha, ha! Been there before. Thanks as ever for the tips though.
Miles
-
It’s the switch. Removed the 2 securing screws and moved the switch as far as I could and can just see that the blue / white cable connection has come adrift from the unit (also the cable covering has worn through and a little of the cable is exposed).
So just need to work out how to get that metal cable shroud off the underside of the steering column tube so that I can disconnect / replace the stalk switch ASAP. Seems to be a single clip with both sides held together by a screw.
Thanks again for the prompt responses. A great help.
Miles
-
Thanks both. Have saved those diagrams to my phone Stuart!
Checked all the connections under the dash where they meet the loom. No lose connections - all look good and solid.
Think I need to remove the stalk switch from the steering tube to see if there is something unconnected there.
Noticed that when sidelights are engaged there is a slight movement of the ammeter needle to “-“. Drops back as soon as I switch to headlamps. Consistent with no current being switched on I suppose.
Miles
-
Noticed when parking the car in the lock up this morning that I seem to have lost headlamps (main and low beam) and gauge lamps at the same time.
Moving the light stalk down to the first position I get side lights and gauge lights. Moving the stalk further down to the bottom position side lights go off, no headlamps (main or low beam) and the gauge lights extinguish.
I think I have a ‘flasher’ stalk but that does nothing when pulling it towards me
So thinking no supply getting to dip switch / light stalk
Initially Thought it might be the stalk so cowls off and that has had a squirt of contact cleaner. No change.
Removed the foot dip switch after pressing multiple times. blue/white cable(s) attached but have removed cleaned and reconnected. Same with blue cable although connector looks pretty ropey. Might cut off and put on new connector.
Am at a new lock up and all the diagrams / kit are at home! Any thoughts chaps before I trudge back?
Car is ‘69 PI.
Many thanks as ever.
Miles
-
44 minutes ago, Steve-B said:
Is this a suitable replacement?
Steve
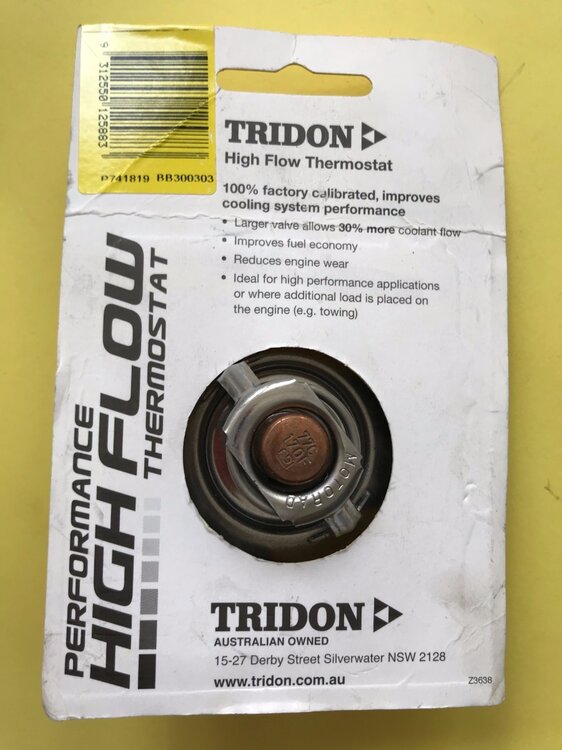
That is the two wire version mentioned by John and will do the job. Fitted one to my 3A and have one ready to fit to my 6 as it does not have one (original or modern).
On the casing somewhere the two cables may be marked "C" and "NC". C is power in and NC goes to the pump.
If you want a warning light you can wire one from the plug between the two wires shown in the picture. A 'nice to have' but not essential.
Hope this solves your cut out problem!
Miles
-
Roger - my thoughts initially based on my experience of the absurd complexity of modern car design but actually it’s a 5 minute job. Grasp existing bulb (readily accessible), twist to release from bowl, press tab to release connector and reverse to install. So a big tick to Toyota.
Rob - my first thoughts too. Replacing both bulbs worked but I have told my daughter to carry a spare in case she has some other intermittent fault.
Miles
-
Toby - thank you for your comments and experience. As is often the case with these cars, a simple problem throws up the original design rationale and considered solutions from owners. I need to jack-knife myself under the dash again to work out what is in place and what is missing. Thanks for the offer of photos. I will PM you if I need any.
Marco - thanks for your thoughts. As I intend to install a column mounted dipswitch as I cannot easily operate the foot switch, the cable cover may be unable to accommodate the extra cables and so have to be removed.
Thanks
Miles


New Member
in TR2/3/3A/3B Forum
Posted
Correct Rich. My ‘69, CP, TR6 has an A type. Interestingly, my 3A had had a 6 A type installed in the past (and worked rather better than the one in my 6!).
Miles