This is going to be a long chapter, so make yourself and cup of tea or coffee now and get comfortable. There's nothing wrong with the standard Lucas PI system, the car came with it, and these days, most reputable TR specialists can make the system run pretty well. However, I wanted more… I wanted the car to start and run more like a modern vehicle. I wanted to go to it after leaving it for a few weeks of not driving it and for it to start easily, not run on 4 cylinders for the first 20 miles or so, and to get the best performance and fuel economy out of my investment in the engine rebuild. You could argue that you would get all of the above from the standard PI system, but I'm afraid that hadn't been my experience of the car before the rebuild, hence my decision to go down the EFI route.
I contacted Kevin at Classic Fuel Injection in Chelmsford (https://www.classicfuelinjection.co.uk/) regarding the EFI system that he sells after seeing a picture on his website of a converted damson TR6, and after a few conversations the order was placed.
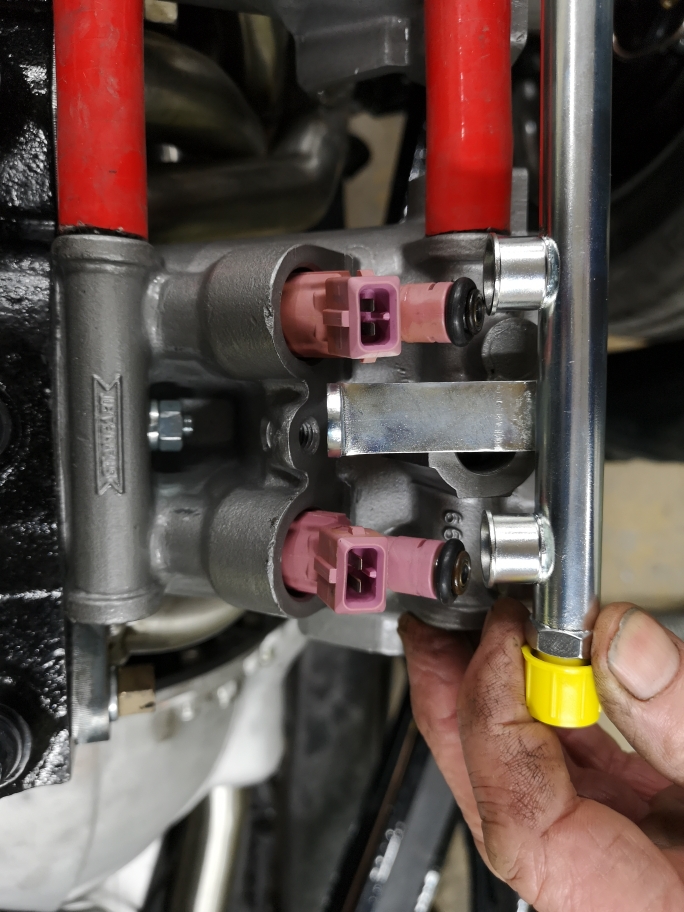
The standard kit includes:Fitting guide, Engine Control Unit, Wiring Harness, , Ignition Amplifier, 6 x Bosch Fuel Injectors, Fuel Injector Top Mount, Fuel Pump and Filter, Fuel Hose and fittings, Fuel Pressure Regulator, Distributor Sensor and Magnet, Coolant Temperature Sensor, Throttle Position Sensor, Manifold Air Pressure Sensor, Wideband Oxygen Sensor, Idle Speed Control Valve
The kit is a generic one, so designed to fit many vehicles… it is not designed specifically for the TR6, so be aware that the fitting guide is also generic. It tells you what you need to do, but you need to work out how this translates to your own specific vehicle. Whilst the kit comes complete with pretty much everything that you would need to install it, there were a few modifications which I had spotted on the website photograph which I wanted to implement on mine.
It transpires that the damson TR6 was not installed by Classic Fuel Injection themselves (they can install the system for you for an additional cost if you would like), but actually done by one of their customers, who just so happens to be another TR Register member.
Anyhow, having got further information regarding the modifications required to the standard kit, the first job was to modify the PI throttle bodies to remove the butterflies and fill any holes to stop air leaks. I understand that you could still use the standard butterflies, but it's a more difficult installation and harder to set up, so we went with the easier option. In addition to the above, the injector enclosures needed to be opened out slightly in order to accommodate the larger than standard Bosch electronic fuel injectors and Glen needed to tap a feed out of one of the throttle bodies for the vacuum pipe needed by the MAP sensor.
I wasn't so keen on butchering my PI system as I wanted to remove it and keep it all intact just in case I ever decided to sell the car, so I purchased a set of throttle bodies off eBay which needed refurbishing and used those instead.
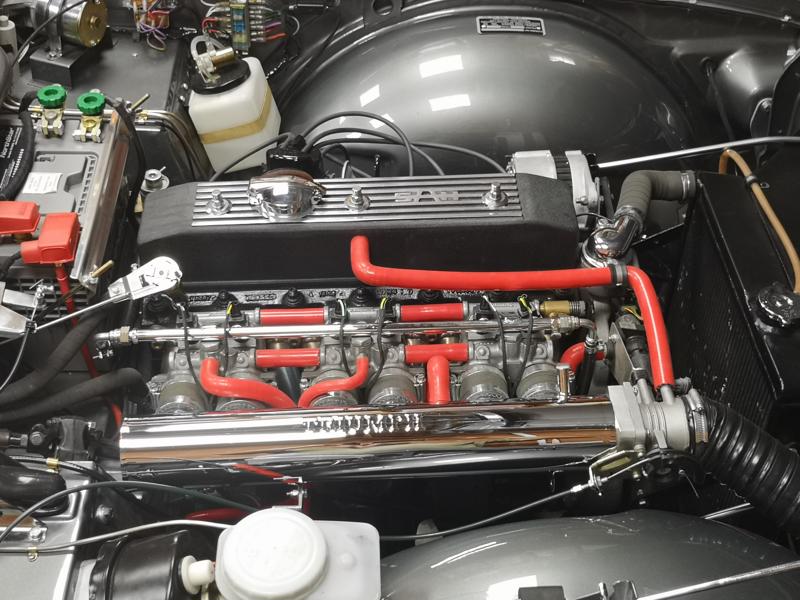
The standard kit uses fuel hose to interconnect between the Fuel Injector Top Mounts, which obviously works fine, but is not that standard-looking in the TR6. I noticed that the damson TR6 had a custom-made fuel rail and the owner was kind enough to give me his engineering drawings for it so I sent them off to Jenvey Dynamics (https://www.jenvey.co.uk/) for them to make up a rail. What I didn't realise and that became apparent when the rail came back, is that the throttle bodies that I had bought from eBay seemed to be from a later CR model TR6. They therefore had dual interconnecting vacuum pipes, rather than the single vacuum pipes on the earlier CP model throttle bodies. This shouldn't have made any difference at all in theory, but even though the throttle bodies bolted onto the head and fitted perfectly, there was obviously a 5mm difference in spacing between the rear two throttle bodies.
After chatting to Alastair at Jenvey Dynamics, it seemed easier to remake the rail rather than try and modify the existing one, so they produced a second rail which was then sent to Colonnade Chroming in Wembley (http://colonnademetal.com/) for them to chrome.

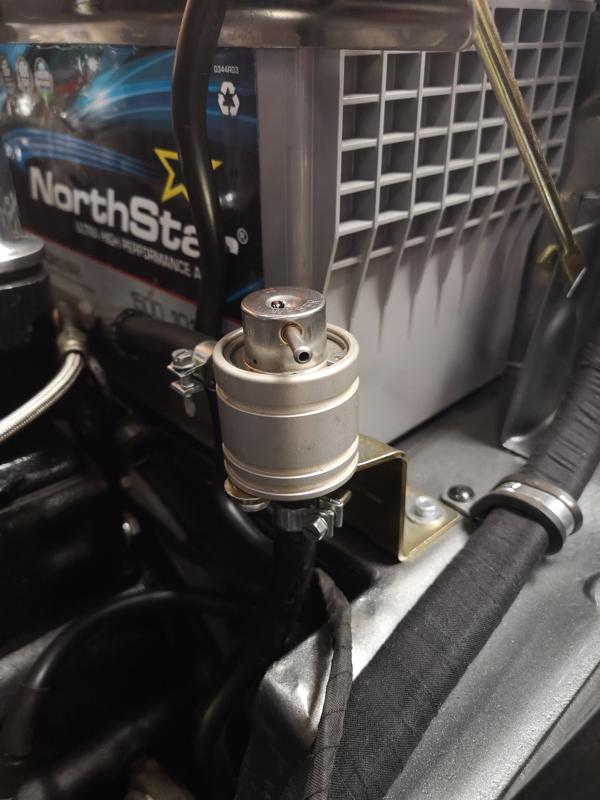
The Fuel Pressure Regulator (FPR) was fitted to a custom-made bracket fed from the rear of the fuel rail. You have to be careful to ensure that you feed the fuel in from the rail and back out to the fuel tank off the correct ends on the FPR as it's not marked on the device... we got it the wrong way round of course, which caused a lot of fuelling issues later on until we spotted it.
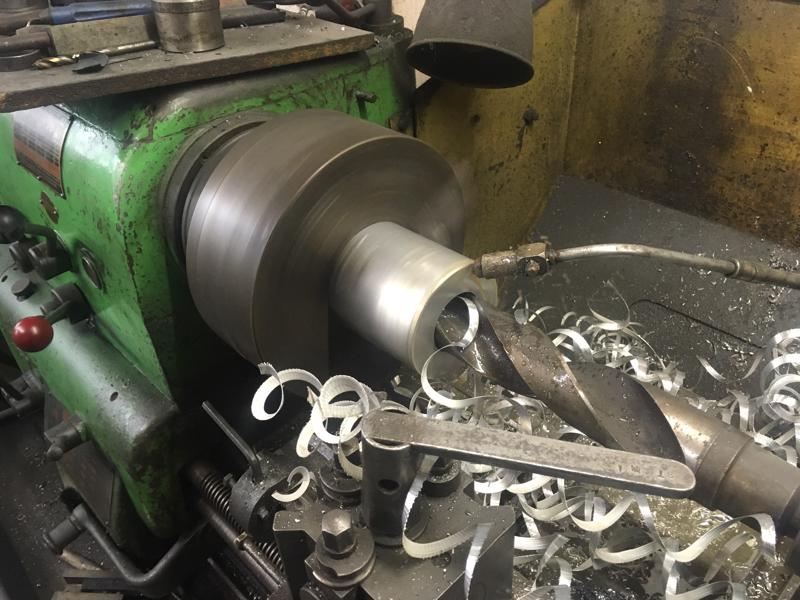
The next job was finding a replacement throttle body which fitted. Again, information from the damson TR6 owner saved me a lot of time and investigation here. It seems he used a Dellorto throttle body from an MGF with a built-in throttle position sensor (TPS), and it looked very good in the photograph, so I decided to do the same. This also meant that we didn't need to use the TPS from the kit, substituting it with the one that was already fitted to the MGF throttle body. Of course getting this non-standard throttle body to fit on the end of the TR6 plenum chamber would involve some customisation and engineering, which fortunately, Glen had the ability to do in-house. It took some time to get right of course, but once he had machined up an aluminium flange to shape and sized it for an interference fit, the end result looked brilliant I think.
Milling the aluminium flange
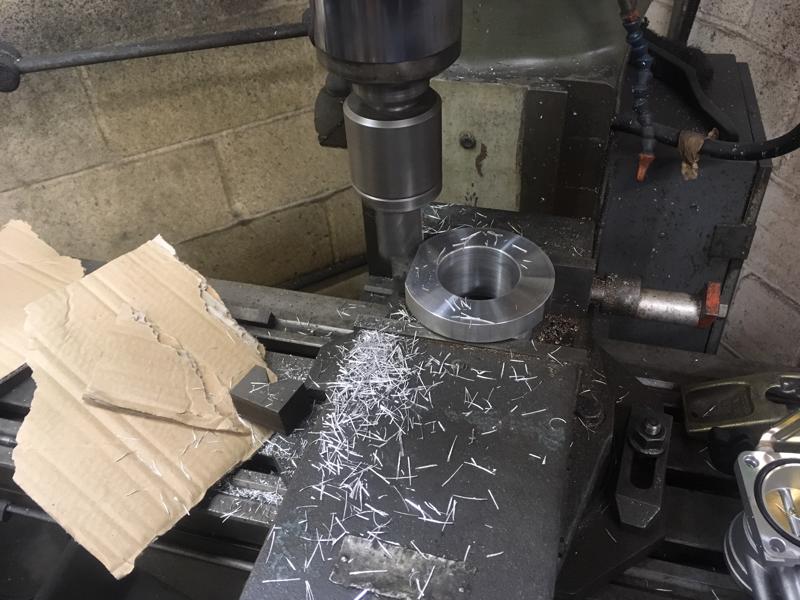
Flange fitted to the throttle body
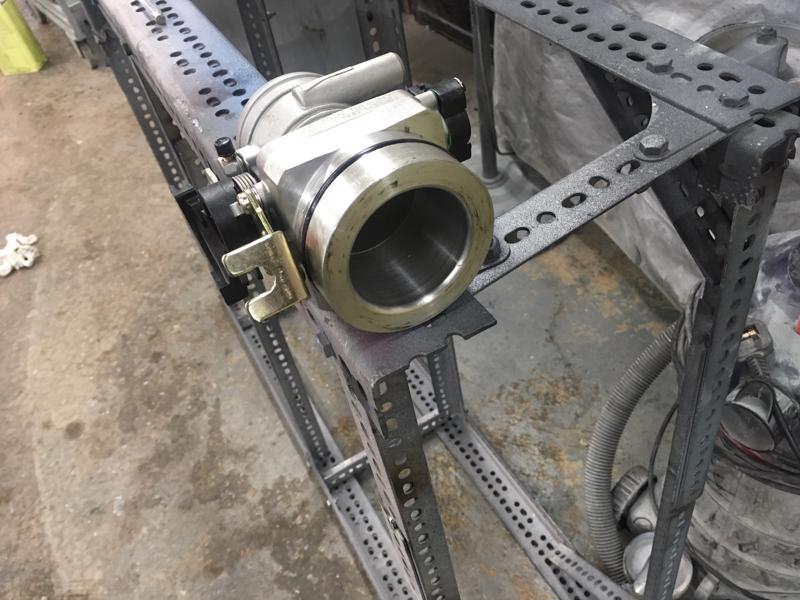
Throttle body and flange fitted to airbox plenum

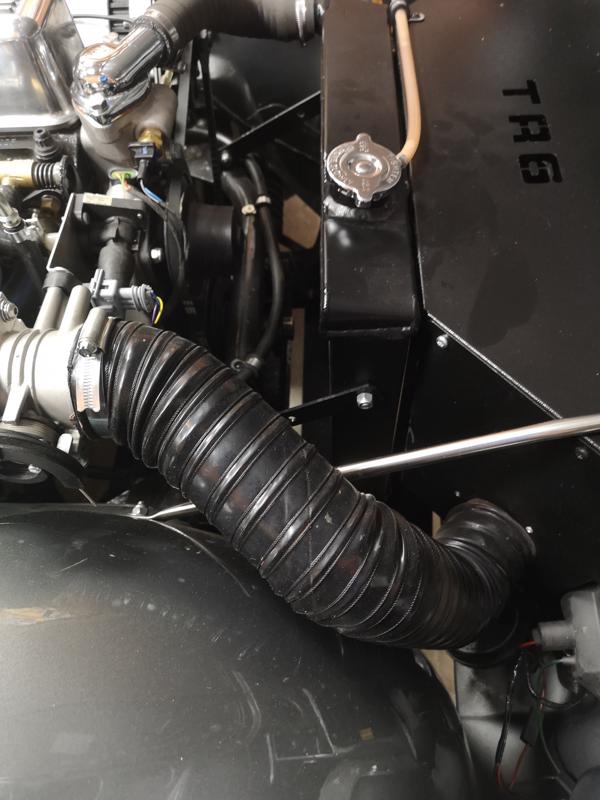
My remit to Glen was to try and keep the engine bay still looking relatively (don't laugh!) stock so rather than just put the K&N air filter on the end of the throttle body, he ran a flexible hose, similar to the standard set up, down to underneath the radiator cowl where it would be hidden from view.
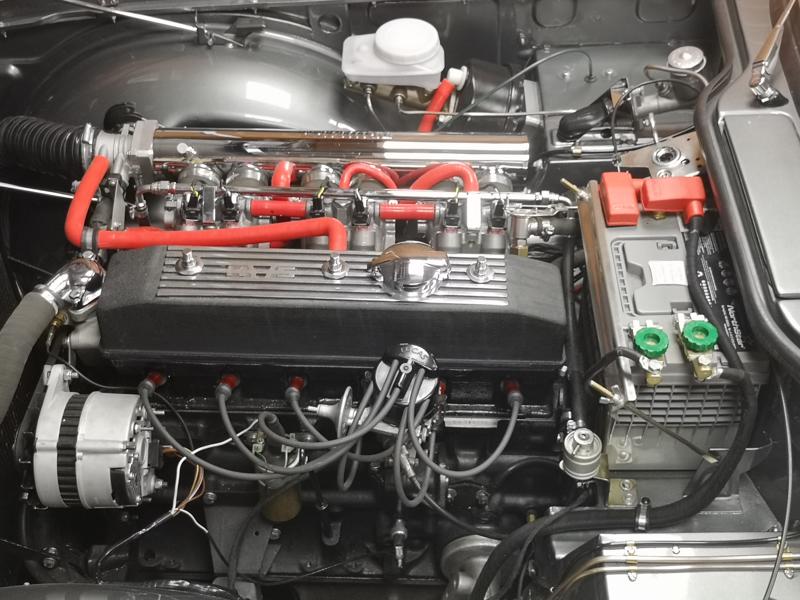
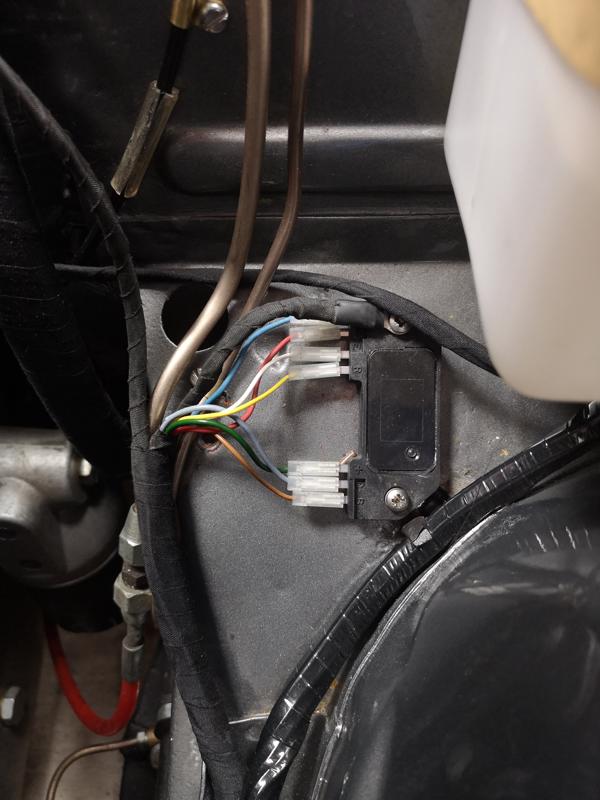
Next was the installation of the Engine Control Unit (ECU) which was located behind the glovebox, screwed to the underside of the area below the windscreen motor. The wires were then run roughly to where the various sensors and ancillary equipment would be located.
When fitting the distributor sensor and magnet, we initially tried to use the existing pin in the distributor to locate one end of the sensor, but it makes life a lot more difficult to get the pickup positioned correctly with the correct air gap, so both ends of the sensor were screwed down and spaced correctly as per the instructions.
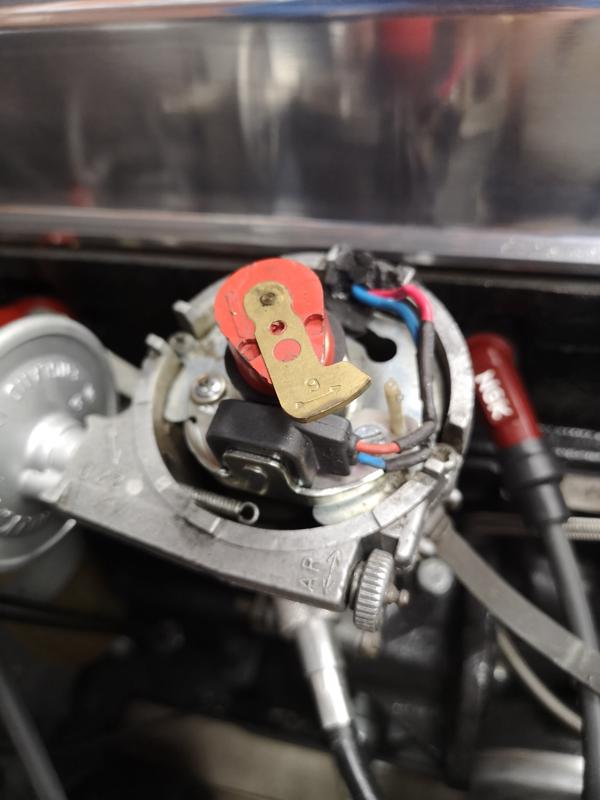
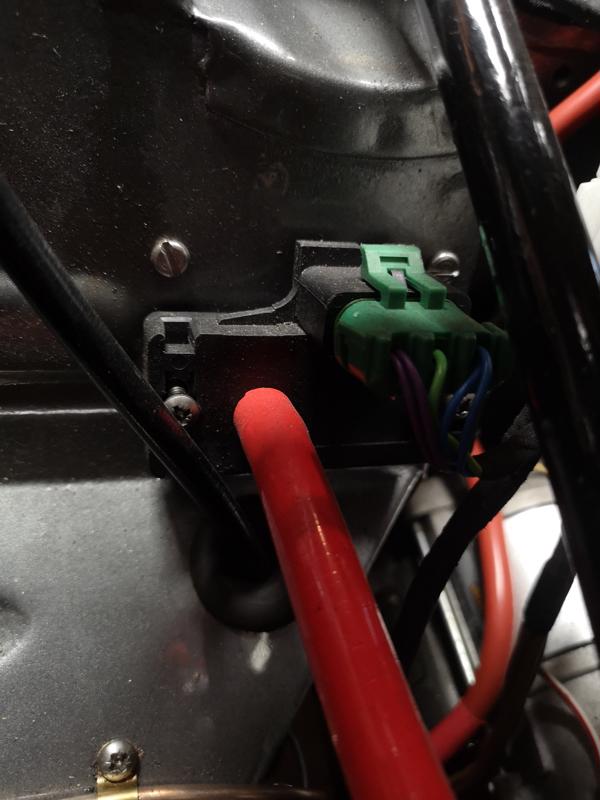
The ignition amplifier was fitted to the bodywork near the distributor as it needed to be bolted to a flat expanse of metal so the body acted as a heat sink.
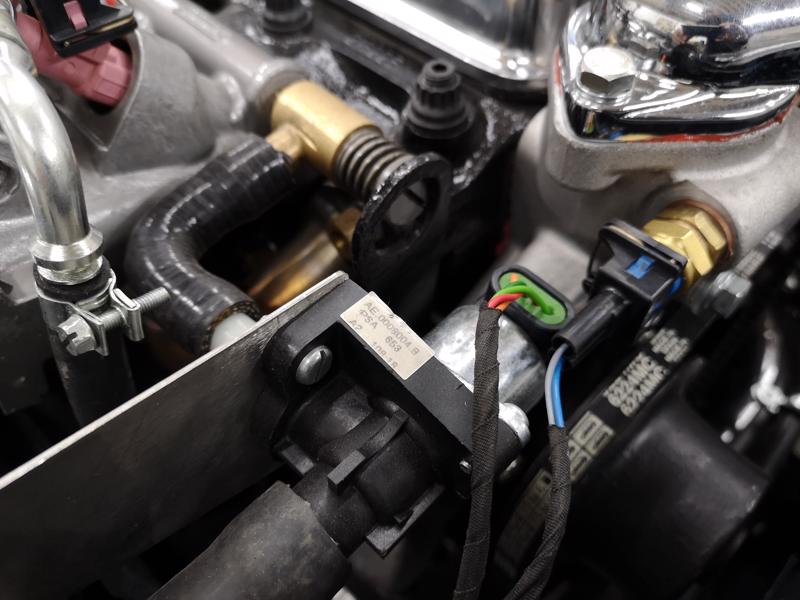
The Coolant Temperature Sensor was mounted on the opposite side of where the standard car temperature sensor was located in the thermostat housing
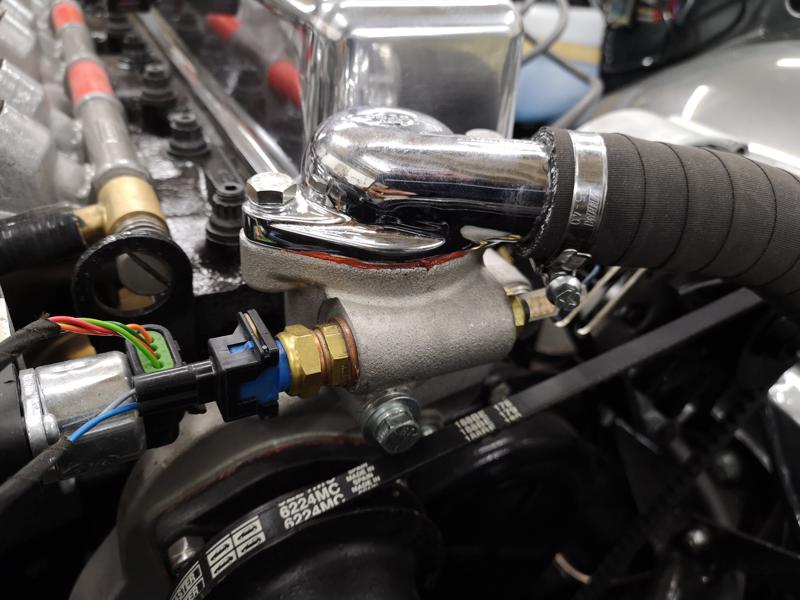
The Manifold Air Pressure (MAP) sensor was mounted against the bulkhead on the throttle body side of the cylinder head as we needed to feed a vacuum pipe from one of the throttle bodies to it at a later stage.
The Idle Speed Control Valve (ISCV) was mounted on a custom-made bracket between the Dellorto throttle body and the thermostat housing. In our original set up, the filtered air was drawn from one of the existing outlets on the front side of the Dellorto throttle body (before the butterfly) through the ISCV and back into the standard throttle bodies through the standard idle adjustment value on the front of the first standard throttle body as below.
However, whilst this looked like a really clever solution, Kevin from Classic Fuel Injection pointed out that cylinders 1 & 2 would probably grab most of the available air coming through the valve, and cylinders 5 & 6 would probably end up with very little. So we rerouted the pipe coming off the ISCV so that it now fed straight into an existing inlet feed between throttle bodies 1 & 2 on the airbox plenum. Whilst it was still not the ideal position (ideal being centrally located between all three throttle bodies on the airbox), it was close enough so as not to have too much detrimental impact.
The fuel hose was installed on the chassis before the bodyshell went back on, so all that was left to do was to install and connect up the fuel pump and filter, and connect the fuel line to the front of the fuel rail. The fuel pump was attached to the wheel arch on the outside of the vehicle to aid cooling and also keep it below the level of the fuel tank.
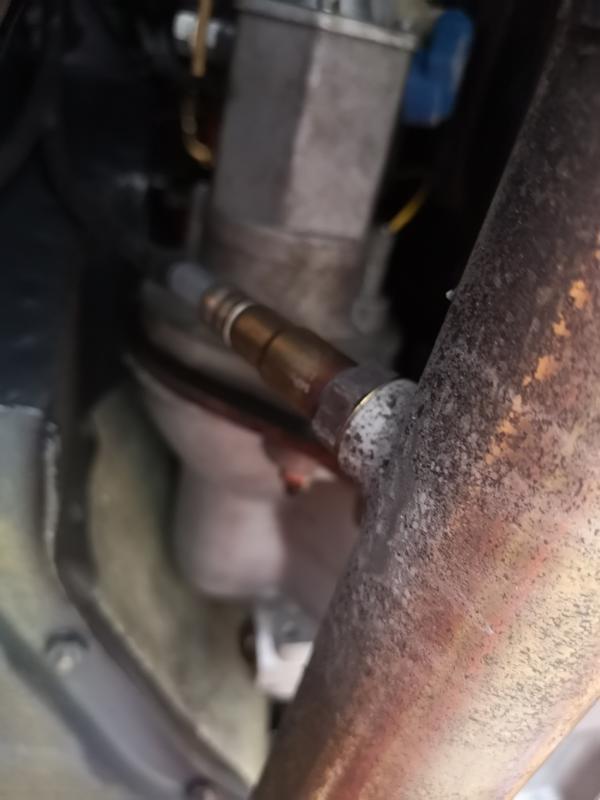
The Wideband Oxygen Sensor was installed on the exhaust front pipe about 10cm from the bottom of the manifold.
Finally, after considerable hunting around, I managed to find a company that was willing to custom-make the vacuum hoses for sensible money. The measurements all complete, I sent the order to Pro Hoses in Essex (https://www.prohoses.co.uk/) who produced the hoses in about two weeks. They colour-matched the red of the hoses between the throttle bodies which we had purchased earlier from Moss, so that meant we didn't need to replace those again.
Once completely installed, Glen fired up the engine just to make sure that everything was connected correctly, and that it did actually start and run. First signs were very promising… fired up fine and ran for about 10 seconds before they turned it off…result!
Fast-forward now to a completed car ready to be run-in. Here's where all the real fun and games started. Whilst the car did start and run… initial impressions were not great, partly due to the fact that we had connected the Fuel Pressure Regulator the wrong way round. I appreciated that there was a 'learning' exercise for the ECU, which I had hoped would take no more than a hundred miles or so, but even after this distance, the car was obviously still over-fuelling most of the time, and under-fuelling on the overrun (which incidentally sounded brilliant with all the popping cracking). Overall though, it wasn't quite what I had hoped for. Numerous phone calls between me and Kevin at Classic Fuel Injection (he'd started to recognise my mobile number, which is never a good sign) and several Map and Log files transferred between us, the issues still didn't seem to be resolving themselves. It seems that the 'self-learn' process which had worked just fine in previous installations didn't work well in my car for some reason and therefore manually configuring the system and the map files was the best solution. The car was therefore driven up and left with Kevin for a week or so for tuning and upon its return, was running much better. She now pulls like a steam train in every gear, and leaves most things standing when you're really 'on it' through the twisties.
Throughout the whole process, Kevin has been really helpful and has spent a considerable amount of time explaining the various aspects of the EFI system and the set up to me.
So with hindsight, would I still have done this conversion? Absolutely, Yes… but you do need to go into it with your eyes wide open... it certainly hasn't been a smooth journey, and has at times been quite frustrating. The installation was not as straightforward as I had hoped and took a lot longer than I had expected, more due to my remit about how I wanted the end result to look maybe. If I had my time again, I think I would probably have taken the car up to Classic Fuel Injection once the installation was complete for Kevin to cast his eye over it to make sure everything was installed correctly and then set the car up. In fact, if I weren't quite so picky about how I wanted everything installed, it would probably have made sense to get Classic Fuel Injection to do the whole installation and calibration from end-to-end.
The completed engine bay...