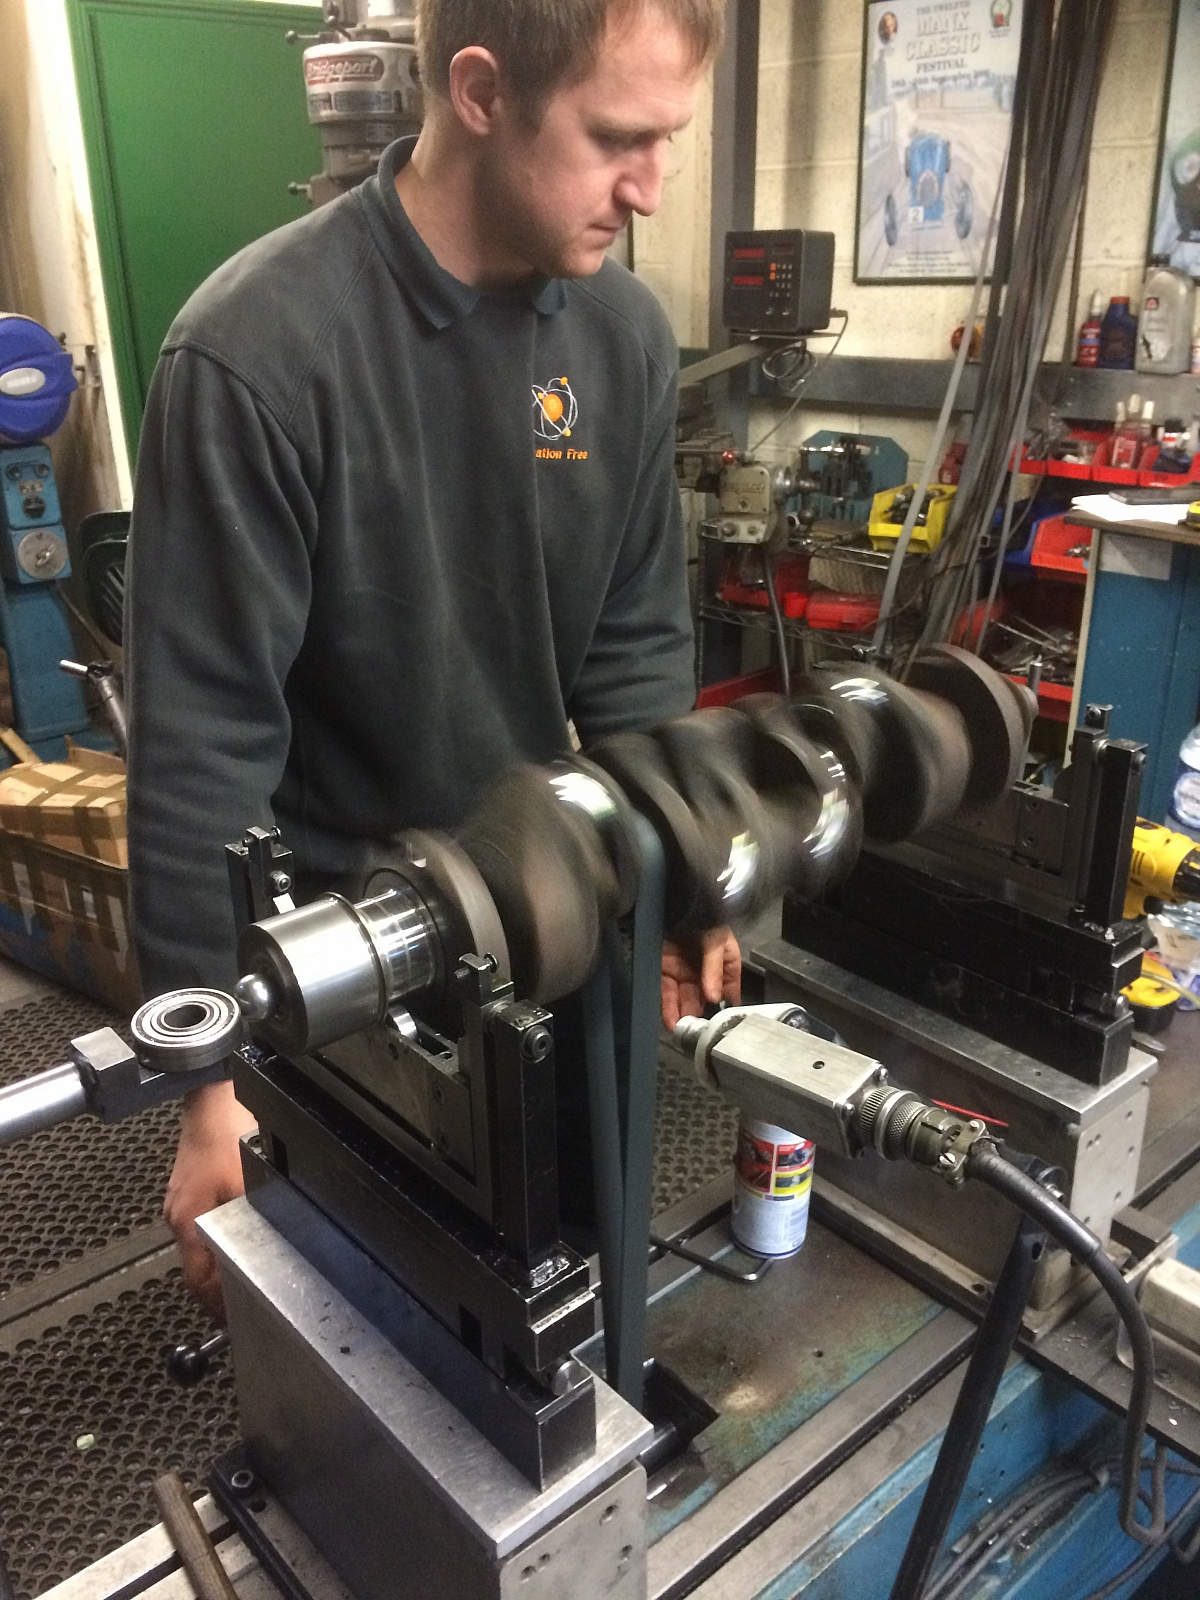
Sept - Nov 2015 During this period the engine and cylinder head were sent to the machine shop. All items balanced by Vibration Free. The gearbox and overdrive were also delivered to Overdrive Repairs, in Sheffield for a complete re-build.
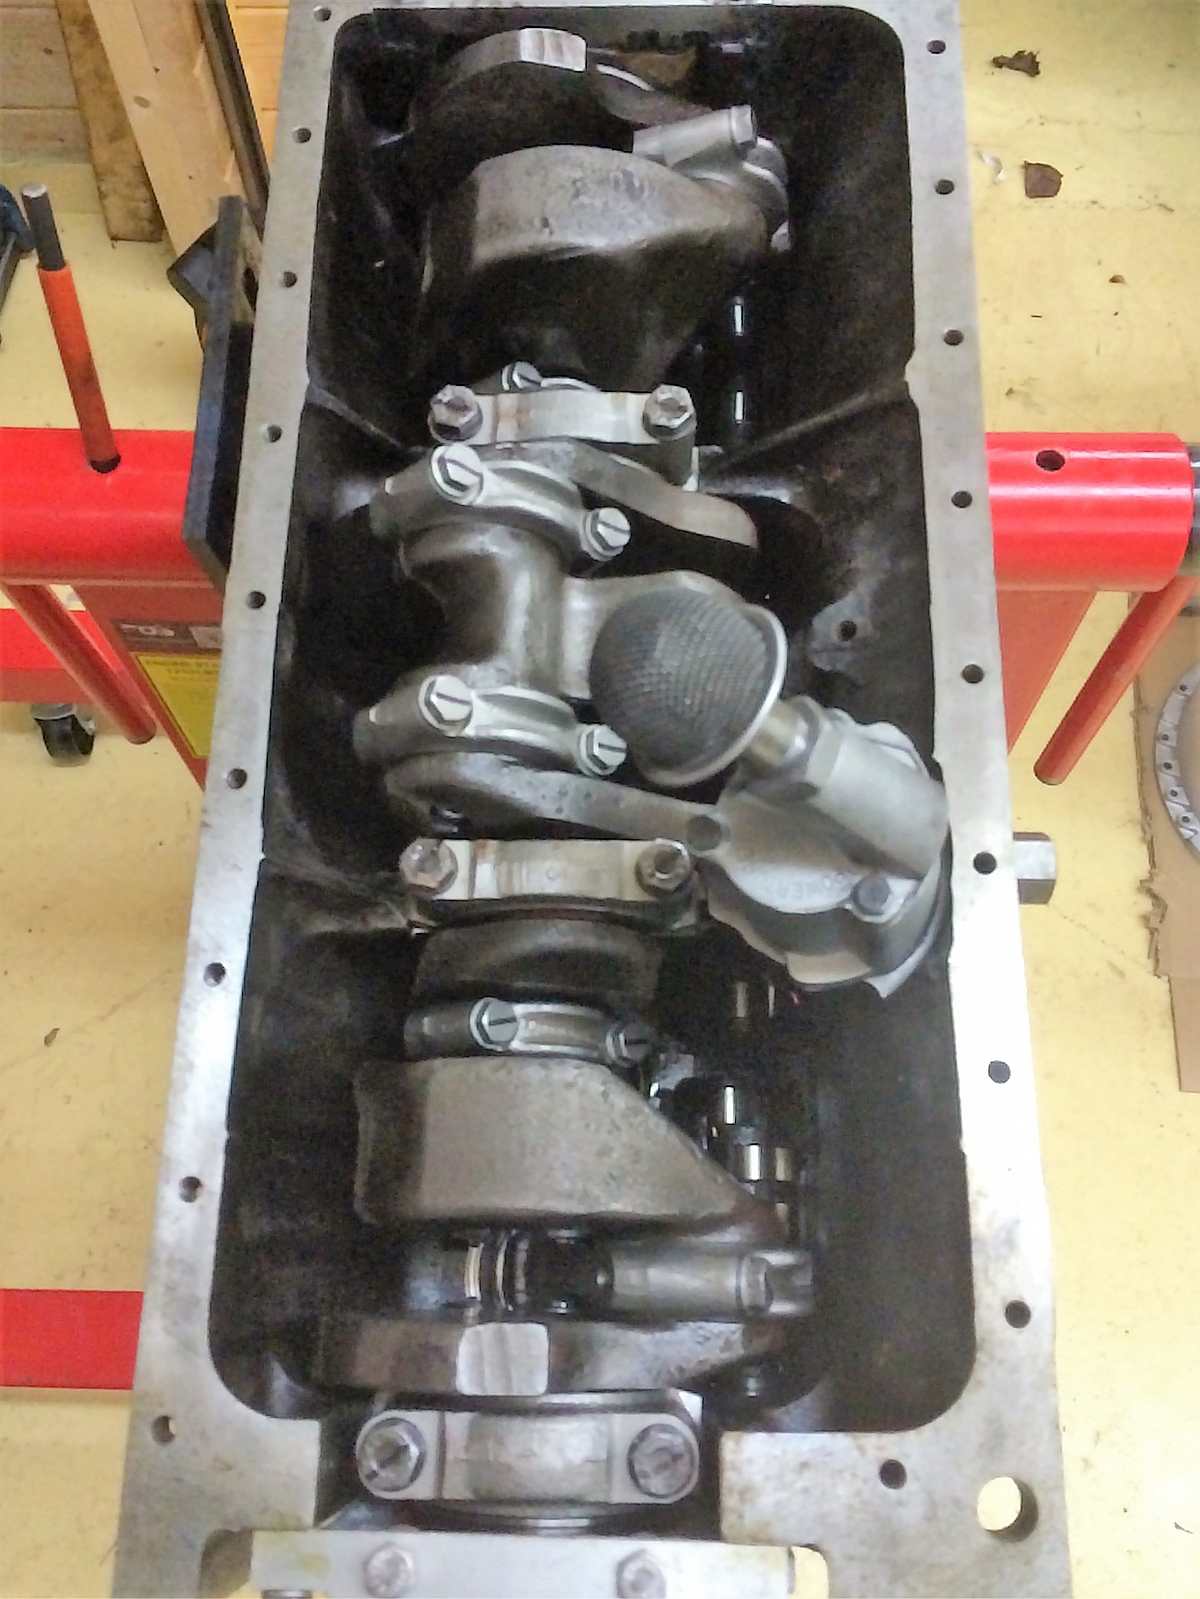
Dec - 2015 - Jan/Feb 2016 -The engine returned in Dec 2015, and the re-assembly started in Jan. Timing etc and camshaft set up all done -Feb 2016. This does take a lot of time.
Feb 2016 - Trial fitting of the head - front end, timing chain etc, refurbished and fitted. The gearbox finished and returned. The engine has been set up as standard and the cylinder head converted to unleaded.
Feb 2016 - Next jobs. Fit a new rocker shaft and rockers, new push rods, cam followers. Complete the rear end, fit the sump (an aluminium finned type). Fit the cylinder head etc etc. - well that's the plan.
Feb 20th 2016
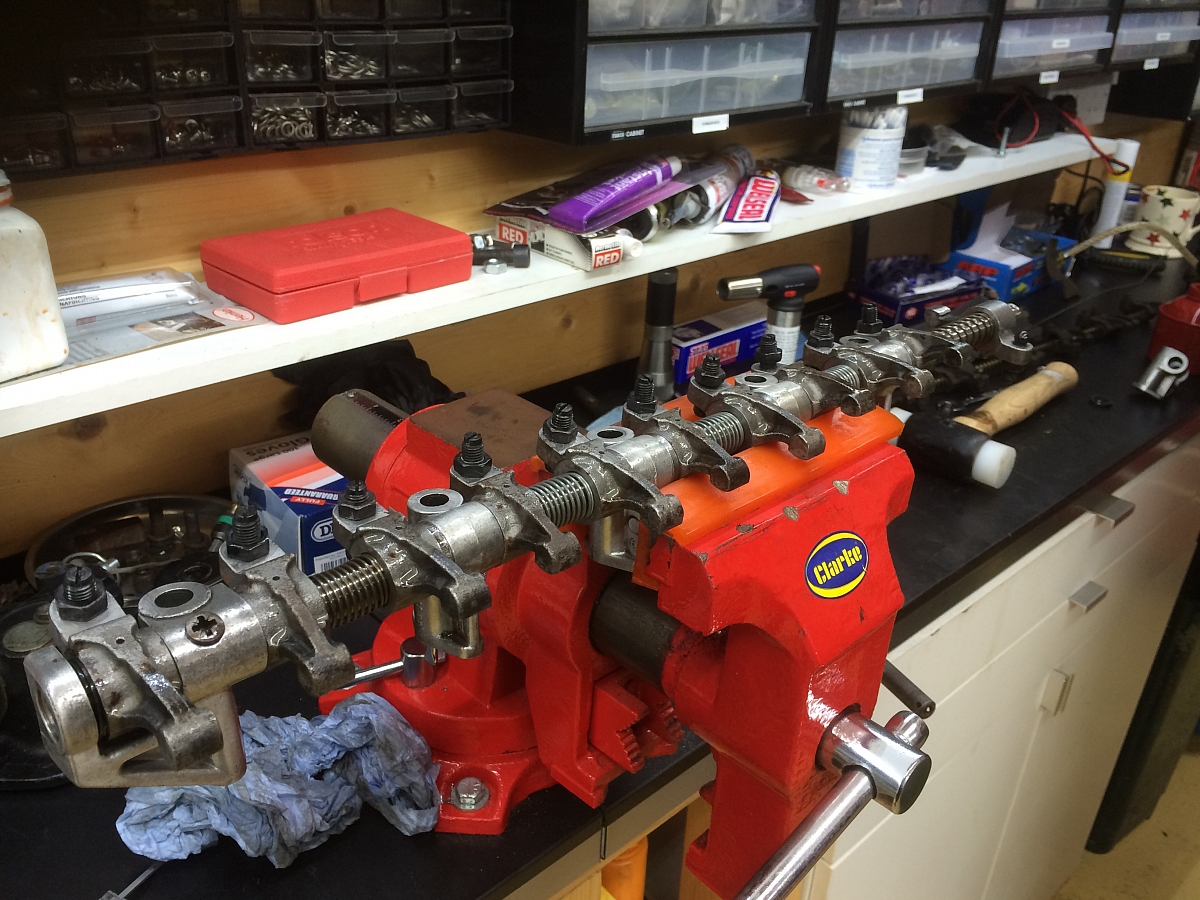
Spent another day with Paul assembling the engine, this time fitted the cylinder head with ARP new studs and nuts. Fitted the new rocker shaft and new rockers. Used and cleaned up the original pedestals and spacers. Fitted new thackery washers and springs. It took a very long time and boy is it easy to make a mistake. We used an old piece of wire and as we took the old one apart, put those on the old wire and re-assembled one item at a time. Had to heat up each pedestal to get them off, but they came off fairly easily, although one or 2 decided to be a bit difficult.. And before we took the old one apart we used an old piece of cardboard to pencil around the position of the pedestals and then measured the distances between them, so that they could be put back in the same position on the new shaft. So no mistakes. The new rocker lock nuts, turned out to be metric !! Filled the shaft with oil before re-fitting and setting up the tappets.
And finally fitted new exhaust/inlet studs, trial fitted the rocker cover which I have had machined on the bottom with a small shoulder to keep the gasket in place. I intend to use a silicone gasket.

12th March 2016
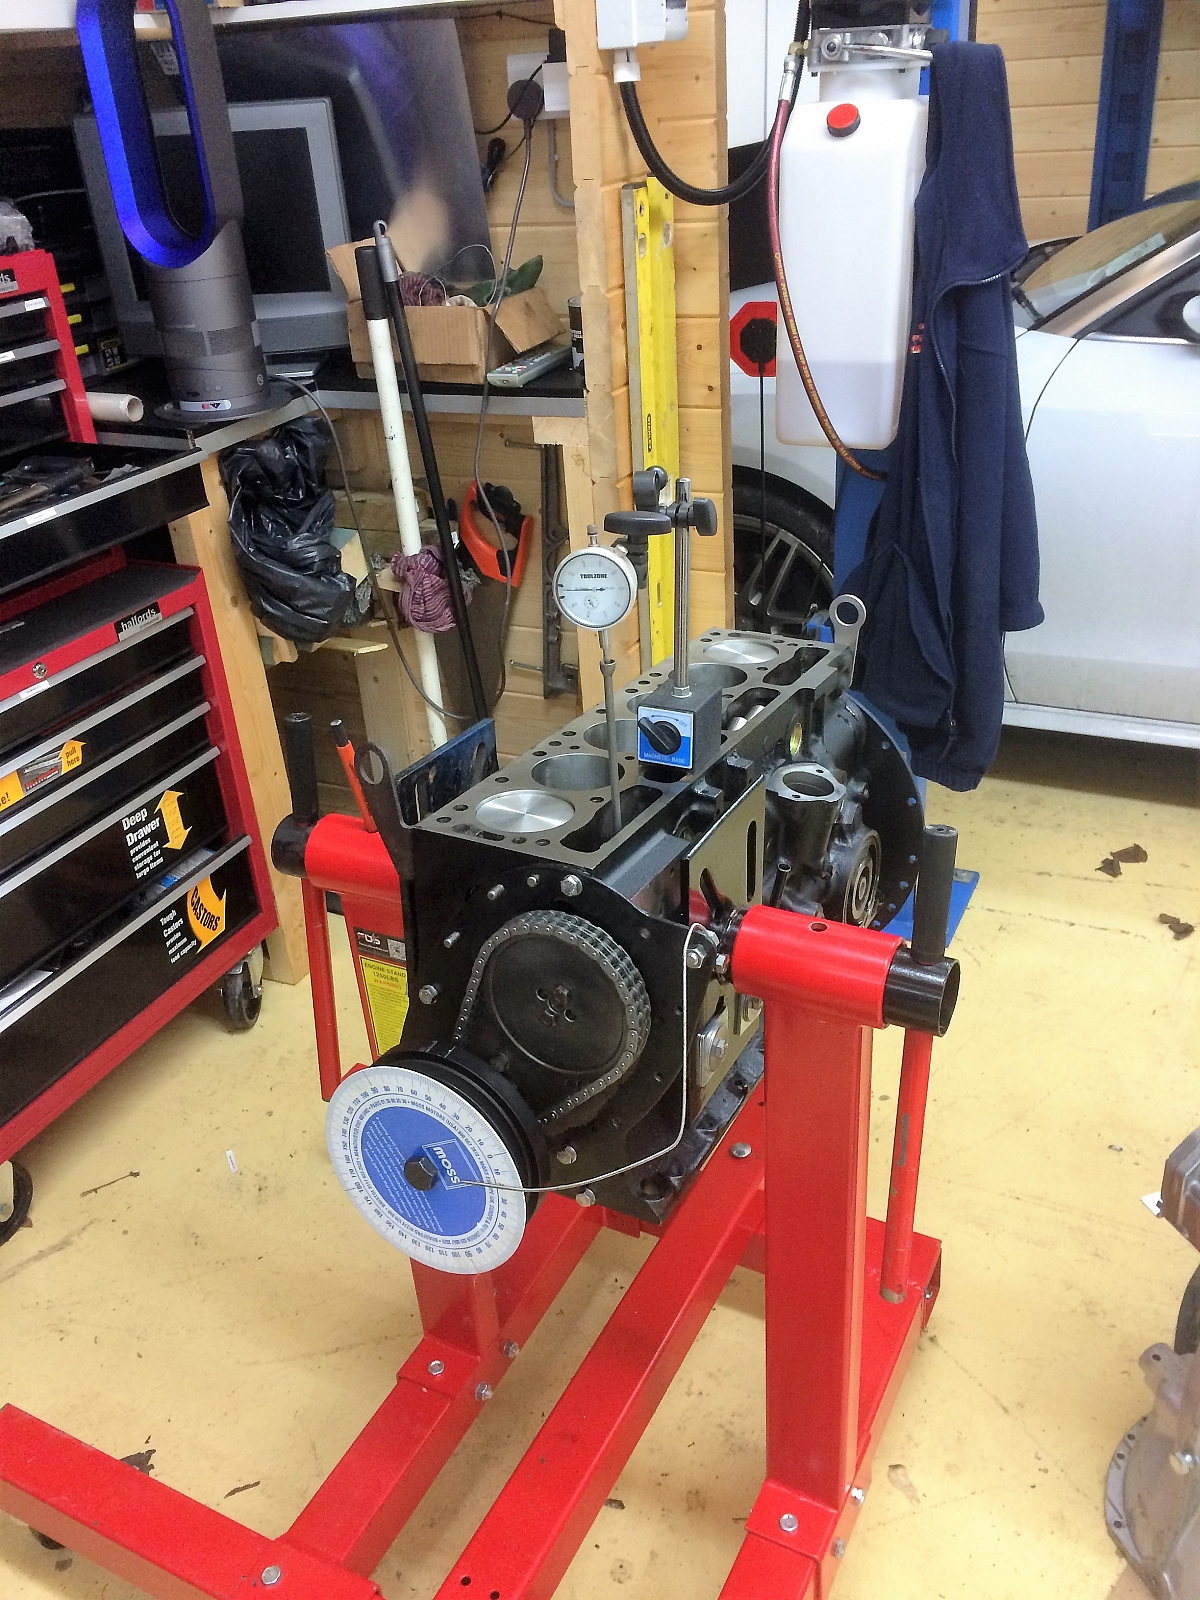
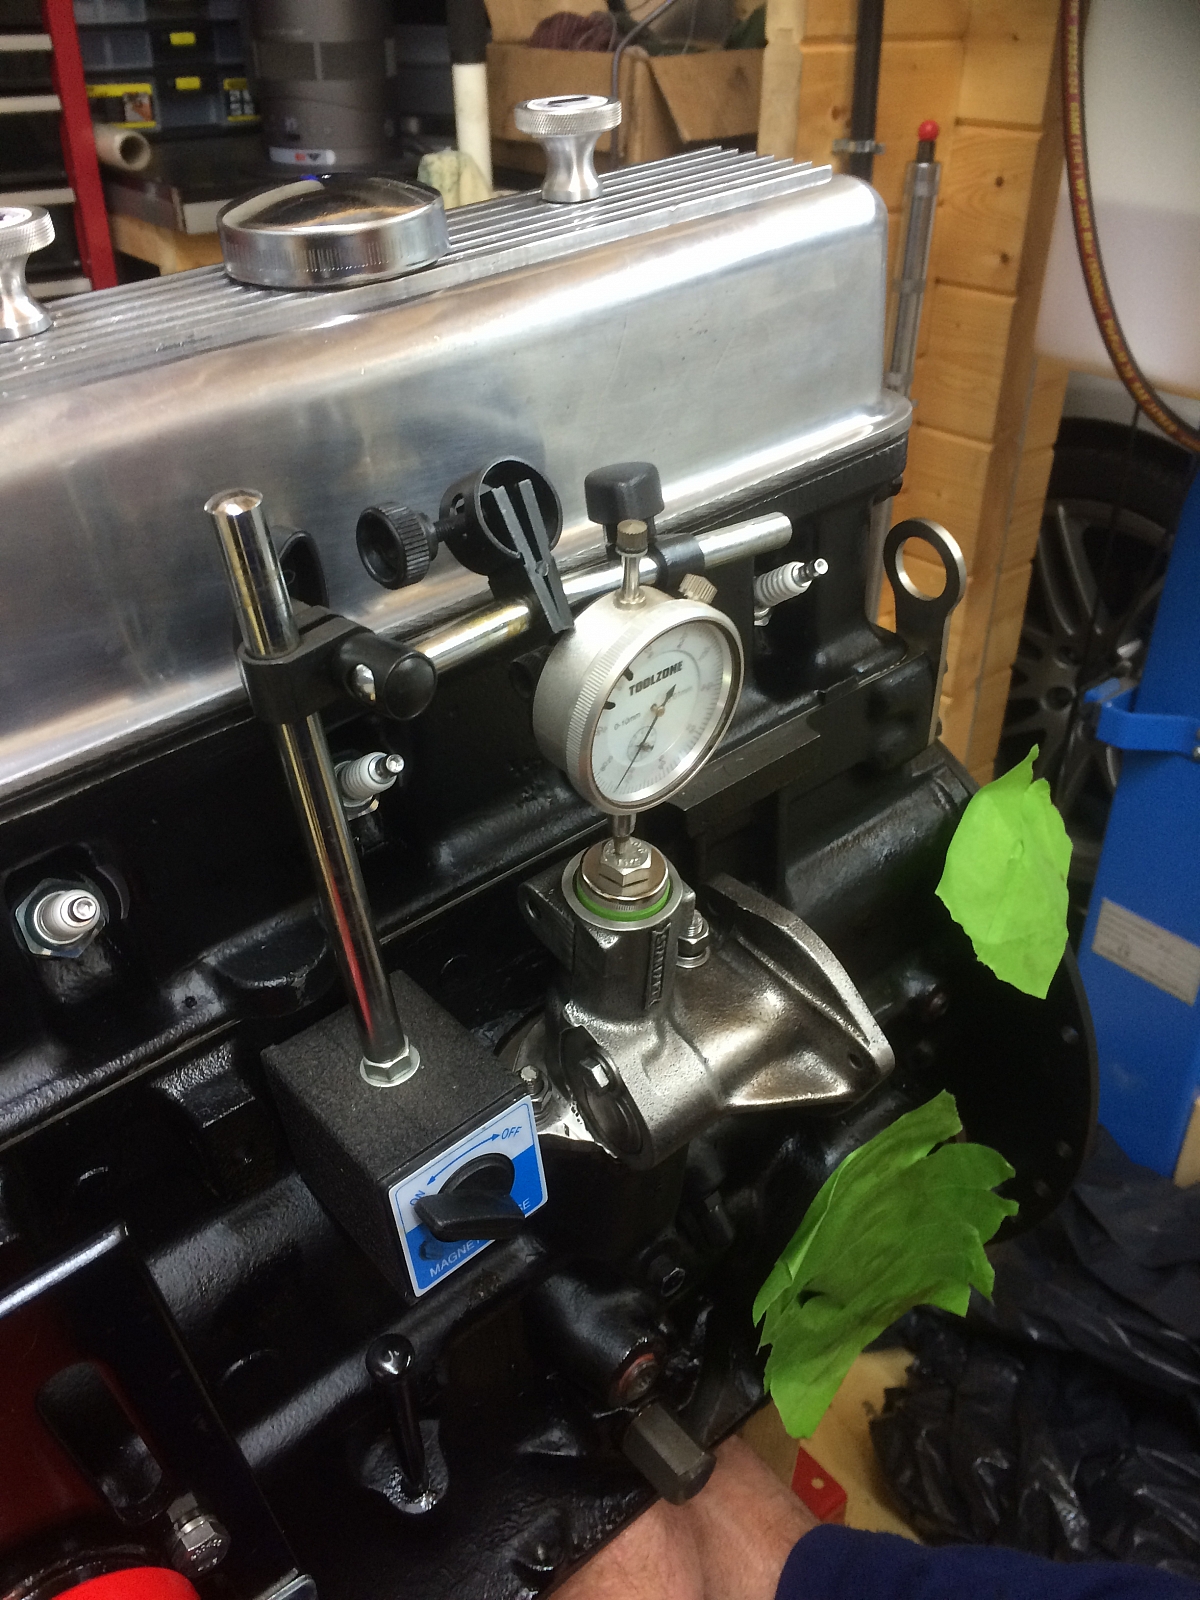
Not a lot of significant things done since the last entry, but spent several Saturdays doing various things. Mainly cleaning and re-painting parts. Example water housing , engine mount brackets and so on. Packing up and sending off the water housing to EPS for a complete re-build. Getting the alternator re-built, cleaning up the distributor pedestal so that new seals could be fitted. Rocker cover now fitted with slightly longer studs to enable the Le-mans hand nuts to fit. The Silicone gasket was a very neat fix with the machined shoulder. Lastly, this picture shows the pedestal end float being set up. All done and the pedestal has now been painted. Just awaiting the arrival of the re-built metering unit from Neil Ferguson before final fitting.
Next jobs. Fit and set up the metering unit, fit the flywheel, sump, clutch and wait for a new bracket to arrive that fits behind the water pump for the power steering pump. Then fit the water pump, housing and ancilliaries. Then take the engine off the stand. Modify the stand into a cradle so that the gearbox can be attached.
3rd April 2016
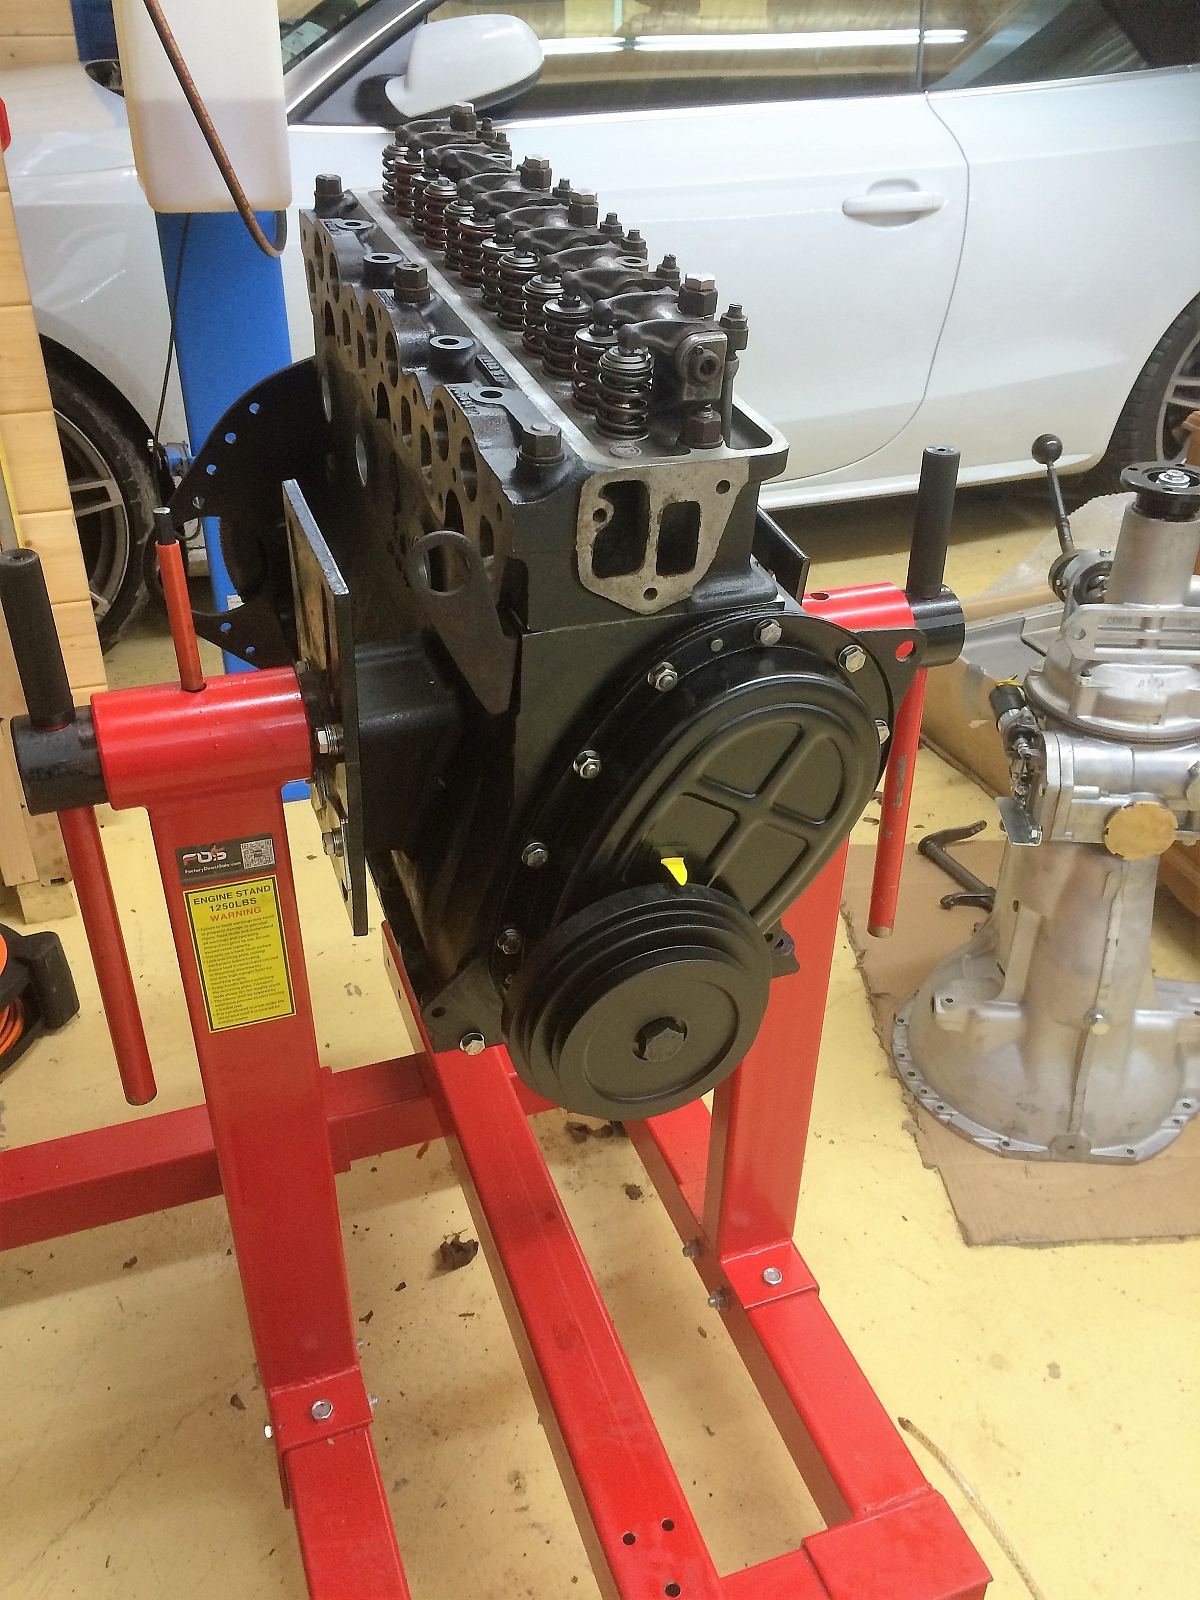
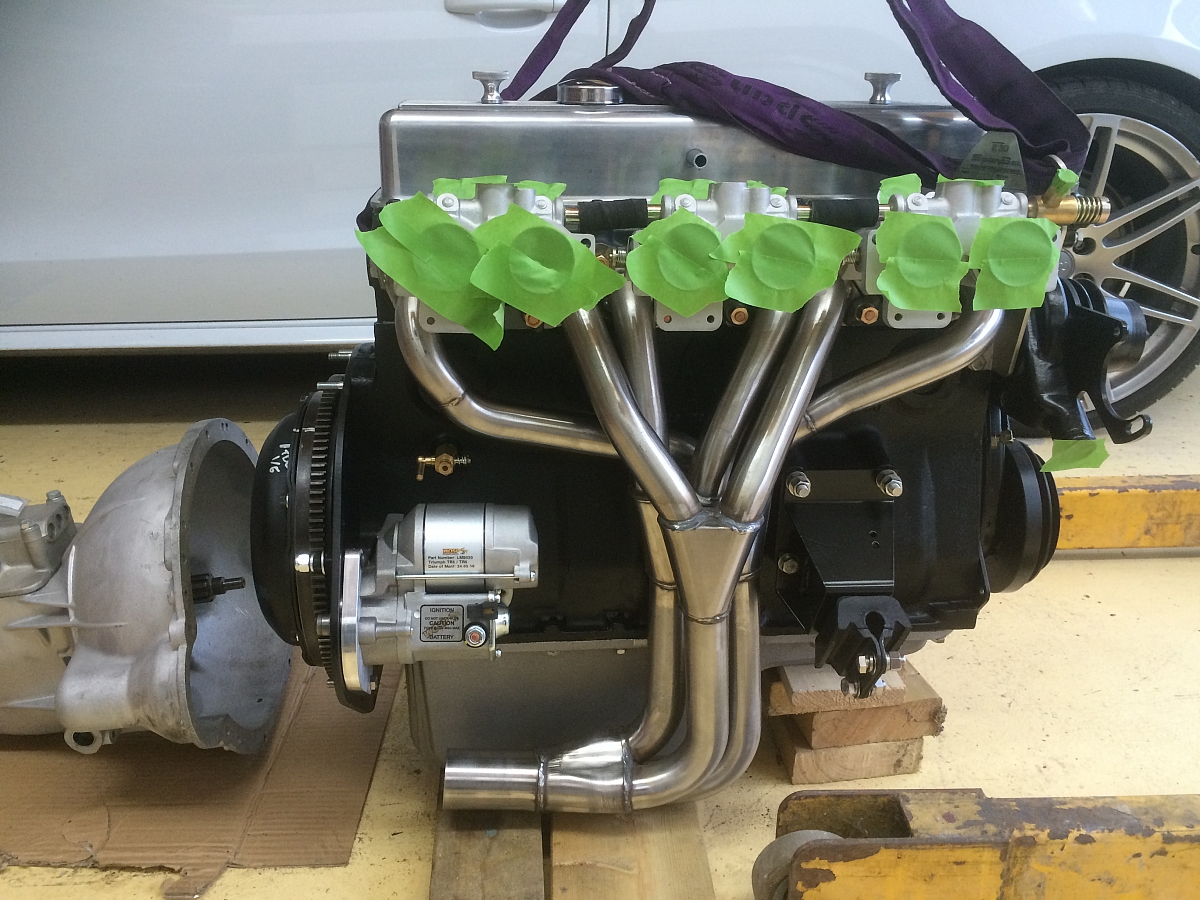
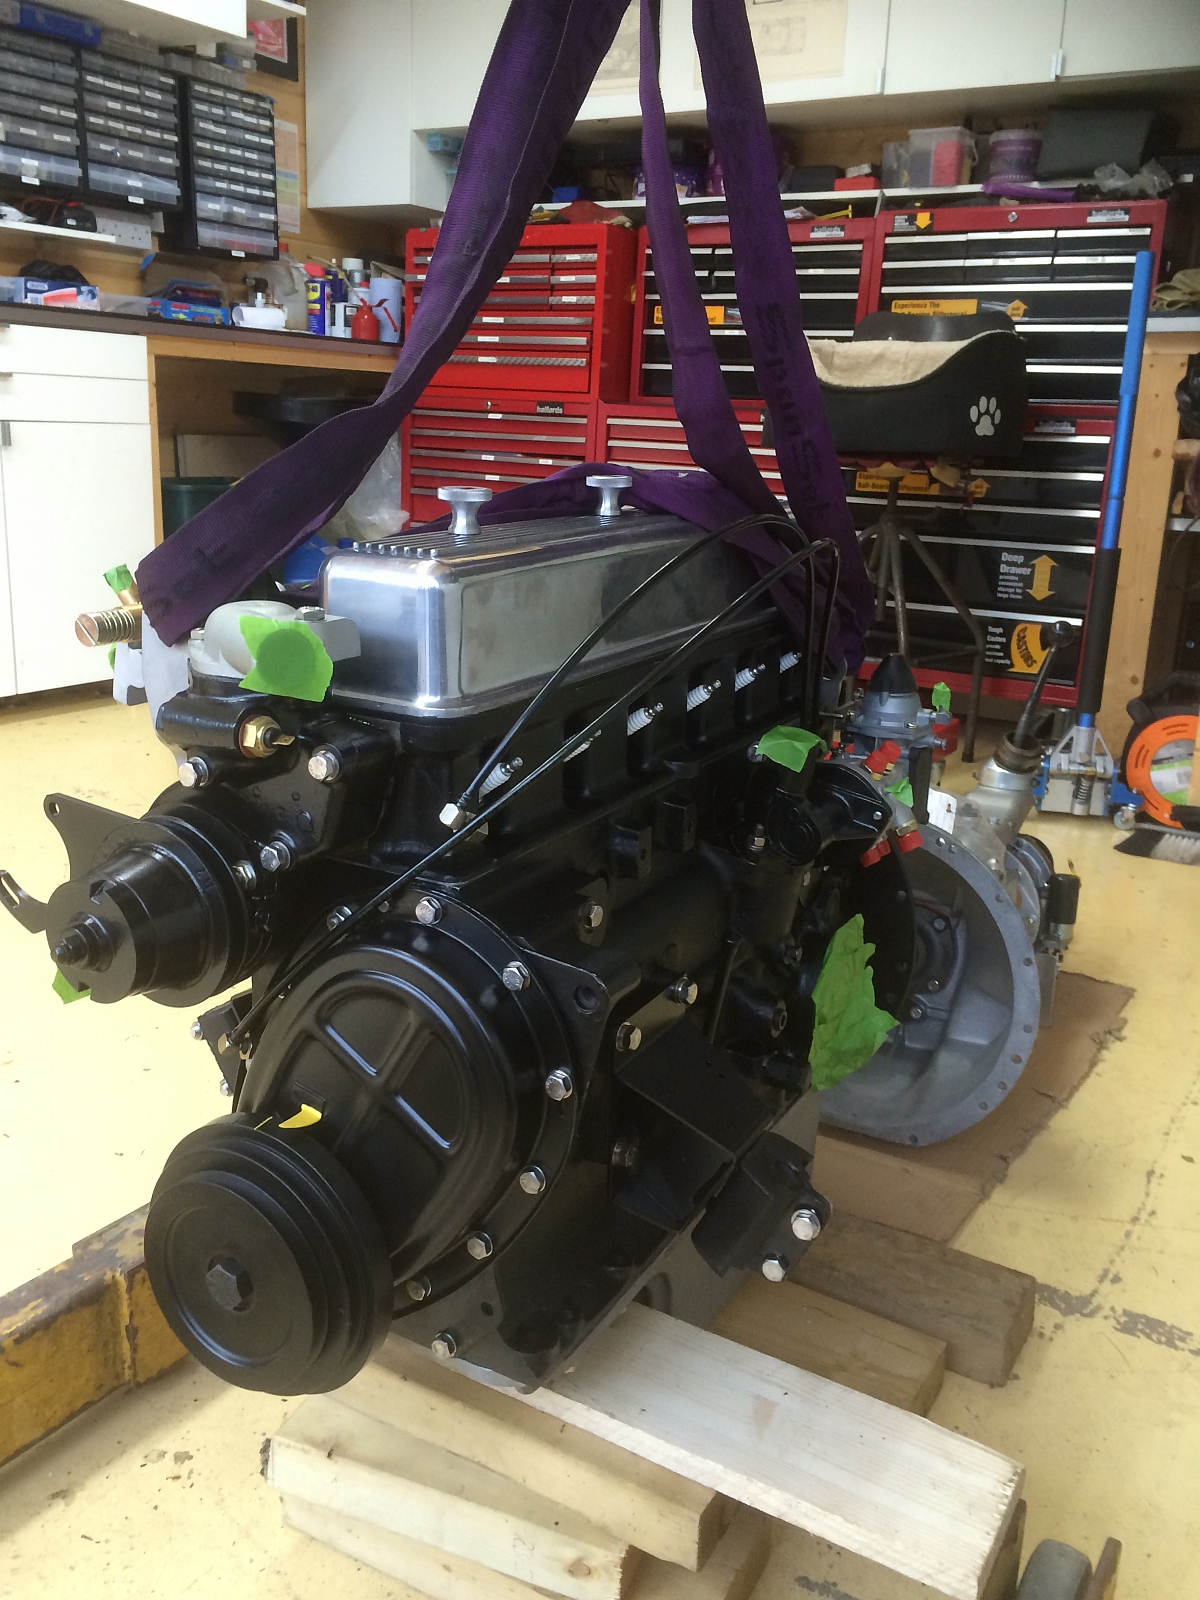
The engine is now off it's engine stand.
Some ancilliary stuff fitted, sump, clutch, metering unit, exhaust manifold, throttle bodies, water pump and housing and power steering pump bracket, thermostat, engine mounts etc. Starter motor just a trial fit.
The metering unit timing got a little tricky. I couldn't fathom out why I couldn't get the correct moon shape within No.6 port. So, Mr. Paul, help. He quickly deduced I had it on the wrong engine stroke. Should have been on the firing stroke. However it still wouldn't show the correct position,which if you look in the brown book, gives you 3 correct options. None of which show a fully open position. We tried numerous permutations, none of which worked. But.... then Mr.Paul brought out an original Lucas test kit, which shows the port should be fully open. This is in contrast to the brown book. So that's where we left it - fully open. As I would rather trust the original Lucas diagram than the brown book.
Next - fit the gearbox to the engine, but first get the thrust bearing carrier machined to accept square pegs on the end of the clutch fork, instead of the standard round pegs. Picture below.