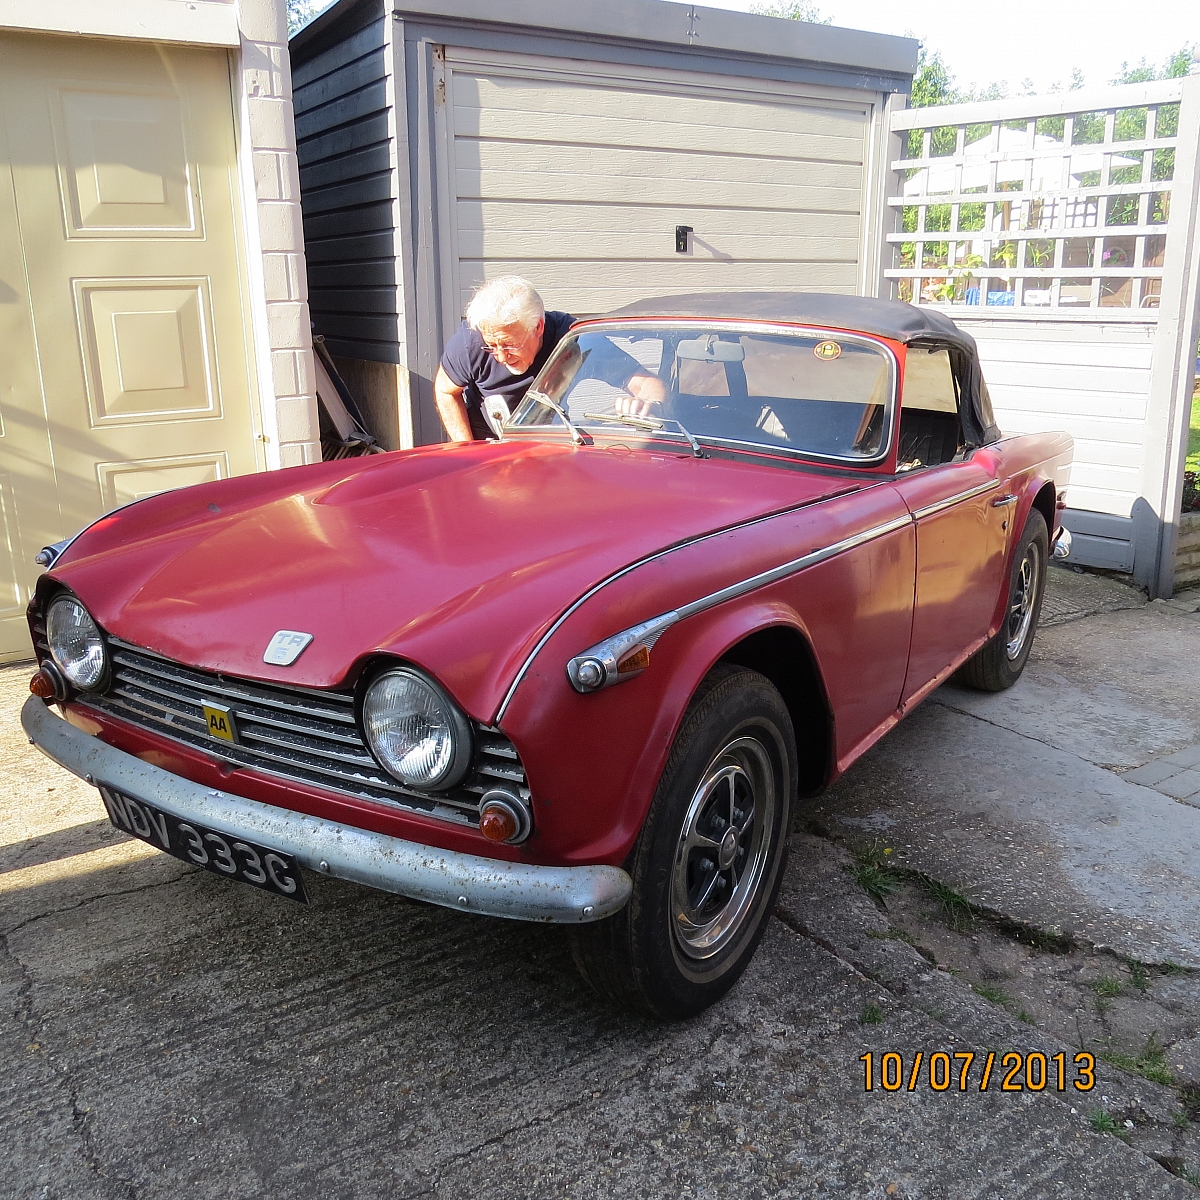
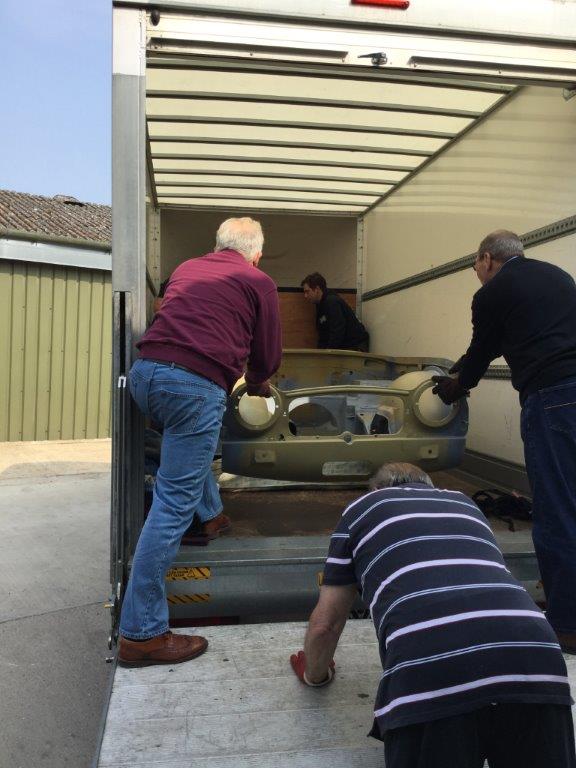
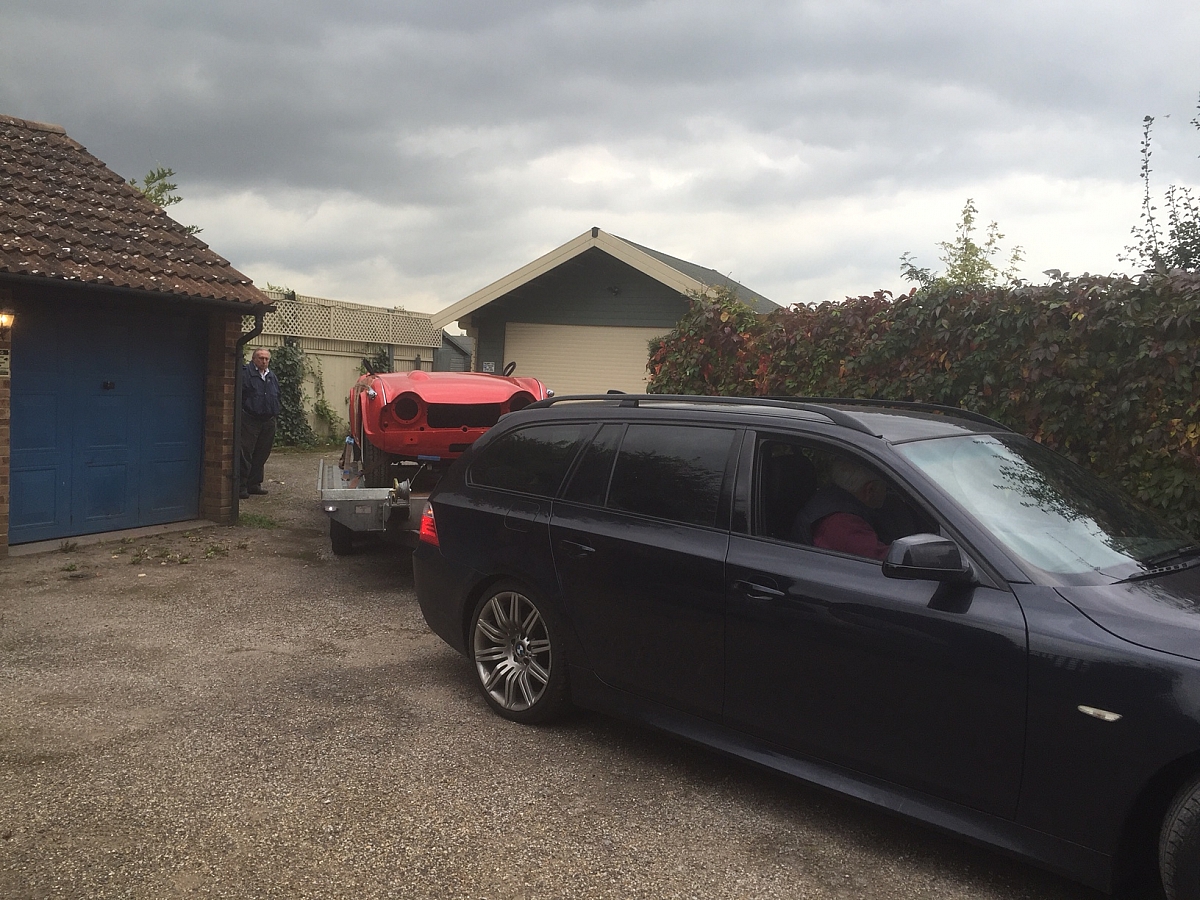
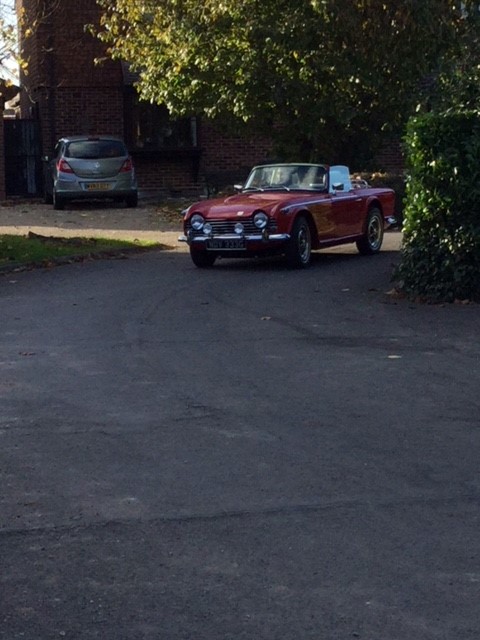
This is a genuine UK car. 1st registered in Devon during - 1968. It has had 4 owners (2 of which at the same address) She has been dry stored in a barn for some 27 years. She's in pretty good shape and our restoration started in earnest July / Aug 2013.
Here are a few pictures that provide a brief overview of progress so far.I've missed out all those things you also need to do, like re-furbishing all those parts that you can't buy, or need to re-use as original parts. Hours and hours of work mess and dirt. Cleaning, de-greasing, shot blasting, painting and so on. All those of you that have done this before, will know exactly what I mean.
I can't weld, I can't paint and I don't have the in depth experience, expertise and knowledge that others do, but I will undertake to learn and apply myself to undertake all the tasks that I can. I have had a lot of help and would not have made the progress that has been achieved so far without it. Thank you. You know who you are. Lastly a big thank you to the suppliers as well. They have all been great.
July 2013
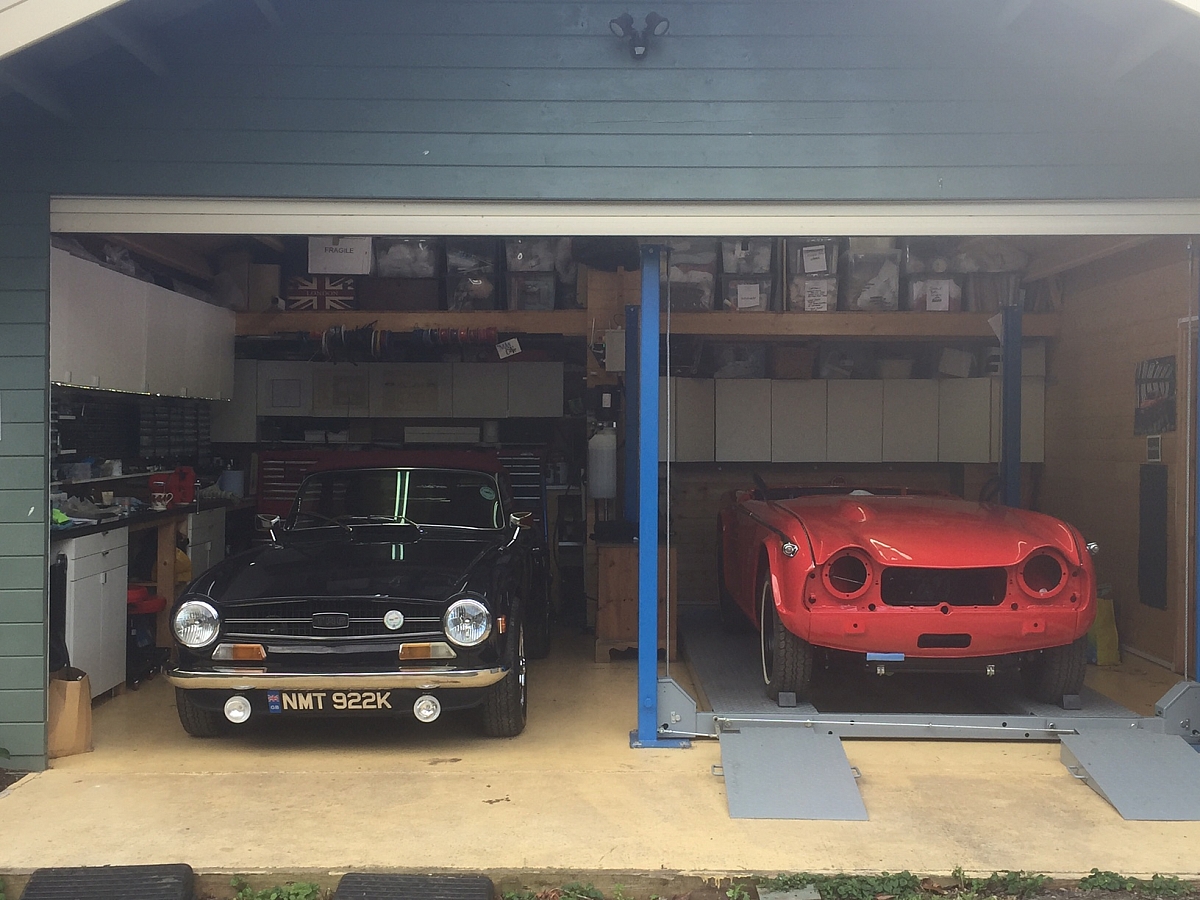
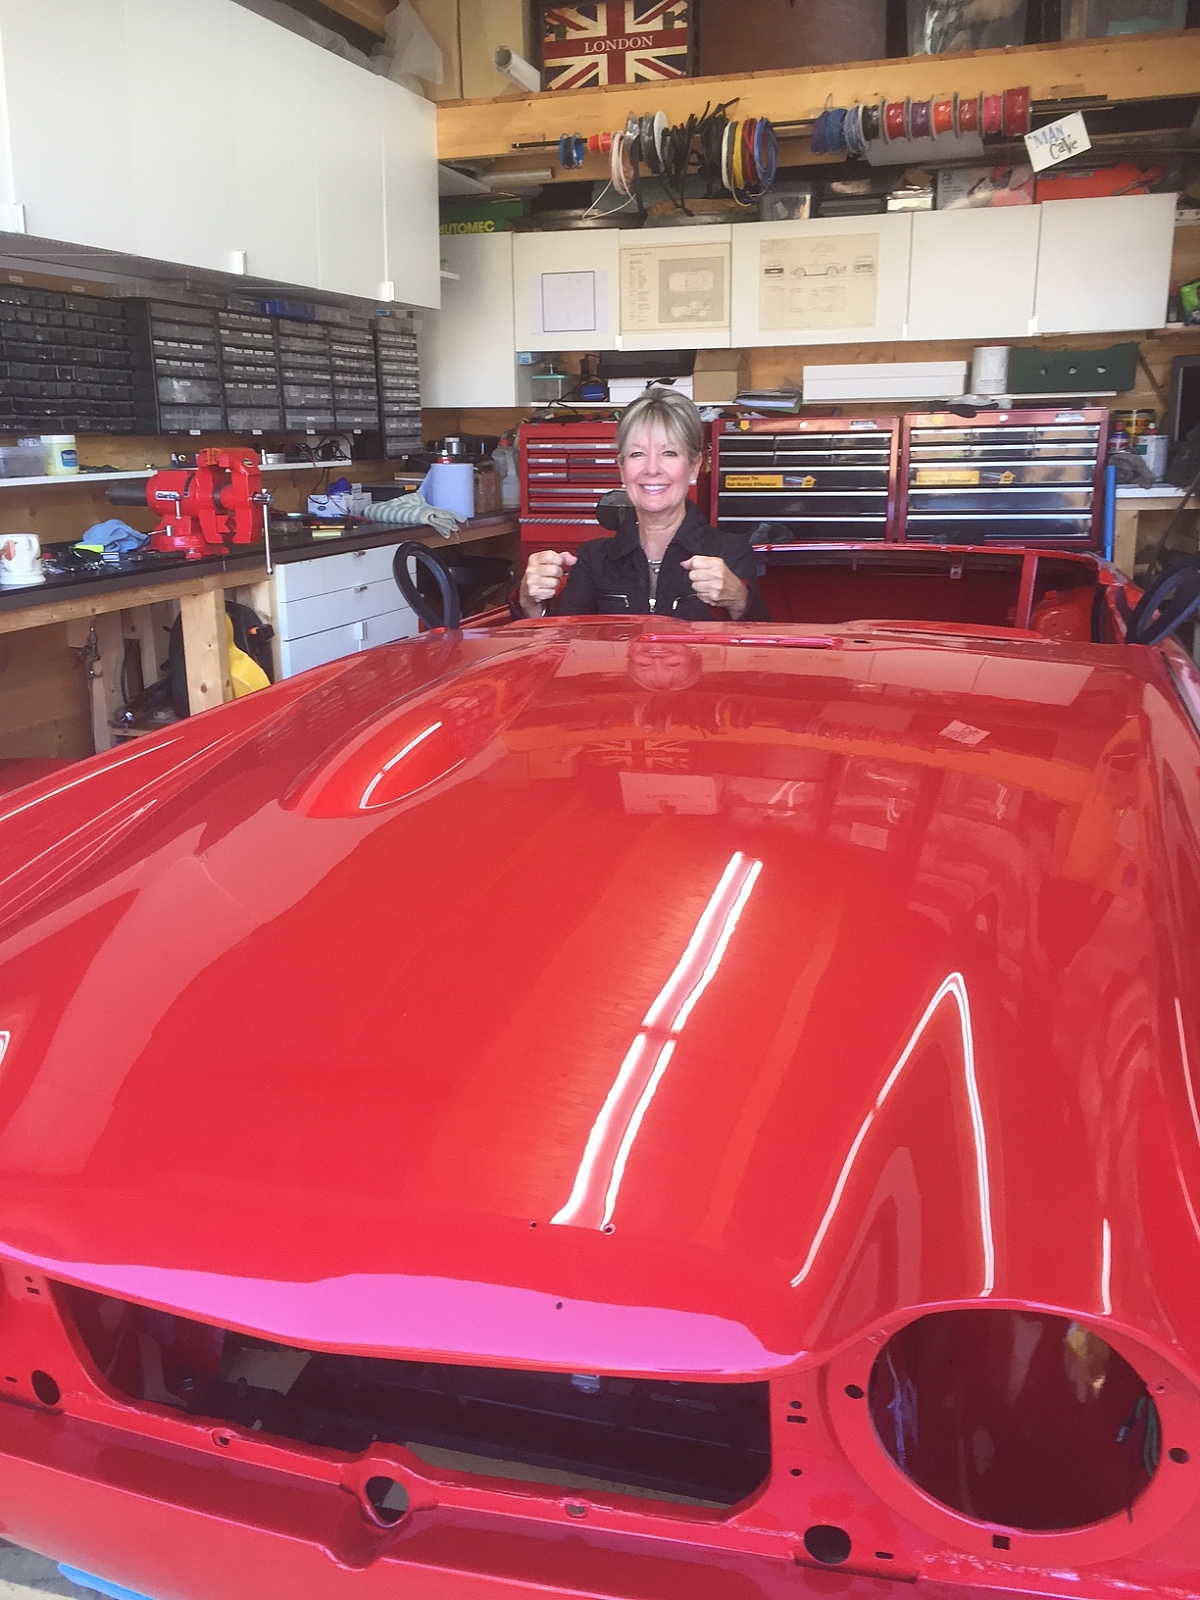
This car is being re-built for my partner "Fiona". One day I hope she will be smiling even more when the car has been completed.

August 2013
Yuk...

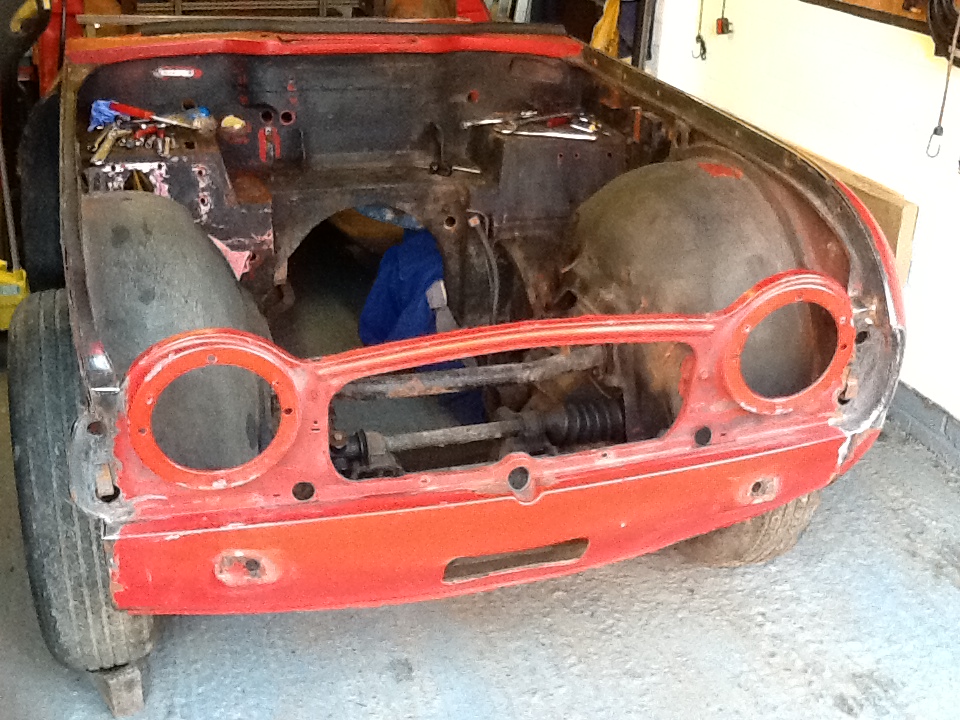
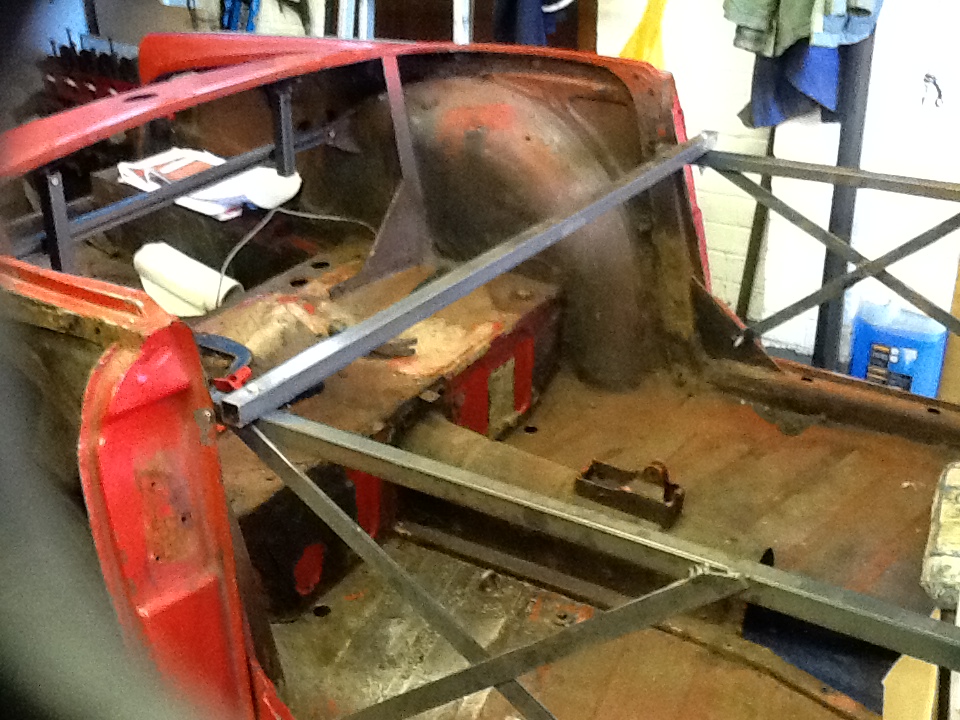
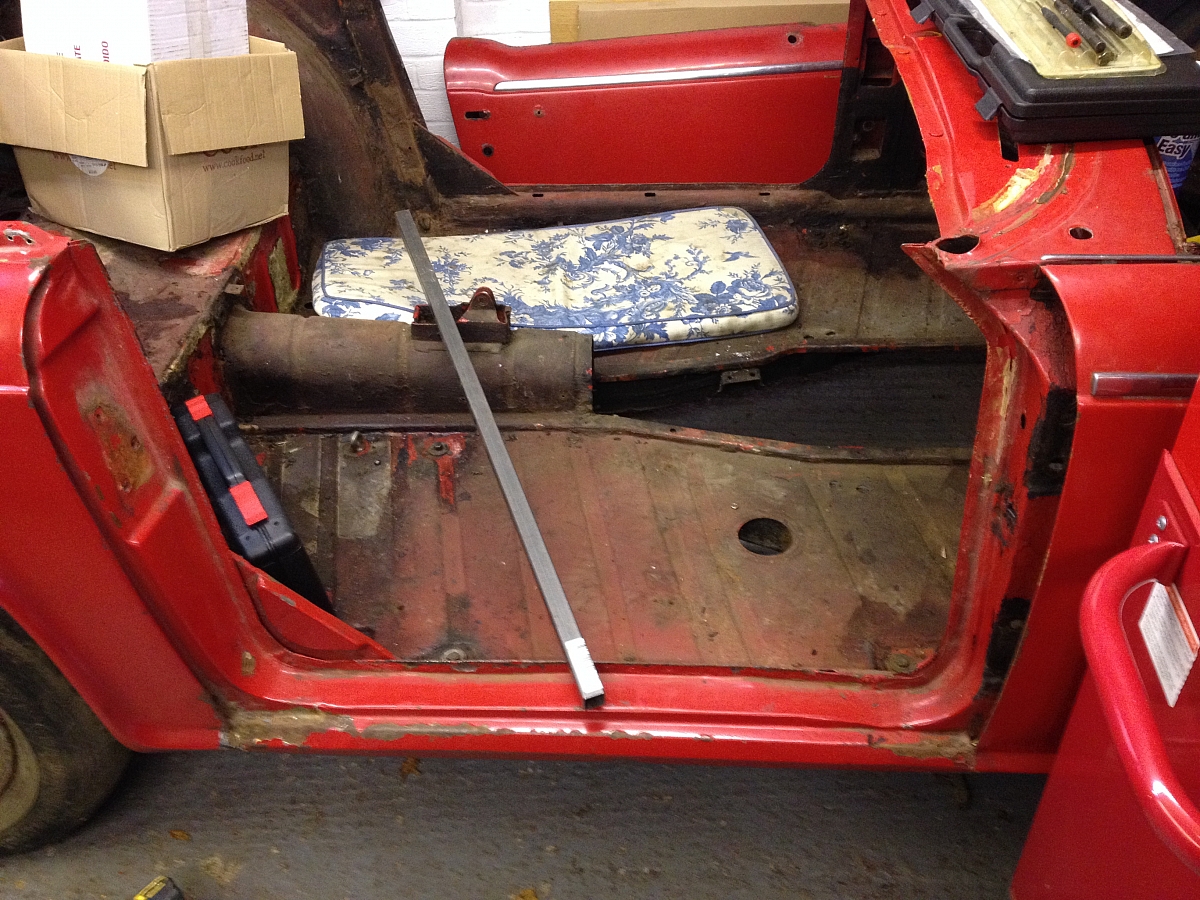
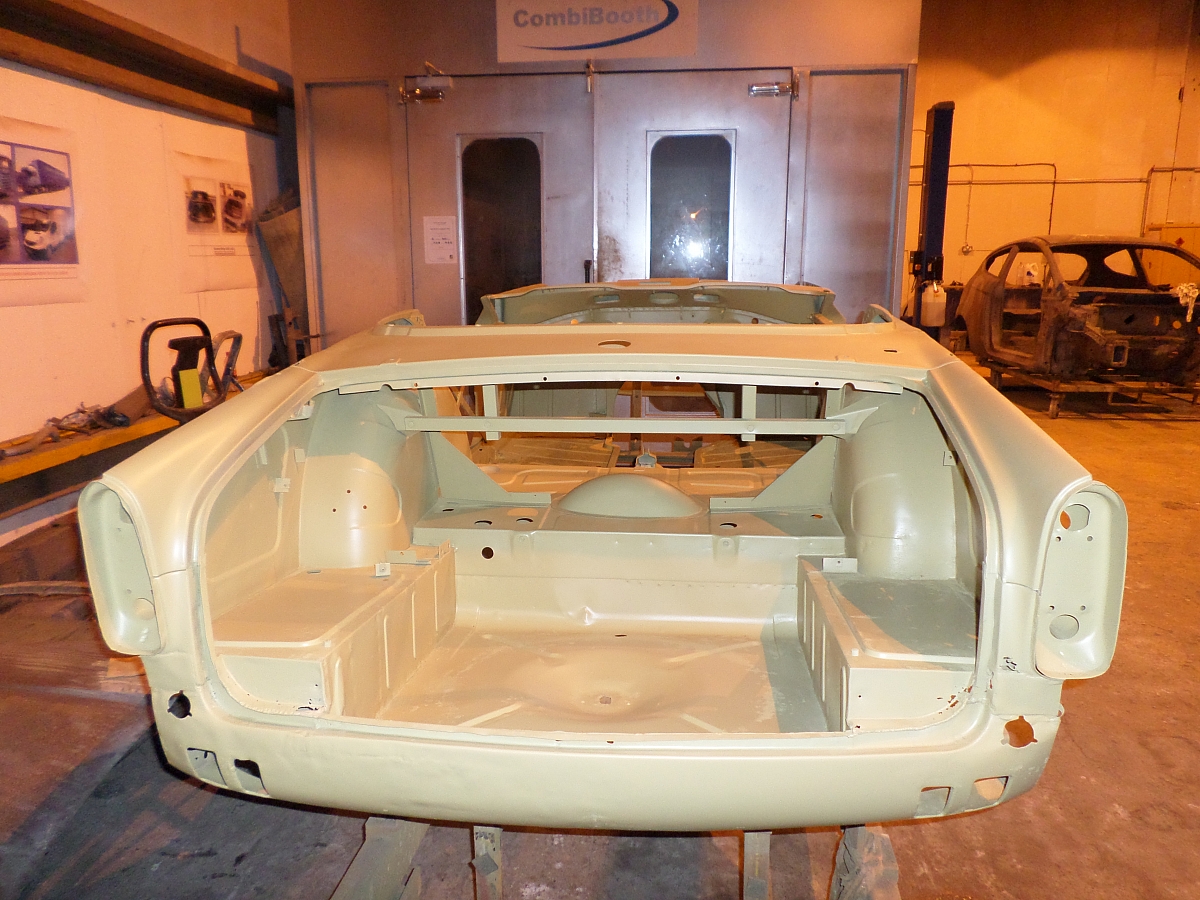
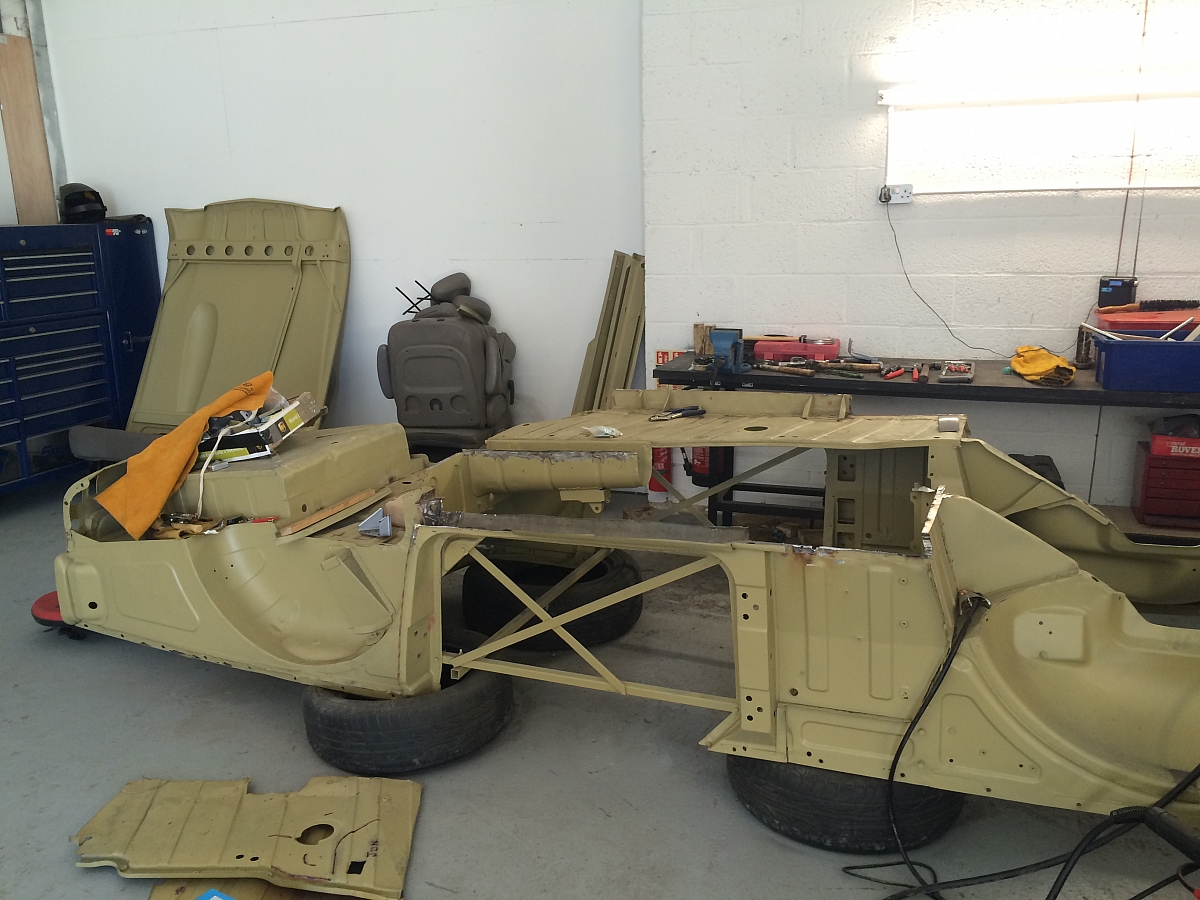
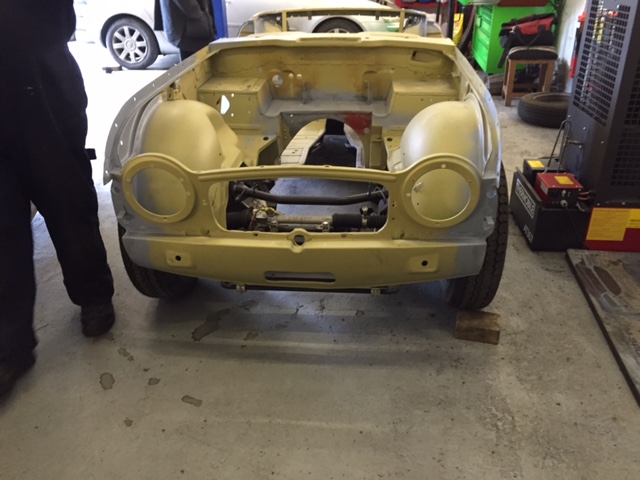
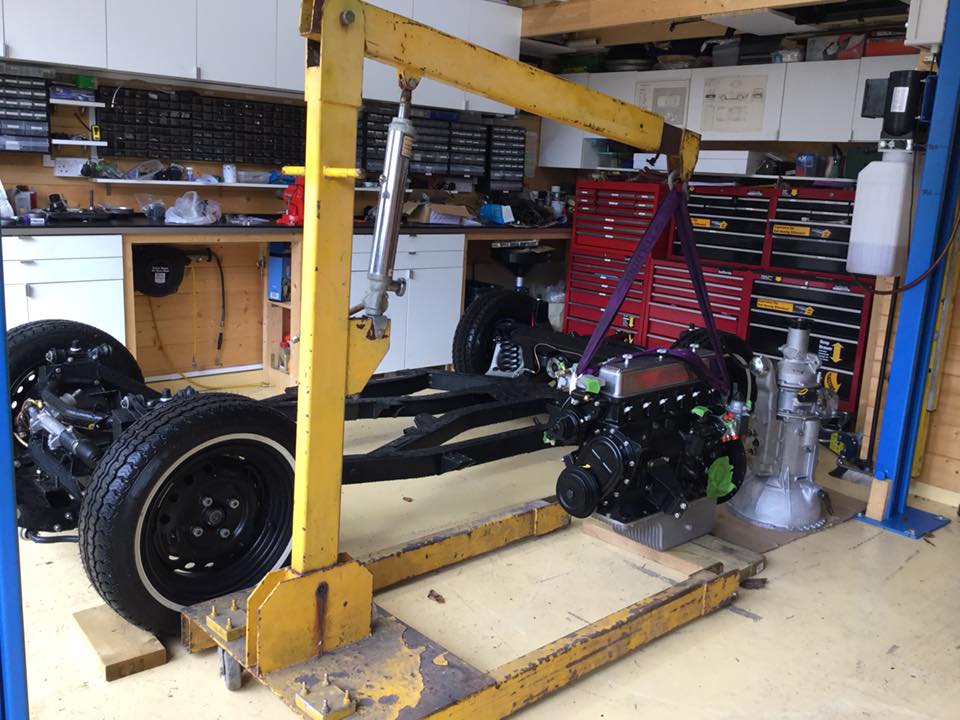
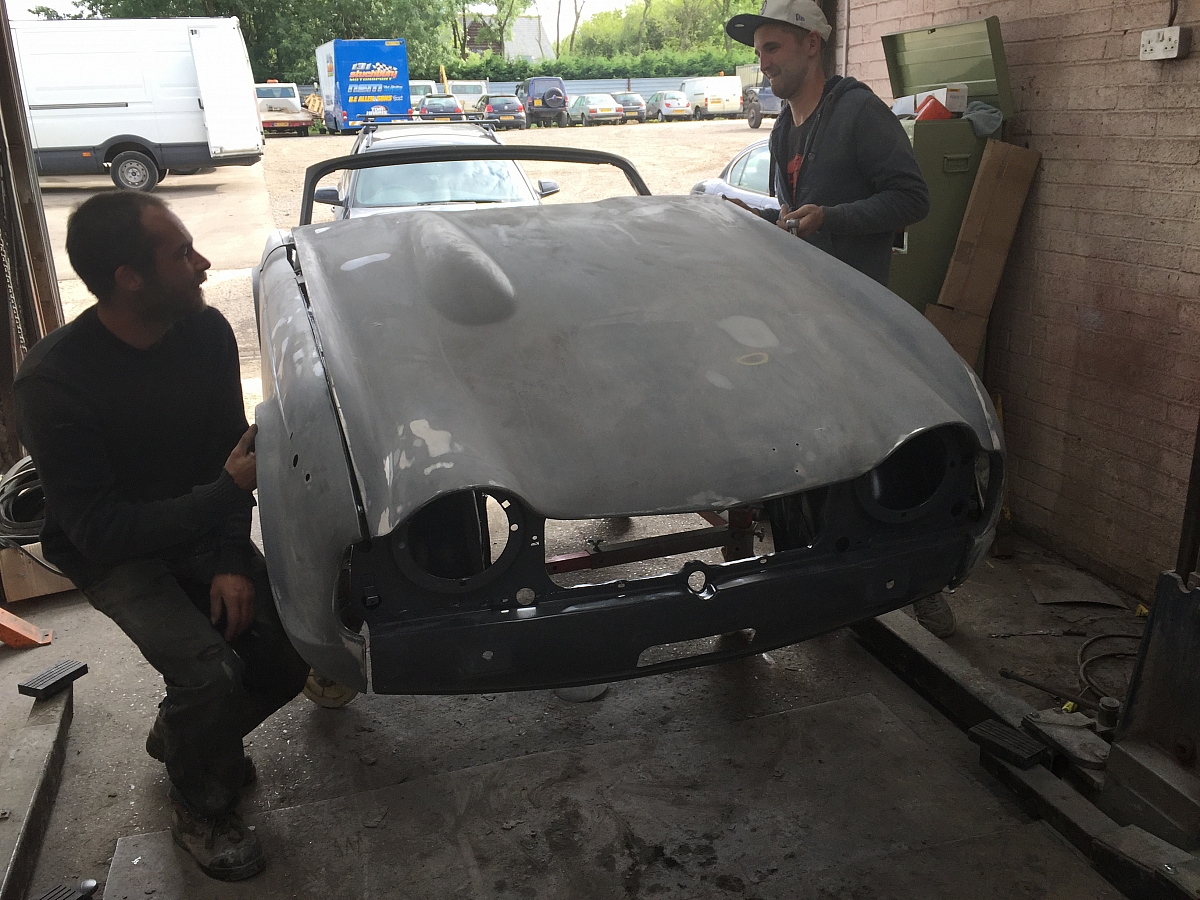
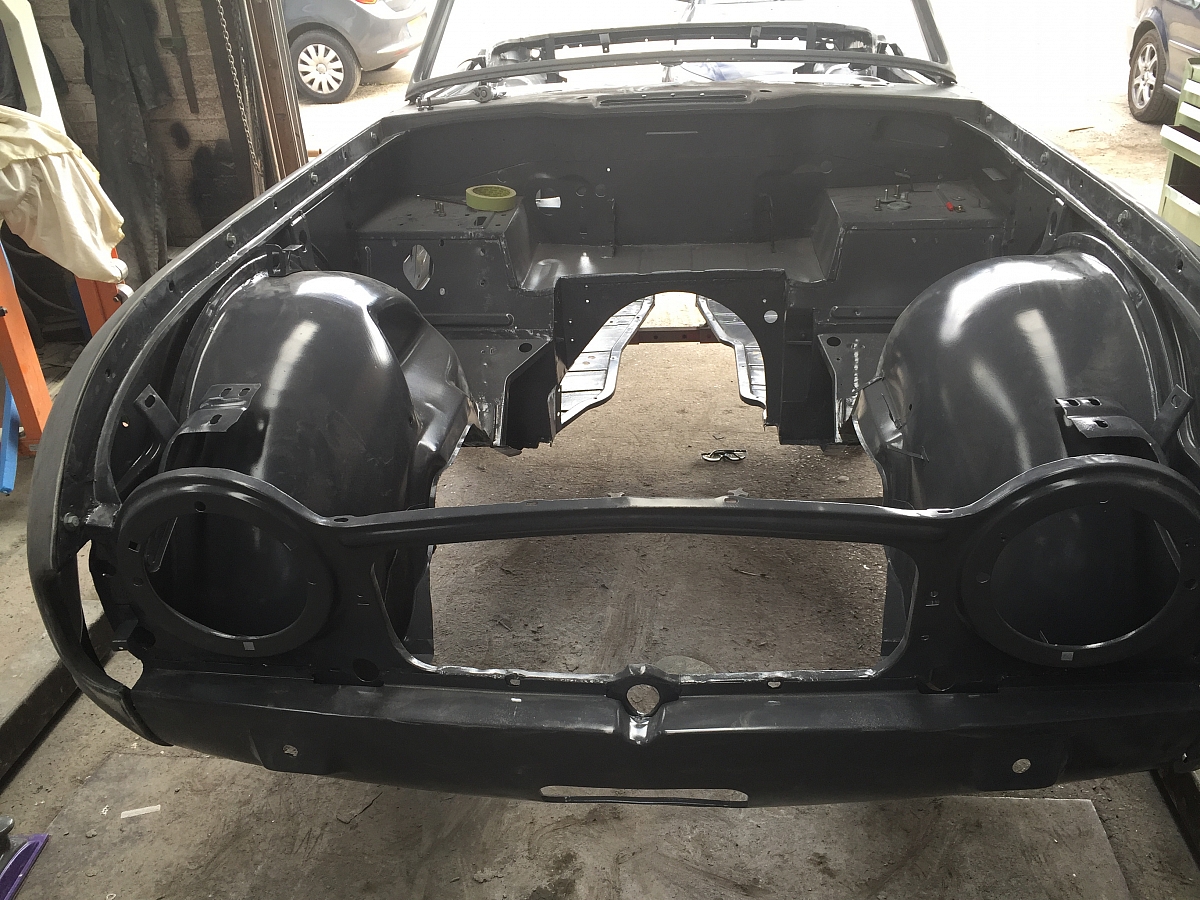
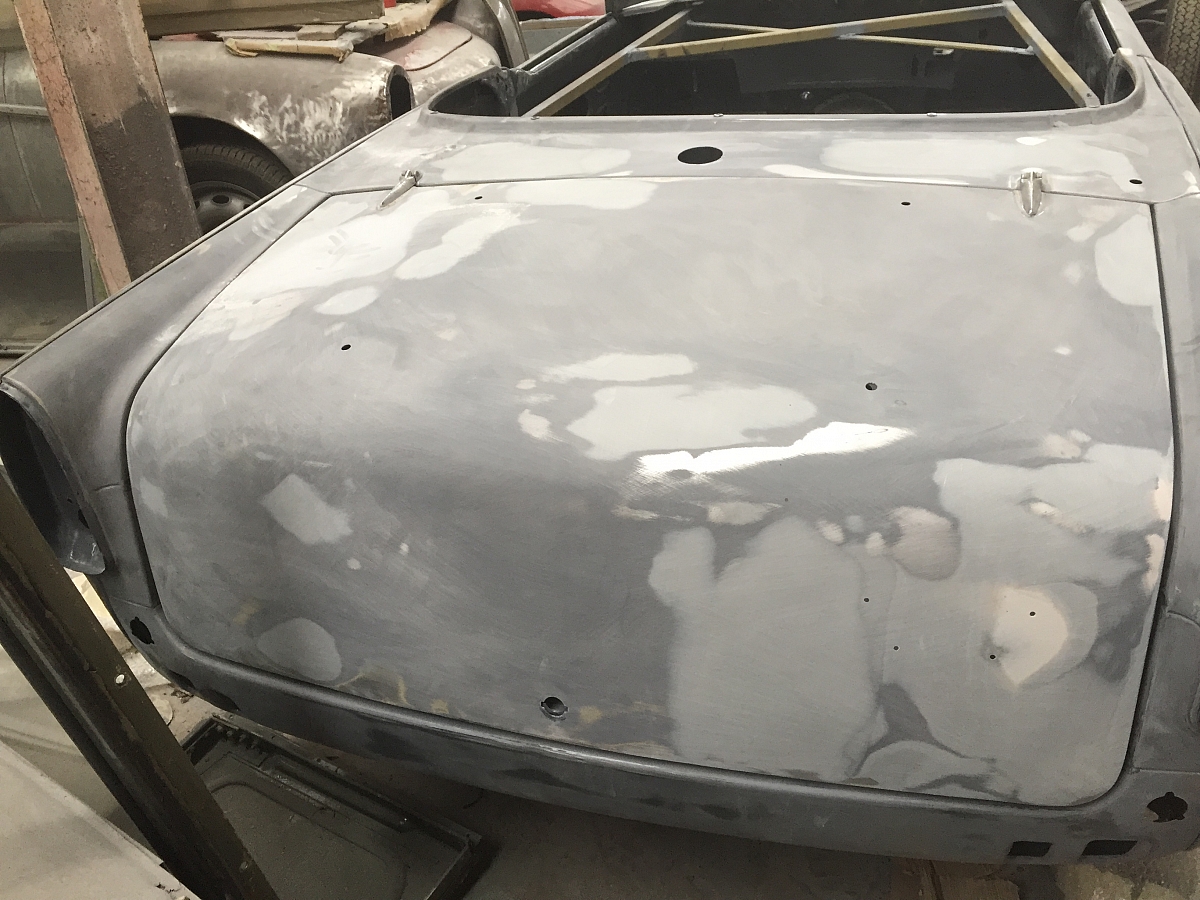
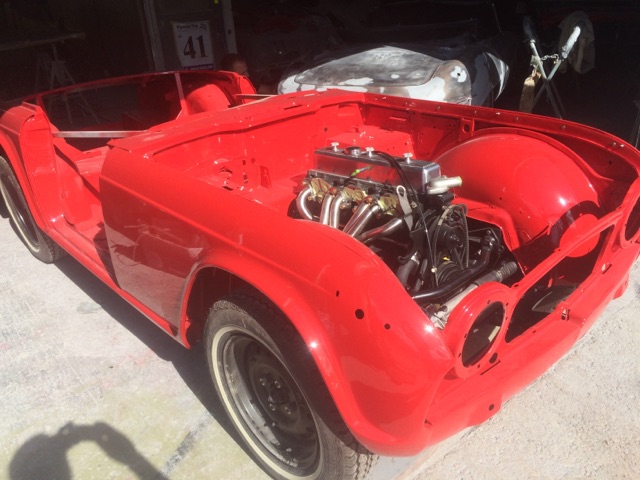
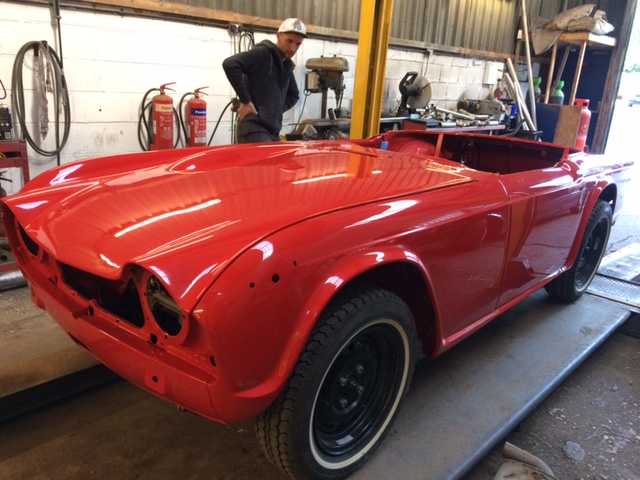
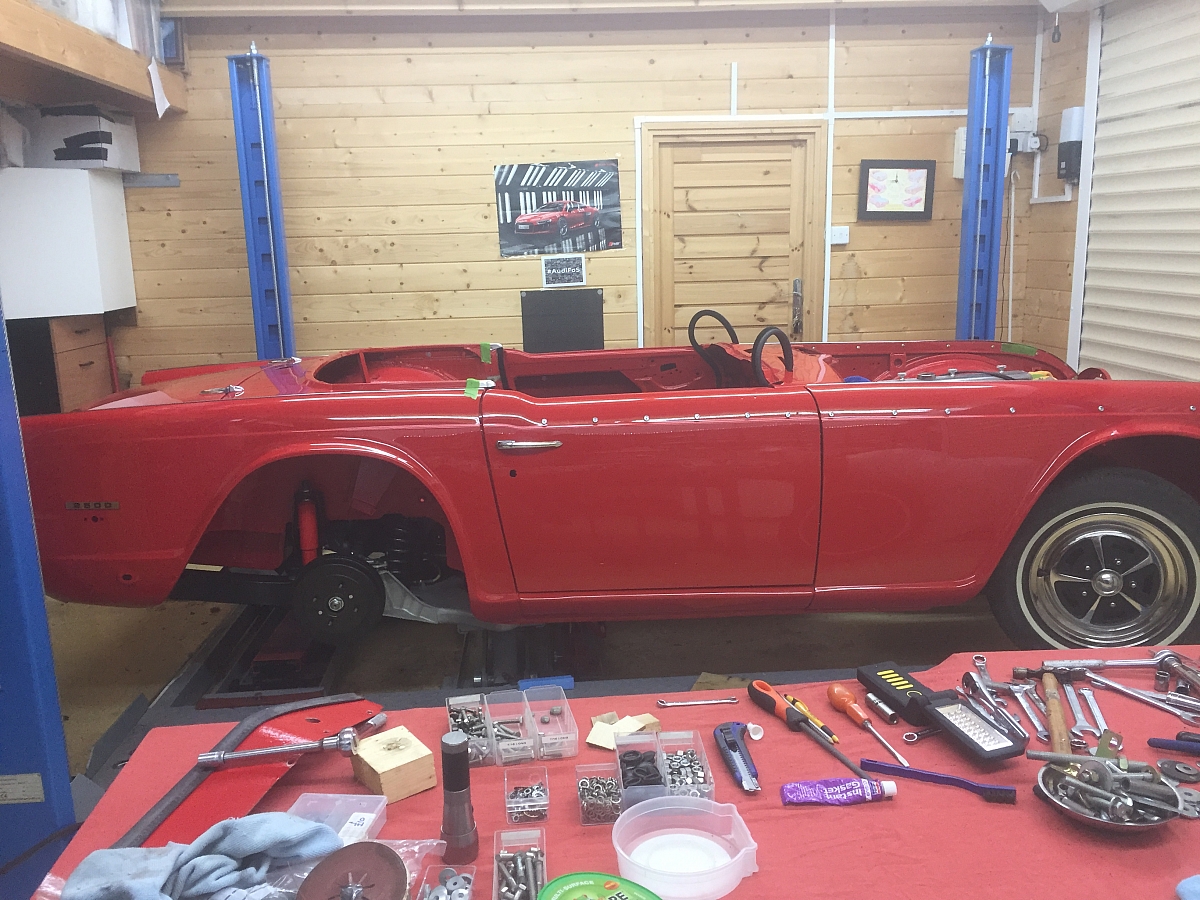
February 2014 - Body off. A bit messy but looks reasonable. Well at this stage anyway.
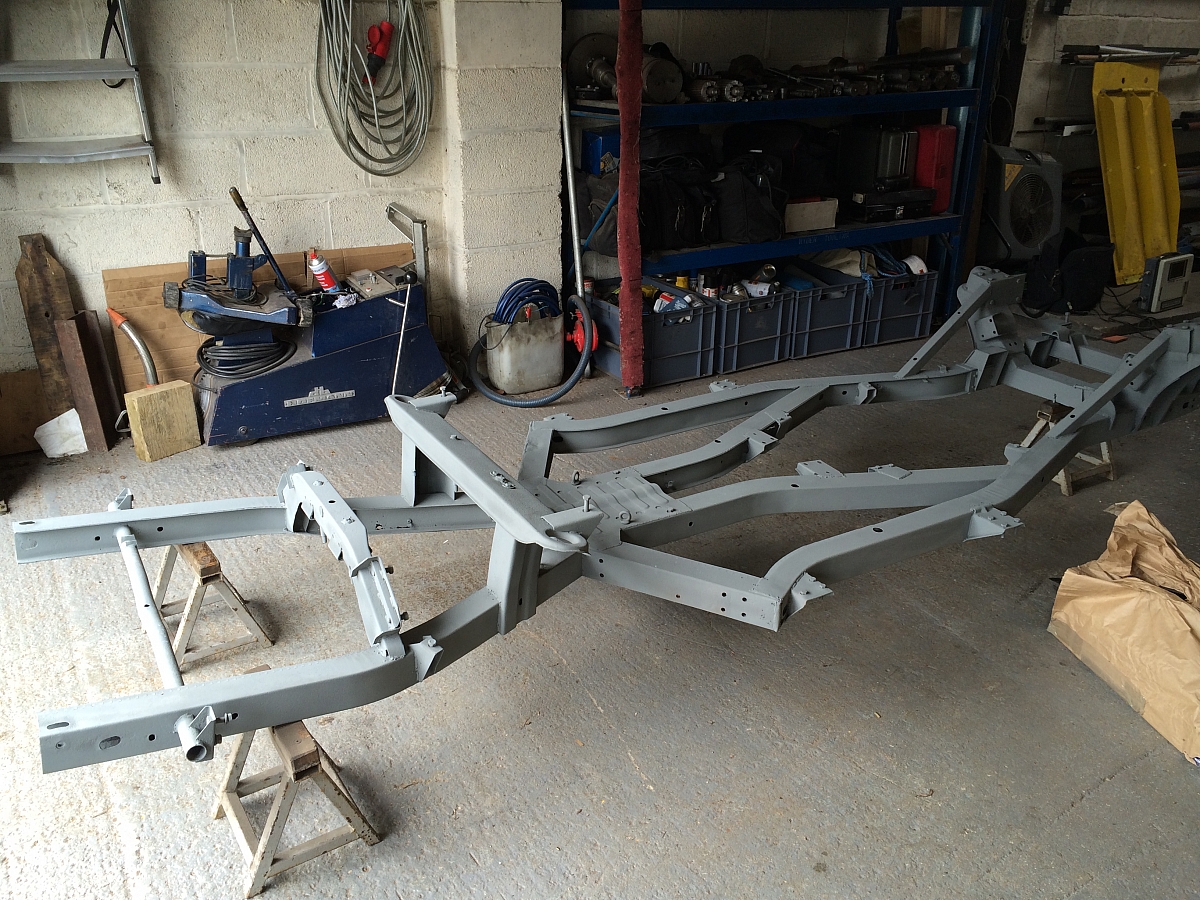
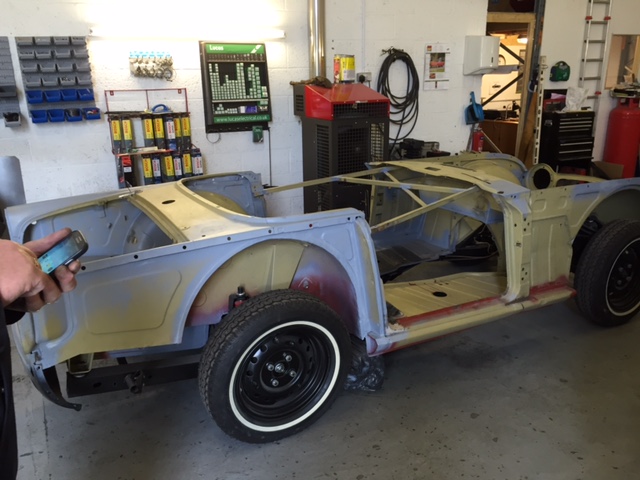
August 2014 -The chassis after shot blasting and priming before the repairs were carried out.
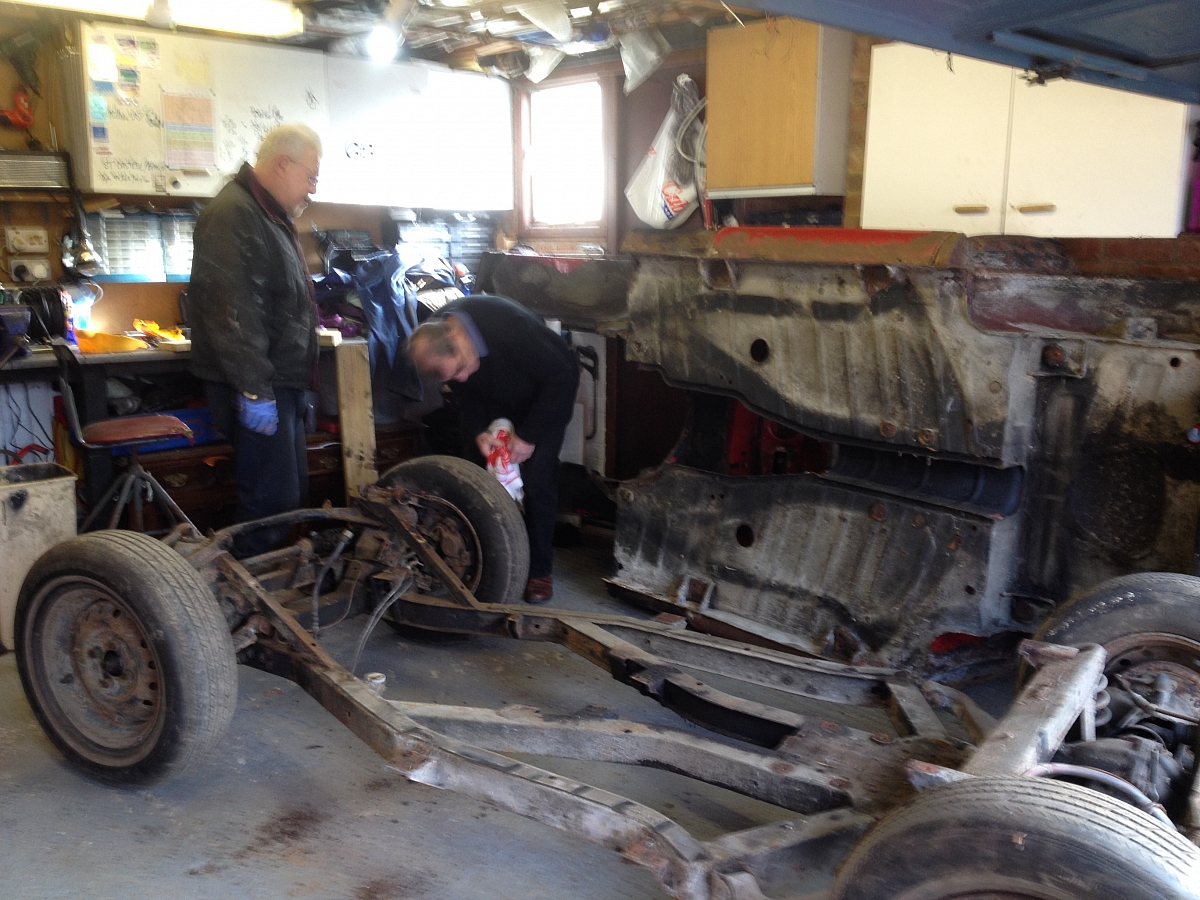
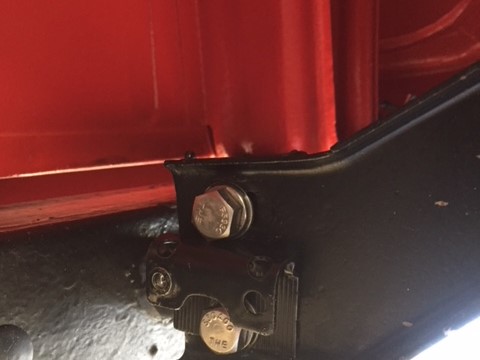
Aug - Sept 2014 The repairs to the chassis were reasonably straightforward. All the usual sections were replaced, renewed and strengthened. Extra jacking plates were fitted to the front cross member and the rear legs and a new bridge was fitted. The chassis was found to be straight with no evidence of any accident damage, except some distortion was found around the front wishbone mounts. So these were also renewed.


September 2014 - The laborious task of waxoyling, painting,inside and outside. I used a remote camera to inspect the inside to ensure everything had been well treated. Messy job.


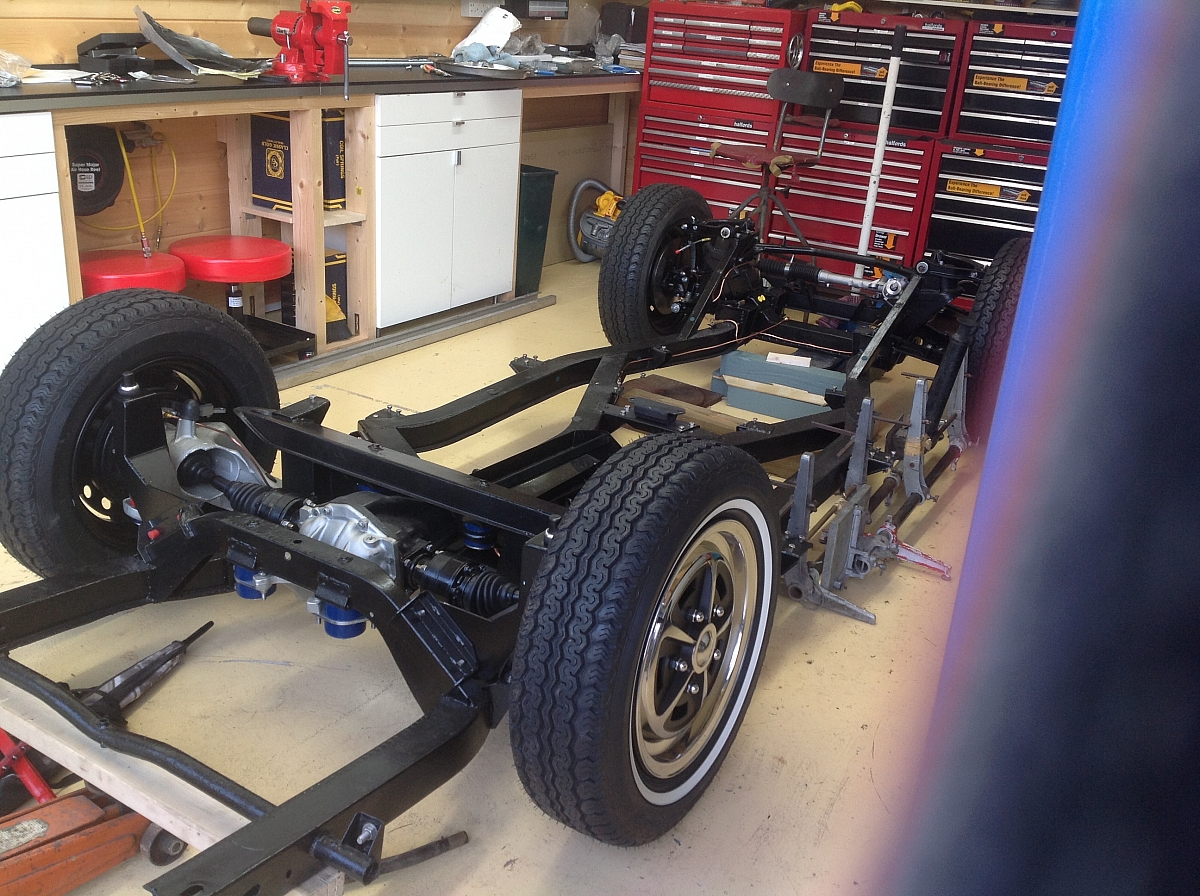
Oct 2014 - Jan 2015 All new running gear, brakes, poly bushes, CV drive shafts, etc fitted

Finally completed Jan/Feb 2015

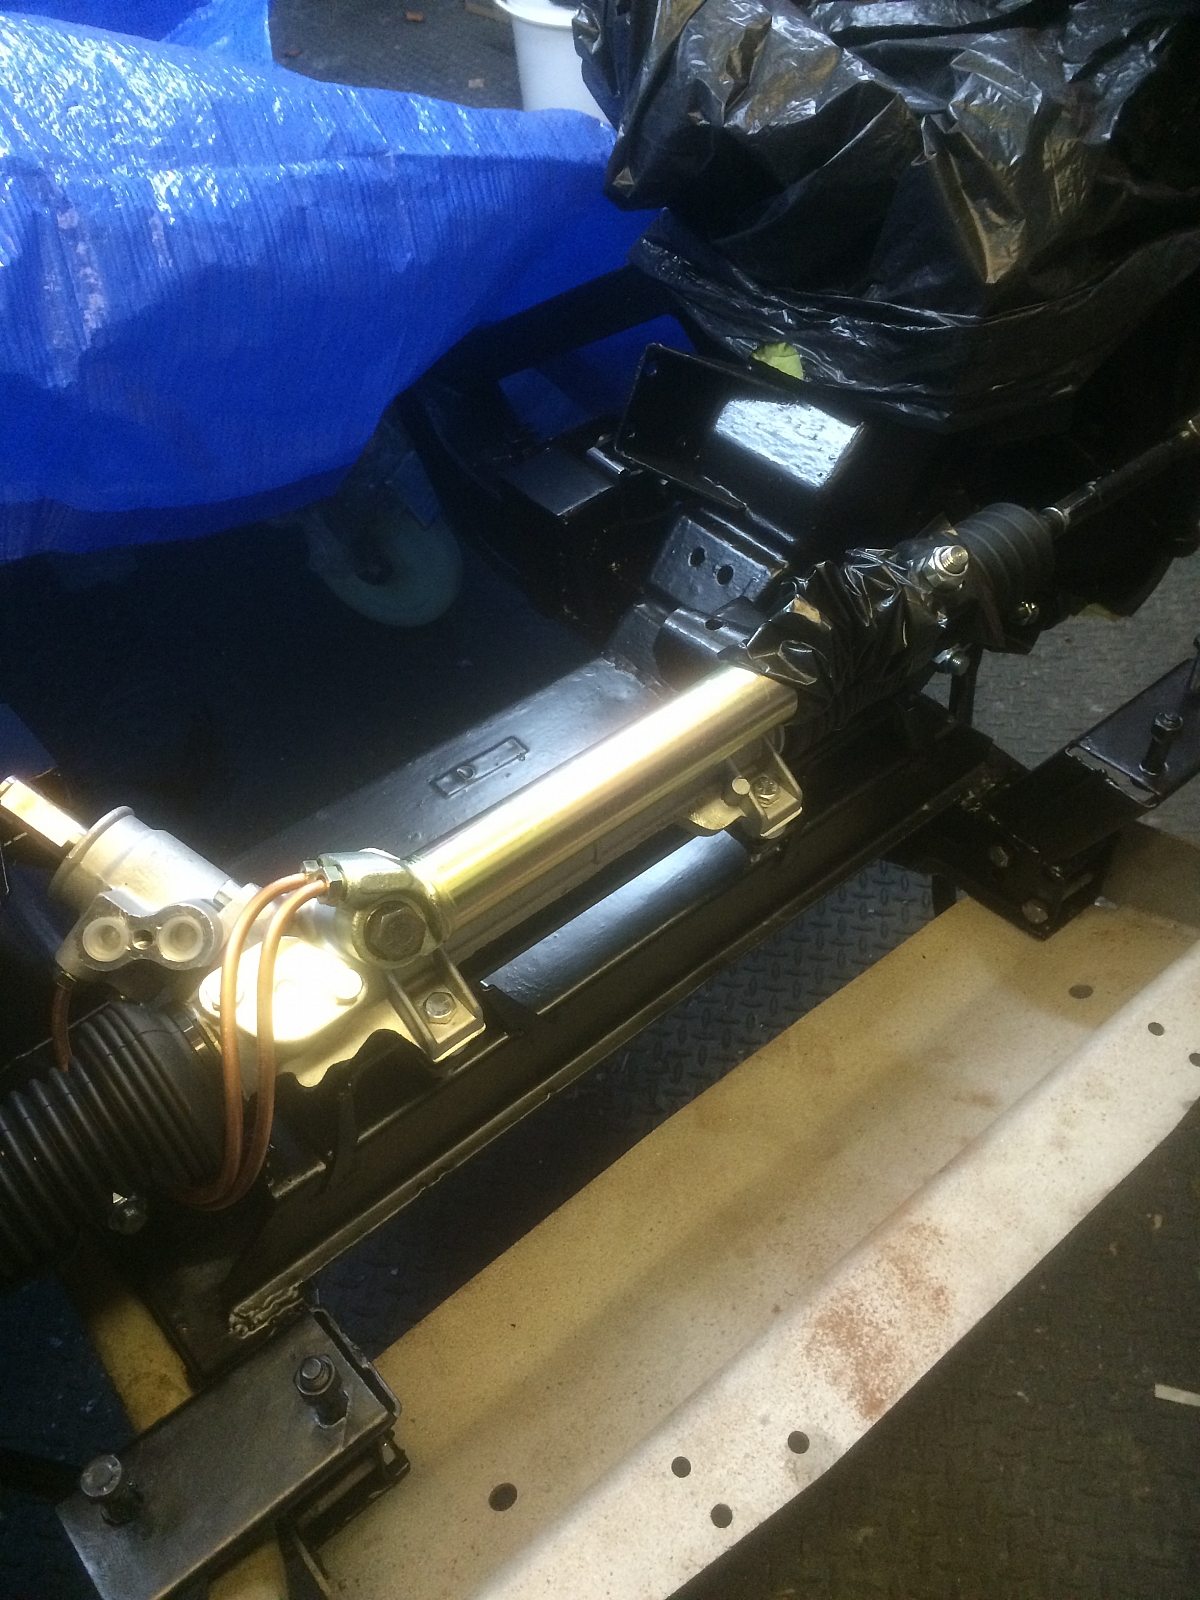
Then the power steering rack fitted. It's a hydraulic system from Classic Driving Developments. For Fiona of course, although I have the same on my TR6 and it's great.
Feb 2015 - Then the body was sent off to Envirostrip with all her panels. She was plastered with underseal everywhere. Someone went a bit over the top in the past. It would have taken ages to remove any other way. After much research Envirostrip were chosen. In my opinion they offer the safest method by far.


At Envirostrip on the metal skid getting ready for the 1st stage of 4. The oven.

After the oven - looks horrid !

Then the 1st of a few dips.

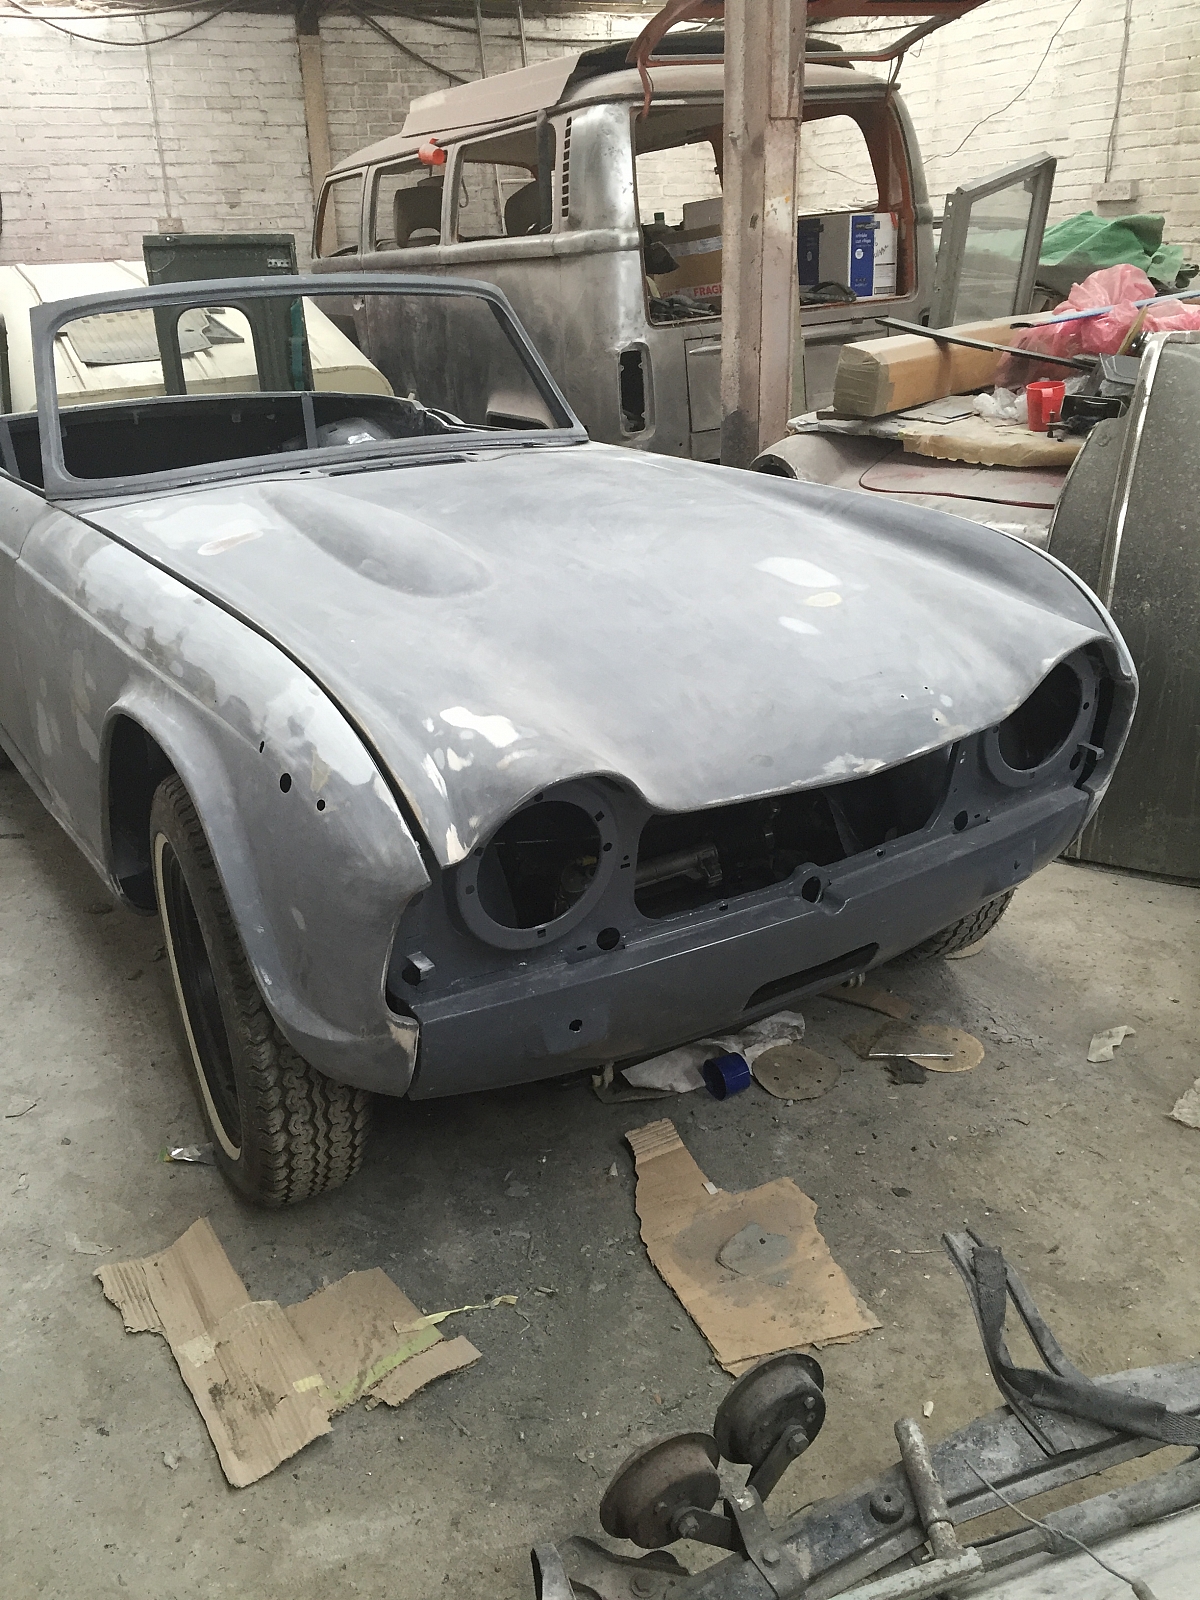
March 2015 - Voila.. dried, and etch primed. Looks like new.

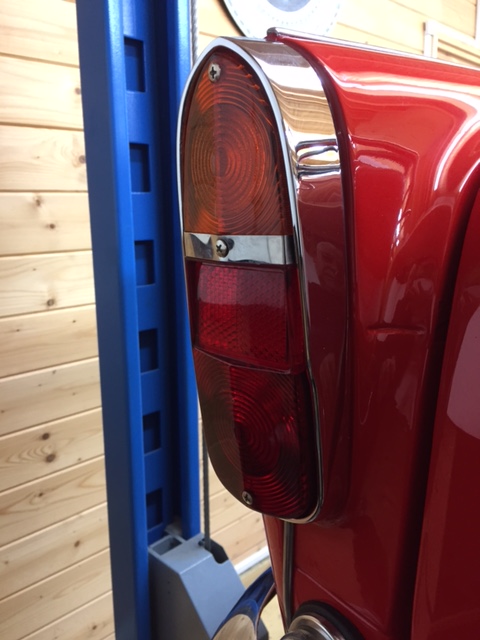
June 2015 - The wheels straightened (well four of the five) the fifth was skip fodder. They were shot blasted and powder coated. New tyres fitted. 185x70x15's . The trims took ages to refurbish. Very tricky to get all the edges and lines straight.
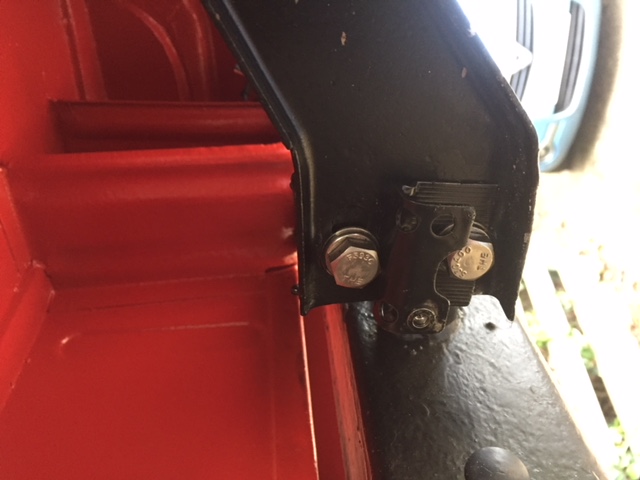
Managed to get some button stainless steel bolts and nuts, that look almost identical to the original mazak nuts. Before and after below.

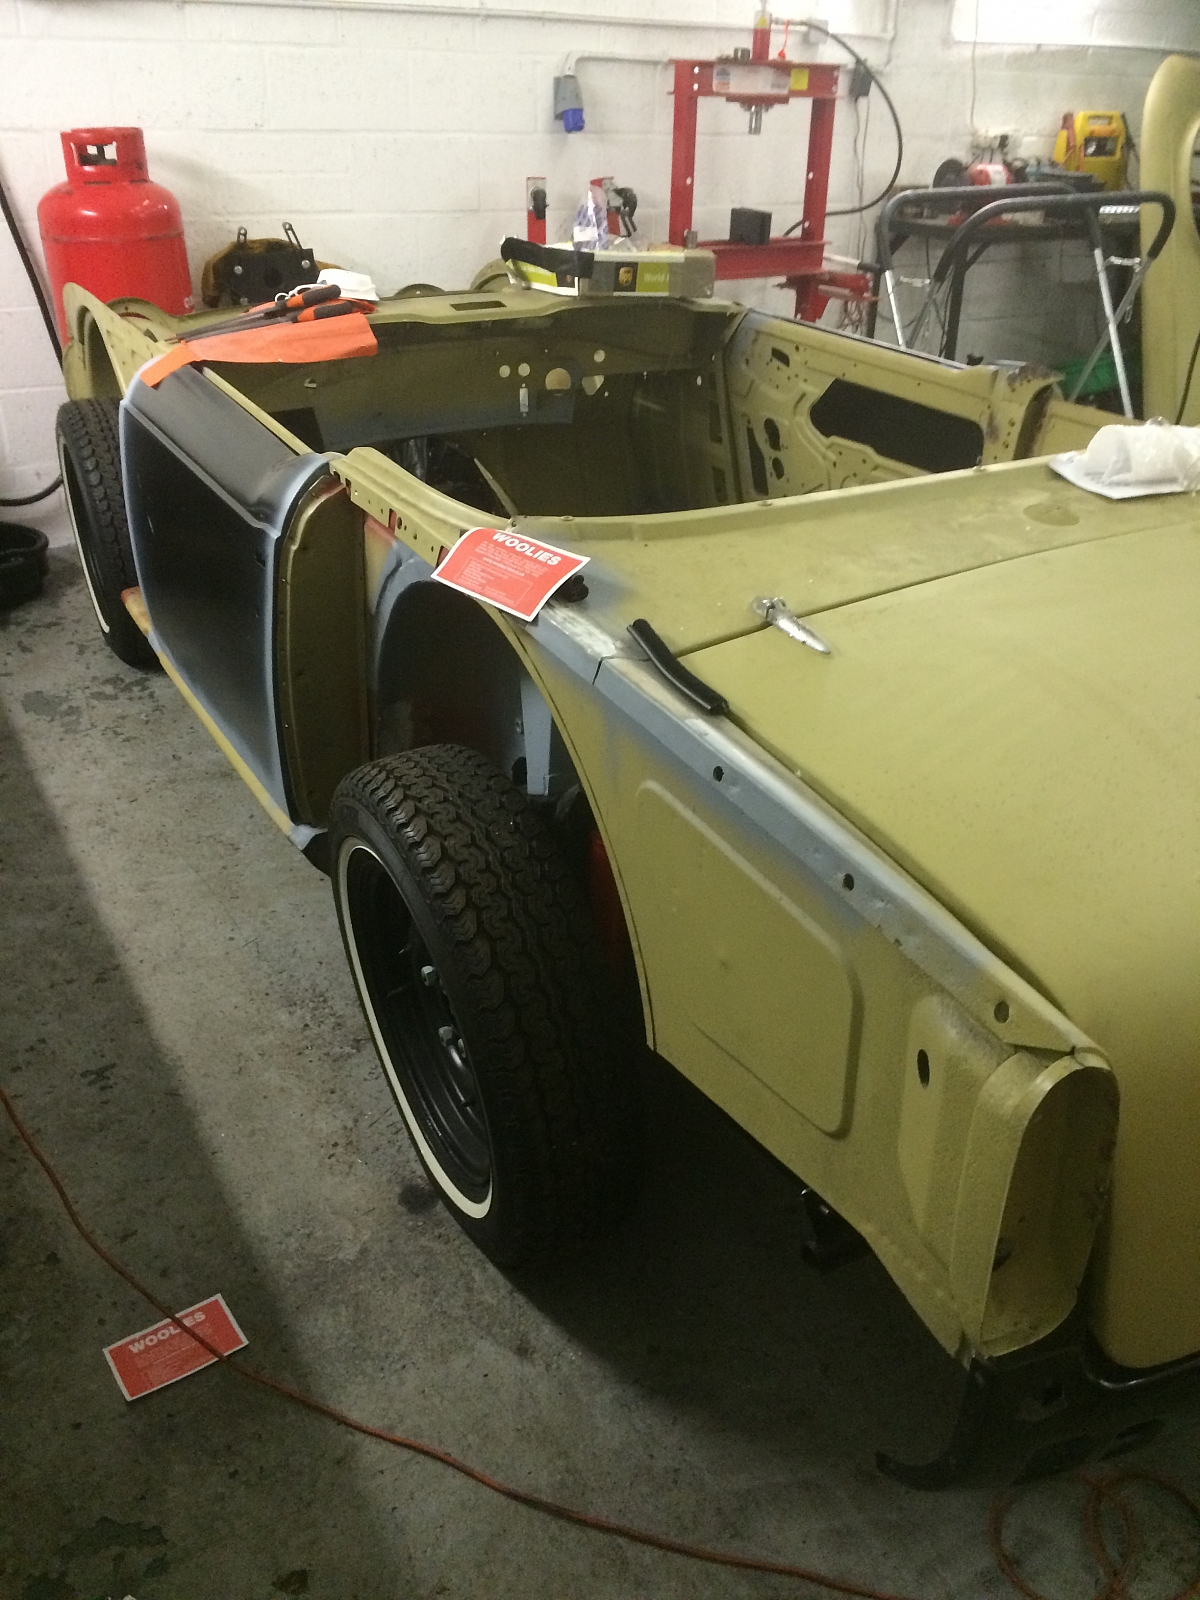
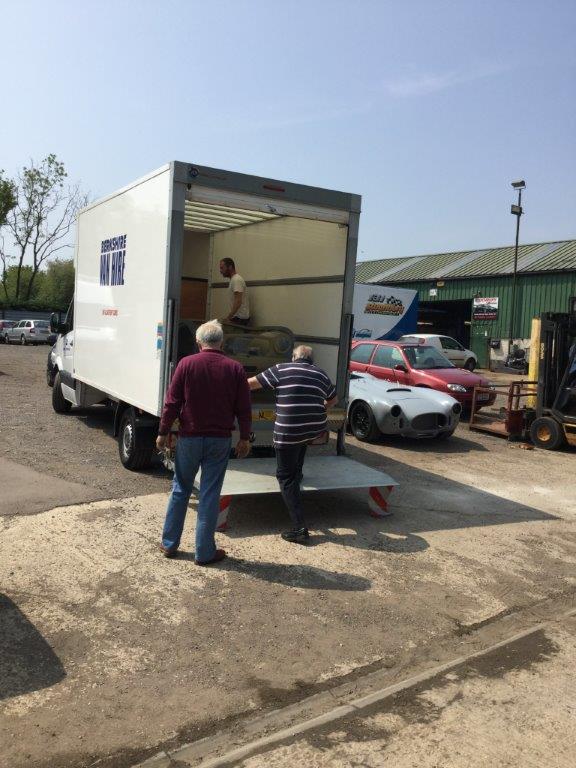
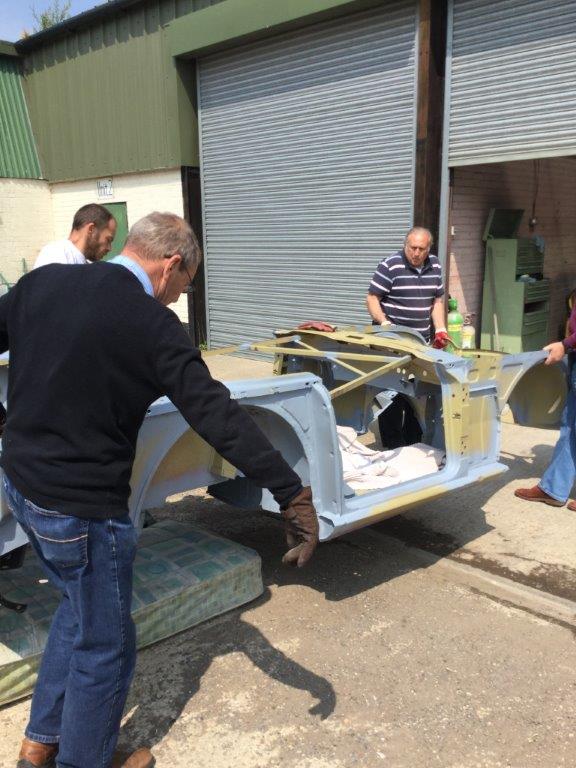
April 2015 - The body going off to the fabrication shop. Being collected by ( M & J Classics ) Malcolm and John

July 2015 - Followed afterwards by the chassis, after all the alignments had been done. Well as far as you can without the body. More will have to be done at a later date when the body comes back from the paint shop with the engine and gearbox fitted., but that should be just fine tuning.
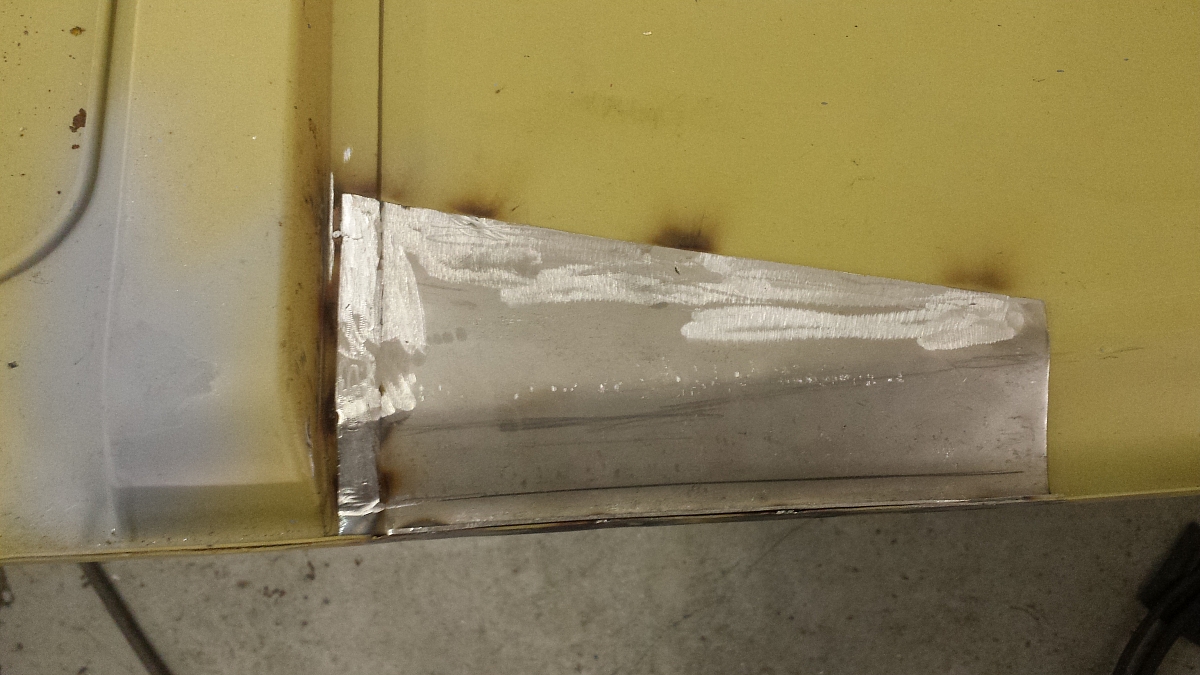
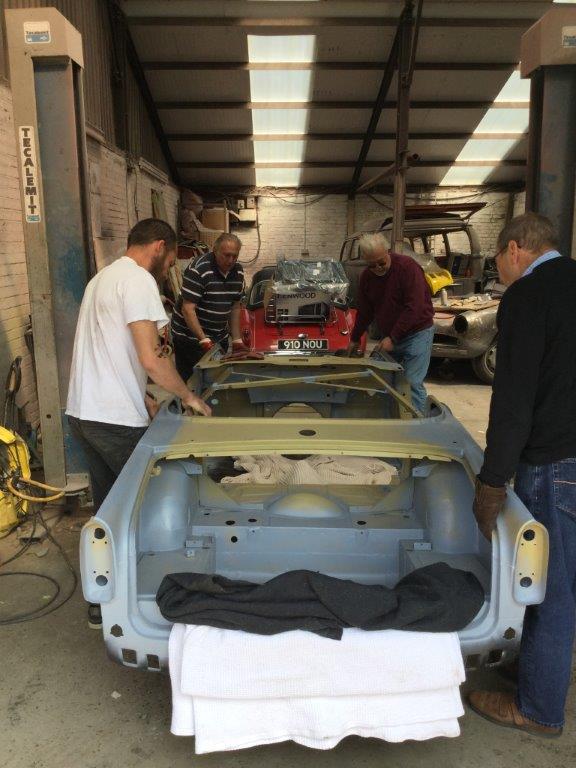
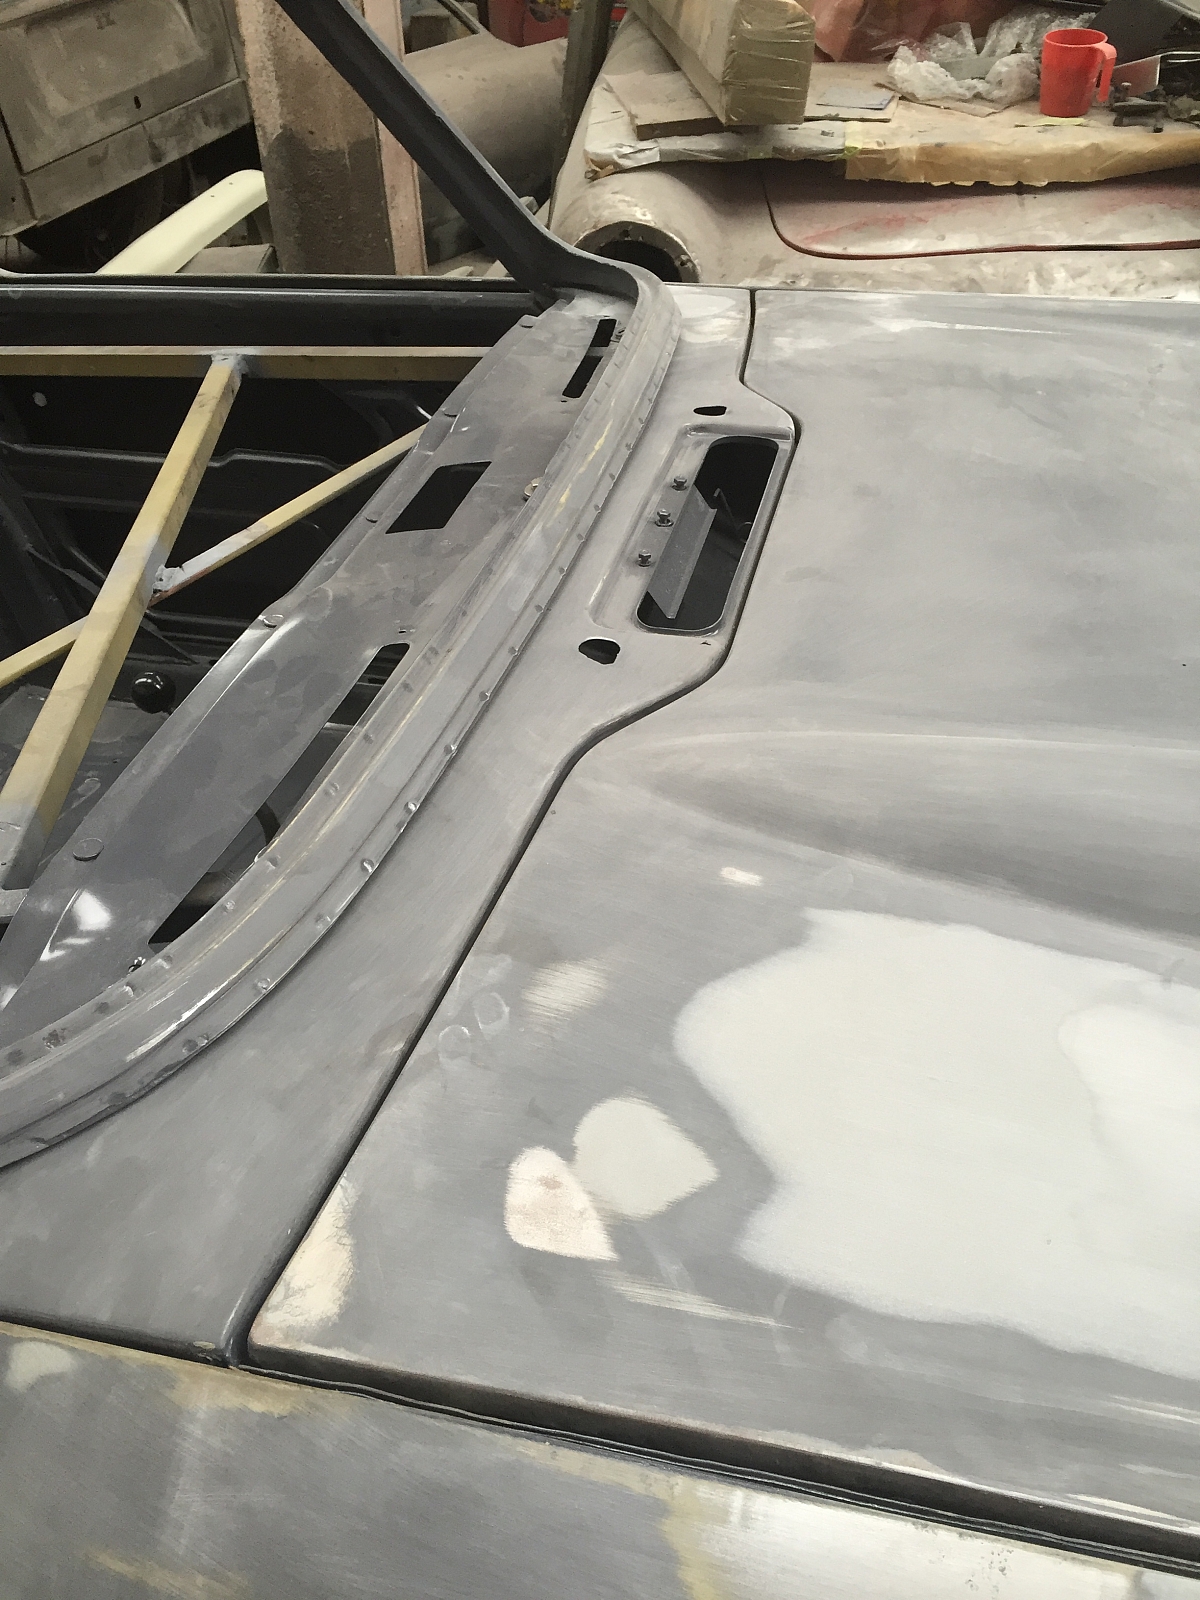
July 2015 - Work started on the body. The main panel work required. 1 new passenger floor,inner and outer cills, battery floor, rear valance, door skins, back of B posts and front rear deck sections.
Oct 2015 - Progress is slow, but being very carefully put together. It takes a long, long time to get things right. Worth waiting for though.
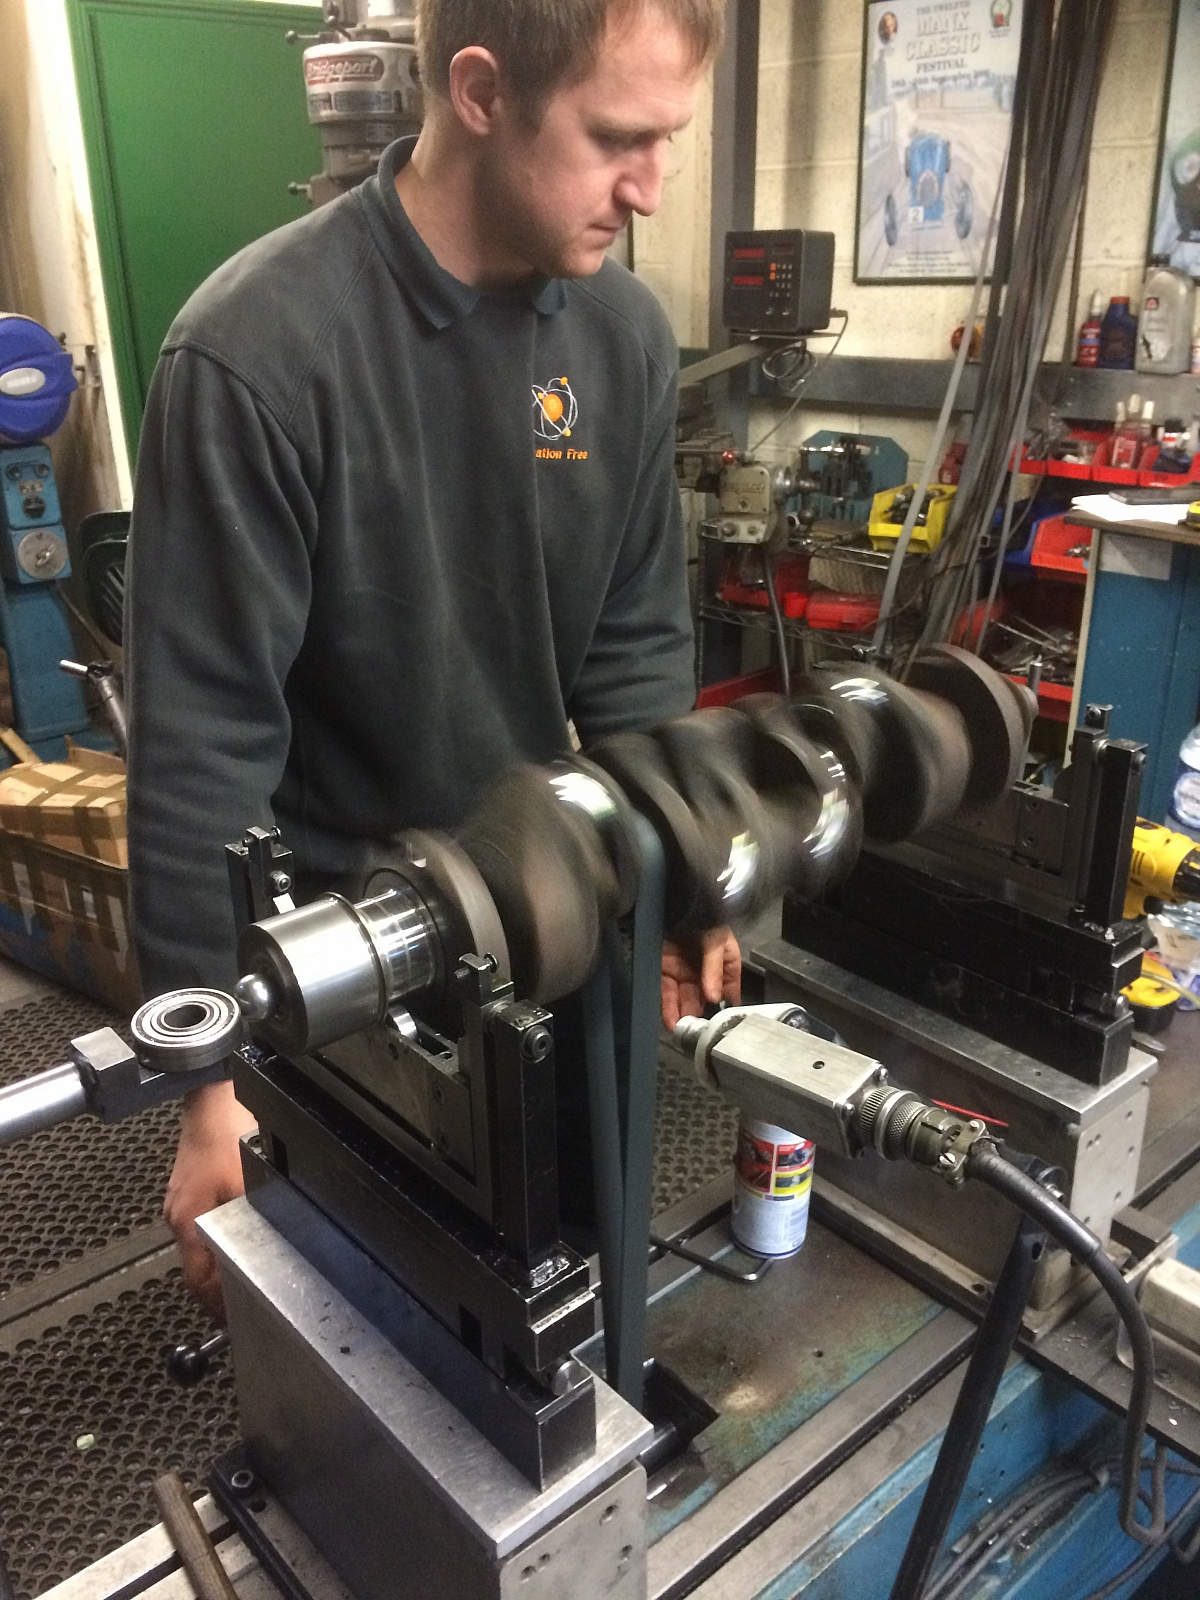
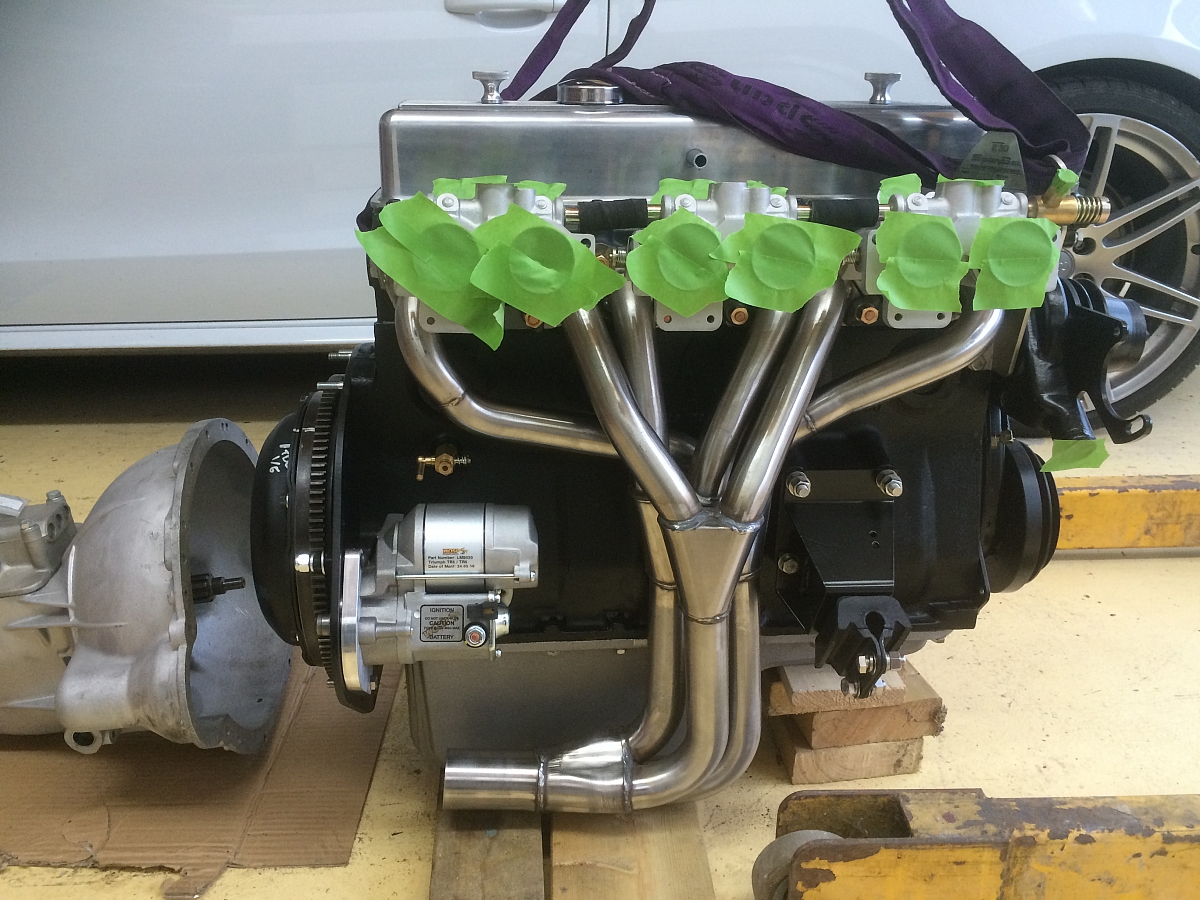
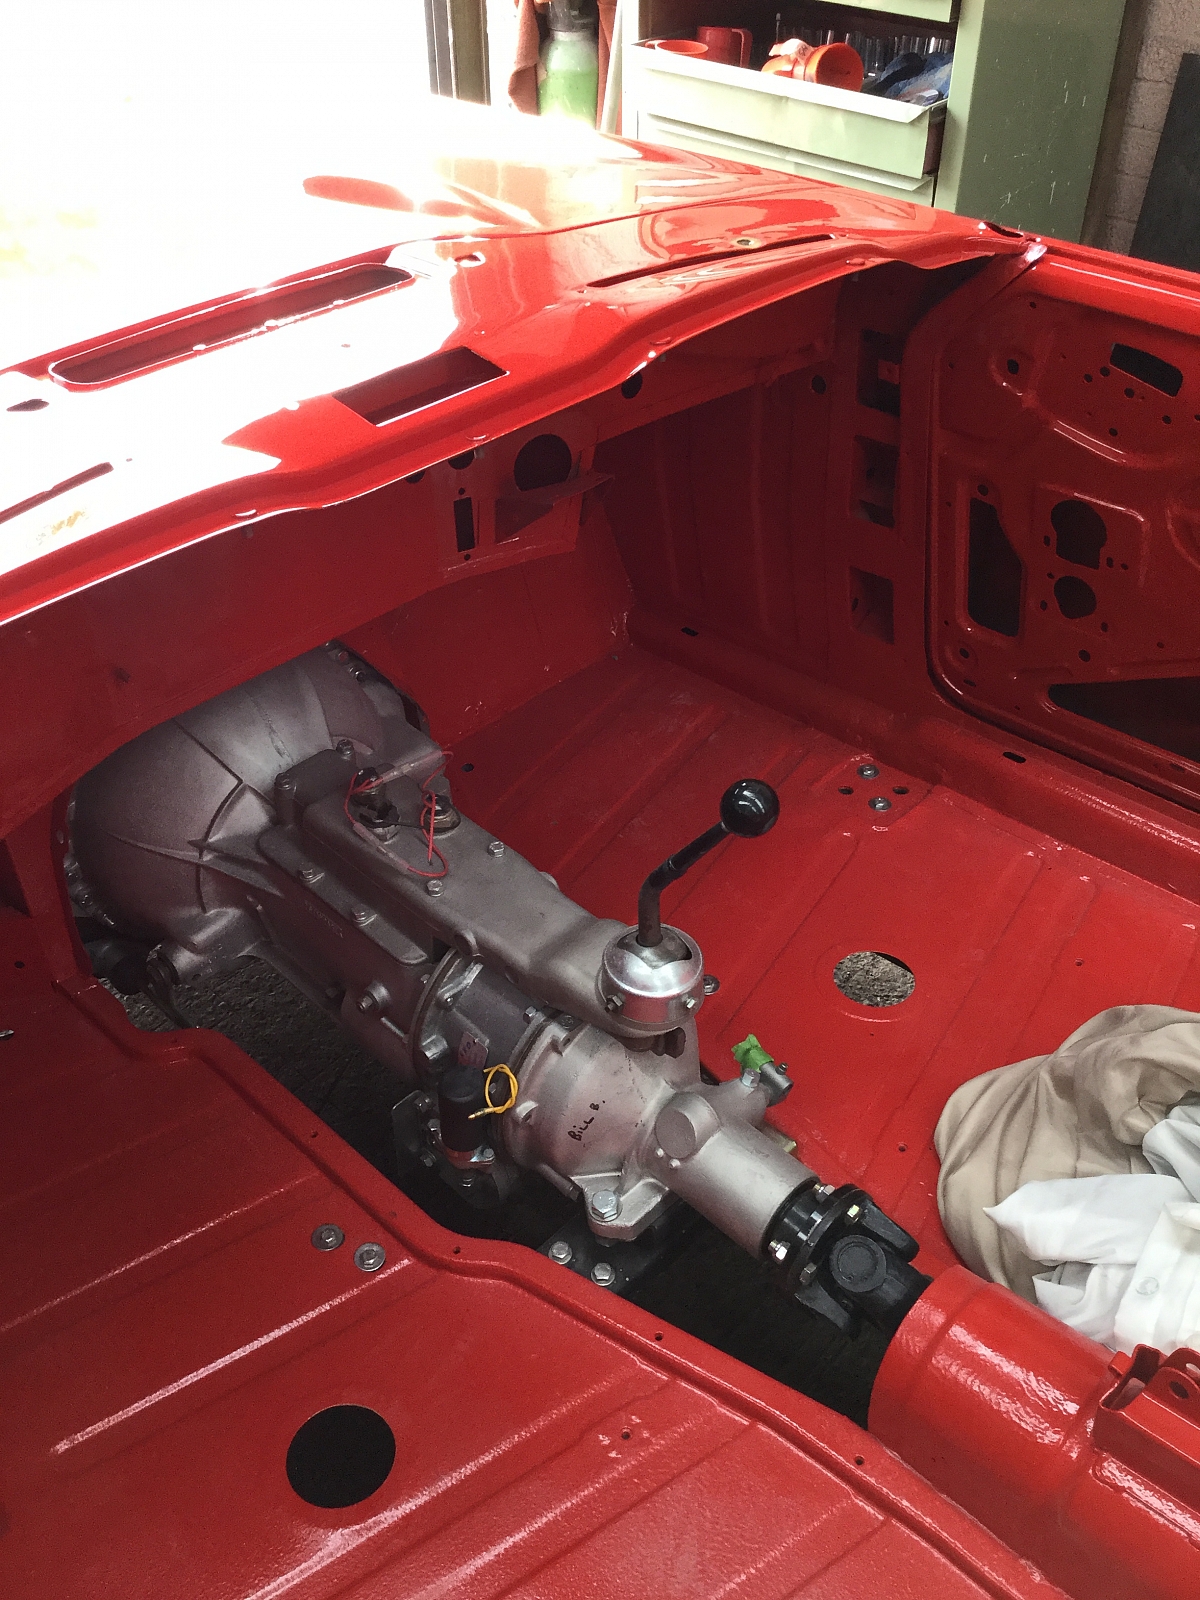
Sept - Nov 2015 During this period the engine and cylinder head were sent to the machine shop. All items balanced by Vibration Free. The gearbox and overdrive were also delivered to Overdrive Repairs, in Sheffield for a complete re-build.
Dec - 2015 - Jan/Feb 2016 -The engine returned in Dec 2015, and the re-assembly started in Jan. Timing etc and camshaft set up all done -Feb 2016. This does take a lot of time.
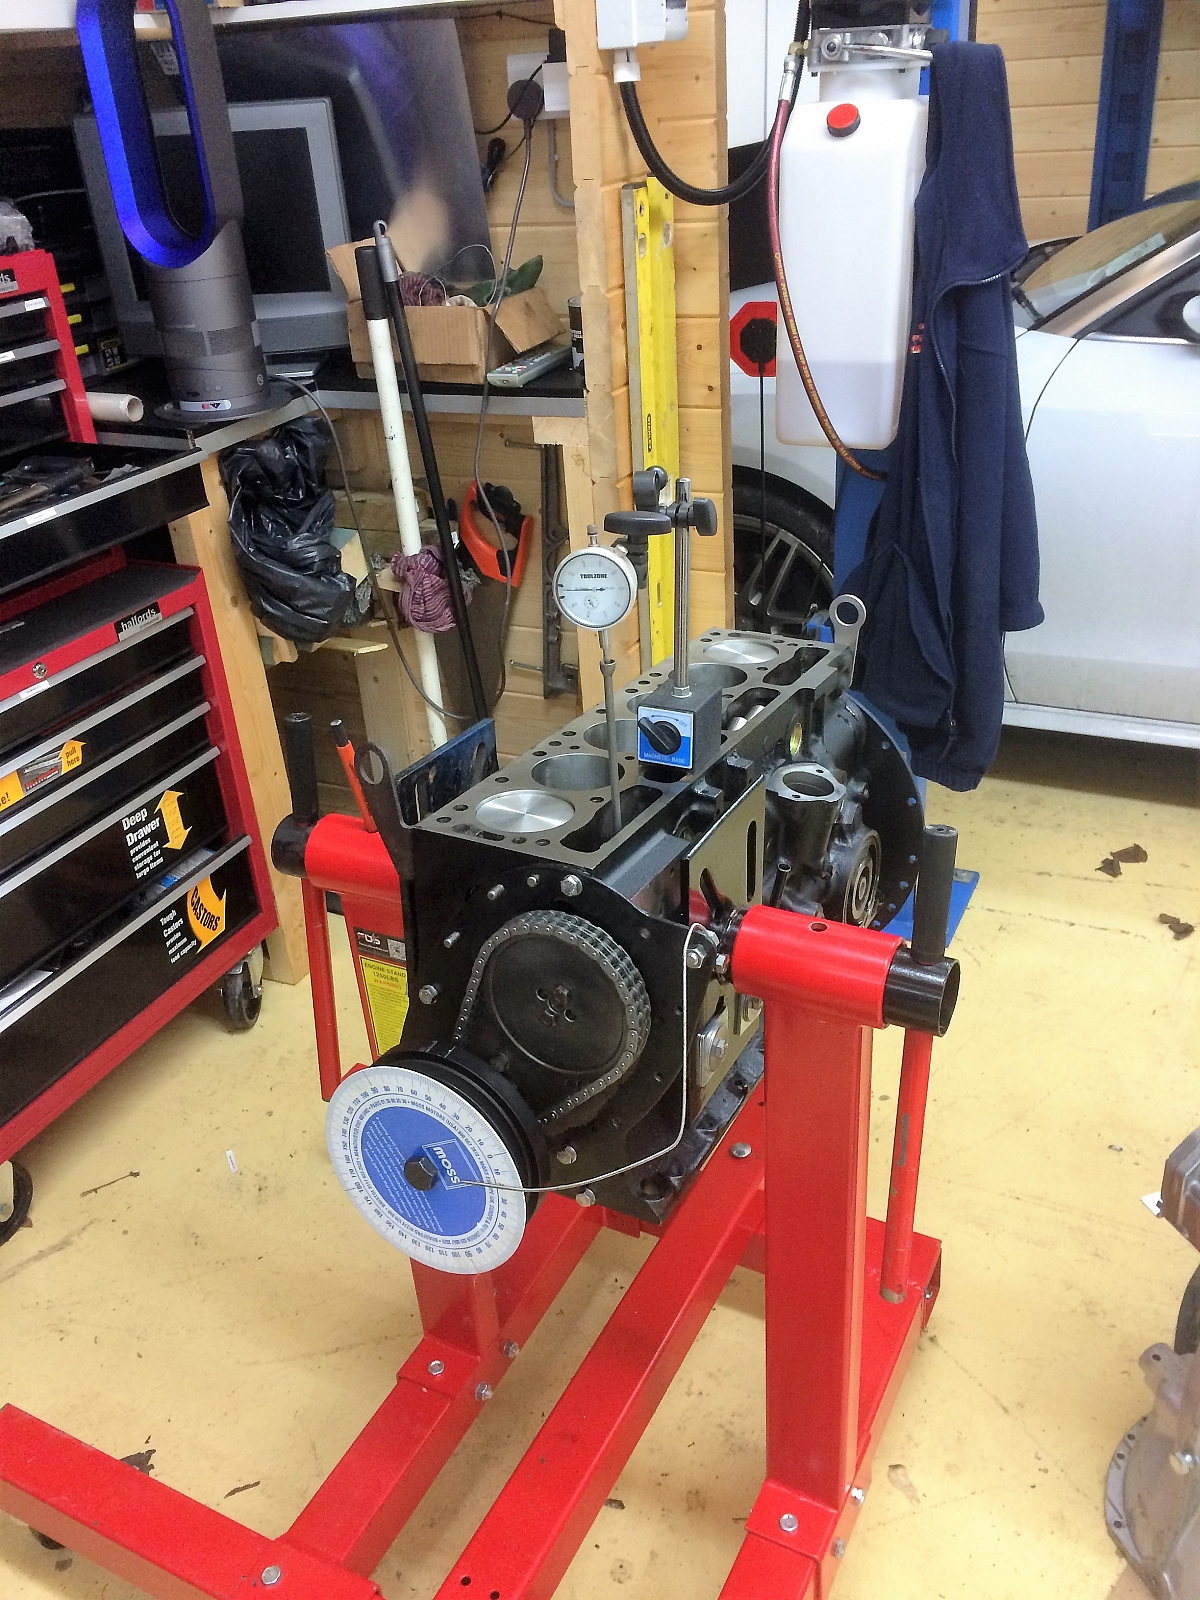
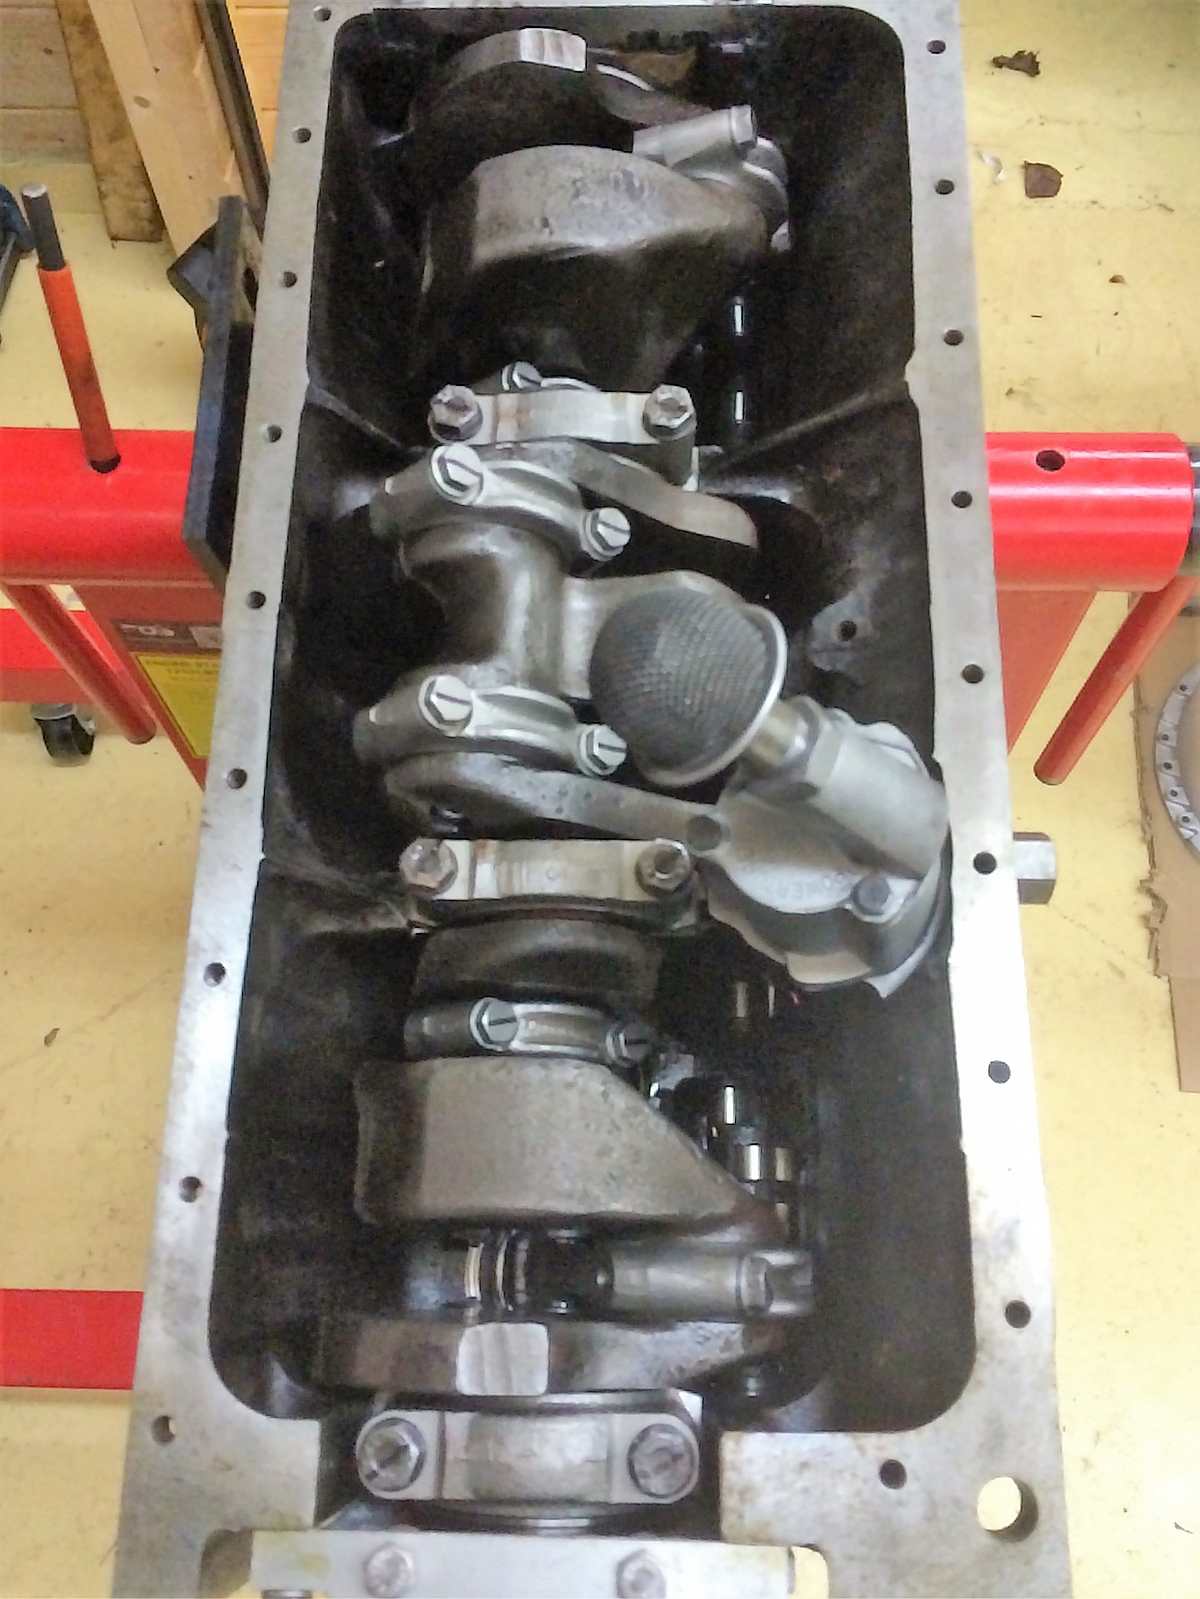
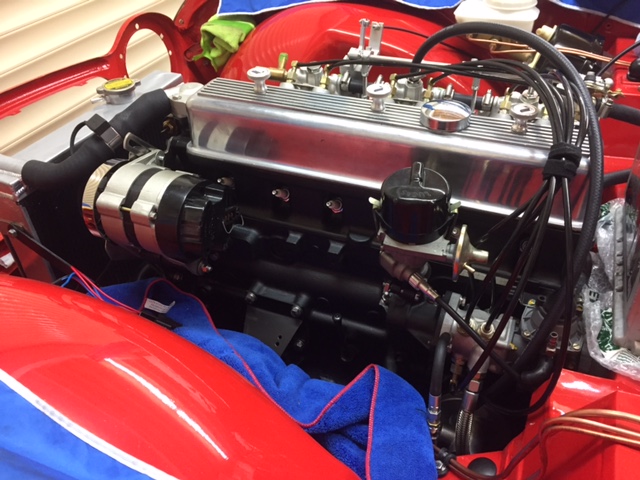
Feb 2016 - Trial fitting of the head - front end, timing chain etc, refurbished and fitted. The gearbox finished and returned. The engine has been set up as standard and the cylinder head converted to unleaded.
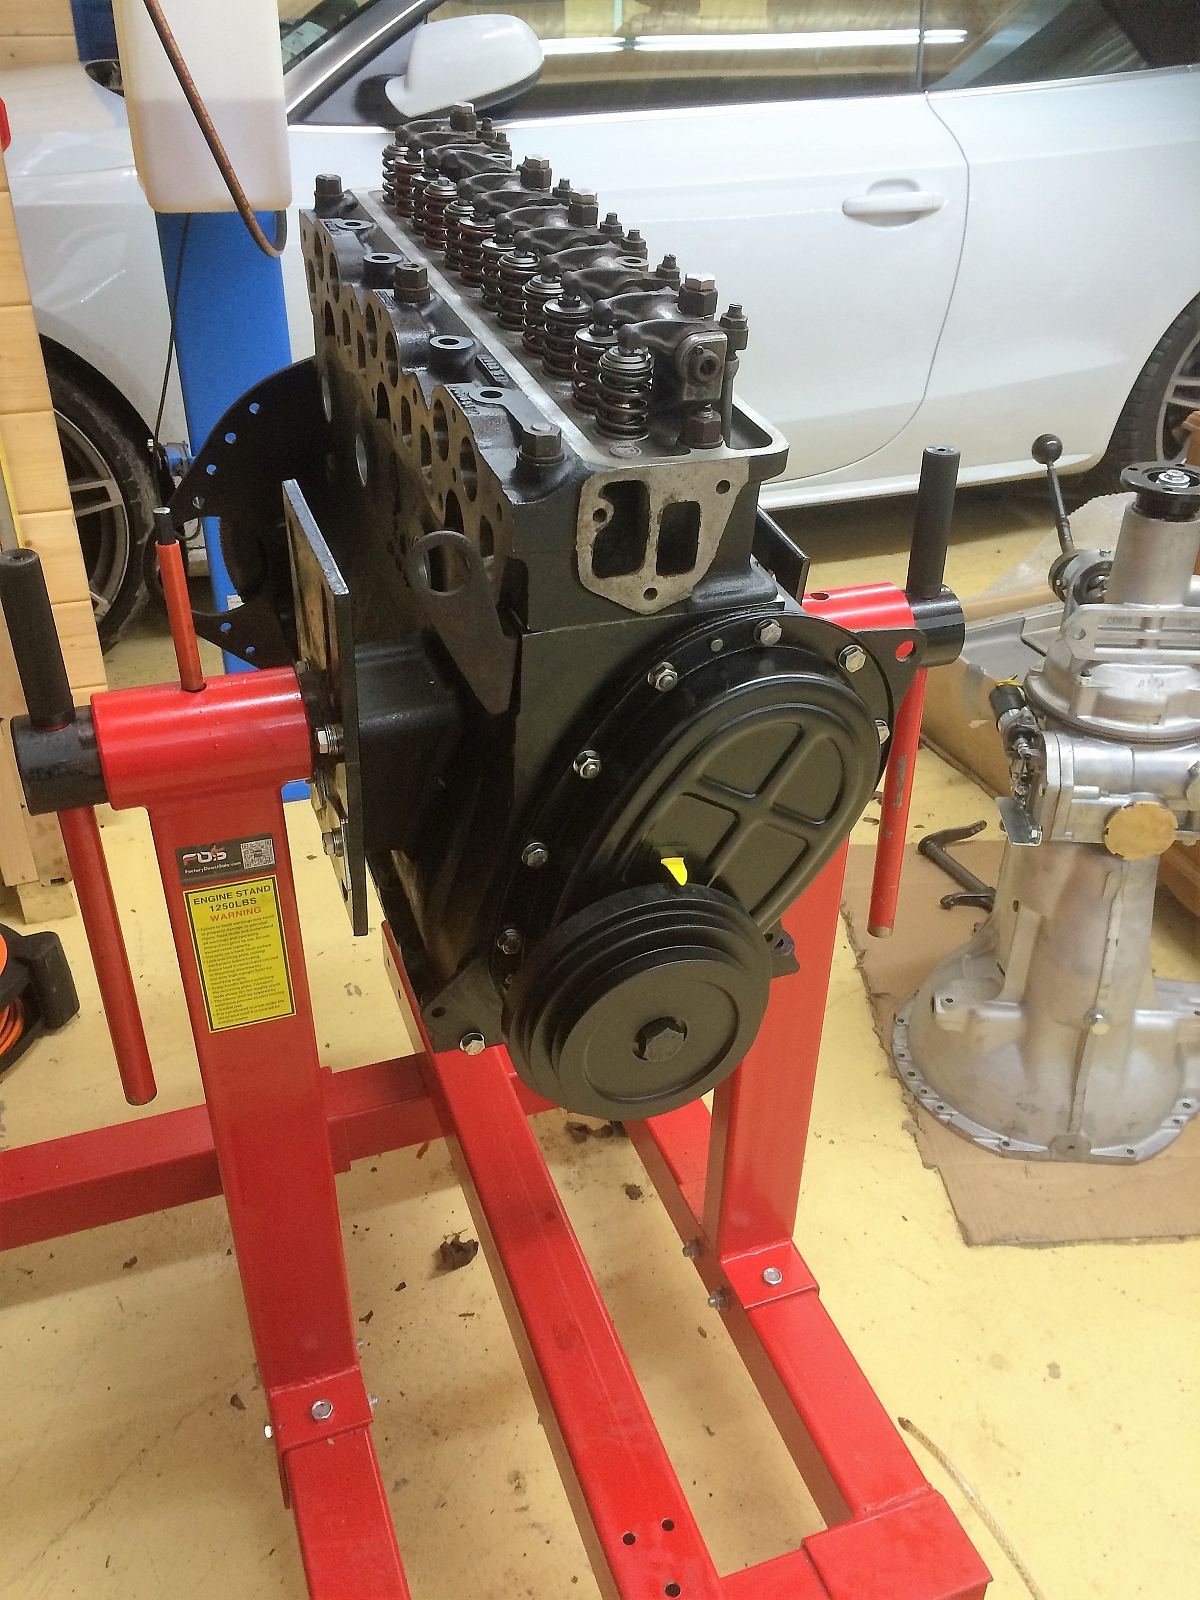
Feb 2016 - Next jobs. Fit a new rocker shaft and rockers, new push rods, cam followers. Complete the rear end, fit the sump (an aluminium finned type). Fit the cylinder head etc etc. - well that's the plan.
Feb 20th 2016
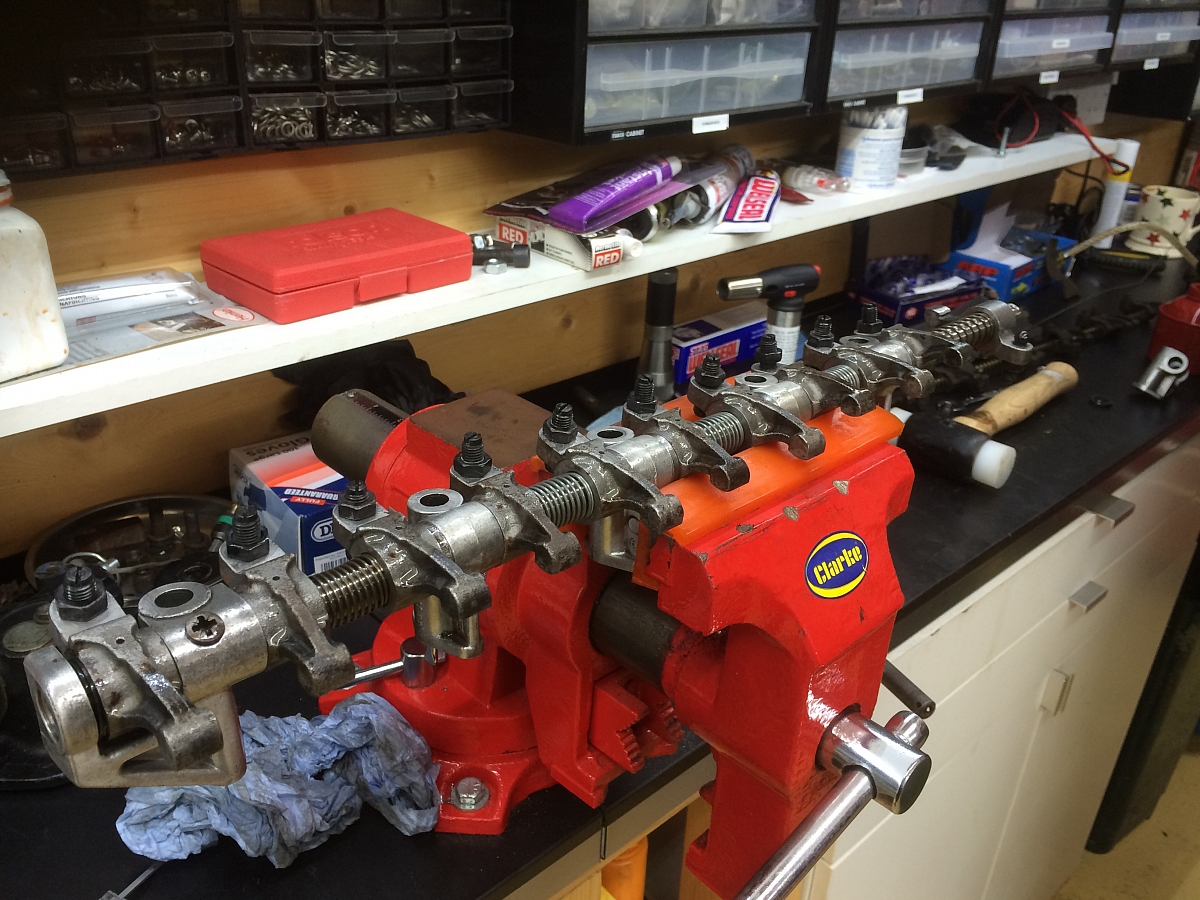
Spent another day with Paul assembling the engine, this time fitted the cylinder head with ARP new studs and nuts. Fitted the new rocker shaft and new rockers. Used and cleaned up the original pedestals and spacers. Fitted new thackery washers and springs. It took a very long time and boy is it easy to make a mistake. We used an old piece of wire and as we took the old one apart, put those on the old wire and re-assembled one item at a time. Had to heat up each pedestal to get them off, but they came off fairly easily, although one or 2 decided to be a bit difficult.. And before we took the old one apart we used an old piece of cardboard to pencil around the position of the pedestals and then measured the distances between them, so that they could be put back in the same position on the new shaft. So no mistakes. The new rocker lock nuts, turned out to be metric !! Filled the shaft with oil before re-fitting and setting up the tappets.
And finally fitted new exhaust/inlet studs, trial fitted the rocker cover which I have had machined on the bottom with a small shoulder to keep the gasket in place. I intend to use a silicone gasket.

12th March 2016
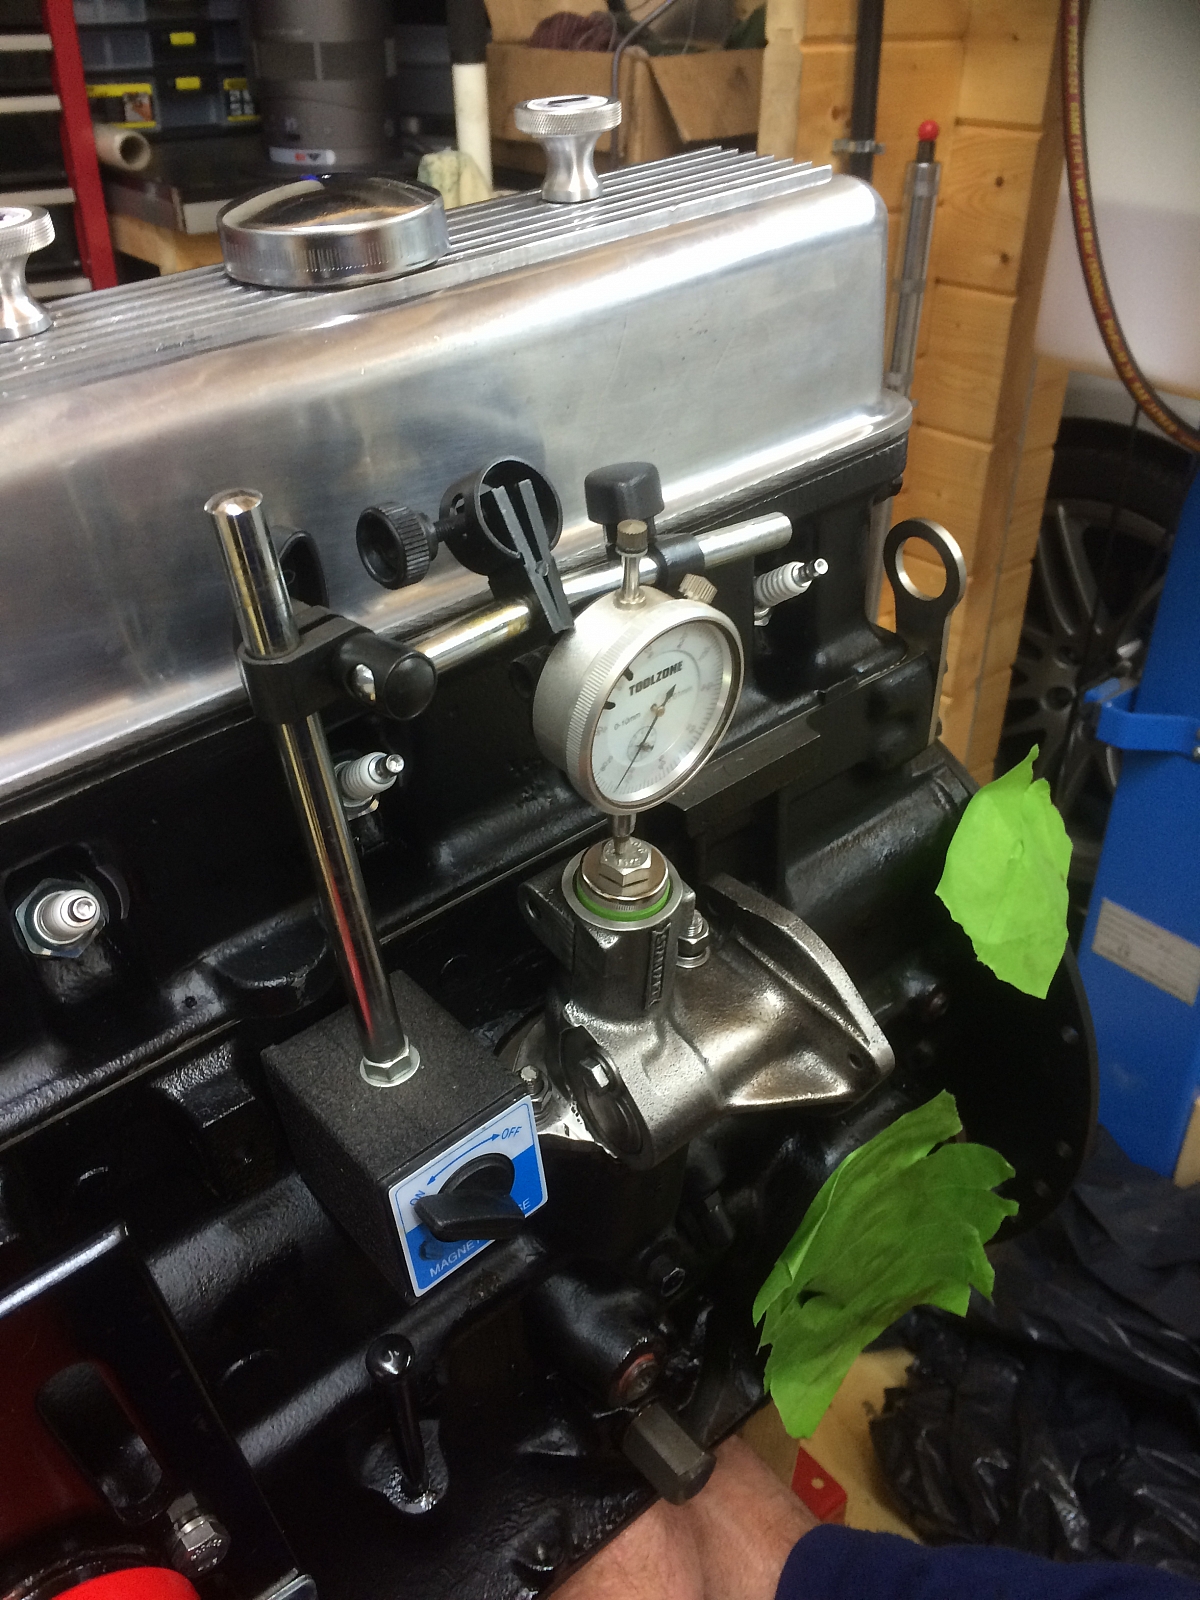
Not a lot of significant things done since the last entry, but spent several Saturdays doing various things. Mainly cleaning and re-painting parts. Example water housing , engine mount brackets and so on. Packing up and sending off the water housing to EPS for a complete re-build. Getting the alternator re-built,cleaning up the distributor pedestal so that new seals could be fitted. Rocker cover now fitted with slightly longer studs to enable the Le-mans hand nuts to fit. The Silicone gasket was a very neat fix with the machined shoulder. Lastly, this picture shows the pedestal end float being set up. All done and the pedestal has now been painted. Just awaiting the arrival of the re-built metering unit from Neil Fergsuon before final fitting.
Next jobs. Fit and set up the metering unit, fit the flywheel, sump, clutch and wait for wait for a new bracket to arrive that fits behind the water pump for the power steering pump. Then fit the water pump, housing and ancillaries. Then take the engine off the stand. Modify the stand into a cradle so that the gearbox can be attached.
3rd April 2016
The engine is now off it's engine stand.
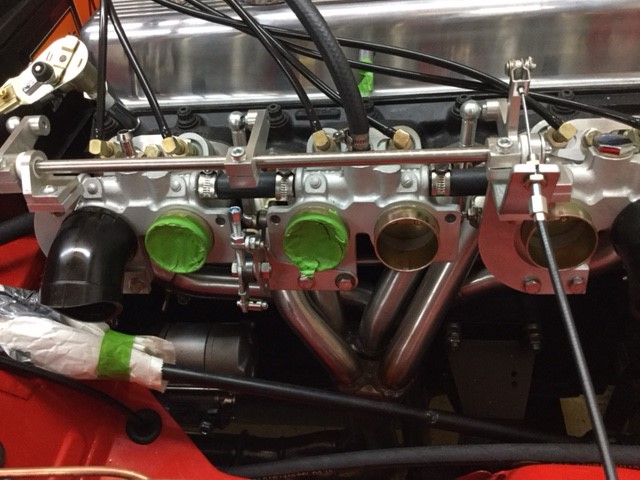
Some ancillary stuff fitted, sump, clutch, metering unit, exhaust manifold, throttle bodies, water pump and housing and power steering pump bracket, thermostat, engine mounts etc. Starter motor just a trial fit.
The metering unit timing got a little tricky. I couldn't fathom out why I couldn't get the correct moon shape within No.6 port. So, Mr. Paul, help. He quickly deduced I had it on the wrong engine stroke. Should have been on the firing stroke. However it still wouldn't show the correct position,which if you look in the brown book, gives you 3 correct options. None of which show a fully open position. We tried numerous permutations, none of which worked. But.... then Mr.Paul brought out an original Lucas test kit, which shows the port should be fully open. This is in contrast to the brown book. So that's where we left it - fully open. As I would rather trust the original Lucas diagram than the brown book.
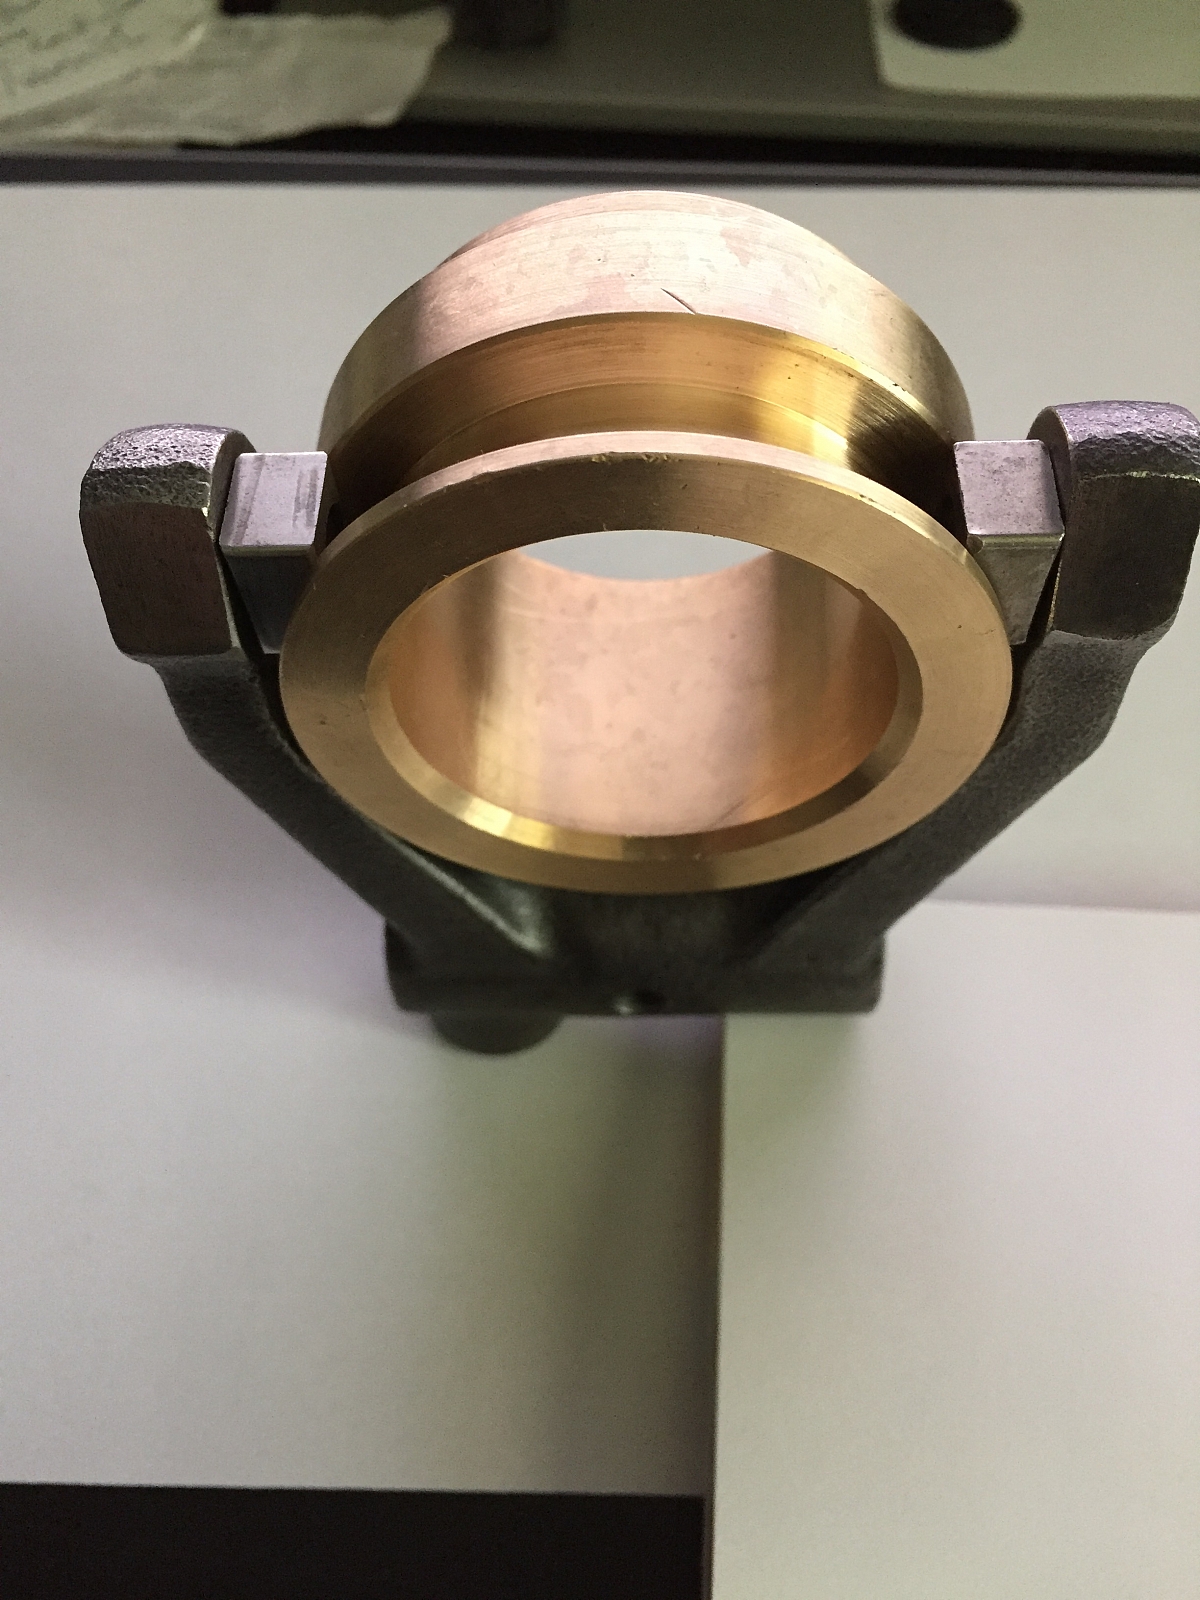
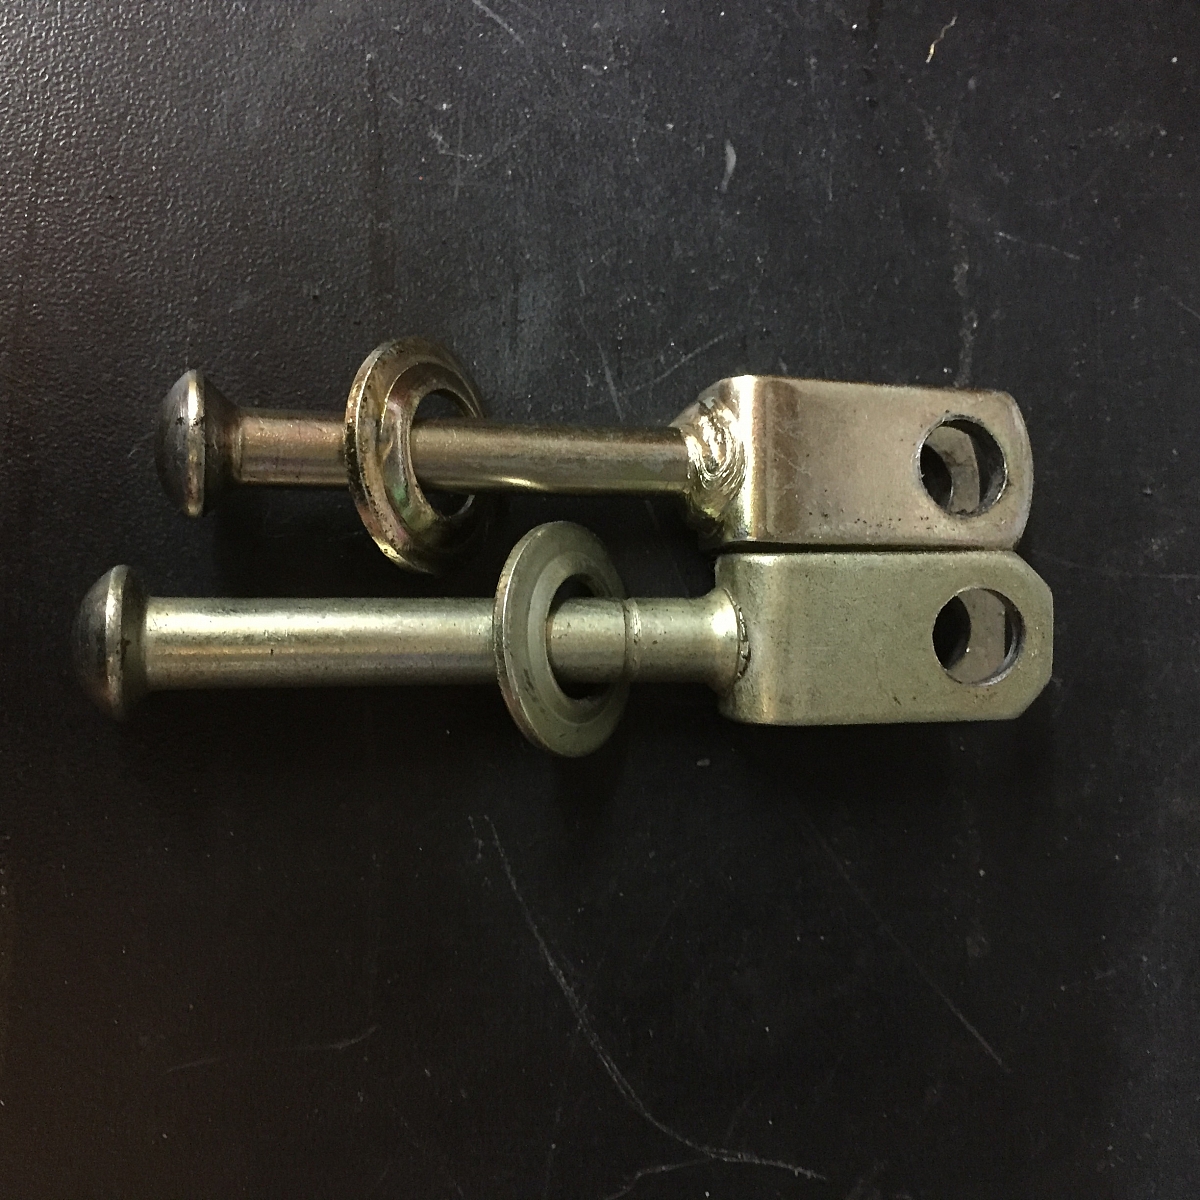
Next - fit the gearbox to the engine, but 1st get the thrust bearing carrier machined to accept square pegs on the end of the clutch fork, instead of the standard round pegs. Picture below.
April 15th 2016
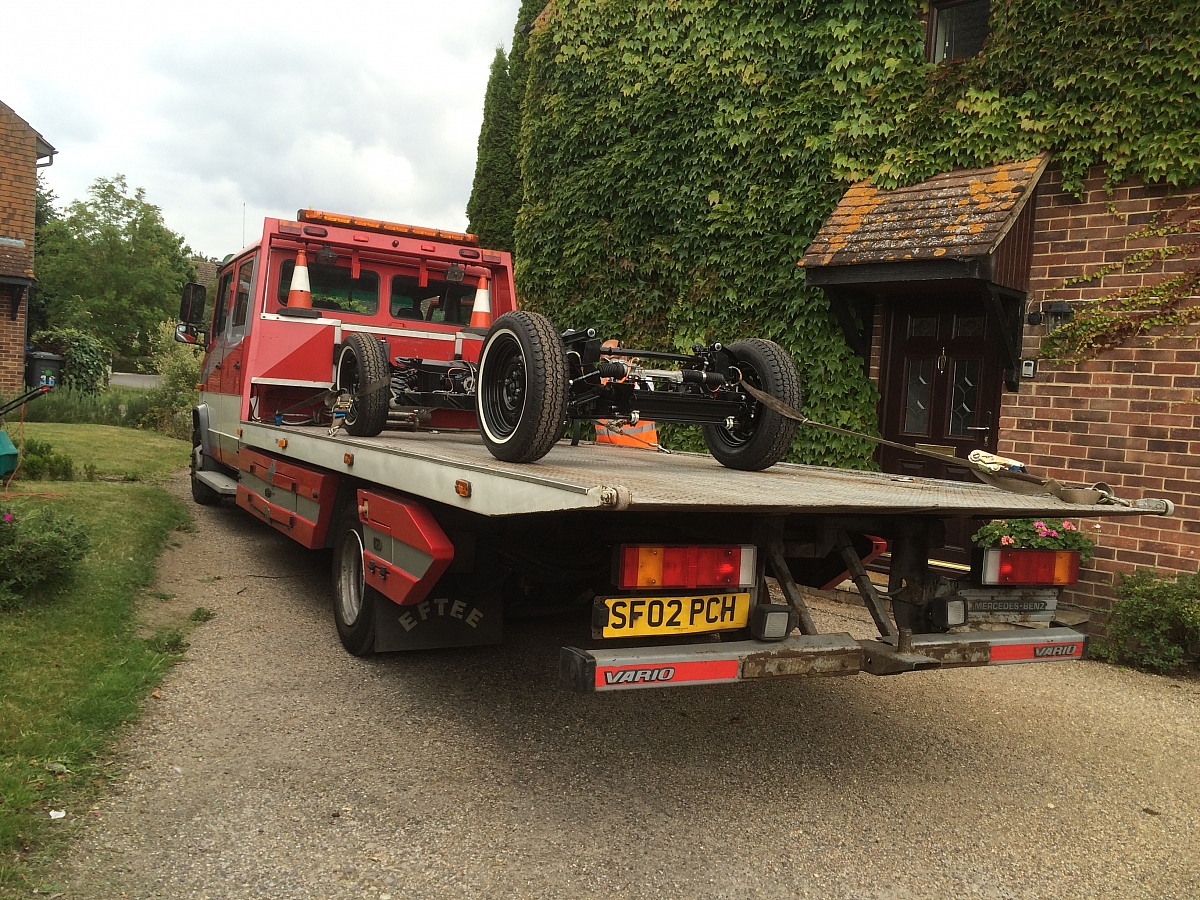
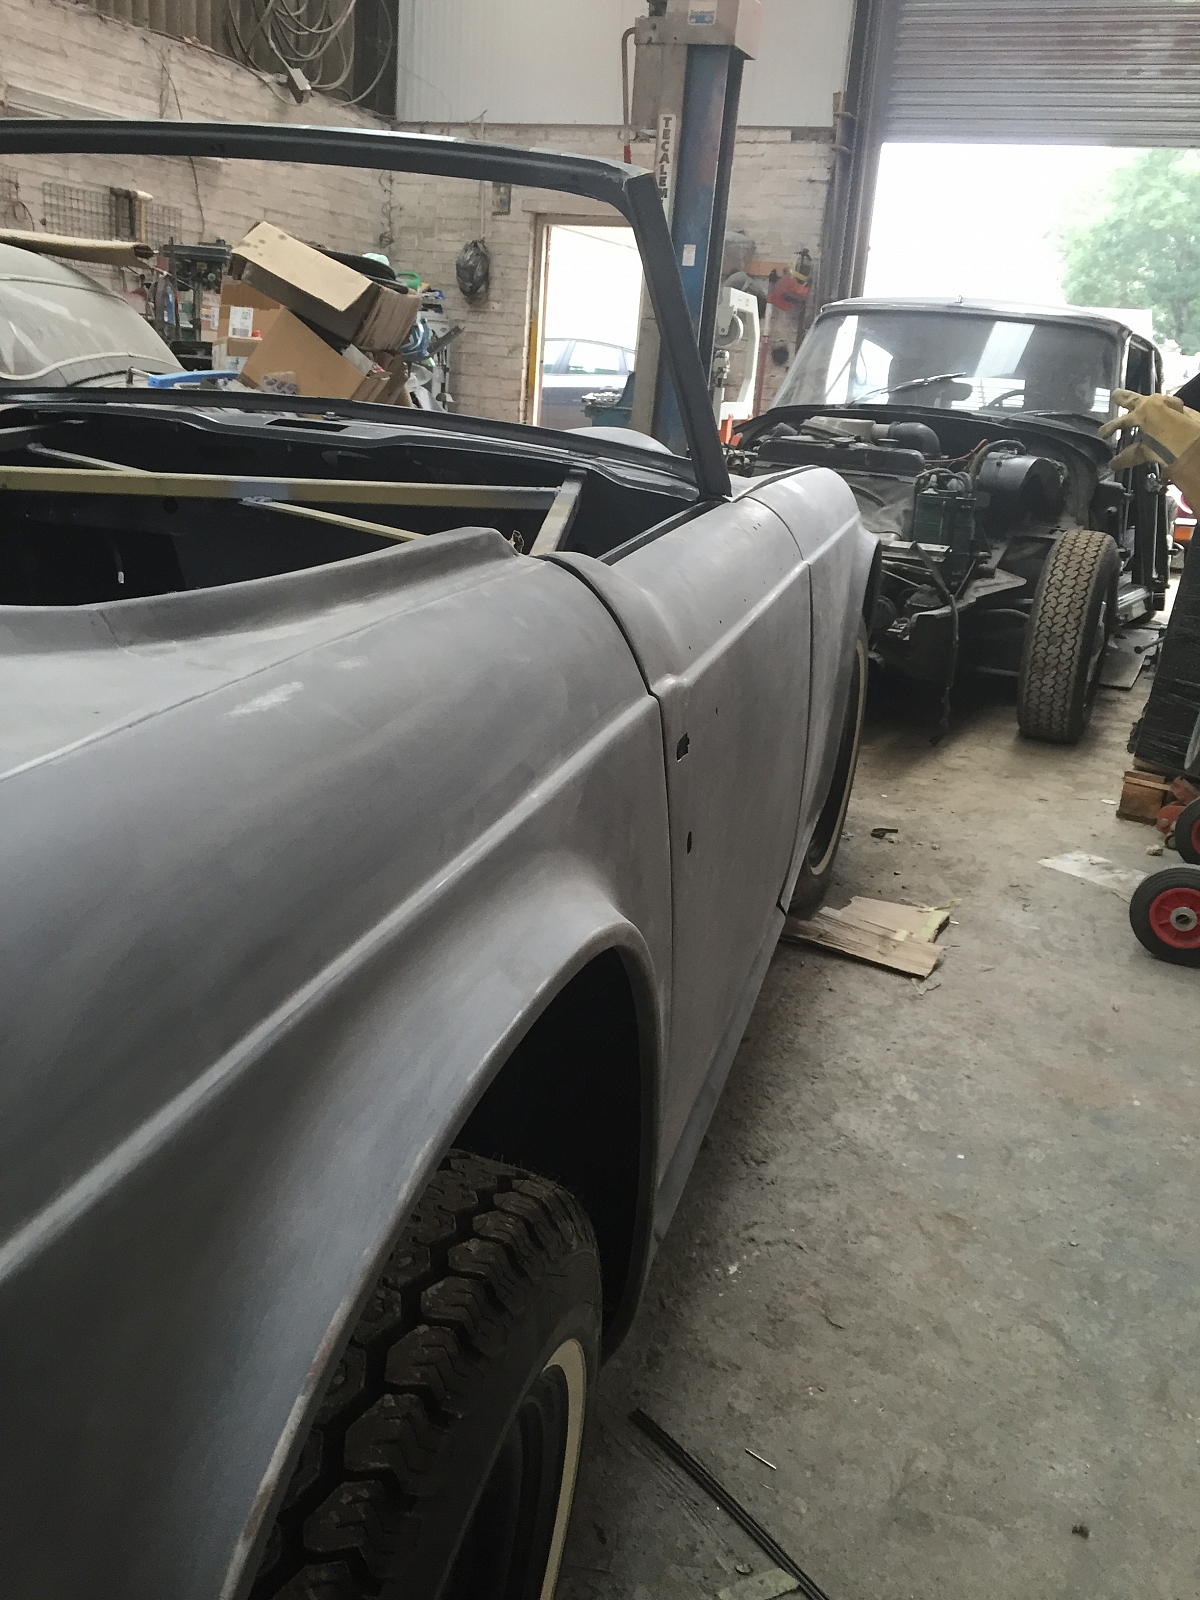
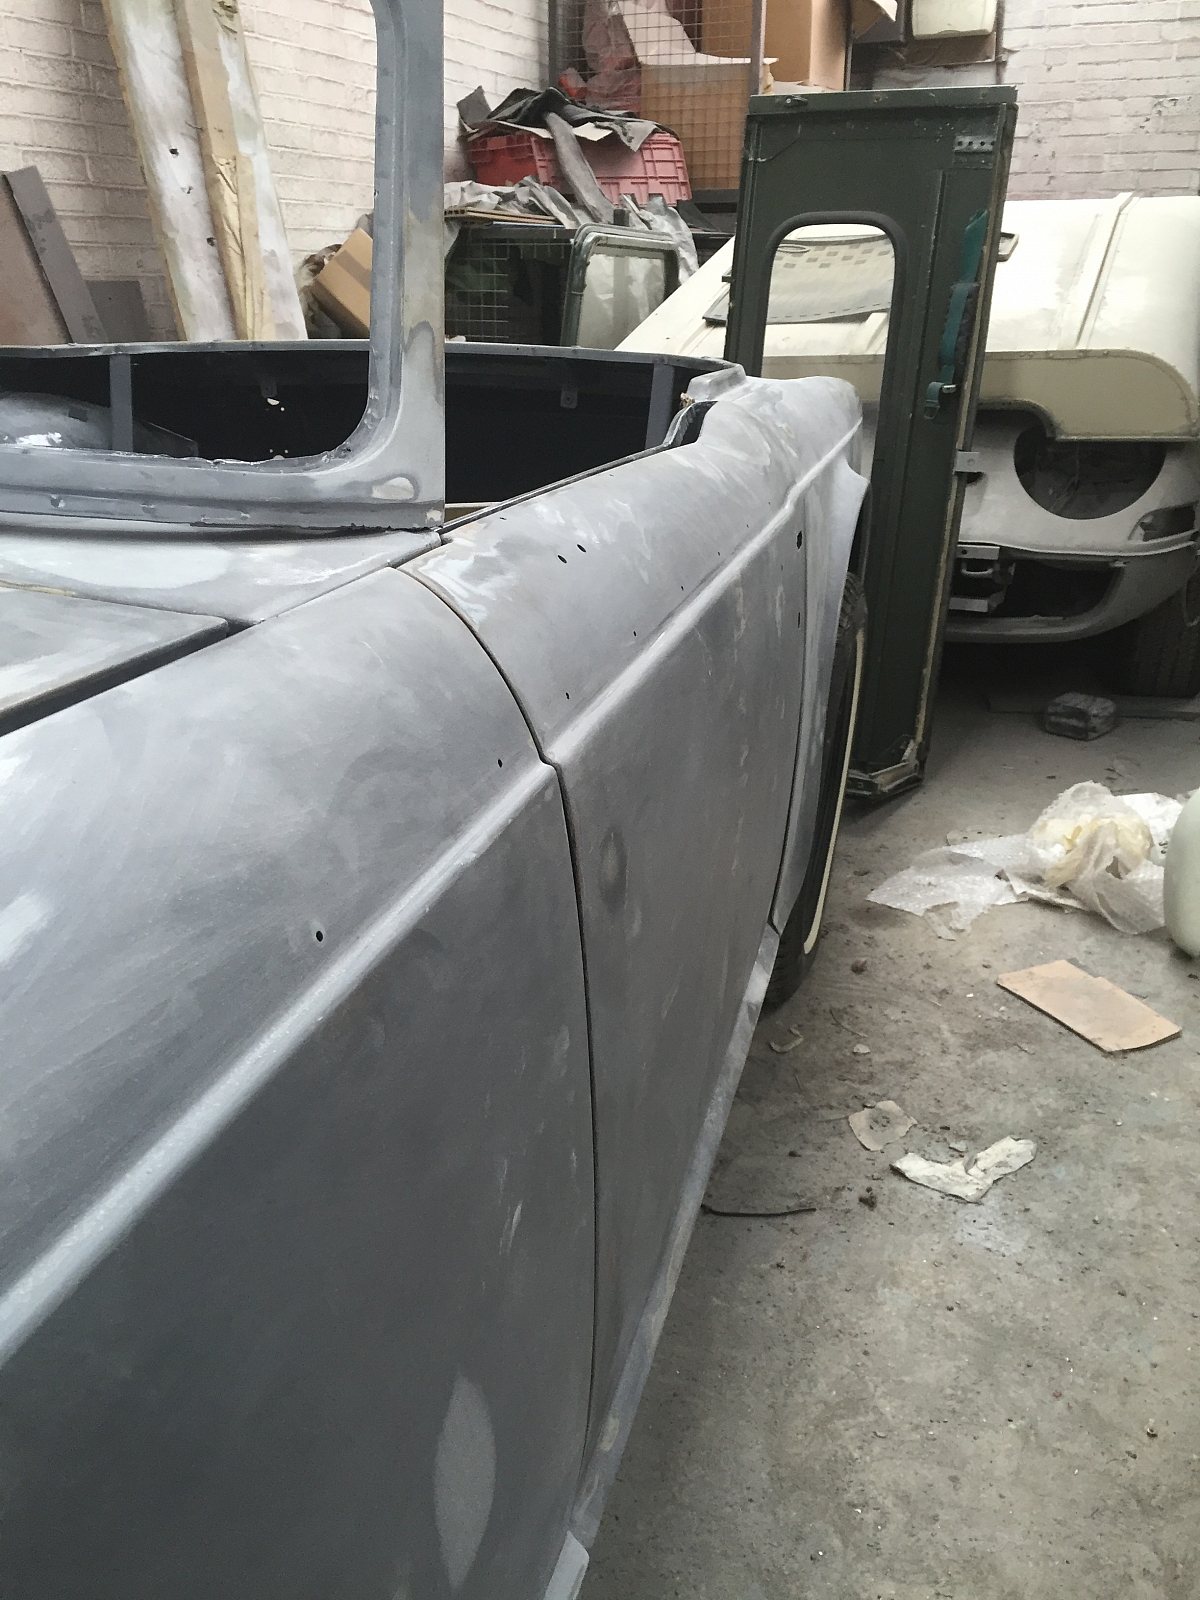
The chassis has now been separated again from the body, so that some small and final underneath repairs can be carried out and finished off, by Malcolm, the fabricator ( M & J Classics ). These body pictures were taken just before we lifted her off. Then we brought the chassis home.The weather was not kind, but heh, it's all protected.
Top bonnet corners strengthened
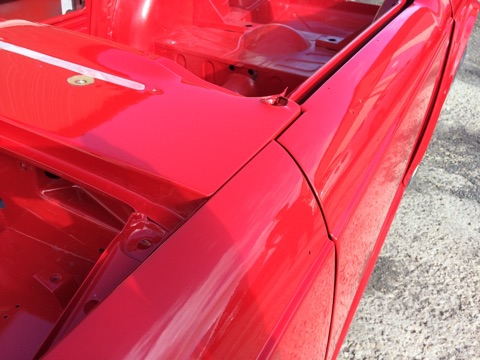
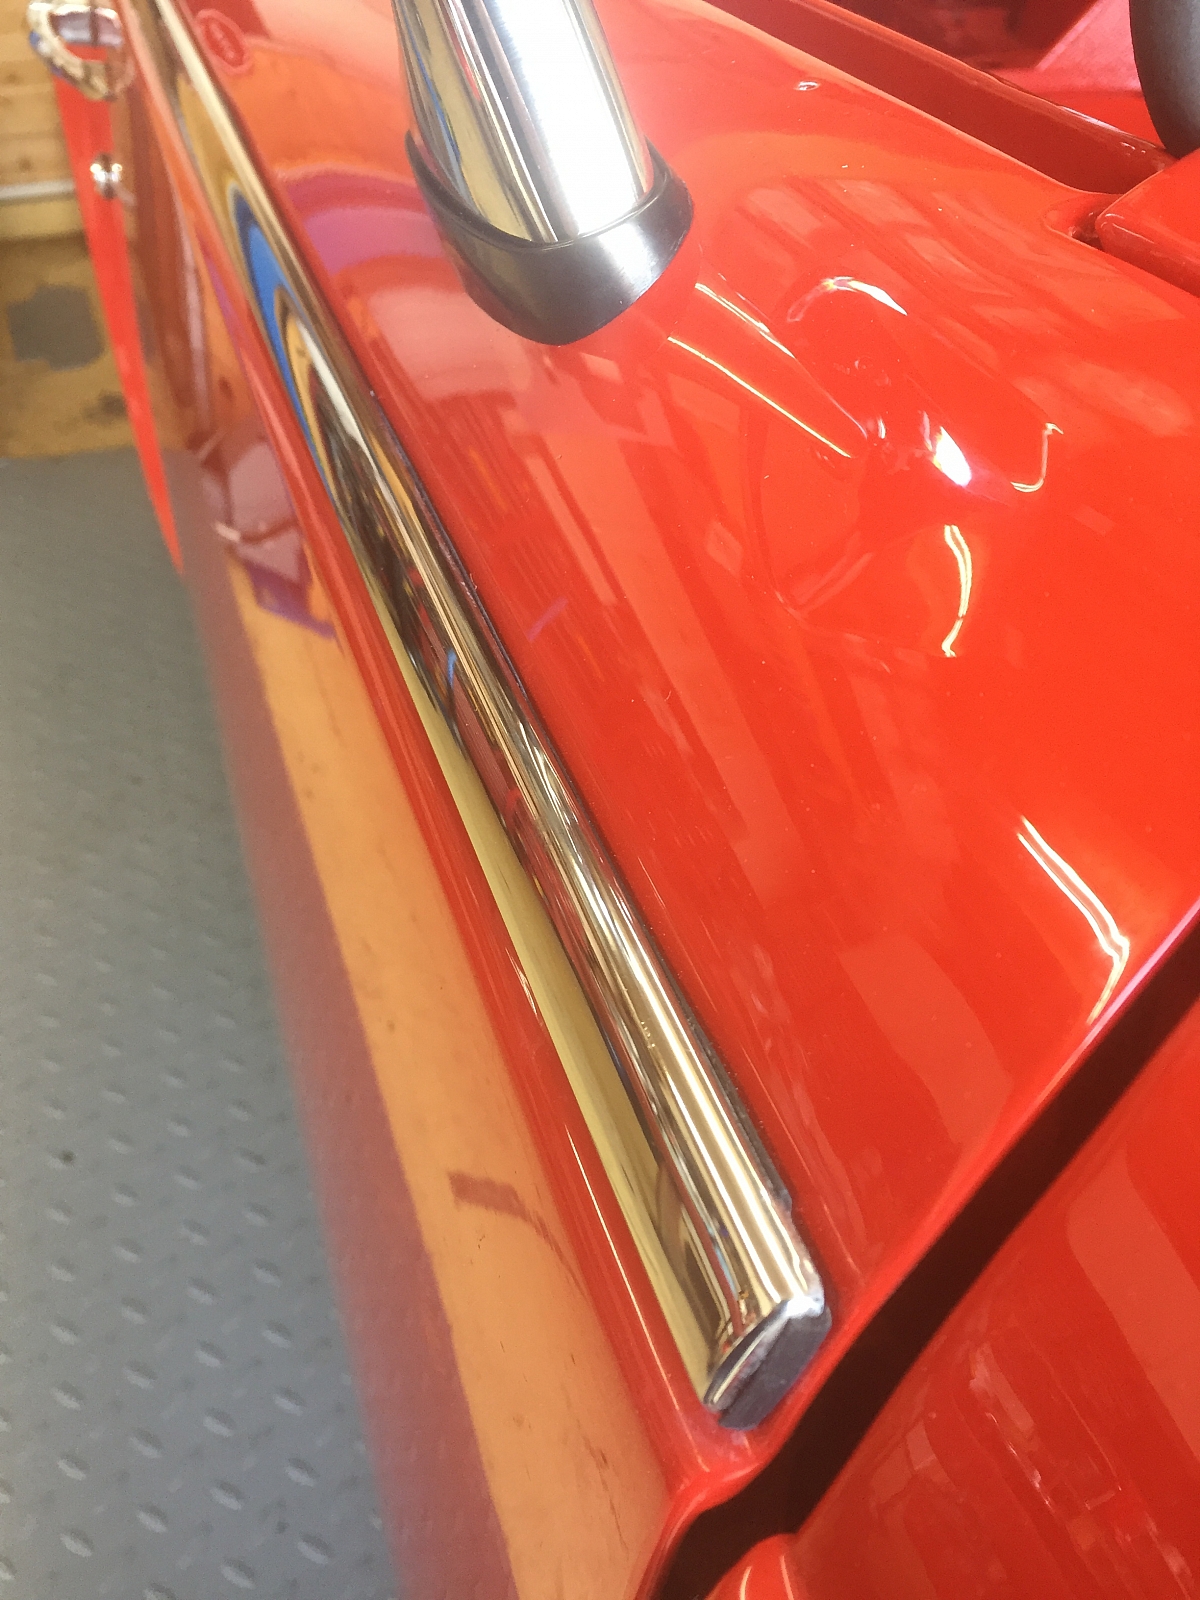
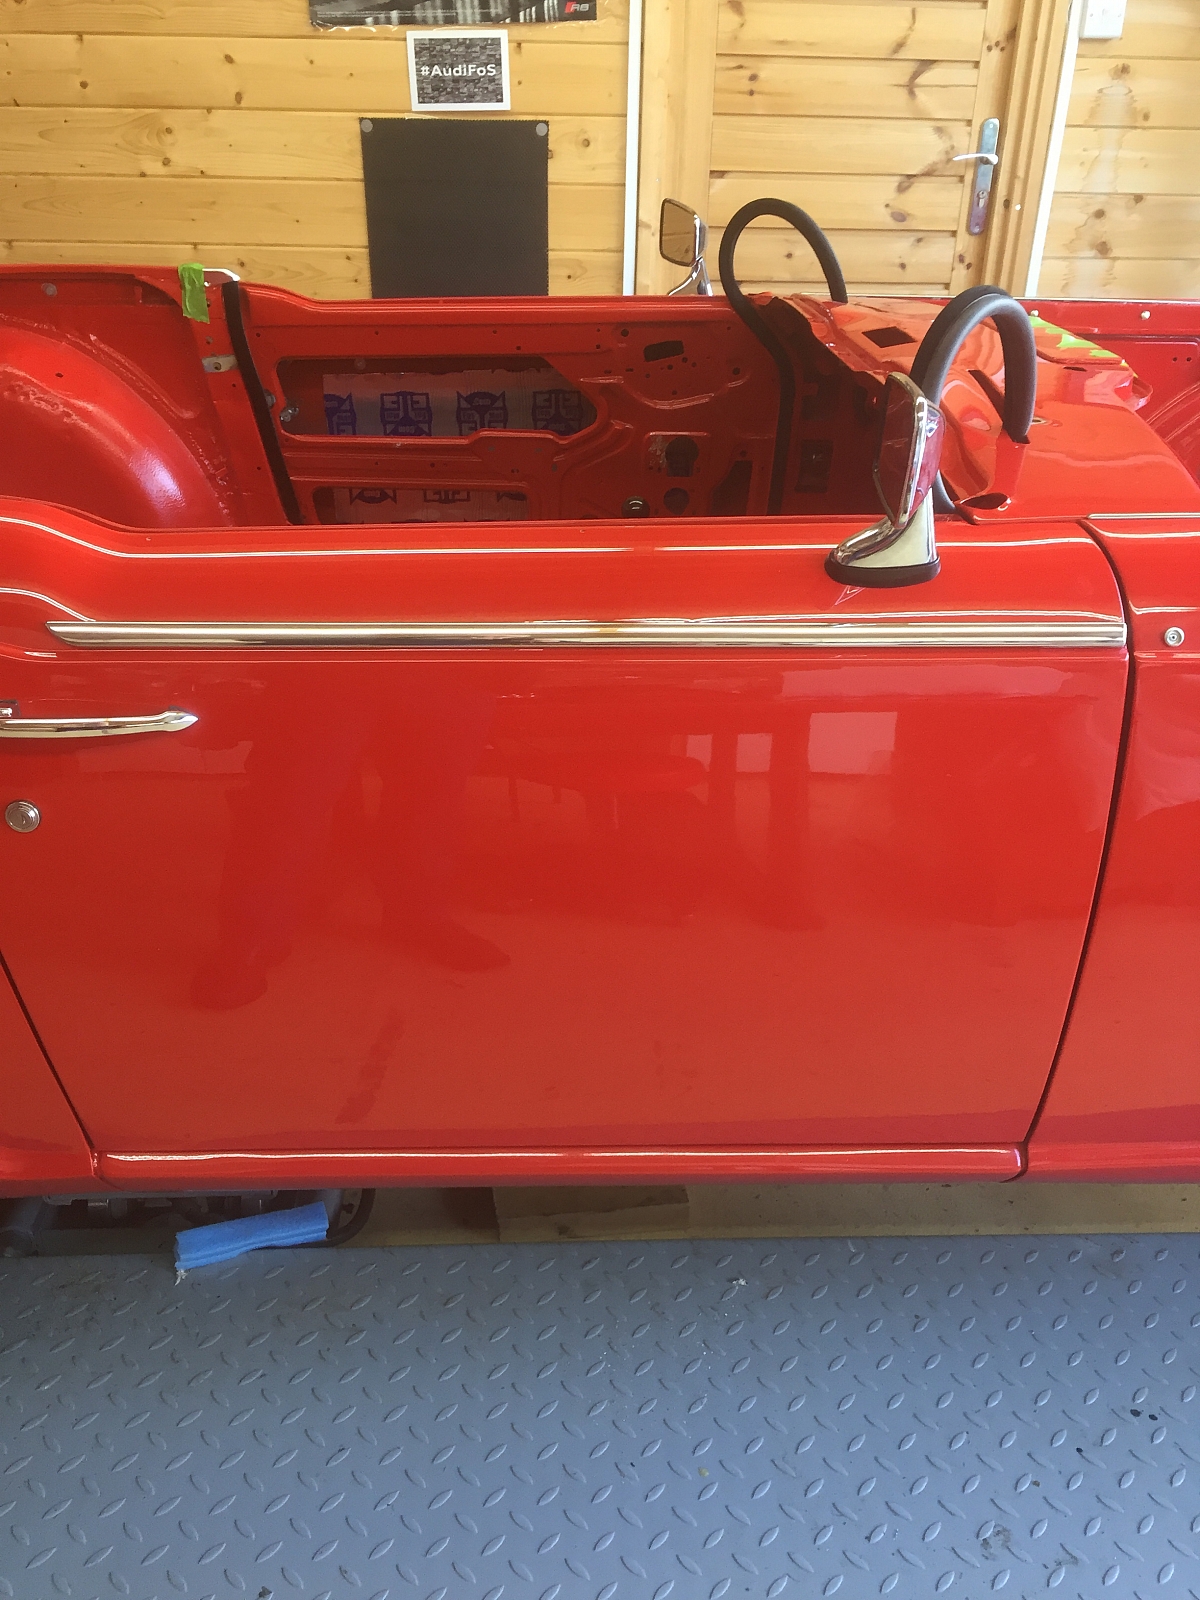
Door gaps looking good

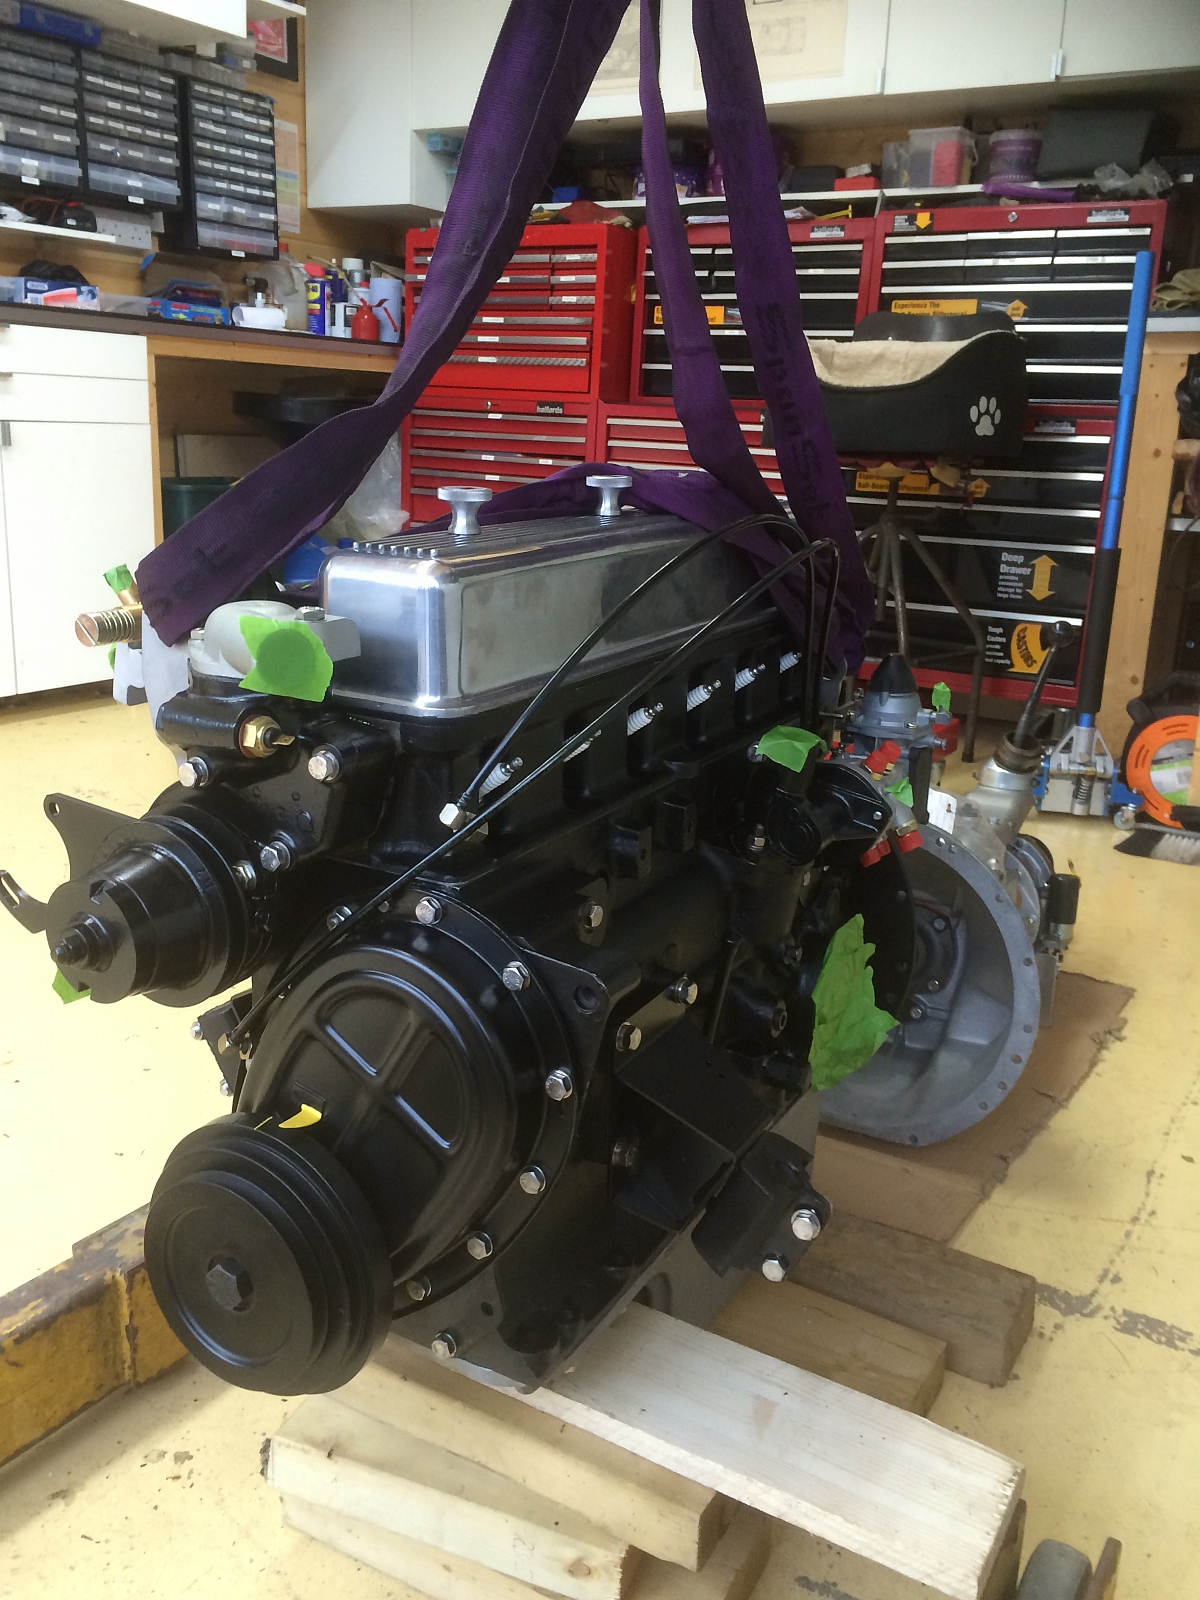
Now need to clean the chassis again, await the machined thrust bearing carrier. Fit the gearbox to the engine and then mount both onto the chassis.. It's coming together... !!
20th April 2016
Here's a picture of the machined thrust carrier. Just slightly machined on the thick side to accommodate the square pegs. So to summarise. Stag forks, with Triumph 2000 square pegs. Hopefully a useful mod.
18th May 2016
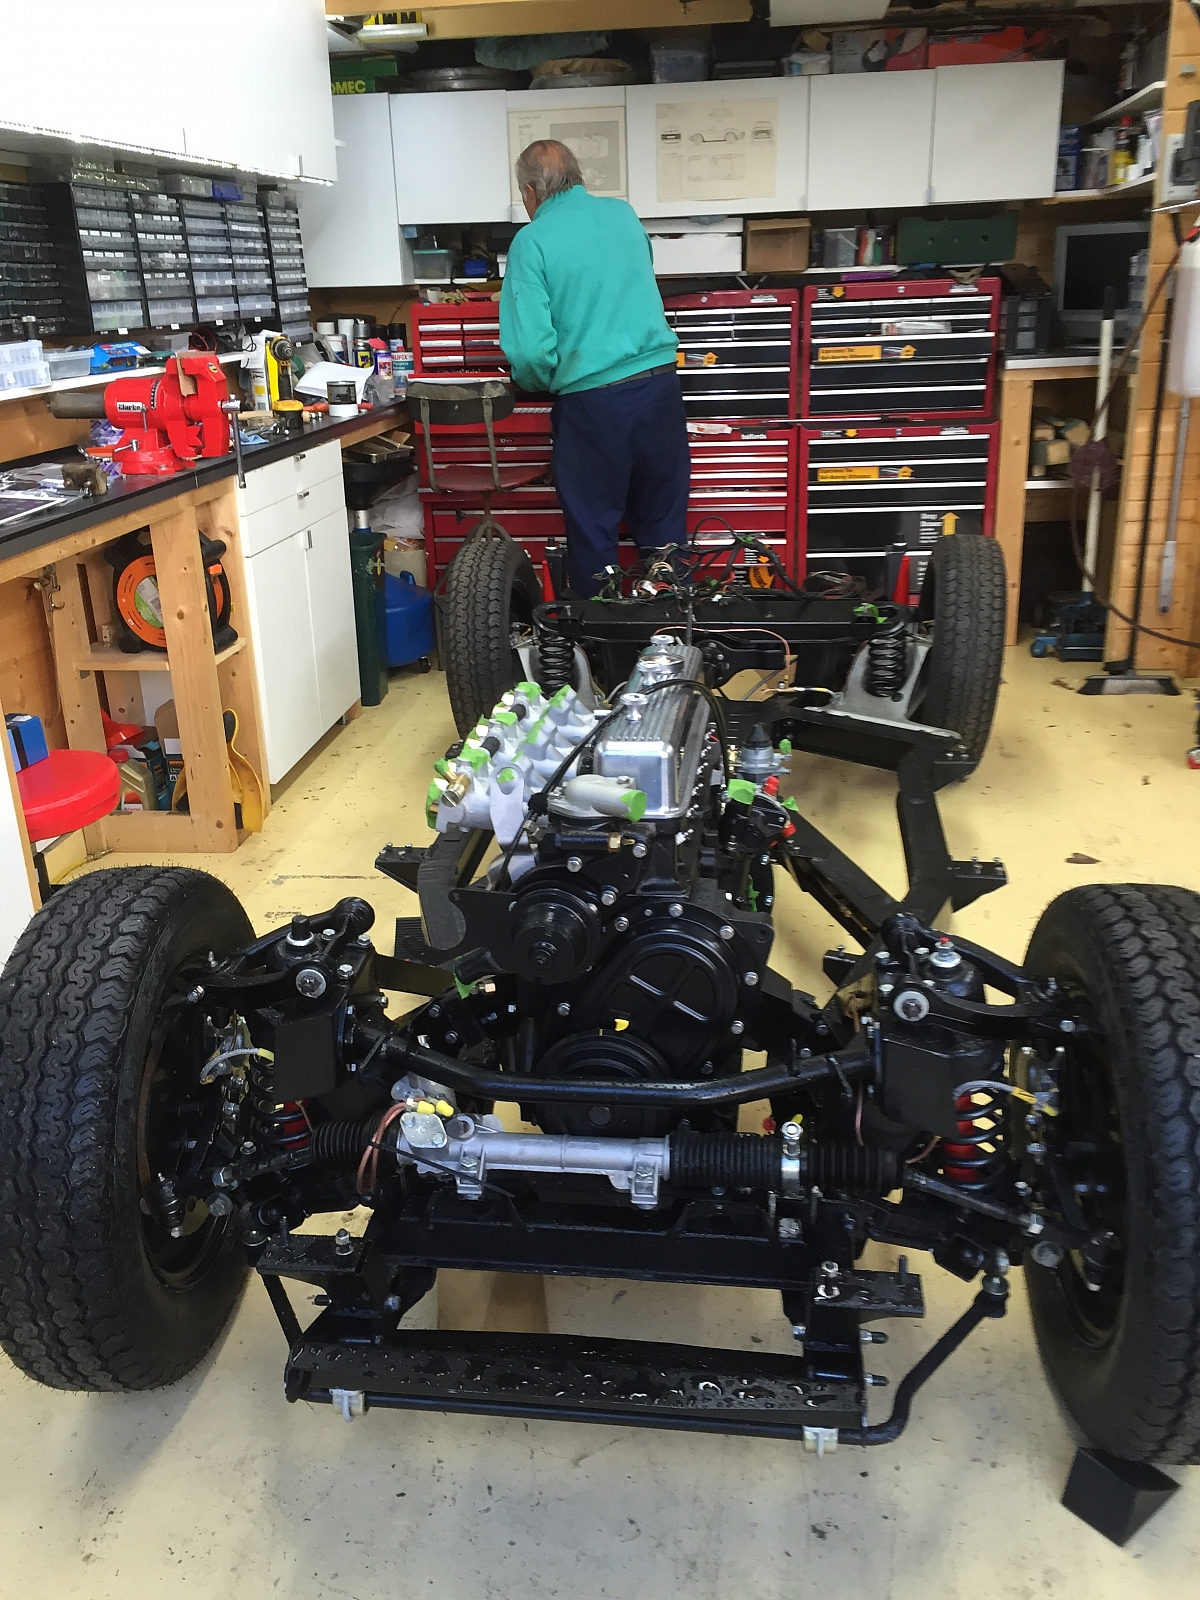
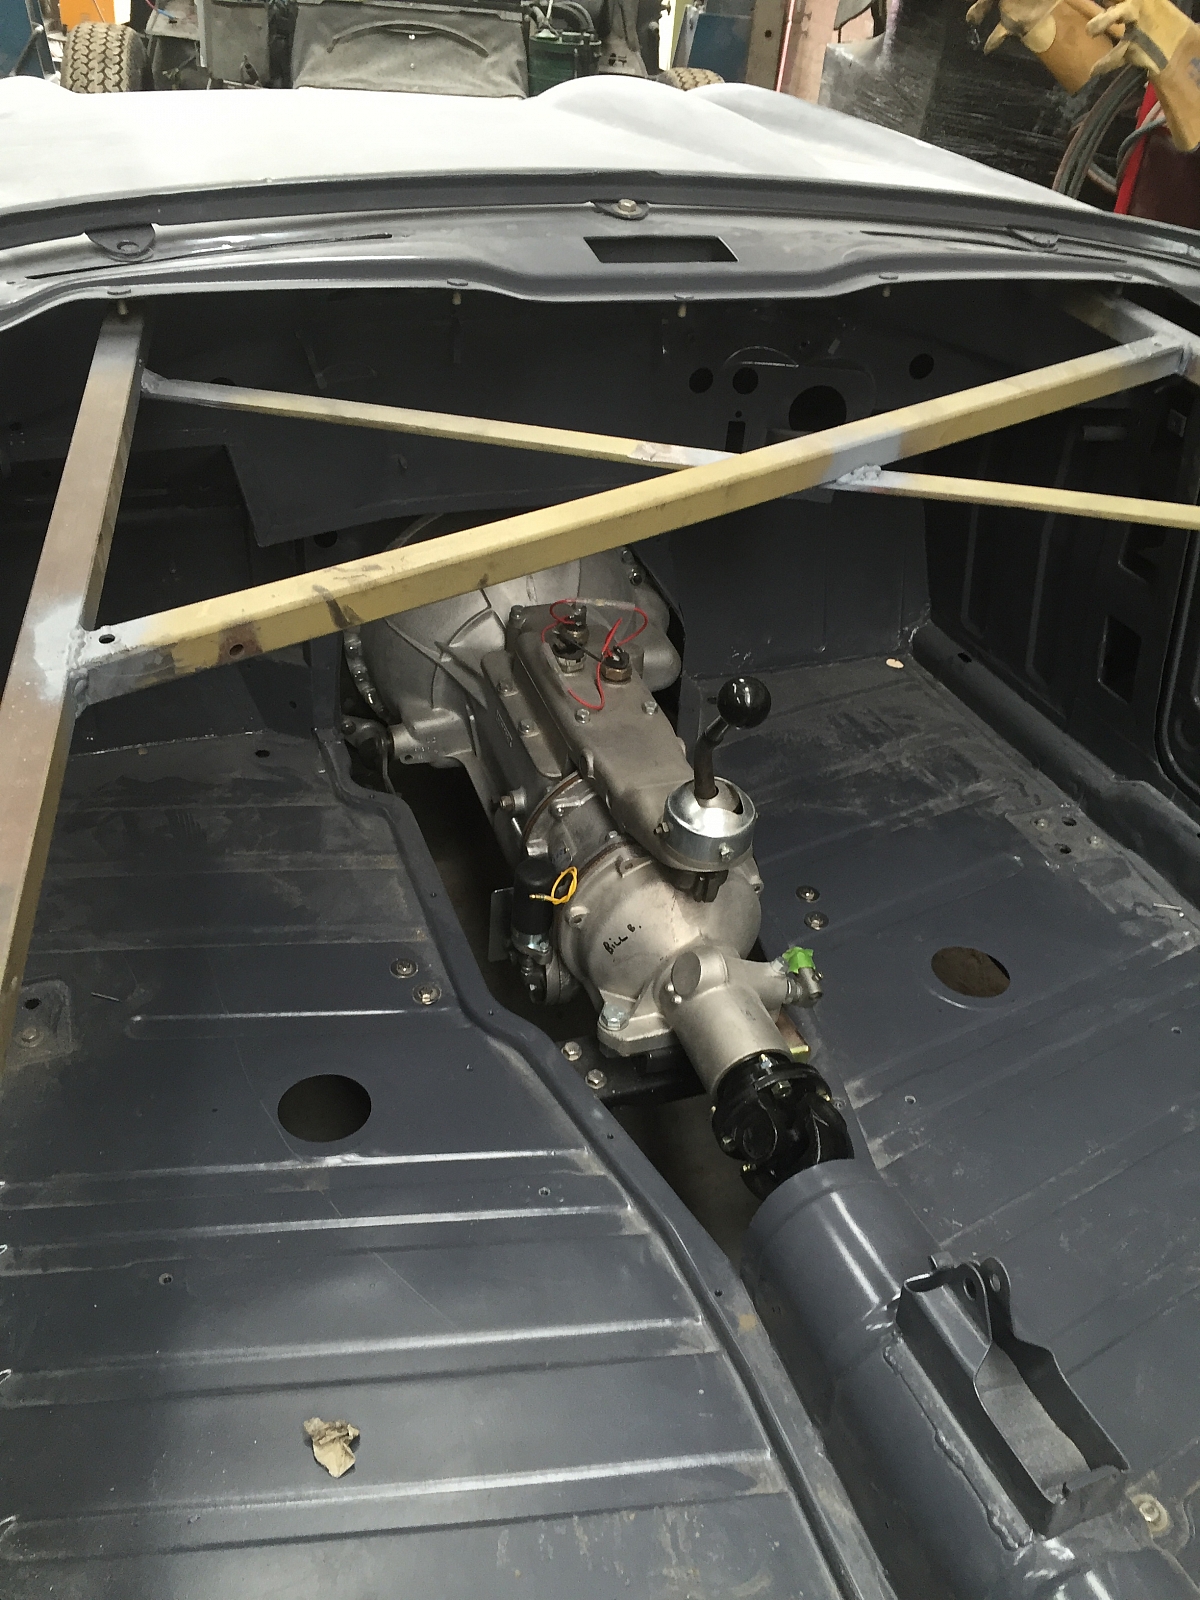
A significant moment, with the help of Paul, the engine and gearbox are now back together and mounted back onto the chassis. A few more things can now be fitted. Slave cylinder, speedo drive, etc, perhaps the fuel lines.

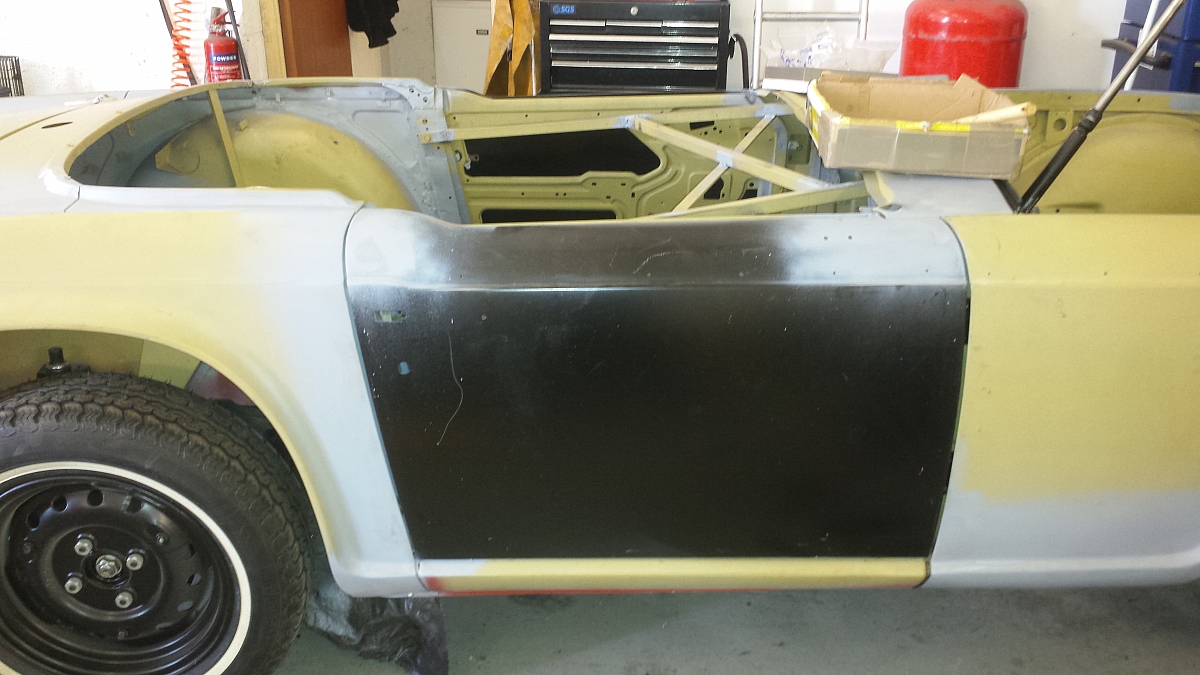
Background activities. Currently planning the wiring/loom installation + some extras, supplied from a separate fuse box for front & rear fog lights, thermo fan, interior lights and so on. The bumpers have been sent to the chromer's, the seats have been purchased. Fiona is on a mission to source the steering wheel, and the dash board and door caps. The speedo and rev-counter have been sent for re-furbishment. The smaller gauges have been purchased. The next moment will be (hopefully) the body being completed by the end of this month. Then it will go to the painters for approx 4 weeks. So perhaps a rolling/painted chassis and body by the end of June. We will see. More soon.
May 23-24, 2016
Drilled holes in the boot lid aggh ! Scary. Then trial fitted the boot rack. All good though. Much rather do this before being painted. The boot rack is an adpated MX5 Mk1, stainless steel type. 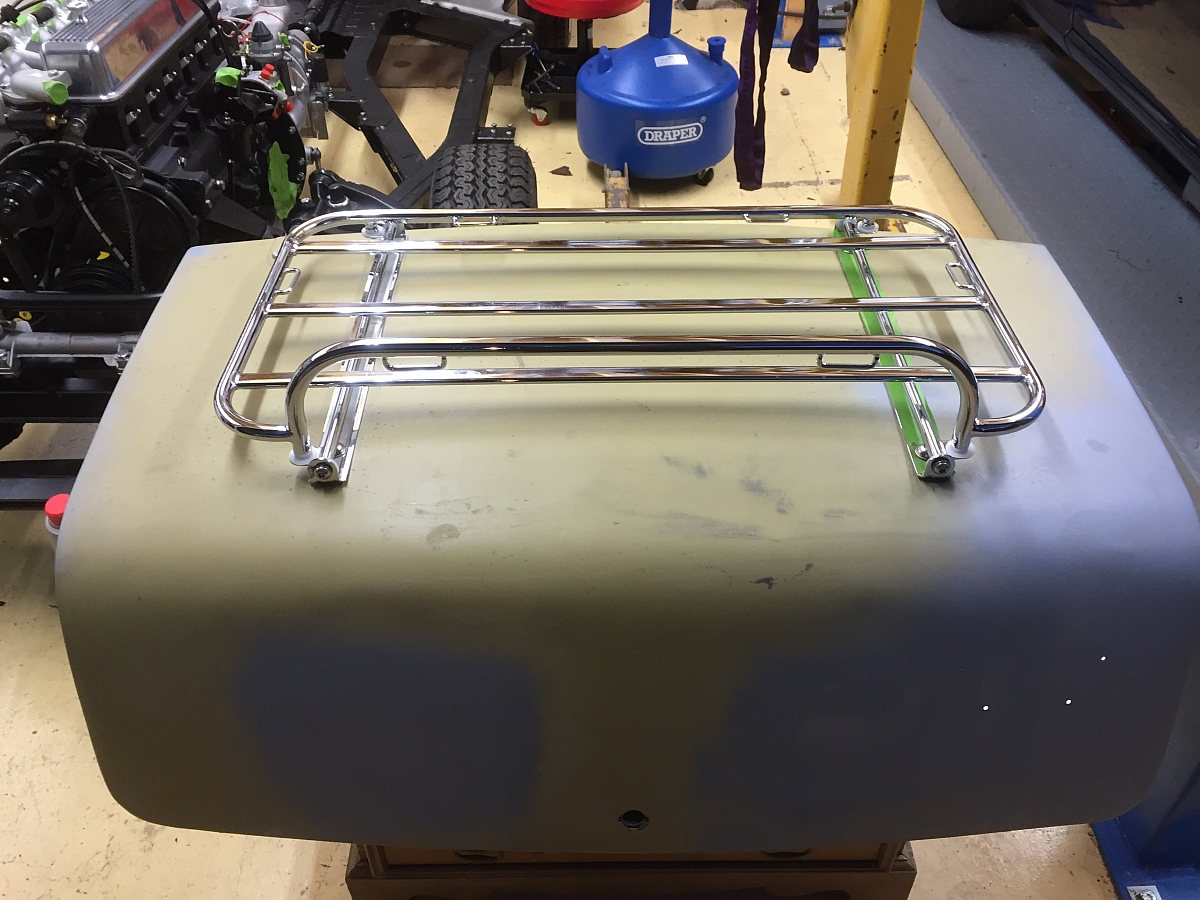
May 27th 2016
The next big step taken. Collect the body and panels from Malcolm (J &M Cars and Classics), Lewknor and take them to Gavin at The Paint Shop Pros, Hogshaw, Bucks, for the final fettling and the painting. I hired a luton tail lift and got hold of an old mattress to rest the body on and load of blankets to protect the panels. All went very well with the help of Fiona, Paul, and Joe, and of course Malcolm, John and Gavin. Exciting, as this should take 4-6 weeks. probably 6 weeks. In the meantime, on with the wiring plans.
30th May 2016
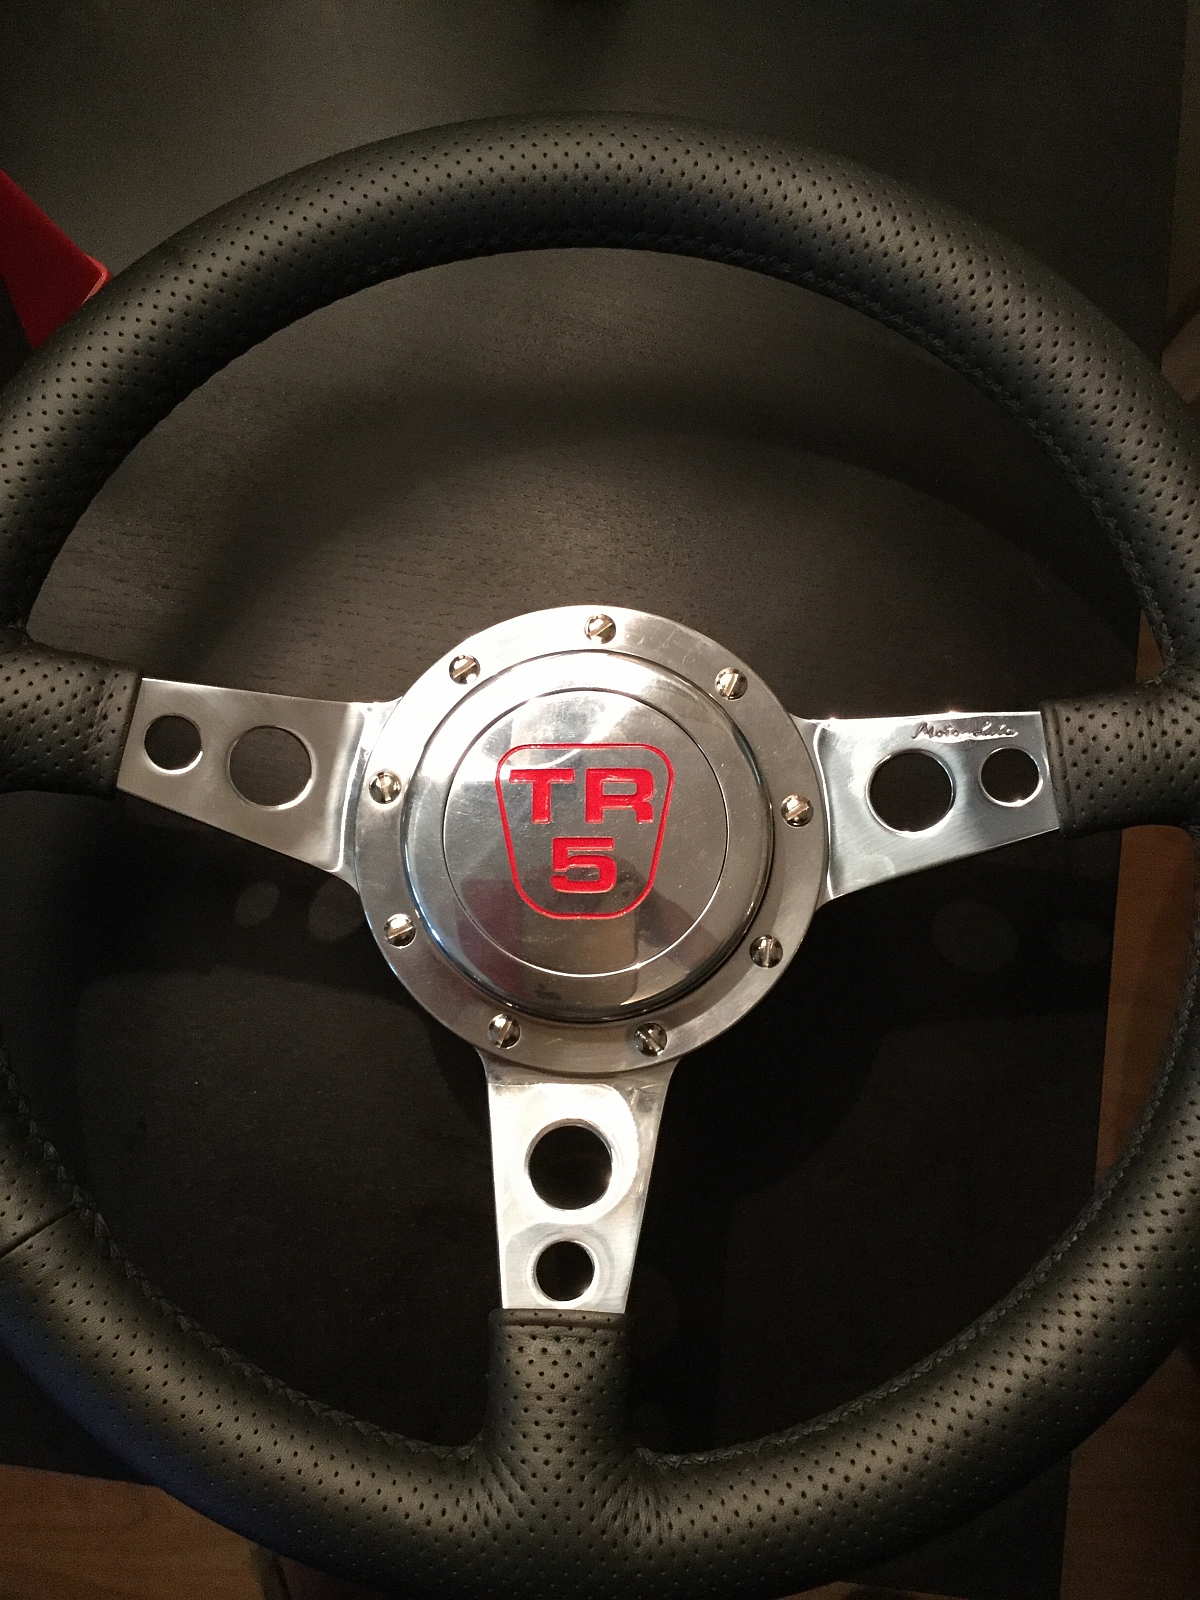
A side project now completed. The steering wheel and horn push. Specially made. Nice
1st August 2016
A re-assuring moment.After waiting for 3 weeks, the Paint Shop have started prepping the car for painting. The 1st stage was to paint all the external panels with expoxy primer.
Also the drain pipes being fabricated for the front wings - Sept 2016. Didn't like this design, so we have now changed it to a rubber option.
10th August 2016
The body now painted in epoxy undercoat and the panels being trial fitted. After this has been completed, then it will all be taken apart again. Then more epoxy undercoat, then a rub down, then undercoat. then another assembly. Then apart again for final painting..
19th August 2016
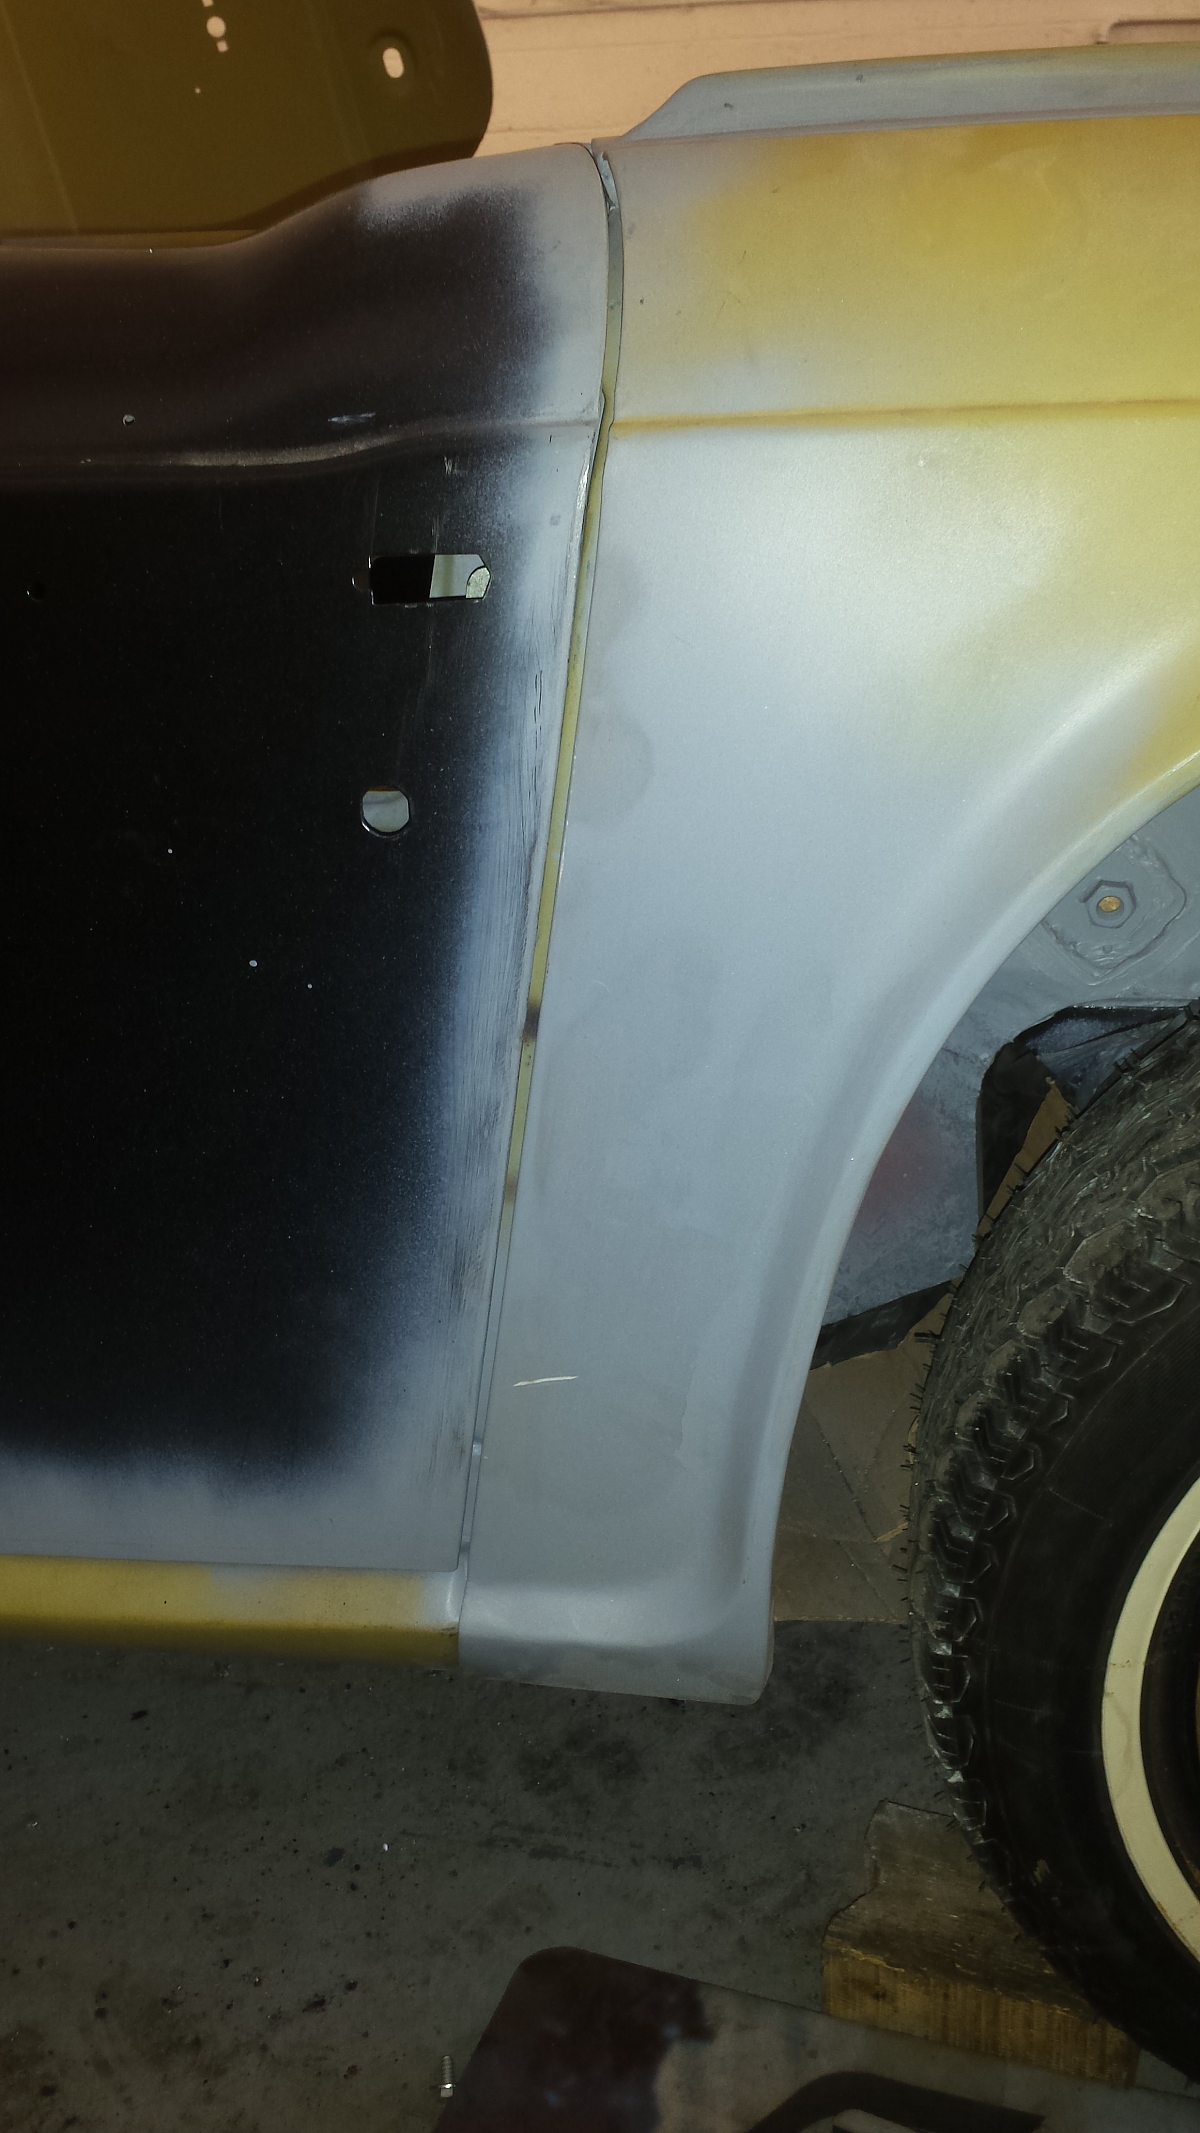
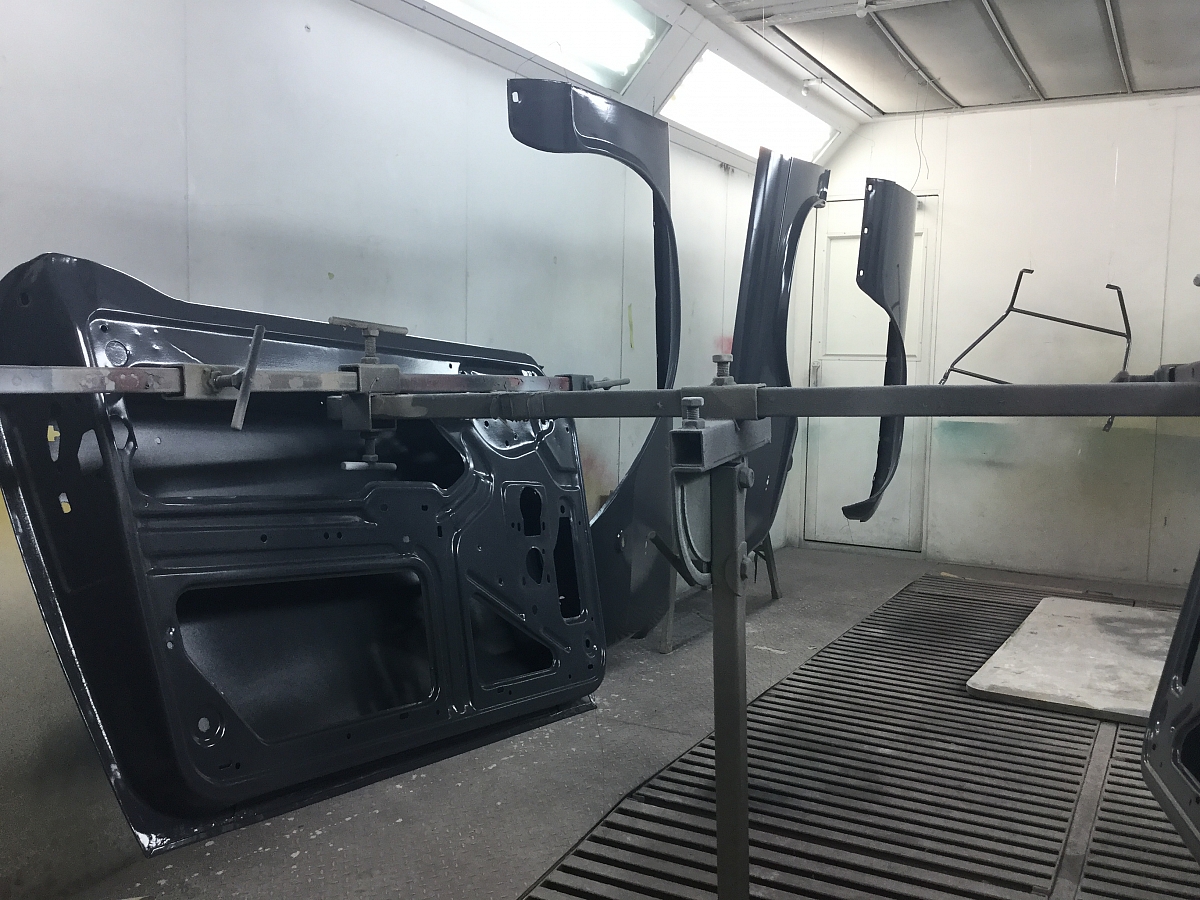
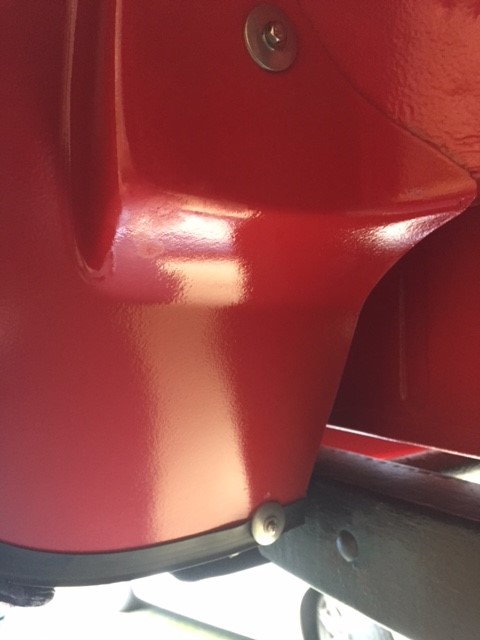
The body has now been put on the chassis for more lining up of the panels etc. Before this was done, the gaps and especially the bonnet were not lining up properly. From this experience it's very important to carry out the line ups with the body fully bolted down to a loaded chassis. i.e with the engine and gearbox.
These pictures have been taken when more accurate line up's have been achieved together with positioning holes so that it can all be put back together in the same place after painting. Still some more to go, but generally 90% there.
16th September 2016
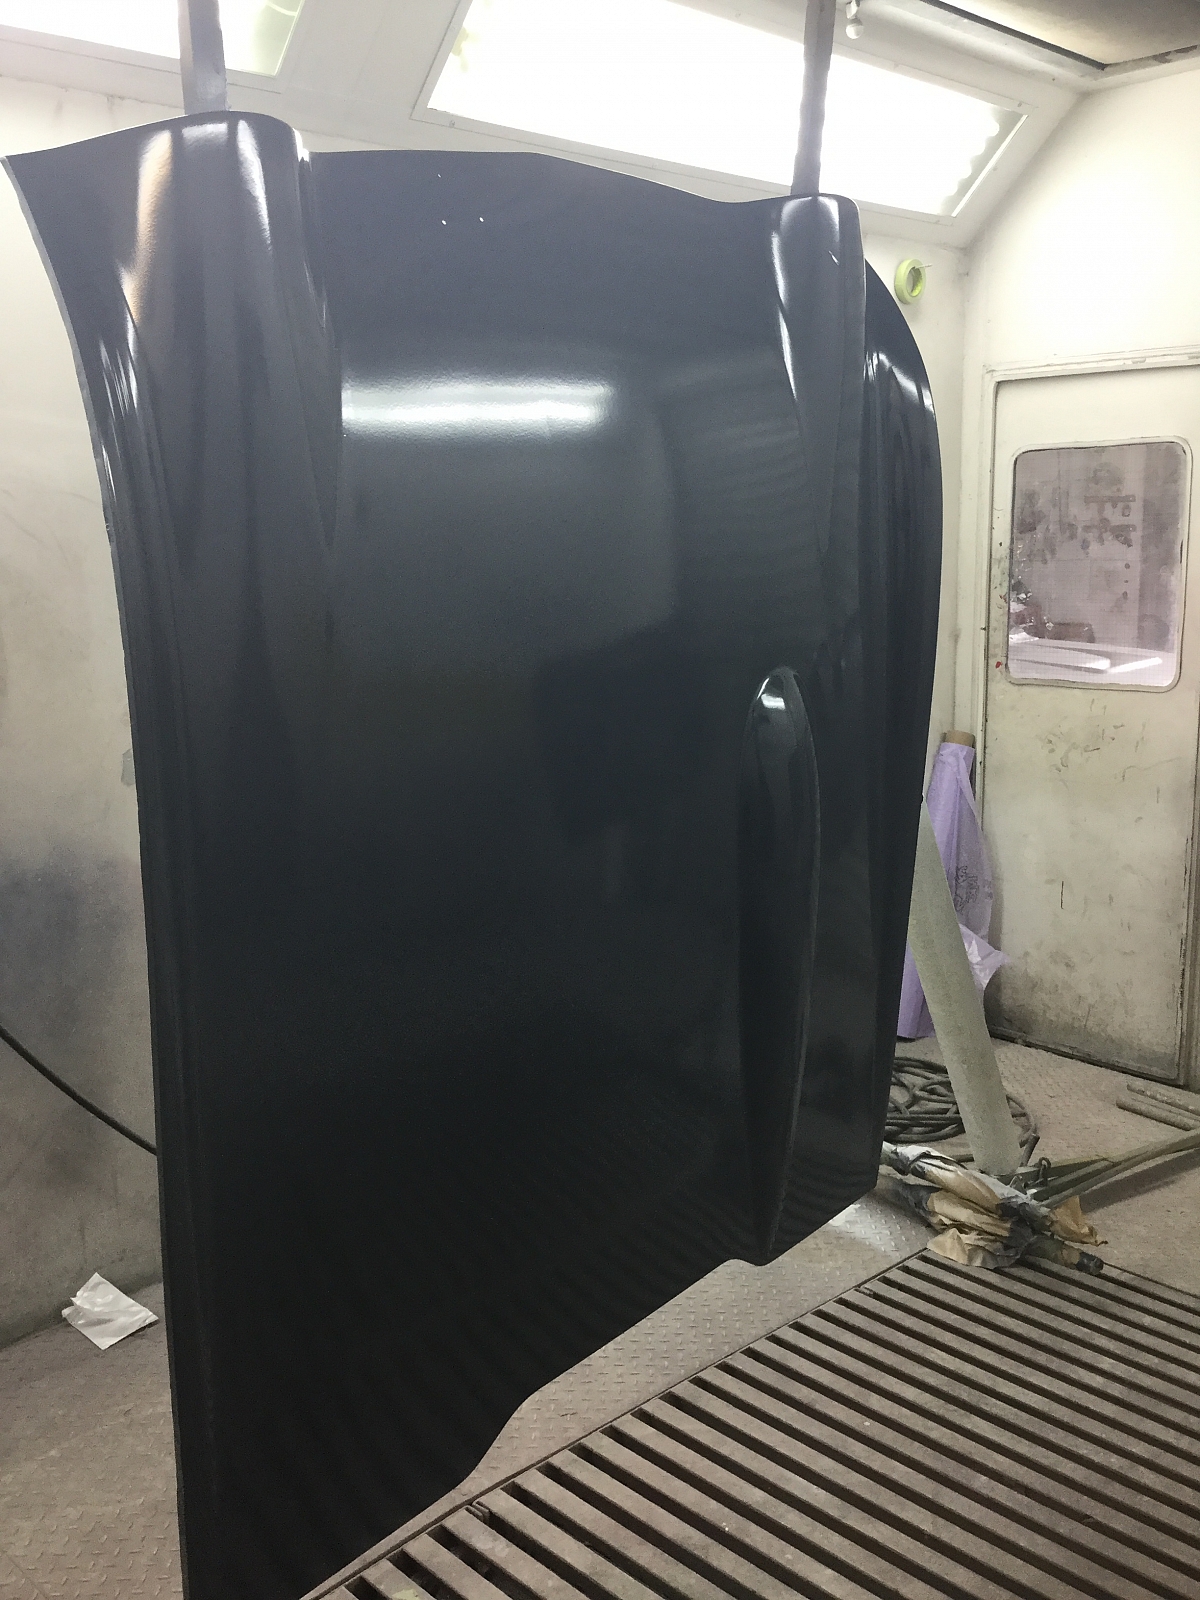
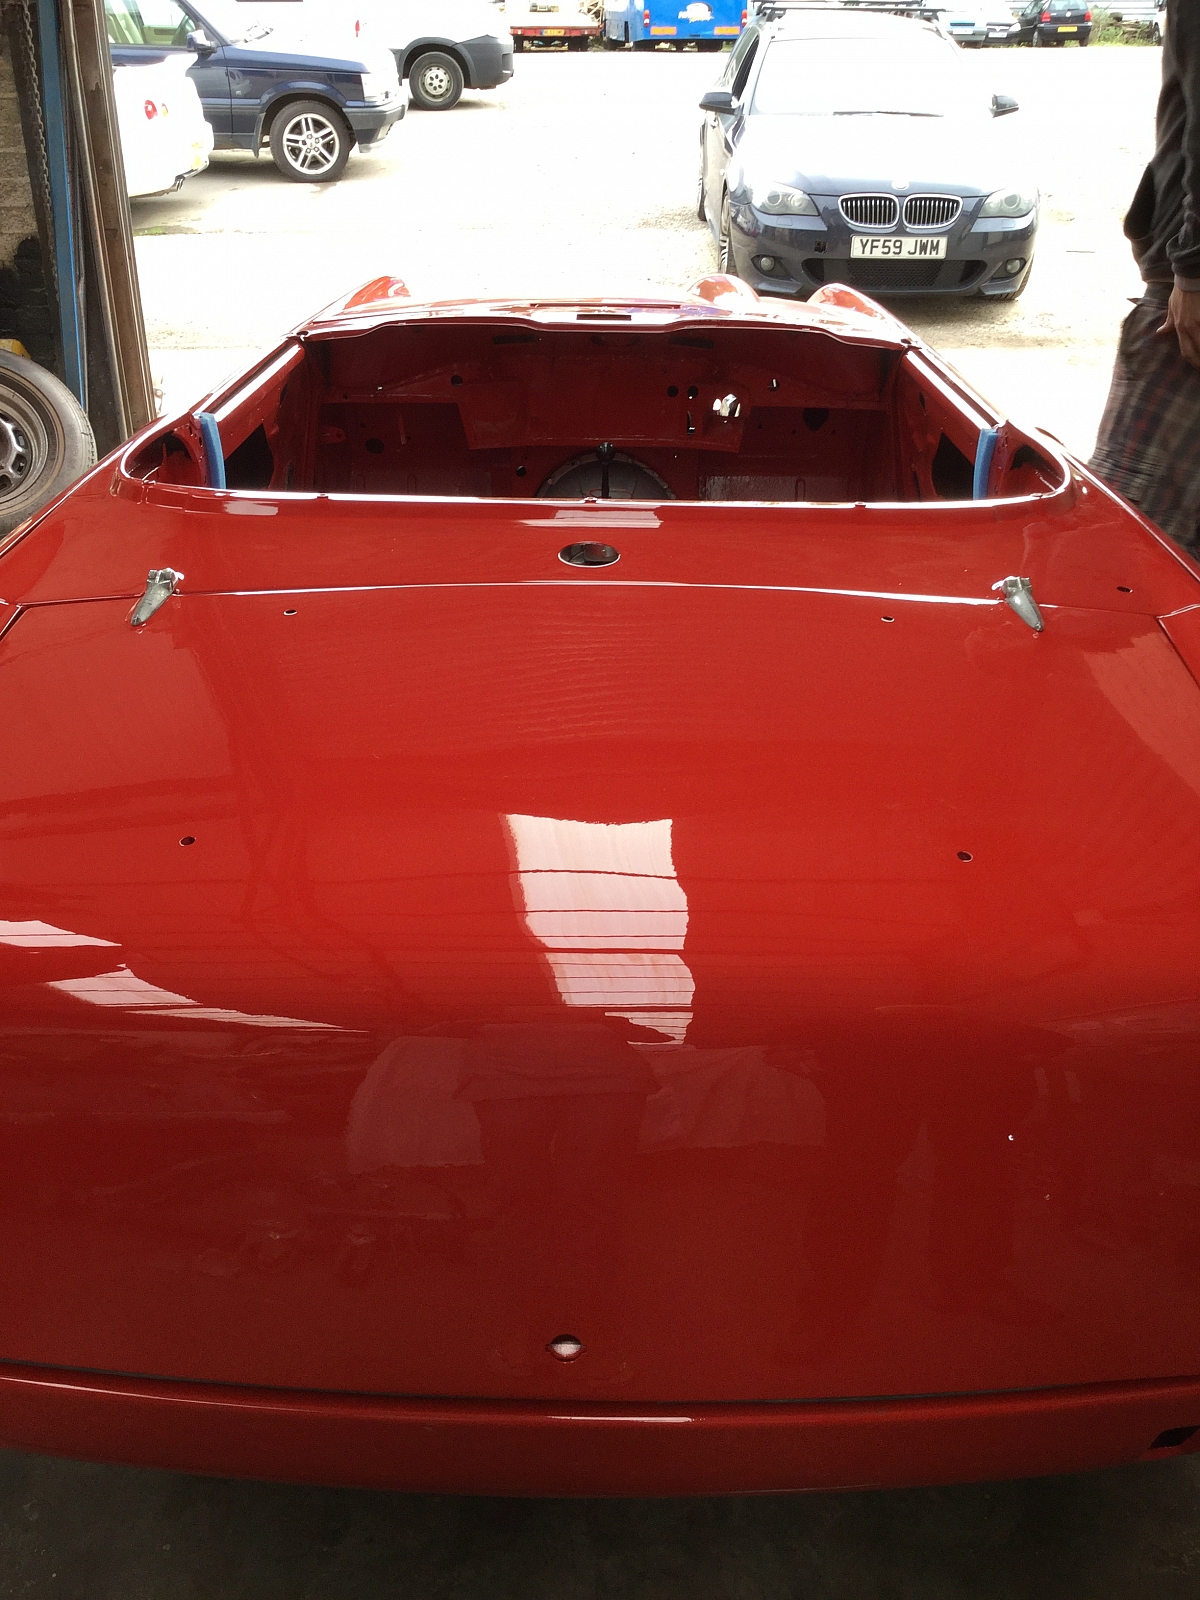
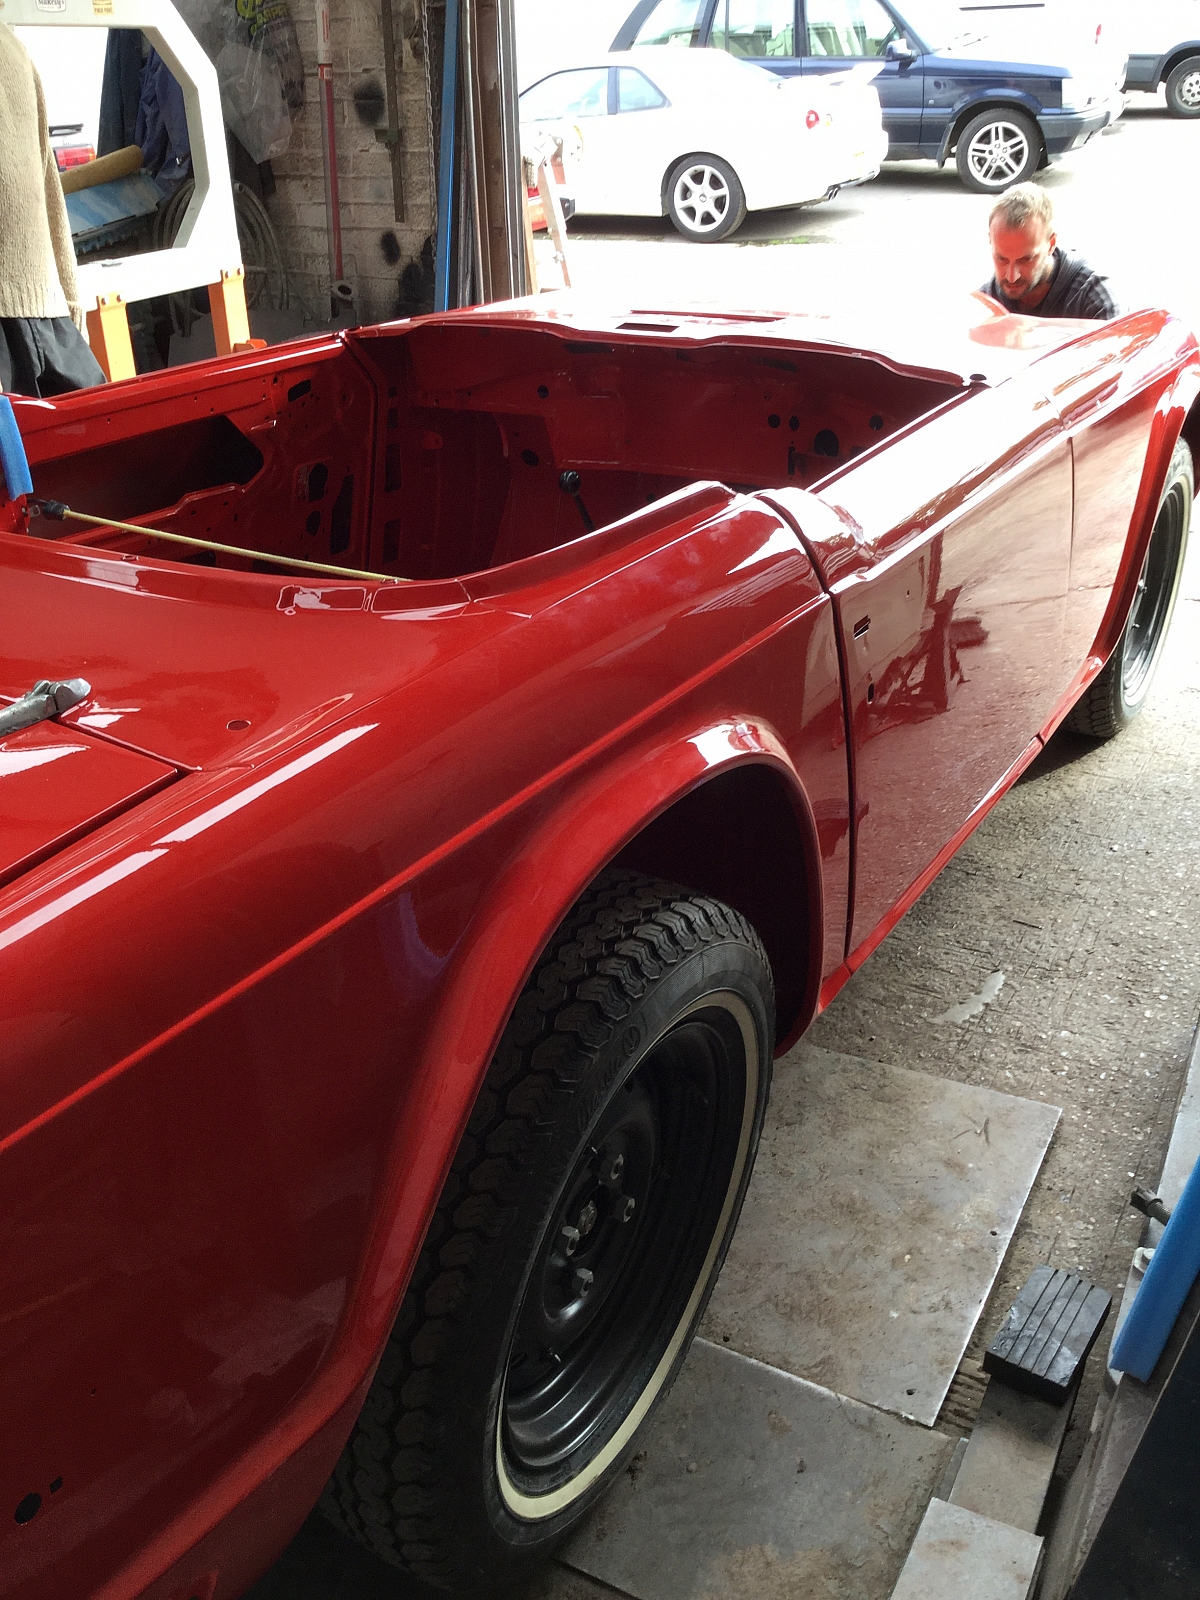
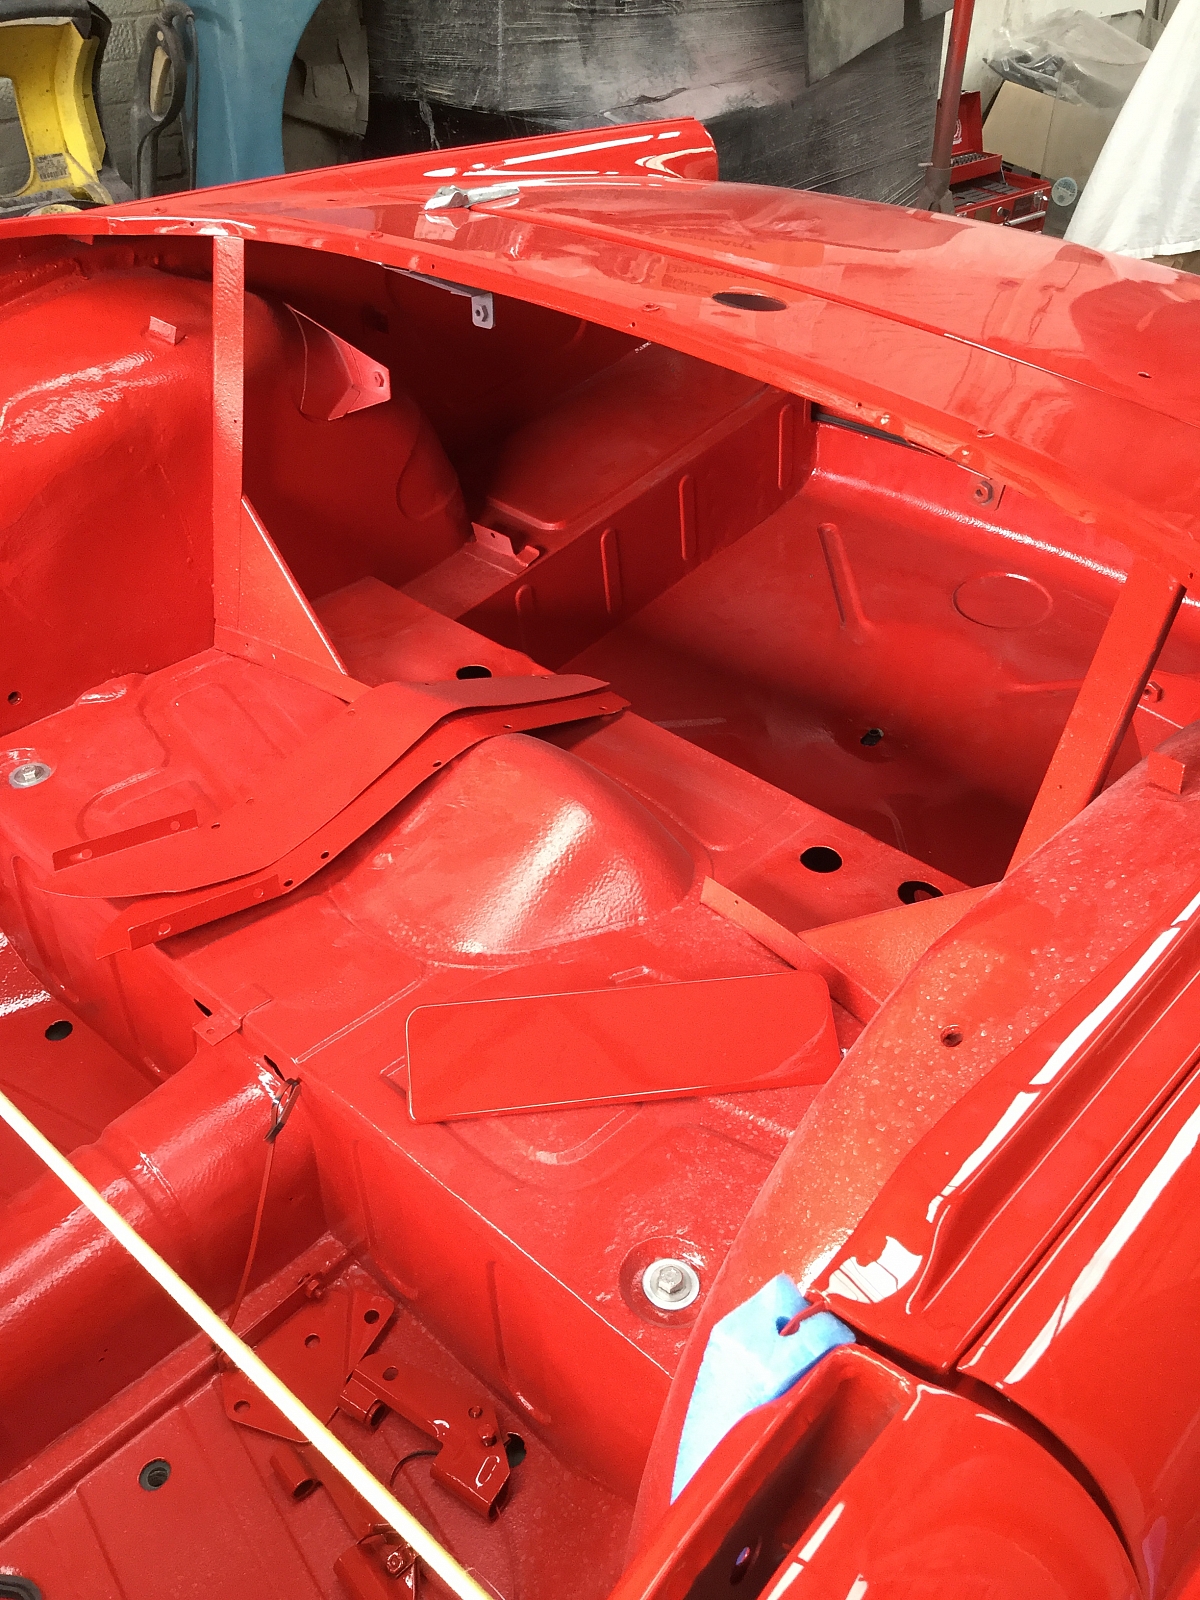
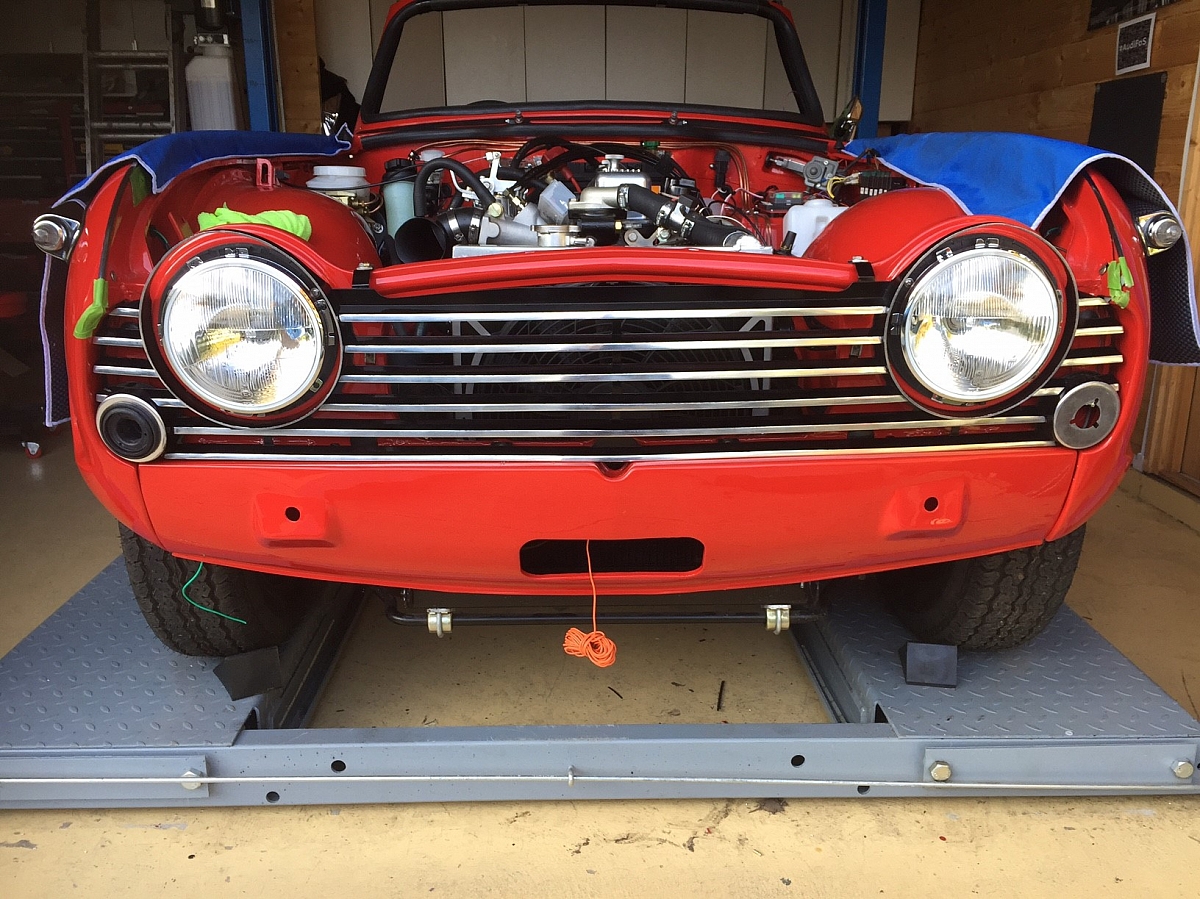
Woh, At last, after a much deliberation, the colour has been chosen ! The body and panels have now been painted in Triumph signal red. Paint code "RAL 3001"

28th September 2016
And now the body and panels have been lacquered. Just the bonnet and boot lid, windscreen frame and wing trims etc to be fitted for transportation purposes. Then on Thursday 6th October she is booked in next door to have a tailor made exhaust system fitted by ARO Exhausts.Target date for the collection back to home is 7th October. Just got to find a covered trailer to hire.

29th September 2016
More pictures taken today. Next steps are to flat and polish, some more alignment work and fitting her jewellery, wing trims etc.
Here are the 2 guys that have done most of the work and preparations. Adam on the left is the painter and has done a wonderful job. The guy on the right (at the time of writing I've forgotten his name, doh...) but he has a bag full of enthusiasm and yet applies great care to his work. Brilliant.
6th October 2016
Now lacquered and nearly finished at the paint shop. Off to the exhaust place next door today. Pick her up tomorrow !
7th October 2016
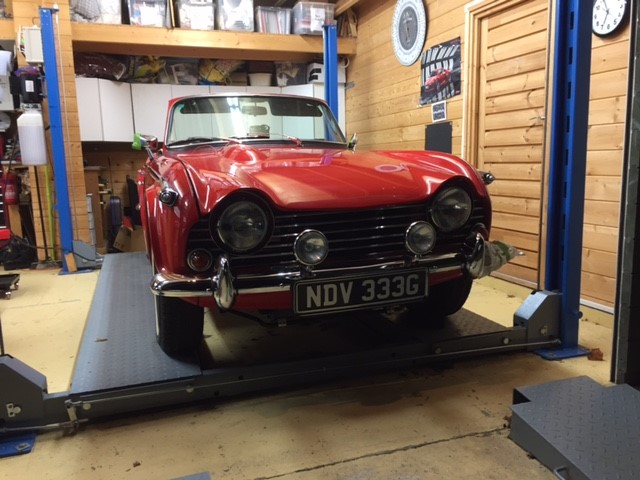
The big day. Collecting Patience from the painters "Paint Shop Pros"

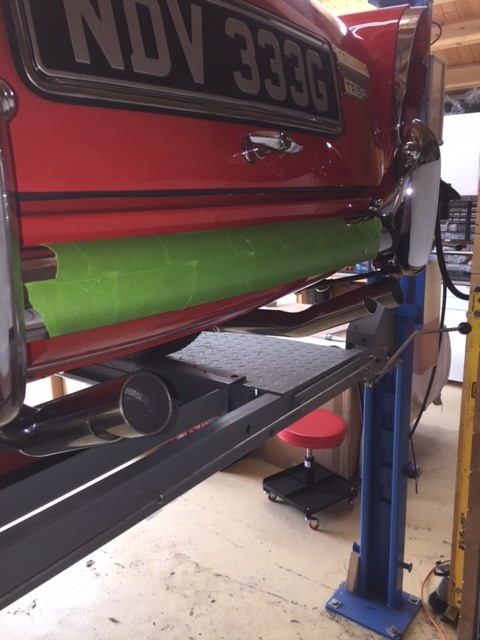
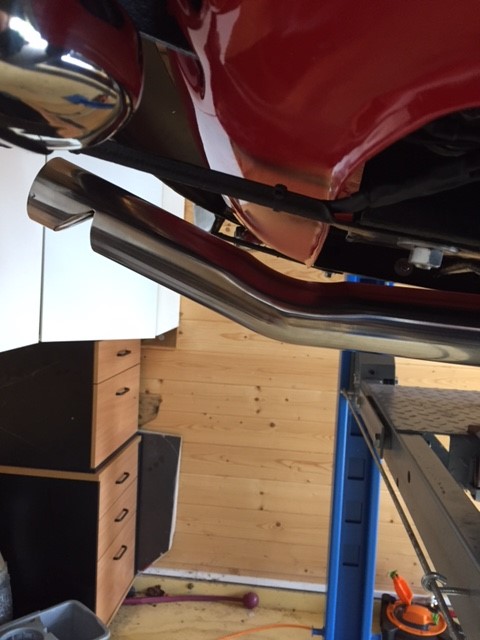
The experts ! inspecting the tailor made exhaust system fitted by "ARO Exhausts" who were next door.Very convenient. In case your'e wondering the end pipes have not been fitted yet, as they will be cut to length after the rear bumper has been fitted.
The tricky business of reversing the trailer down the drive
Made it !
Home at last with her brother
Sooooooooooooon.....
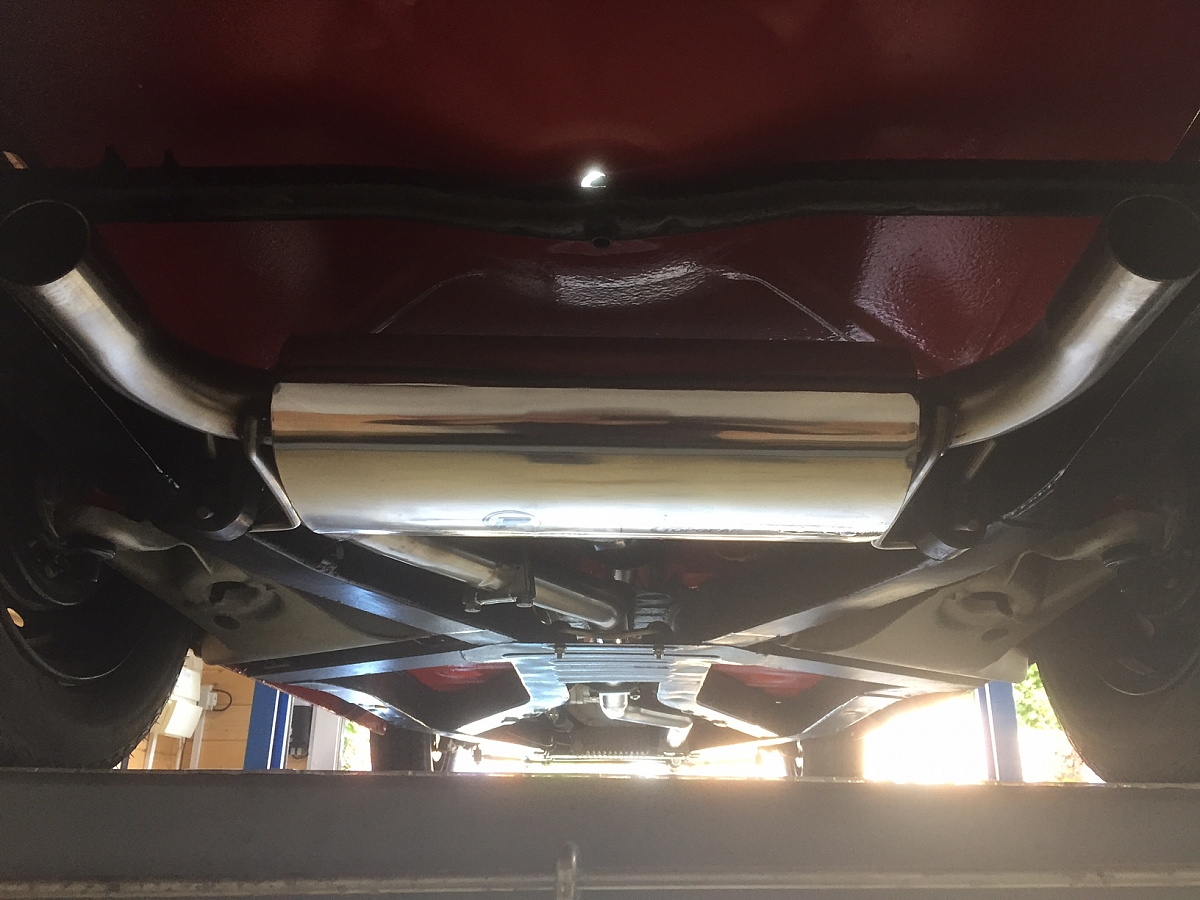
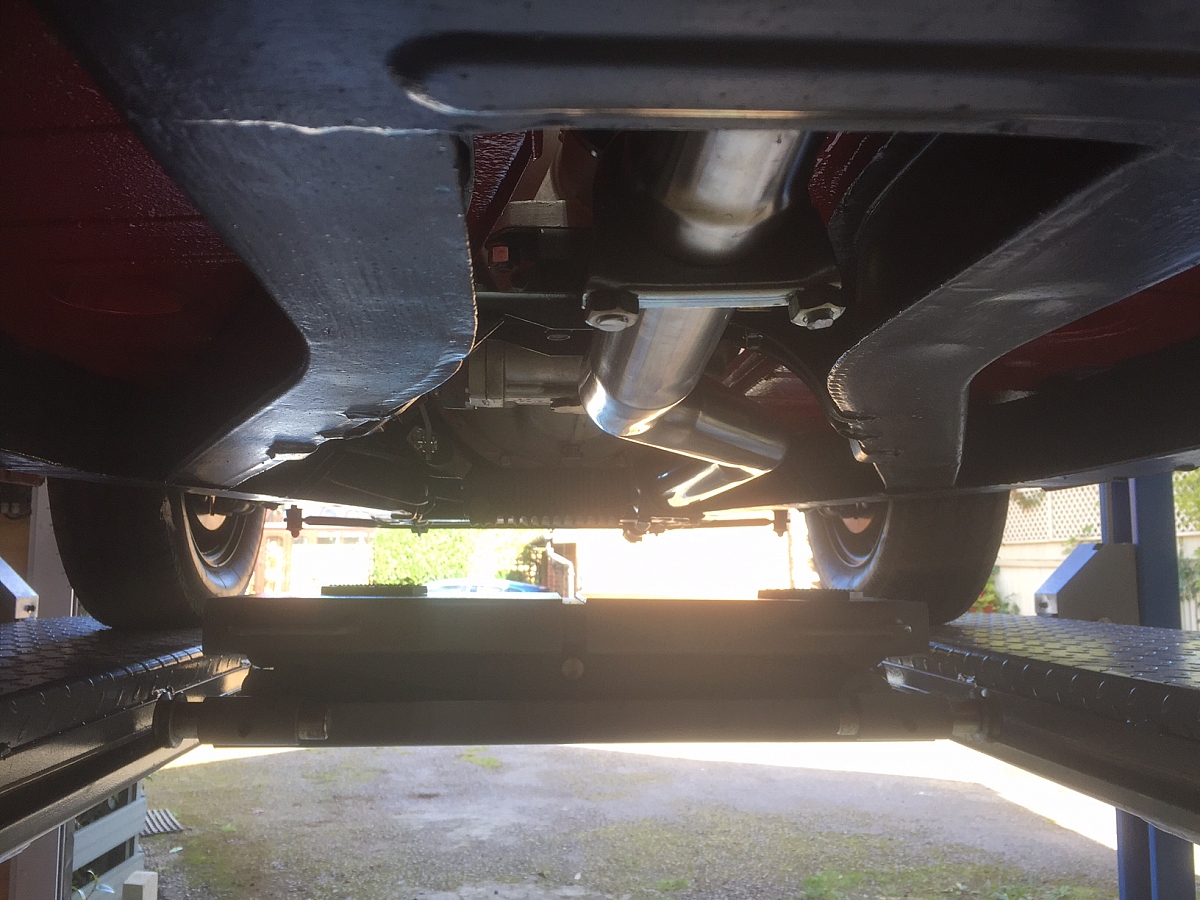
The exhaust system. All stainless steel. The total cost for this was no more than a sports system that you would get from the usual suppliers. The big bonus, is an extra 4 inches of ground clearance. I have this on my TR6. Wonderful.
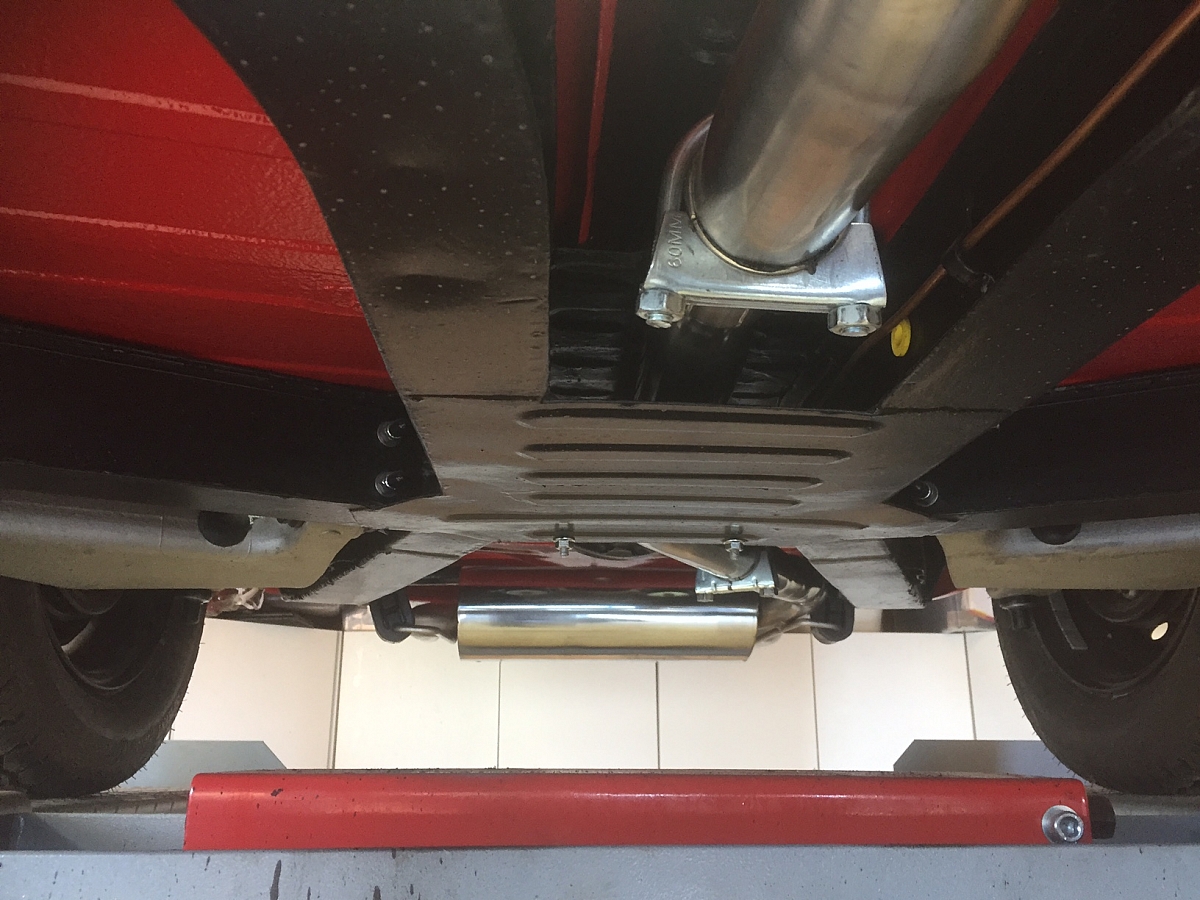
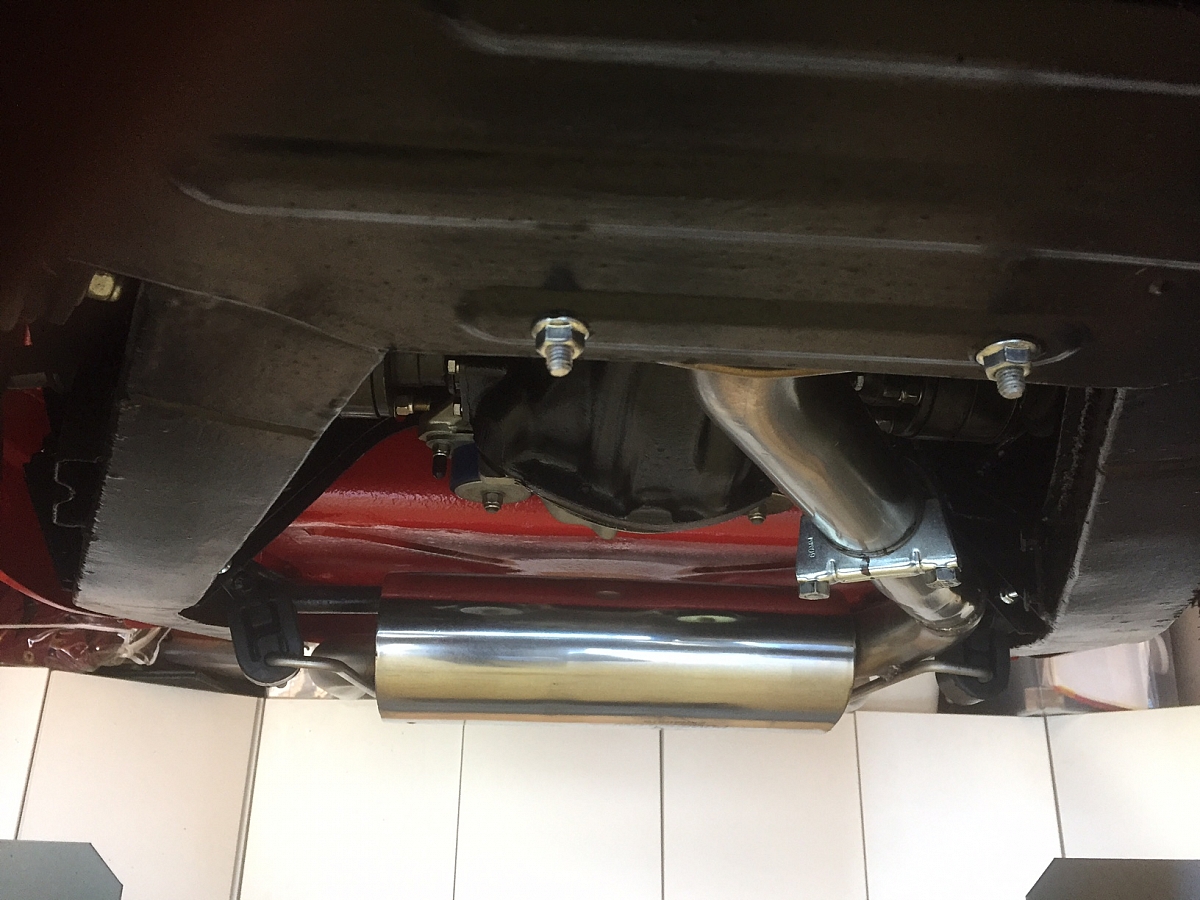
The tail pipes will be fitted and cut to length after the rear bumper has been fitted.
There was no need to use the gear box exhaust mounting bracket and the pipe is held in position though the T shirt with a new bracket.
9th October 2016
Hand brake fitted, adjusted and working to Fiona's liking.
3rd November 2016
Paul and I are currently checking to make sure everything fits which takes a long time. Well more Paul than me. Coming on though. I've bought a gearbox tunnel cover from SC parts - It's a split type in rubberised/plastic. Considerably less cost than others that are around and I prefer the plastic/rubberised ones compared to the fibre glass type. I find they are easier to fettle and make fit. This one is just laid on top for the moment, but the line ups don't look too bad. We will see how good or bad it is, when the time comes to fit it.
5-6th November 2016
Door and wing strips. I found when fitting these that the riveted clips are too small for the moulding's. I even cleaned up the old ones and tried those. Result - still far tooooo loose ! So I've used T.bolts and rubber edging, taken out the riveted clips and re-fitted. This was really fiddly, but well worth it and I am very pleased with the result. Here's a couple of pictures of the T.Bolt fixings.
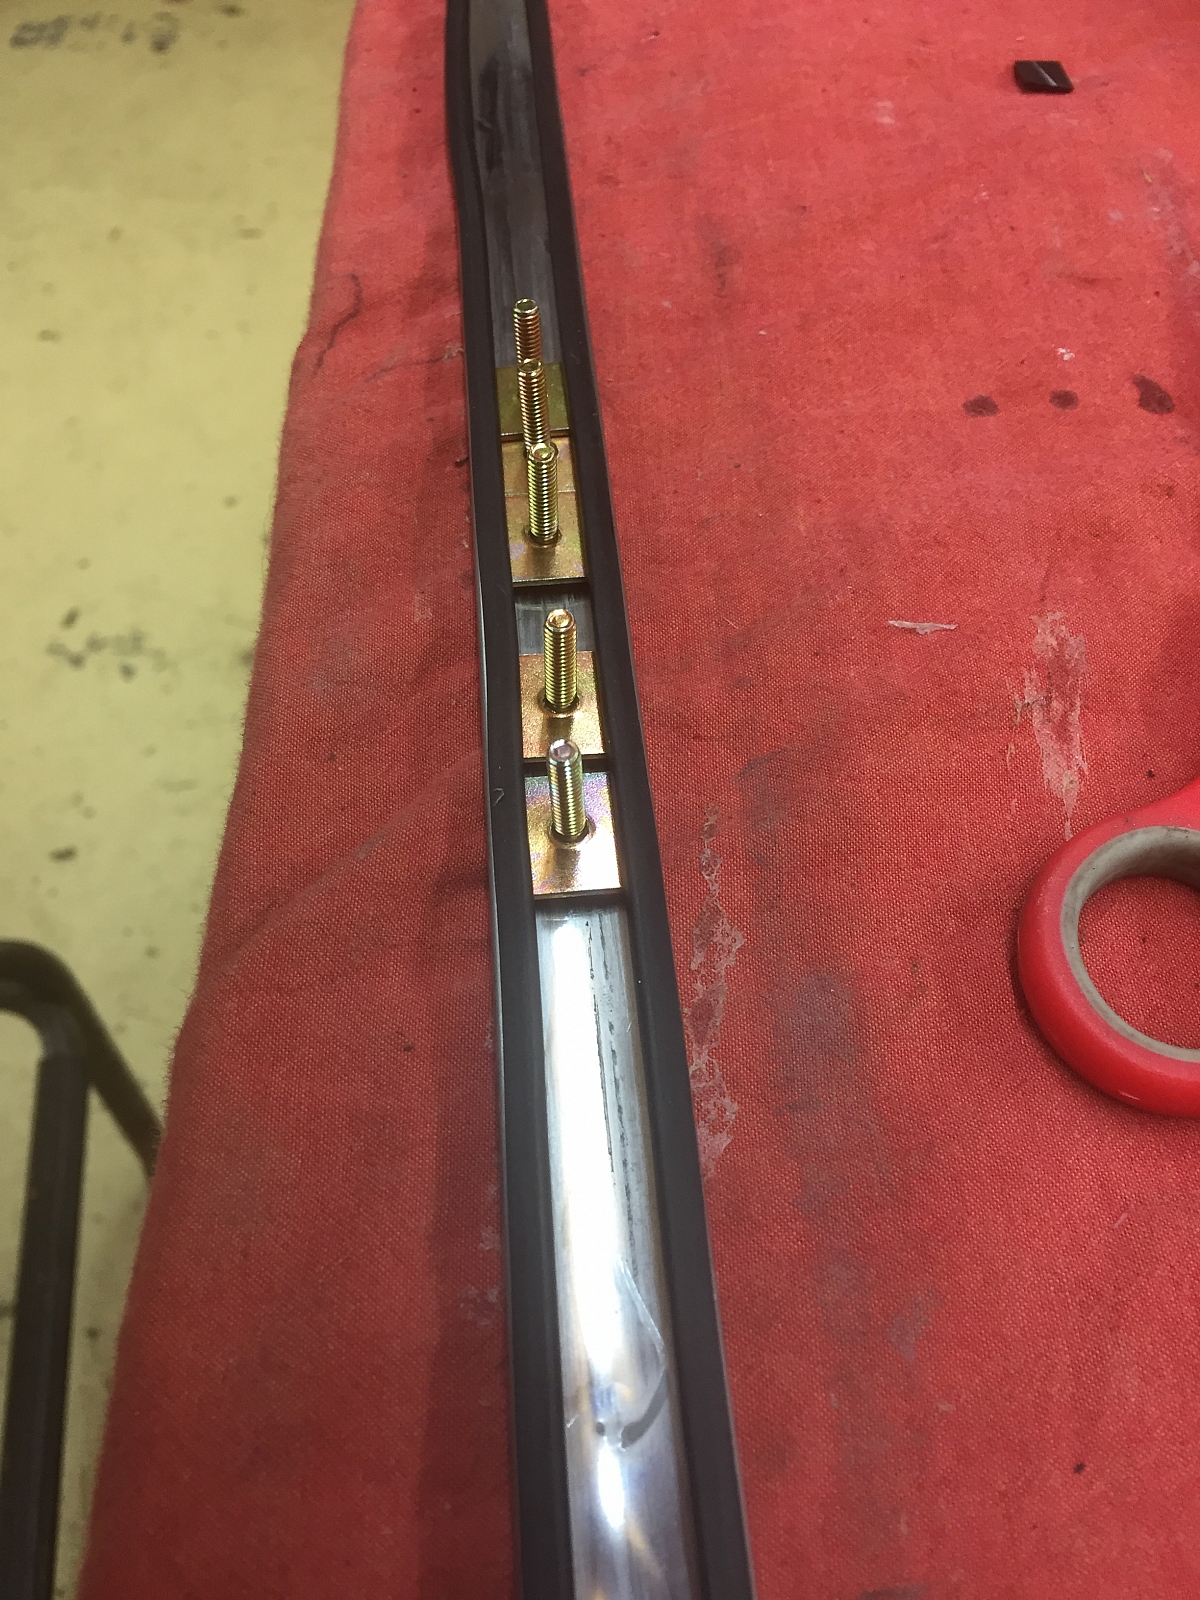
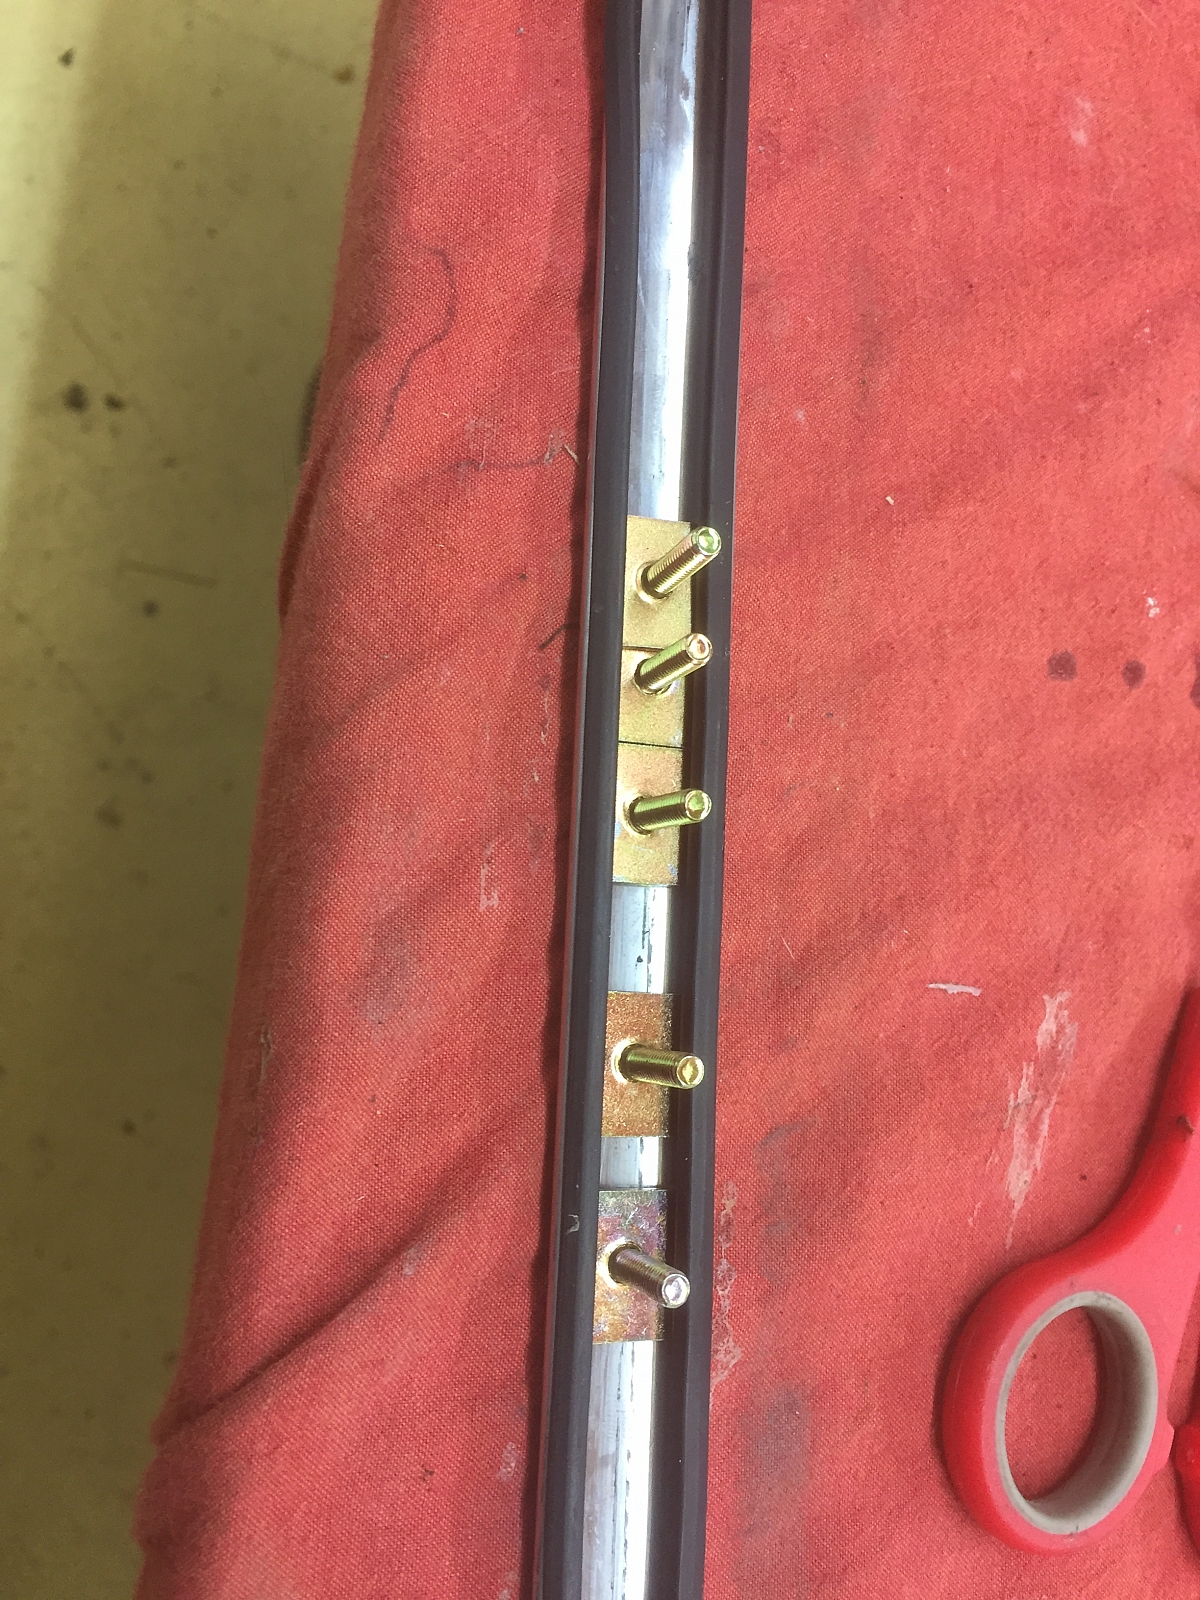
And fitted. I used captive nuts and bonded stainless steel washers on the inside. They act like a spring washer, provide a seal and you don't have to over tighten, just pinch and then a quarter turn on the nuts.
19th November 2016
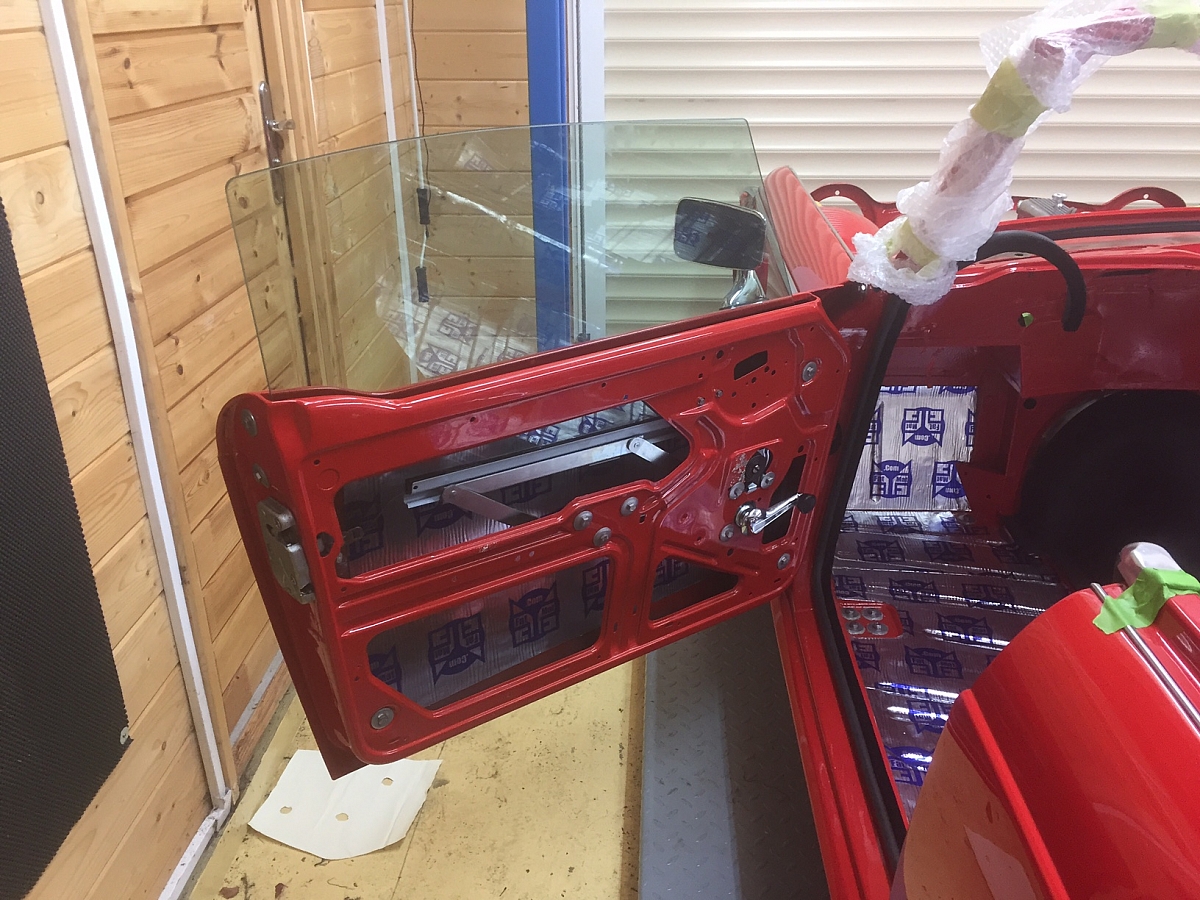
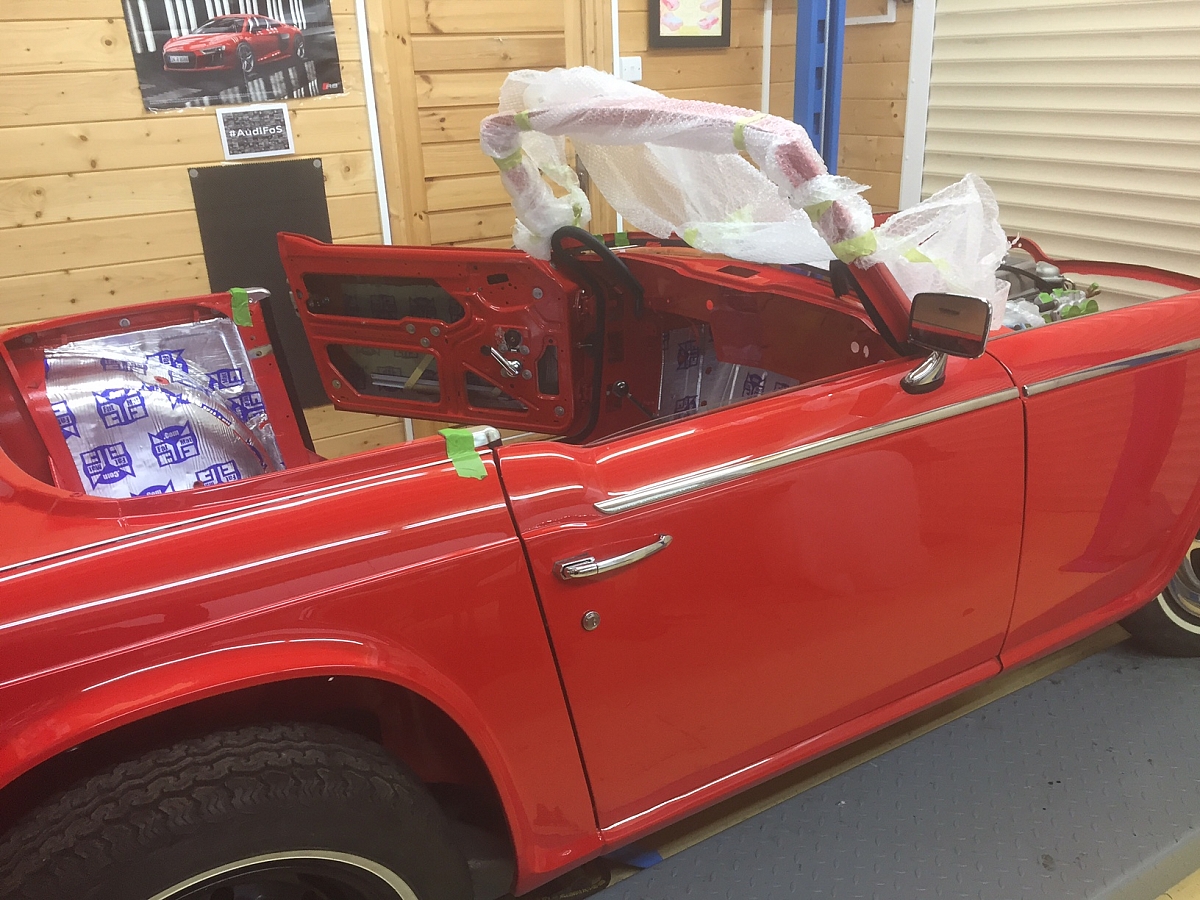
Paul and I spent the last 2 weeks or so evaluating the doors, the boot lid, windows etc for final fitting, and seeing that door handles, boot handles, locks, latches will actually fit and work as they should. As we all know, we are forced to use reproduction parts and some of them are awful, but if you can't get anything else, then you have to modify and make them fit. For example the new window winders are not made properly. One area of the mechanism is shown below. It's the part of the winder that bolts as an anchor to the door frame and is the main pivot for the winder to work properly. When I bought this, the rivet shown was way too loose, causing the arms to start bending and pushing the glass towards the front of the door and jamming the glass. The original is the dirty one and you can see the rivet is a very tight fit. Paul made a modification, by simply welding in a washer in the gap to take up the slack. Heh presto, it now works really well. Just got to do the other one now. Where's Paul ?, Paul....
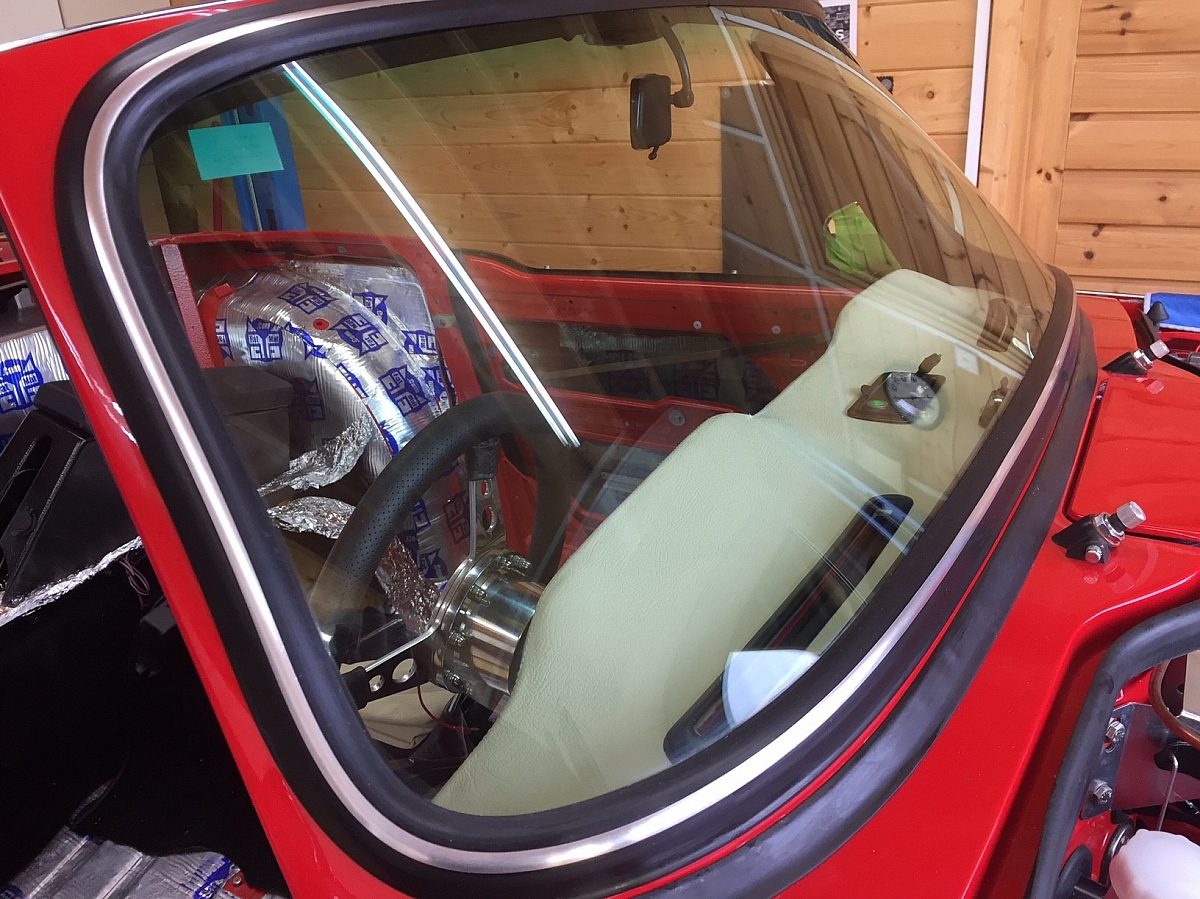
So,all the parts for the windows have now been refurbished, painted and new door glass's fitted. This is a trial fit, as we want to ensure the door glass's align correctly with the windscreen frame. The original glass channels were in super condition. Very lucky, as I understand you can only get new channels now. No brackets.
The windscreen frame has been brought out from storage to loosely fit the bottom rubber, so that will take some shape and settle down after it's twisted condition during the delivery etc. That should make it easier to fit when the time comes.
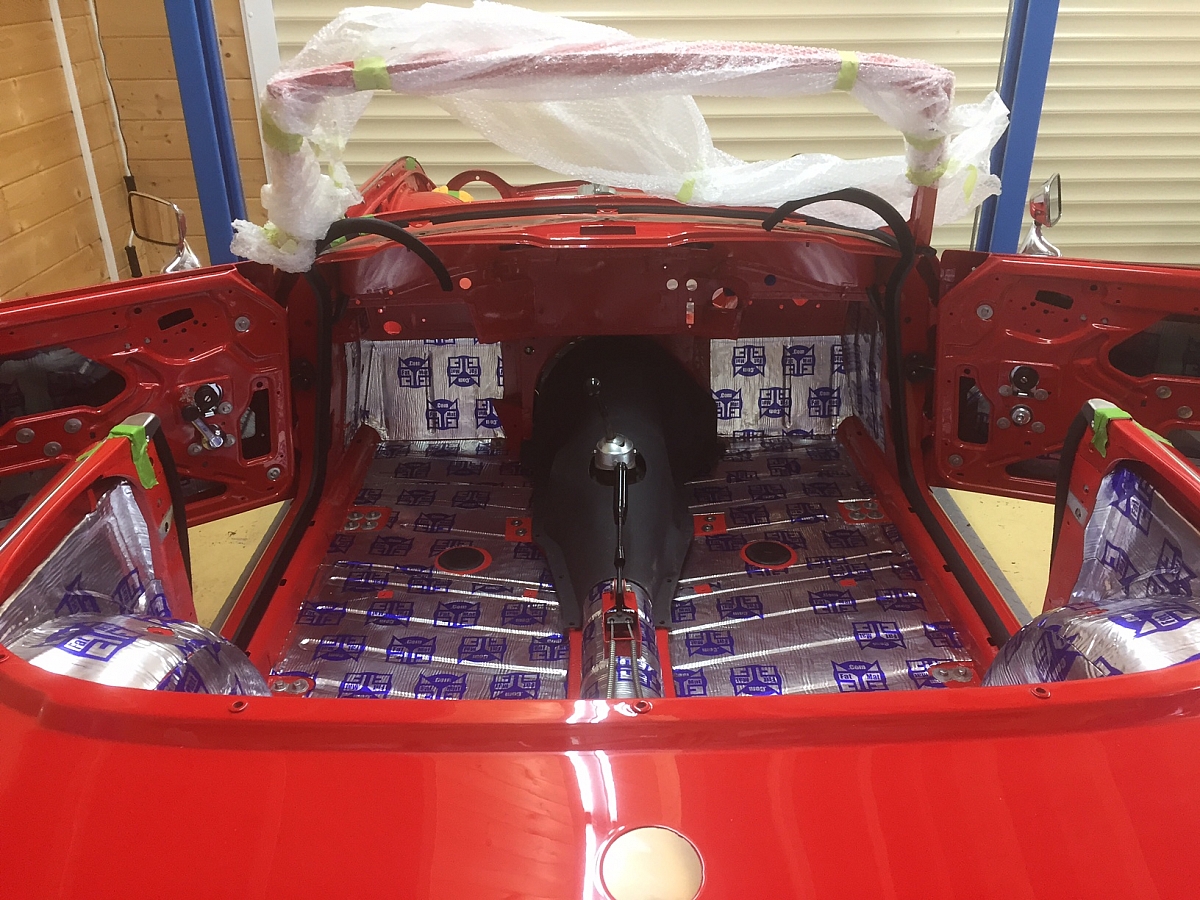
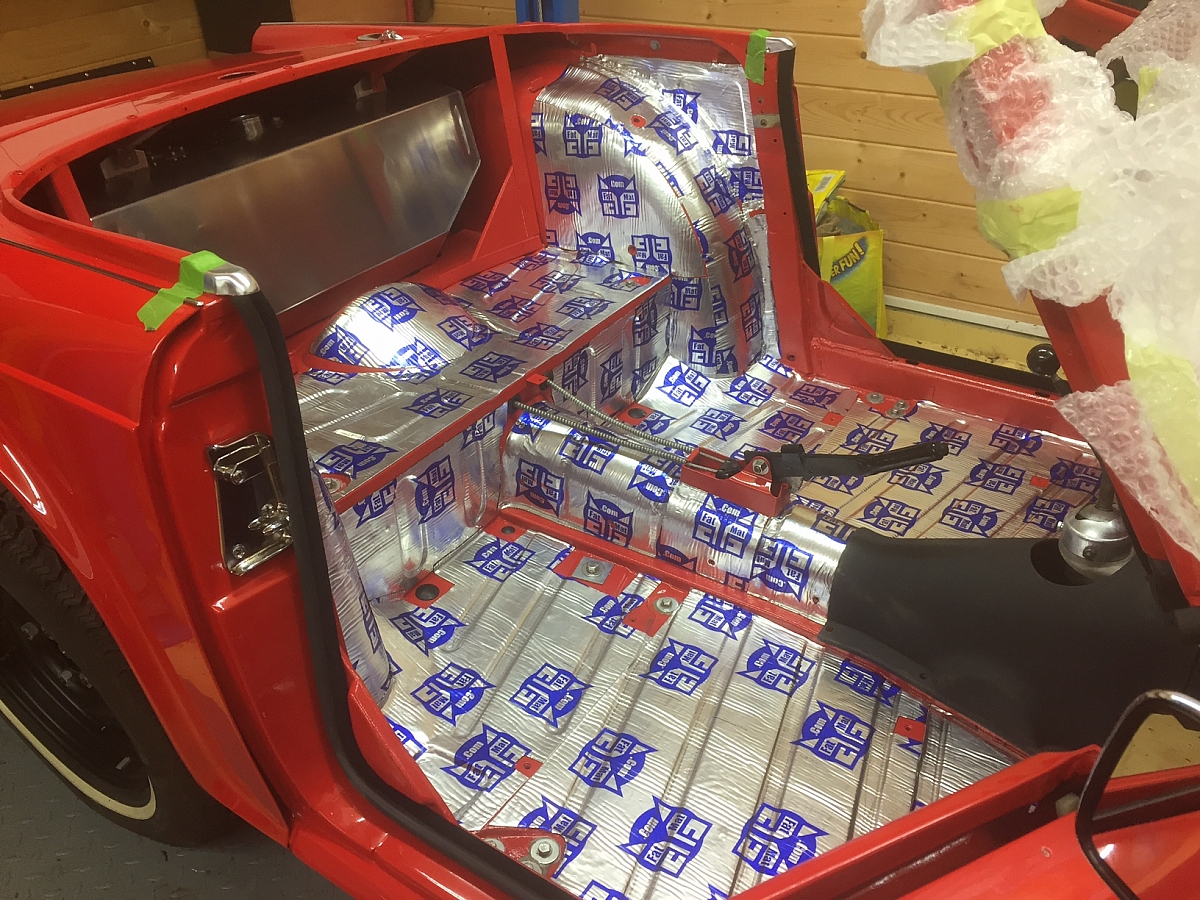
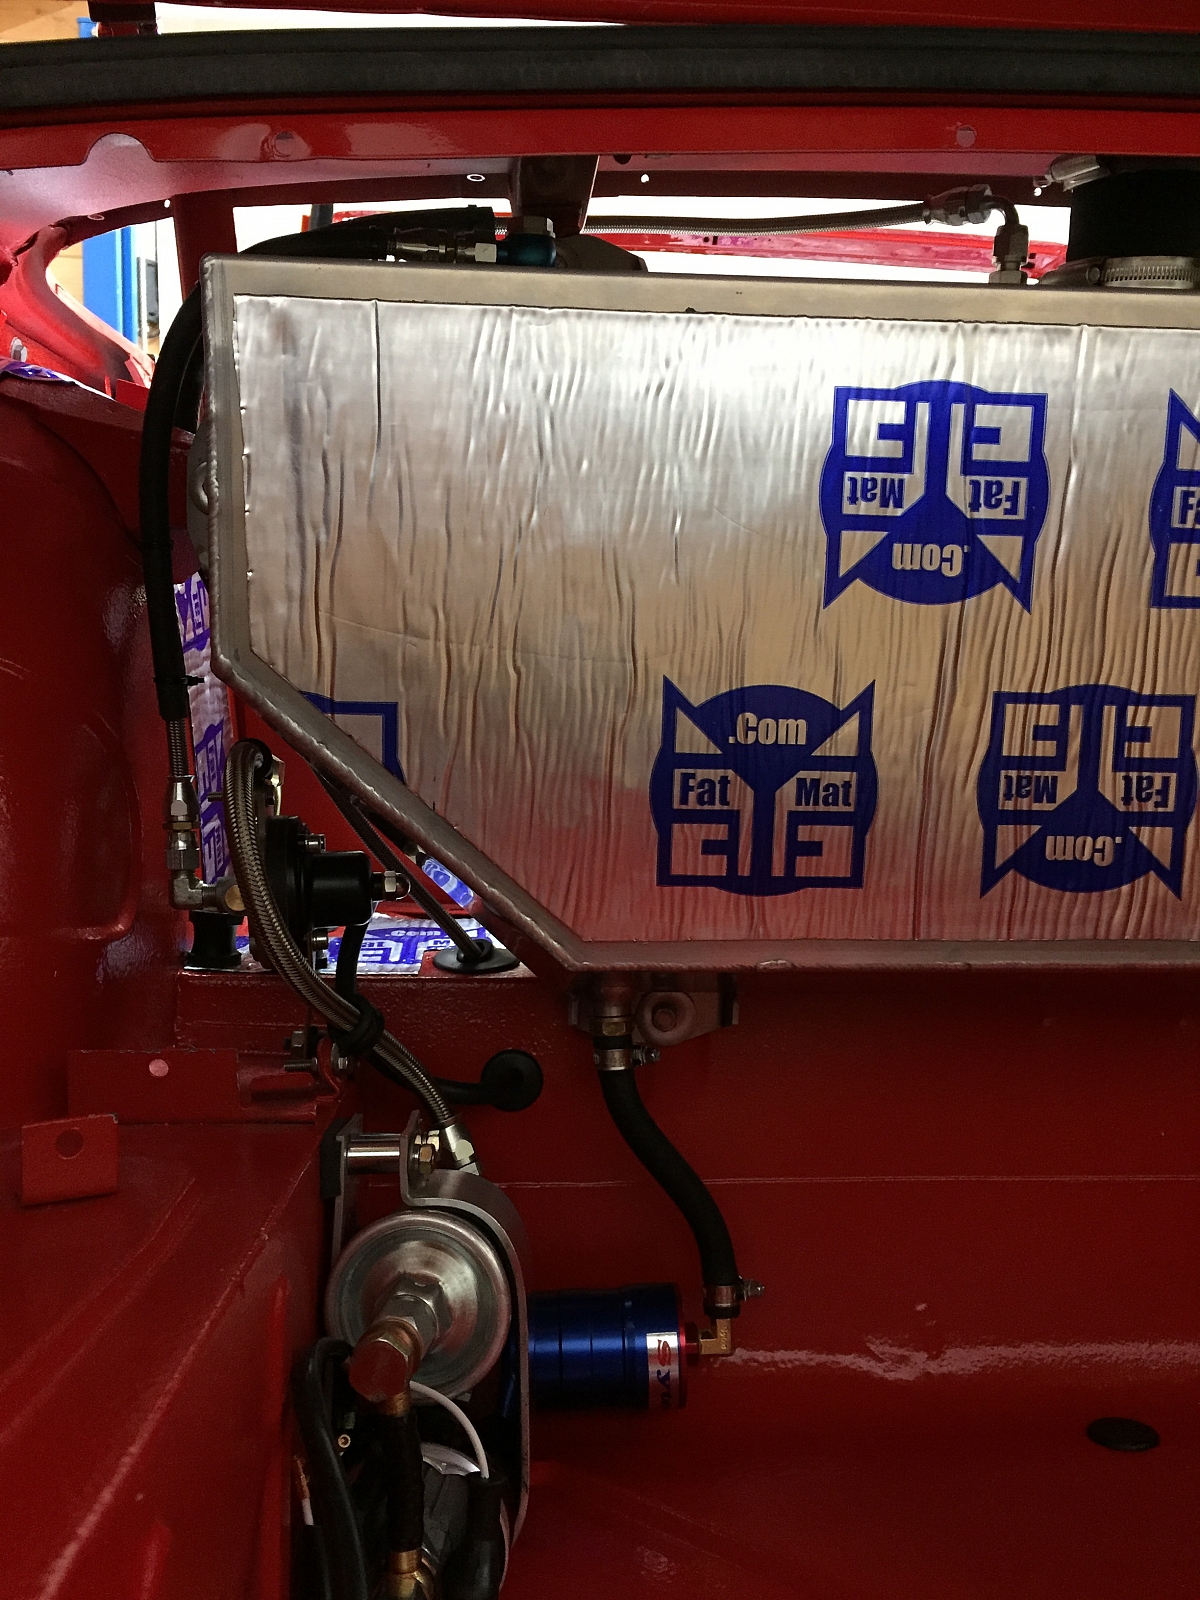
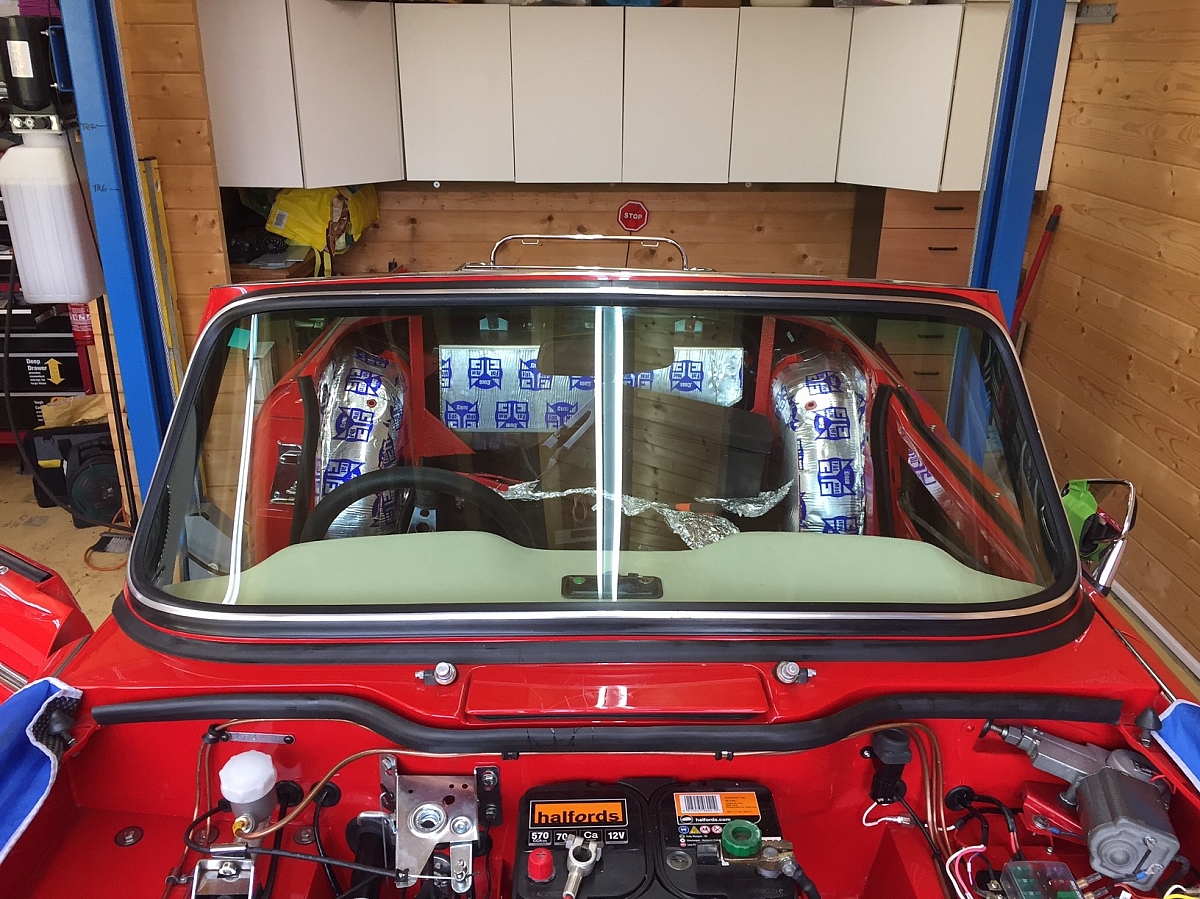
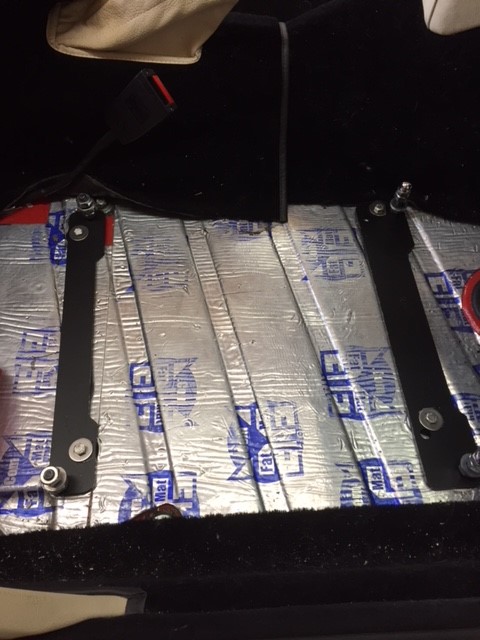
I've now also fitted all the sound proofing in the cabin area. I used "FatMat" - Very easy to use, cut and fit. I've never used it before, so here's hoping for a good result when she's on the road.

20th November 2016
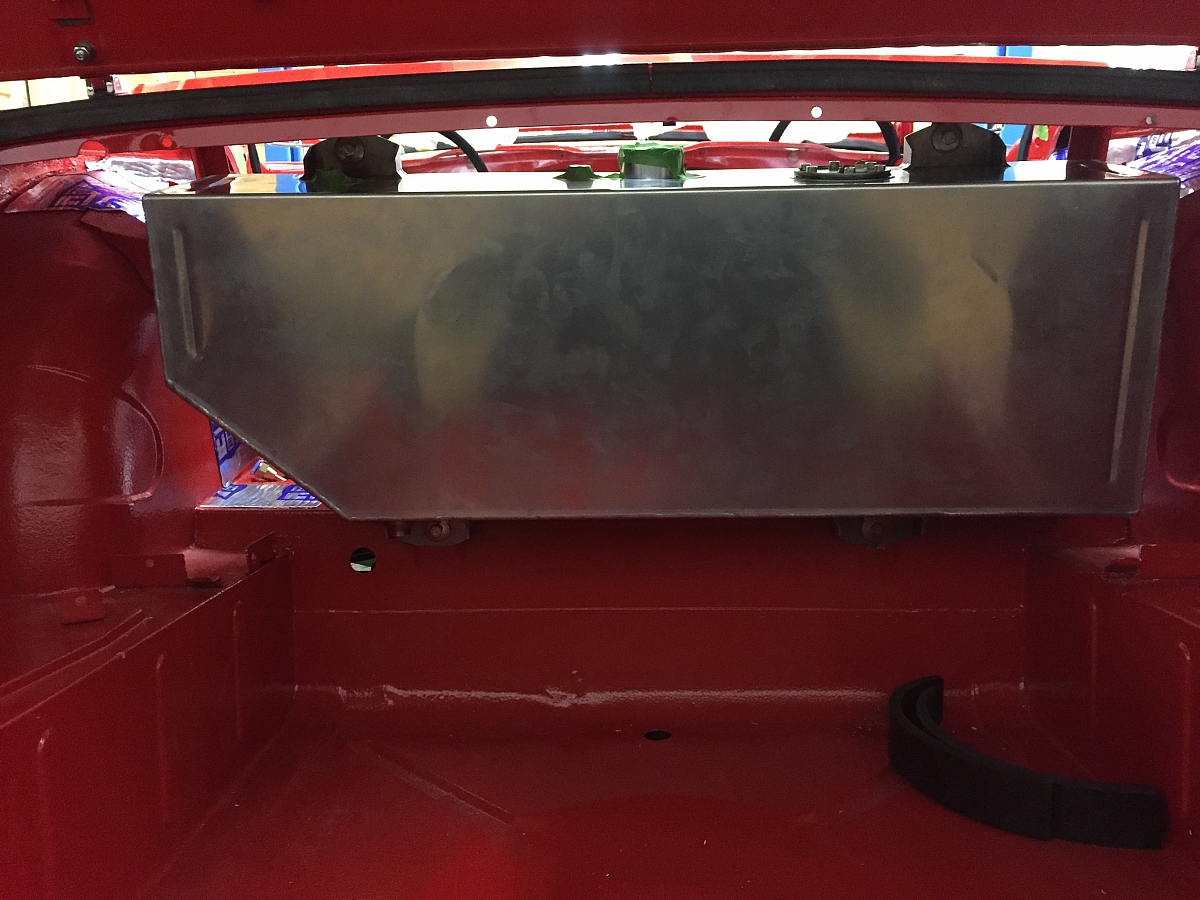
Trial fitted the boot rack - it fits !! Thank goodness. This is a Mazda MX5 - stainless steel.

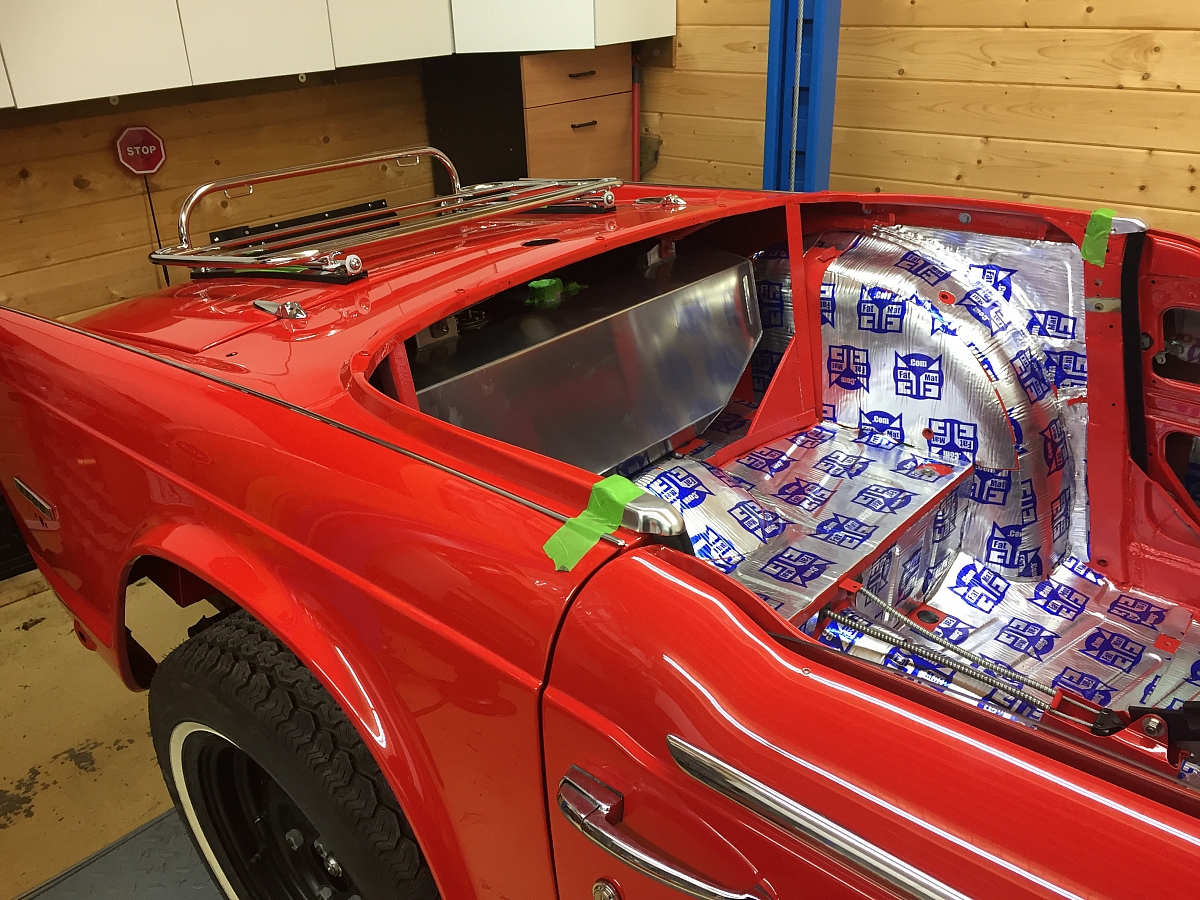
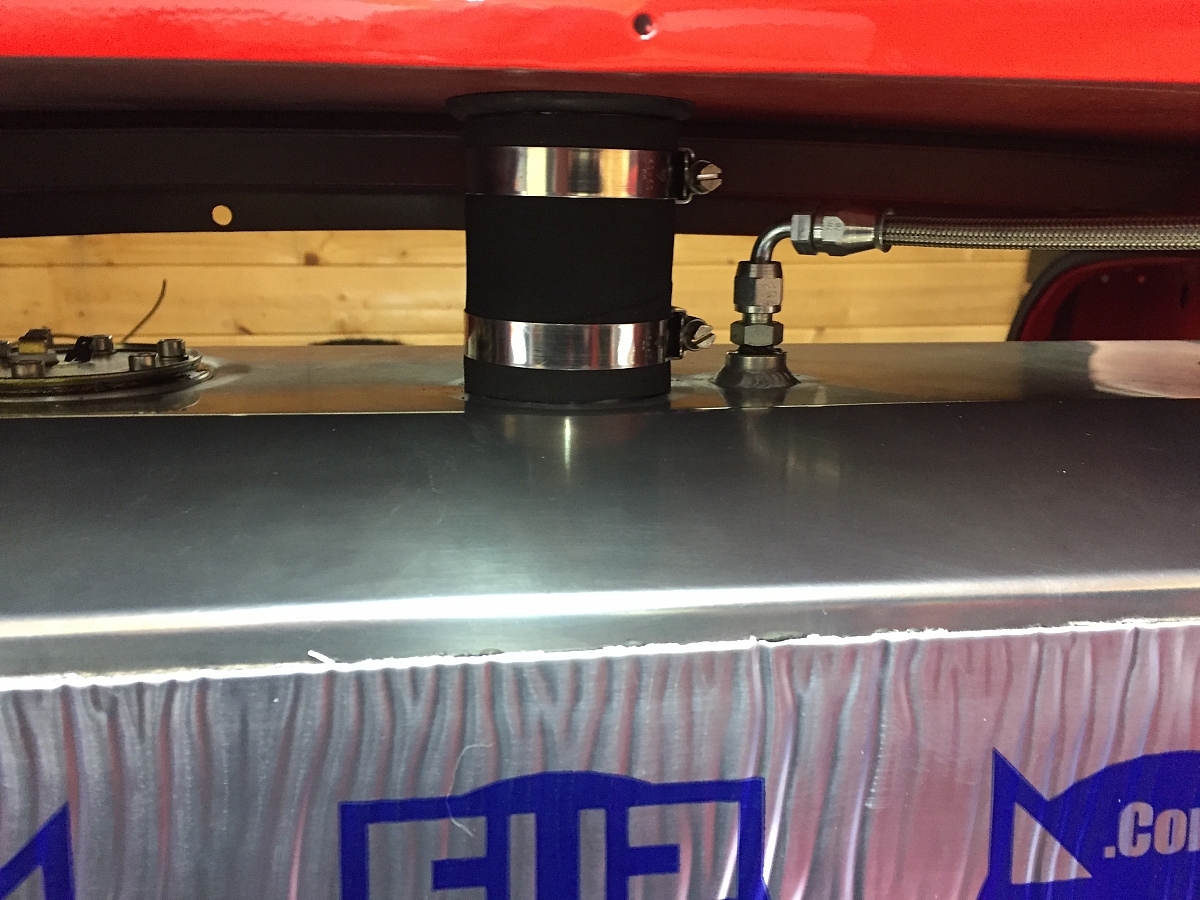
And so does the fuel tank. Just ! - as I did have to modify it a tad. This fuel tank is from Andy Wiltshire. It's slightly larger and has a bigger capacity than the standard tank. I think from memory 51 litres as opposed to 46 litres. Just got to plan the plumbing now. I should have done that earlier, but.. too late now.
January 3rd 2017
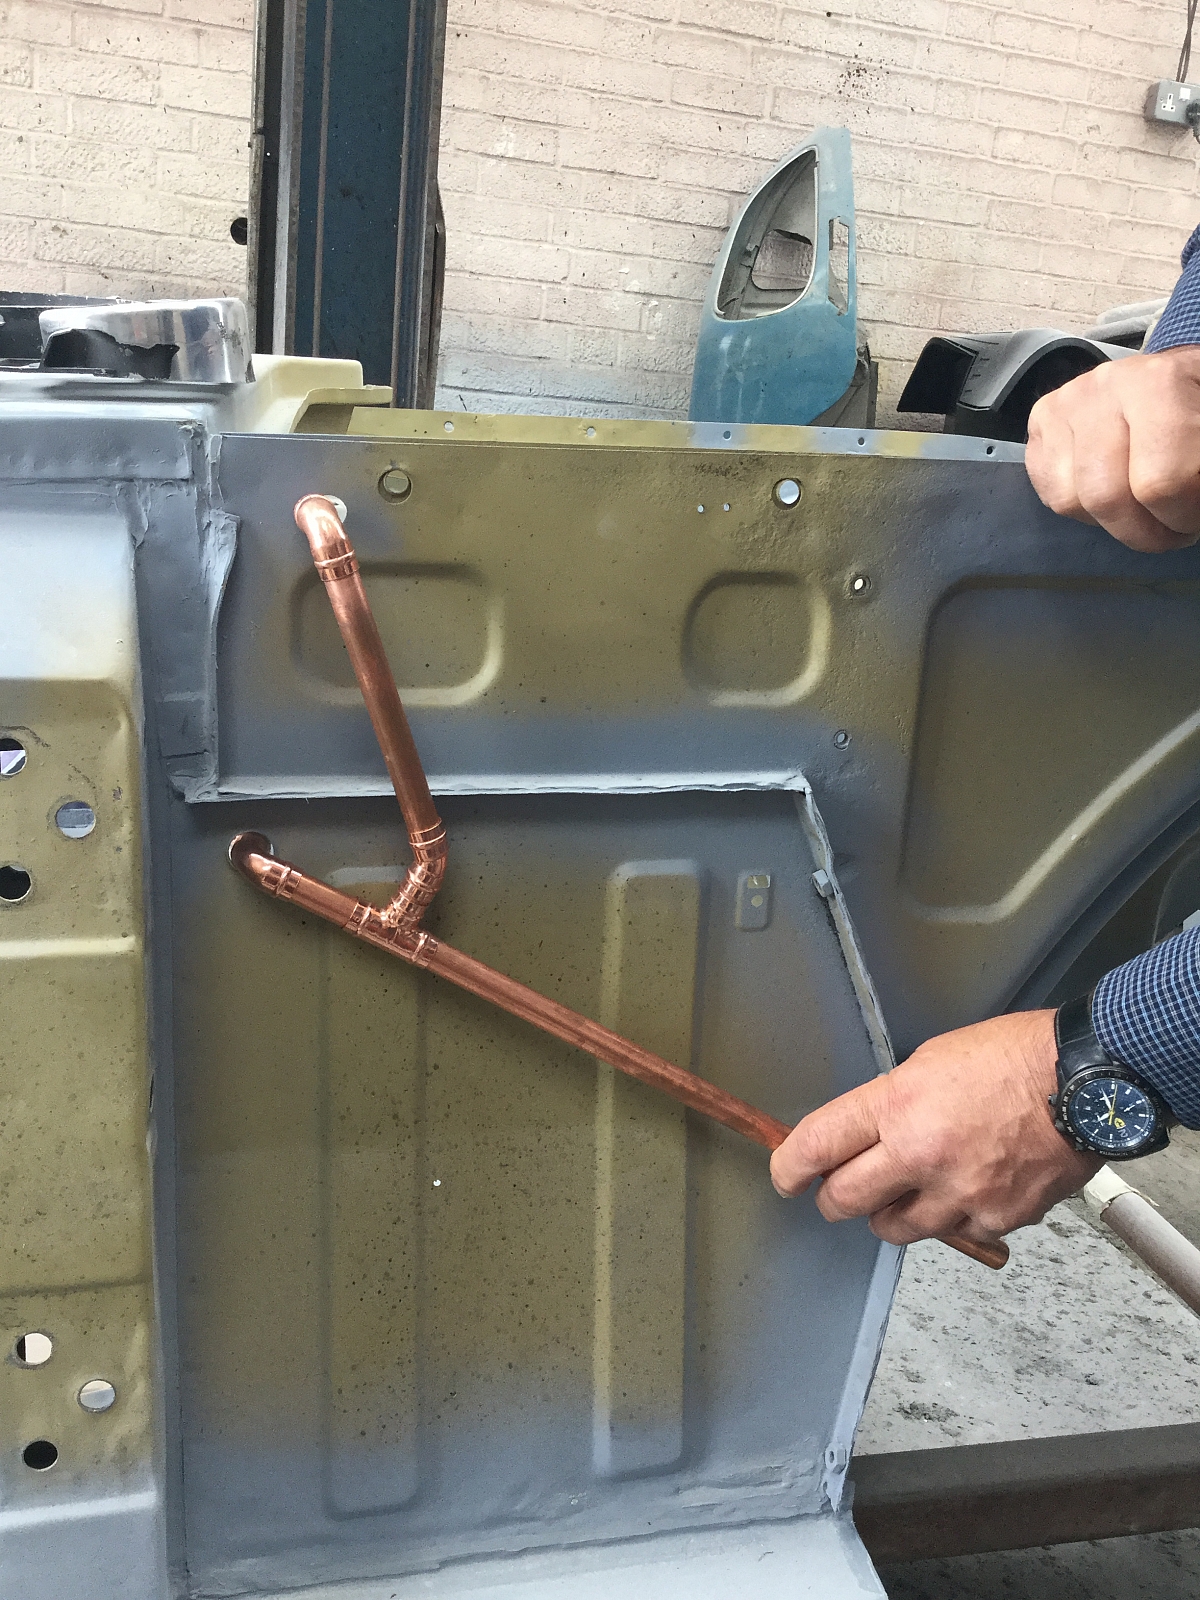
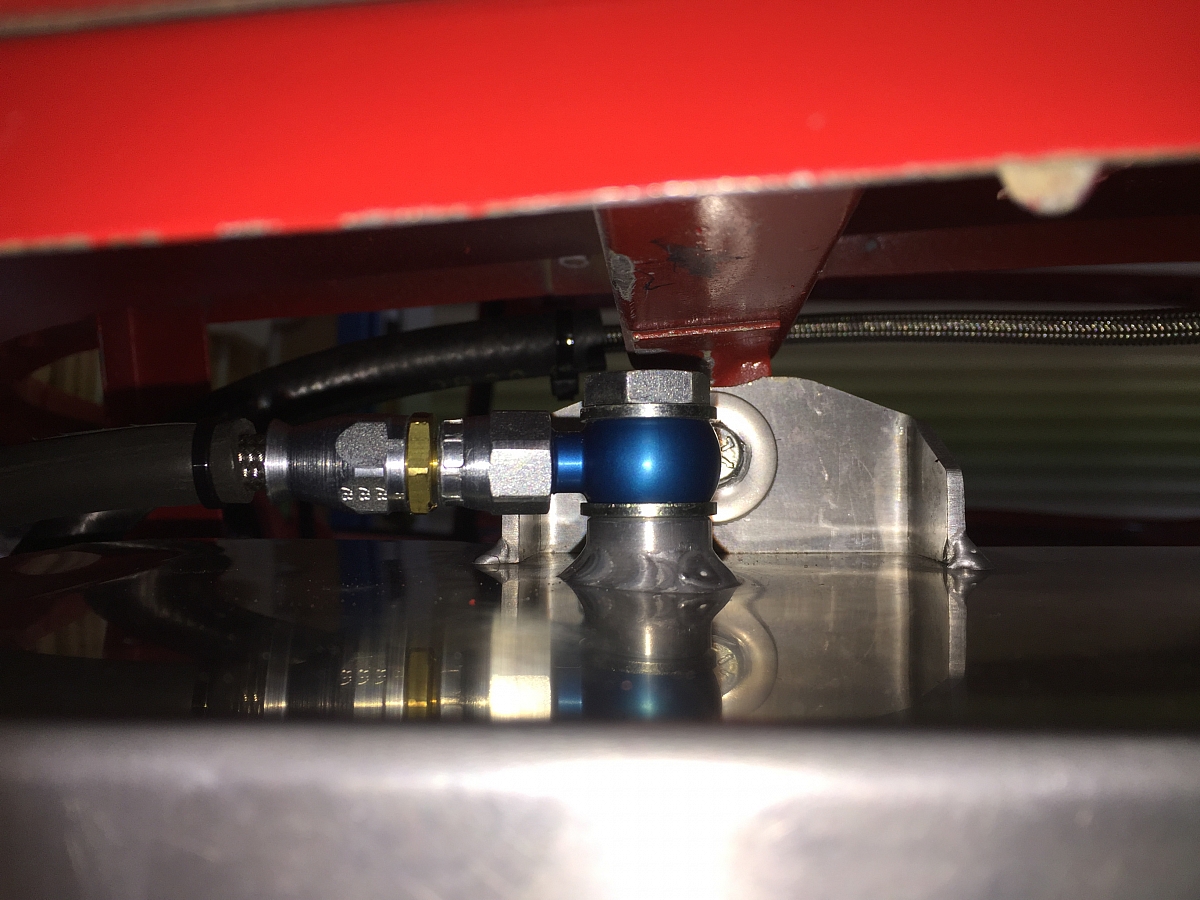
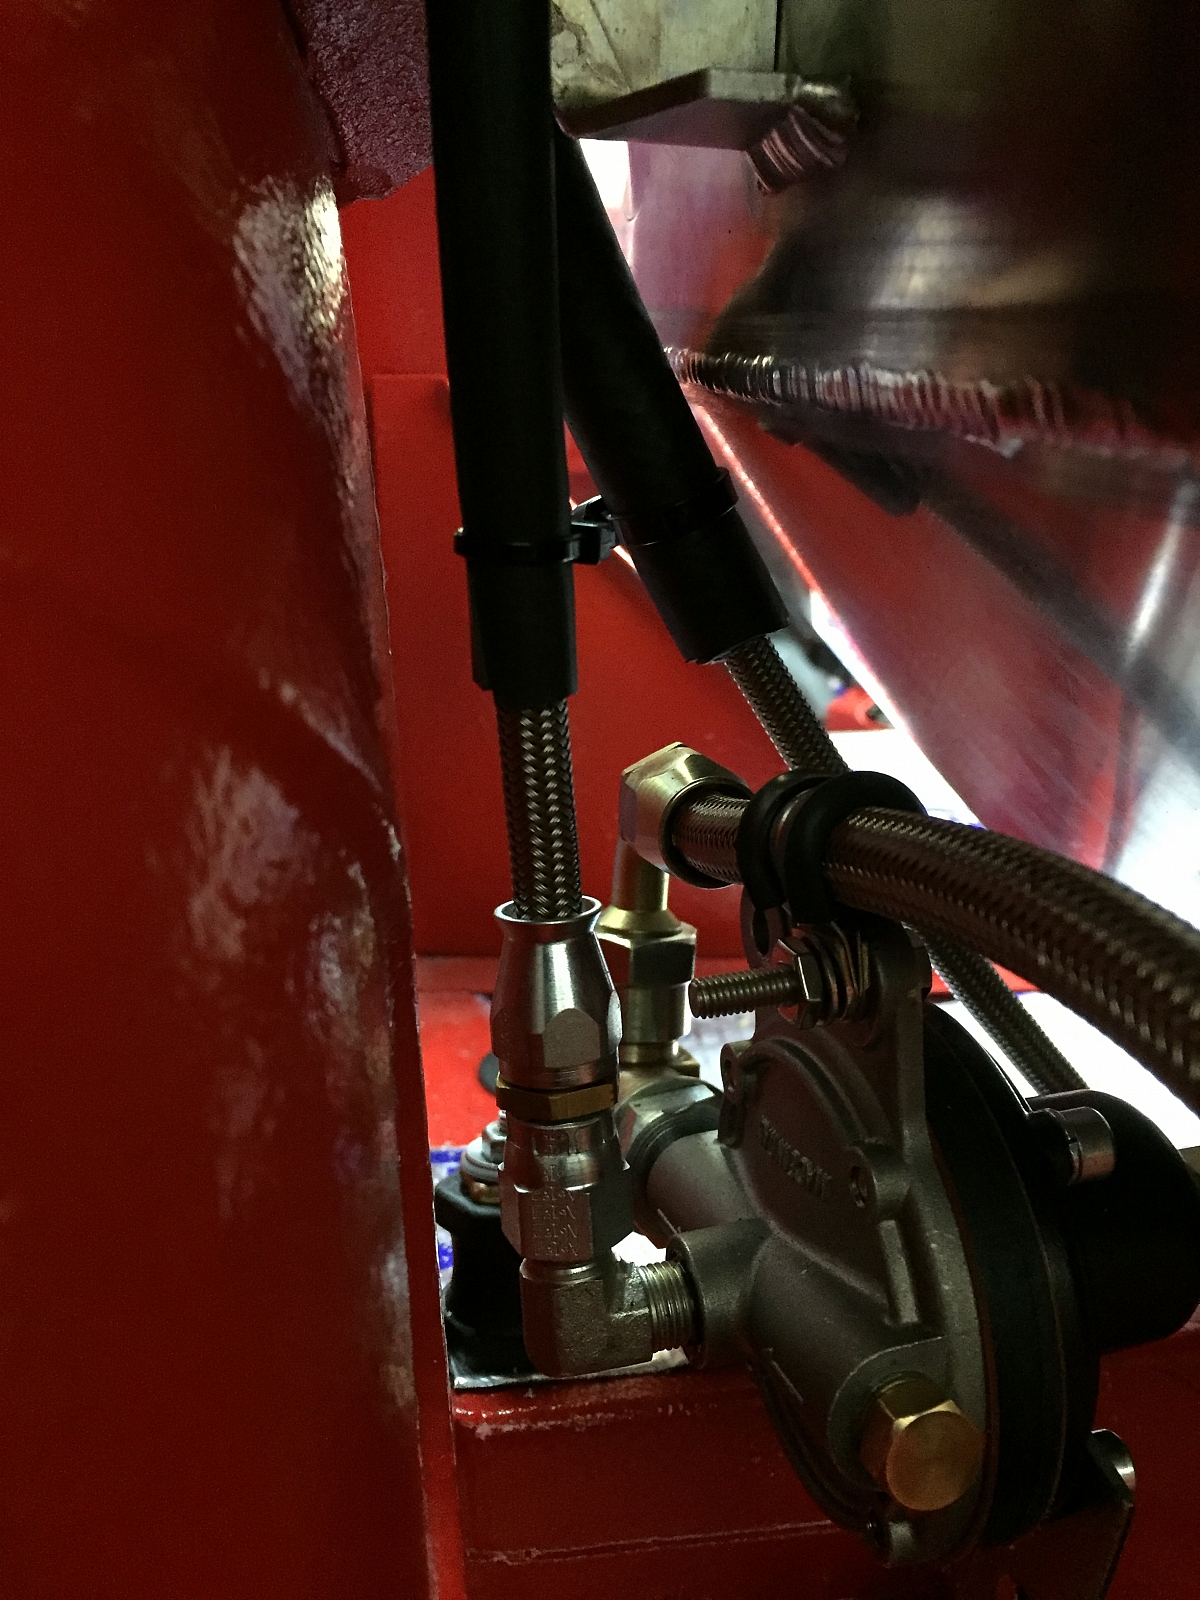
Finally finished the tank installation and the plumbing to the tank over the xmas period. This took a very long time as we had to plan and configure where and how we could run the pipework, given the error of not fitting this before the body was mounted this wasn't easy. We have managed to run the standard copper pipe for the main feed. It was a real faff, but it's done, be it with one extra joiner and having to make up a copper pipe run with double flares etc. Paul came to the rescue again and used a very old pipe flaring tool and it did the job superbly. I also had some new pipework made up by Mocal "Think Automotive" in Isleworth. They are very helpful and will do most things on the spot. Several issues. I wanted to use Teflon (PTFE) pipe to reduce and hopefully eliminate any risk of petrol smells, but that can only be crimped using JIC thread unions. I'd never heard of JIC threads before, so that was new to me. The tank has BSP threads, so I had to use adaptors to make the connections. That was OK, for the connections to the PRV and the MU return feeds, but wasn't OK for the return feed from the PRV to the tank. I had 2 problems here. 1) The position of the inlet to the tank has been positioned just in front/left of the tank mount and 2) The height between the tank and the support bracket is far too low to enable the usual union to be fitted. So I had to use a banjo fitting, which you can see in the photos. The banjo had to be reamed slightly to enable a BSP union/bolt to be used. This has to be done very well to ensure a good fit. Thankfully Paul has a reamer and did this for me. Then we used doughty washers to seal. I had to modify the tank brackets some more, so that I had some wiggle room to position the tank properly as the fuel tank filler pipe was slightly off centre. I also had to buy a longer fuel filler pipe, so that I could make the cut straight, as the ones you get from the usual suppliers are cut scew wiff and are awful. I've also changed all the rubber pipework to Teflon (PTFE). The pump and filters have been fitted and insulated against the body using rubber mounts etc. Hopefully we won't get any resonance. I've made up a support bracket for the PRV. Life isn't perfect though as I'm not entirely happy with the alignment of the outlet pipe to the filter/pump as I think the outlet is in the wrong position and the length of the filter pushes the pipe out of the vertical, but It should be fine. (I hope) The last issue in fitting the tank, was the drain outlet on the bottom right hand side. I don't have a photo of this, but the outlet is too long to enable a grommet to be fitted in the access hole. So I used a block of close cell foam (about 1/4" thick) and cut to shape around the outlet and glued this to the tank before fitting. It seems to be a good solution and should be water tight. Last job, will be to fix and secure the pipework underneath. It's all in the right position. but it needs securing.
February 6th 2017
A few more items fitted. Progress is a bit slow. Nothing fits straight away. Sometimes it's a case of 2 steps forward 3 steps backward. Do it again, because it doesn't fit quite right. Namely radiator, foot pedals, windscreen wipers, and so on and on. We are currently lining up the gear box tunnel for fitting. Having tried the SC parts split plastic cover + another unknown fibre glass cover and perhaps the best of the aftermarket ones a "Restorations" fibre glass cover. None of them fit very well. I could make them fit, but after some thought. Why not use the original cover ? Better sound proofing and we know it will fit. Luckily it was in a reasonable condition, and although some repairs were needed, it looked a like a good option. So we have now decided to repair and fit the original one. Paul has undertaken the lengthy task of making the repairs and what a wonderful job he has done. Some more work needed, but nearly finished.

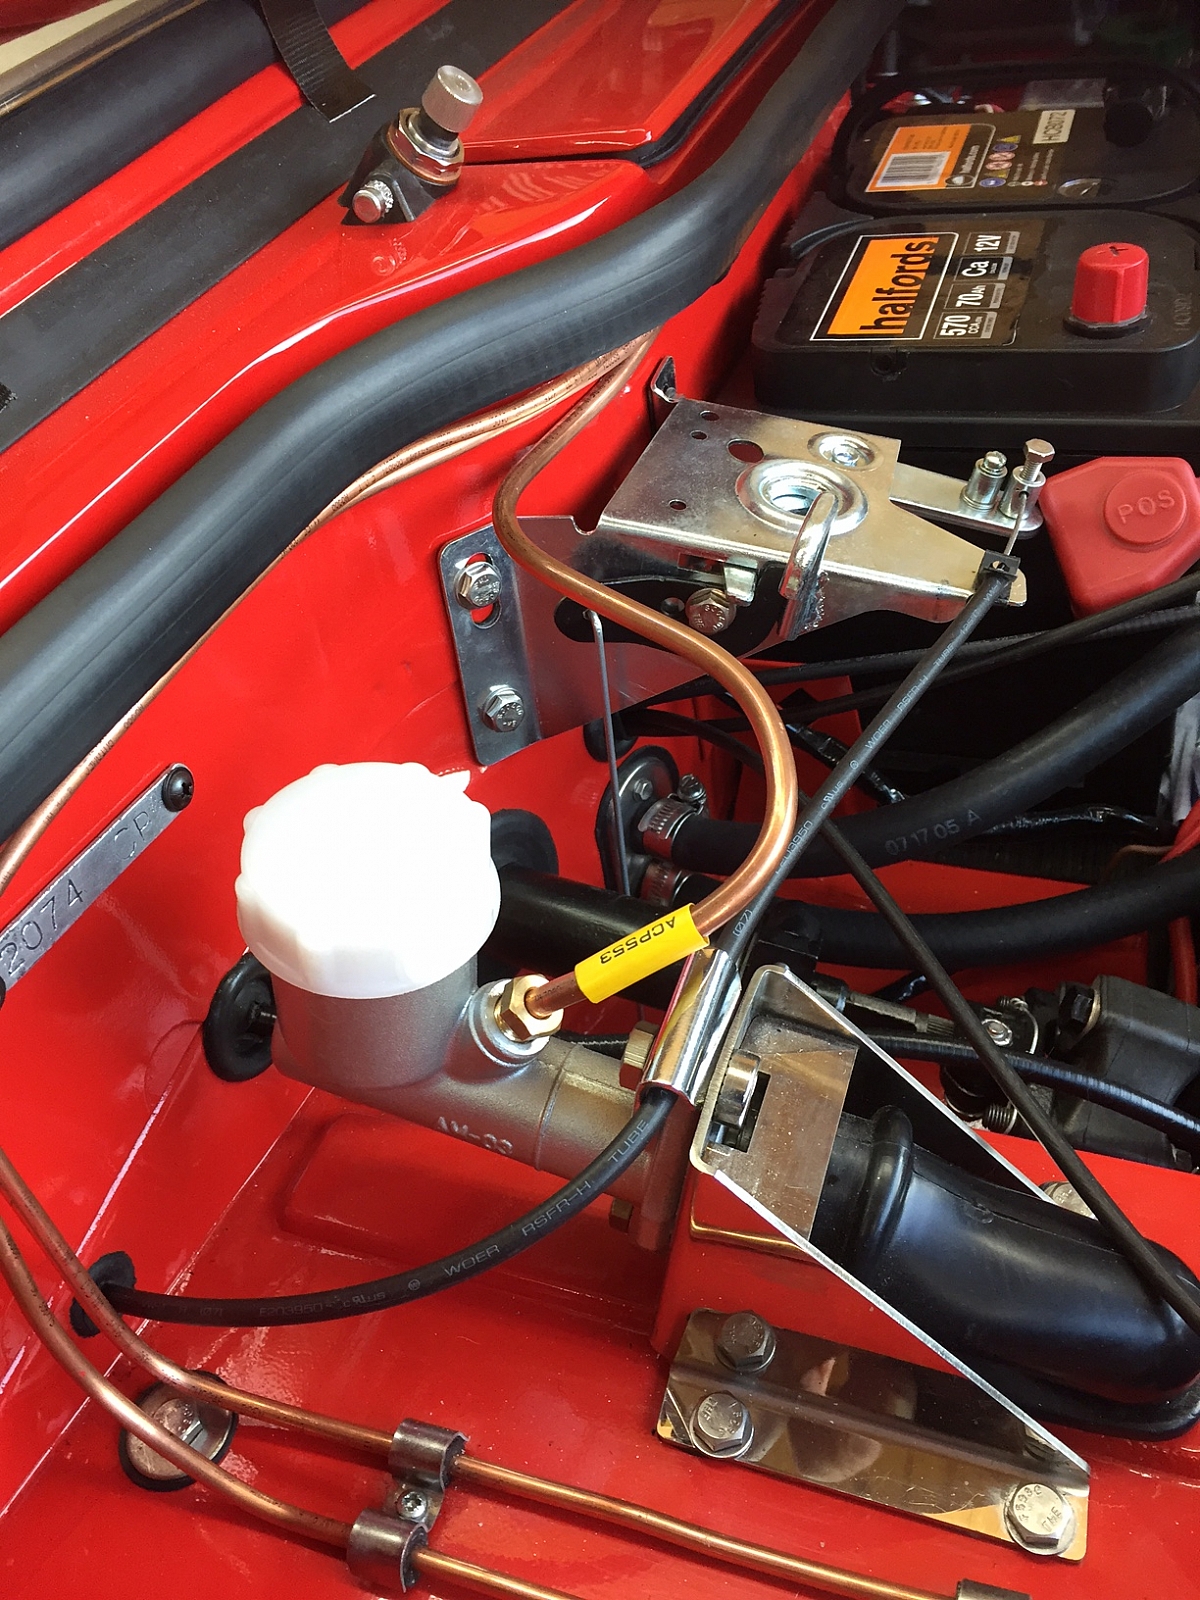
Clutch and brake master cylinders fitted.
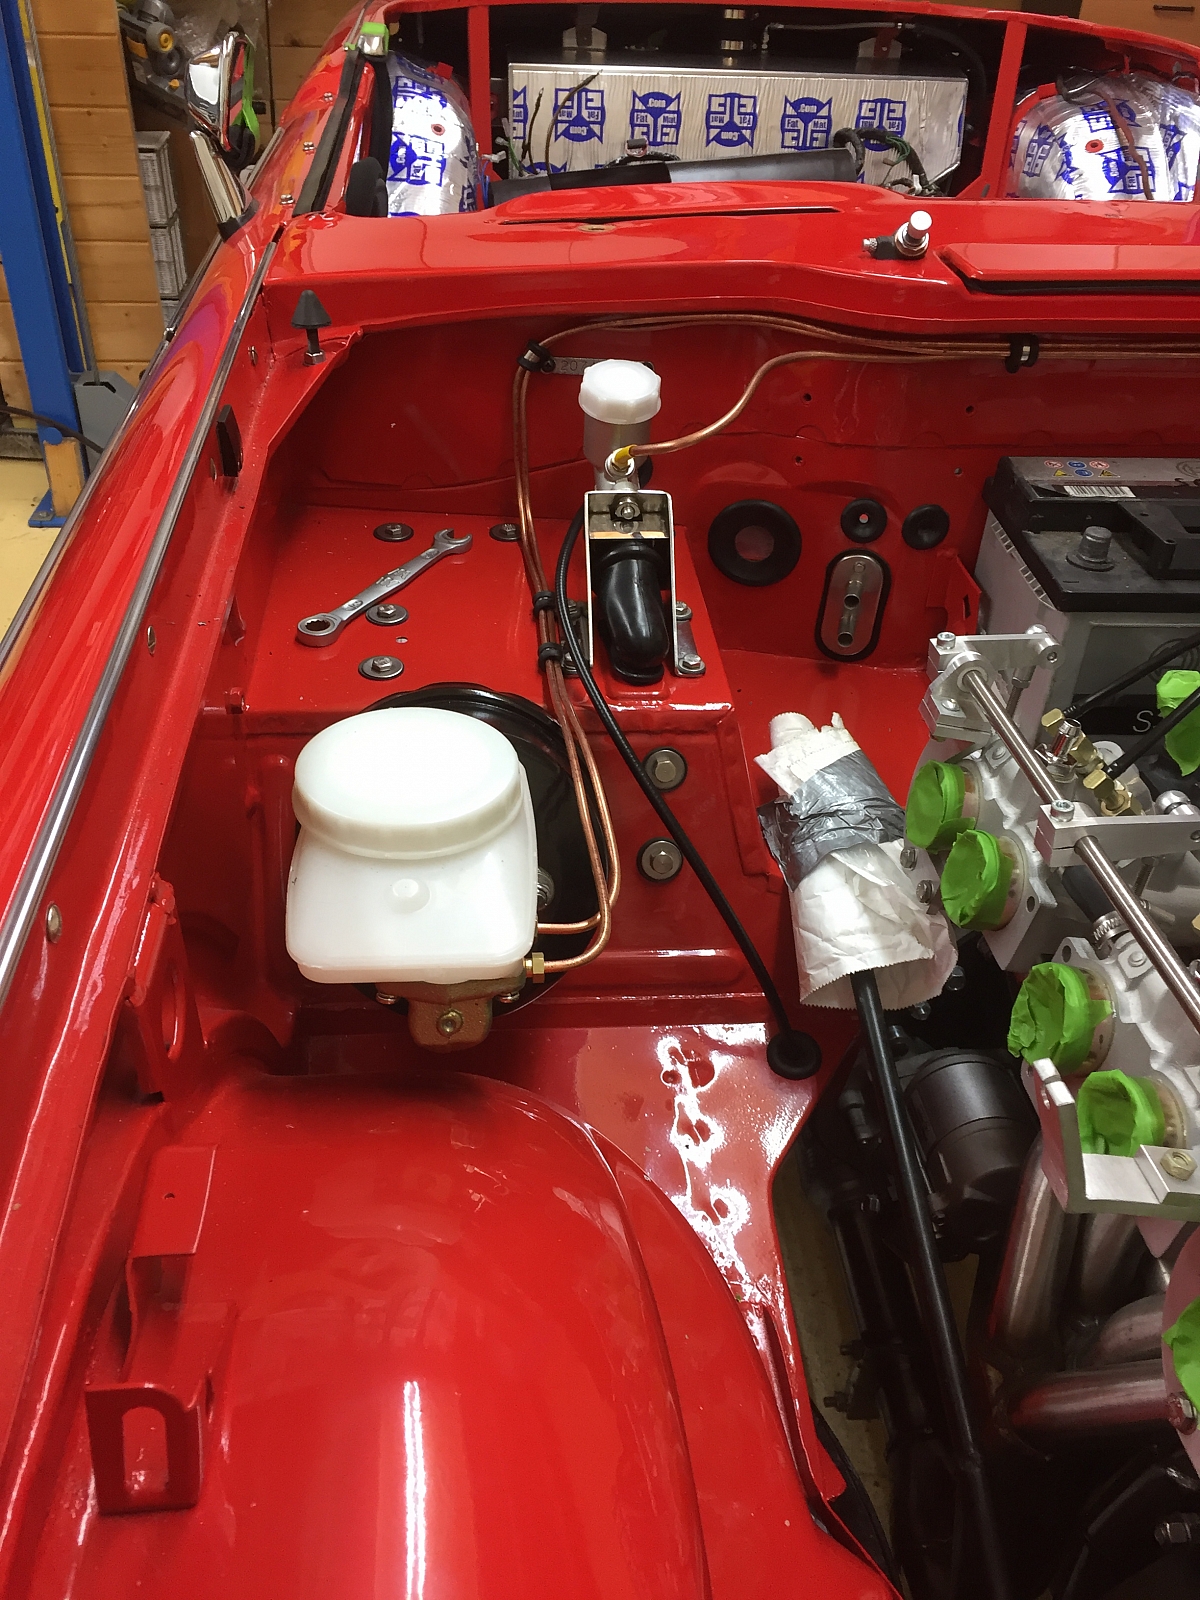
Not very happy with the pipe clips or the bending. I'm sure it's a black art to get the bends correct. I'll be re-visiting those very soon. The wring loom is threatening in the rear. That's the old and the new one being compared.
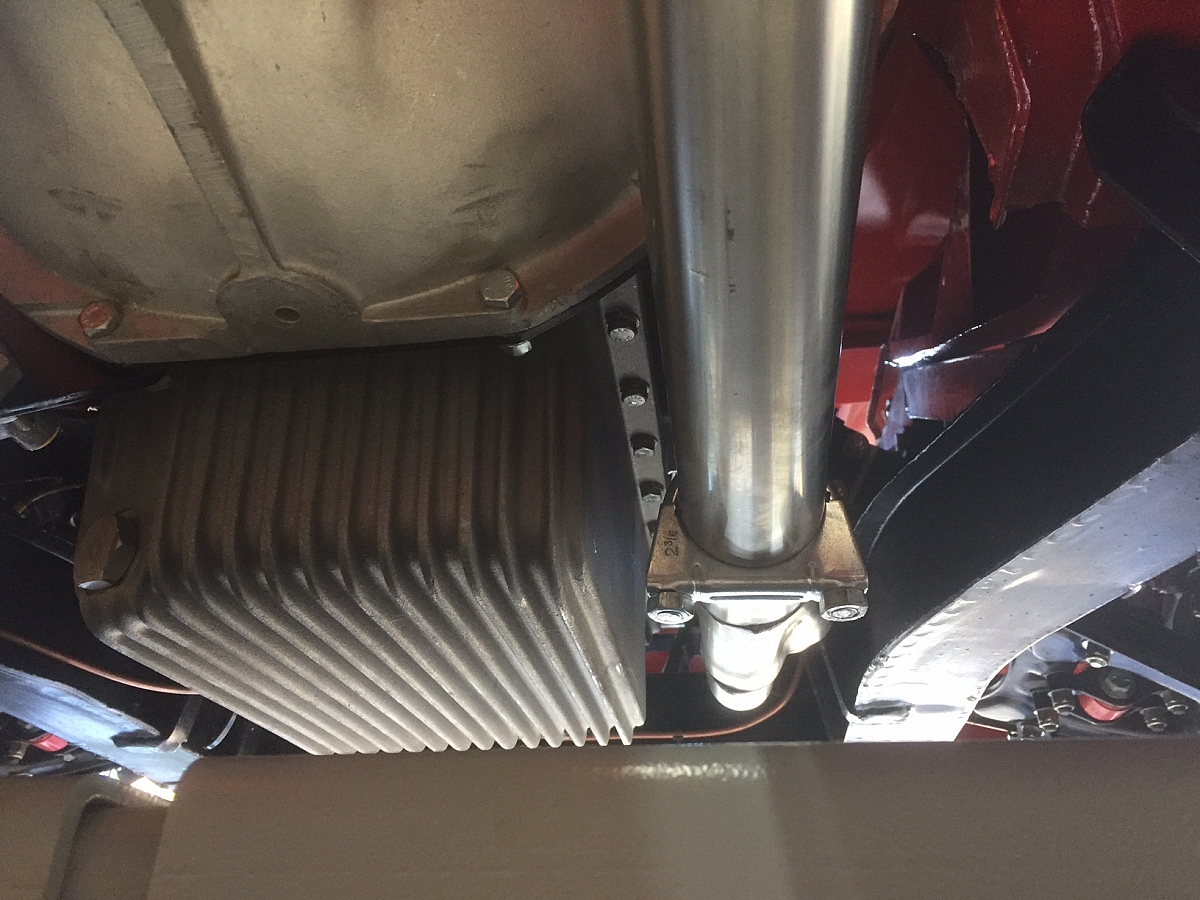
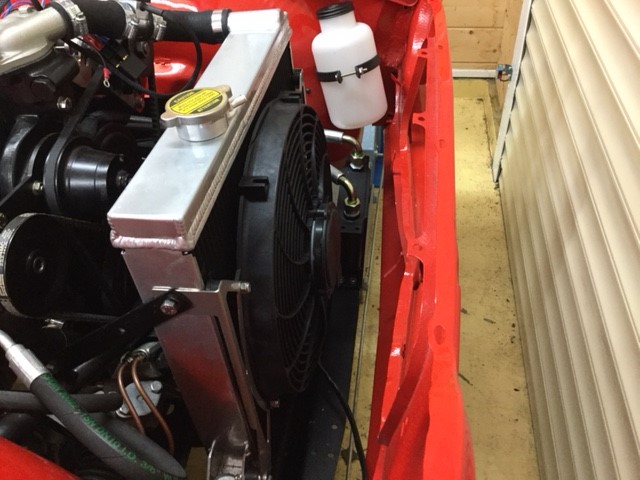
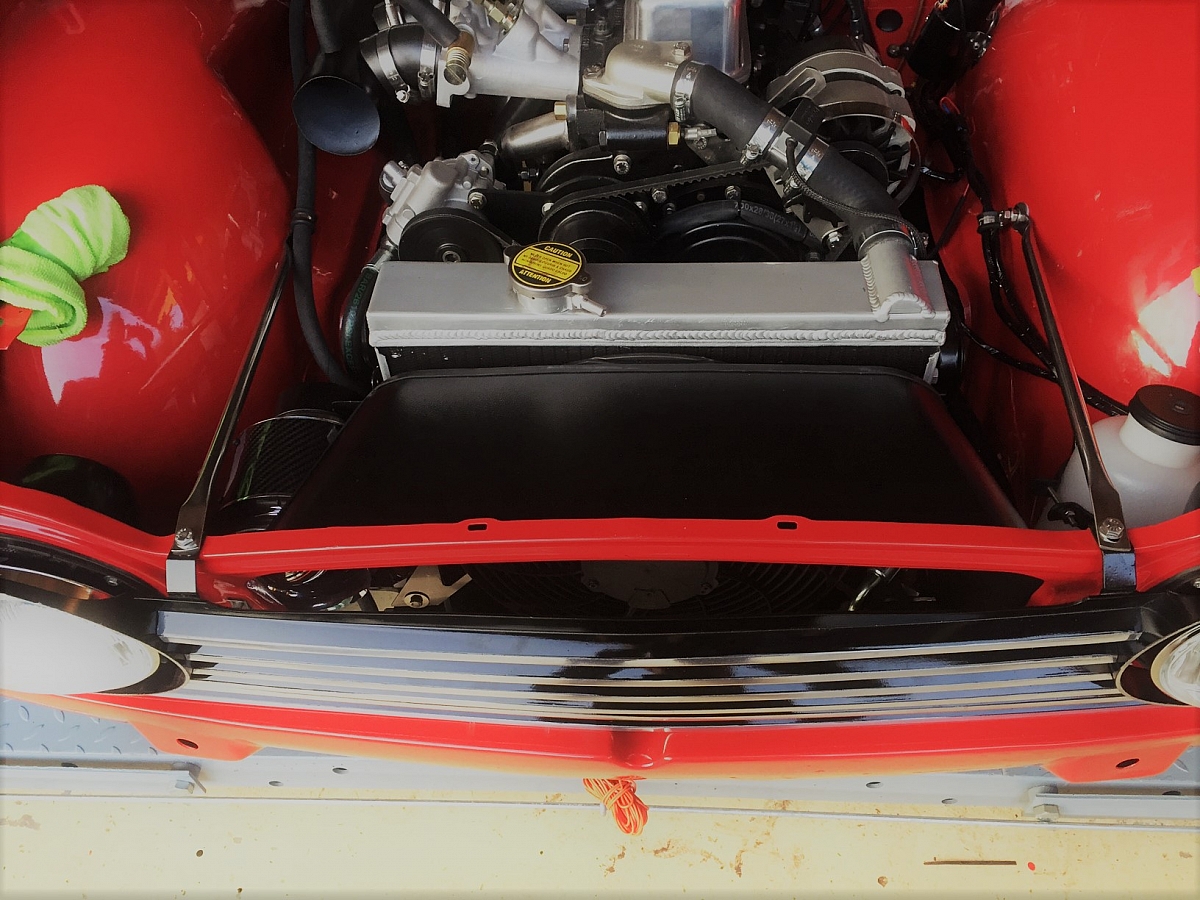
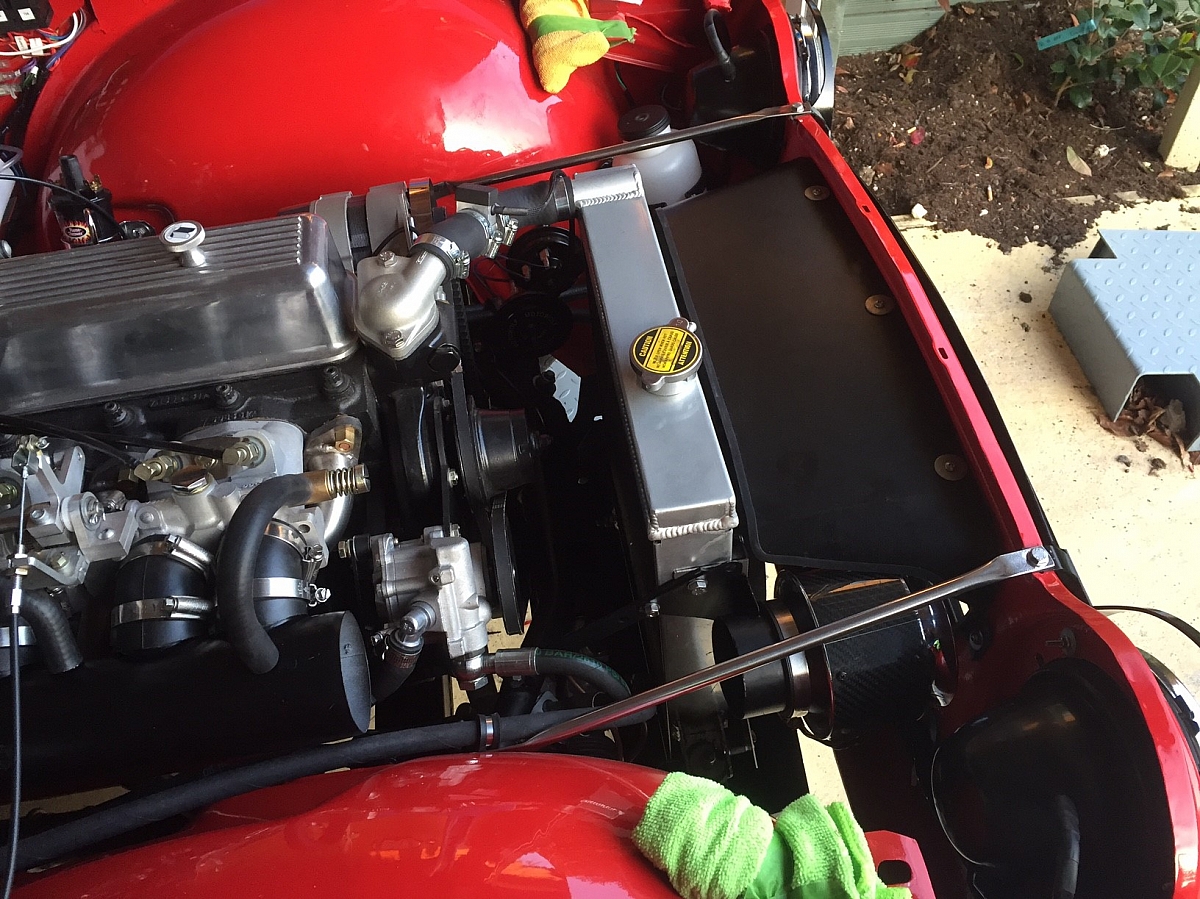
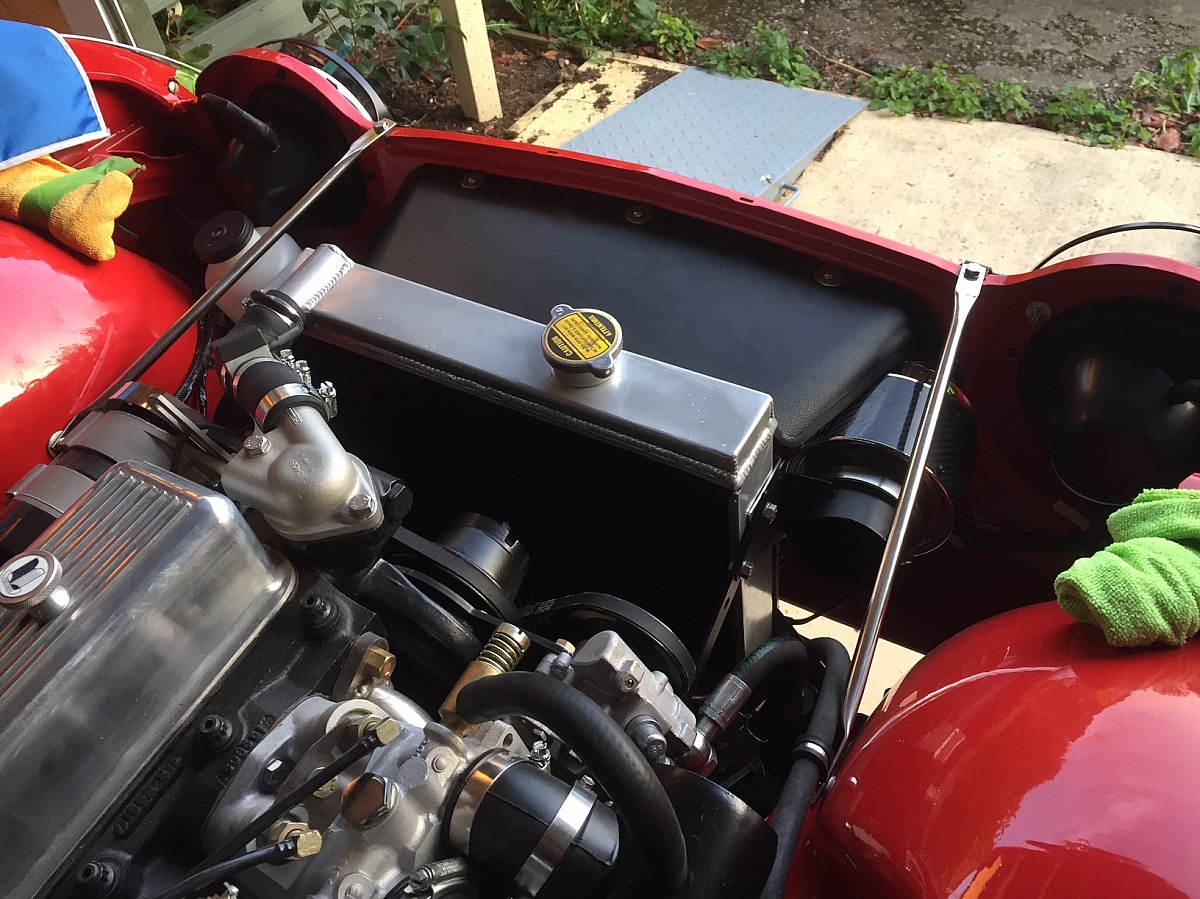
Ali radiator and a Revotex fan. That took a lot of time to get positioned correctly. Might have to re-visit though, but reasonably happy. Power steering pump trial fitted, but not lining up properly.

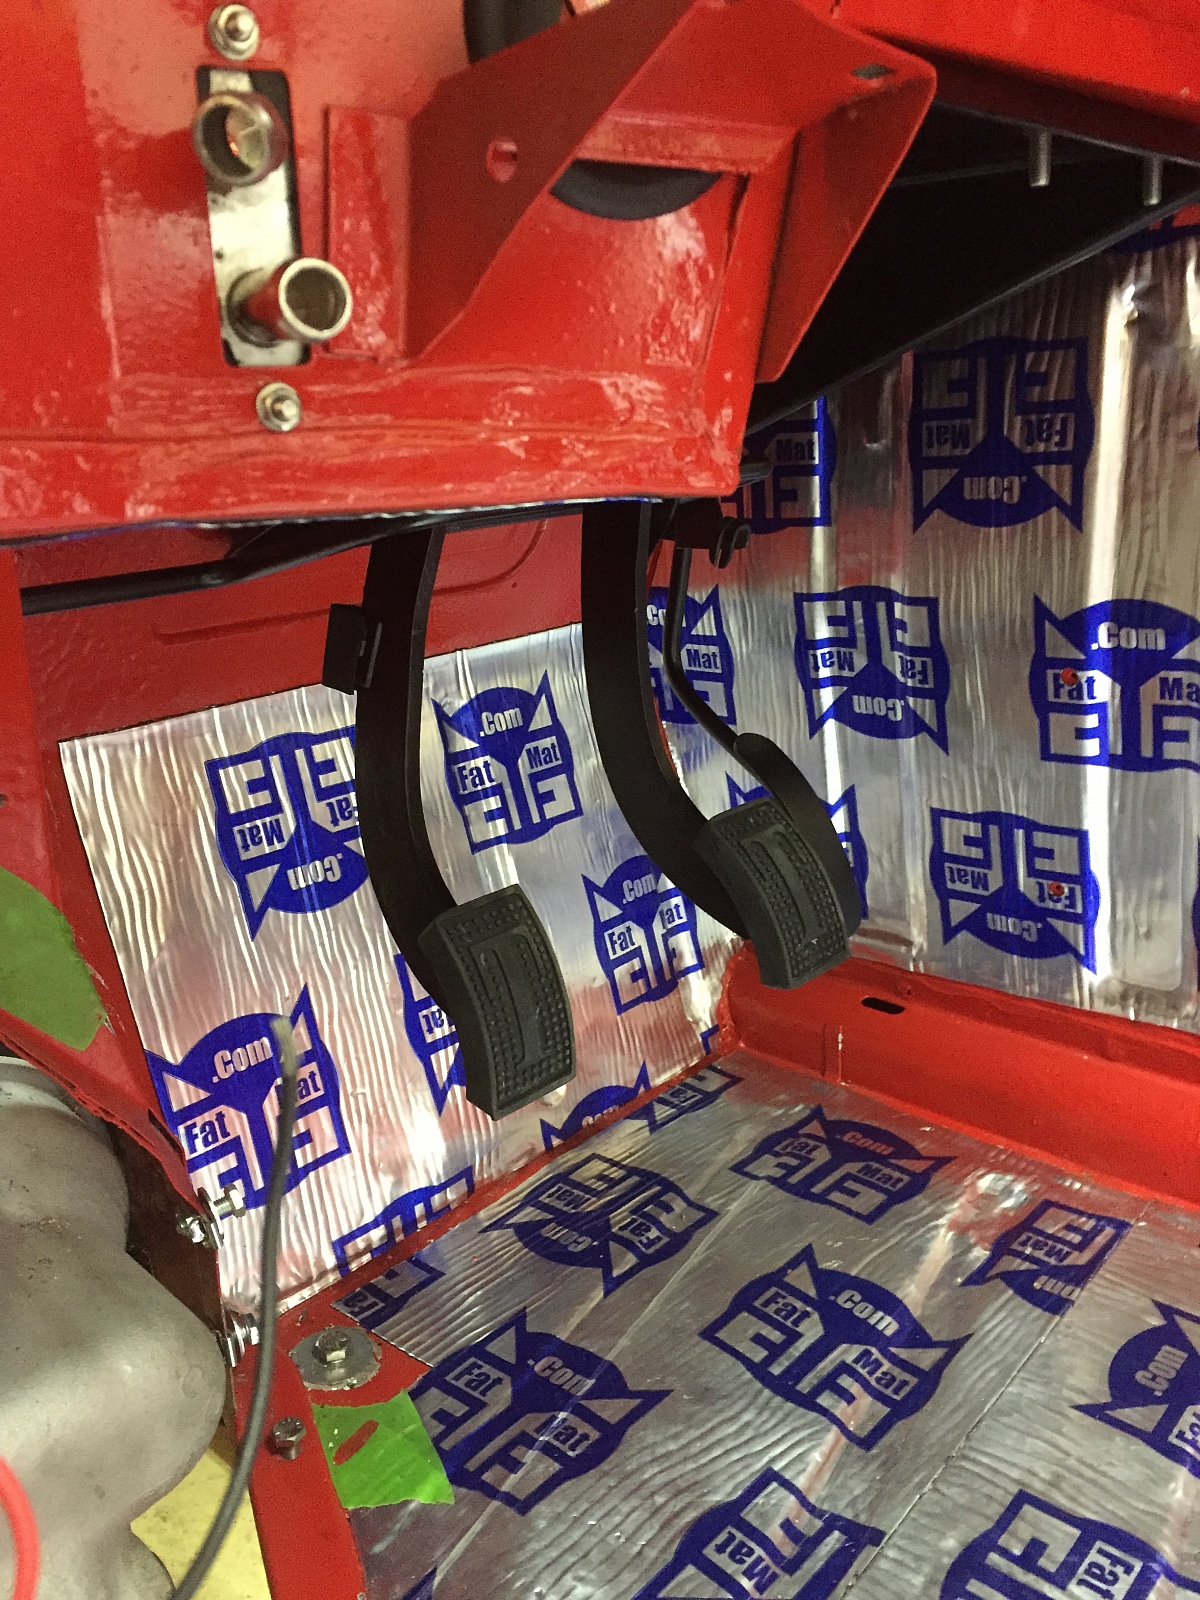
Not sure yet, why the brake and clutch pedals are not level with each other, but it's certainly going to get another visit . More soon.
8th February 2017
Resolved the pedal issue. It was the clutch pedal master cylinder fork. The one supplied with the master cylinder was wrong and too short. Re-fitted with the correct fork and now all good.
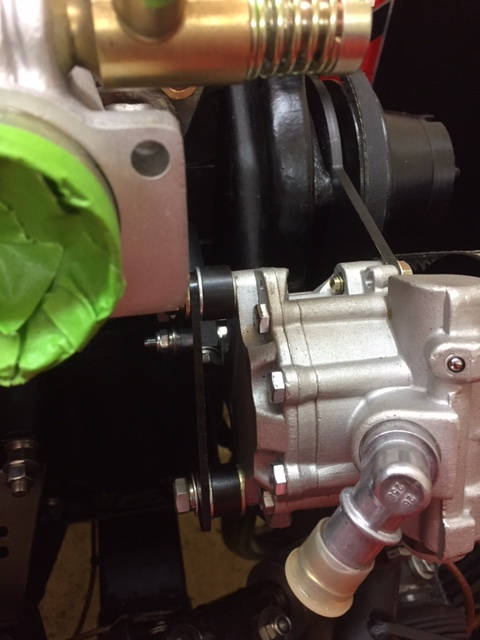
Ran into another issue when fitting the power steering pump. The back plate wouldn't line up properly. After a lot of head scratching and comparing this fitment with the same on my TR6. The conclusion was that the mounting hole in the engine block was slightly different. Not much, but enough to put it out of line. So Paul bushed the rear mounting. All good.
Before
After
The gearbox cover, now finished and painted inside with stone chip and top with mat black. Now ready for fitting.
13th February 2017
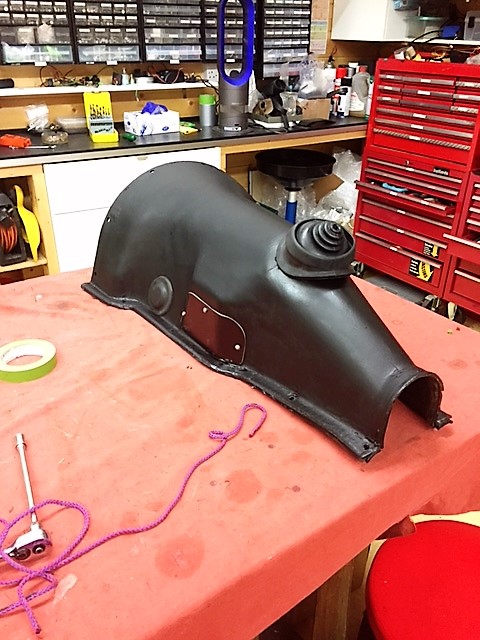
The Heater
I re-furbished this last year. New matrix, re-painted, new seals, fixings and screws etc,motor cleaned and re-used. The standard fan has been replaced with a tube fan from an MGB. It seems to provide a stronger flow of air and it fits very well inside the aperture and you can get new ones. When I took off the old fan blade from the spindle, it became too loose to be used again and I couldn't find any new ones around. So using a new MGB fan overcame this problem.
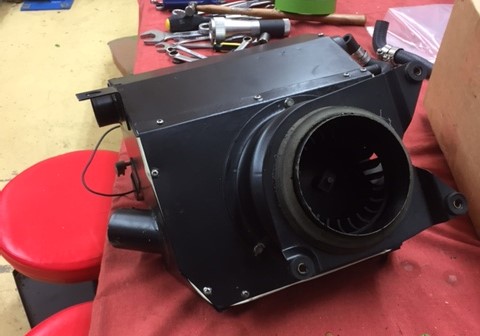
The heater now fitted, the gearbox cover fitted and a trial fit of the metal dash.

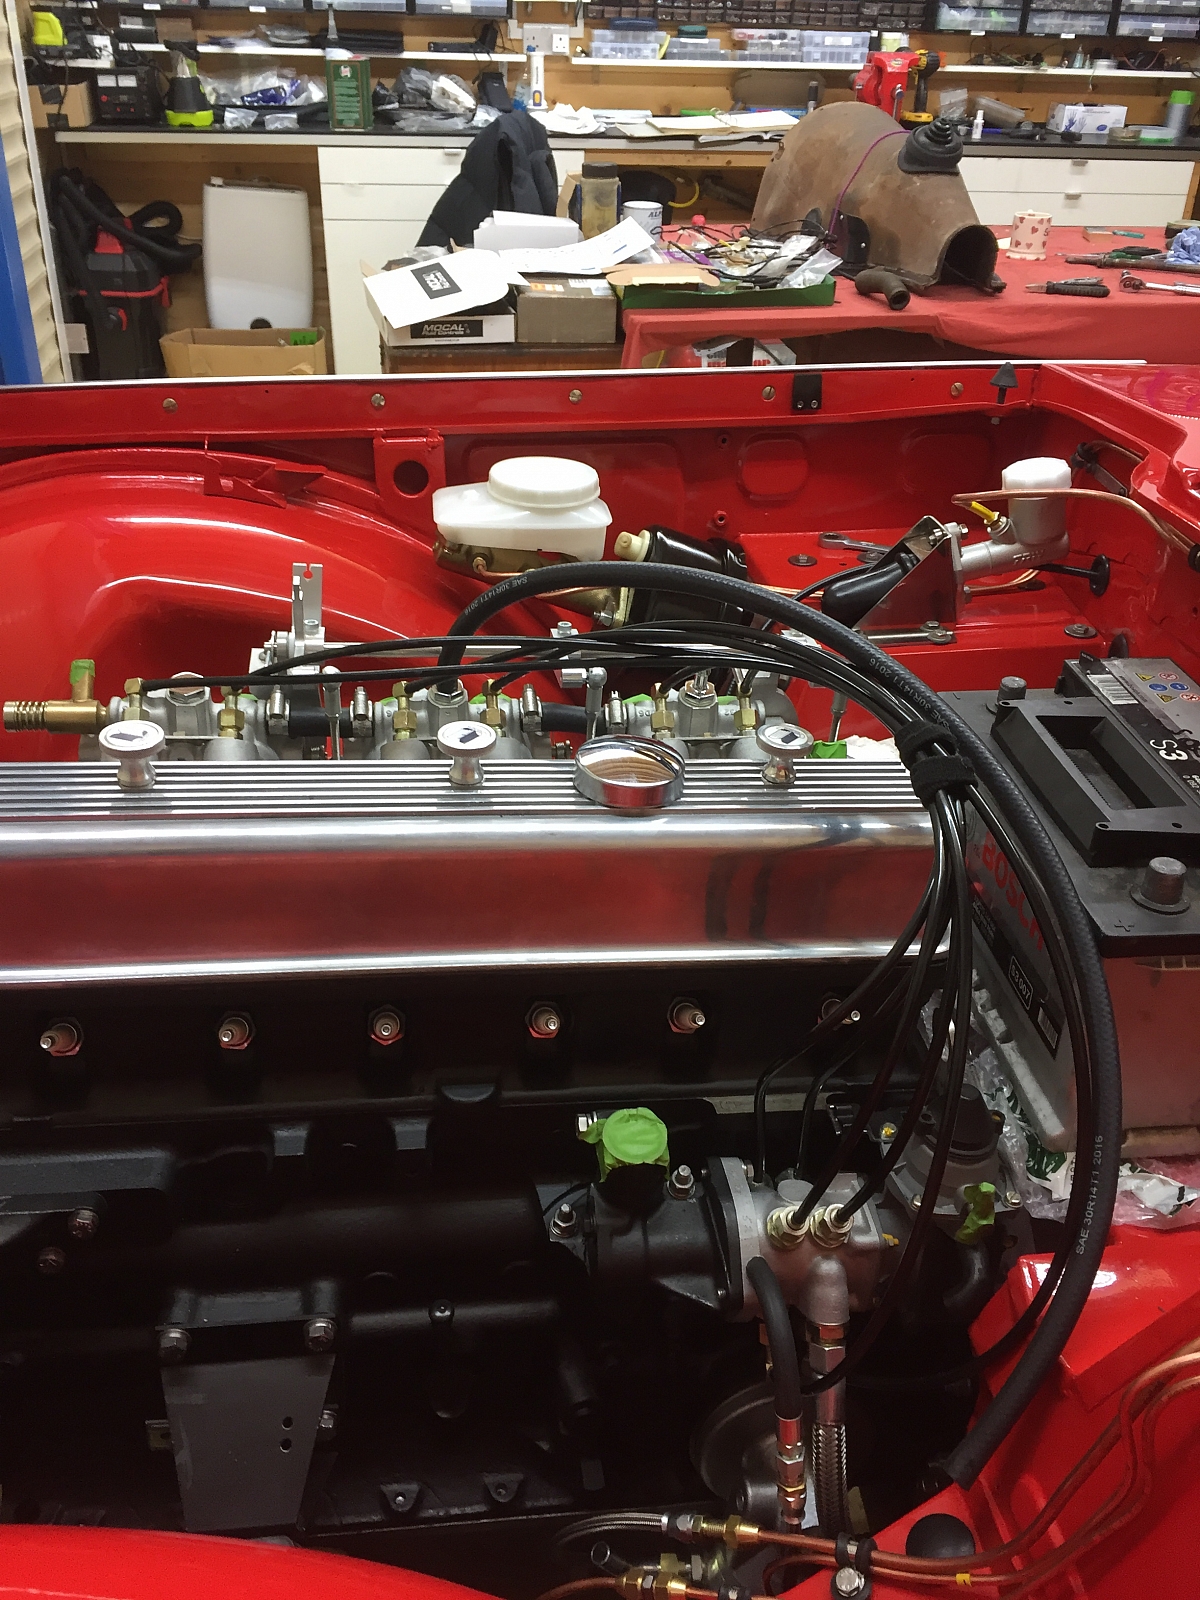
Plus a few more items added to the engine bay, including a different water valve arrangement compared to the standard one, which always binds. This one has a very easy swivel valve and I had the main outlet stem on the engine block modified and chromed so that the new valve screwed directly into the stem.
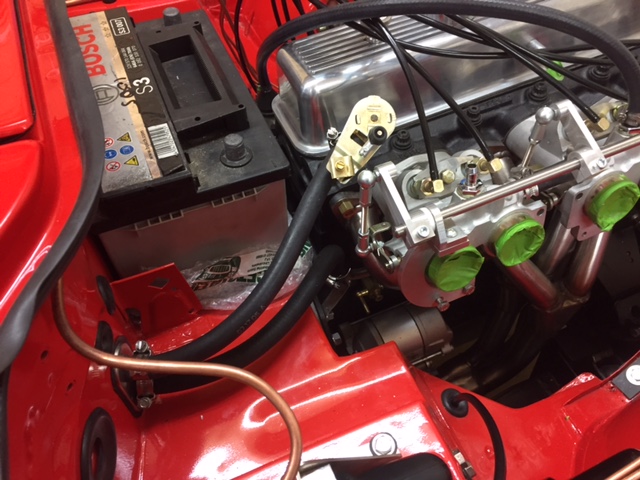
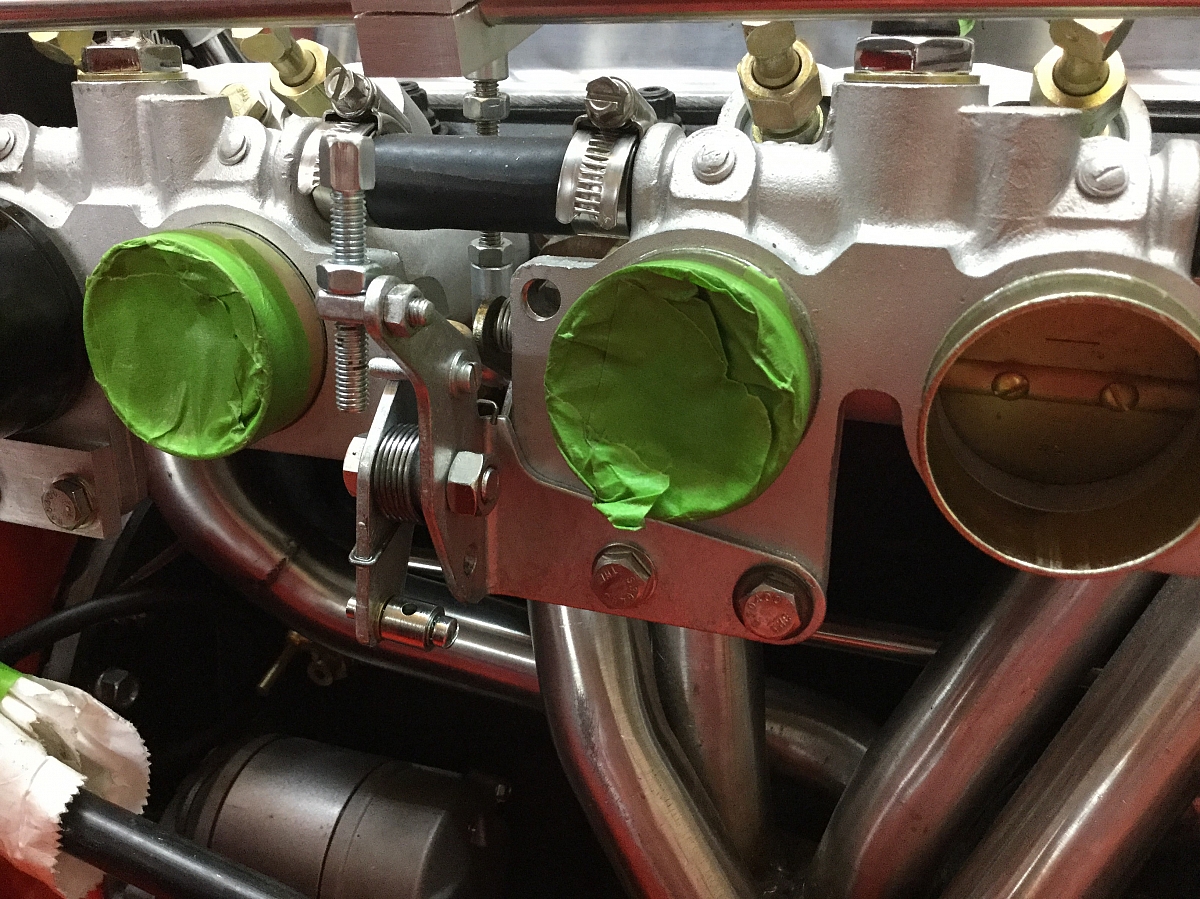
I used this tool to get the correct alignment of the throttle bodies. The tool was expensive at £56, but I have peace of mind.
The top hose cut and fitted to accept the Revotec temp sensor. Awaiting the pipe clips to finish

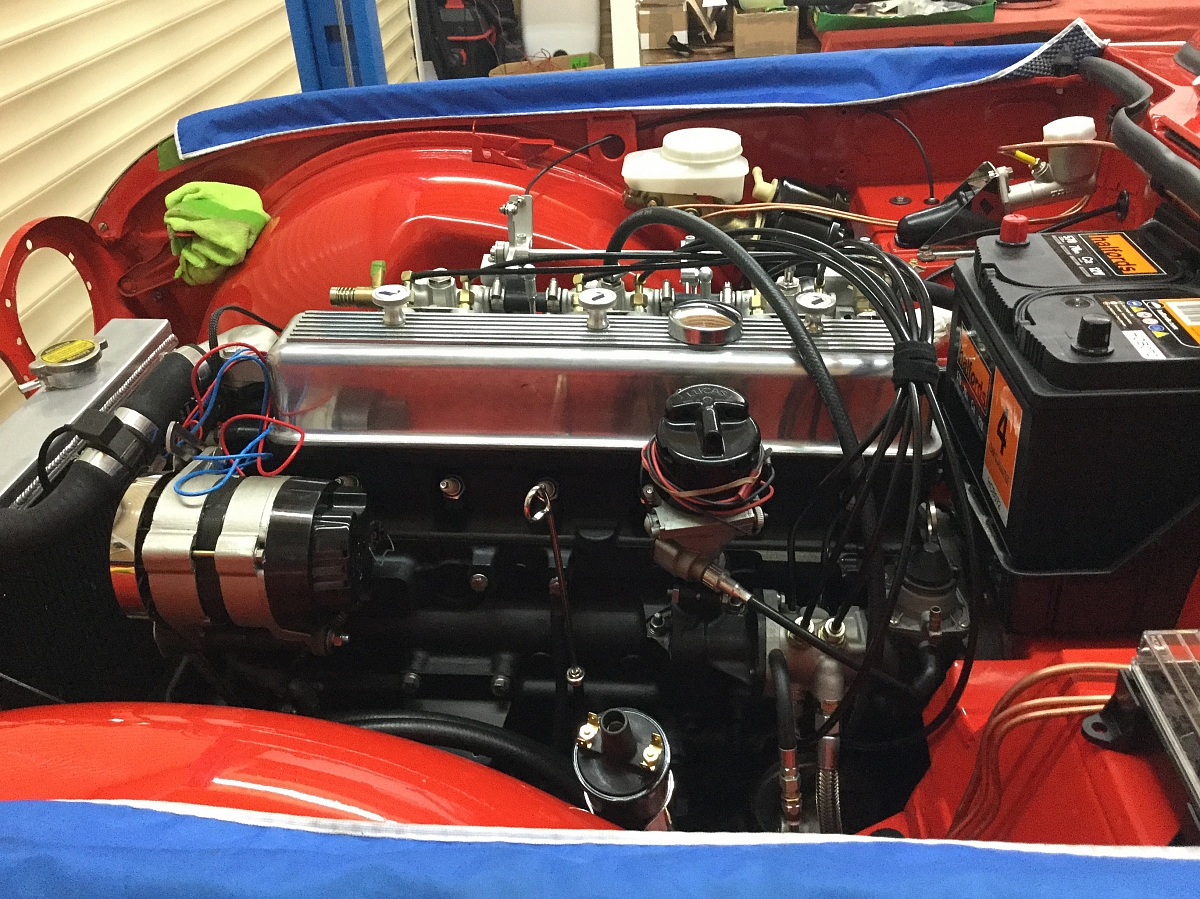
Alternator fitted with chrome guard. Dizzy fitted, but obviously not set up yet.
14th February - 4th March 2017
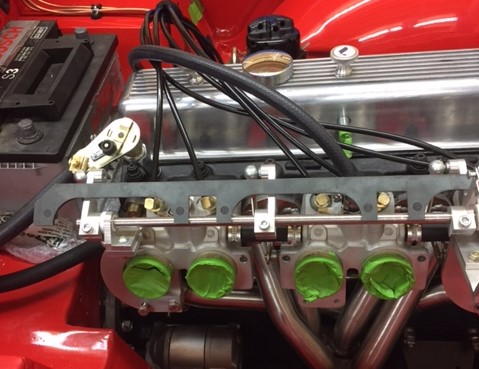
More items added to the engine bay. Throttle cable, oil cooler, coil, dipstick, name plate choke assembly (made by Paul a great job) and numerous fitting adjustments. And at last the dash top and windscreen frame. We have also been spending a lot of time identifying and labelling all the connections on the new loom and checking/testing to see that everything works. Next job there, will be to modify/change the loom to accommodate the alternator and a volt meter instead of an ammeter.


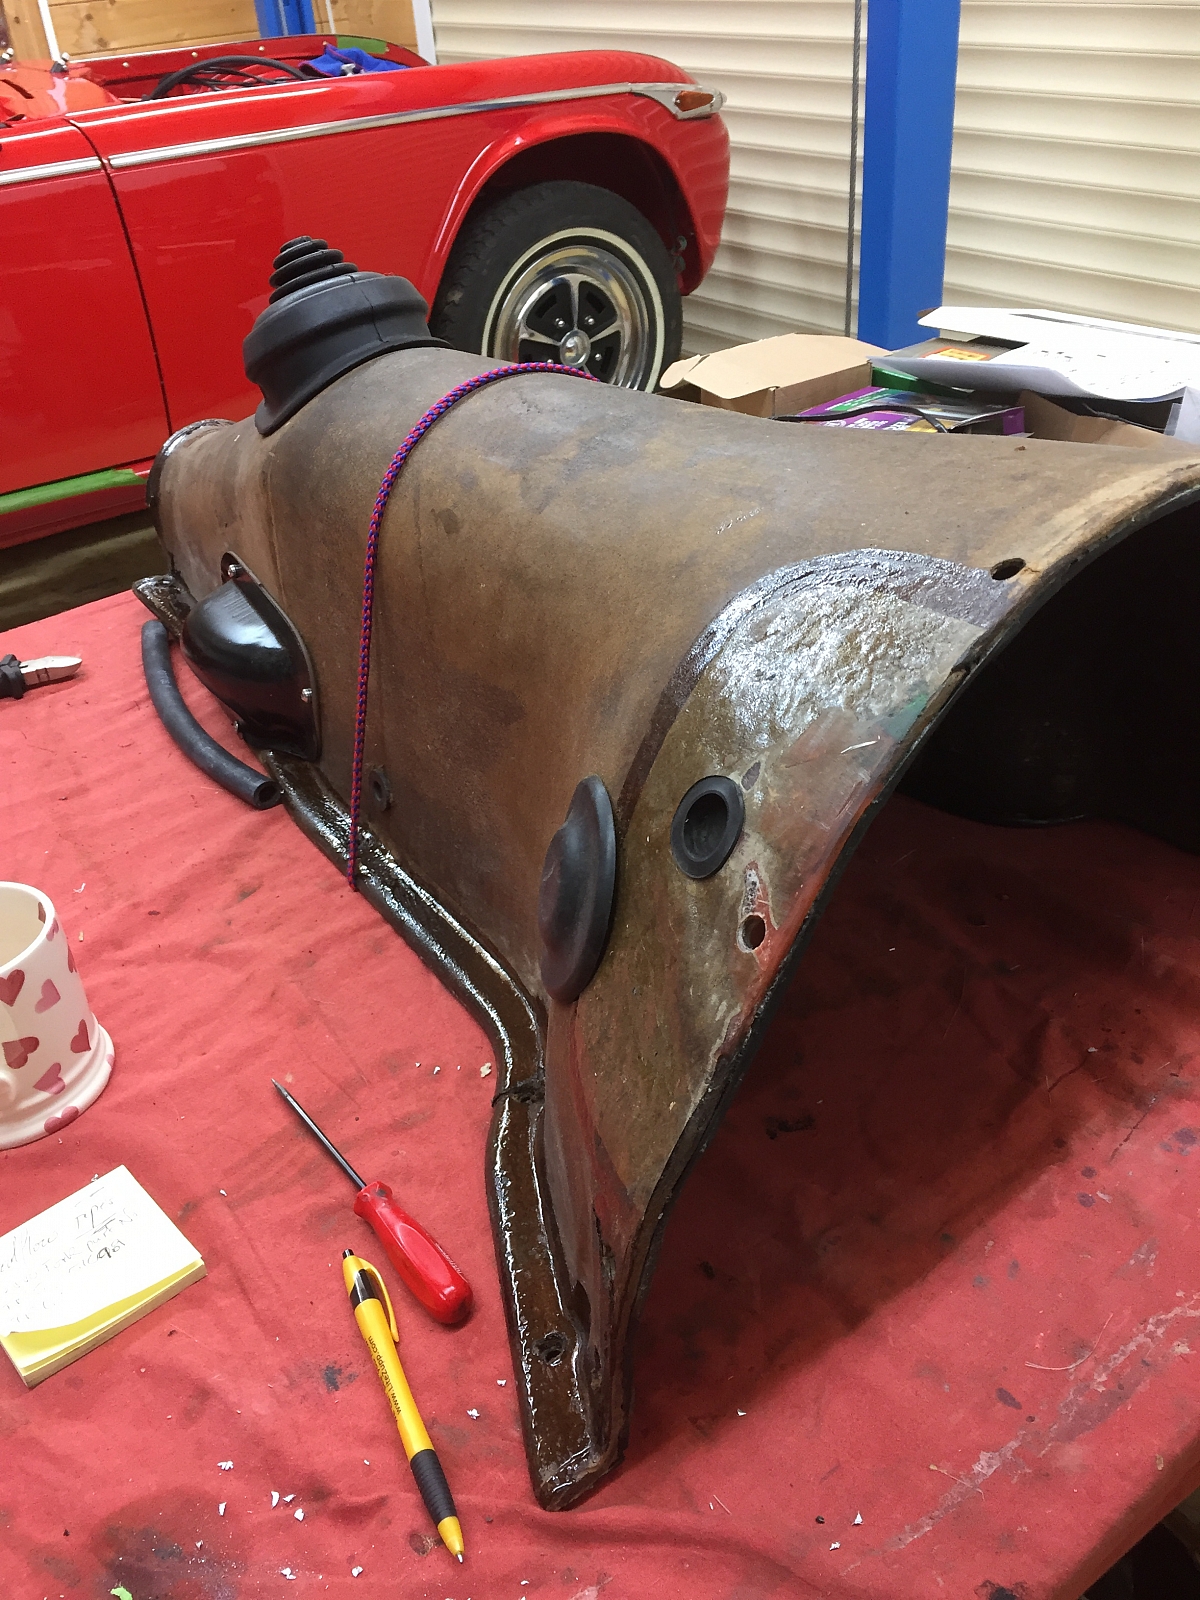
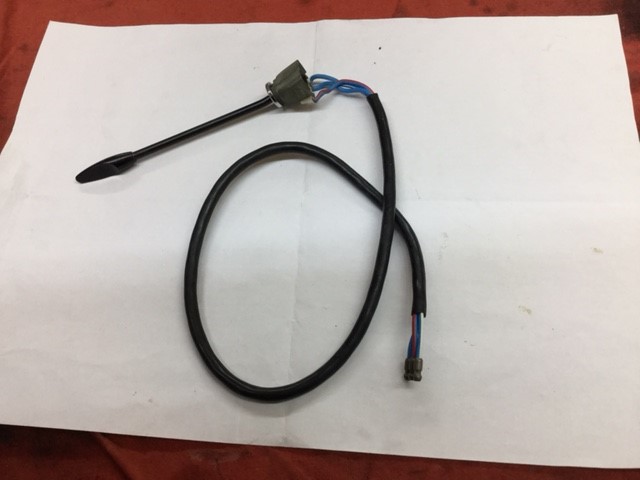
Also I found this little beauty a while ago. A stalk operated dip switch, which will fit onto the steering column behind the light switch stalk and replace the floor switch. It's never been used.
April 6th 2017
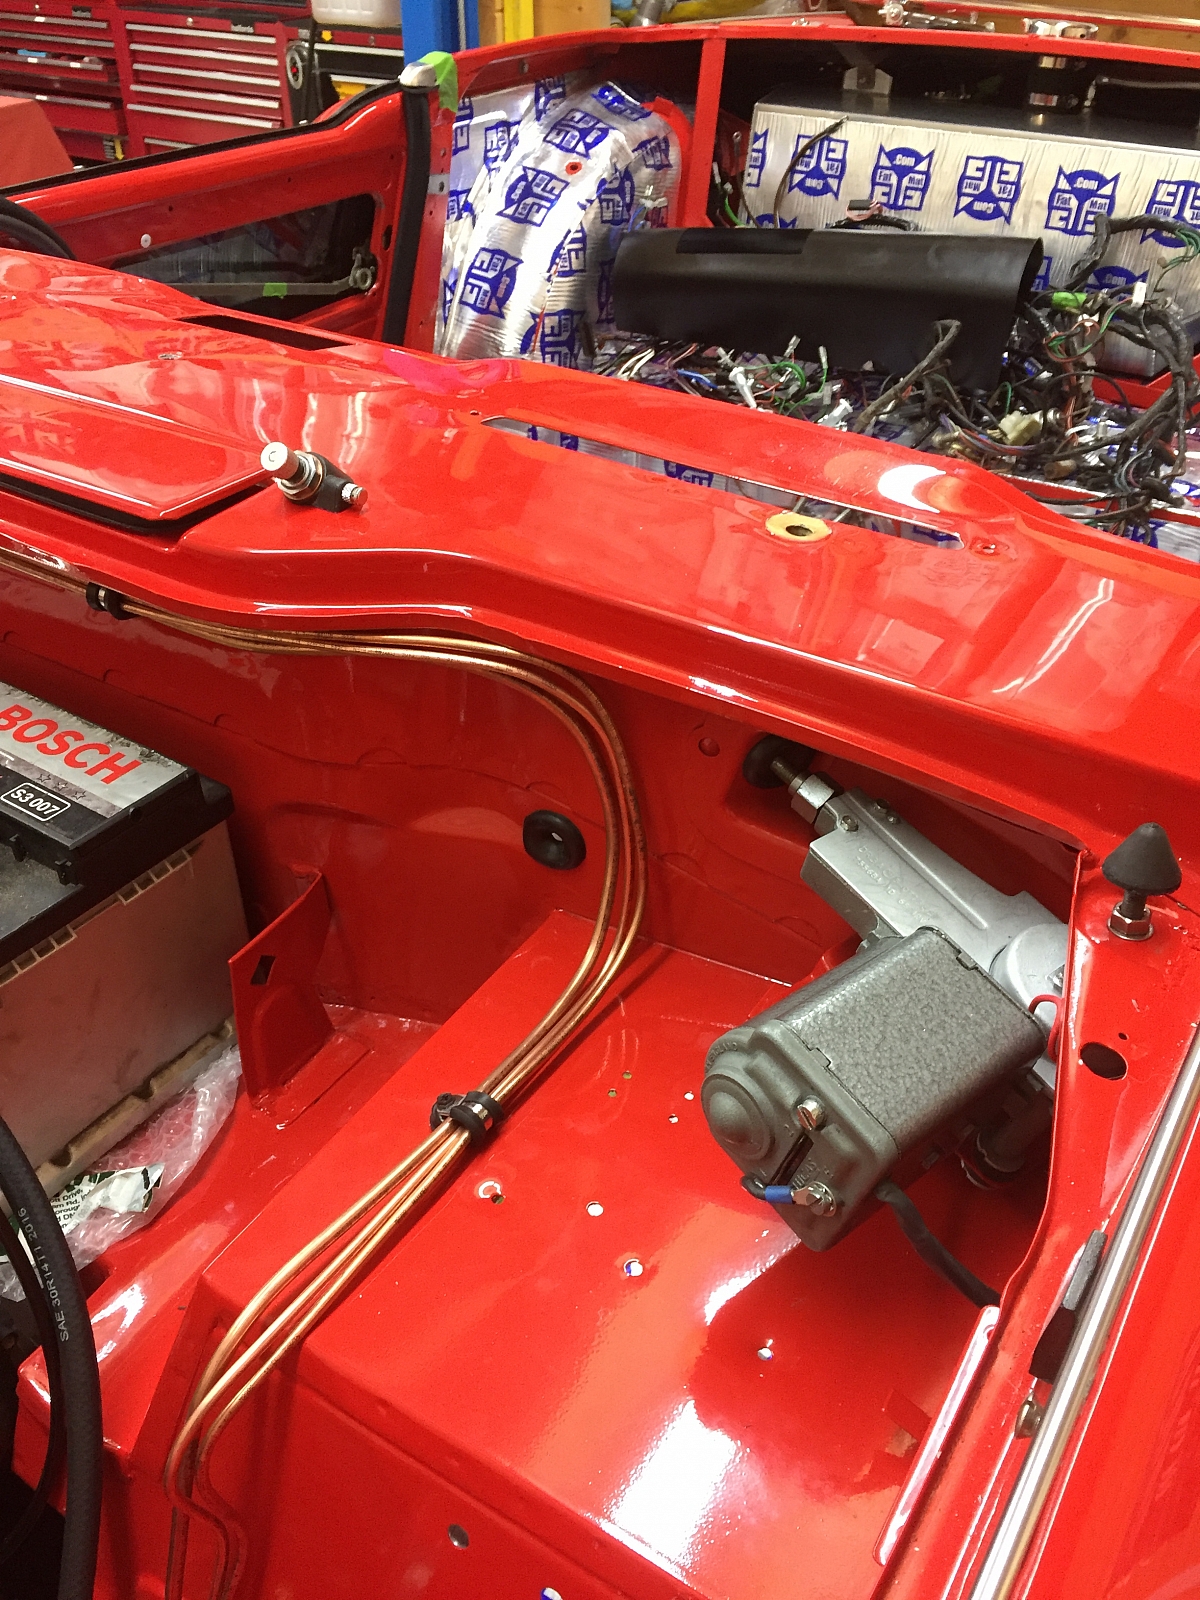
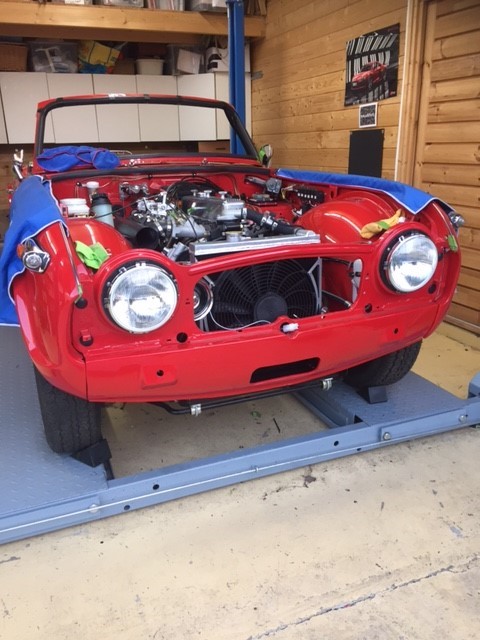
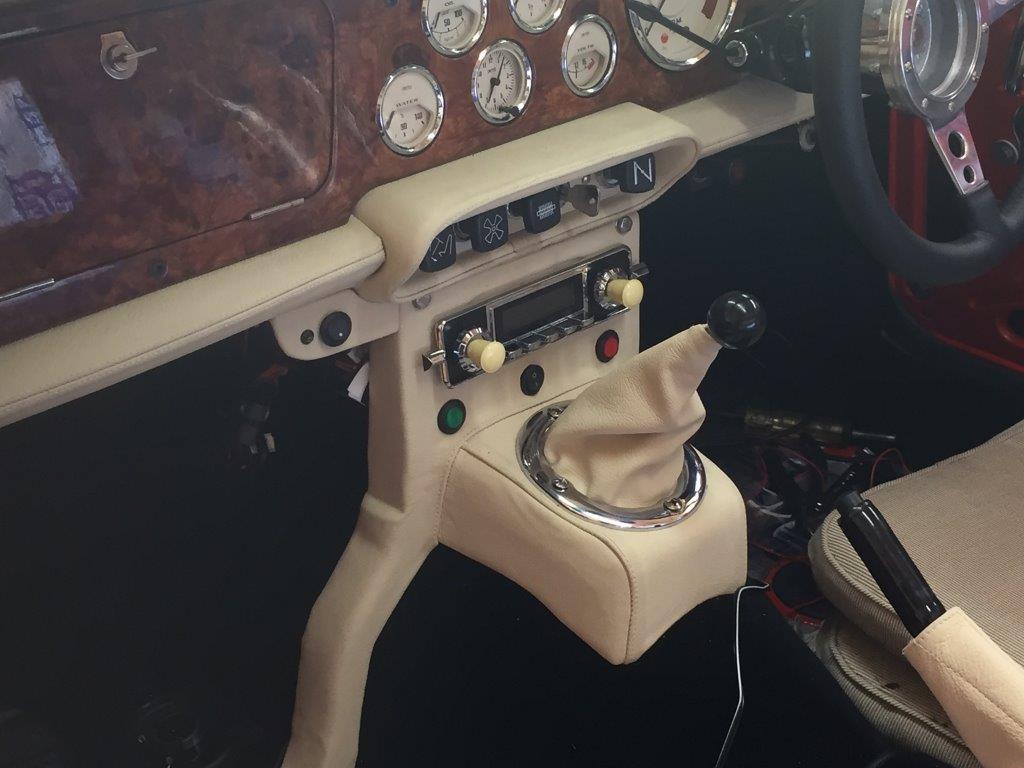
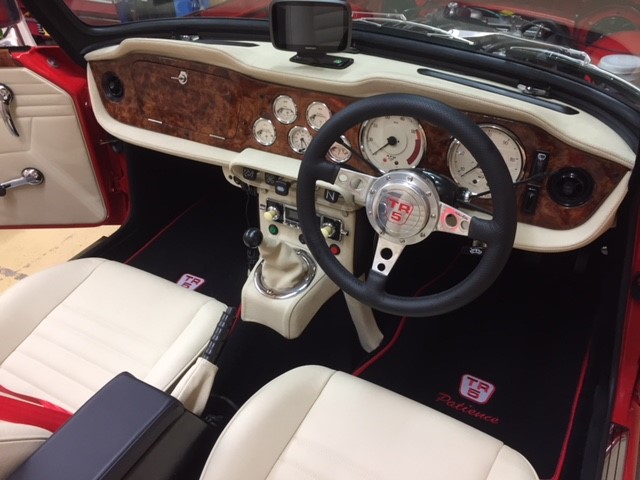
Loads of stuff done, since the last entry, but not a lot to show. 1st issues. The windscreen frame won't fit properly. Tried all sorts of permutations, but it won't sit down nicely on the passenger side. I've left it for now and I've bought some different bottom rubbers to try. In the meantime we thought it was time to get on with the electrics. Paul has very kindly modified the loom to eliminate the voltage regulator and plumb in the volt meter wiring. All the new joints have been soldered. I've then loosely fitted the loom, then made up 2 plates to accommodate the extras and the relays. The 1st plate can be seen just in from of the windscreen motor which holds a seperate fuse box for power distribution. the 2nd plate is on the n/s of the engine bay, which holds the standard fuse box/loom connections, and all the relays. Not finished yet by a long way, but good progress is being made. She also has her eyes back for the 1st time and the power steering fitment is now complete.


21st April 2017
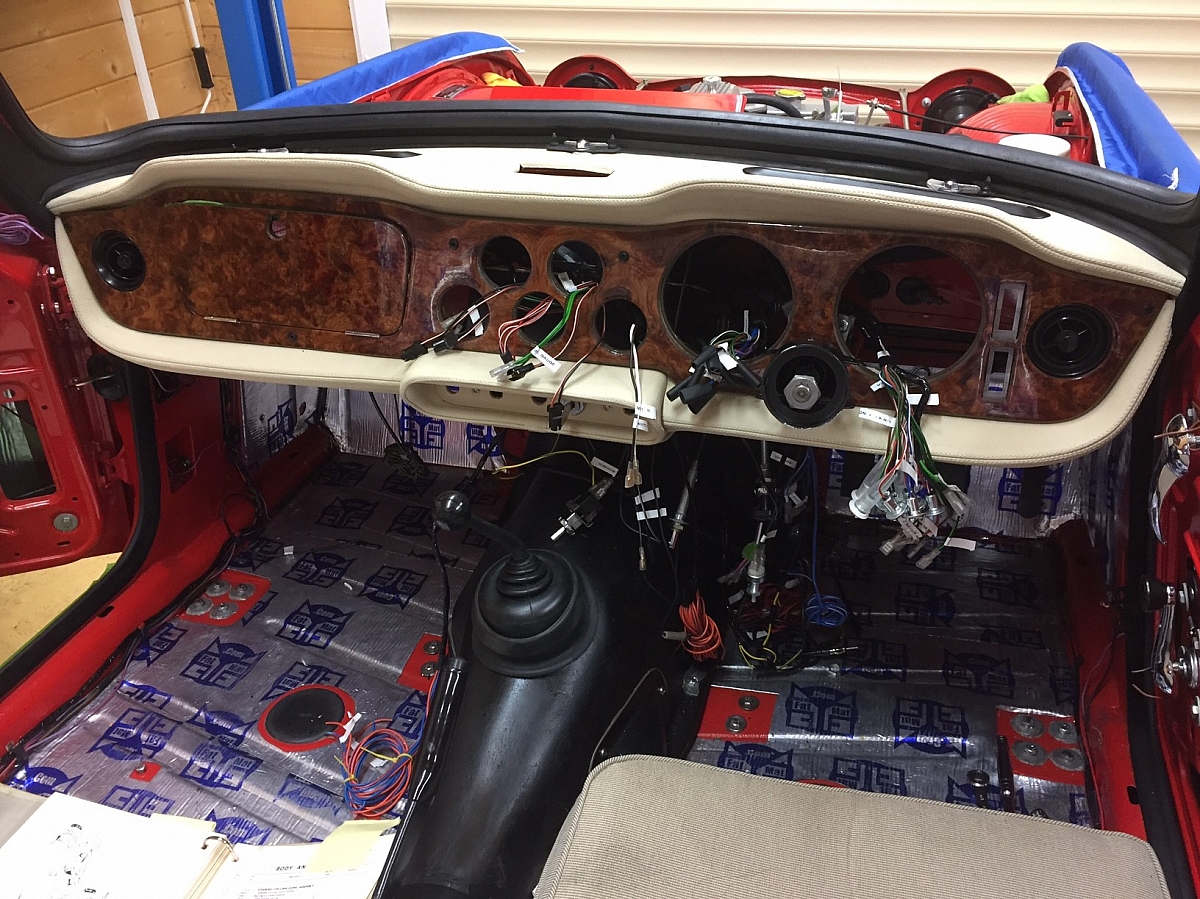
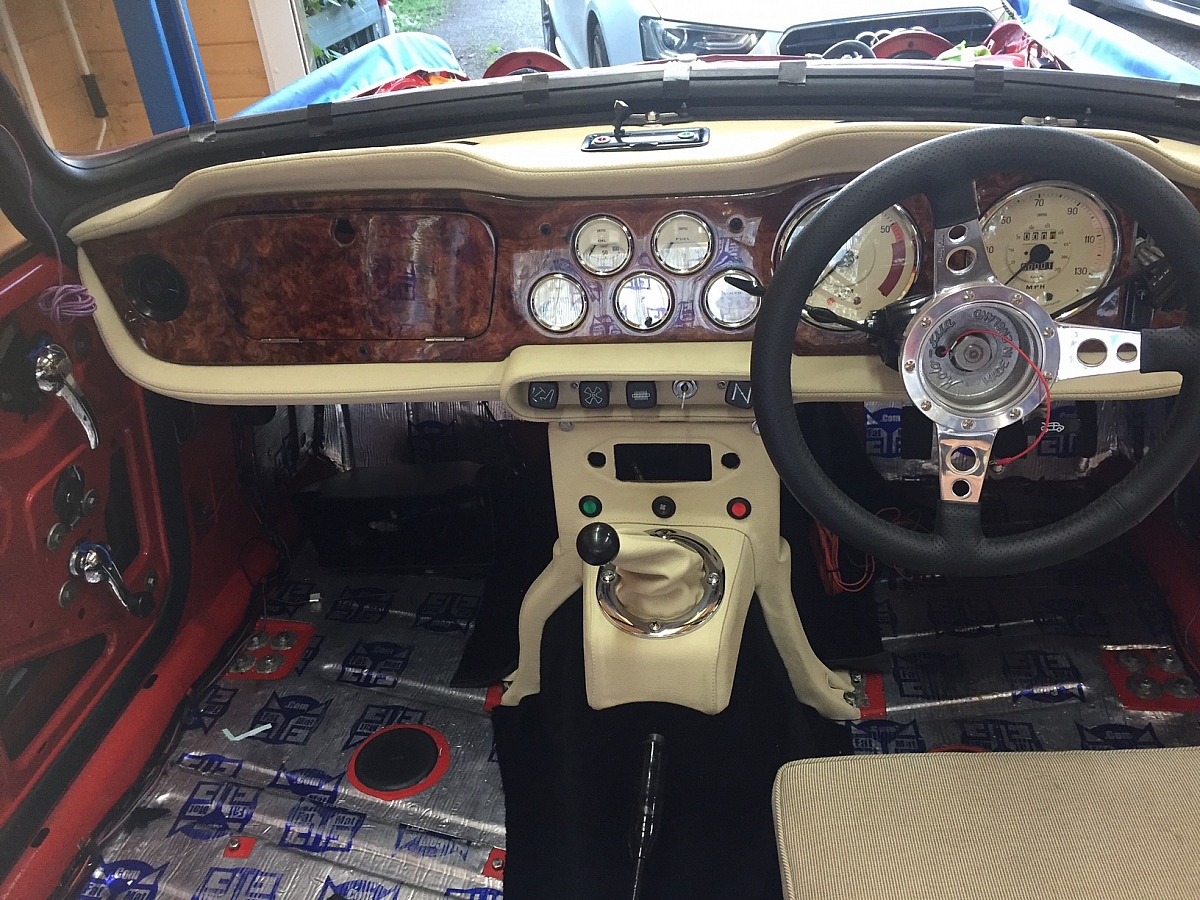
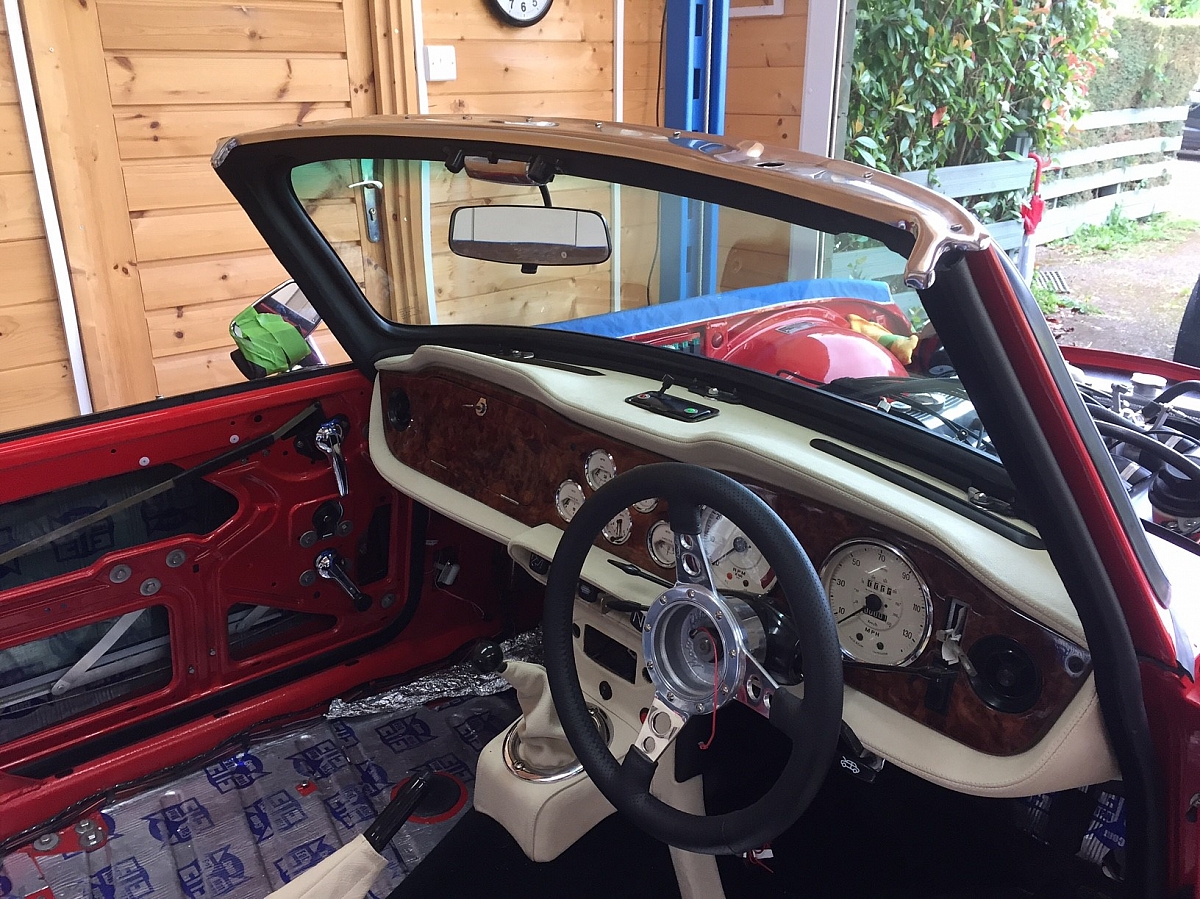
The dash frame trim, crash pads, centre plinth etc, trimmed and glued into place. Then fitted the whole assembly . Had to dig out quite a bit of foam from the sides of centre plinth to get it all to fit, but got there in the end. With Paul's help some more wiring connected, and testing done before the final fit. A big forward step and thank goodness I had labelled all the connections before hand. Now I can fit the steering column and then back to completing some more wiring and the heater/choke cables etc.

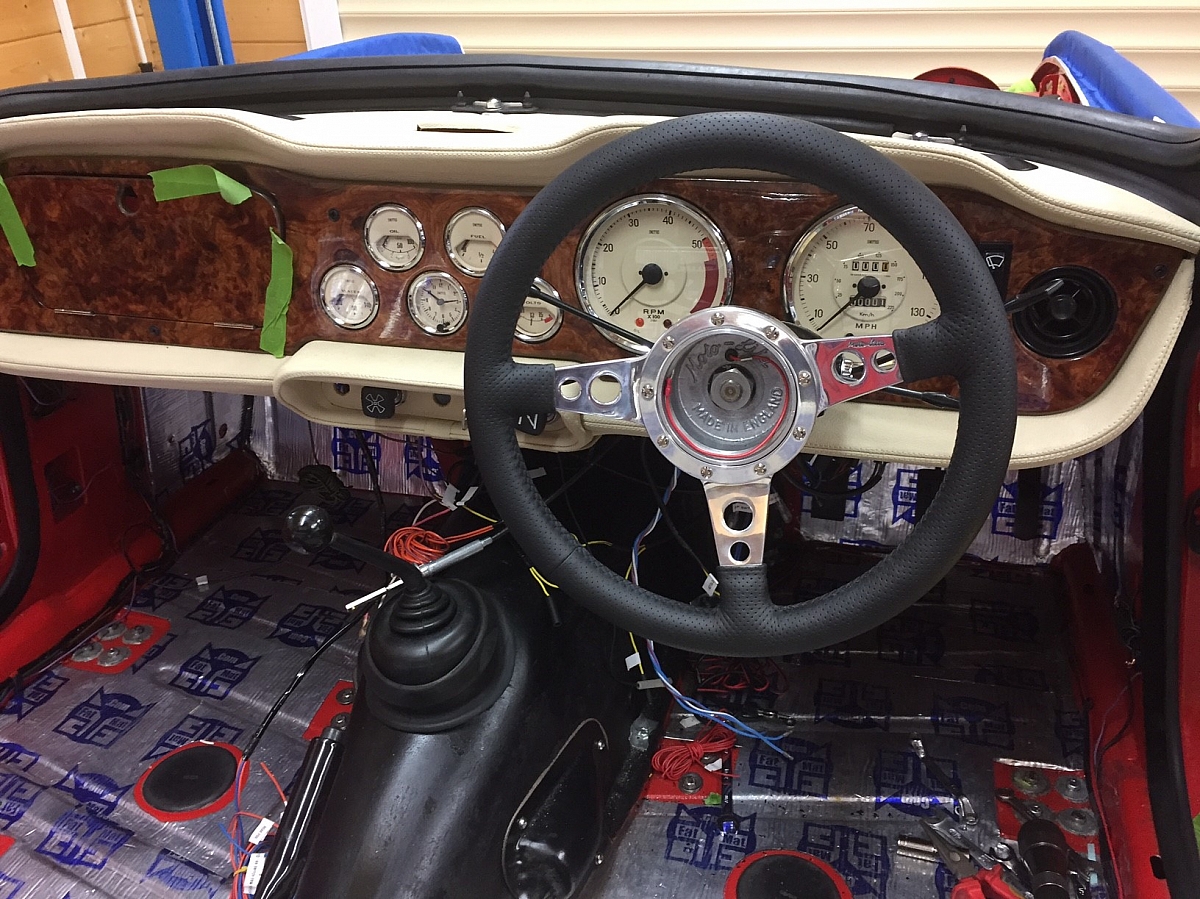
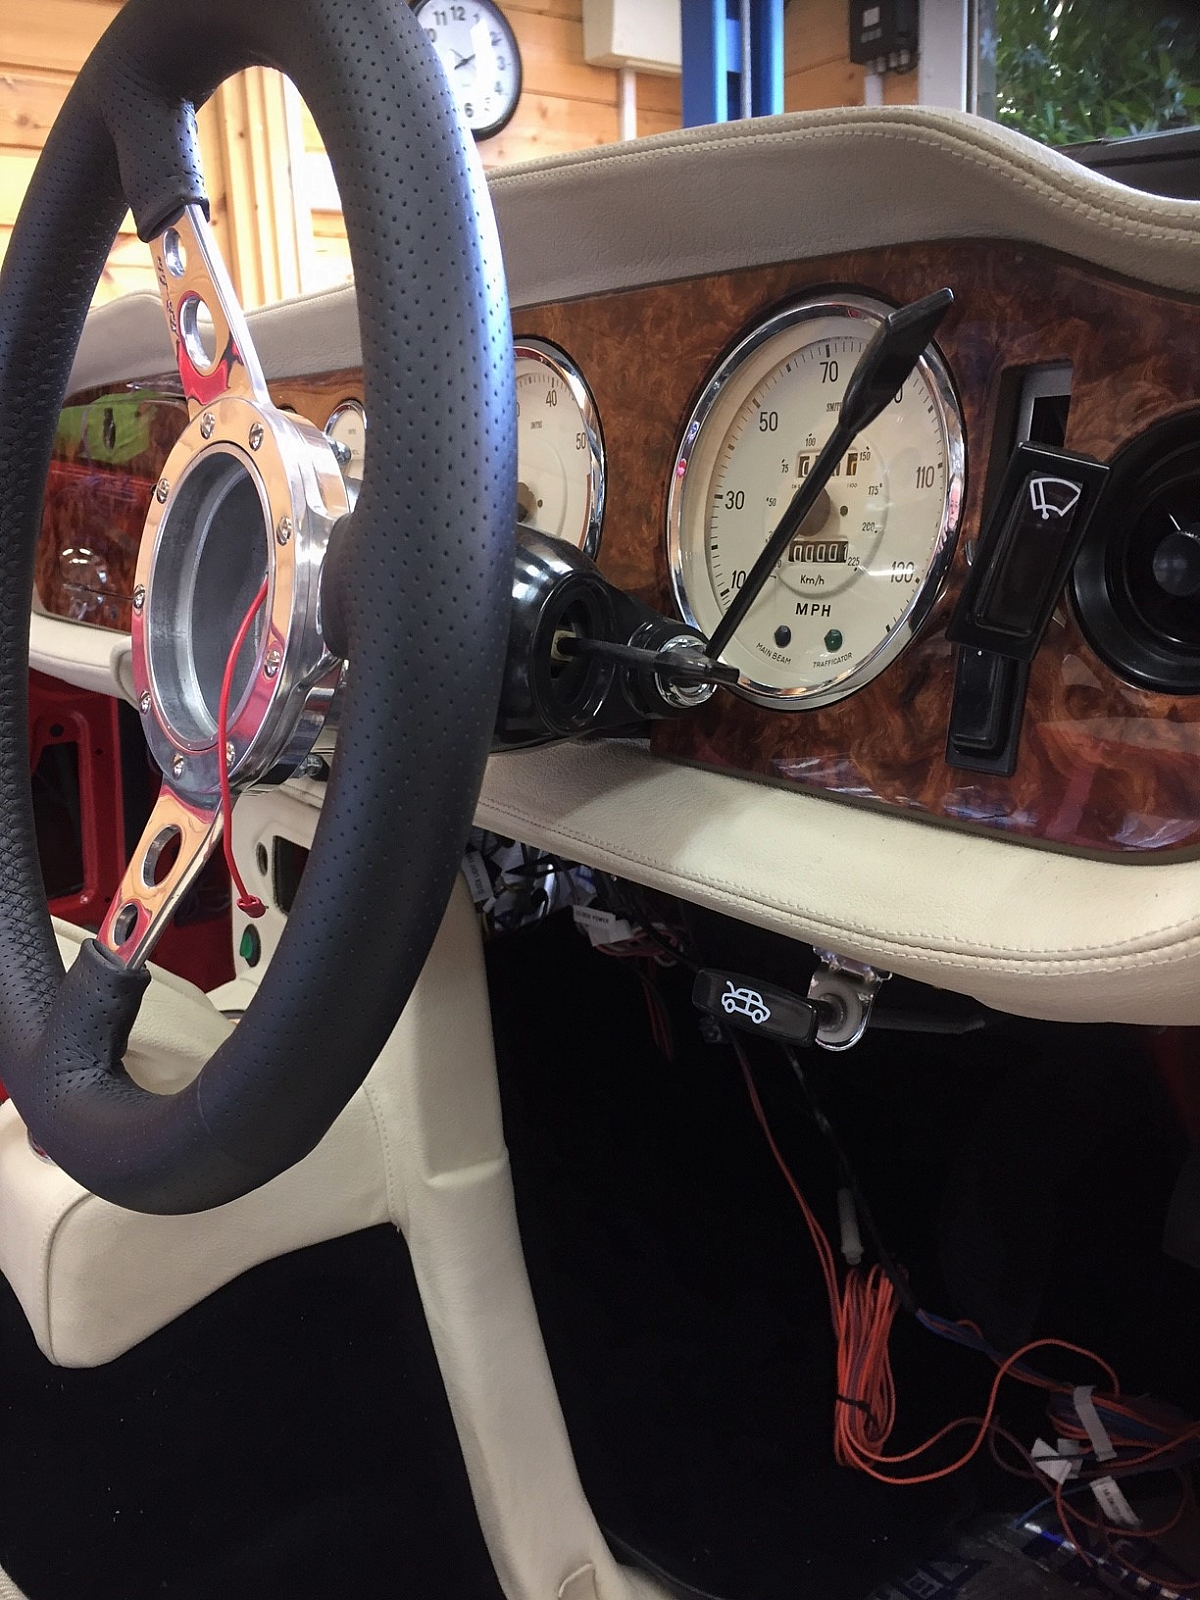
24th April 2017
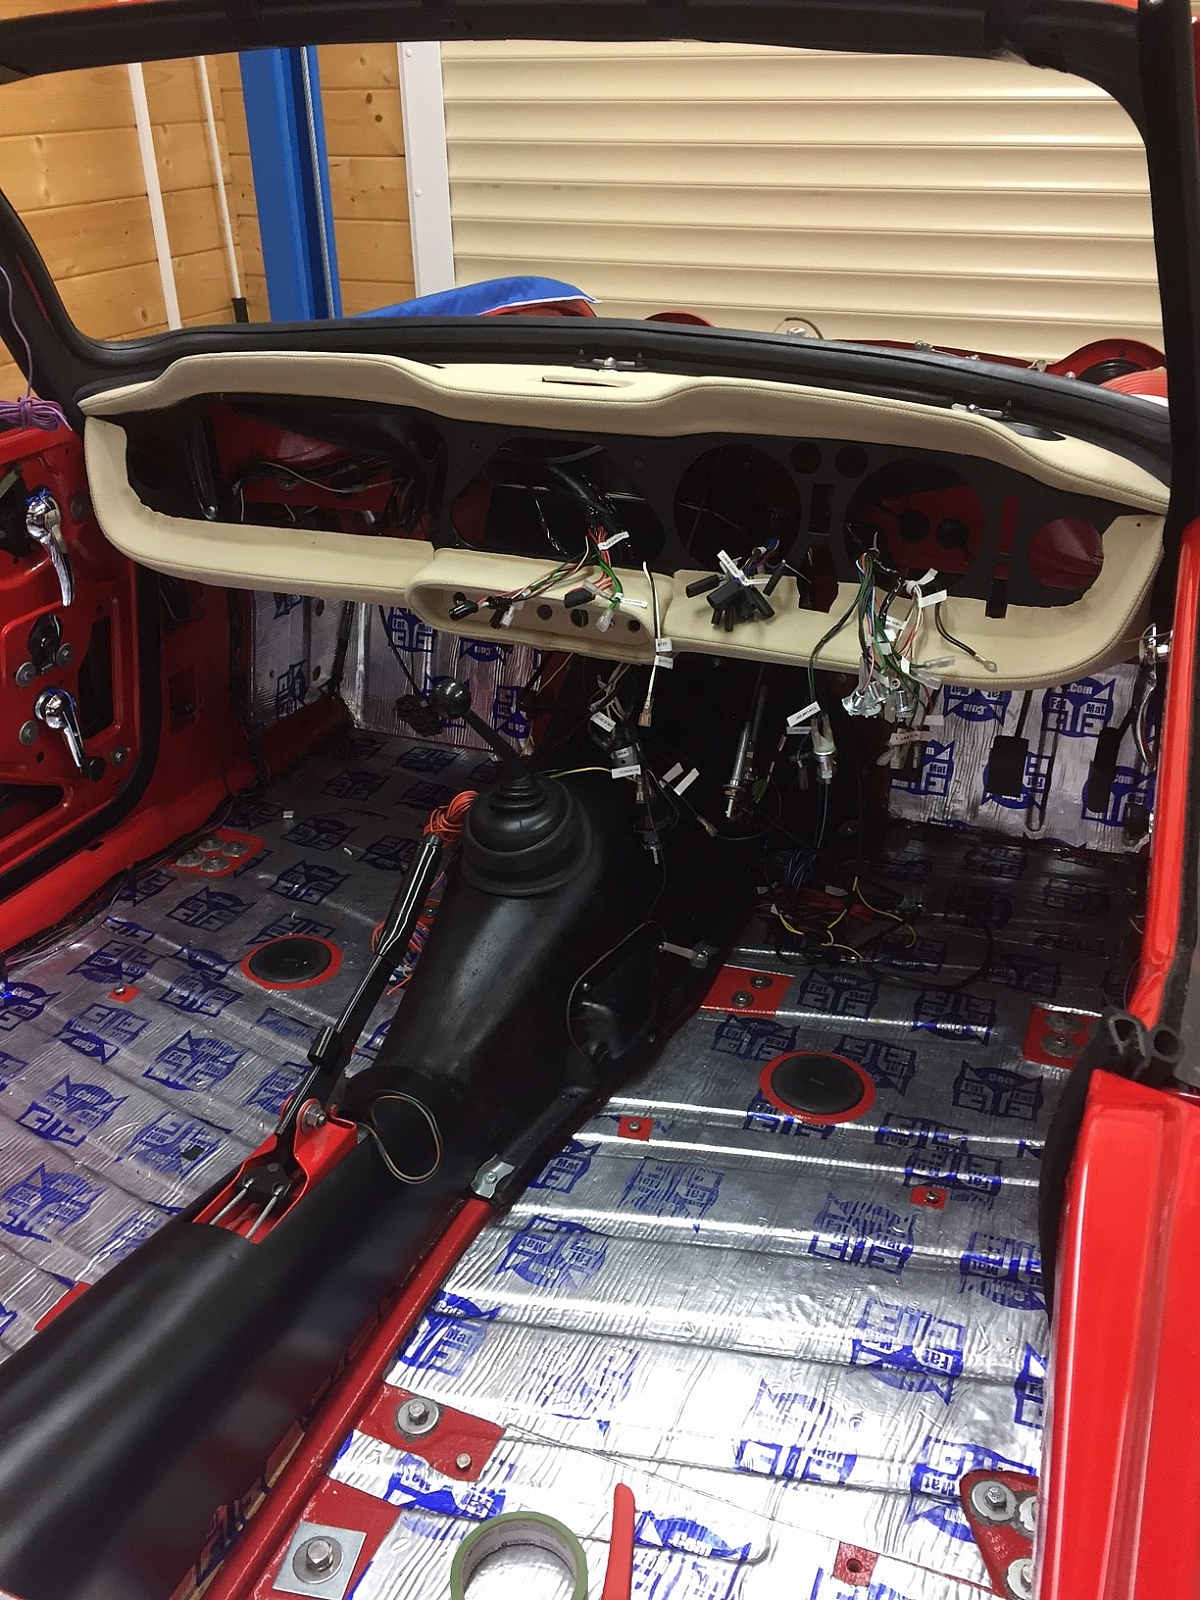
Steering column fitted, dashboard fitted. Eyeball vents fitted. I've yet to adjust the length of the inner column for the steering wheel to fit on the splines. Before fitting the dashboard, I've fitted the small bracket and rubber to the right hand top corner on the back of the dashboard for the glove box lid stop and the spring switch bracket for the glove box light and the stop bracket to the inside of the lid, plus the backing plate for the wiper switches. All a bit of a fiddle and you have to be careful to get the little screws in the right place, but done and now for all those wires, switches, cables and gauges.
28th April 2017
The small gauges now fitted. I wish I had 10 inch long fingers. Fiddly or what ! But they are in and all wired up with green LED dash bulbs.

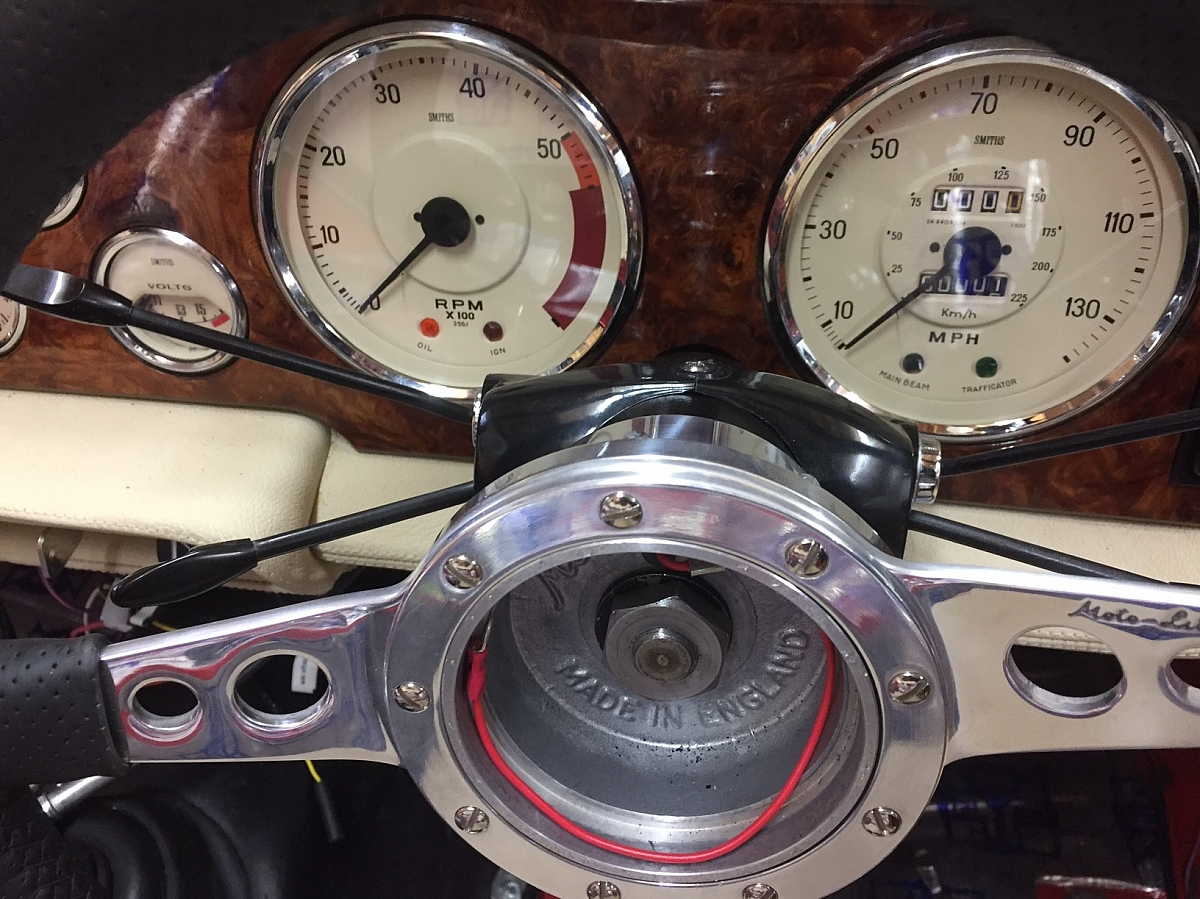
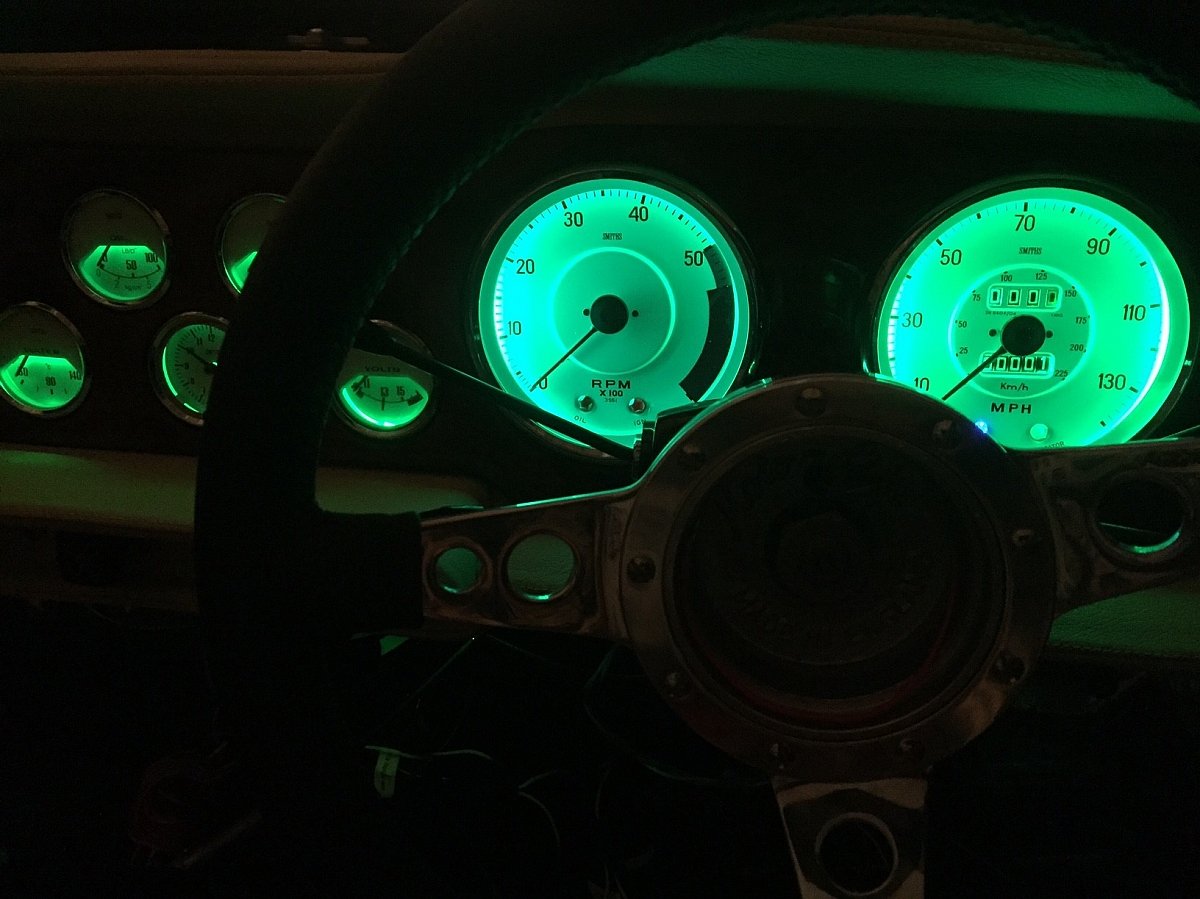
3rd May 2017
The big dials and column switches fitted.A bit of a faff, as I fitted these once and ran the wires through the bottom dash/column bracket and because I have an extra set of wires for the dip switch (which is fitted to the left of the light switch) the column bracket wouldn't clamp down properly. So I had to take it all apart again and run the dip switch wires to the left of the column clamp. I've fitted green LED bulbs for the back lights, a blue LED for the main beam, a white LED for the oil warning light, standard bulbs for the indicator warning light and the ignition light. Took about 4hrs, but all done and I'm pleased.
4th May 2017
Wired up to test. The dash lights and headlights, dip main beam work - yoh..
6-9th May 2017
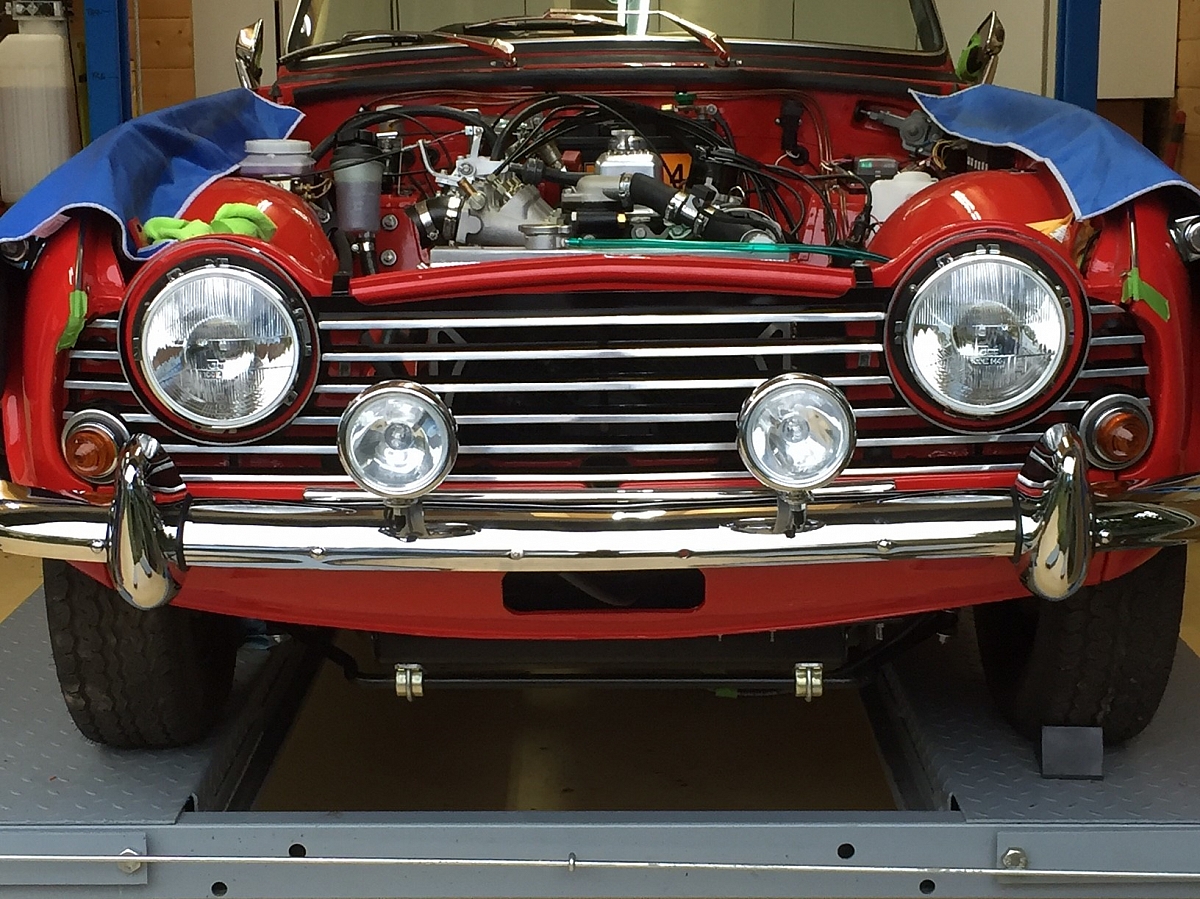
Spent a long time securing and connecting all the wires at the front of the engine bay for the headlights, indicators, side lights, thermo fan etc. Secured a new earth strap to the front of the chassis. Secured the front wing lights. Then trimmed and trial fitted the front radiator cover - No picture of that yet, but will insert later. Then fitted the grille. A bit stressful, as it's so near to the paintwork. Yet to fit the indicators and connect the final wiring. The dangling orange wire, is for the front fog lights. Other work, connected the choke cable, rocker pipe, air valve pipe and re-painted (twice) the air box. Wasn't happy with the 1st attempt. A busy weekend.
10th May 2017
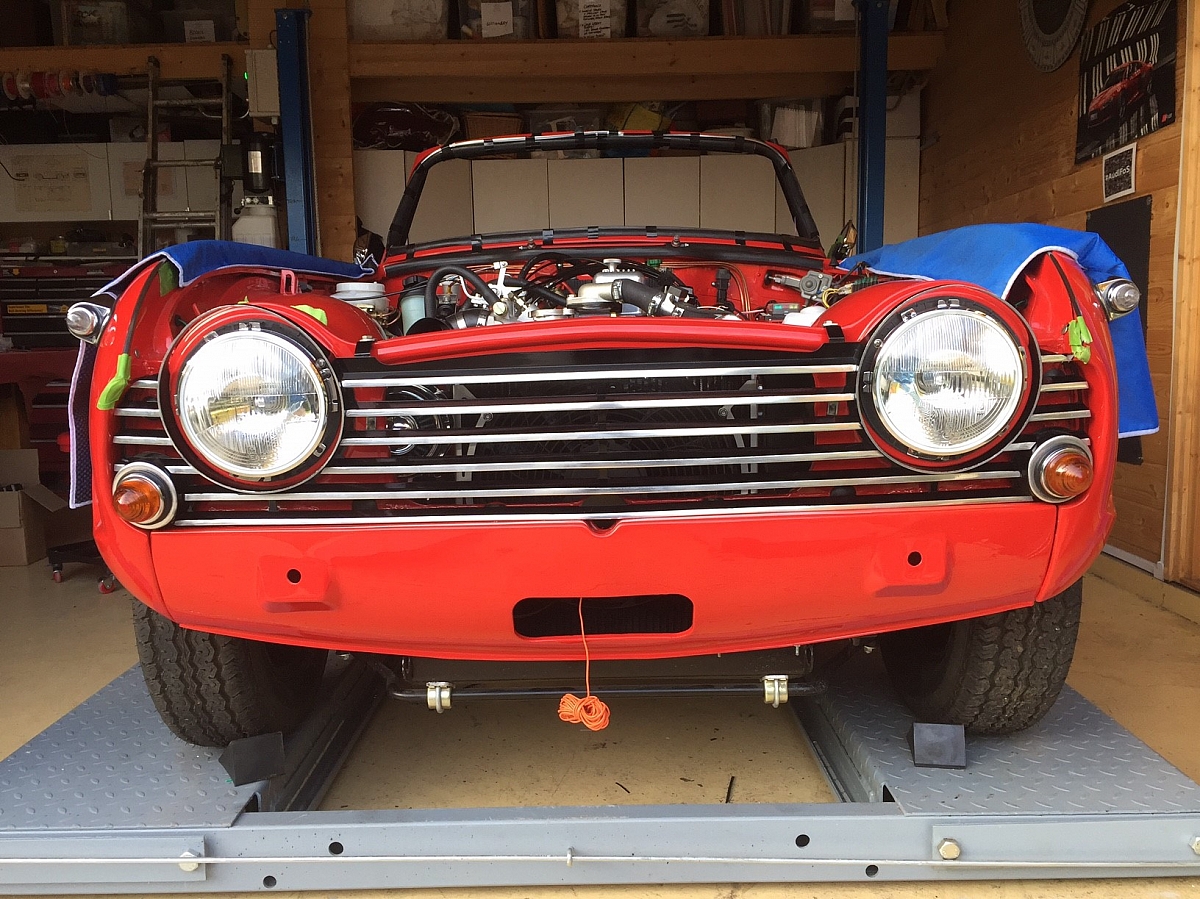
The grille finished with the indicators and the rad cover made up and fitted.
And now the next project - prepare the H frame for the fog light switches, the radio and repair the feet etc for re-trimming. It's a TR6 frame and in pretty good shape, but the some of the side and feet vinyl is damaged.

1st June 2017
H Frame, repaired, re-trimmed and fitted plus warning lights and Sat nav wiring fitted to the ash tray.
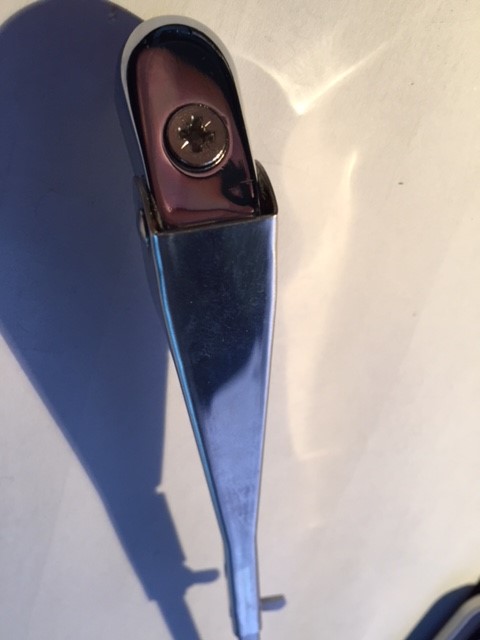
Main bonnet pull fitted. Made up some S.Steel bracketry to fit. A simple, but very time consuming little job. It took about 4 -5 hrs. But very pleased with the end result.
Glove Box next, then the air pipes, then complete the wring for the fog lights and fan to the switches in the H frame.
24th June 2017
Air pipes done, glove box done. Haz light switch connected and fitted.. I've also installed a double USB port inside the glove box for charging a mobile phone and a plug in point for the satnav, Interior lights and wiring installed. Thank you Den (Denis Carter) for helping me out with the wiring diagram. The TR5 didn't have interior lights and I wanted to have one on the inside of the windscreen, near to the drivers mirror, one on the tunnel and 2 footwell lights plus a master switch. The wiring gets complicated and made me scratch my head a few times, but with the help of Denis - bingo. They all work as I want them to. Really pleased. So, after that I was able to fit the screen top, drivers mirror and finish off the door furflex ends. Still got to finish off the fan wiring. I've forgotten to fit a wire for the pilot light, so I'll have to break into the loom and add the extra wire. Which is a pain. Again Denis was a great help with another diagram. Today, Paul came and we fitted the windscreen. A pretty tough job and I suspect impossible to do on your own. Well done Paul. Brilliant.
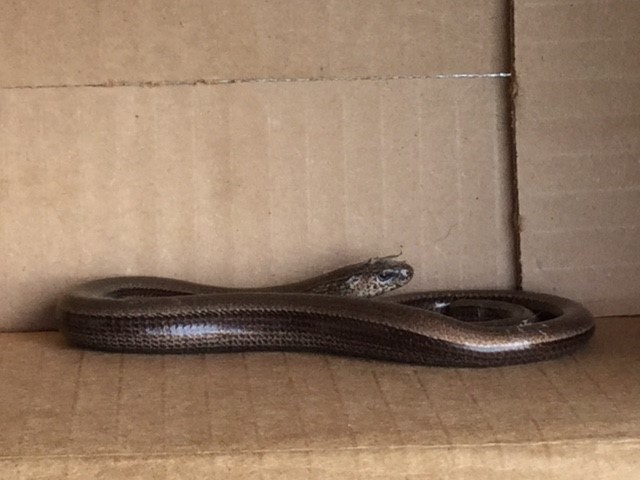
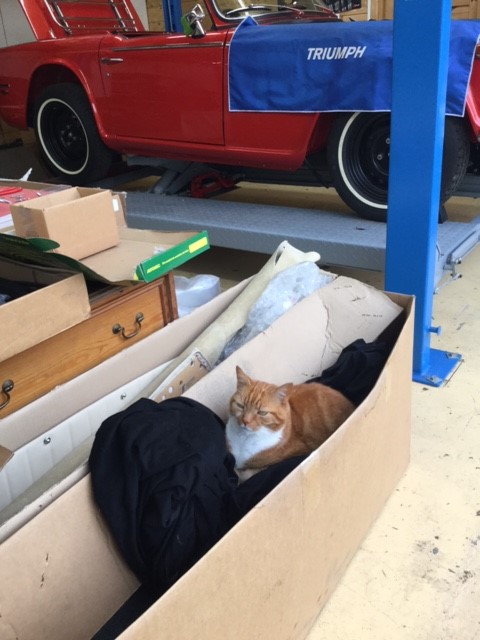
We also had a visitor to the garage today.. This freaked Fiona out. A female slow worm, God knows how it got into the garage. Jack the cat me thinks !! as part of her tail was missing.
11th July 2017
Radio fitted - it works very well although a bit complicated. I'm sure we will get used to it
After we have digested all the instructions. This is one of the Retro radios from Moss. Sun visors fitted (nice leather ones) and I've made up a small switch plinth for the over ride fan and trimmed it in leather.
22nd July 2107
1st breath !!!!!!!! - started and she ran - really quite well considering she hasn't been timed properly or the throttles set up yet. Can't find a way to put the short video on here. so.... sorry.
That's approx 27 years, since she was last running. Brilliant moment.
https://www.facebook.com/fiona.farrell.94/videos/1...
https://www.facebook.com/fiona.farrell.94/videos/10212216674599256/
23rd July 2017
Trim fitting - what a fiddly job. All the trim came form John Skinner. Some parts worked very well, others not so good. Had a lot of trouble with the wheel arch covers. Well I'm not a trimmer, so it was probably me.

August 14-20th
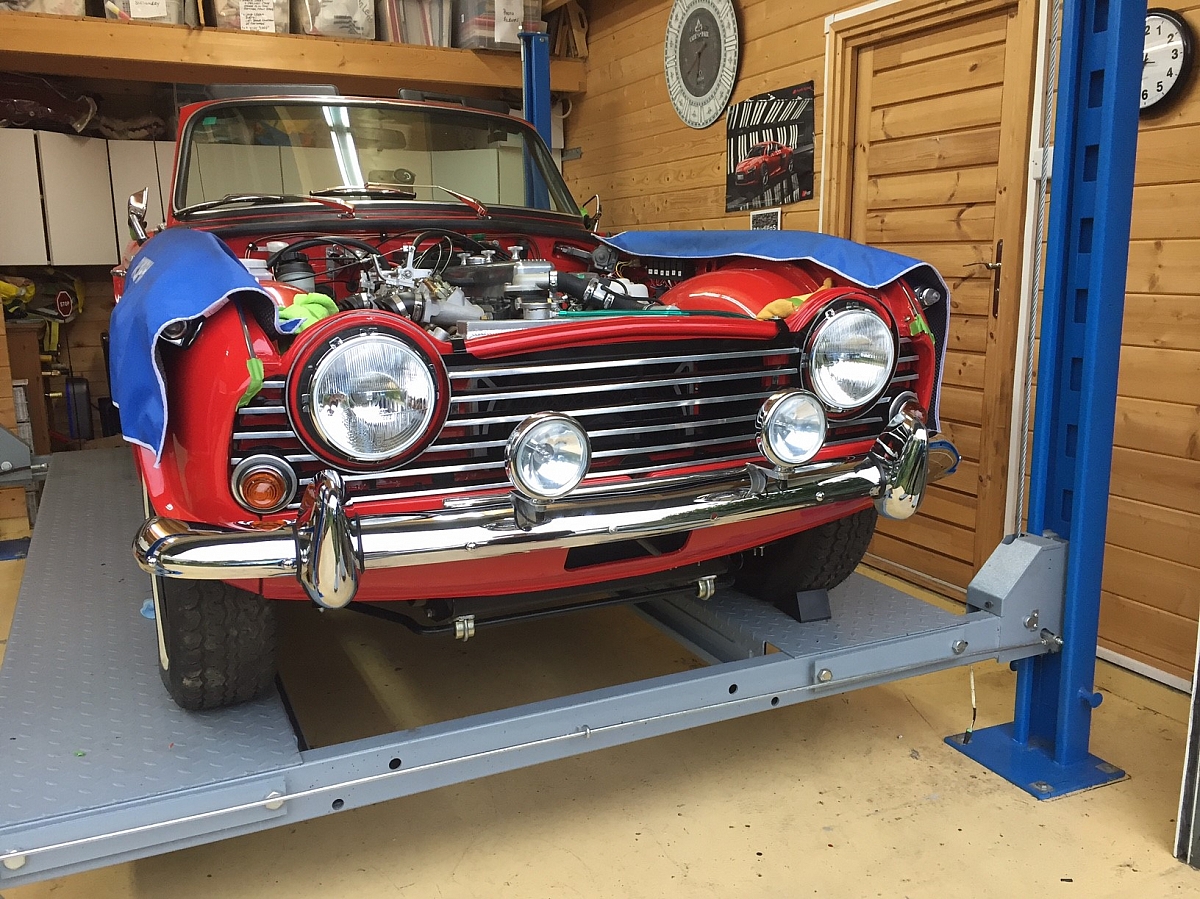
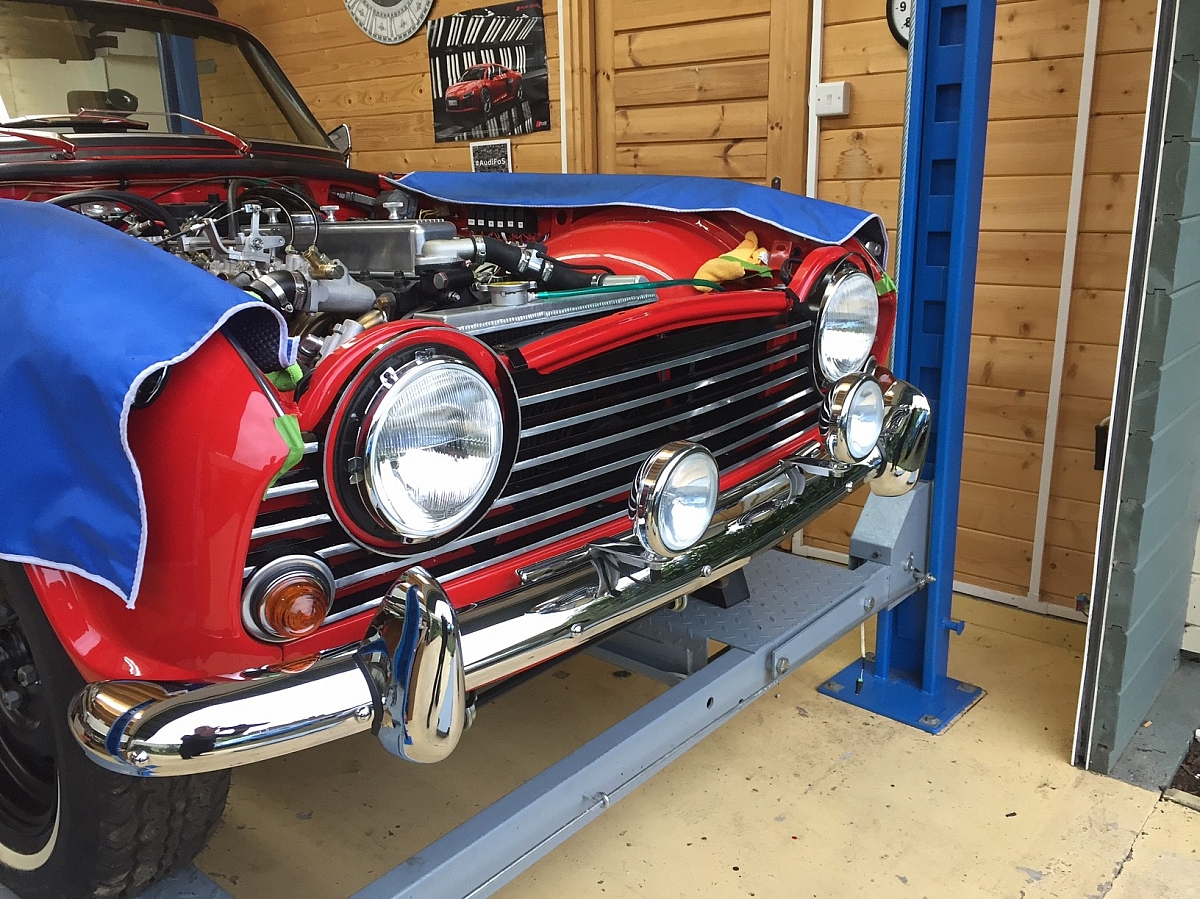
Tried to fit the front bumper, but found the oil cooler was in the way of the n/s bumper support iron. So I had to move the oil cooler half an inch towards the centre by modifying the mounting plate and re-position. It took a while. Then the horizontal irons were not flat in their centre's, so Paul straightened those for me on an anvil. I then re-painted and fitted together with a new lamp bar and spotlights. It sit 's straight, looks good and I'm pleased.
Sept/Oct 2017
Earlier on in the year, I forget the date, but I damaged the drivers door when trying to fit the window winder mechanism. It slipped out of my hand when I was trying to get it into position and with the glass attached, it was heavy. I guess it's inevitable that you will damage something. Although that's not what i said at the time. Anyway it was a small punch out at the bottom of the door skin. I've just had it repaired and re-painted.
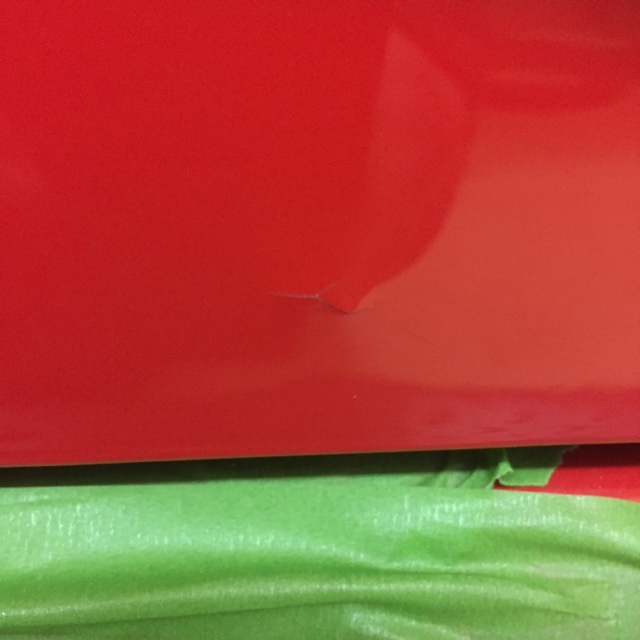
I had to strip the door again and re-fit everything. A nause, but... A very good repair and re-paint by Paint ShopPros. Very pleased.
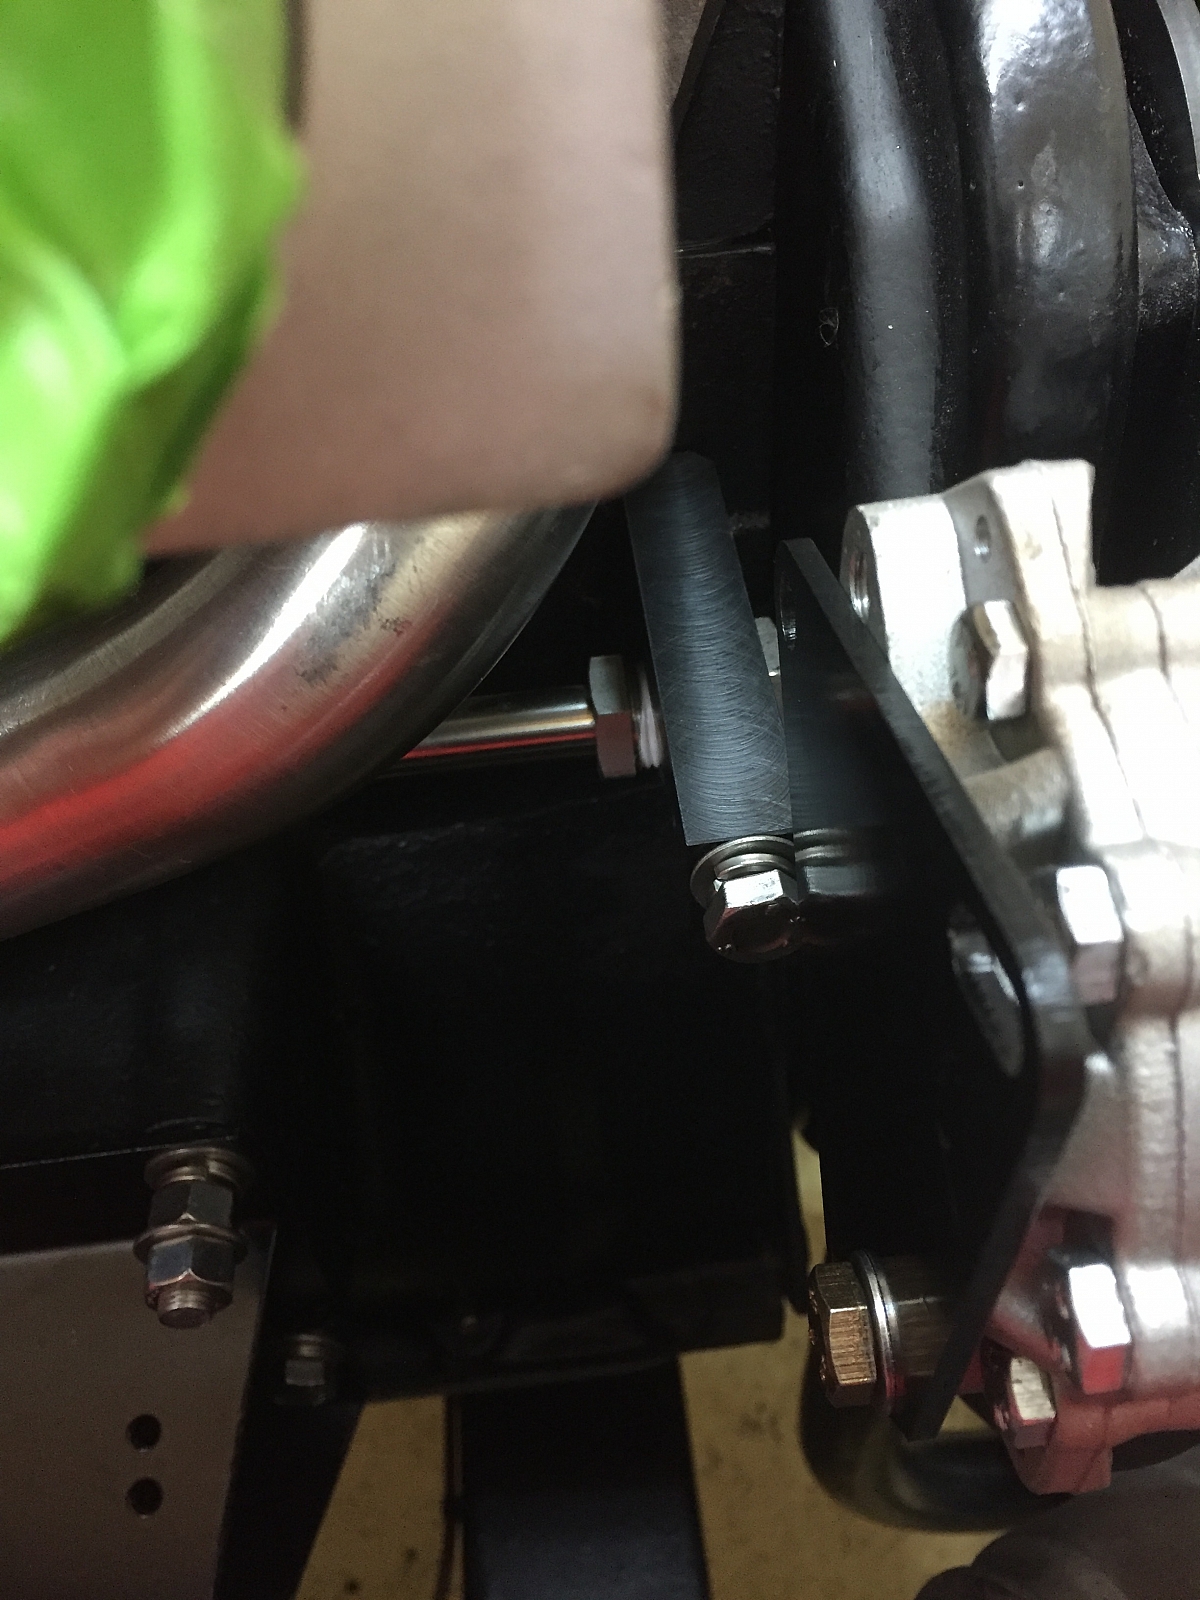
Other corrections made about 2-3 months ago..The power steering pipes kept leaking due to the original holding plate not being able to clamp the pipes down properly. Paul to the rescue again and he made up an alternative keeper plate and stud. All good now.

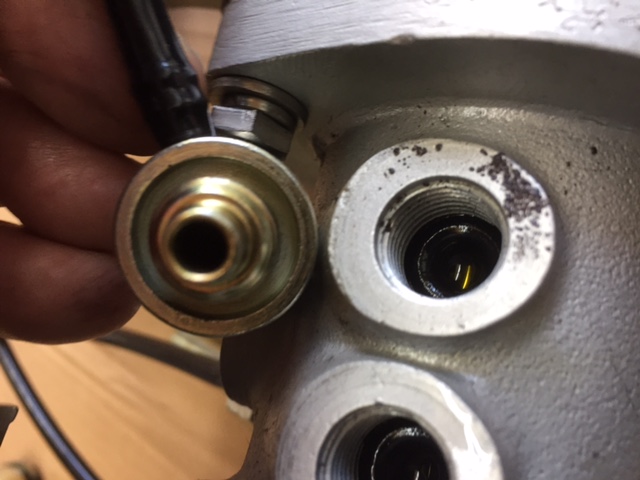
Another issue, that made us scratch our heads. After starting and running the engine, we found that it just wouldn't run on all cylinders. One of the reasons, was that I had forgot to put one of ring seals inside the bango fitting on No.2 cylinder and we also found a load of rubbish (iron particles) on the flange. Doh..God knows where that came from ? I had already cleared out the new fuel pipes with an airline, and the tank is a new aluminium tank. Very strange, especially when it it was only No.2.
We then found that No.2 injector was leaking at the the injector end where it screws into the square union and the olive. Very dangerous. As it wasn't that noticeable. Changed the injector and the leak stopped.
2-9th October 2017
Fitted up the rear bumper, over riders, rear lamps and rear fog lights. I had an issue with the eye lids on the over riders. I couldn't find those pesky little spire clips that you use to screw into to secure the eye lids. I found them in the end from "Bresco". They do all sorts of odd fixings for older cars. Very good service. Then after fitting the lights, I went to fit the bulbs. One was OK, but the other !! The bulb just kept popping out. There were no grooves inside the lamp housing for the bulb pins! Chinese rubblish !! It doesn't sound much, but I lost more than a week trying to find another good bulb holder, strip down and re-build. Ugh ! Anyway, all good now. I have also inserted studs into over riders. It makes life so much easier to fit and locate the over riders into the correct position.

Next to fit were the rear fog lights. I made up a stainless steel rectangular plate (approx 3mm thick) for each side. Cut to length, width and height, so as not to show and sit just inside each side of the bumper. Then I made cut outs, so that they slid over the bumper irons. Then a hole in each end, so that they could be secured onto the existing corner bumper bolt and bottom over rider bolt. Next a hole made in the centre (length ways) of the plate. Then I made up another s/steel L shaped bracket - drilled 2 holes. One on the vertical to secure to the plate and one to the horizontal for the lamp bolt to secure the lamp. Sounds complicated, but was fairly straightforward. Both lamps are now positioned accurately each side and tucked up high and I can tilt the lamps backwards/forwards and from side to side, as I wish. So I'm pleased. Not brilliant pictures, but you should be able make out what I've done. Just got to touch up some of the bumper iron paintwork
Both rear lights, reversing now fitted, wired in and LED'S used.
Rear Exhaust pipes. As these are separate from the exhaust system, I've had them bent to shape and had cut outs made at the ends with deflector discs welded on the inside. The hope being that all the exhaust fumes will be deflected onto the ground, rather then swirling backwards onto the rear bumper. Well that's the plan. If it doesn't work, then it's not a big job or cost to change them back again.
October 12th 2017
Some more engine work, changed No.2 injector again, another new spark plug, head tightened down, and tappets re-set. Running very well. Very pleased.
The bonnet has been taken out of storage and re-united. The 1st line up and trial fitting is pretty good. Thank fully we had put some pilot holes on the brackets and bonnet to assist, otherwise, I'm sure it would have taken ages to get any where near where it should be. A bit more fiddling and fettling to do, to get it to line up properly, but a very good start.


October 15th 2017
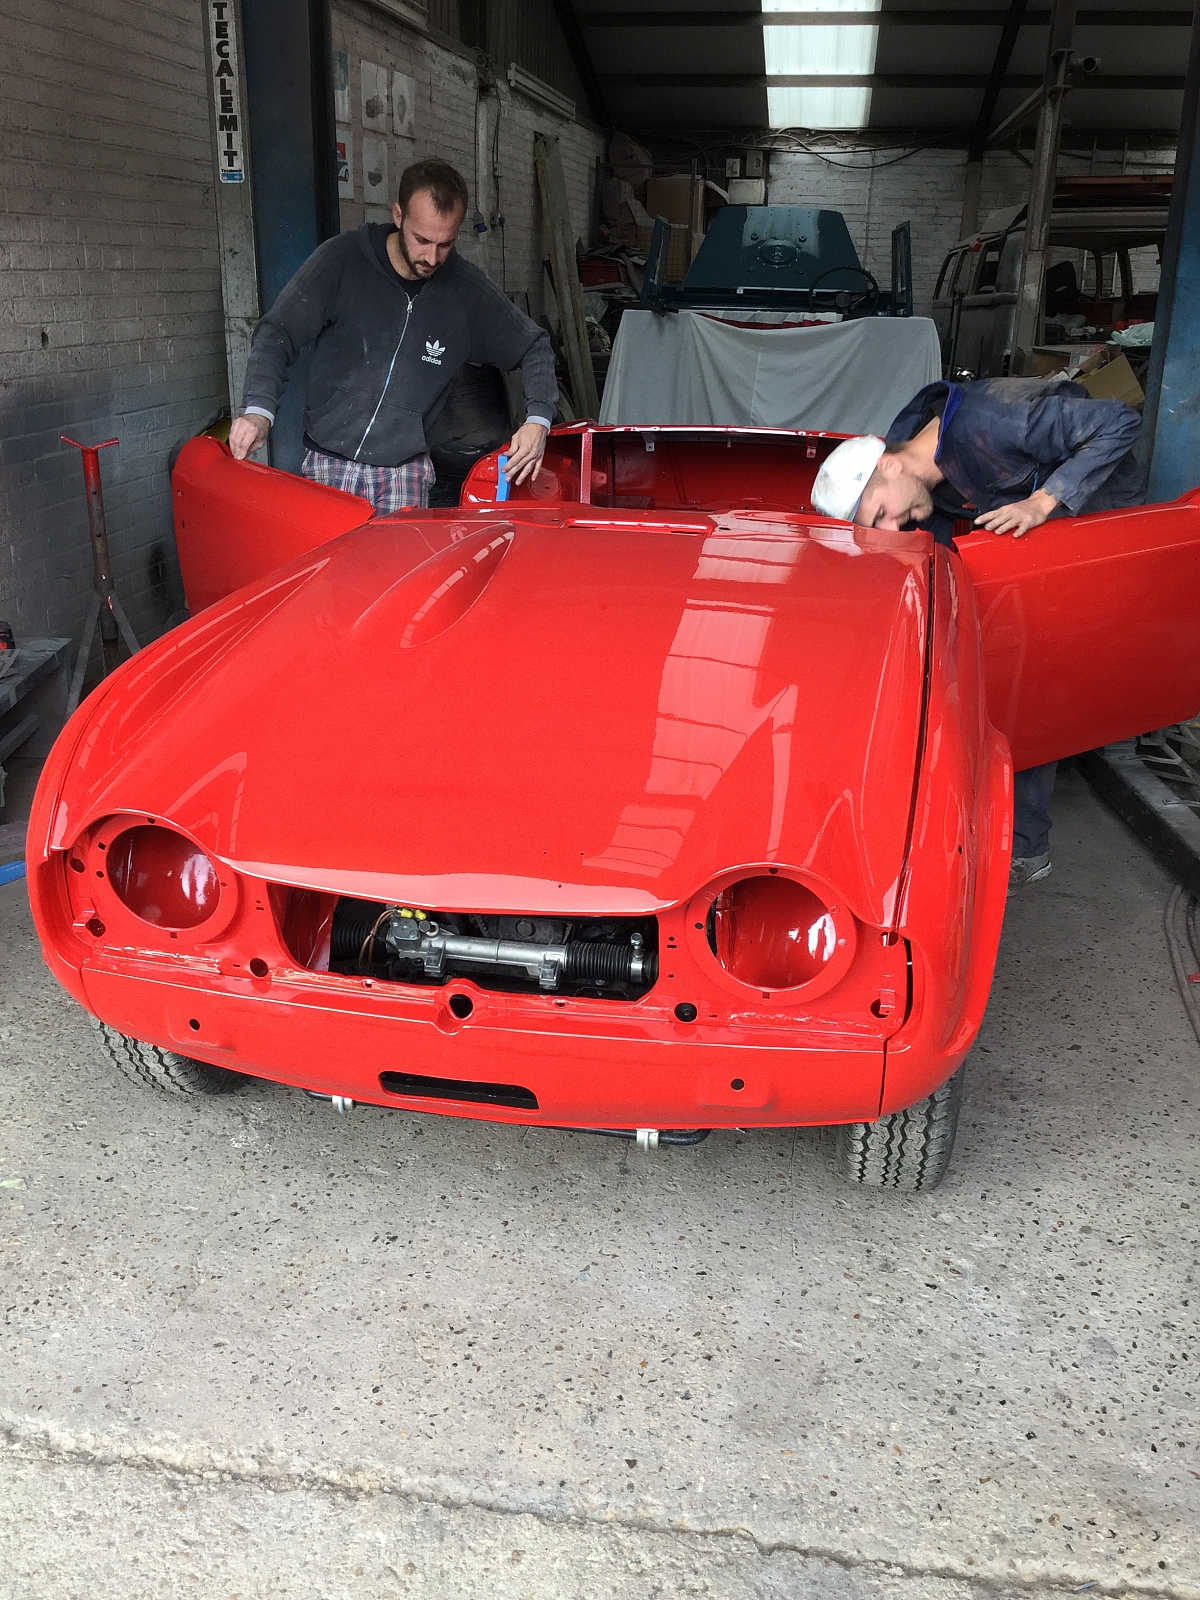
Just thought I would come and give you a hand !
October 19th-22nd 2017 - nearly there !
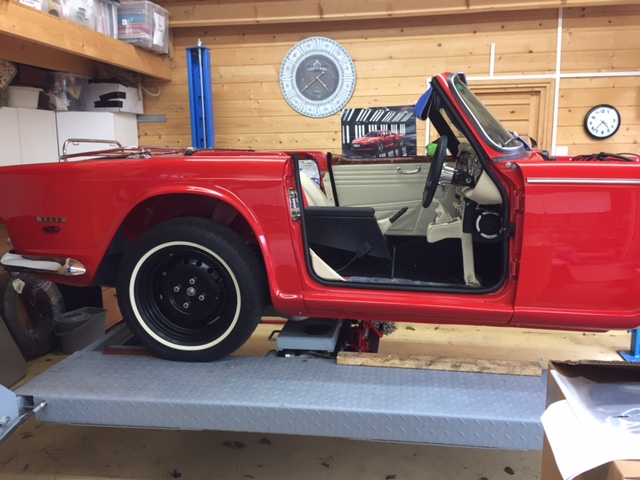
Lots of finishing work carried out, with Paul's help. Mainly checking all areas for loose bolts/nuts, fitting the splash panels etc. Seat belt reels have been secured with additional bolts through the mounting plates to stop them turning. We ? - well Paul found quite a few loose bolts ! Hands up, my fault for not getting into the habit of tightening everything regardless of whether you intend to go back to it or not. It's so easy to forget. Thank goodness for another pair of eyes. So in short, all the the underneath and all 4 corners are now complete. Just the engine bay to double check and re-fit/finish off the interior. Jobs left are getting fewer. The horn doesn't work for some reason. Not sure why yet, but has to be something simple. The carpets, seats and hood have yet to be fitted and the boot interior needs to be done. The spare wheel needs to be painted and then fitted with it's tyre. Not sure where I will get the hood fitted yet, but I will get this done externally. It will probably be a black mohair with sliver studs. Here she is, as of 22nd October. Hoping to get her MOT'd within next week or so.

25th-27th October 2017
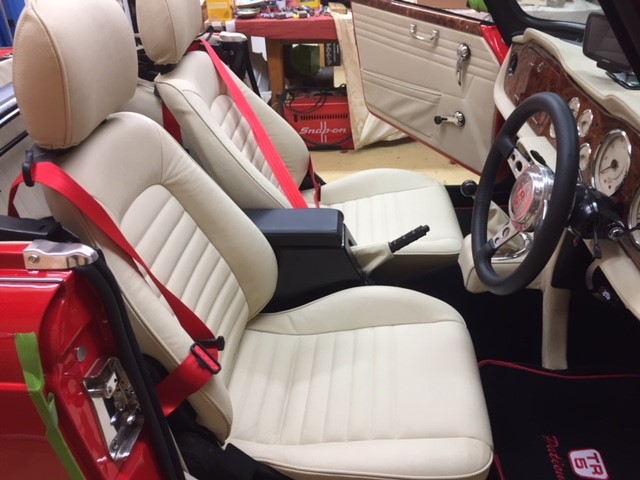
Spent some long evenings with Paul getting the seat mounting brackets to fit (Mazda MX5 seats). The brackets aren't made properly.They fit the seat mounts, but don't line up with the floor holes.I had the same problem when I fitted these to my TR6. I think many others have also had the same issue. Why can't they be made properly ? Anyway after some fettling and some re-drilling and enlarging the holes we manged to get them to fit. Then re-marked the positional marks with a punch, otherwise when you come to paint them they will be lost. Then painted them up and fitted to the floor. We bent the front of seat brackets upward a bit to provide a flatter plane and put some spacers on the studs to raise the seats a bit. That's a personal choice. Test fit the seats, then tighten down the brackets into the correct positions. The drivers seat is a very tight fit as you have to line the seat up to miss the speedo drive housing at the front and clear the inside of the B post when moving the seat backwards. The passenger seat is easier as you don't have the same restrictions. Next we made a template for the rear carpets so that we could hole punch the rear carpets to fit over the seat bracket studs. The carpets will be fitted over the top of the mounting brackets as it looks a lot neater than fitting the brackets on top of the carpets.


We also found out why the horn didn't work. Me the muppet ! had extended the horn wires from the offside front to the nearside of the engine bay so as to mount the horns together. In doing so I had put the negative and positive wires together and thought I had separated them with insulators,but they were touching ! Unfortunately I had to dismantle the front cowling etc, to find the fault. All sorted and working now and I've just got to put everything back together again.
28th October 2017
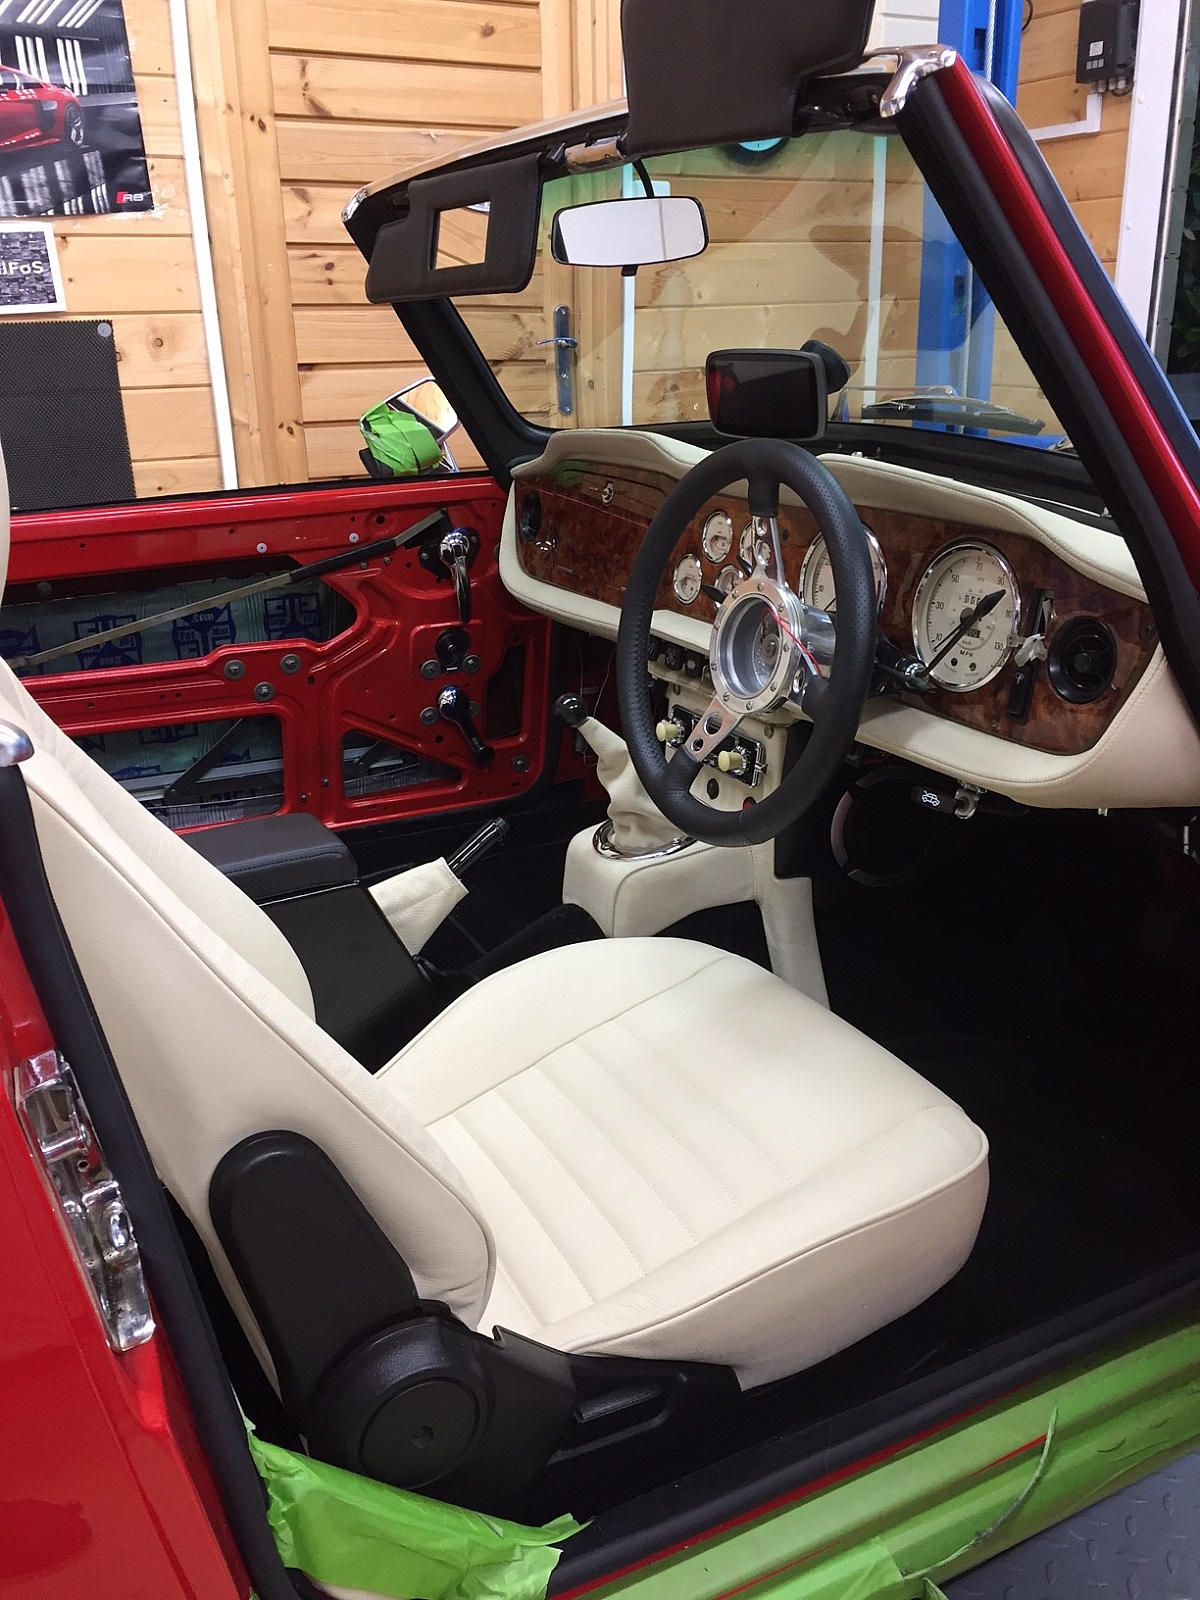
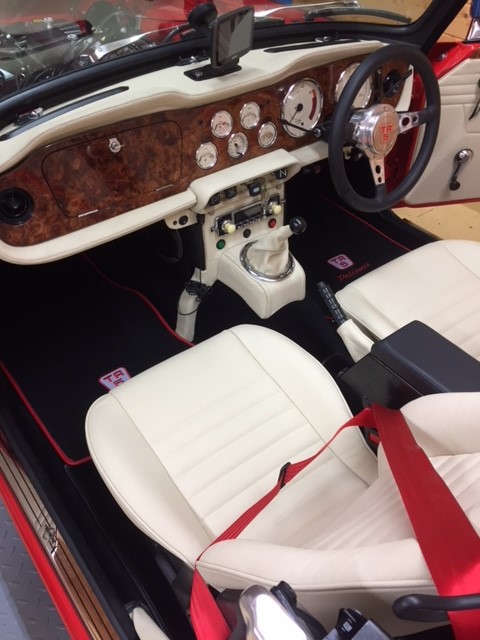
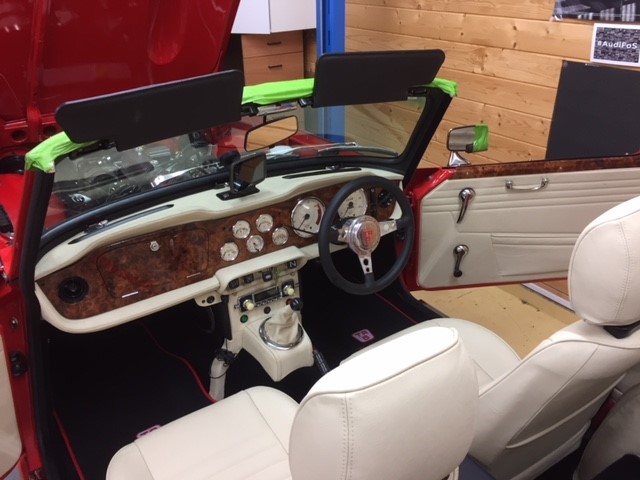
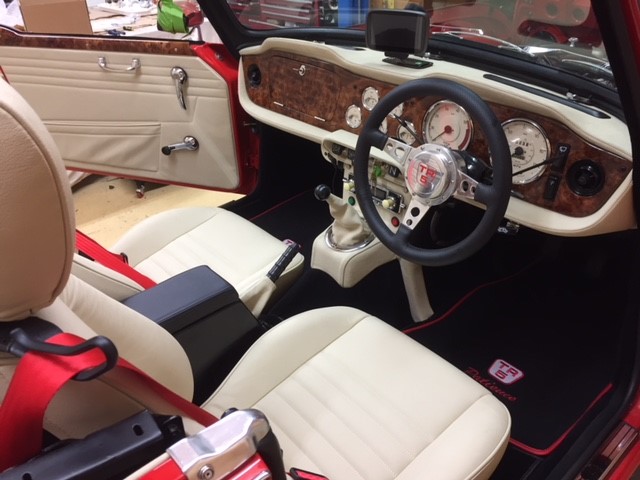
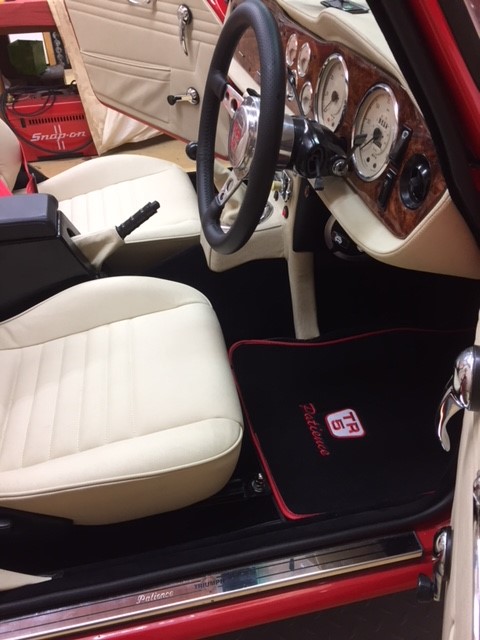
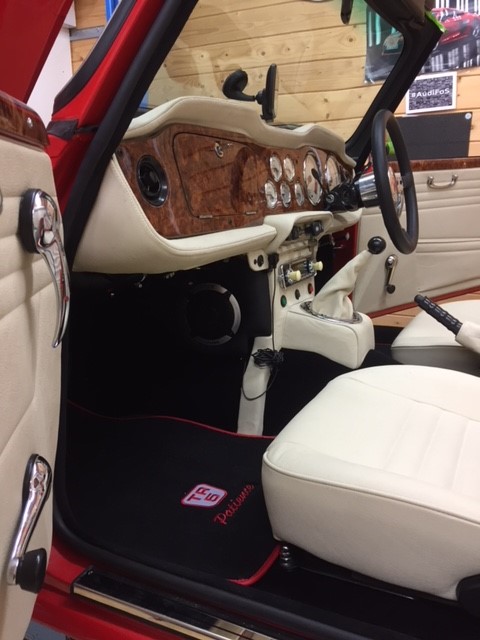
A long, but good day today. Everything put back together, then onto the carpets and seats. All went well. The following pictures speak for themselves.
A few more jobs to do and one problem found. We found a small weep from a brake line on the rear n/s at the chassis "T" connection. So that will need to be sorted. Other jobs. Fit the "P" rubbers on the windscreen. Fit different windscreen wiper arms. Well the correct one's for a TR5. I've currently got TR6 one's and of course the wiper motor just isn't up to the job. I didn't even know there was a difference, but there is, in the springs. The boot needs to be fitted out, but after we sort out the brake line next week, then It's MOT time !!!
29th October 2017
A very big day for Fiona !! Her 1st drive since we started this project. It was only around our green as it's a private drive and only up to 2nd gear, but a glorious moment nevertheless.
30th October 2017
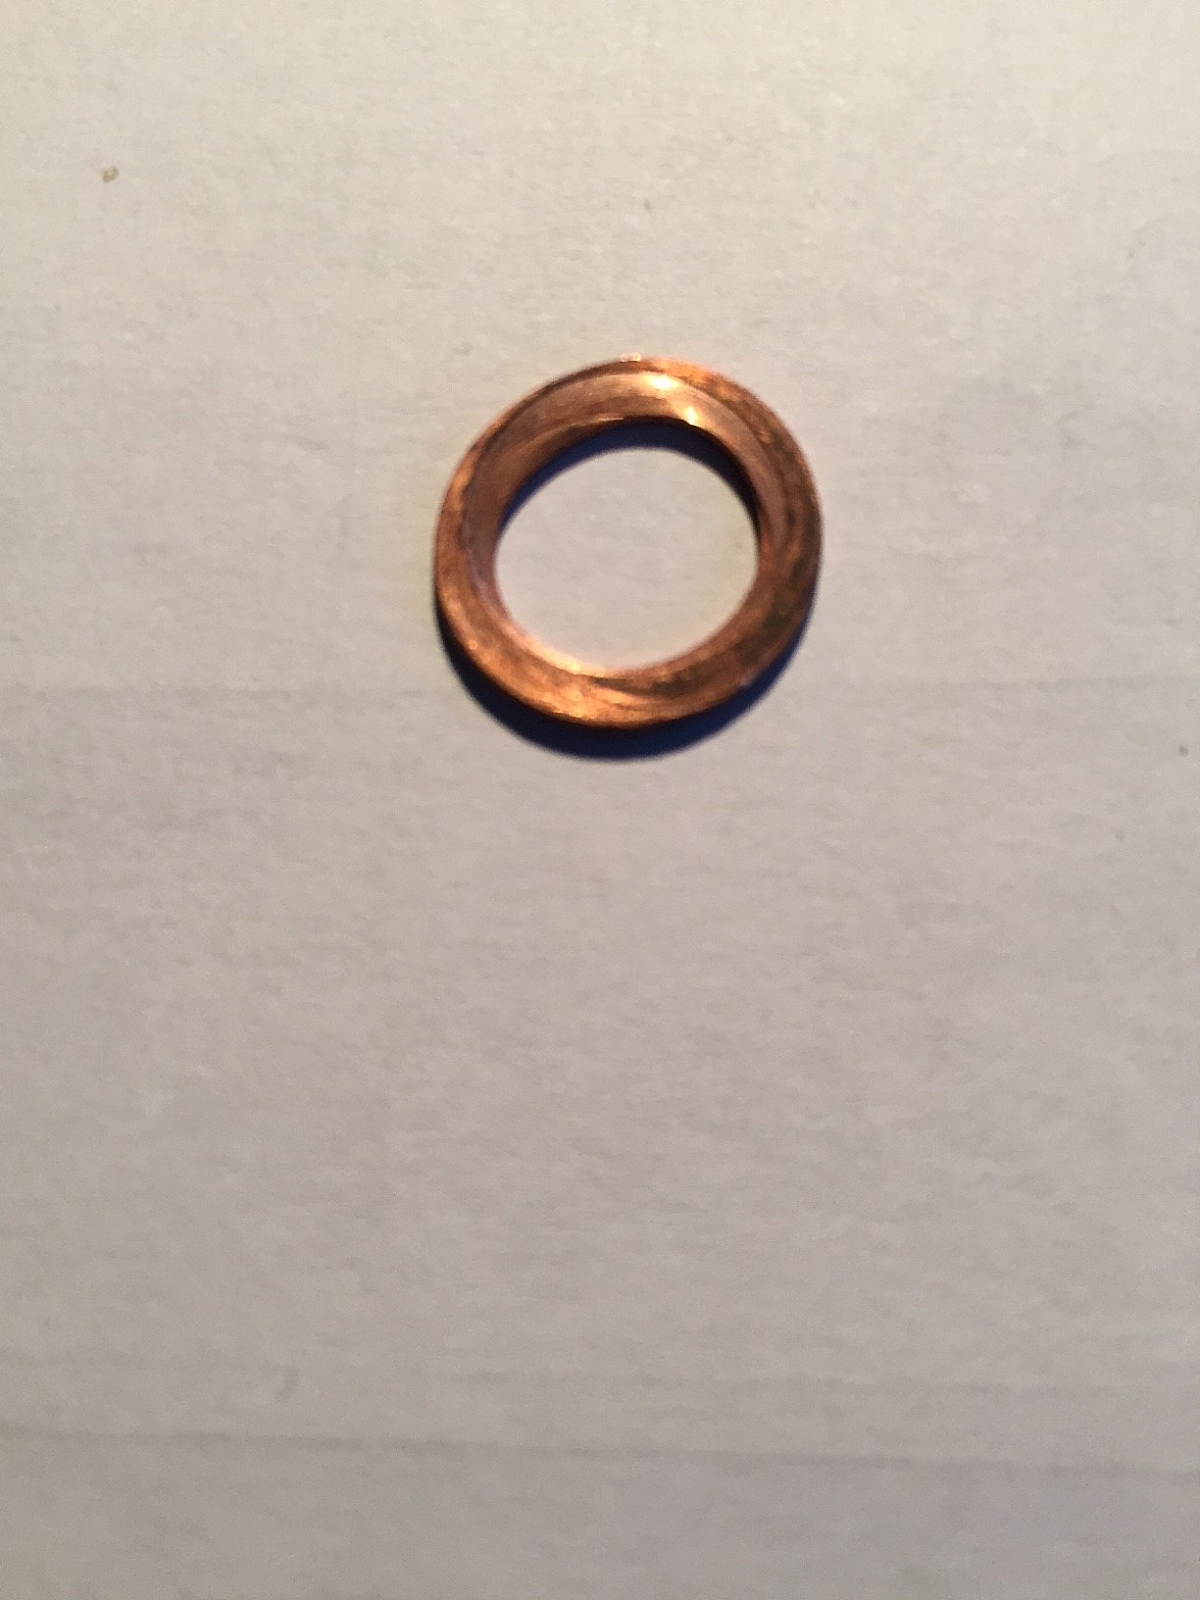
The brake line leak found and sorted. The problem was the copper washer fitted between the flexible Goodrich pipe and the union. I had fitted the wrong washer ! It was too large and too thin. Such an easy mistake to make and it's a safety issue. You can see from the picture and the dirt foot print that it wasn't seated properly.
1st November 2017
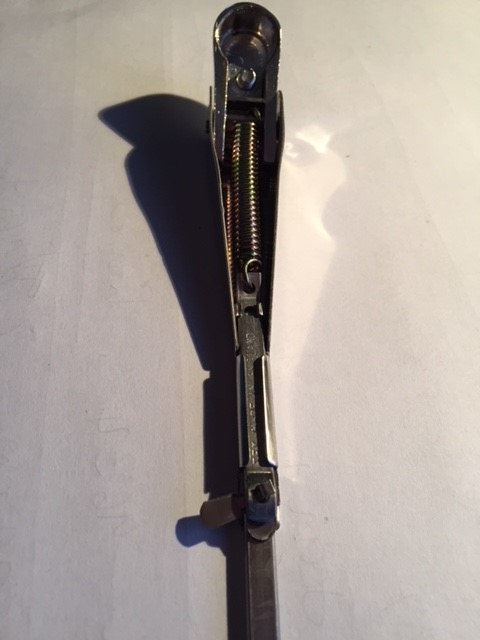
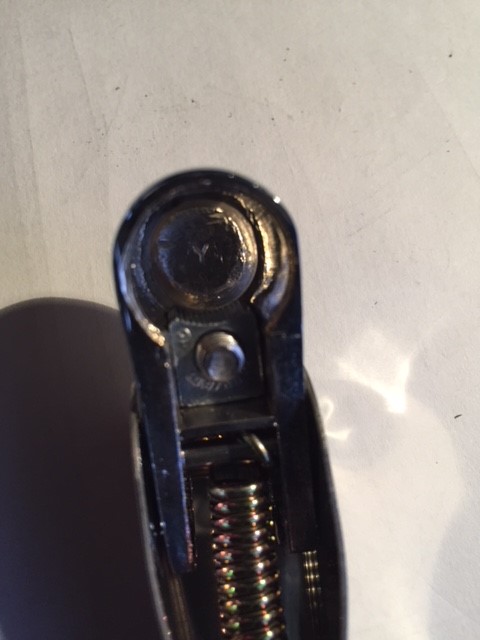
Received new wipers arms from Moss today. Yep, they are very different to the TR6 ones. The passenger (cranked arm) is fine, but I have no idea what they have sent me for the drivers side. It doesn't fit the spindle and won't stay up off the screen when you pull it away for cleaning. It has a grub screw on the spindle head, which I have never seen before and what on earth is that tag for ? This is the sort of delay and frustration that drives me mad. It's such a time waster.
5th November 2017
OK, someone showed me how the wiper arm above works. The tag is for adjusting the length. The rest ? - still doesn't fit. Anyway all avoided now as I managed to get some standard ones from Classic Car Parts. They fit.
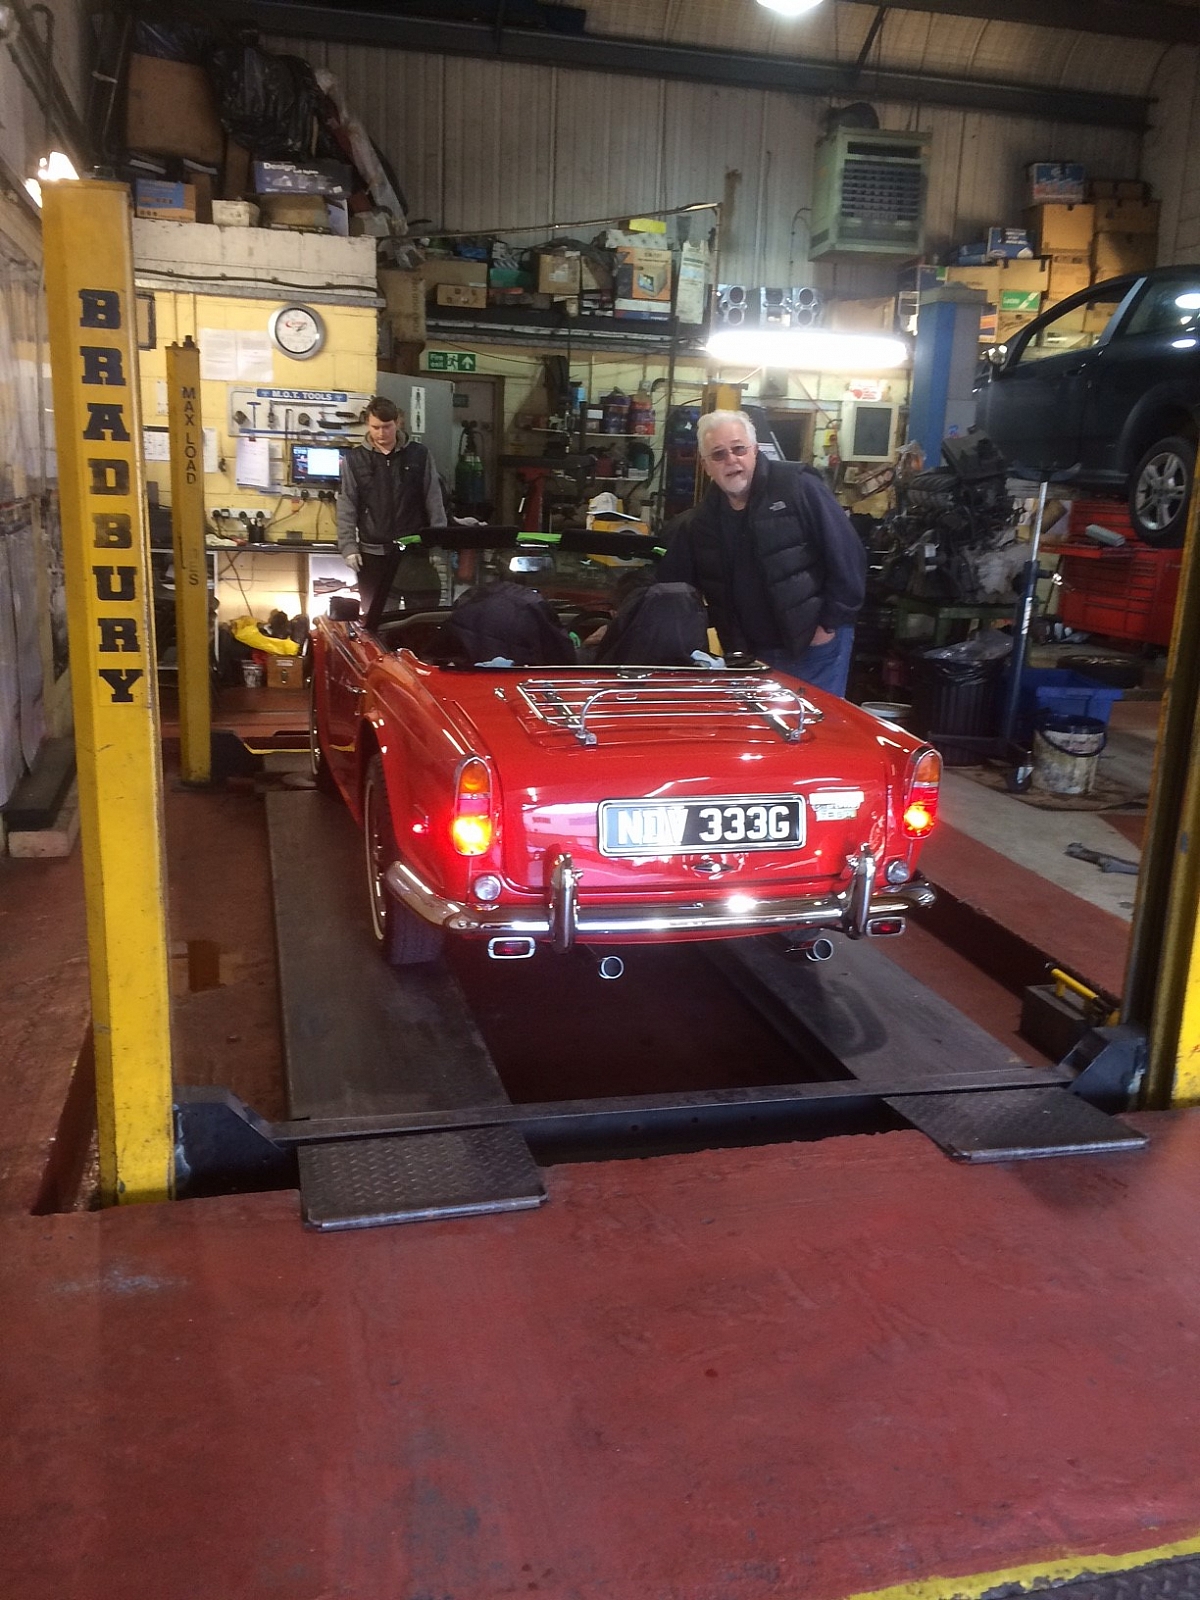
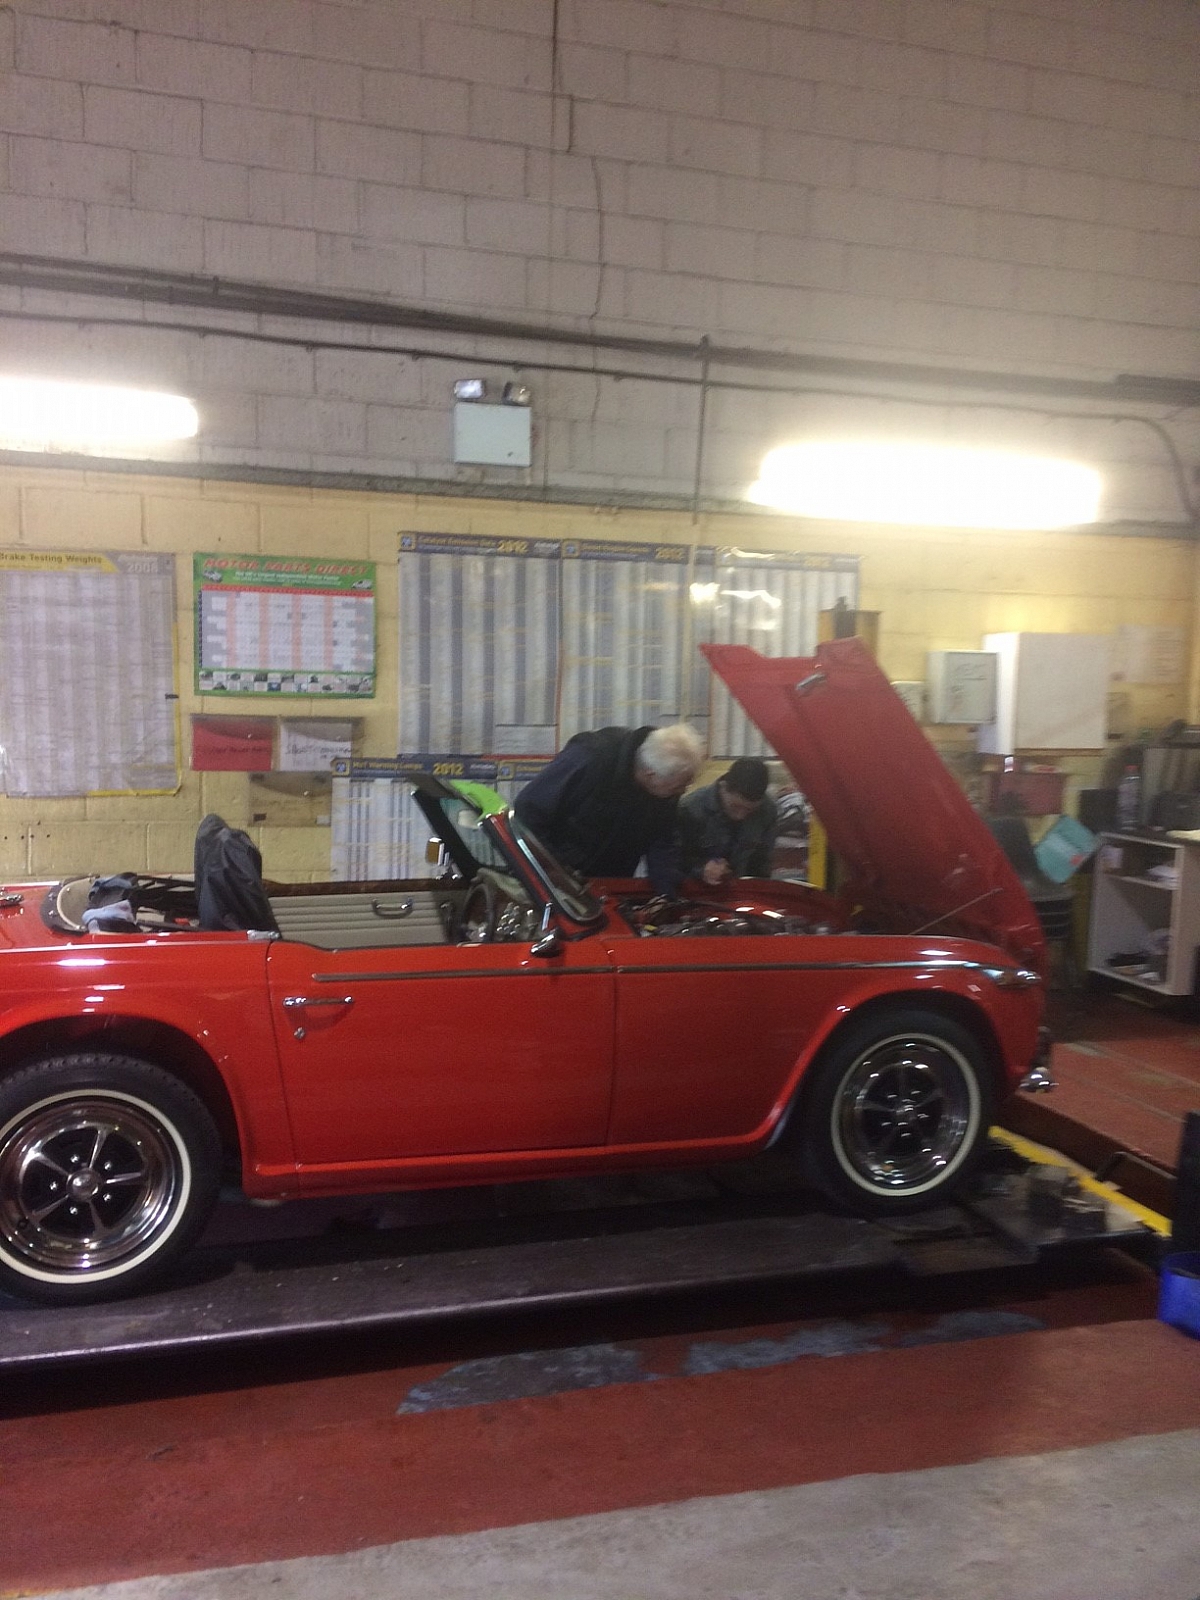
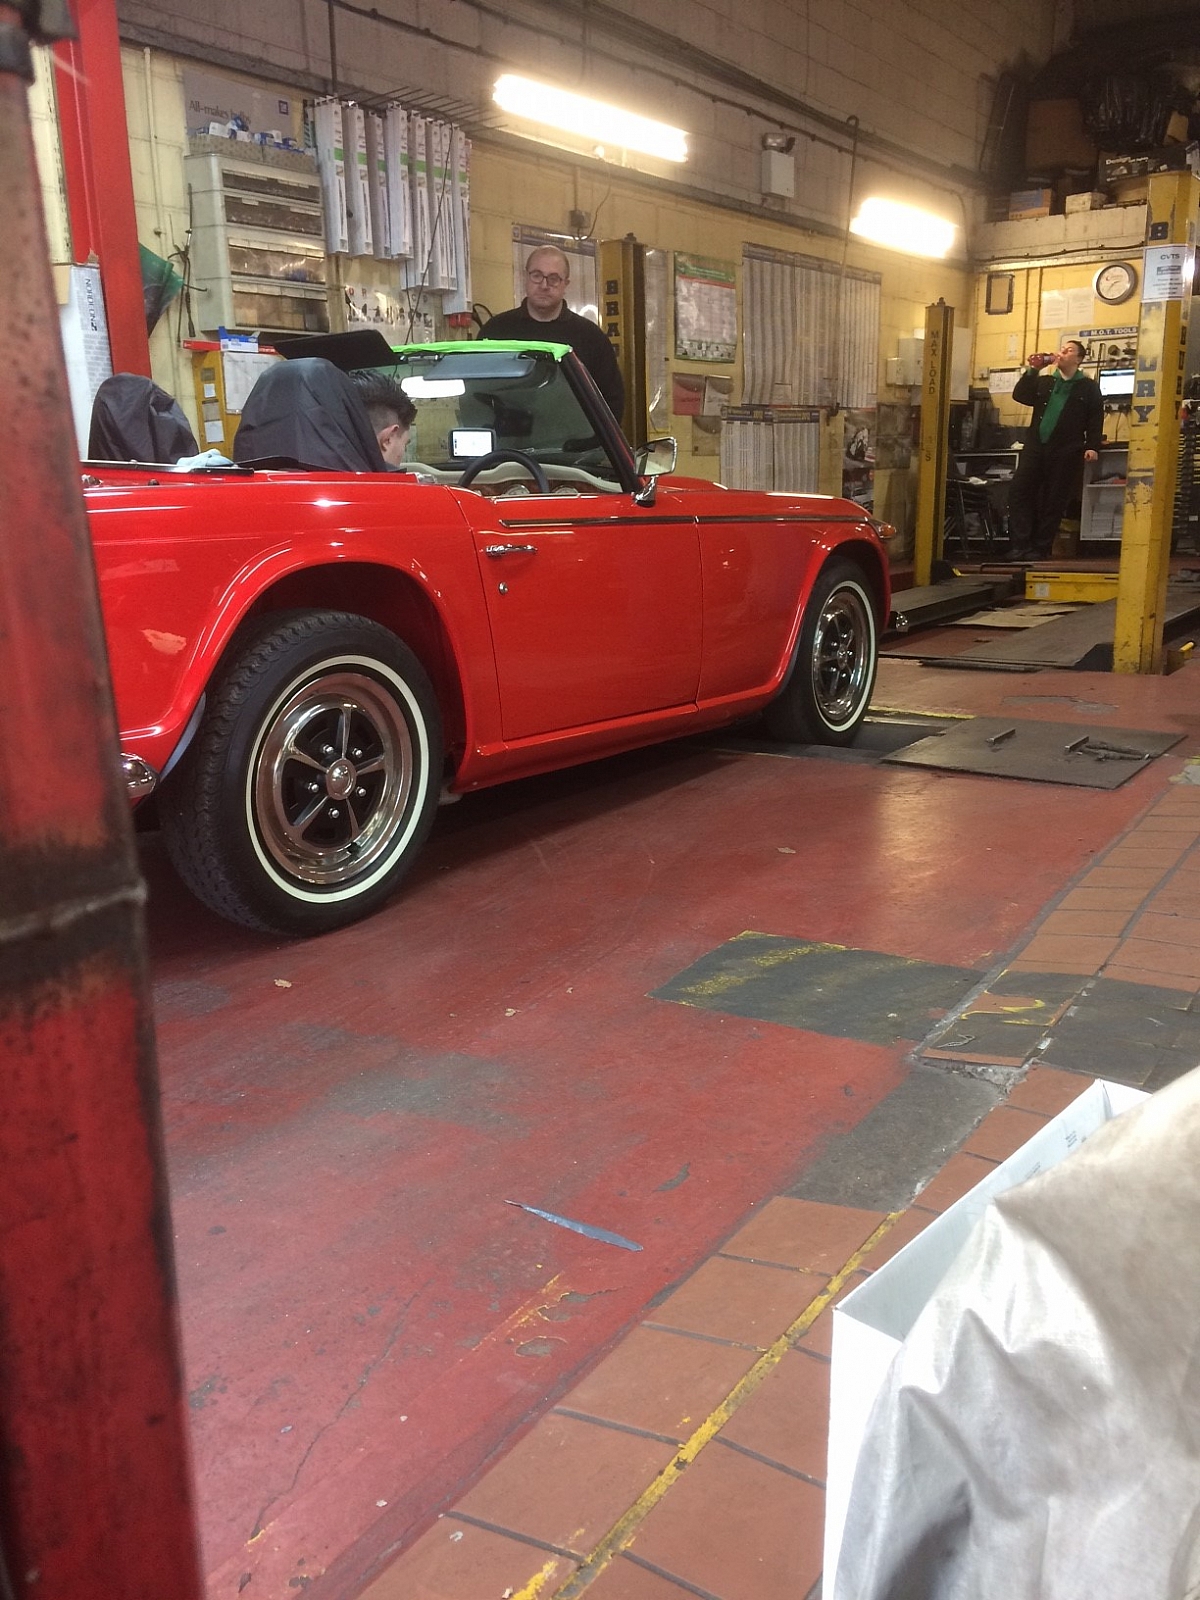
6th November 2017 - The BIG DAY !!
Today, she went for her MOT test, and passed !! No written advisories, but some verbal ones. The headlights need to be adjusted upwards. They are already on their max, so that needs looking at. Some readings on the brakes. The rear foot - both read 100, but the hand brake read 80 on the n/s and 97 on the o/s. F n/s read 247, F o/s read 245. So pretty close on the front brakes. Plus the horn wouldn't work all the time. But that's it. So a pretty good result in my book. So after the MOT - we checked the insurance was in place and went to the post office to convert her V5 to Historic Exempt and took her for a short drive to Paul's house. She spluttered a bit as you would expect , but she's back on the road - Yoh.. After 4 years, 3 months and 24 days from when we bought her and approx 30 years since she was last on the road.
December 2017
Haven't really done anything to the car this month, what with Christmas, cold weather. I did have her booked to have the hood fitted, but that got deferred until Jan due to the weather. I've decided to use Trimania near Wokingham to fit a black mohair hood. The cost for a tailor made hood, versus getting an off the shelf hood is more expensive, but not that much, and this option provides a really good fit. So as soon as the weather makes an improvement I'll take her down to get her fitted up.
January 2018
Started to fit the wheel arch liners. It's fettle, file and fiddle time to get them to fit. I've finished the rear offside and just about to fit the rear nearside. (just waiting for the pain to dry). On the rear I've got 3 attachment points on each side, using rivnut's and had to make up brackets (fitted to the rear bumper brackets) for each side to hold the bottom rear part of the liner in place. Otherwise it's going to flap about and break. When taking them on and off and on and off, I noticed the paint was getting chipped on the shoulder between the outer and inner wing joints. I thought once fitted, this might rub a little. So to ensure this doesn't happen, I've put some thickish acrylic tape on the liner shoulder. Which should hopefully protect the paintwork. After making the necessary holes, I've then painted with stonechip, then over painted in body colour and glued the edging rubber into place before the final fit.
The front ones are next !
Rear n/s rear. Steady brackets to stop the bottom of the wheel arch liner flapping about, with a rivnut inserted at one end of the bracket to allow easy removal.
The same was done the other side and here is a picture with the fitted liner of the rear o/s rear. So just 3 fixings, using s/s rivnuts and 6mm s/s bolts and bonded washers.
This is a picture of the front r