


angelfj
-
Content Count
1,500 -
Joined
-
Last visited
Content Type
Profiles
Forums
Calendar
Posts posted by angelfj
-
-
Hi,
I am about to do a job that I have been putting off for sometime now, and thats to replace the windscreen, I have the black adhesive and all the parts, had a few trial runs, but am very aware that once the black stuff is applied that there will be no going back, does anyone have any guidance/procedure on how I should set about this job
Keith
Agree - no sealant required!
-
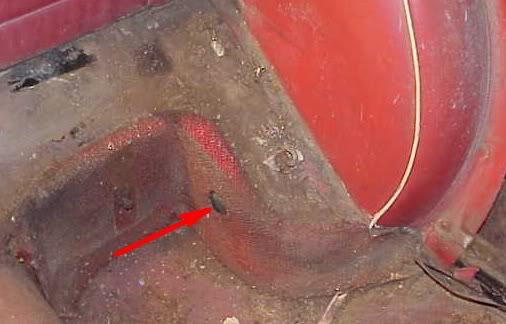
Frank - As noted above these holes are access holes for the front bolt head securing the lever shocks to the support bracket on the TR2, TR3 and early TR3As. The re-design at TS 60000 with the large boxy rear space eliminated the need for these holes as there was now lots of space to get at this bolt from below.
My 1958 TR3A (TS 27489 LO) had the holes and the rubber plugs. I can't remember if the hole was in the carpet to expose the black rubber plug, but I believe that it was visible as you show in the early photo of your TR3A.
For the last 21 years, these rubber plugs on mine have been hidden under the carpet which contours all these rear angled spaces. No judge at TRA or VTR has commented because the plugs are not visible with the hood (top) erected and because of the curvature of the seat backs, these plugs cannot be seen. I don't believe that I ever lost a point because of this. Imagine a judge peering inside through the rear quarter panel window in the hood - he can't see down there. He would have to do it with the door open and feel (grope) to find out if these plugs are "visible". But judges are not permitted to touch the car. Even opening and closing the doors, boot lid and bonnet must be done by the owner because the judge cannot touch anything - except with his eyes.
I remember in 1988 or '89 having to move one of these holes about 3/4" so it would be in alignment with the shock bolt. I marked crosshairs for the correct center, used my die grinder ot make the hole round, then I MIG welded new material to fill in where needed.
Just found this. Another piece of evidence to confirm that the early cars did not have a hole for access to the shock absorber bolts and approximately when the factory made the change.

-
AFIK yes.Though Im sure Don will confirm.
Stuart.
Hey Stu, thanks for your late night reply!
-
When we removed the carpet from the 3A (several years ago), there was a hole cut in the carpet where the rear shocks attachment bolts can be accessed. In the photo below the arrow is pointing to the rubber plug which normally covers the hole in the sheet metal. Can someone confirm if this hole (in the carpet) was made at the factory as standard practice?
-
Frank,
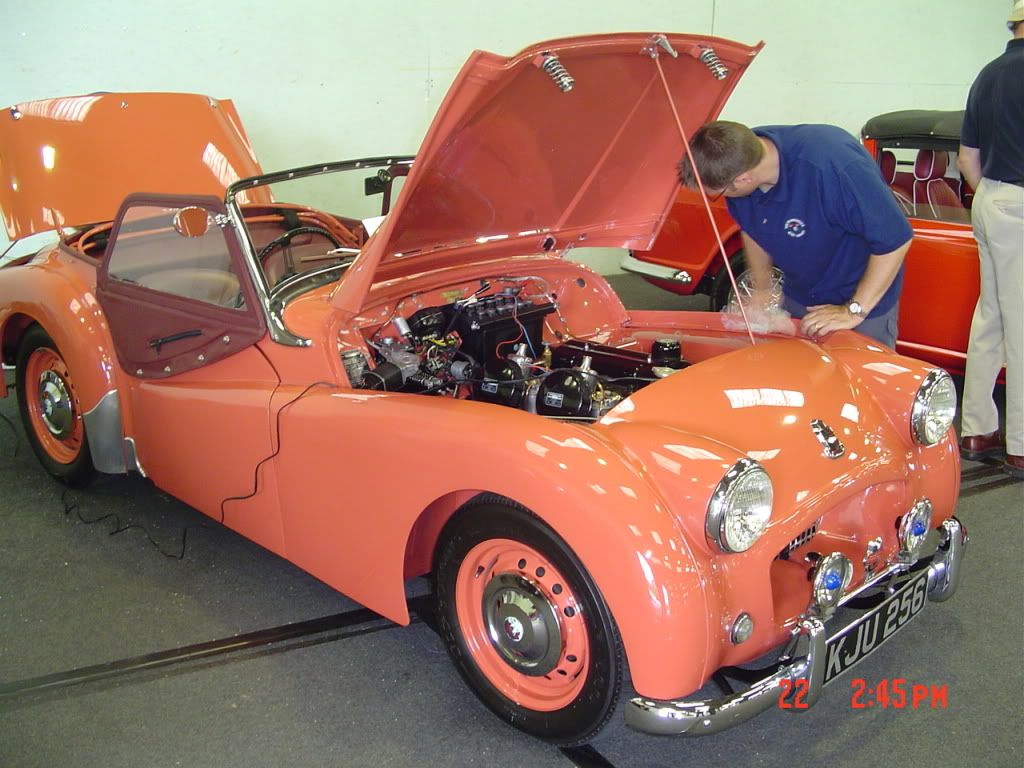
In answer to your question I don't have any more pictures of the 790 JKB Jabbeke replica.
But instead a picture of Ken Mumford's TR2 Jabbeke replica, which he owned in the nineties.
This picture, taken by Tony Baker, has been published in Classic & Sportscar in November 1993.
In my opion a very nice Jabbeke replica as well.......what ever happened with this TR ??
Regards - Raymond
Thanks Raymond!
-
No this is Geranium.
Stuart.
Oh! Wow. That does take some getting used to!
Thanks
-
Hi raymond hope u & your wife are well!! Thanks for the pic this looks like the car i was talking about looks great!!!
More photos of this car would be appreciated. Is this colour the famous geranium?
-
I hope Bill P is monitoring the forum. I just wanted to verify something he states in "Super Profile". Hood sticks were an optional item? I seem to remember that TR3A'a delivered to North America had hood sticks as standard equipment. Could I be mistaken?
-
I thought these metal tonneau covers were banned by the racing rules because of what might happen in a side-ways crash.
Why not consider a carbon fibre composite material instead?
-
Sorry but yet another request for advice.
Having fixed my cold start cable I took the 5 for a short run perhaps 5 miles just to check I had not messed anything up. That side of things was fine.
I had a quick check under the bonnet when I got home and noticed what looks like steam coming from the side of the rocker cover in a couple of places removed oil cap and vapour came from their also is this normal ? I suppose it could be
The expansion bottle was also rather full but the water did not feel warm.
I use a little oil, but suspect this is mainly due to worn valve stems as we get a puff of blue smoke when starting from warm then it clears.
No sign of water in oil or mayo build up in rocker etc.
Temp gauge stays in normal range.
As the title says am I being paranoid just do not want to do any damage.
As always your comments would be much appreciated.
Cheers.
Nick.
Nick: Here's a suggestion. Park your TR with the nose in the air near a water hose or have coolant ready. With the car in this attitude, prop open the bonnet and remove the radiator cap and turn the engine on without the radiator cap. Run the engine until it reaches normal temp. If you have a heater, be sure your heater control valve is OPEN. When you reach operating temp, the thermostat will open and your coolant level will drop dramatically. At this point, top off your coolant until no more air bubbles come out. This process is called "Burping". Although your not over-heating, this process will get rid of air bubbles which boil your coolant to steam causing your engine to suck in more coolant from the reservoir, causing you to LOSE COOLANT. make sense?? If you continue to lose coolant, I'm afraid your problem may be more serious, like a blown head gasket. You can take your car to a garage and ask them to test your coolant for dissolved hydrocarbons, which can verify the head gasket is shot.
good luck
-
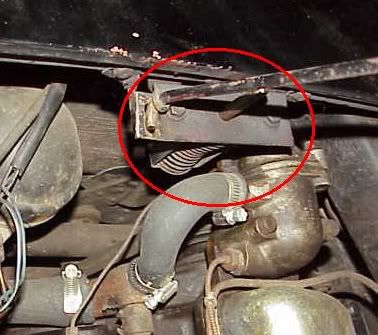
Frank, the two vertical bolts that hold the "screwed on" brackets and the plunger need to be left slightly loose. This allows the brackets to be wiggled to align the underside screw holes.
Leave the two apron rail horizontal fixing bolts loose too. Align the screw holes with a mirror.
Fit the 4 x screws then tighten the 4 x bolts (easier with the LH horn off).
I use phillips head screws as they are easier to offer up in a magnetic screwdriver.
Regards,
Viv.
Thanks Viv and all for your hints and condolences!
-
It can Frank but very hard to fix the screws underneath
Thanks Neil!
So on a scale of 1 to 10, 10 being best, where would you rank the job?
-
 The pump that Esben's link shows appears to be an electric pump that has a foot switch. Mine, if it's correct, is a mechanical bulb type affair.
Tom: Was your pump installed on a TR? I have never seen these on a sports car?
Thanks
-
Hi,
I have never seen one installed in a TR3, but you might be able to find use for this one:
http://www.ebspares.co.uk/news112.htm
Cheers,
Esben
Hello Esben. That looks rather fragile for repeated stomping, especially with my big feet!
-
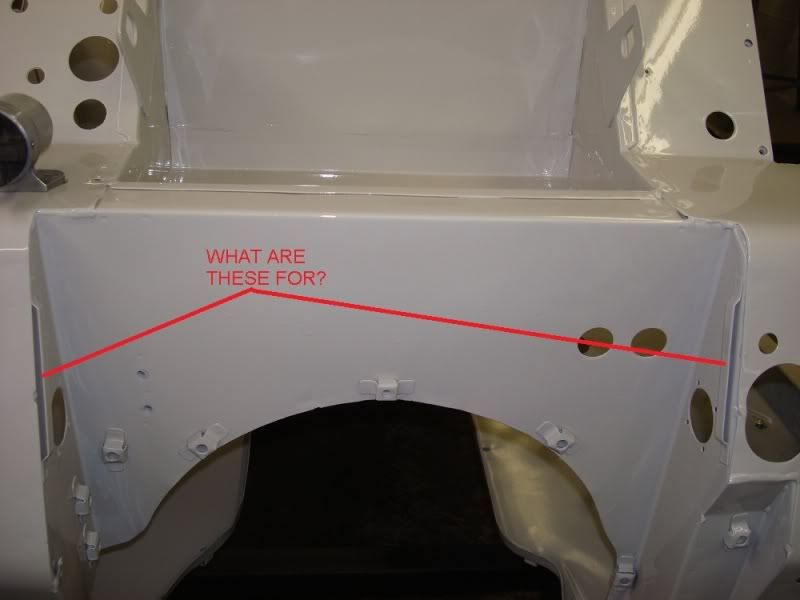
In the photo shown below, can the assembly shown,(plunger, spring, bracket and other bits)be attached to the apron/cross brace AFTER the apron is in place? We are not sure of the attachment details because the parts manual does not illustrate this later arrangement. Only the early TR2 is shown.
Cheers,
Frank
-
I've got one of them, you wind a handle and it shifts the hanger loop backwards and forwards, so I'll use it. That's how I got it all out.
I'm pleased it'll go in with the starter on, because it's a fiddle to get at once the engine is in the car.
Ash
Ash: yes, that's it. be careful - gravity is well rather grave!
-
I'm assembling the engine and gearbox ready for re-installing in the car. Does anyone know if I can fit the plate that holds the clutch slave cylinder before the assembly goes in, or must it be after?
Ash
sorry for the late reply but couldn't find this photo
It helps to have the load angle adjuster that can be seen at the top.
-
Don't wet the leather what ever you do, but use the best upholstery adhesive, such as you get from Woolies-trim.co.uk and just pull and pull.
Best of luck
Ash
Despite concern expressed by many not to wet leather, we followed the advice of an old timer here. He has experience with early American cars and leather upholstery. The hot water makes the leather super soft and pliable.
First we removed all surface rust from the underlying metal and powder coated the frame. We cut the leather trim to a size suitable and manageable for the particular trim piece. For odd shaped pieces we made a :buck" out of soft wood and securely mounted it in a bench vice.
The leather was heated in filtered tap water for about 1 hour at approx. 120 degrees F.
Leather was removed and all excess water blotted out.
Leather applied to frame , pressed with fingers to conform to the proper shape and secured with clips until dry. It is important to line up the grain so that the leather drys with the desired appearance.
Usually overnight, but when the leather is quite dry it has now taken on the shape of the frame and can be cemented. We used a high quality water proof contact cement. The leather covering is now carefully pulled away (one side at a time)longitudinally and cement applied to the frame and underside of the leather. After the cement has flashed off, carefully reapply leather, from centerline to edge, gently pulling and pressing into place. be sure not to over-stretch the leather or you will distort the grain - this looks bad! Repeat for the other side. Bobs your uncle
Good luck!
-
Still being a bit of an anorak, I would like to know if post-60,000
LHD bodyshells have this bracket both sides or one side only.
AlanR
Very Interesting question. Personally can not comment since Grey Lady is pre-60K!
-
Mulliner details below may help - relates to RHD cars but one bracket
only shown. Other page, for LHD cars, shows the same single bracket.
Note also the date - 1959 - this is, I suspect, the details for the
post 60,000 production.
Later models were all made LHD, weren't they - as it proved cheaper
to change a LHD shell to RHD rather than make all shells adaptable
to either.
AlanR
Alan: This is fantastic! I have never seen a document like this or any other from Mulliners. Where, might I ask, did you find this, and are there more examples?
Best regards,
Frank
-
Thank you gents. I can understand how it became a convenient place to tuck in the edge of the steering column grommet. However, I have to believe, as mentioned by Bill G, that there was a more practical reason, such as an assembly mechanism, jig or similar purpose. If I only had a TARDIS!!!
Cheers,
Frank
-
-
Good work Frank !. I'll check my overflow hose for signs of a clip. I knew there was something in that hole as the edges were all rusty but I could not recall what it was for.
Stan
Just found the photo. Unfortunately, the clips are unobtainium! I'll be trying to make one.

-
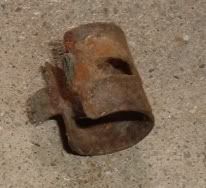
Does anyone recognize the small hole circled in this image ?
http://i38.photobucket.com/albums/e119/foster461/TR3A%20restoration%20project/hole.jpg
I posed this question to Stuart who indicated that he didnt recognize this hole but I am seeing it on other TR3 RHS inner wing pictures so I'm not quite ready to dismiss it as a PO project leftover. I have no recollection of anything using this hole and no pictures with evidence so I'm polling the wider community in case this is a LHD or US feature and someone recognizes it...
Stan
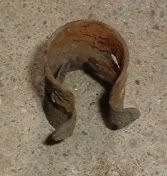
That hole was for a metal clip which secured the radiator overflow hose.
Stainless wing beading
in TR2/3/3A/3B Forum
Posted
As Stu indicated, we used #4-3/8", round head-slotted sheet metal screws. If you can find stainless steel all the better!