


ptjs1
-
Content Count
97 -
Joined
-
Last visited
Content Type
Profiles
Forums
Calendar
Posts posted by ptjs1
-
-
Thanks very much for all your thoughts.
Just to clarify, Incorrect assembly, wrong parts etc doesn't seem likely. I probably haven't made my self clear (quite likely!) but 25 years ago, when it was assembled, the wheels rolled and all seemed well with no excess play.
All that has happened in 25 years is:
- Car has sat still unless it's been moved (8 times perhaps?)
- Each time it's been moved to put it on a trailer, I've had to manually pull and push the wheels around in order to manoeuvre it out of its storage space.
Now there is lots of play and trying to take out the play even with the castle nut at only hand tight seems to tighten up the hub. Not completely locked but very, very stiff to turn by hand. (I only did this on one side, Peter, as I got so depressed,I just assumed it would be the same on the other side!)
So, I'm guessing that the jerking of the wheels to turn them has somehow compressed the felt or something similar? Somehow, play has become introduced over the years. That's the key issue. How has the play got there?
If the felt has got compressed with just the rough handling of the wheels over the years, would hand-tightening the castle nut now potentially cause the bearing to tighten up causing the hub to get very very stiff to turn? I suspect the time-hardened grease probably doesn't help anyway.
I suspect the only answer (to which you've all alluded) will be to strip them down, check for damage to the bearings / felt / shaft, reassemble with new felt as a minimum and see how it is. I've got to take the "new" discs off anyway as they've become completely rust-coated after 25 years! And the "new" balljoints and trackrods also have surface rust.
Even though the car has never been driven, do you think the "new" wishbone bushes etc also need replacing after this time. In fact, should I just completely rebuild the front end again?!
Paul
-
Thank you for your replies. All of them give me some ideas but I'm still a little confused.
Peter,
Are you saying tighten up the nut more than normal, to make it take out the play, and then run the car with "tight" bearings until it loosens? Although some time away from it running, I wouldn't be able to run it with the nut tightened at the correct torque as the amount of play it then haves would make the car undriveable.
Andreas,
I don't think it can be worn shafts. 25 years ago, when assembled, the shafts were either perfect or brand-new (can't remember which). The car has only "rolled" a maximum of 200 yards since then, so I can't think it could then wear the shafts.
Roger,
If the felt is too thick / deep, then when assembled 25 years ago, I guess I would have had the same problem then. But I certainly didn't have the problem when it was first rolled onto the trailer. Yet 25 years and 200 yards later, they are way too loose.
So, could the pulling and pushing of the wheels that I've done to move it around over the years have compressed the felt such that I've created the sloppy play? Is that possible? It does feel that I'm going to eventually have to strip and reassemble anyway, maybe with new felts.
Very confused of Kent
Paul
-
Mark,
This thread any help?
I still can't decide whether to run my new pipes in the original manner, or whether to do it the way I recently saw one at my local meet - All Aeroquip, dropped straight from the master cylinder through a drilled hole in inner wing and then run unseen across to LH front caliper, and run down outside of RH main chassis rail to rear. Apparently it cost a fortune in pipes and fittings but engine bay looked incredibly clean without any pipes. Clutch was also done same way through the hole in RH inner wing.
Paul
-
Background:
The body and bare chassis of my 73 CR car were restored 25 years ago. I built up the front suspension with all new parts. The car then went into storage waiting for me to complete the restoration and....it's still waiting.
It's been moved around a few times over the years to different storage locations. Each time it's moved, the wheels have to be pulled around to change directions as there's no steering column attached. So it's had a bit of wheel wrenching done each time.
Last month when taking a wheel off to put on some spacers (as the Wolfrace wheels catch the top wishbone on even a small amount of lock), I realised that there was a lot of play in the bearings.
Today:
I visited the car with the intention of adjusting out the play. After an hour of fruitless effort, I had to destroy the hub grease cap to get it off. I removed the splitpin eventually and then the problem started. If I tighten up the castle nut by hand and then back off to insert the splitpin, the bearing seems so tight that the hub will hardly turn by hand. If I back off the nut to allow the hub to turn freely, then the unacceptable play is still there. I didn't even bother with the other wheel as I assumed that it would have the same issue.
So, what do I do? Is it something to do the felt seal and the car just sitting for 25 years and not having really turned a wheel since the suspension was put together? Should I just tighten the nut at 10 ftlbs, then back off, insert split pin and keep spinning the wheel until the bearings free up? At the moment, I'm just stumped as to what is the issue.
Any thoughts gratefully received
Tks
Paul
-
Mark,
Could you tell us what camera you bought and any chance of posting the pics it took in your box sections?
Tks
Paul
-
Mark,
I have used a number of these type of covers in the past and found many of them to be unsatisfactory for the following reasons:
- Many of them are much bigger than the exact footprint of the hood, windscreen and side windows. As soon as that happens, they can tend to flap, causing abrasion marks on the paintwork. This happened to me on an XJS from one of the quite reputable companies. I immediately returned the cover.
- If the cover touches the body and it's nylon, it can also cause paint abrasion over time
- Many of them use straps to attach to wheel arches etc. This is not ideal.
In my limited experience, I think you need to go for one which is a custom fit for the car and doesn't use wheelarch strap fixing. Although it may cost more, it will be worth it in the long run. Have a look at the following:
http://www.cabrioshield.com/uk/triumph-tr6.html
I have no direct experience of them but know a few guys who have them on Jaguar XK8s and they are very happy with them.
Good luck
Paul
-
Robert,
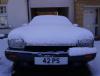
My TR6 lived outside in the early 80s, often with the roof down (and often with the roof left down and it rained!). Eventually it succumbed to the rot and I've been on a 25-year restoration project (Well, 6 months of body restoration and then a 25-year wait in storage!)
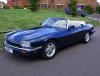
However, I do have an XJS convertible which has lived outside for at least the past 13 years. I use a breathable waterproof cover and I would suggest that it is quite practical for a well-built, or restored, rustproofed car to survive like this for many, many years, even with the wind, rain and snow that we have. I also have some of these dehumidifier granule bags in the footwells. I'm a great believer in using my car all year round. I'm sure that regular use stops a lot of problems. And I modestly believe that at 21 years old, she still looks pretty good with a polish. And yes, it does surprise people that it lives outside all the time!
For your TR6, I would recommend a hood cap underneath the cover to prevent any extreme water ingress.
Yes, in an ideal world, she'd have a heated garage in which to live. A carcoon or car port would also work better, But that's just not practical for me. And because she lives outside, it gives me more excuses to drive her!
So, but I certainly wouldn't discount a good quality cover. My latest one came from Hamiltons and the TR register has a discount scheme with them. Add to that, regular top-ups of rust-proofing, don't cover the car when wet or dirty, and lots of driving. She'll last for years and you'll have a grin on your face on a crisp winters day with the roof down!
Or how about keeping it outside with a cover for 6 months of the year and keeping her in a storage facility for the worst 6 months of the year? With the constantly increase in classic values, even the cost of a professional storage facility would be offset by the increase in value each year.
Good luck
Paul

-
Ian & Roger,
Tks for your replies.
I've just returned from visiting the Stag Owners Club National Day where the Kent TRs were a visiting display. One TR6 owner kindly let me grovel under his dash. As expected, it was impossible to see anything, particularly which side the heater duct clamp is fitted.
However, I was able to feel (with difficulty!) that the H-bracket was fitted with the cross-piece welded on the underside as shown in the parts diagram. So if, as Ian says, the bracket can only be fitted one way, then I guess I must have loosely reassembled it upside down after originally removing it from the car.
I expect that I'll work out where the 2 felt pieces go when I finally fit it all back together.
Thanks to everyone for their input.
Paul
-
OK,
So I've now pretty much straightened the wiring shroud bracket, sandblasted, primed and topcoated all the parts, and put them back together as they were when I pulled them out of storage. I'm still not sure where the extra 2 felt pieces go but I'll worry about that when it finally gets put back together.
BUT, I'm thinking that I might have dismantled all this bracketry when I stripped the car 25 years ago and loosely put it all back together to put the bits in storage. Because when I now look along the alignment as shown in the second pic, it seems the bridge piece of the H-bracket would foul the steering column. The parts diagram seems to show that bridge piece underneath the 2 side pieces but mine was definitely on top when I pulled the bits out of the box.
So, did I loosely put it back together upside down when I stripped it off the car, or have I got it correct and the steering column sits at an angle, thus clearing the bridge piece?
I also don't know what is the purpose of the round clamp bracket that I have which is mounted on one side at the lower end of the H-bracket. It doesn't seem to appear on any of the parts books that I have or which are available online. Does anyone know what it does and is it positioned correctly on my assembly? Is it for a heater blower duct hose or a wiring loom or what?
I guess I'll only know all the answers if someone has a pic of the brackets assembled correctly, or if I can crawl under the dash of someone's car. But I'm assuming the lower dash panel will preclude me from viewing it in situ?
As always, any thoughts gratefully received.
Tks
Paul
-
Peter,
Although it's probably not of any help to you, I actually own CR2845-0. So, if it's important and you can wait until next week, i could tell you what distributor is fitted on my engine, which has been sitting on a pallet crate for 25 years.
So, is the change point "...up to CR2845" or "...from CR2845"? Which should I have?
As part of my rebuild, I want to go up to 150bhp spec, and have wondered if I can just change the springs in my distributor rather than buy a 150bhp type?
Paul
-
Mark & Roger,
Thank you for your comments.
At last I understand where that channel piece goes. From your pic, Mark, I'm guessing the square cutout is engaging with a slot in the column shroud. Closer examination of the piece shows that the last 1/2/" (where the round bracket would be) is a duller paint colour so perhaps the round bracket is actually a separate item that is clamped around. The parts diagram shows it all as one piece but there is no broken weld on my channel piece. I think I will straighten it and then make up a round clamp bracket to go on the end. Maybe I damaged it and lost the round bracket when dismantling the car 25 years ago? Or maybe its still clamped around the column when I eventually look at the column?
Marks's photo makes me think that the design must have changed at some point. You have two unjoined lengths whereas I have a welded cross-piece between them on my 73-built RHD car although the cross-piece is welded above not below as shown on the diagram.
I can see from the diagrams that I must have other bits either still attached to the column or maybe still on the dash (which i remember taking out in one piece). Looks like I'm going to have visit the storage garage and dig out the column and dash before I know what might be missing. I can see where the dome covers go now from the parts diagram but the additional 2 felt pieces are still puzzling me. One might be part no.49 on the Moss diagram? The other one definitely looks like it fits on top of the cross-piece on the H-frame. Maybe the column just sits on top of that felt on the cross-piece?
Tks again to everyone.
Paul
-
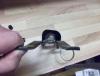
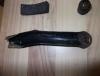
Guys,
Thanks for your replies. However, I'm left confused. The loose felt pieces are not items 17 & 18 (36 & 37 on Rimmers) as those pieces are still intact on my U-clamp as you may be able to see from my photo. In addition, my "bent" channel seems different from item 10 (30 on Rimmers) as I don't have a round bracket affixed to the end. I just have a square hole with the metal cutout pressed through at 45 degrees. I do have a round bracket but mine is affixed to the U-clamp plate as you can see in my photo.
I wonder if the setup changed over the years and the schematics relate to an earlier year. My H-shaped bracket is definitely slightly different with the cross-piece of the H welded on top not underneath. One of the felt pieces is shaped such that it looks as if it would sit on top of that cross-piece. Is there another steering column clamp or fixing that sits at that position which would need those felt pieces?
I think the channel piece is probably supposed to be straight anyway, so I'll straighten it before cleaning and painting. But I still don't know what it does or to where it should be affixed. And I'm still confused by the extra felt pieces. As you can appreciate, the location of all of this makes it difficult for me to look at another TR6 to compare anything.
Any more thoughts gratefully received.
Paul
-
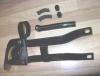
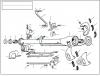
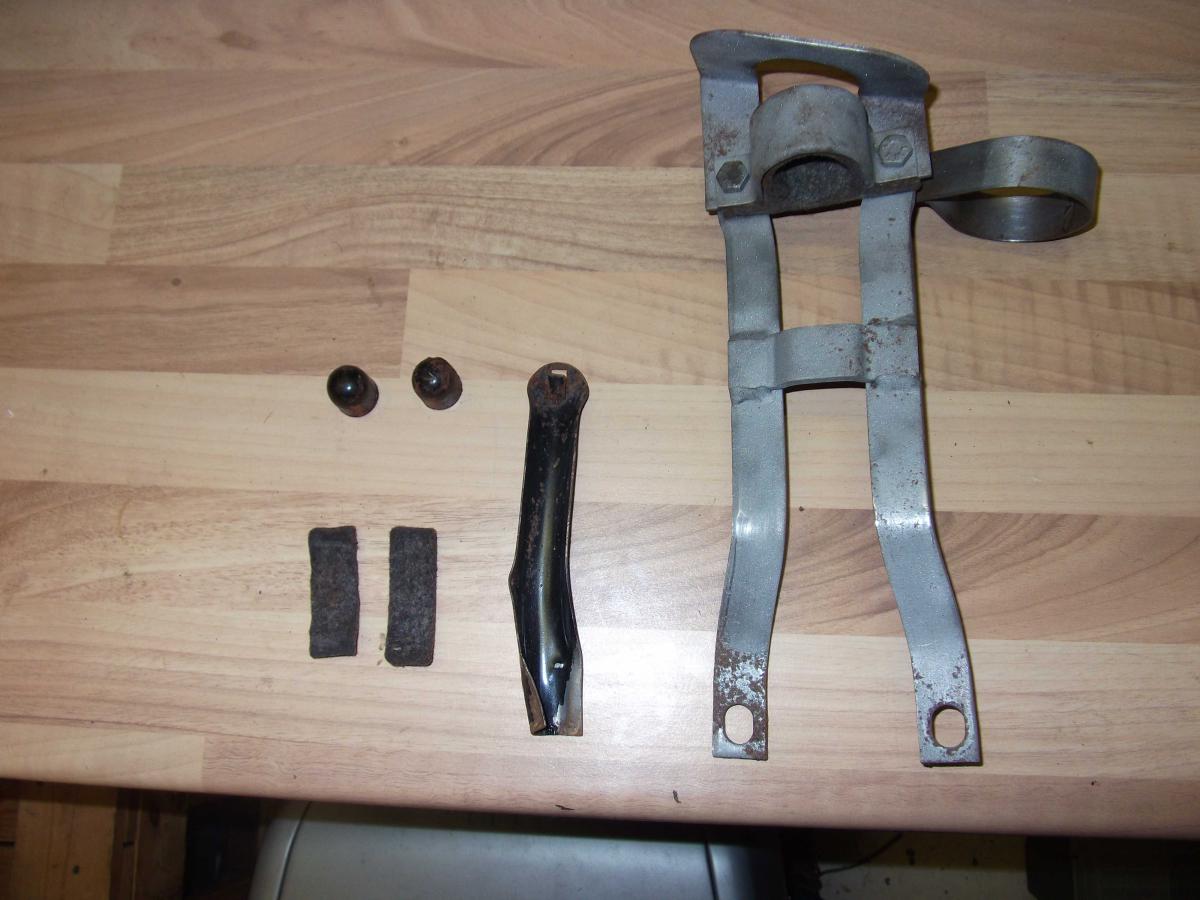
I wonder if anyone could help me identify the correct shape for an item that is part of the Steering column dash attachment on my CR TR6. I'm also confused by the location of a few other items.
I've started the refurbishment of a number of items which were removed 25 years ago (Yes!) when I first started the restoration. Before I blast and paint one of the items, I'm trying to understand what shape it should be and where it fits in relation to the other bits. It's the channeled black item in the pics. It seems like it's got bent either when it was originally in the car or when I removed it all these years ago. I can't believe that it's supposed to be this shape.
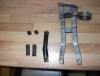
So, I wonder if some kind member can tell me:
- what is the correct shape for the channeled item?
- where does it fit?
- where do the two dome covers go?
- where should those two short strips of felt go?
Tks in advance for any thoughts.
Paul
-
Derek,
Shame to hear about the difficulties. Good luck on the rest of the work.
I'm really hoping to restart my restoration within the next year. Body done 24 years ago, then....nothing! Multiple moves into different storage places have stopped me ever doing it. But I will...eventually! I have some minor paint rectification to get done as result of the long-term storage then I need to start seeking some views as to the optimum order to do everything else!
Paul
-
About 6 months ago, I messed up my old 1/2" drive Torque Wrench when I foolishly used it in conjunction with a piece of scaffold tube to undo a VERY tight wheel nut on a friends car.
Since then I can only use it as an unlocking ratchet and can't use it as a torque wrench to tighten.
So, I've been looking around to purchase a new one and toying between buying an electronic one as opposed to a £25 OK-ish quality screw type.
Browsing on the internet, I saw an interesting alternative from Machine Mart which is an electronic torque 1/2" adapter enabling one to use any ratchet or breaker bar. I'm not usually a huge fan of Clarke tools although they do have a big reasonably-priced range and their Pro range does have a lifetime guarantee. So I thought this might be an interesting alternative enabling me to use my existing 1/2" & 3/8" (with an adapter) drive ratchets.
It has a very good range of 22 lb ft to 265 lb ft (I have a small 3/8" drive torque wrench which does lower figures), reads the exact torque clockwise or ant-clockwise and can be programmed to sound a buzzer when you get close to your set torque figure. A few quick tests indicated that all the wheel nuts on one wheel of my XJS all loosened off at a figure within 4 lb ft of each other which seems quite remarkable considering I did them up originally by hand without a torque wrench!
The adapter came in a good quality storage box and a certificate of calibration which seems to indicate a high degree of accuracy.
Early days but at £35 I'm really quite pleased with this so far.One of the advantages of this electronic device is that you can easily use it to check the consistency of other torque wrenches just by connecting them together. I checked an old 3/8" drive wrench which was almost exactly spot-on, and then checked a colleagues 1/2" drive wrench which proved to be almost 25% out. That was quite a shock to him!
Paul -
Chris,
A man who can tell the difference between the typical Wolfrace Slot and the rarer Wolfrace Turbo! Respect!
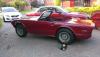
The wheels were on the car when I bought it from a friend in 1984. I've always liked them and with the 205/70 tyres they did make the car look quite serious. They always put a limit on the steering lock available but it was a small price to pay. As I've got older, I think I prefer the original look so original 6J rims with maybe 195/65 tyres will probably be the final fitment. I've never really liked the US chrome trims but they do make the rims look a bit wider. I don't think I'll fit those, though
Paul
-
Tks to everyone for the suggestions.
John, I love the idea of a wheel connected direct to the rack! However, the bonnet is on so sadly that isn't really practical.
Jerry, Tks for that. I'm going to try that. I'm trying to think where to "hang" the floating upper column from. Maybe a strap from top corners of windscreen or similar? I don't think adjusting the lockstops will help the fouling. It seems to foul without much lock at all. I suspect the wheel rim depth is too big and is catching somewhere that even the lockstops can't allow for. I'm pretty sure that 25 years ago, it had spacers on either the front or the back and that I put them back on? Maybe I didn't, or put them on the back end instead of the front? Time to go down to the storage garage and have a proper look.
And now I have this awful feeling that there were locking wheelnuts on each wheel. If so, I now have no idea where the lock is!!
Denis, Very fair point! I will buy a set of original 5.5j(?) rims when I do eventually finish the car. I do think that 165s always look under-tyred so expect that I will go 195/60 or similar. Funny how I loved the Wolfrace in the 80s! Maybe I'll refurbish them and just keep them for "Bling" days!
Paul
-
OK, so I've now bothered to actually look up the diagram of how it normally fits together. Apols, I should have had the courtesy to do that before!
I'm guessing that (25 years ago!) I took the upper column out as one assembly (inner and outer). That should make a temporary fitting somewhat easier.
The parts diagram seems to show that there is a forward mounting bracket which attaches to the bulkhead, then linked to that is an anti-torque bracket and that attaches to the rear mounting bracket. That rear bracket should be secured, I guess, to the metal dashboard? If so, that's my problem as the dash won't be in the car. I'm guessing that the forward bracket wouldn't be sufficient on it's own to hold the column even for light manual manoeuvering?
As before, any thoughts much appreciated.
Paul
-
Conrad,
Tks for the suggestion. However, when I say "move it around", that includes putting it on to a low-loader to take it to another garage. So you can see why getting the steering working is important!
Tks again
Paul
-
I wonder if anyone can offer me some advice on my (very, very!) long-term TR6 restoration.
The body and bare chassis were restored and painted 24 years ago and the car has been sitting in various garages since waiting for me to get on with the rest of the restoration. The car has front and rear suspension fitted and the steering rack, track rod ends etc in place. It has a set of wider Wolfrace wheels on it although something is fouling on the left hand side if much lock is put on it. Maybe I forgot to put a spacer on the hub?
The interior (and engine compartment) is completely bare with just the dash top fitted.
The problem I have is that I now have to move the car around in its storage area and that is a real pain as the only way to steer it is to manually push the wheels in or out.
So I'm trying to work out what is the minimum amount of work I need to do to install the lower and upper steering column just such that the car can be steered. You can appreciate after 25 years that I can't remember too much about the layout and how I pulled it all out as part of the stripdown. Can I fit just the columns in place without fitting all the dash etc? The upper column is in my loft and I'm pretty sure that it's still in one piece with the nacelle, stalks, steering lock etc. Is there a single bracket which means I can just bolt up the upper column and wheel to the inner bulkhead, and connect to the lower column and thence to the racketc?
Hope all that makes sense. Any advice would be very much appreciated.
Tks
Paul
-
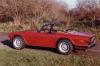
Graham,
When I got my TR6 in 1984 it was fitted with 7 x 15 Wolfrace wheels. Not the slot ones fitted to Scimitars but the vane-type ones which I personally think are much better looking. I left the wheels on for the next 6 years until I started restoring the car in 1990...I still haven't finished it but the "newly-restored" shell is still sitting on those wheels!
The front wheels have always been fitted with spacers. From memory I think they are about 5/8th inch thick. I don't know if they were made especially for my car or came from Wolfrace. Even with the spacers fitted, at low speeds on full lock some part of the wheel always fouled some part of the suspension. I always just backed off a bit of lock.
Hope that helps. If you're interested, I could try and move the junk around the car and photgraph one of the spacers (assuming I remembered to put them back on 16 years ago!).
Regards,
Paul


Problem adjusting play in front wheel bearings
in TR6 Forum
Posted
Tks for the suggestion.
Unfortunately, there's no calipers fitted on the car, so it's not brakes causing the problem.
Paul