


adriantr4
-
Content Count
144 -
Joined
-
Last visited
Content Type
Profiles
Forums
Calendar
Posts posted by adriantr4
-
-
Thanks for the inputs. Insulators all round it is.
regards, Adrian
-
Thanks for the prompt reply. But my (very old) Moss Catalogue gives rubber washer (part 80) as 4 in total?
Adrian
-
In rebuilding the front suspension on my '4, I have found that I have, from the top:
Rubber washer
Aluminium packing piece
Rubber washer
Coil spring
Rubber washer
Which initially strikes me as correct, and the Parts Catalogue seems to support this. But a very experienced TR friend is adamant that the coil fits directly into the packing piece. (Maybe to prevent spring & packing piece wobble?)
What is correct/best practice?
Thanks, Adrian
-
Hello
I have been looking around to see if I can lay my hands on a piece of steel tube 3" long by 5/16" internal diameter (the critical-ish dimension), so an outside diameter of about 1/2". My friend with a lathe doesn't have anything suitable and doesn't fancy making it from first principles from a bit of bar. But he did suggest if I could find something similar he could drill it out, or adapt it.
So, has anyone got a piece of tube of those dimensions I could have? Happy to pay.
Thanks Adrian
-
Thanks for the advice. I'll will put the old ones back with new rubber, and to Pete: they seem ok, when on the car and the wing bounced it returned to normal height, behaving as expected.
Regards Adrian
-
I am in the process of rebuilding the front suspension on my '4, and have the Spax adjustable shocks which are about 30 years old.
They "seem" ok on the bench - no graunching, strong resistance, smooth action. Clean too, no leaks. I did note that the "pulling" resistance is a bit more than the pushing. Is this normal?
Anyhow due to their age I'm thinking of replacing them, and Rimmers have a sale. But... cheapest adjustable is Gaz at £145 a pair, whereas the standard shocks are £37 a pair. That's quite a price difference.
I don't really need adjustable shocks, so should I put the ancient ones back on, buy the standard ones, or dig deep (and I have been Spending on the car recently) and get the good ones? Or ...?
Thanks Adrian
-
Thanks Stuart, will do.
I've had the other side apart and although very grungy, it's fine. A bonus which I didn't expect.
Regards Adrian
-
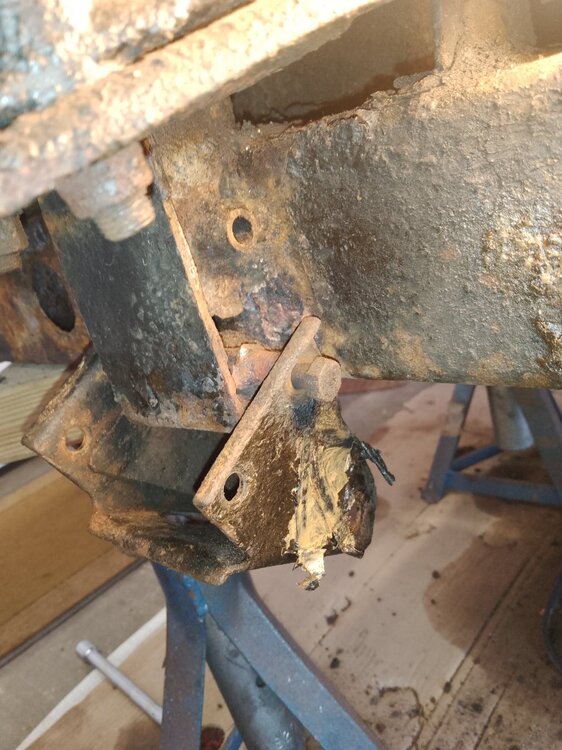
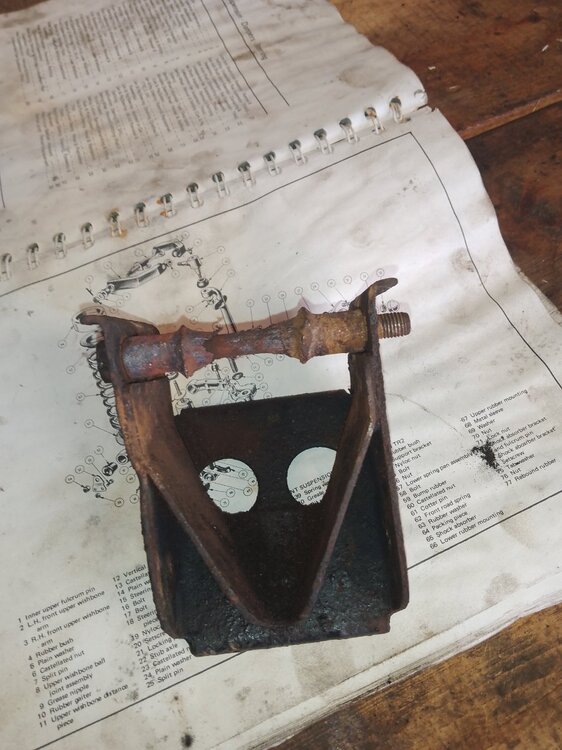
With a huge amounts of heat, and luck, I have removed the bump stop mount. It is held onto the chassis by two long bolts. The top came out ok but the lower has the remains the chassis attached.
However now out. The pictures show the before and after. The chassis area seems ok, apart from the missing mount, and the bracket itself is solid.
I'm a bit surprised the lower mount has totally dissolved as the rest of the car is fine - what are my options?
Regards Adrian

-
pm sent. Mine's ok, but very slightly ovaled and ancient. Others might have a better example.
Regards, Adrian
-
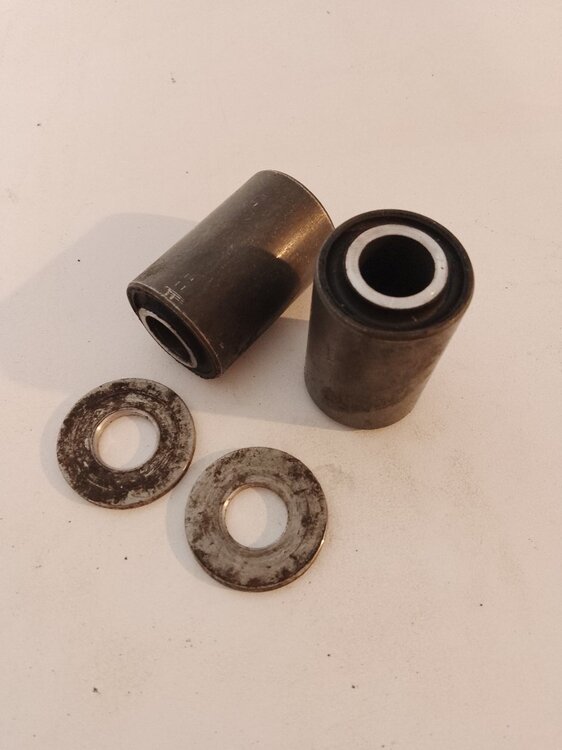
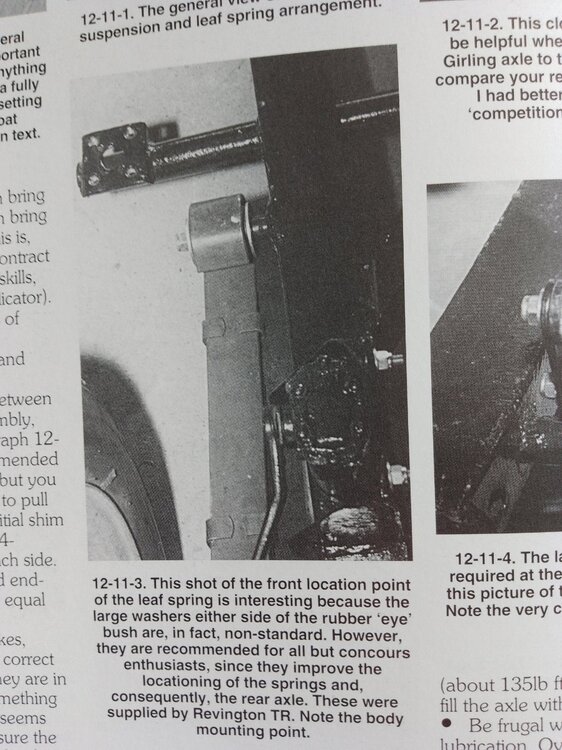
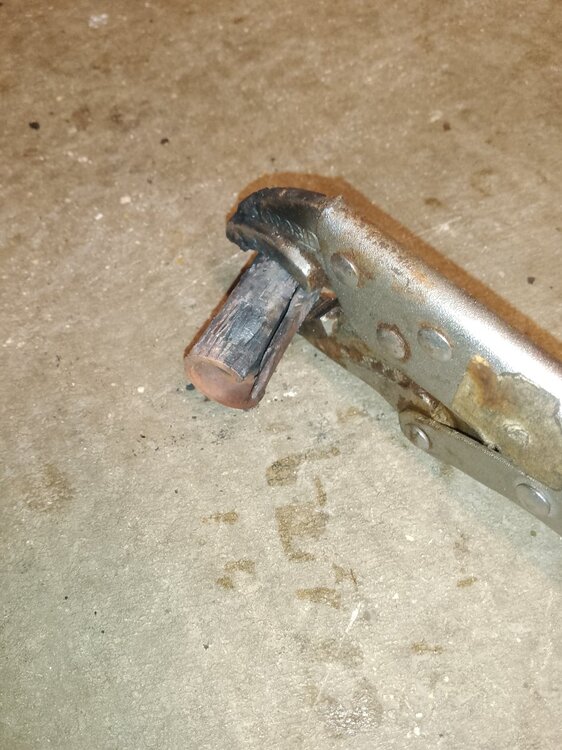
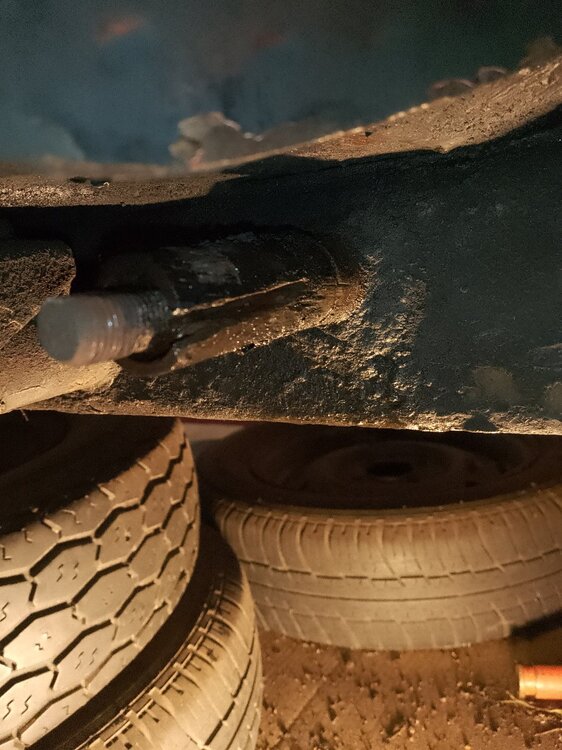
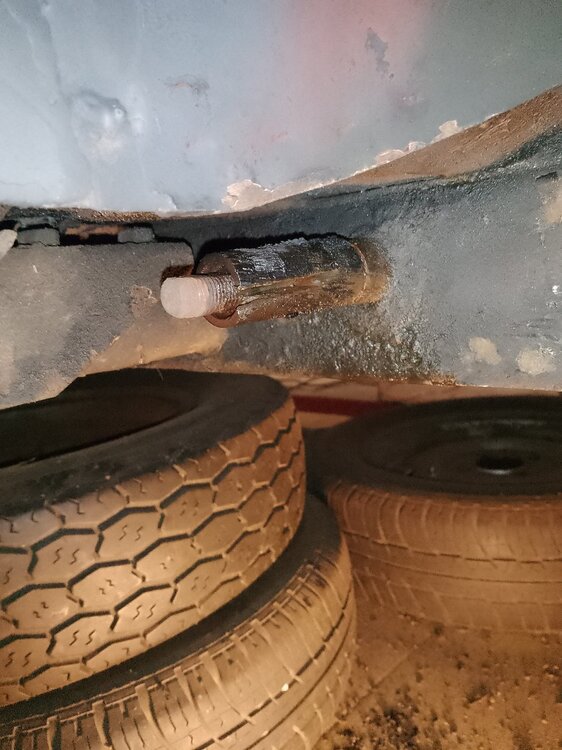
Attached is my homework - custom washers to fit the leaf spring pins, and the Silentblocs inner metal bush trimmed back. With hindsight perhaps we could have taken a bit more off, but in practice for my car I don't think its critical.
The only minor issue in adapting the Silentbloc is that the inner bush isn't totally centered, so it does wobble in the lathe.
Lastly, I spotted that the clamps on the leaf springs were trying to loosen off, so simple to compress them up tight in a vice.
My thanks to Dave Smith of the Wessex group of the TR Register and his vintage lathe for his time, and to the Posters of this thread. All very interesting.
Cheers, Adrian
-
Hello
Thanks to all responders.
Below is the link to the Revington kit
https://www.revingtontr.com/product/rtr3059k/name/location-kit-rr-springs-tr2-4
Which comprises 4 washers: 2 "D" washers and 2 washers that fit over the leaf spring locating pin.
As a cheapskate I intend to attempt to make my own equivalent.
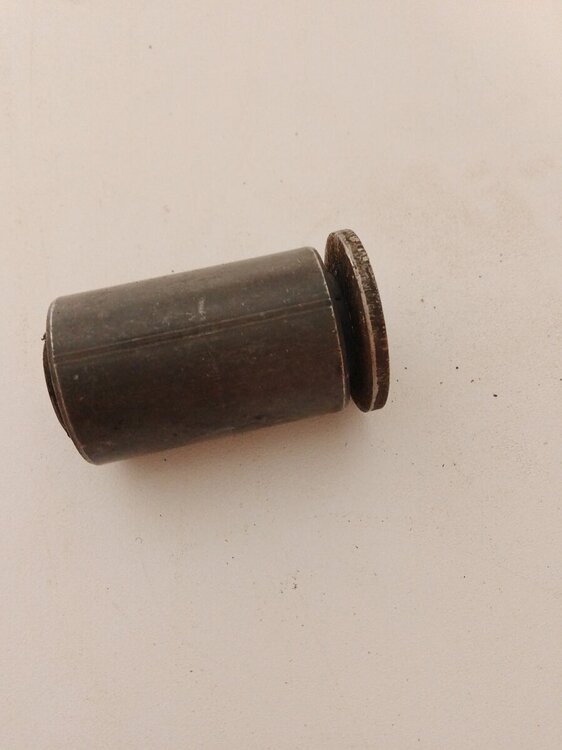
My last question: although hardly worth it, should I shave a little bit off the inner bush of the Silentbloc (but leaving the inner metal bush still proud of the outer metal bush)? The picture shows a bit of a gap.
In other news I got the remnant outer part of the Silentblocs out of the leaf spring eye, and they fought me all way.
Adrian
-
Hello
About to reassemble my TR4 rear suspension when I found the attached photo taken from the Roger Williams "How to restore Triumph TR4 and TR4A", p134. It shows what I think is 2 "D" washers and a spacer on the front pin? (Instead of 1 "D" washer). Says it's a Revington mod.
Another edit: not a spacer but the shoulder of the pin, and 1 "D" washer plus a washer of same outer diameter but will fit on pin.
Comments please?
Thanks, Adrian
-
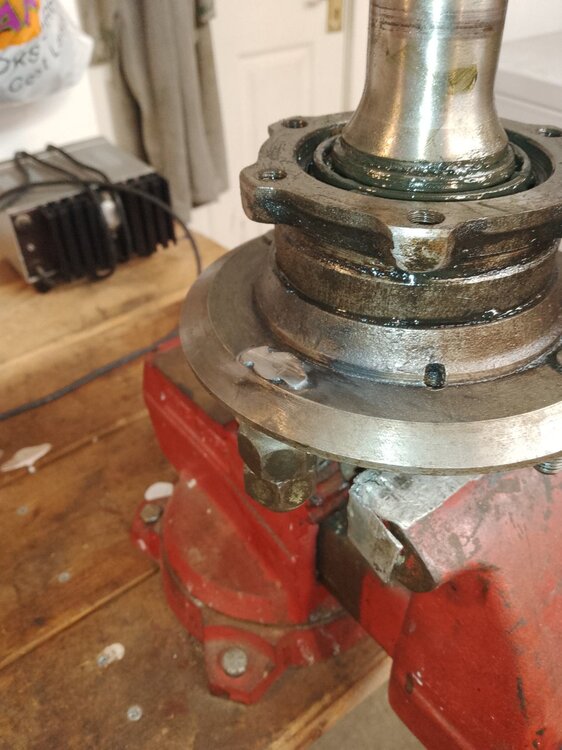
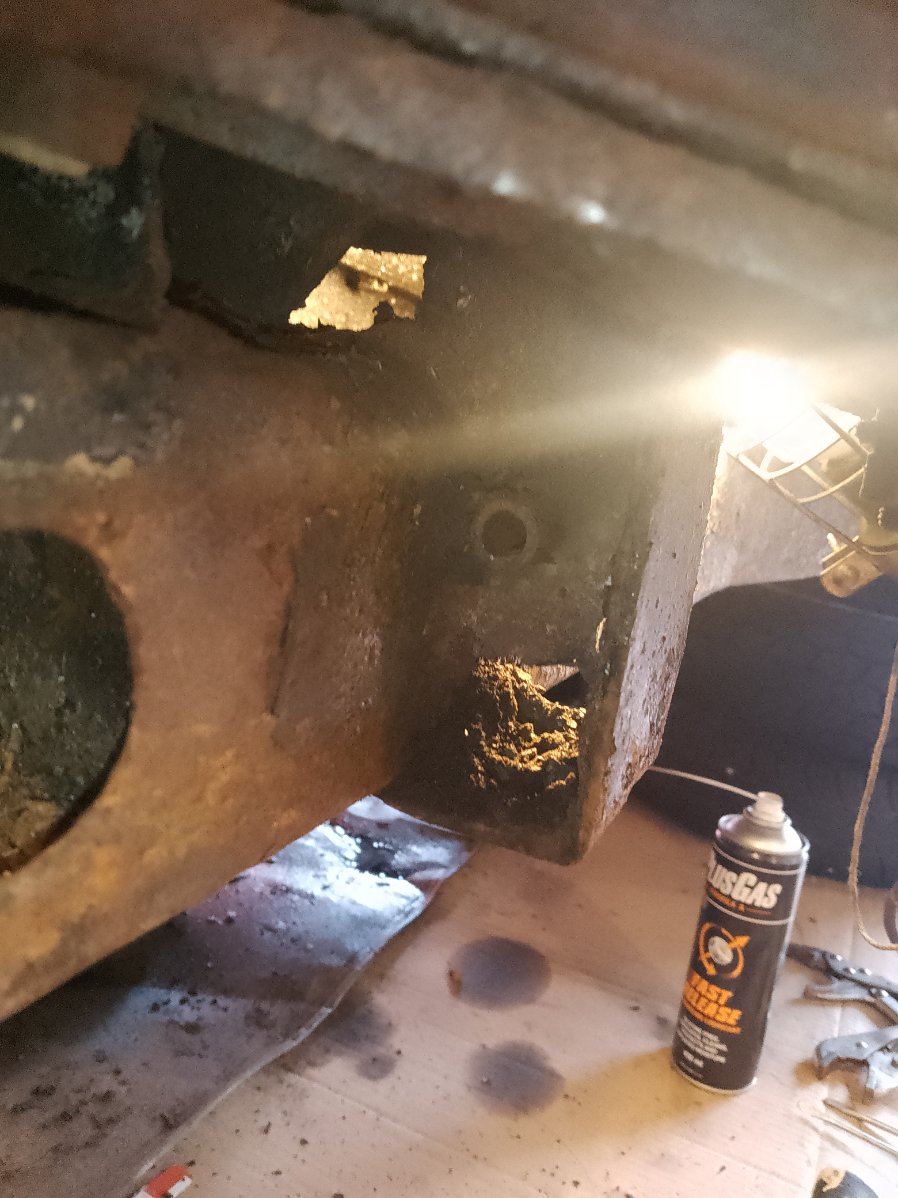
Hello - success! My new propane torch did the trick. I seriously heated the bush up, tried a few hard taps with my new chisels - nothing. Tried the mole grips as a last resort and it just gave in, easy after that.
Thanks to all Posters, advice much appreciated.
I think the order of attack should be: massive heat, if that fails then a lengthwise partial slot with a Dremel (I used a thin angle grinder disc, which regret - I later used a Dremel disc in a drill which worked fine), then Stillson as described,plus Heat. I also used PlusGas spray.
In the past my last resort has always been Heat. The expansion/contraction forces must be colossal, and localised.
Now for the refurb - then the other side!
Adrian
-
Hi - yes I have curved mole grips. Thanks for the suggestion. I think serious heat is going to be key to the solution. I hope....
Regards Adrian
-
Thanks to everyone. I have invested in a propane torch, chisels, Dremel diamond cutters and nut splitter set (an excellent idea).
All this won't arrive until next week. In the meantime all other suggestions welcome.
Regards Adrian
-
Hello
Thanks for suggestions.
I have to report that both I and the bush are equally stuck. I've cut in and along as deep and and as far as I can, and heated with a plumbers torch. I have also attempted to hit with a chisel and twist it to open the split, but no go. It's like it's fused to the pin.
I am rather out of ideas now: weld a bar across it, heat to red-hot and ...?
There is no room for a puller.
Any ideas?
Thanks Adrian
-
Hello
I'm refreshing the rear suspension on my '4, and l have removed the leaf spring without too much trouble. However, the silentbloc bush on the front has remained stuck on the front bolt and disassembled itself.
Any thoughts on how to remove it? cut off the remaining rubber and heat/mole grips? I've got an angle grinder but I'm not keen on this approach.
Access isn't great, but the rear wing is off.
Thanks, Adrian
-
Hi
An example of a welded stud. Thanks to all posters.
Adrian
-
Hello
After a pause I am now looking at fixing my loose rear wheel stud. As was discussed, I can confirm that on a '4 the rear wheel stud 100869 is threaded, while the front hub 114282 is splined.
I have tightened it and it seems ok. My plan is to pull the half-shaft, re-peen it then a touch of weld?
Any thoughts? I don't really want to go down the route of drilling out/replacing, or oversized studs (Revington's method)
Thanks, Adrian
-
Perhaps I could have put it better. He does have a MIG and has had a lot of practice in replacing bad metal with good. He showed me work he had done on Bentley bodywork - and a bus! I'll report back in a few weeks.
Adrian
-
Hello again.
I have got the car raised up,having borrowed a big jack. The chassis is now supported on the Y of axle stands but with blocks of 2x4 wood between chassis and the Y.Seems fine
I have had a conversation with ax experienced Mobile Welder who is going to patch up the car, including the front wings.
Regards Adrian
-
Fabrice - Thanks very much for the information. It is appreciated.
I'm going to do some more scraping tomorrow.
Regards, Adrian
-
Thanks to all responders. I bought a hot air gun, but also tried painting on with white spirit. Both approaches work, but white spirit is very fumy so breathing it in probably not the best idea.
However, it's hard going. Where my underseal is a thin coat it peels off ok when given a good blast with the heat gun, but when on thickly its like scraping chewing gum. Anyhow, I'll persist and use the spirit to clean up. I don't have to get it all off and where my the underseal is on well and difficult to access I'll just leave it.
The goal is to tidy up the bodywork, and I 'll brush on paints or products for the interior and underneath areas and let the professionals paint the exterior.
Thanks Adrian
-
At some early point in its life, perhaps the US dealership, a bitumen-like underseal was applied to the wheel arches and surrounding area of my '4. Whoever put it on did a great job as the steel is intact but I am having huge trouble in removing it. Some of it flakes off but generally I am hammering it off in tiny sections, it has a terrific grip still. The picture shows my efforts with hammer and big screwdriver, the curved wheel arch section took about an hour plus I am pock- marking the surface.
I'm attempting to refurbish the body so planned to re-underseal the underbody with the appropriate product. However, am I wasting my time? If it's on so well perhaps just leave it?
Or some vicious chemical? Nitromoors (sp?)
Comments please ...
Regards, Adrian


TR6 starter swap
in TR6 Forum
Posted
Hello
I usually follow the TR4/4a forum, but I can't immediately see what I need in the TR6 forum so apologise in advance if this is old ground. I have a few questions, but we both have owned and fixed TRs for a good few years.
My friend needs to swap out the starter on his '6. The only upside is that it is LHD so column not in the way. Any hints - remove exhaust, get it out from underneath?
He has a spare starter of unknown vintage, but we tried it with jump leads to the body and power terminals, then flashed onto the solenoid - it engaged and spun over well. We think it's ok, unlike the one in the car which just clicks.
It's a later 6, so the third (?) iteration of the wiring diagram. Also, what is the very small terminal on the replacement starter solenoid - test pin, or some sort of feedback to ...? I can usually read a circuit diagram but the starter section is a puzzle - far more wires than seems possible. Plus: there are extra PO wires going into the starter on the car, and all in white .... Any ideas?
Thanks Adrian (and Dave)