


R.M.
-
Content Count
160 -
Joined
-
Last visited
Content Type
Profiles
Forums
Calendar
Posts posted by R.M.
-
-
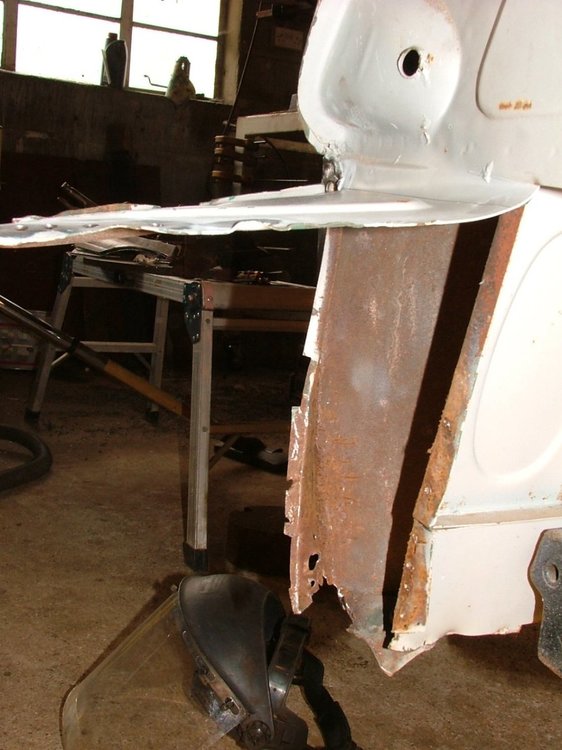
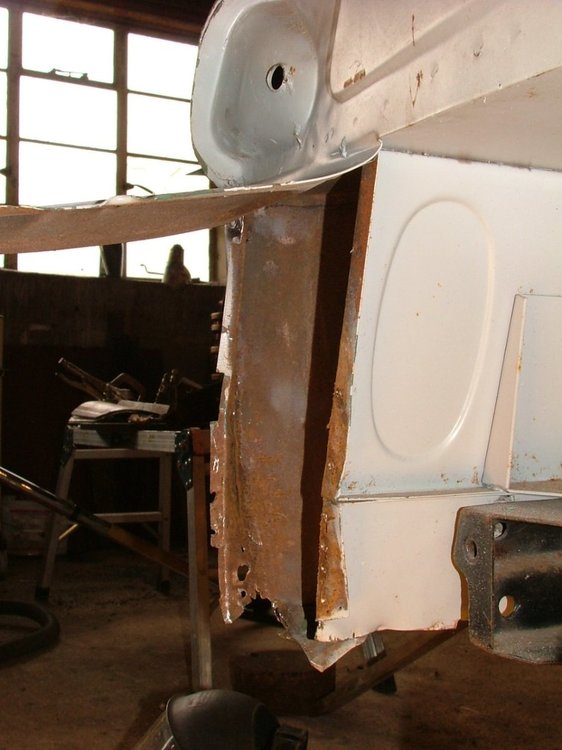
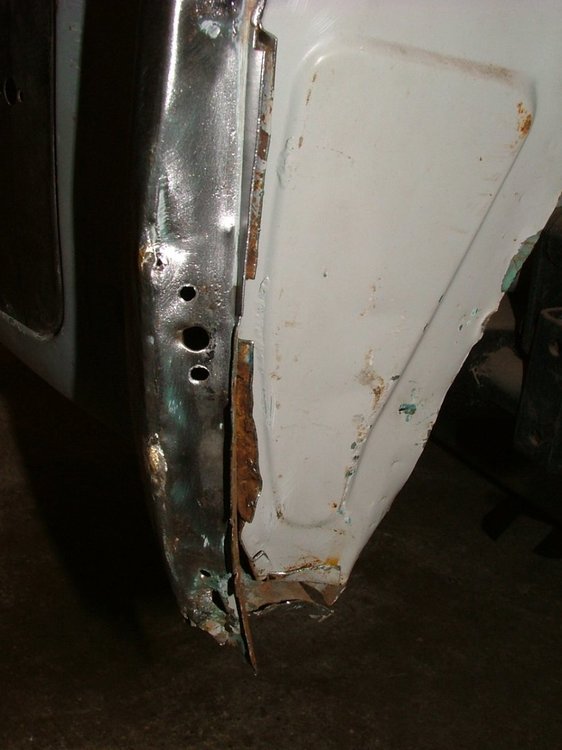
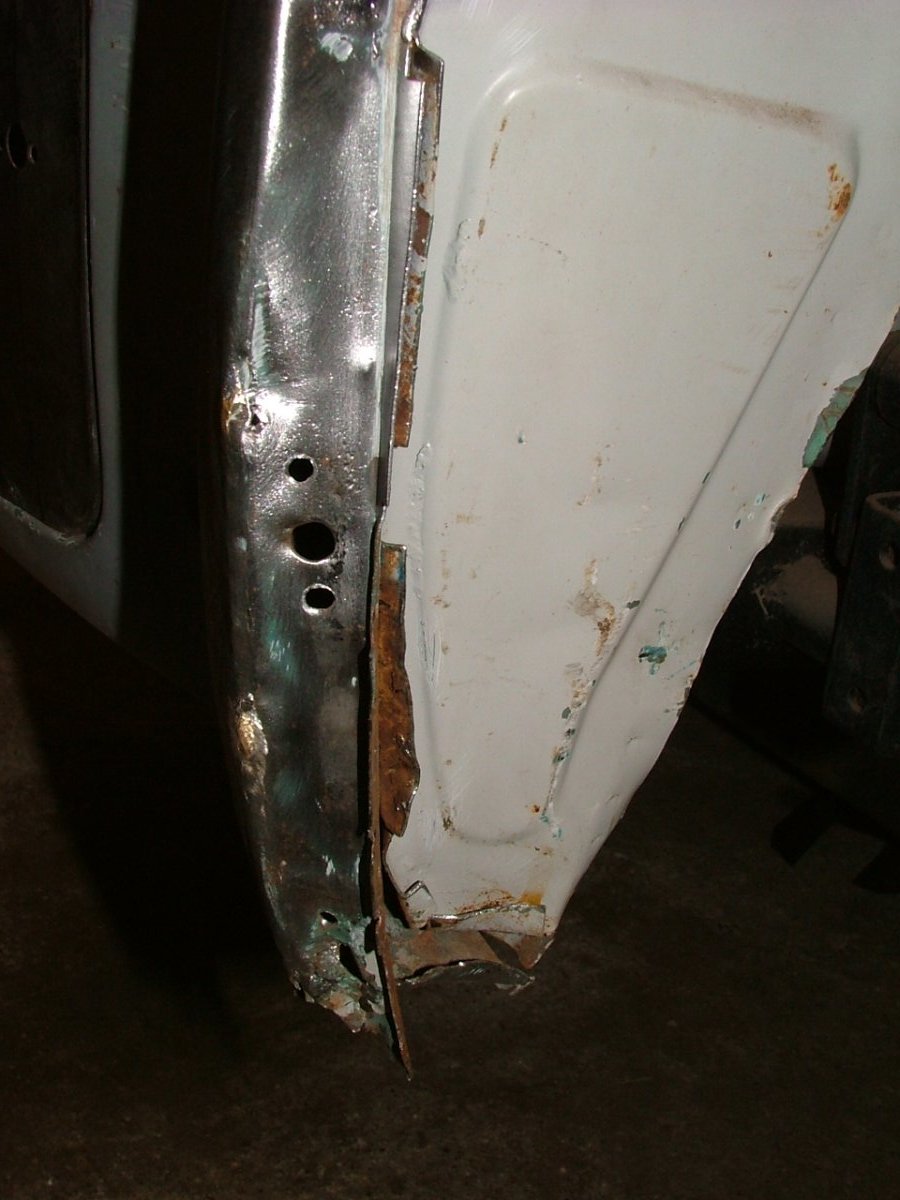
just add a few more, had to peel back the quarter closing panel to work the shape back into the end of the rear panel as you can see no problem with rust on my car just badly dented maybe it broke loose in the container in transit as all panels are dented in some way or another.

-
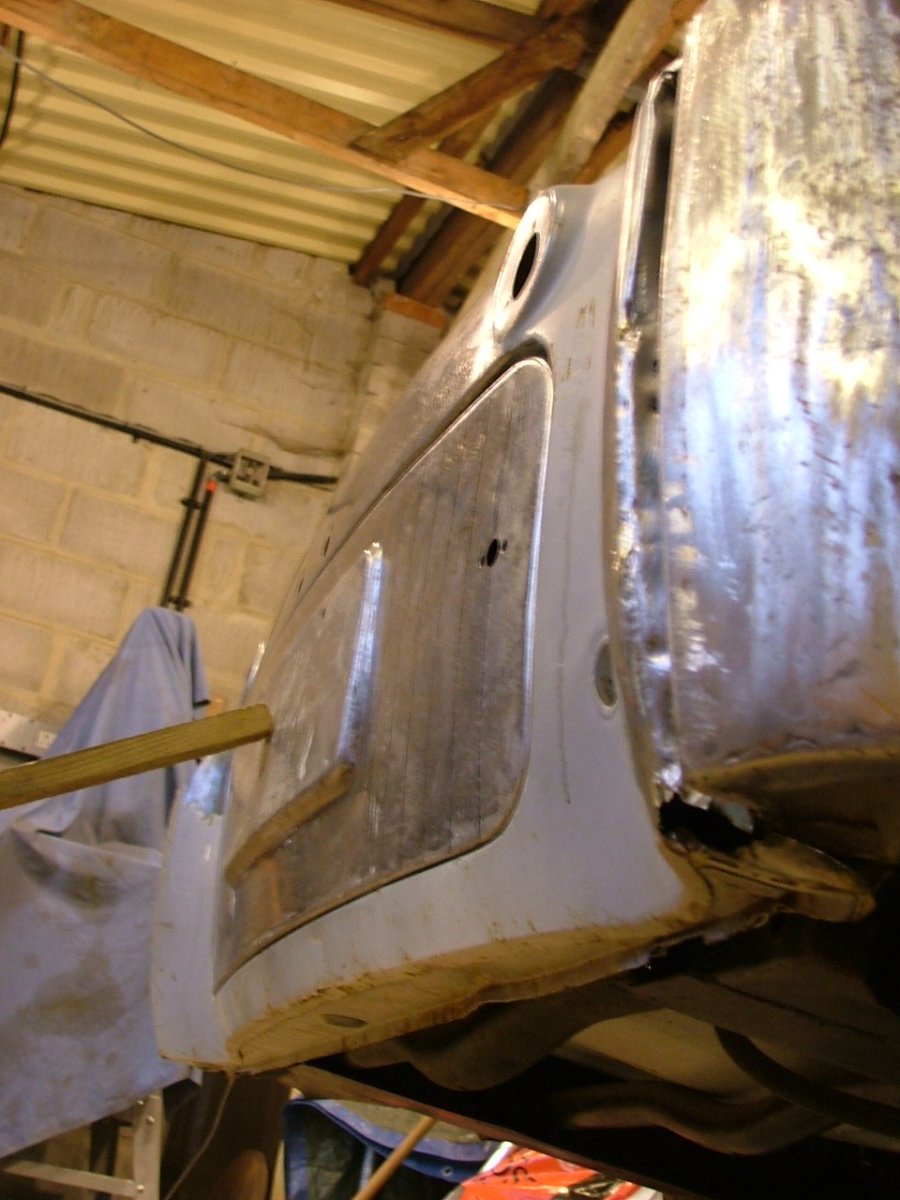
just taken a quick break from working upside down on the rear quarter real time, i am amazed at how badly the car was spot welded at the factory, most seem to just pop off, this is useful though as it saves mangling it to get it apart, looking at your car i don't know which would be the worst to work on badly rusted or solid but dented, at least on yours you can just cut a whole piece off and replace it though getting the parts to match will take some of effort plus the price just looking at a rear panel on ebay made my eyes water, i popped a pic or two below of the area i am on now, i do have more pic's on my camera for a few more before and after photos.
-
Hi, I'm working on the same area on my car at the moment and just had a look underneath and i can say 100% that it is the bottom one of your pictures with the flange ends going the opposite way to the main flange. just posted pictures the other day of the rear end work, luckily the car i am working on was from a dry salt free part of the USA so it's almost as good as the day it came out of the factory
-
Thank you for that Roger, i found a picture of a very cool looking tr3a on the internet all in white with wheel spats and a black hard top, to me it looked so 1930's art deco that i was inspired to copy it, it is the thought of how good it will look in my mind that that keeps me fired up and going on this restoration, so far i have completed one spat but need to finish the other but can only go at a snails pace due to a summer work load and the fact that i am also trying to be more methodical by working my way around the car one side at a time though sometimes it's almost impossible to stop getting all excited and doing a bit here and there in a scatter gun approach.
-
2 hours ago, Ian Vincent said:
Very nicely done.
Rgds Ian
Many Thanks, i try my best and agonise when it all goes wrong.
-
43 minutes ago, stuart said:
Very nice until you fit the rubber seal that is generally supplied, this is why I use a closed cell foam rubber strip instead, this is thin enough and soft enough for the panel to pull back into place and still be a good fit.
Stuart.
Yeh i recon you will be right about that and i may need to slim the flange on the cover down a bit, all things the factory didn't do due to time and the costs of fettling. a foam gasket will be much better than a harder rubber gasket.
-
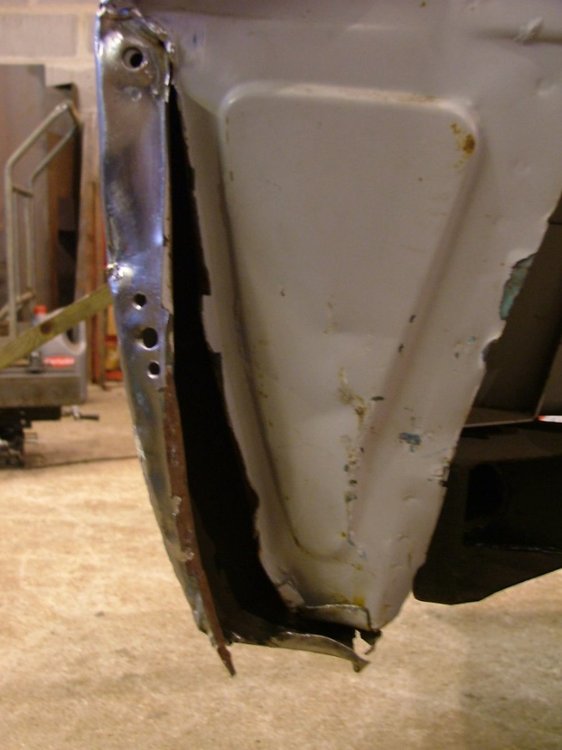
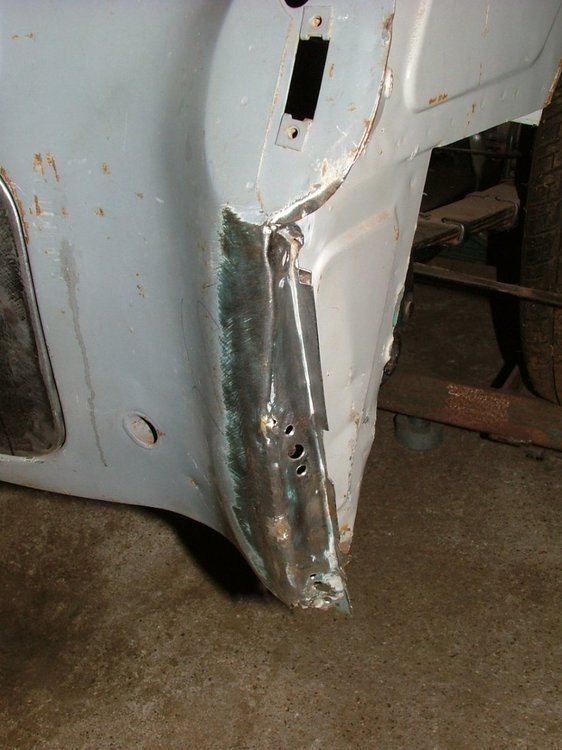
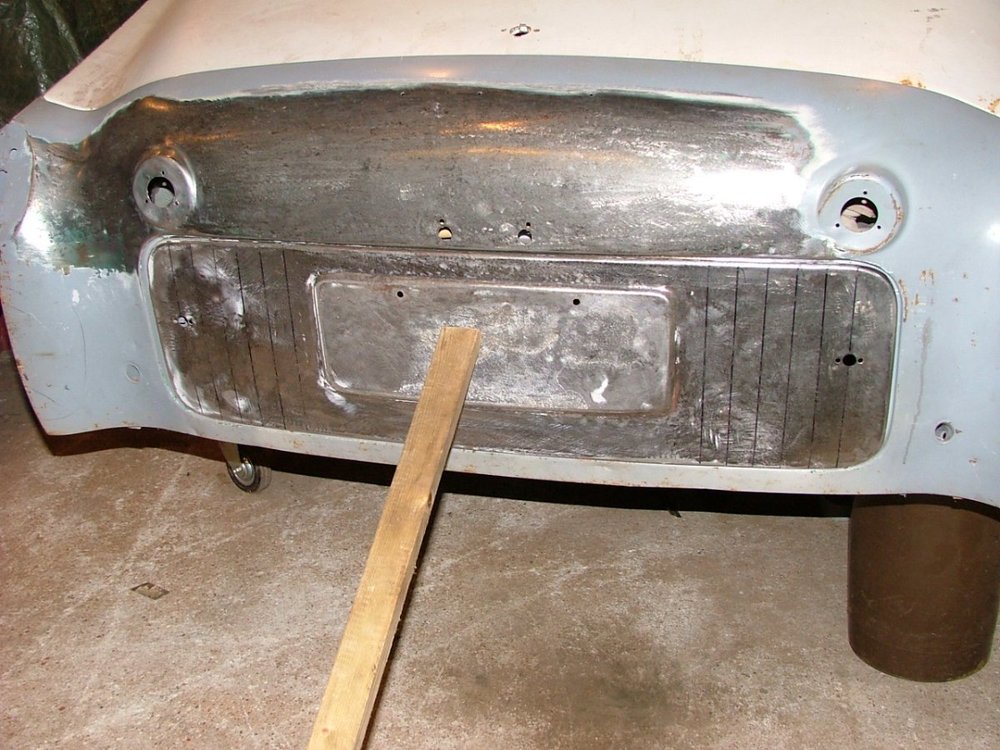
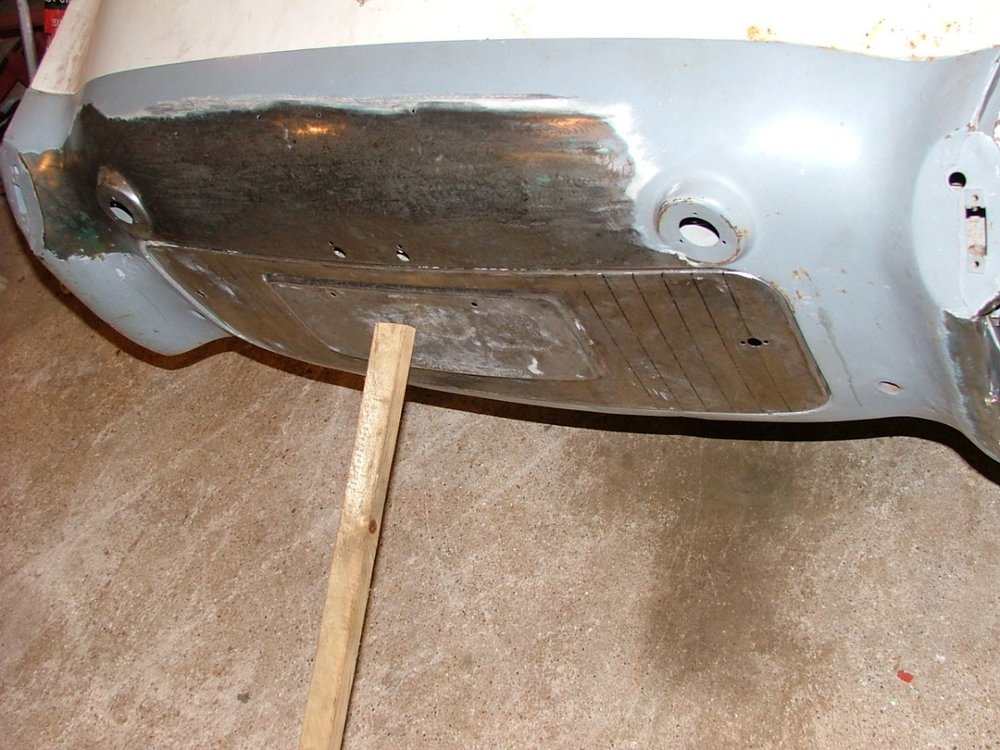
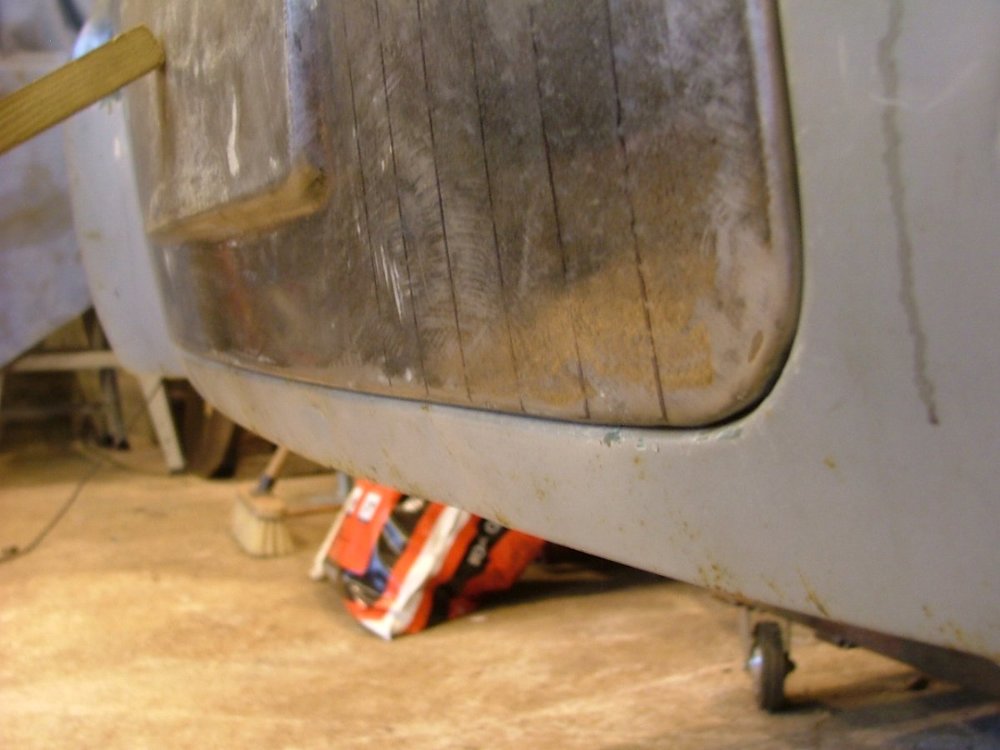
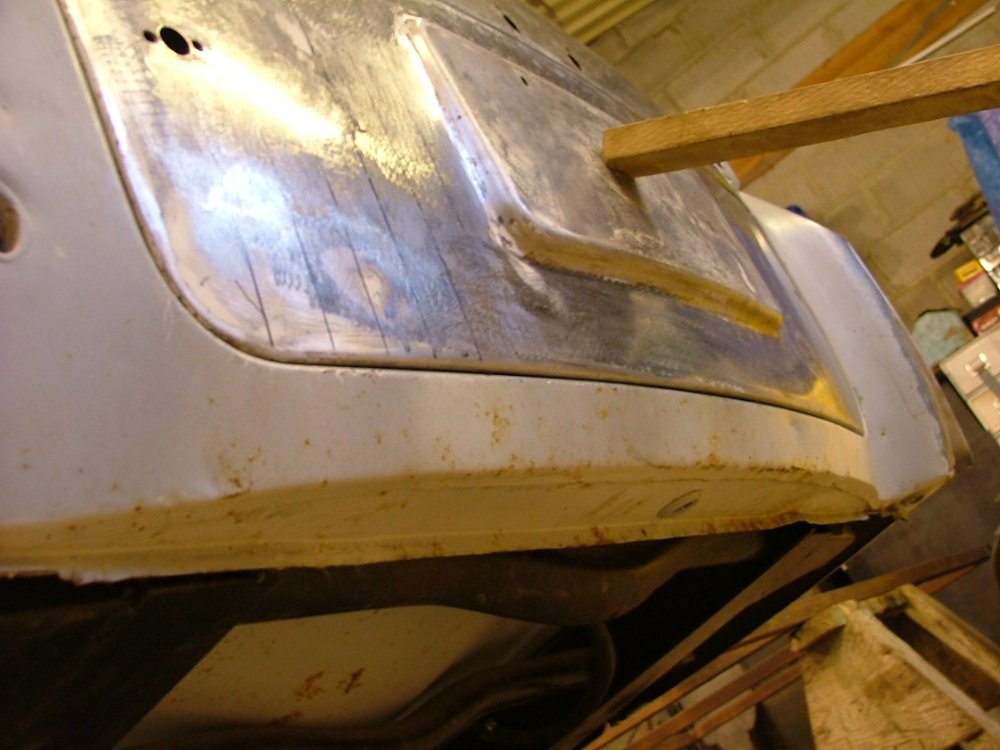
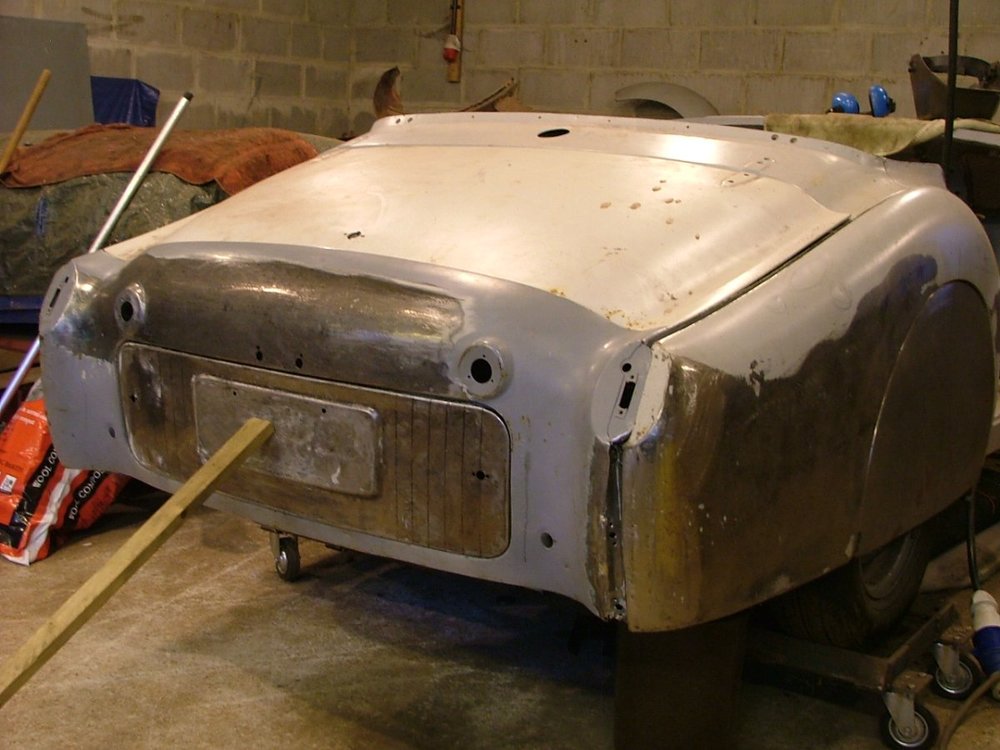
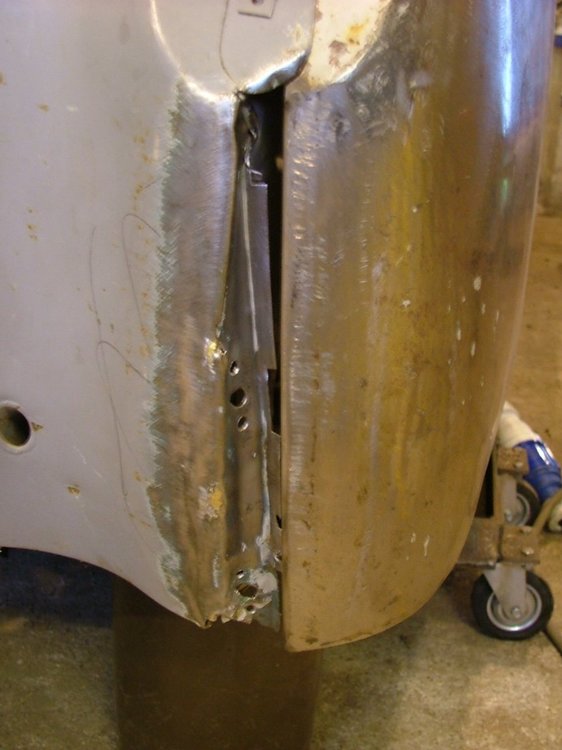
As promised here are a few pictures of the many i had taken on my camera, as usual i had to delete many due to an appalling lack of photography skills, ignore the wooden prop as i had to remove the tyre lid catch equipment on the inside so i could get to access to the inside to beat out all the dents, i think the pictures will show the cover matches the lines of the bodywork ok, a good result, i did have to use a shrinker on the edges to get that matching right, the last picture shows the point where the rear panel meets the wing this was also badly roughed up and i may have to remove the inner closing panel behind the wing to get enough access to beat it smooth again, hopefully i will have a bit of time this weekend and rectify that area, and i will post a pic when done, you will see that the area on the back panel above the tyre cover has also been sanded back, this had an inch deep dent the size of a grape fruit right in the middle of the panel that the previous owned had used lots of filler to hide, this meant i also had to remove the inner catch and strengthener in the boot to get enough access to hammer and dolly out that dent, lastly a quick final run over with an angle grinder shrinker stretcher to get rid of the dent, and will not now need any filler to finish, a good outcome i would say,

-
Thanks for the welcome, as to your question it's bit tricky as i am in Suffolk and i only do restoration as a weekend hobby and not as a business, and though i do like Lewes a lot and all of the south coast i will not be down that way in the foreseeable future. If my camera works tonight i will post a picture of area of the car i am working on if anyone is interested.
-
What a coincidence just finished working on that area this very weekend, just a one more dent on the rear o/s corner to finish, it ended up quite an easy area to work on in the end, had to do quite a bit of hammer and dolly work but it now looks as good as new, i also had the same problem with the spare wheel cover but a couple of hours panel beating and shrinker stretching the flanges sorted that one and it now matches the rear panel very well, like the others mentioned don't use an angle grinder as that is way to drastic and you may well end up needing a replacement if you do do it.


TR3 rear lower closing panel.
in TR2/3/3A/3B Forum
Posted
just had a look at mine, the tubes just poke through the hole 2 to 3 mm and then they have a weld all around the tube, looking at your picture it looks like you have yours just about right, you just need a bit of weld to finish off, by the way quite a few of the closing panels on my car do not match very well with quite large gaps, some worker at the factory even used the spot welder on them even though the panels did not pinch together leaving them un-welded and open to the weather, a very strange quality of workmanship.