


R.M.
-
Content Count
160 -
Joined
-
Last visited
Content Type
Profiles
Forums
Calendar
Posts posted by R.M.
-
-
yes i would like to think i can't kink it any worse but you never know, i have good days and bad days
-
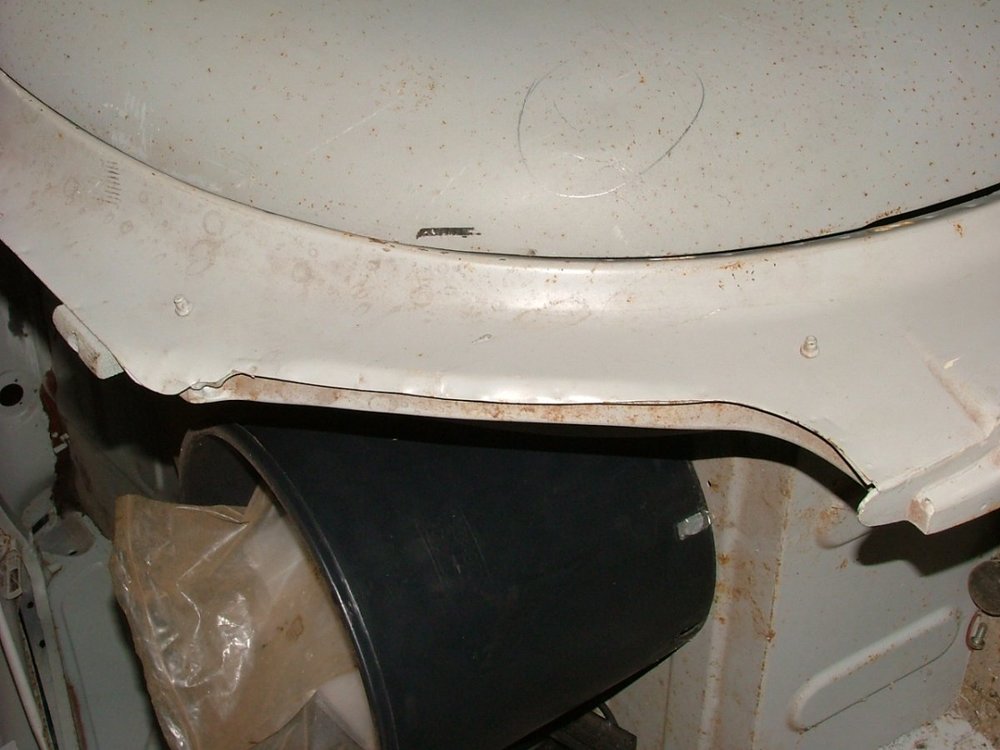
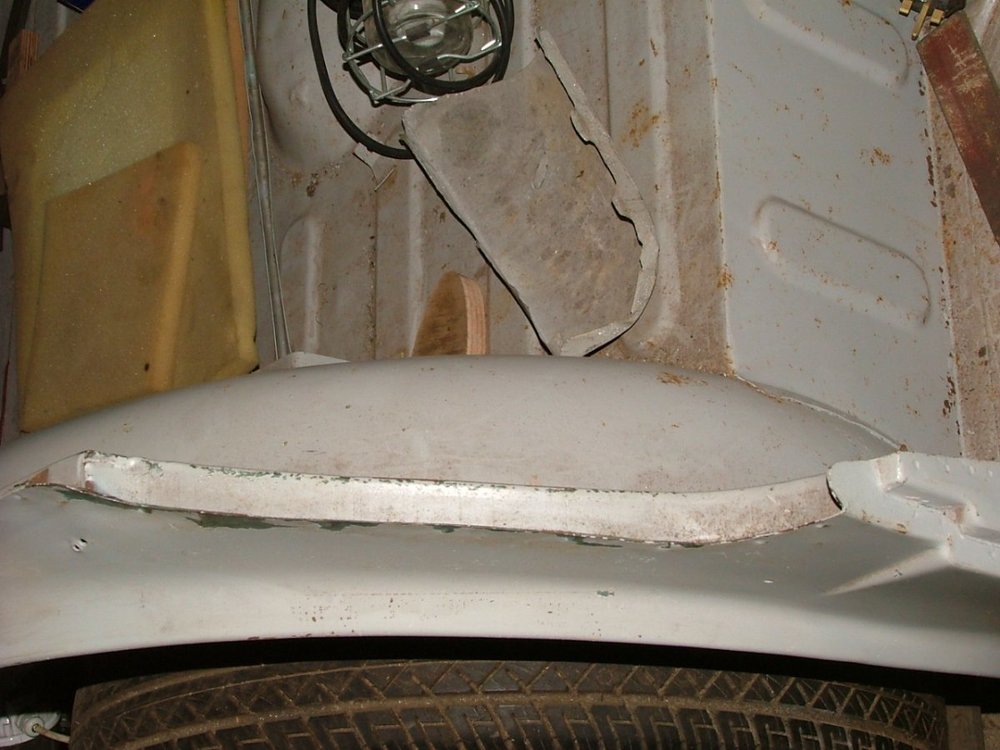
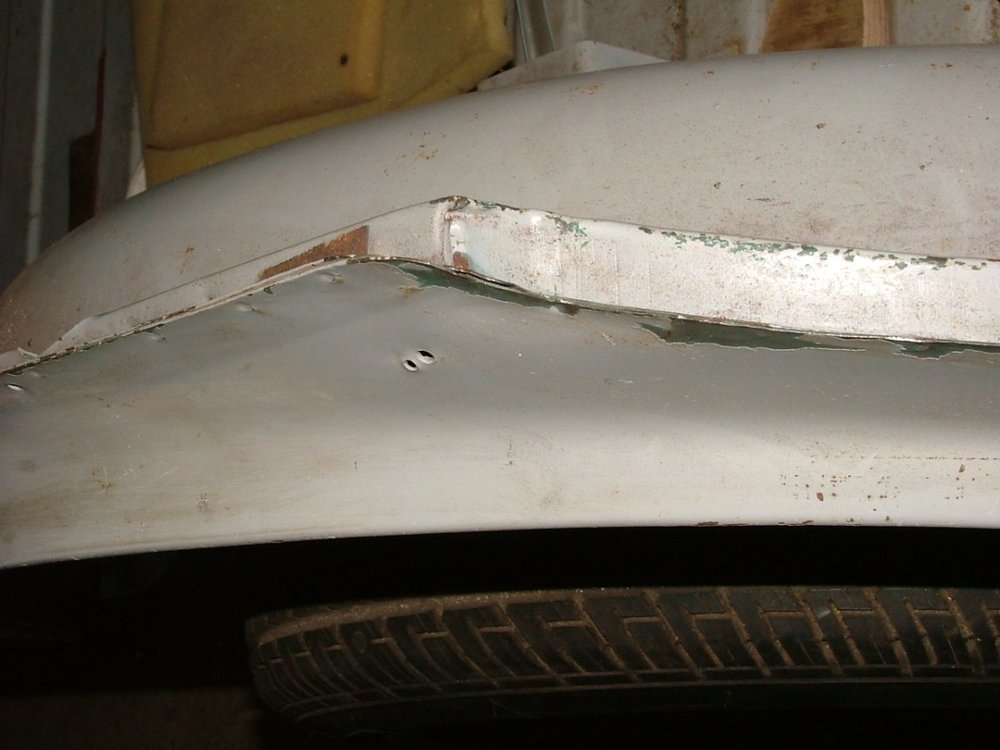
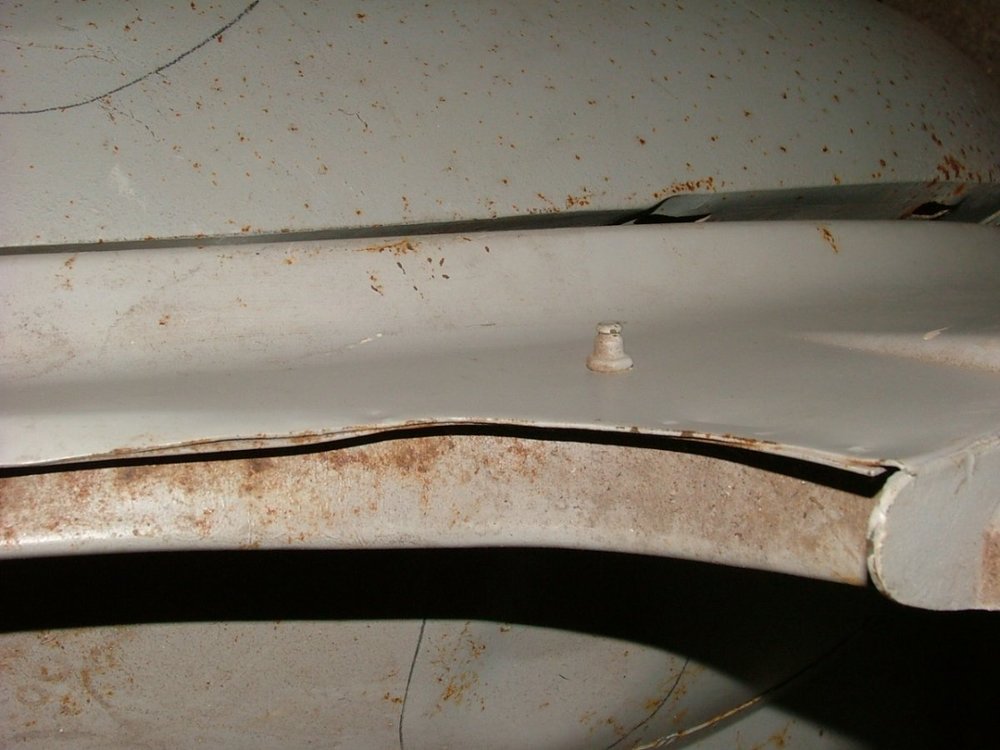
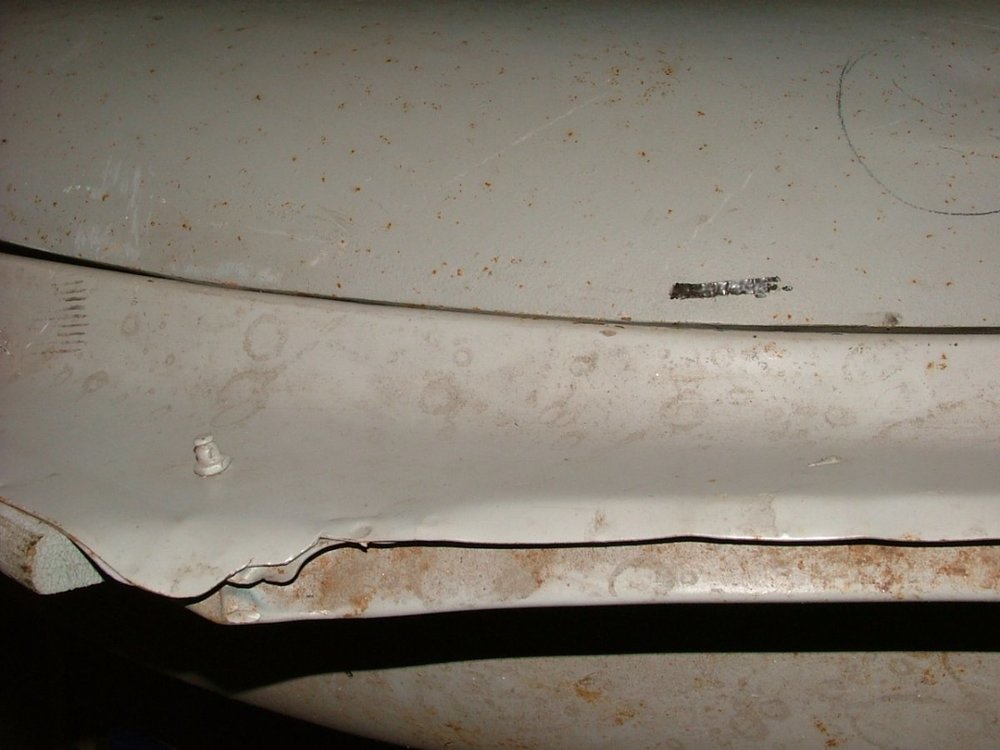
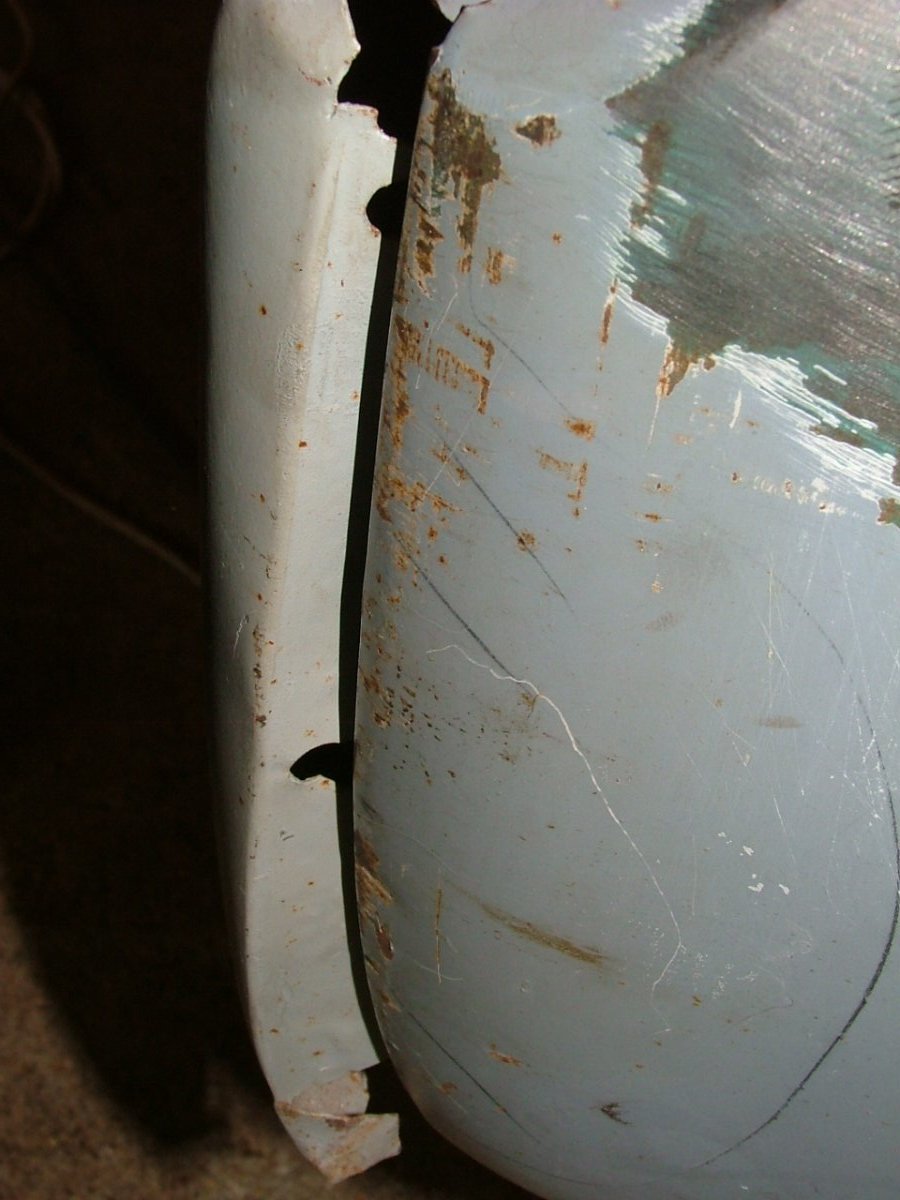
a couple of pictures to show the kink i mentioned, something seems to have sat on my lid at one point, ouch


-
for my sins in the past i was a delivery driver, i used to pick up crates of goods bound for moss Europe from different warehouses in Felixstowe docks, most of the goods they brought in from china and from what i was told by many a customer i delivered to was how hard it is for the Chinese to grasp the simple task of making the parts correctly to start with. i kid you not.
-
i think you are referring to my car in the grey primer, the problem i have with the boot lid is a kink in the panel where the hinge is located making the lid sit a bit higher, to correct this i will need to remove the pressings/strengtheners on the underside of the lid so i can correct the kink, just one of the many bad dents and kinks my car received before i purchased it, ( i think it may have broken loose in a container during transport ) the previous owner had included in the sale a list of all the replacement panels, and in his opinion the car needed all four wings replacing, i know the importance of keeping the originals on a tr3 as they always fit better than replacements panels so i will be repairing these originals, despite the dents they are still very usable. i will post some before and after pictures in future.
-
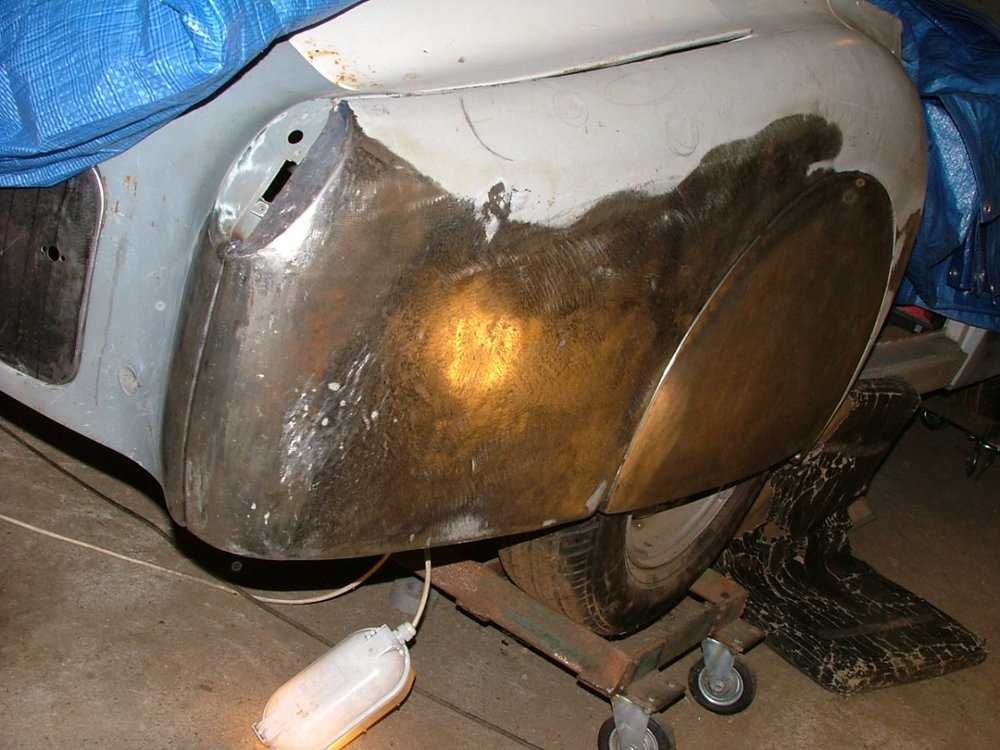
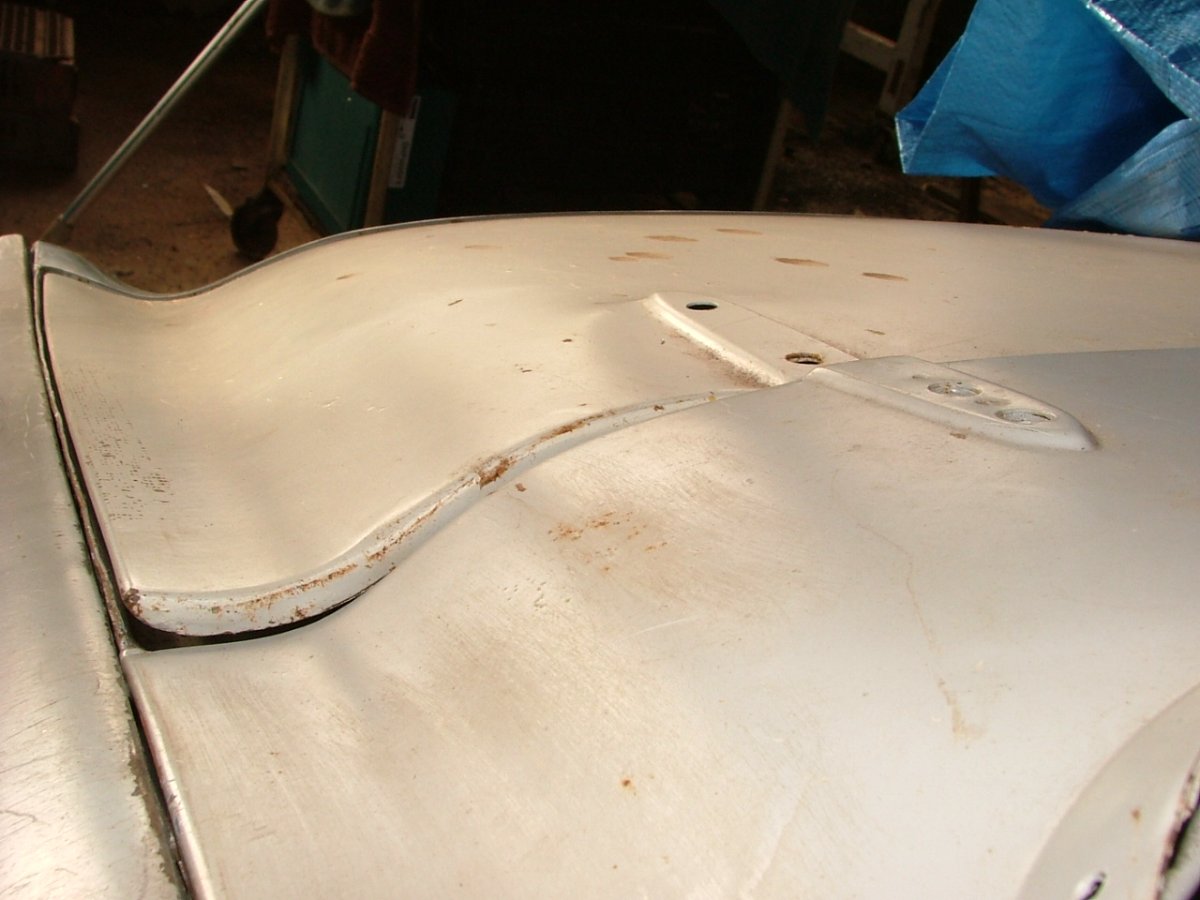
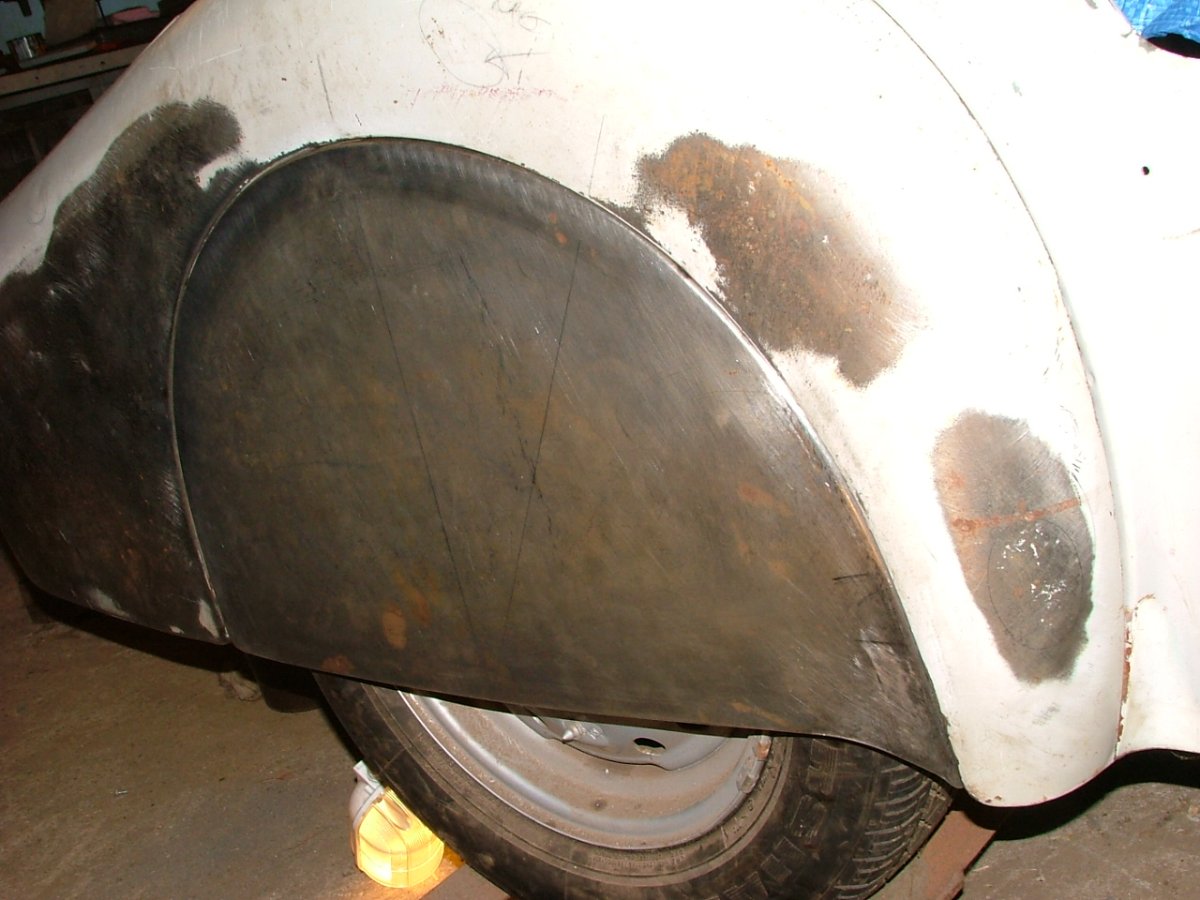
valid point, yes a slight dip but not too much of one, I have pretty much finished tinkering on the O/S rear wing and have included a few of pictures to show finished workings and will now need to get on with the N/S rear wing fortunately not as badly dented as the O/S, i will post pictures of the N/S wing to show the dents before and after, i think i will also need to blast clean and prime the finished O/S wing as i had to sand much of the primer off just to get the dents out, so now i have a little surface rust strangely though no rust on the area where the dents where polishing out, i may have polished so much that the rust cant get a hold now. Though the only problem with blast cleaning is i don't have a blast cabinet so i will have to spend the next couple of weeks spare time just building one, i may just bore you with pictures of that project as well, be warned.
.thumb.JPG.1f3e91df8c0442265106350ba33a97b2.JPG)
.thumb.JPG.dbc84e5b32f76479b3cf9797190a641f.JPG)

-
bravo, looks like you have a very good fit on all your panels now, and a good looking panel fit on the front repair panel too, good job you persisted and did not get a replacement as someone had suggested doing on the forum. if you have a shrinker stretcher that will take out the dip in the top of the O/S wing.
-
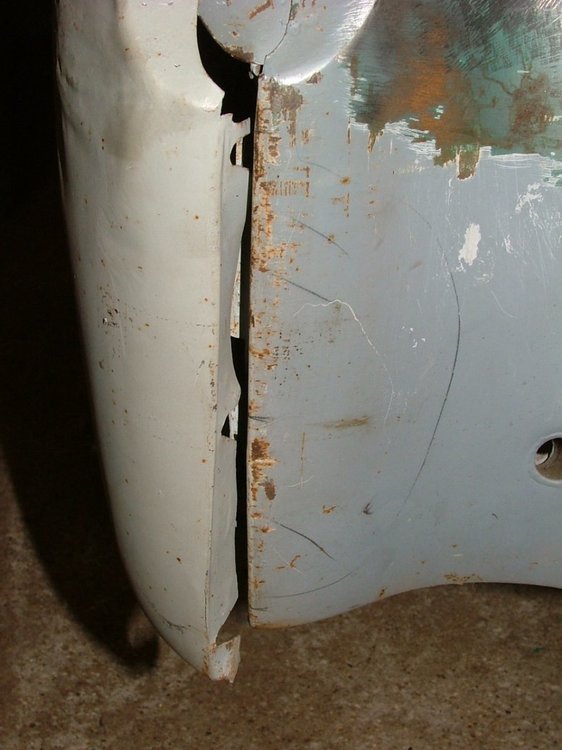
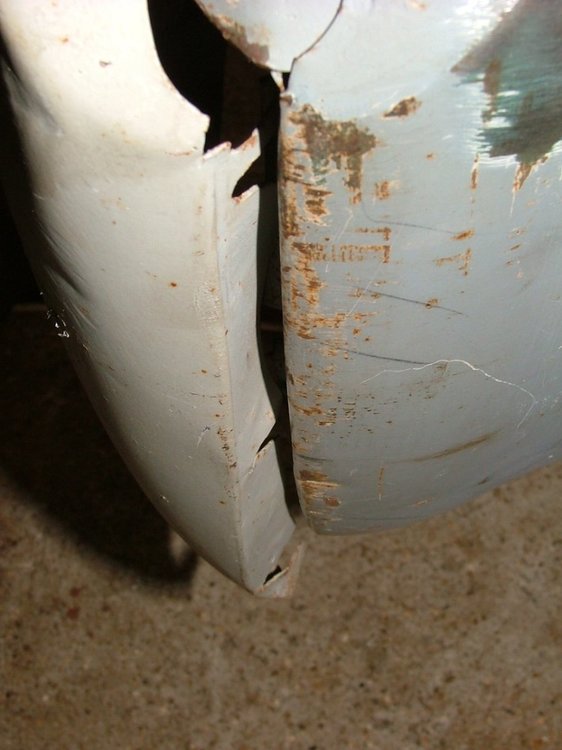
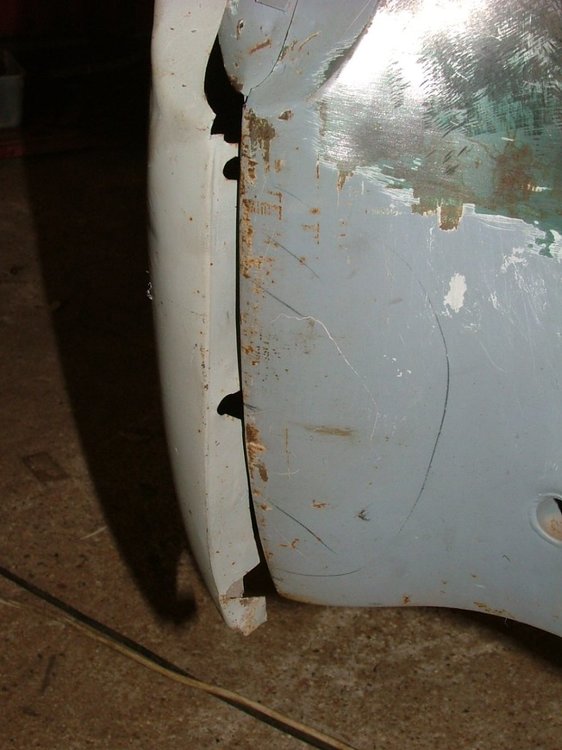
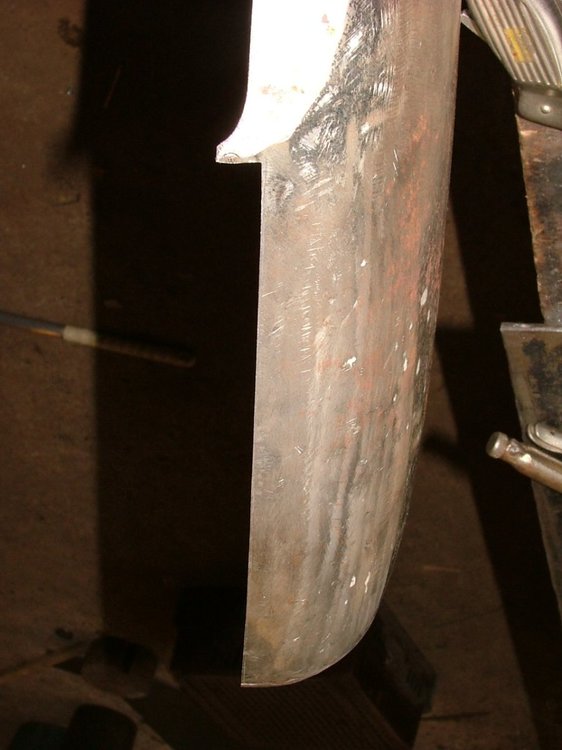
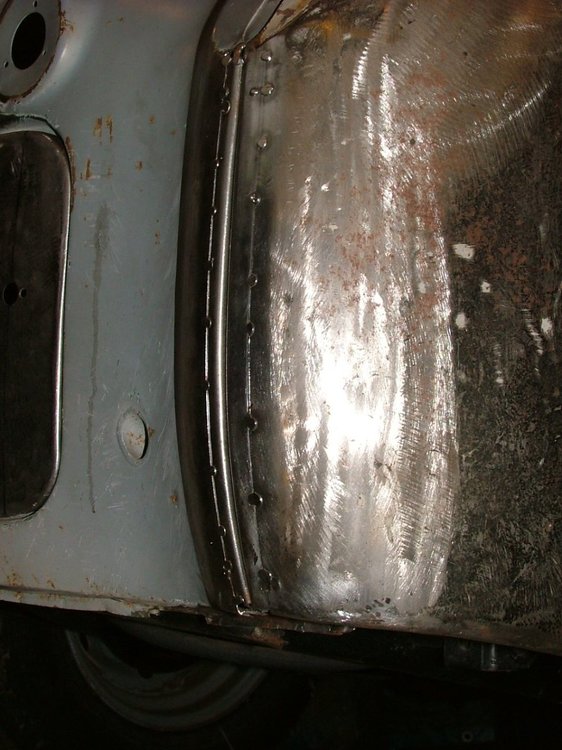
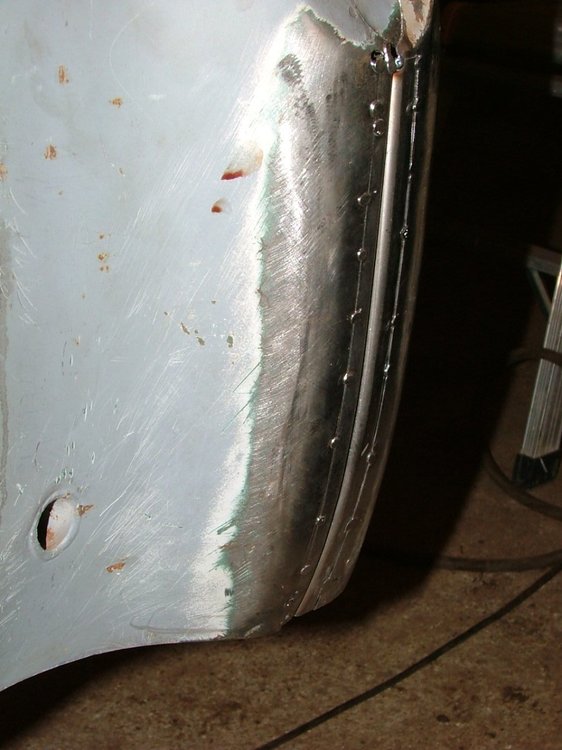
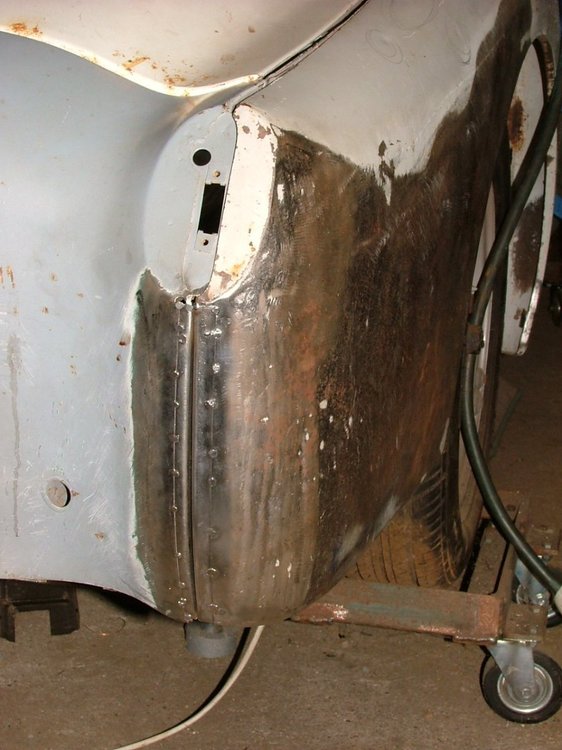
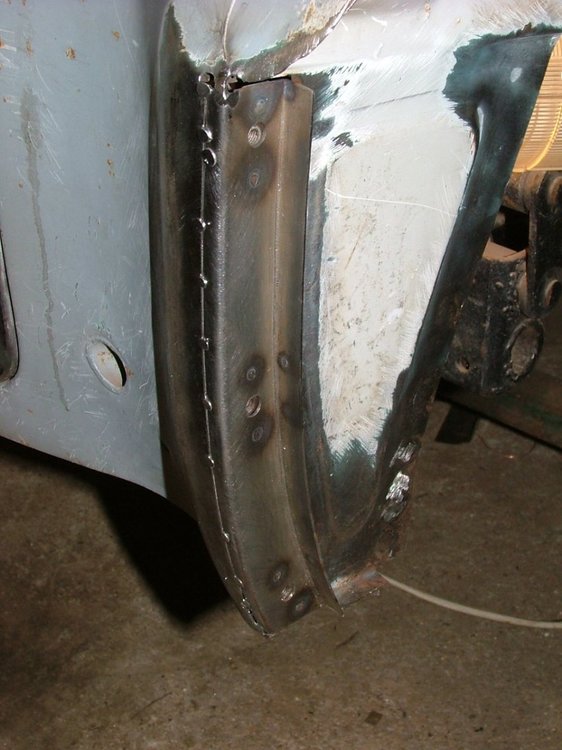
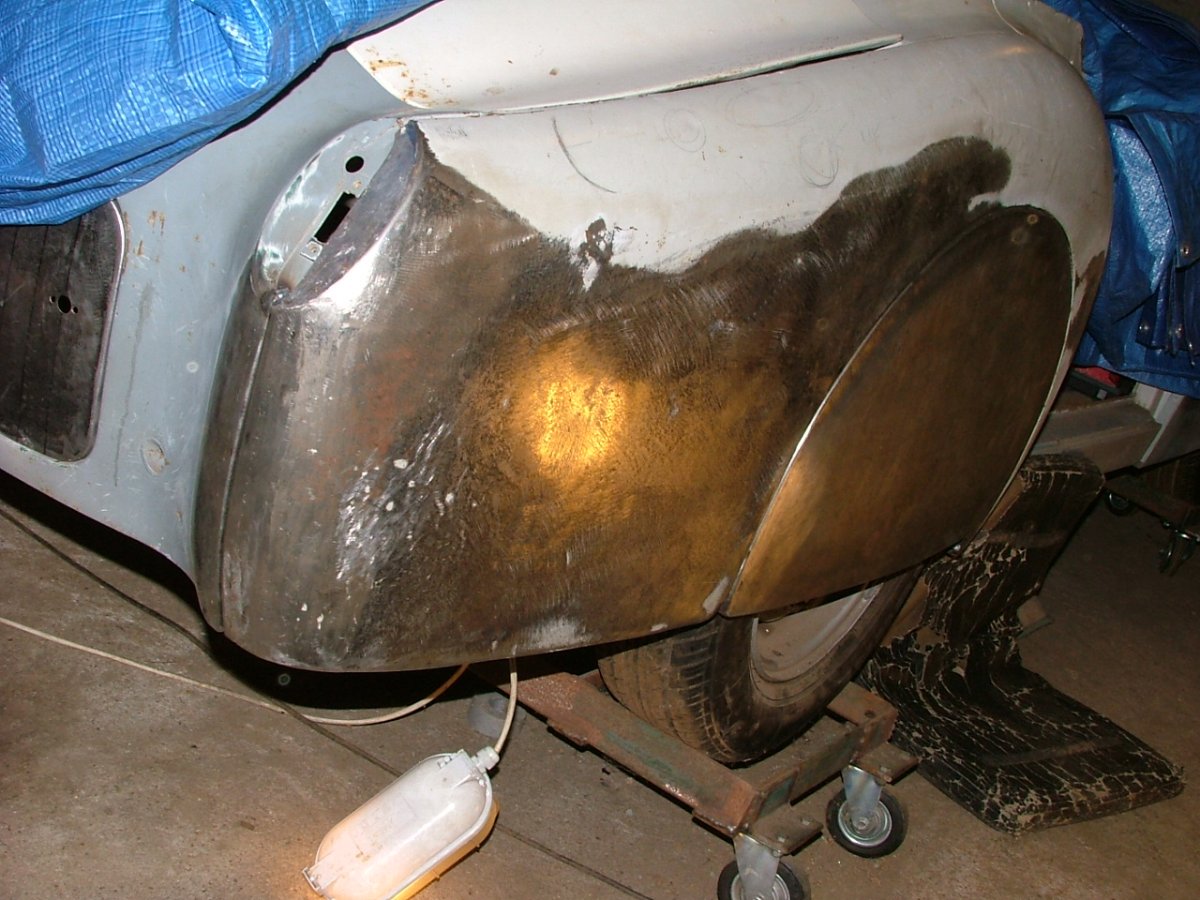
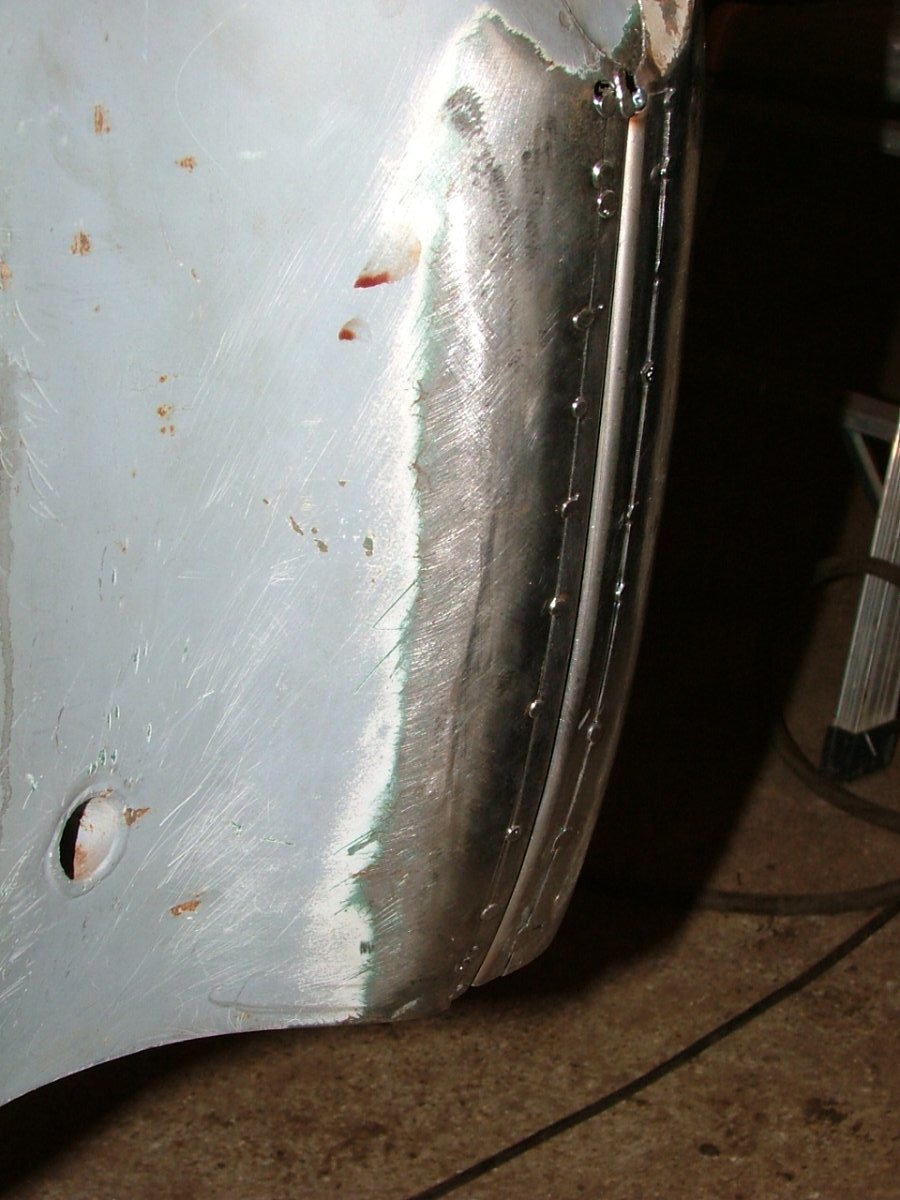
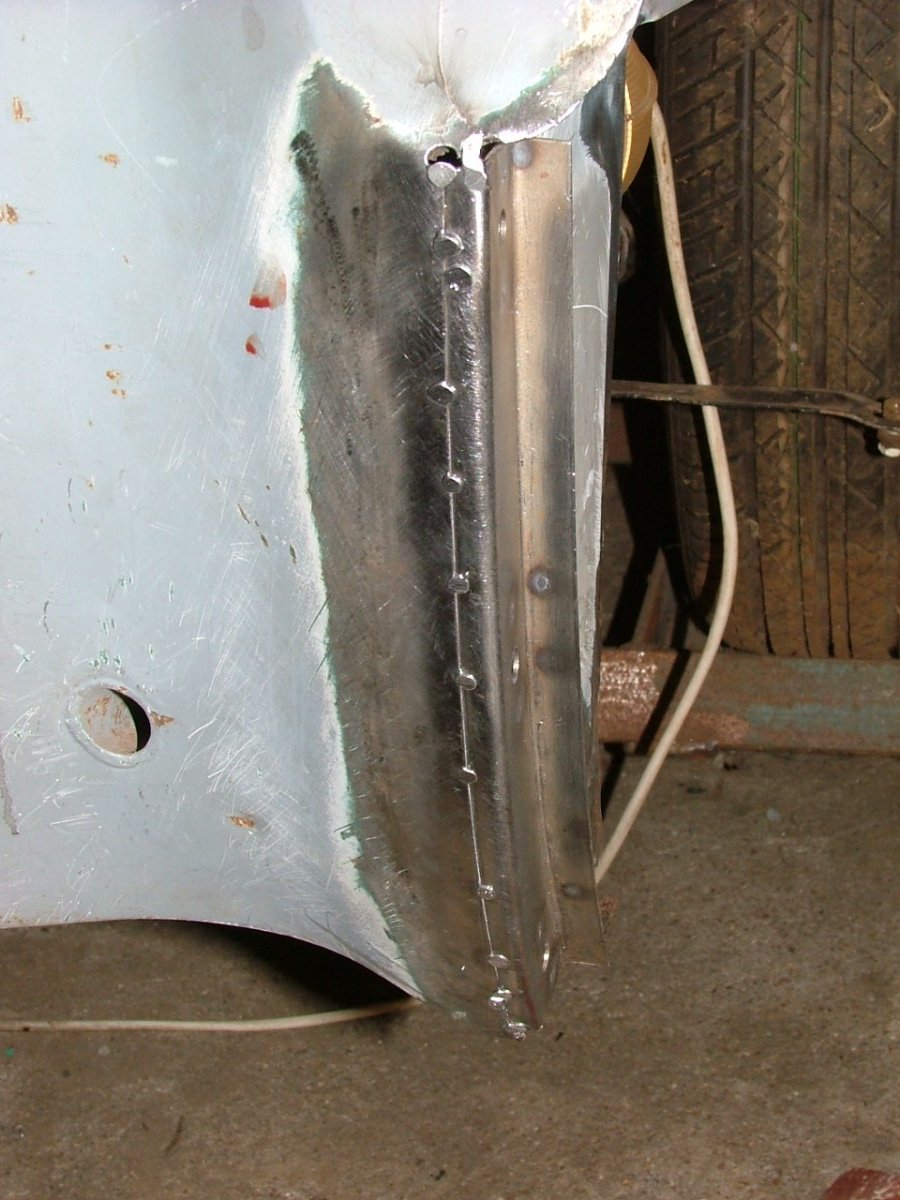
wow you get four pictures of the N/S, this as i have mentioned is how much the rear wing has sprung out, when replacing the flange on the O/S i did make sure i included a flange on the bottom so it welded to the flange on the bottom of the wing to hopefully lock it in place and make sure it does not happen again.

-
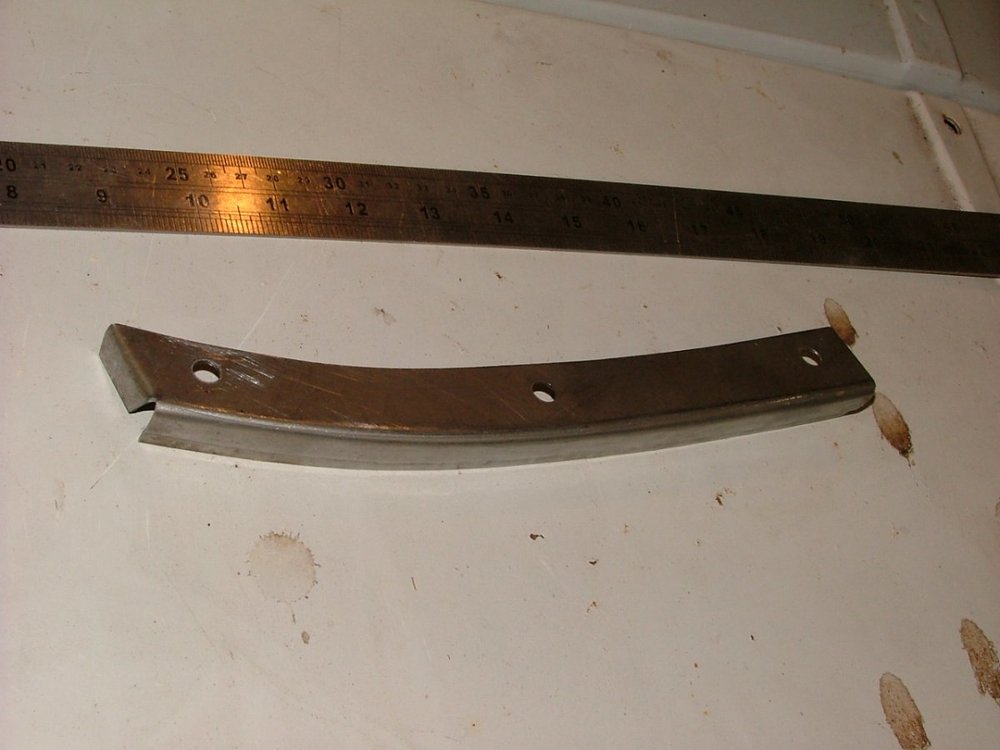
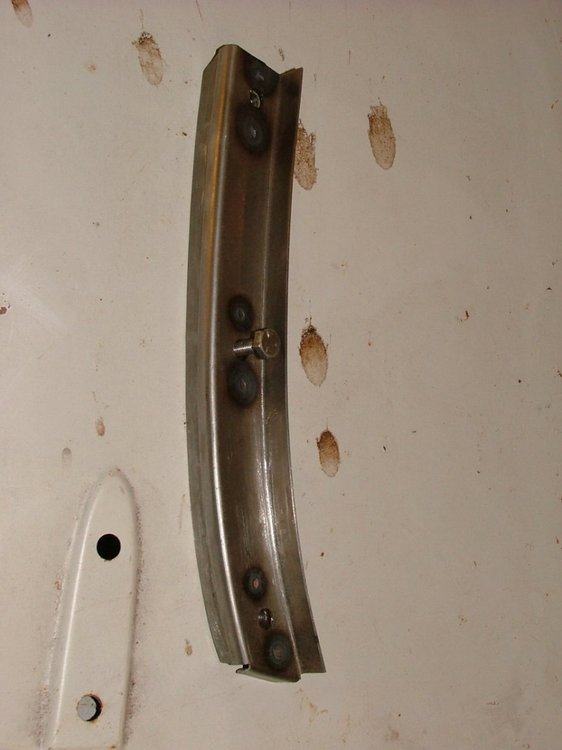
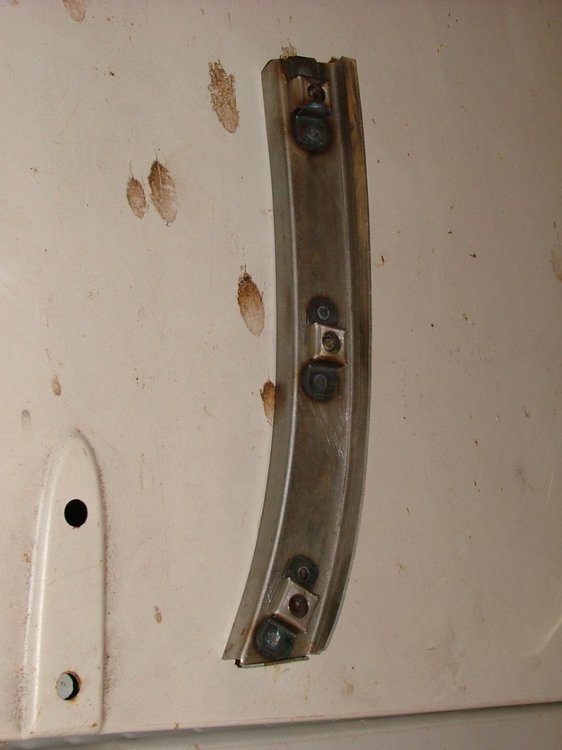
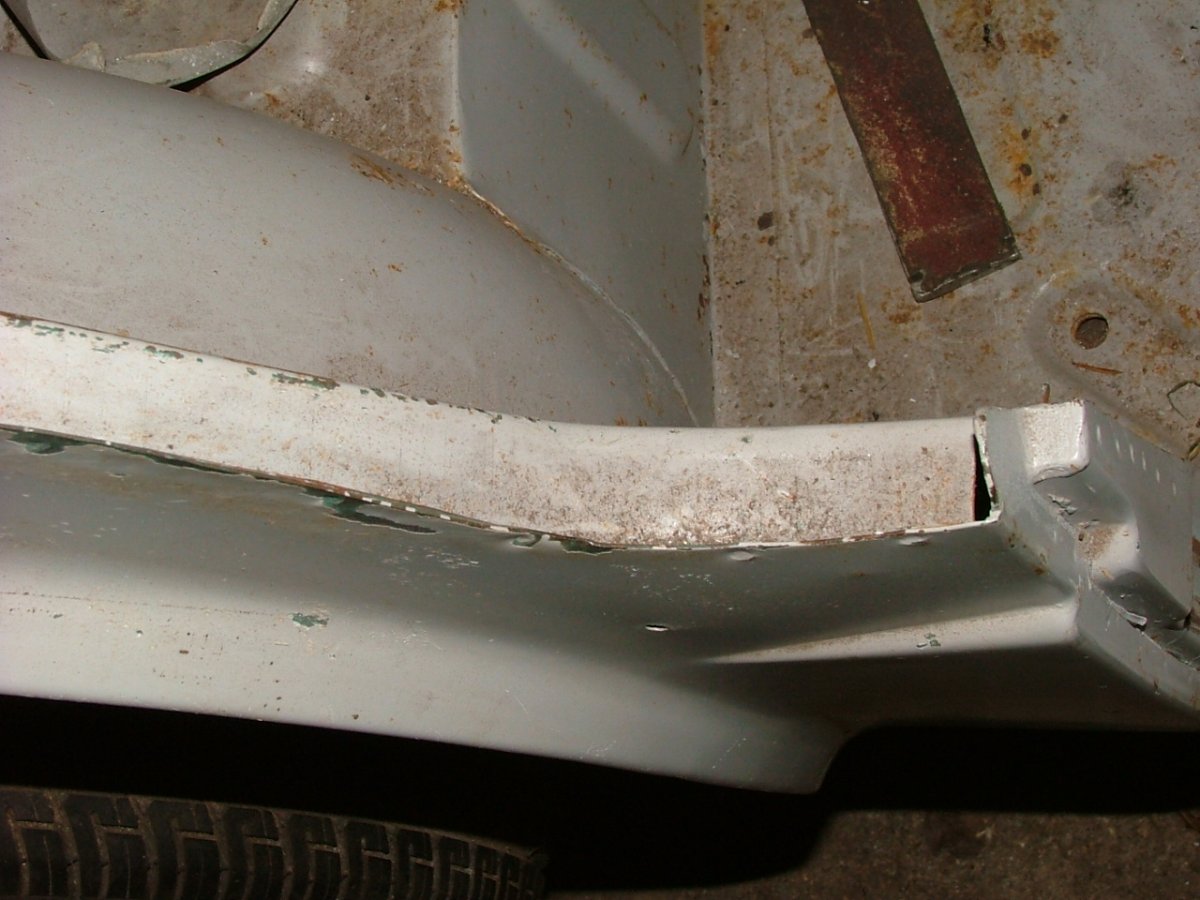
yes i had the same problem, the rear wing was sprung out at the bottom there it meets the rear valance in fact both are the same i have done the same as you by cutting off the flange and welding a new one on and reshaping to fit the valance. the wing mounting bracket is bolted to the chassis frame and the hole to hole measurement is 20.7mm centre to centre i will post a picture to show how far the other wing is out as i have only done the one so far.
-
a bit hard to know how to proceed without a look at the car, it does depend how much you need to do on how bad it is, it would be good to post a picture or two to know how bad it is, can you do that, if the car is very bad then sometimes it is best to dismantle completely and start again and this can sometimes be easier than cutting out and repairing a large quantity of the car, looking at the tr2/3 they look quite easy to do that to and they have quite low accuracy tolerances judging by my one and that is a post TS60000 and those are supposed to be better made and more accurate than the early cars, some of the panels do not match from one side to another, i have restored a frogeye that was so badly rusted that in the end i just had to cut it in half and rebuild the two halves then weld them back onto a new floor pan and sills, it can be done with a bit of time, also taking measurements of other cars can often lead to despair as they do differ.
-
17 minutes ago, Phil Read said:
Thanks for the comments. Your photos confirm the n/s is right and this is what the panel I took off was like. I will modify the panel to that it can be spot welded on. As you say there is a trim which hides this joint.
The panel I took off had a simple right angle and was seam welded into the other angle, I will trim this panel and do the same.
Thanks Guys a big help.
Your welcome.
-
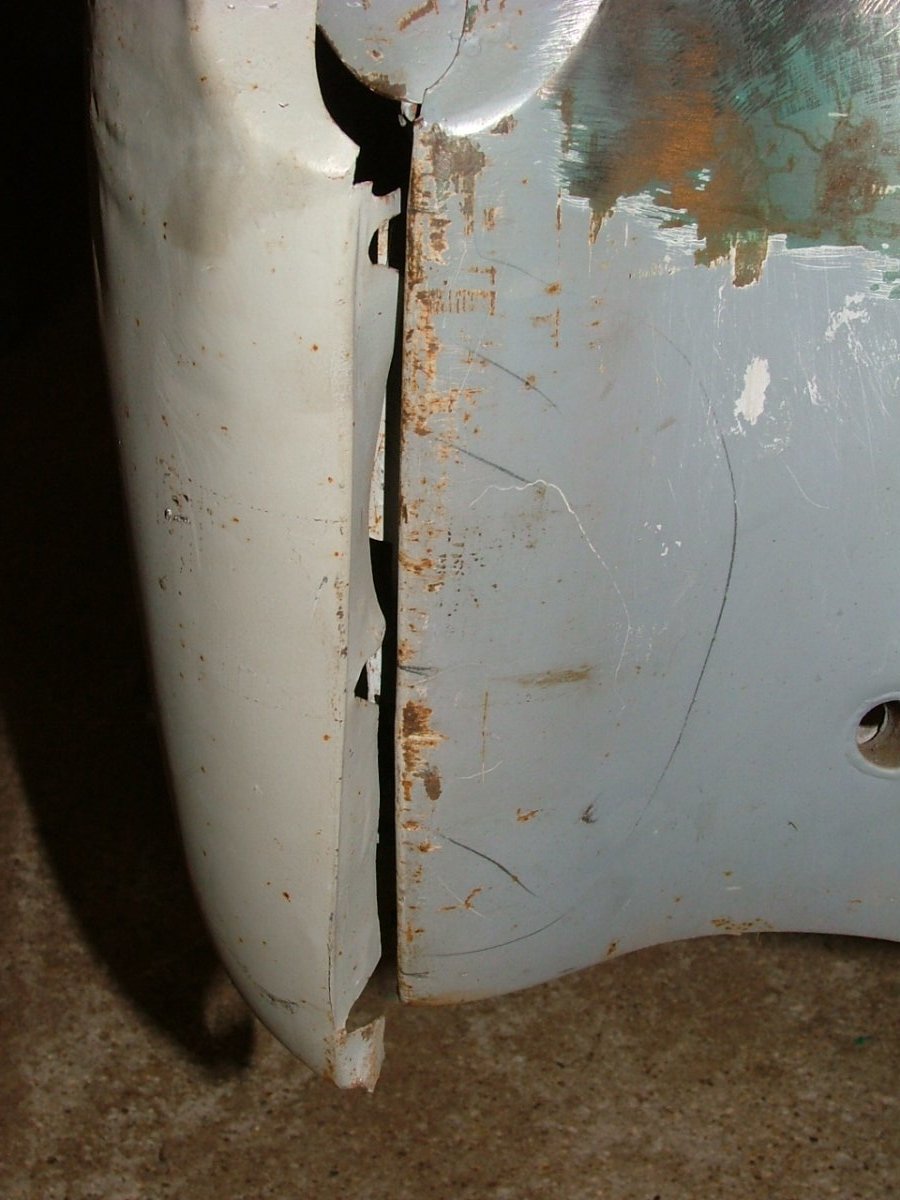
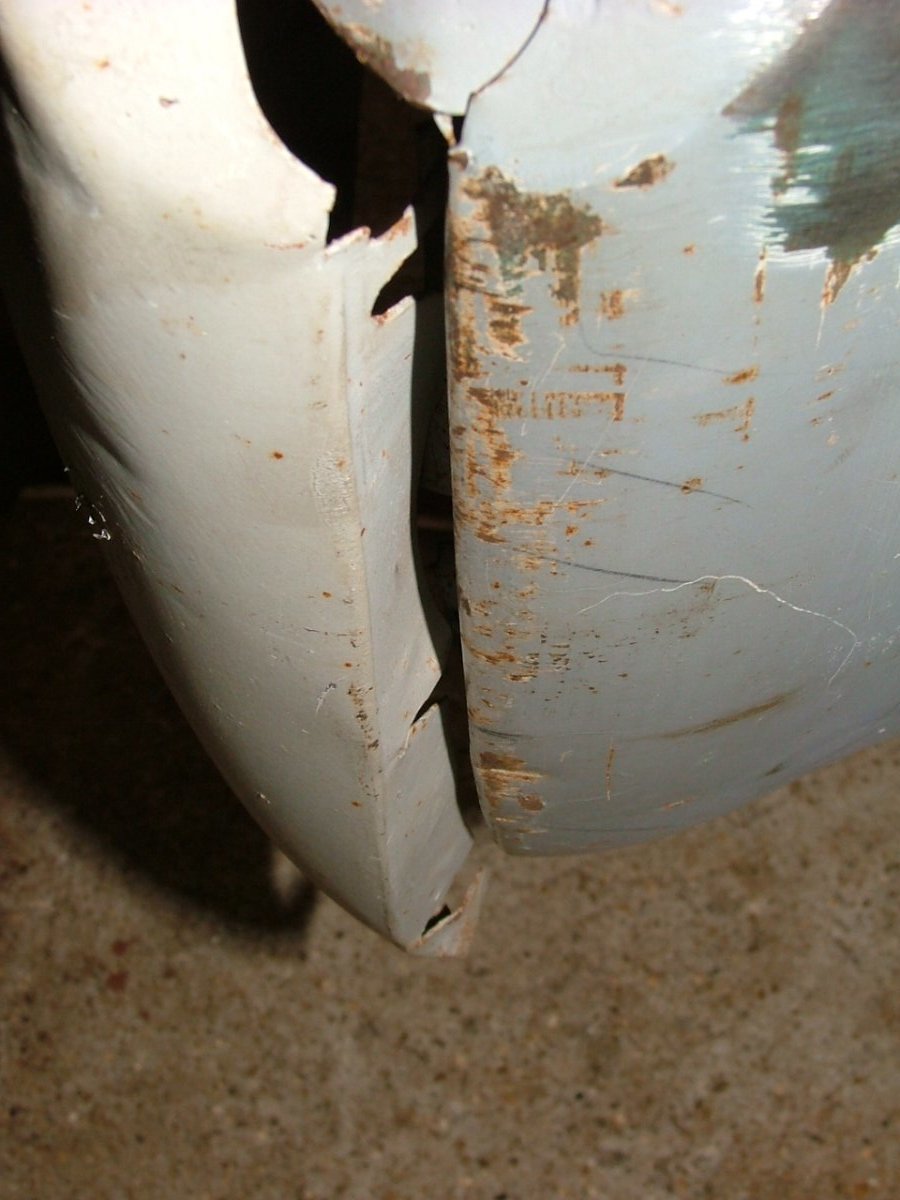
not sure if this will help but both sides are different as i mentioned i have hammered the O/S flat.


-
ditch the curve and hammer it flat, i will send a photo of mine, bear in mind my one is post TS60000 but i don't think it's much different.
-
i also think the reason the top part is bent at an angle is the same one that was on my car namely because i think the elbow capping piece that you fit to finish off the trim will not fit due to the panel sitting to high so at the factory they hammered it over, needless to say i hammered mine flat again.
-
looks like the top of the replacement part is bent over it should be flat then spot weld to the inner piece, other wise it kinda looks right, you may need to add steel to the top of the panel as it kinda looks a bit short at the elbow capping point above the door, would it help if i send you a picture of the same area on my car.
-
8 hours ago, Hamish said:
Agreed but it took me ages to find the right weight of brick to keep the throttle pedal at 70mph. Modern bricks must be lighter.

and i am sure you can also use the breezeblock cruse control on a rope as a most excellent parking brake once chucked overboard. you wag.
-
On 11/1/2020 at 5:01 PM, Colin916 said:
Great effort. Just about to start mine. After seeing yours, I won't be posting any pictures!!!
join in, the more the merrier.
-
looking good, great progress, here's wishing your wings fit perfectly. looks like you also need a bucket of cleco clamps.
-
7 sounds good to me, i like the idea of mixing modern with the old, little things like a cruse control are a delight.
-
well it was the amount of O/D problems i keep reading about that puts me off the idea of using one, it seems far more problem free just upgrading to the use of an ordinary modern 5 speed gearbox rather than all the O/D tinkering and fettling that i have read about on the forum, i think i would rather not have O/D on any gearbox but would like the modern useableness that a five speed has, if you see what i am on about
-
on the same topic and just of interest to me, are there any 5 speed gearbox conversions out there rather than using a period overdrive gearbox, mine is non overdrive mainly due to the car being an export car so would like to know what is available in the way of choices.
-
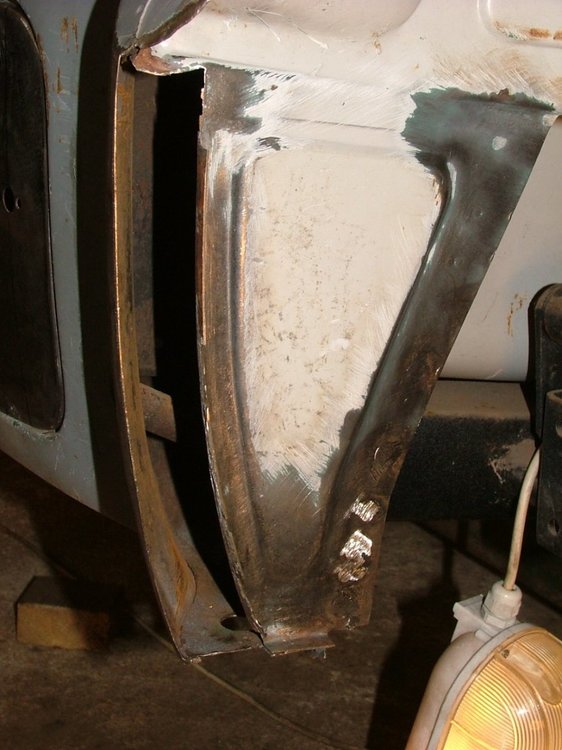
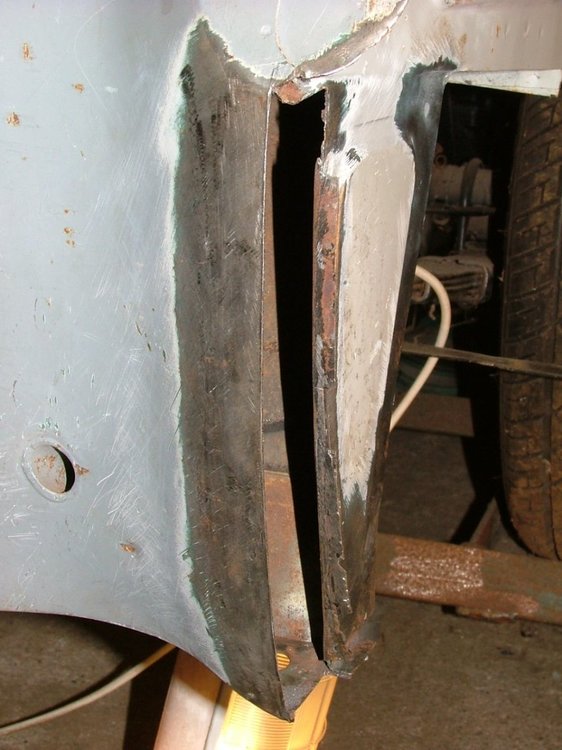
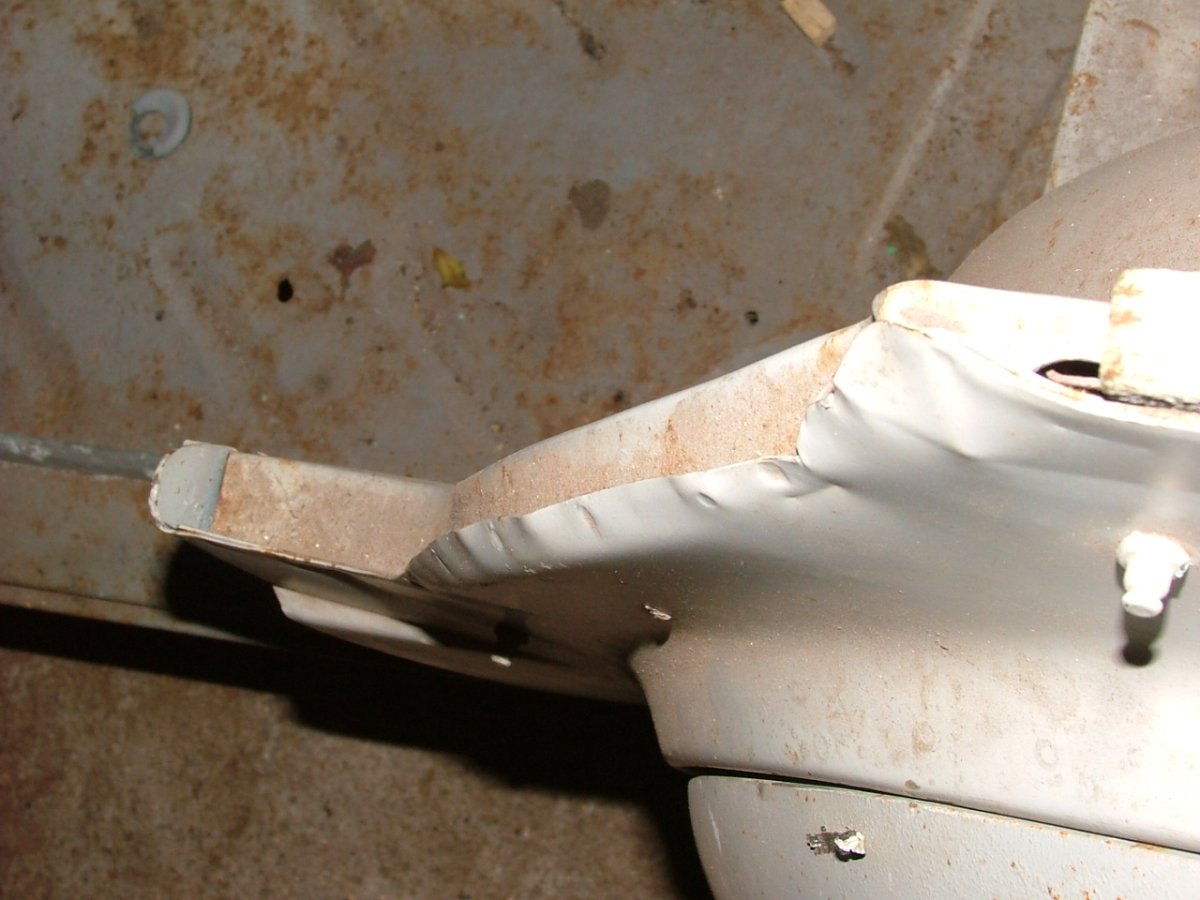
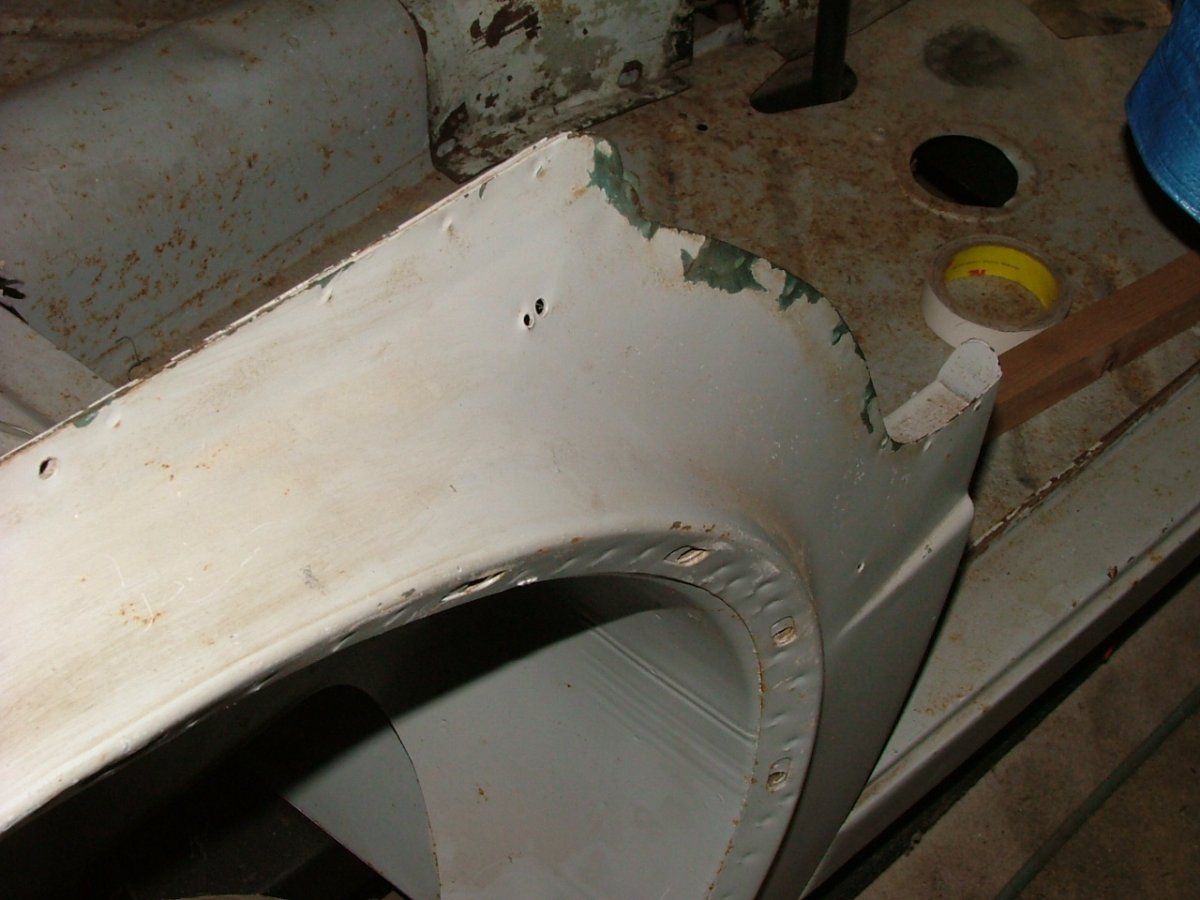
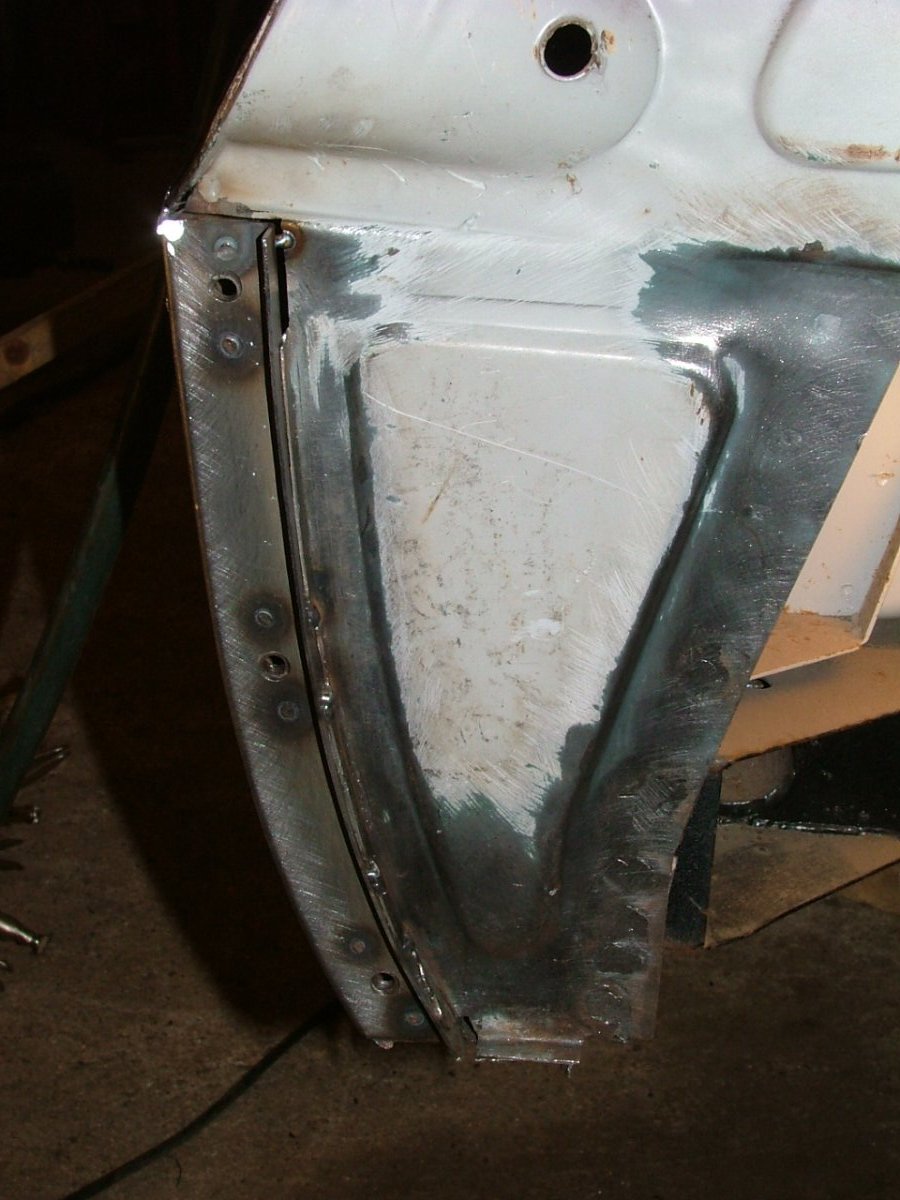
Hi, Thanks, not had much time this weekend to work on this area, i have made a replacement piece for the rear wing edge as that too was a bit mangled, like cheftush in his u-tube posts i also had a badly fitting wing that did not match the profile of the rear panel so cutting and replacing was possibly the better option rather than endlessly beating at the thin wing skin , at times things do go from bad to worse with too much stretching of the steel, the pictures show i have just tacked the repairs so far but i did get a bit of welding done, quite a slow job as i like to quench after each tack to stop warping, also rather than angle grinding welds i prefer to hand file welds again not to put too much heat into the steel. anyway here are some pic's and i will post some of the finished work soon.
-
Thanks, it's just a weekend hobby, i did apply to Colchester collage many many years ago when they first introduced bodywork as a course but it was so over subscribed i didn't get in, though they did say apply the next year, i never did so just picked it up with trial and error, i cheated and made a steel sandwich to bend the flanges of the repair piece so i can always make another if needs be and will use again as i need to repair the rear wing edge as well.
-
update on progress and a few pic's if interested, just had a bit of time this weekend to make a repair piece to the rear quarter and make those fiddly trap nuts as well, i did try to save the old flange but it was too bashed up to repair nicely and then it warped when i tried to weld the holes in the edge, there seemed to be a bit of brazing as well and the MIG just hates welding on brazing, on the rear panel the metal on the edge was very thin where it mates up to the wing i assume this is due to the pressing of the rear panel thinning the metal in the pressing prosses, this may account for the corrosion in this area with many cars, anyway it is now tacked in place and will be finished off tomorrow.


-
You are very welcome, if you need any other info just ask, as mentioned the car i am working on is still quite factory fresh with no work done over the cars life time so is useful for how it was put together in the factory.

.JPG.aff3086ed4509ea941681daff2181997.JPG)
.JPG.1444035e90bdf8d63d36167c901eed0c.JPG)


TR3 rear lower closing panel.
in TR2/3/3A/3B Forum
Posted
Rather than use 4x2 and kneel on the fragile boot lid (thank you for the advise) i removed the lid under parts, fortunately thanks to the Triumph factory's sparing use of the spot welder i was able to remove them quite easily, i was suspicious of the rust in the corners thinking that it may hide more unpleasantness beneath and lo i was proved right with rust penetrating through to the underside, unfortunately i can do nothing about cleaning the rust out until i have the blast cabinet done and working so i just contented myself with repairing the kink in the hinge, that at least proved to be very easy and only took about 20 mins to do, so all in all a good day in the shed. pictures below, before and after.