


R.M.
-
Content Count
160 -
Joined
-
Last visited
Content Type
Profiles
Forums
Calendar
Posts posted by R.M.
-
-
1 hour ago, Ralph Whitaker said:
It wasn`t the height that was the problem for me, it seemed to be smaller than the opening and had to be stretched on, and kept popping off at the opposite end. Finished up using contact adhesive to hold it in place..
Ralph
yes very frustrating
-
interestingly enough frost do a rubber part moulding kit, has anyone tried making there own parts with this product?
-
Just now, Ralph Whitaker said:
That`s a fine tolerance. I would think you could get that just by holding it in your hand for a few minutes and warming it up.
Ralph
not in this weather
-
7 minutes ago, RobH said:
The ARP site implies that theirs are not 'stretch bolts'. As I understand it a 'stretch bolt' is for one-use-only as it is tightened beyond the elastic limit of the material to the flat portion of the stress-strain curve, to give a constant load to the joint over a range of stress. (with a normal bolt the strain and load on the joint varies with changes of stress through temperature or other factors).
ARP say the fasteners should be discarded if there is a permanent length change of 0.0005" or more (which would mean they have gone into the 'plastic' region). That means ARP fasteners are intended for use in the 'elastic' region of the curve only, so re-use should be fine.
thanks for the clarification
-
13 hours ago, Ralph Whitaker said:
What is the difference between the bolts you are measuring and normal stretch bolts. Just curious as stretch bolts are not supposed to be re used but if you are tightening all of yours to check them doesn`t that render them un usable again, or do you sacrifice 1 to find the required torque needed to obtain the neccessary stretch.
Ralph.
good question
-
sounds sweeeeeet.
-
you can always use the gaudy yellow plastic lead beating bats purchased from a building merchants near you, i use these and they work well enough.
-
the icing don't quite reach the bottom p'haps shaving 40thou off might help
-
I'm sure they used it at lunchtime for a jolly old game of rounders heywhat
-
Nice stick, well you know when the family complain about not knowing what to buy you for Christmas you can just give them a list of tools to buy, beats the hell out of socks and aftershave.
-
so i take it the overriding opinion would be not to paint the engine interior, Bob, did you have your block/head bead/sand blasted to get it so clean?
-
Bob, looking at a frost catalogue they do a paint that can be used on the interior of the engine, what is your opinion on that, a good idea?
-
4 minutes ago, Motorsport Mickey said:
Gold star and a tick.

Mick Richards
Yes, i understand what Mr Motorsport was alluding to, that much was clear in his post, and yes one must never always just trust what is said on media channels, but you have to admit there is very little good info on these engine rebuilds by experienced rebuilders, so big up to Bob on his posts, just more pictures please Bob.
-
13 hours ago, Motorsport Mickey said:
But...but... it’s on YouTube. ?
Mick Richards
what's wrong with u tube?, at least it's easier to follow than trying to decipher the written word, i wish bob had done a video so i could follow only from the point of view i have an engine in bits from the previous owner and will need to put it back together and what is more i don't quite know what the previous owner did to it before i got hold of it other than take it apart, at least i do have a local engine performance company called Scholar engines close by if i get into real deep doodoo. "thanks bob for the postings"
-
1 hour ago, Ralph Whitaker said:
Surely then the tyre fitter is not taking enough care. I put my own tyres on and none of mine are chipped.
Sounds like you have had a bad experience with some poor quality cold coating.
Ralph.
now you mention it no, no problems with my wheels, you are more than likely right about that, alloy wheels would mark if the tyre setting tool was too aggressive leading to many insurance claims from disgruntled customers, maybe what i have seen over the years are owners fitting their own wheels with back on with metal tyre levers and probably not putting the tyre on something soft rather having them scrape across the ground while they wrestle the rubber back on.
-
After spending money on powder coating then having the rubber fitted surely the prosses of putting on the tyres removes or chips the powder coating on the rims allowing them to rust again and also look tatty, money down the drain i would say, if you paint them yourself then you could touch up the paint after the rubber is fitted, this is my thinking on the subject,
-
can't find the item on ebay, using the item number on advanced settings just shows a panel hammer kit not a joggler, what's it called, is it an air operated joggler or a manual one, i do have a hand joggler but i find using it hurts after a while, i have to put one handle on the bench and lean on the other one to get it to crimp, that is crimp not wimp,
-
11 hours ago, Ian Vincent said:
I’ve added a link in my post to the hammer I have.
Rgds Ian
yup that's the one
-
Ian, is that the hammer with the rubber gripper on the end? i did look at getting one but the prices put me off, i do have a hammer and a slapping spoon with the surface that looks a bit like a meat tenderiser, i find they tend to leave marks on the steel when used though they do work reasonably well, also applied even heat with a quenching rag works in bringing dents out.
-
yay, yellow? camel, pup, Fokker, Bristol?, tr2, i'll take them all.
-
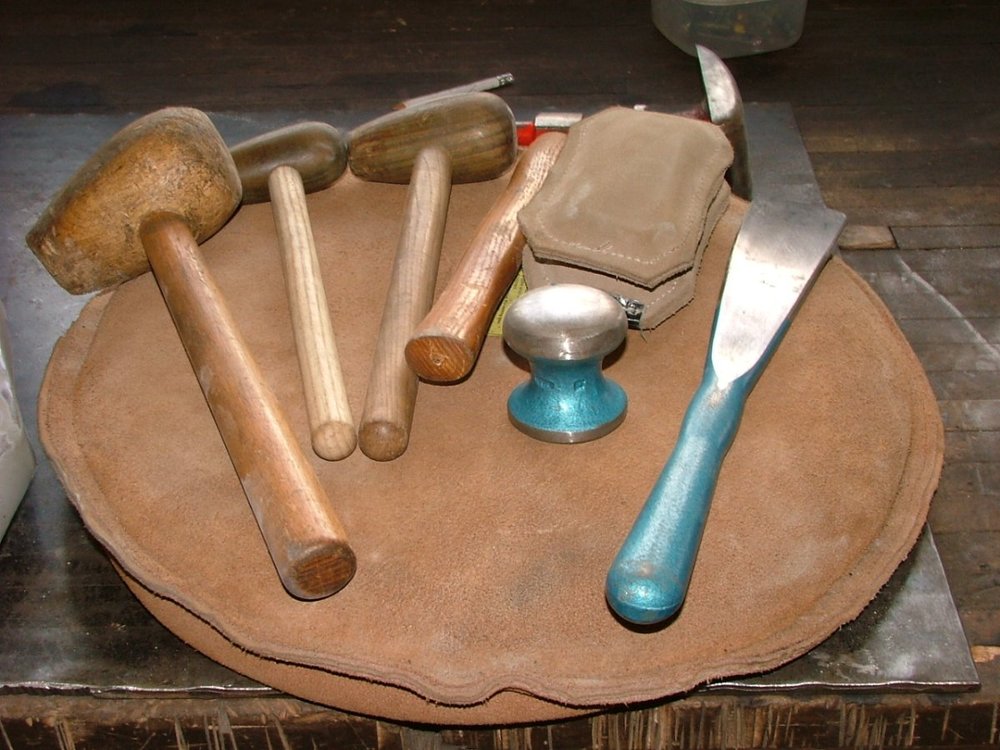
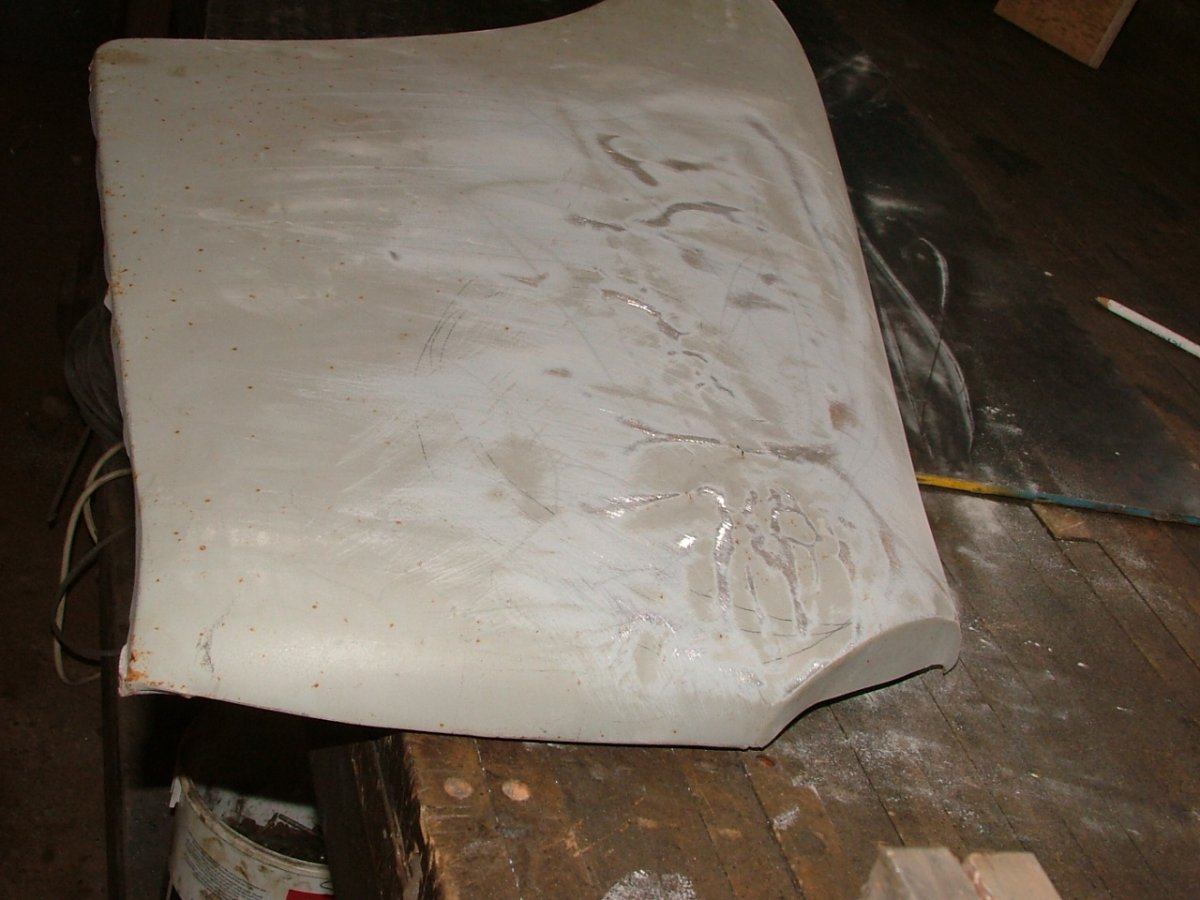
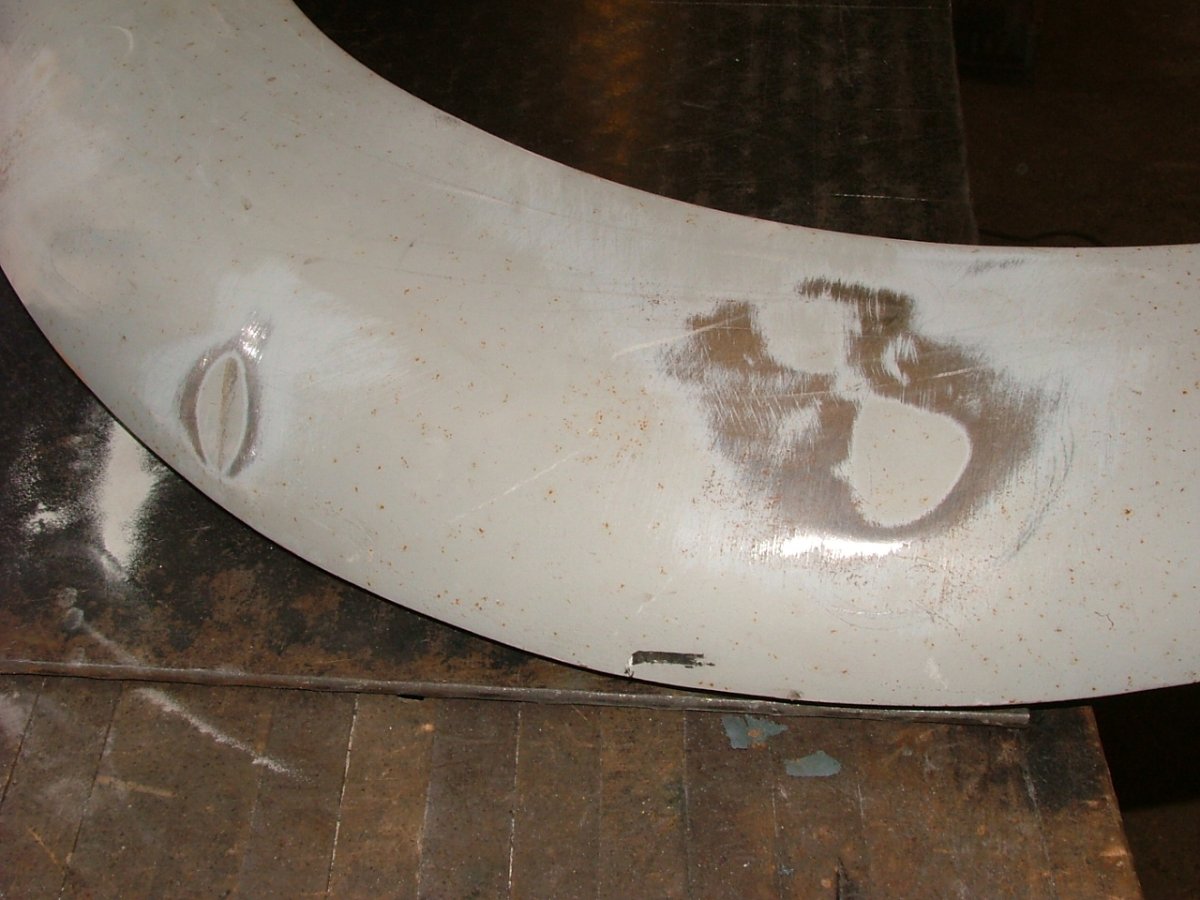
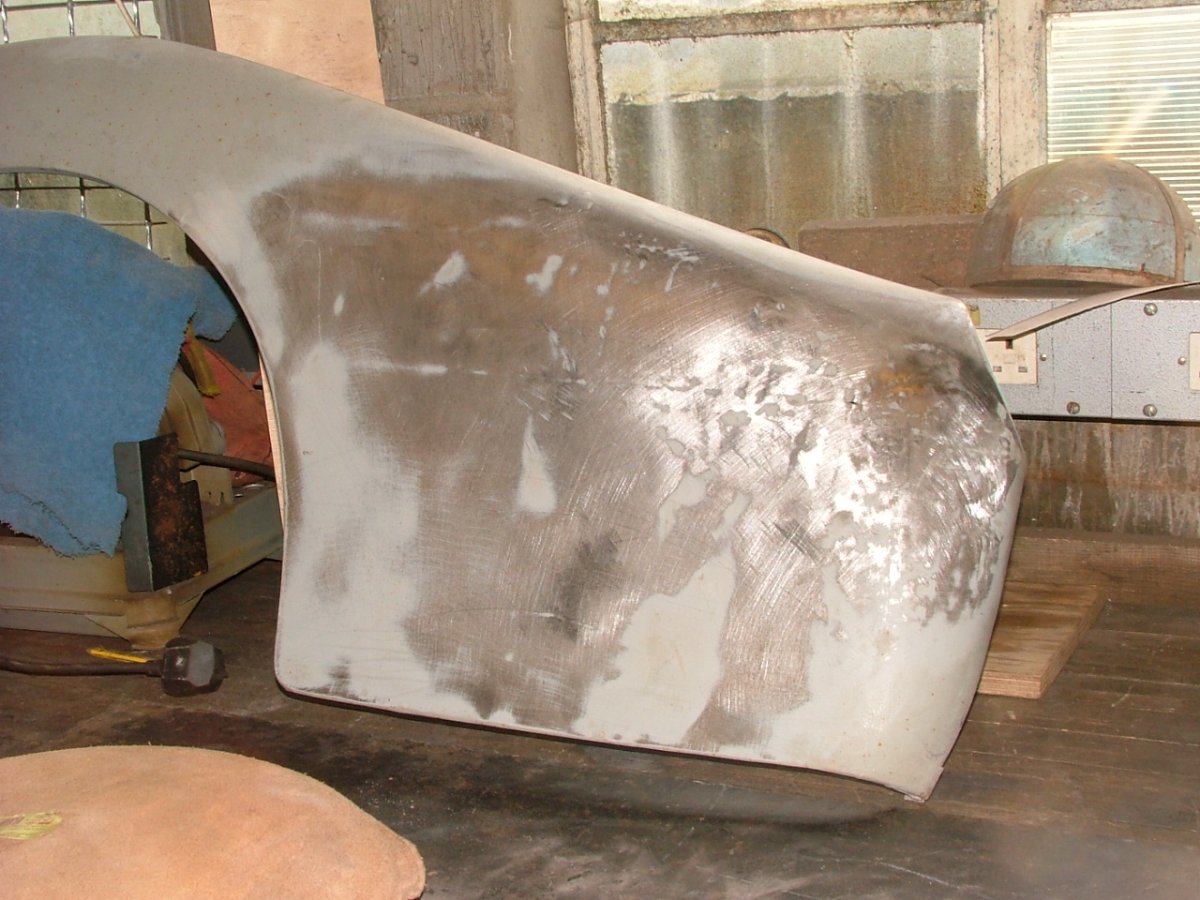
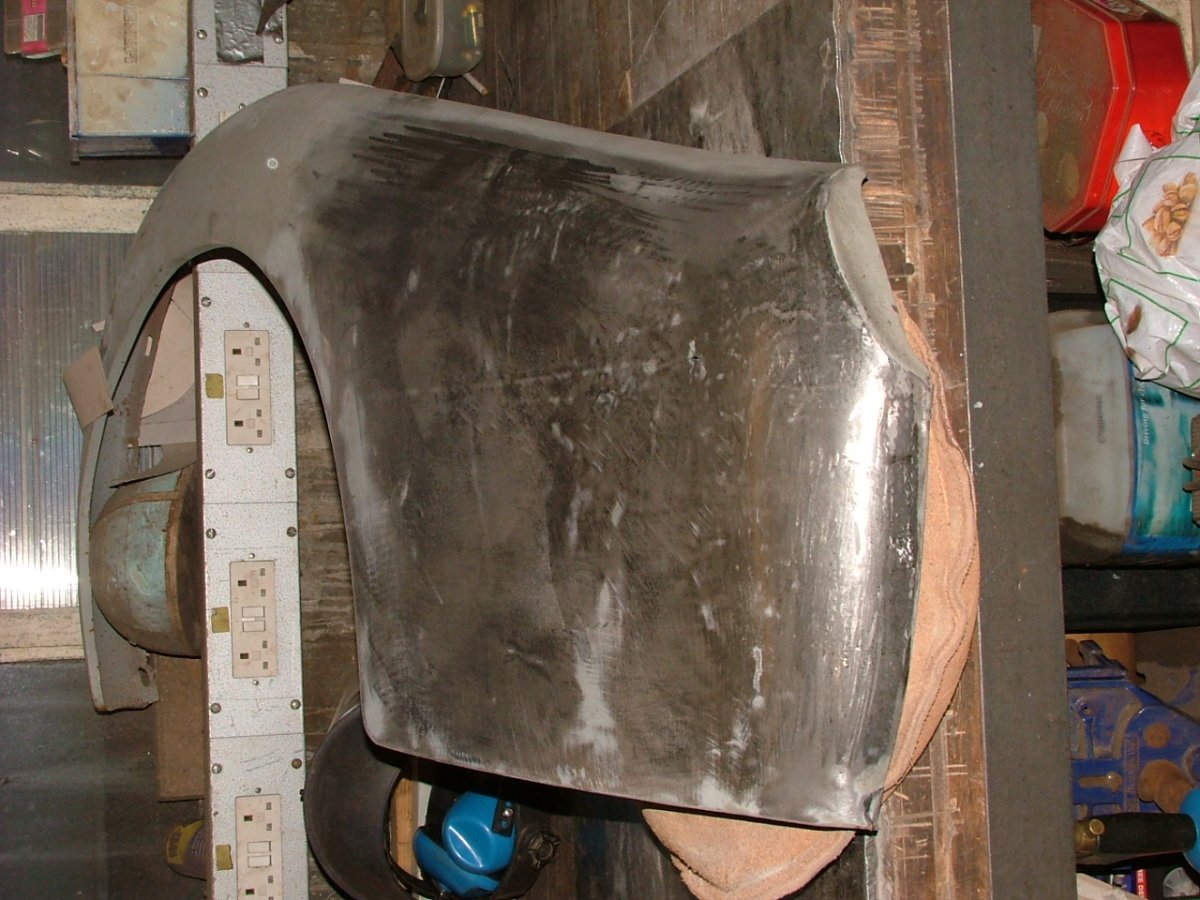
Thanks for that, well it's really that i am far too mean to replace them with better condition second hand wings, plus secretly i like the challenge, the N/S front wing is even worse, even both doors are dented, the front O/S wing had crease damage even to the point the creases had folded over themselves, what could have done that i do not know, bless the previous owner but his attempts to repair the damage was to run an angle grinder over the creases to try to make them disappear when all they need is some light wooden hammer work to reorganise the metal back into shape, i try not to use steel hammers on steel dolly's too much due to stretch issues but prefer a hand sandbag with wooden mallets, much less stress on the panel, spoons/slappers work well with a sandbag too. always worth giving it a try, can't make it any worse than it is.
-
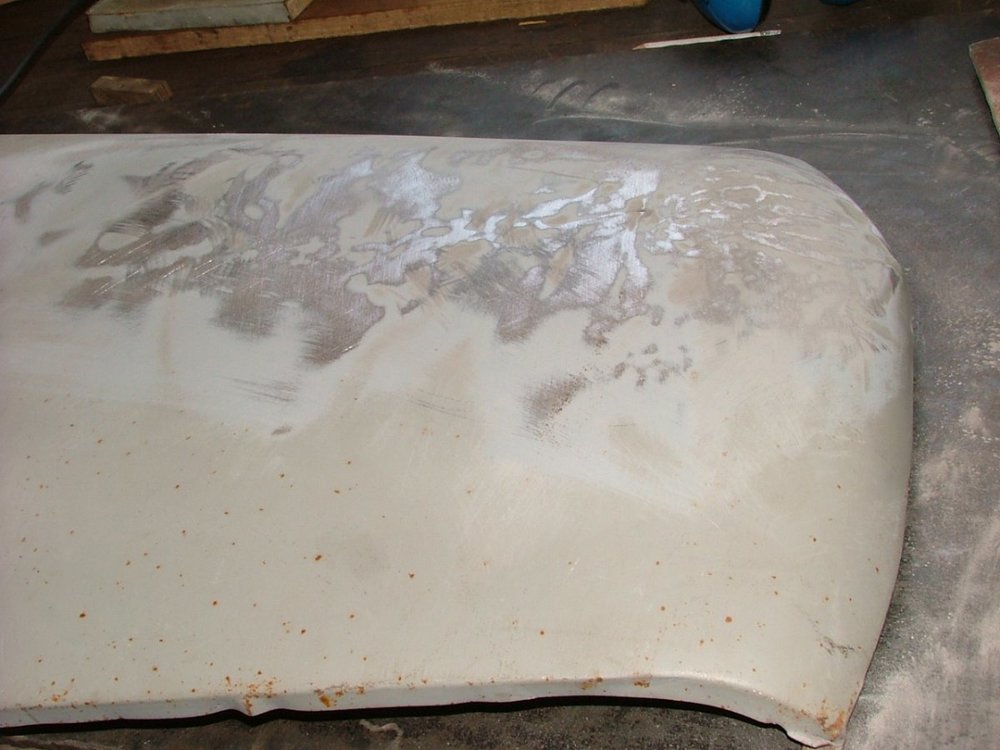
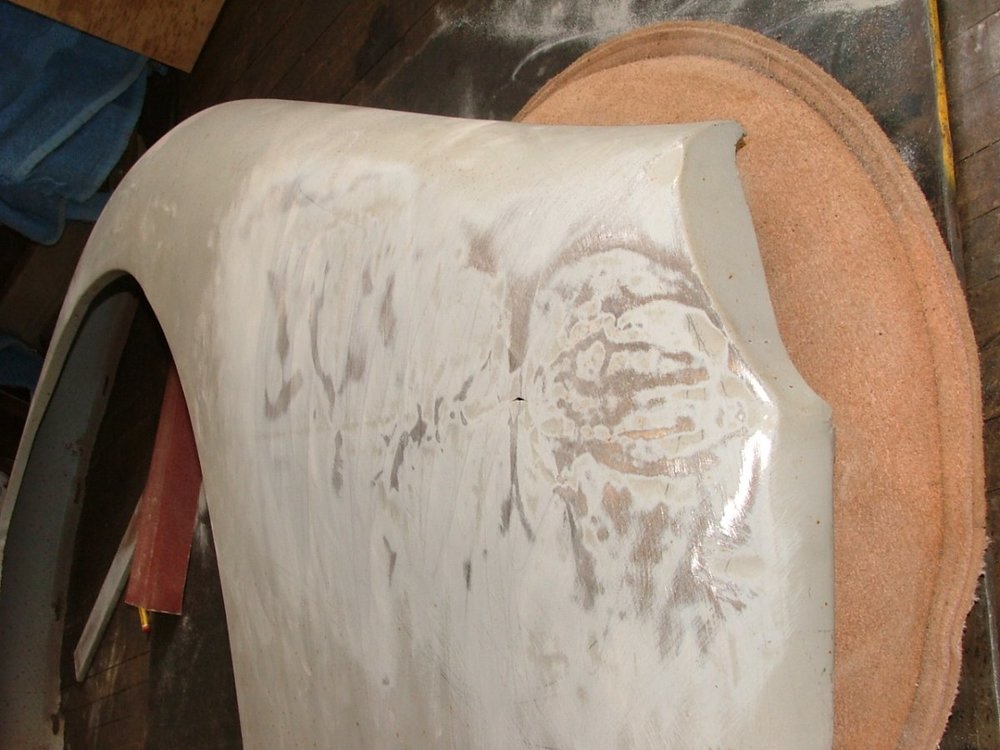
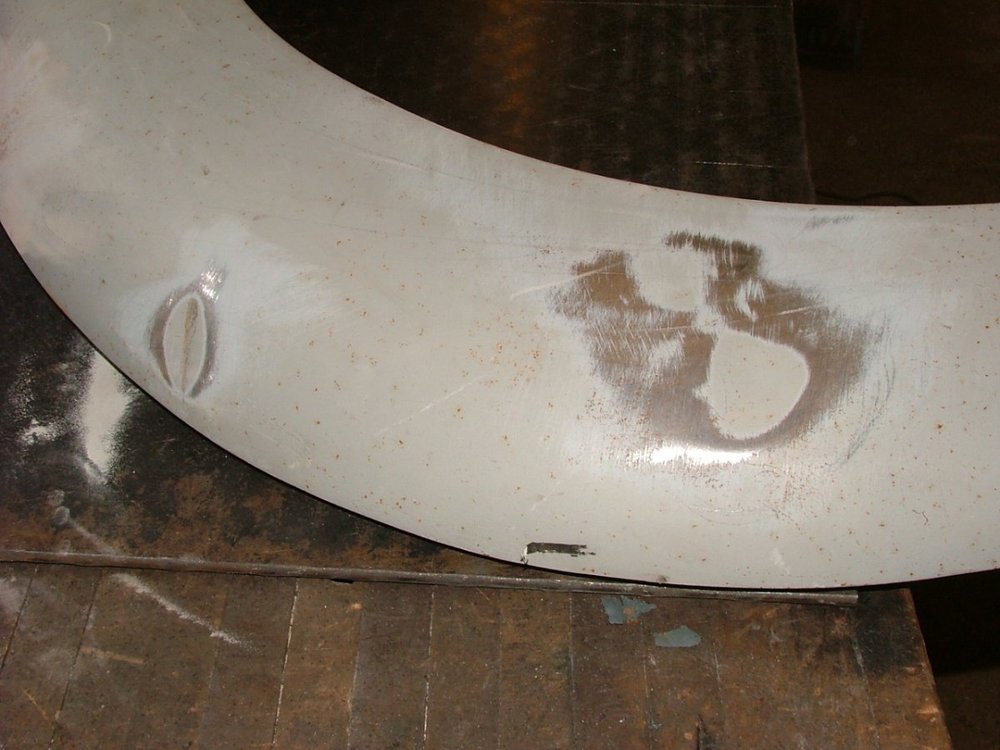
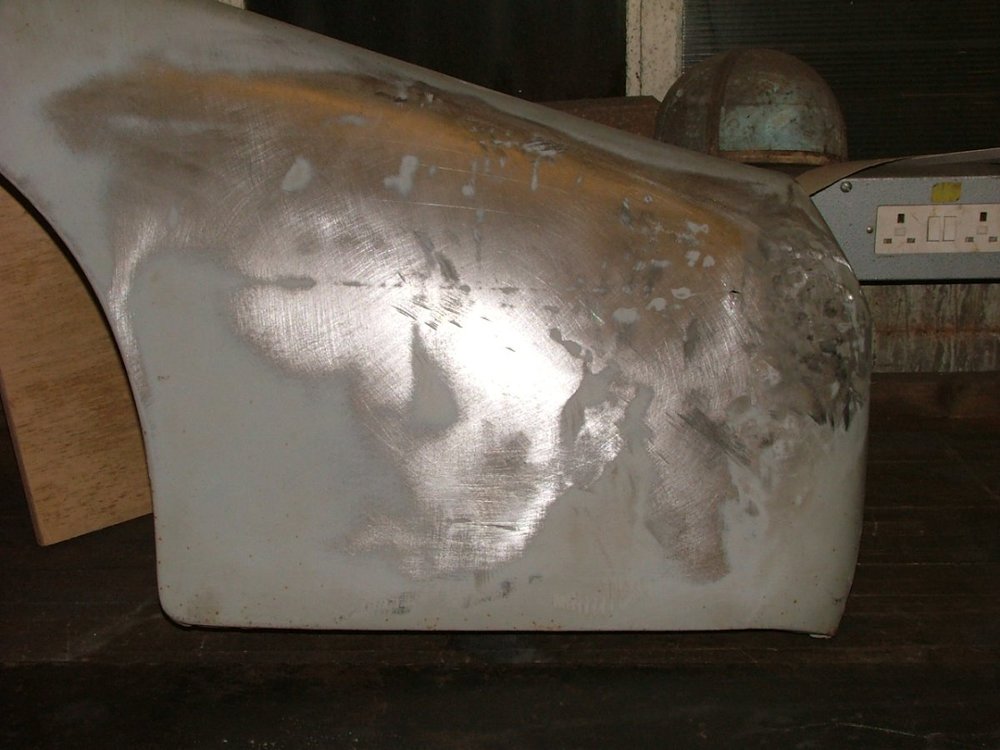
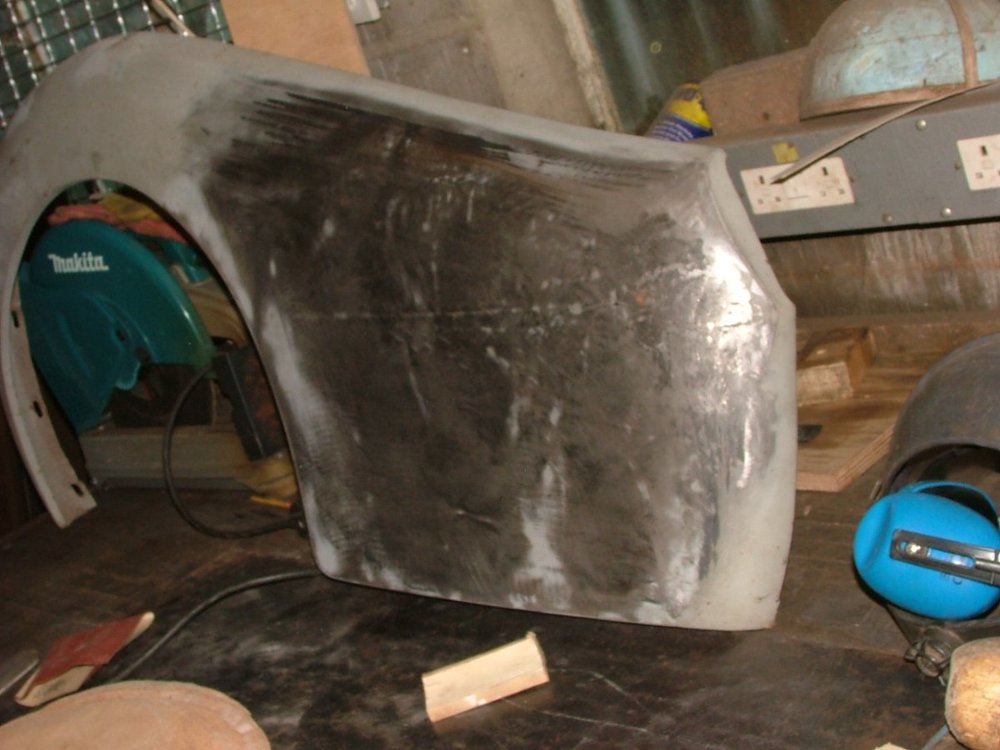
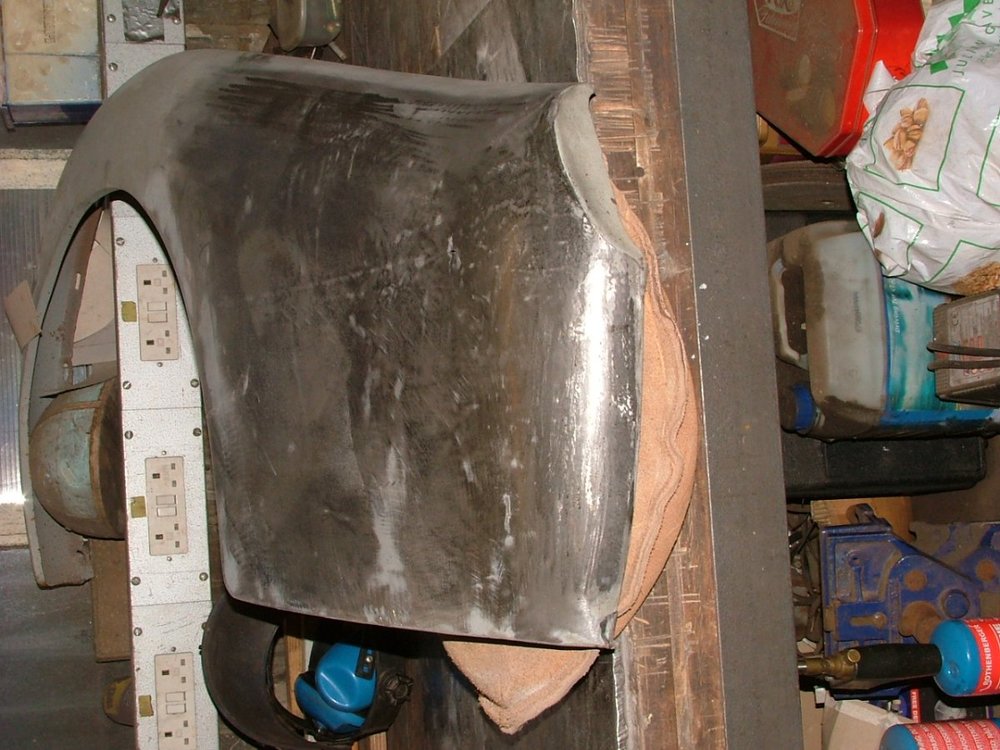
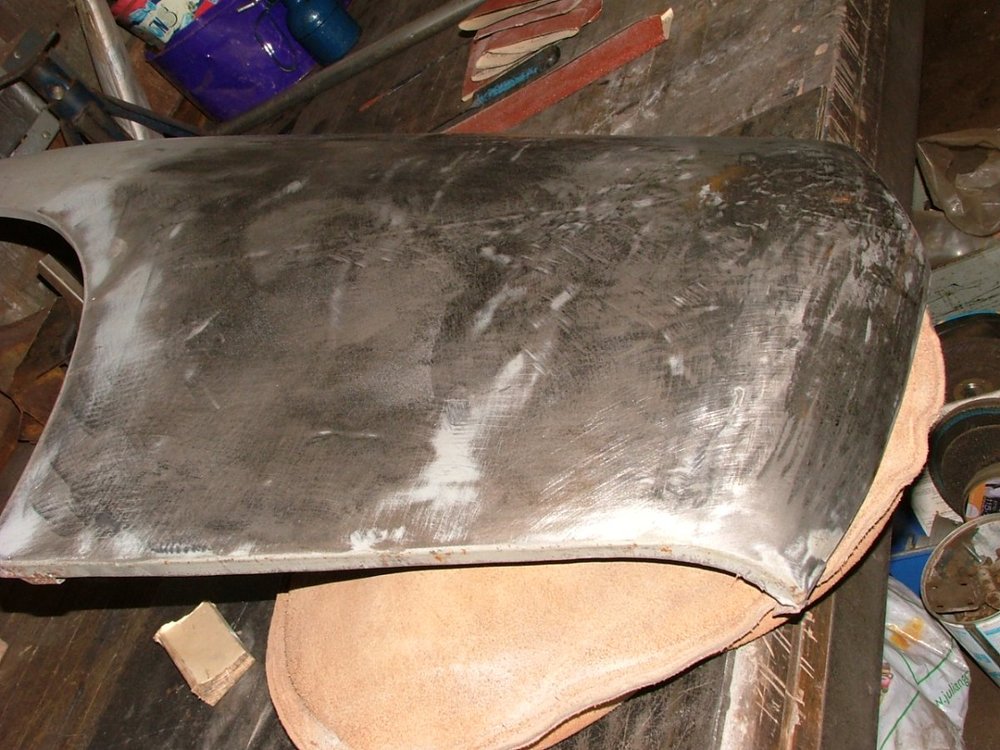
ah the weekend has arrived and time for a little more light wing restoration, this time i needed to turn my attention to the N/S rear wing, again quite rippled with lots of creases that extended to the whole wing as i worked on it, a few pictures to show the change as i go along, first the tools used. then a bit of light sanding to highlight the creases in the wing, then a few more pictures as the creases and dents came out, almost done, though i did rather run out of usable light in the shed, hopefully i will finish on the coming weekend, and then i will go to it and make the new N/S wheel spat
.thumb.JPG.8d9482940d282d5d097488ef03695c8d.JPG)
.thumb.JPG.c6d9a0fe778e37cbb1fa3e39198f324f.JPG)


-
a pretty little car Danny, if your are ever looking to show her locally, try Helmingham hall in Suffolk they host quite a large classic car show in the summer time for all types and models, well worth going to.
-
Thank you Mr Read. Keep on posting results of your rebuild, nice to know i am not alone out there.
.JPG.f6e42a81d7c590e1636a09080f7c5b6b.JPG)
.JPG.5442a5c978477a291d2eb606a8e6e9d5.JPG)


3A Vent Flap Mechanism.
in TR2/3/3A/3B Forum
Posted
made a mould out of Perspex once "great for moulds as almost nothing sticks to it" and used a flexible exterior builders silicone to make "O" rings for a submersible they worked very well and actually did keep the water out, also quite cheap for a tube so if it goes hard you can just chuck it, just a thought.