

Adrian Steele
-
Content Count
27 -
Joined
-
Last visited
Content Type
Profiles
Forums
Calendar
Posts posted by Adrian Steele
-
-
Just bought a recon Diff from TD Fitchett in Telford. Very impressed; delivery within 24hrs and excellent price.
-
Tony
I have the 123 Tune + fitted and really very pleased with it. Had the tacho converted to electronic by JDO Instruments (www.jdoinstruments.com). Think the cost was £150 plus postage.
Adrian
-
Agree, thinking it would be good to get some like minded 123 converts together.
This is my current setting based only on how it 'feels/sounds' when running:
Static 11 deg BTDC - based on LED illumination.
RPM ADVANCE Deg
500 12.0
1000 16.0
1600 21.0
2000 23.0
2600 28.0
3000 30.0
4000 32.0
5000 34.4
My six is running so much better compared with the knackered worn out Lucas dizzy it replaced. Running a Piper TR6BP285B Cam with 6 into 2 Extractor and a very noisy sports exhaust (I may need to silence (sic) that in the future!); so think it would be good to confirm 123 advance curve settings in action - hence rolling road. Gut feeling is I could be more aggressive on advance but want a pro to help me here. Just need to find a pro - Enginuity may be the preferred choice at the moment.
Still smarting about paying for nothing, but expecting Mastercard to sort it out for me...........
-
I have fitted the 123 Tune distributor to my six to replace the worn Lucas distributor. It now runs so much better so I clearly hadn't appreciated how worn the old one was. I have played around with the advance curve settings to get what feels like the optimum so thought it would be a good idea to check/adjust it finally on a rolling road. One near me is Turner Mechatronics in Hemel Hempstead who besides tweaking modern cars claim to be capable working with classics including TR6s. Problem here was the expert mechanic was adamant that I should have a vacuum to the distributor otherwise it will never run properly and then proceeded to lecture me about this retrograde modification - "nothing wrong with the Lucas dizzy but it needs vacuum."
I got concerned when he said he could adjust the metering unit (MU) if it needed it. Alarms bells ringing now, because if he thinks a six has to have a vacuum to the distributor then he is not that knowledgable so I wanted him no where near the MU. I took the car away with no work being done, but had to pay 1 hour labour for the ten-minute conversation to get my keys back despite him never touching the car!!
In short - looking for recommendations of someone trusted in Bucks/Herts/Oxon area with rolling road capability and TR6 KNOWLEDGE.
-
Does anyone have experience of using Porterfield R4-S pads and shoes on their six?
-
The hub nut gets torqued to 215 lbf ft. On CDD shafts its not a nyloc, but the nut has a collar on the nut that is peened in three places to grip the exposed threads on the shaft so its effectively a metal locking nut; see rubbish sketch!
I had to remove the OS shaft so ended up refusing the locknut - may not be best practice but I re-peened the original three lock marks and there was good resistance on refitting so happy that it locks. I'll check re-torque everything next week (about 100 mile since fit) and I don't anticipate any movement.
-
Brackets on my Six are one notch "up" innner and two notches "up" outer. I understand that later cars may be three notches "up" inner and one notch "up" outer. That said, you can have multiple options of notches and brackets fitted "up" or "down" to play with camber.
Re tracking shims, mine had two under each bracket. Changed Off Side(OS) to correct previous toe-out to 2 shims inner and 1 shim outer, and changed Near Side(NS) to correct previous toe-in to 2 shims inner and 3 shims outer.
I still need to get alignment and camber garage checked, but string and iPhone with Mk1 eye-ball tell me its close enough for the time being.
Re mounting bolts, I assembled with both bolt heads inboard.
Adrian
-
Having spent several days over-hauling the rear suspension and replacing the drive shafts of my 1970 Six, I thought I’d write down a few notes of lessons learned. Had I thought about writing this before I started work on the back end then I would have had some pictures to illustrate it. Sadly, I didn’t have such foresight!
Trailing Arms: These had probably been untouched since they were fitted to the new chassis in the early 90’s when the car was restored. After removing springs and drive shafts I was surprised how much effort was needed to make them pivot around the mounting brackets; they were solid with the rubber bushings and bolts well seized. Long story short, stripped, cleaned, painted and poly bushes fitted with new hardware. Note about the poly bushes – they are supposed to be a snug fit in the lugs of the trailing arms. School boy error by me as I used silicone grease to aid the fitment of the bushes, such that once the lip was in the lug they pushed in very easily. I discovered the consequence of that after I’d finished everything and took it for a drive. The trailing arm on the off-side (OS) had moved hard inboard on the bushings such that inboard lug was against the mounting bracket because the bushing top hats had been forced into both lugs. Took it off again, removed the bushings. Noticed that the rebate in the lugs in which the bushing top hats was supposed to sit was rounded/smooth and not clearly defined such that it was making a very easy path for a greased bush to move in. I carefully worked the ends of the lugs with files hand/rotary to get a sharp rebate. Then refitted the bushings with StixAll (Hybrid PMS polymer technology adhesive/sealant from ToolStation) that provided lube for installation but also importantly fixed/bonded the bush to the lug. The steel insert was fitted with silicone grease – as it needs to be free because that’s the pivot – and the hardware was installed with copious amounts of Copper Grease. Torqued the pivot bolt/nuts when the wheels were on the ground.
Coil Springs: Here lay a real surprise, in that near-side (NS) spring was 1/2” shorter than its opposite number and to make up for it the shorter spring had 5/8”red poly bush spacers and the longer OS spring had a very thin and frail black rubber insulators. Springs were replaced with a pair of 450lb new ones complete with new poly bush spacers.
Lever Dampers: I had toyed with the idea of replacing these with shocks and associated bracketry – but having read more on it I decided maybe they were just in want of a bit of attention; and it’s a relatively easy update if I decided to do it a future date. After removal from the chassis the top covers and the taper valves were dismantled, and the bodies were flushed out with paraffin and then clean oil. Finally filled with Penrite No.2 Lever Oil which should give a slightly firmer effect. I couldn’t get replacement gaskets for the top covers so had to make new ones from cork sheet. Note that the taper valve has a washer/spacer that sets the bump/force of the damper; make sure you have the same number of washers on both sides. On mine it was one/side but it’s possible to add additional spacers and that increases the force required to move the arm. The links from trailing arms to lever arms were worn and so were replaced with new standard items.
Drive Shafts: One of the main reasons to undertake this backend rebuild was a clunk (not alarming but there nevertheless) from the back which I suspected was coming from one or both shafts. On removal it was apparent that the splines had not seen any grease for the best part of 25 years and although they still slid there was undue resistance/binding. The bolts holding the inboard flange of the shaft to the flange on the diff were lose which I now understand is a very common issue; note to self to tighten them every year from now on. The Universal Joints (UJ’s) seemed okay with no noticeable play in them. Having gone this far I was left with a shaft decision; rebuild possibly with overhauled hubs – or replace outright with Constant Velocity (CV) jointed shafts. After much forum reading and navel scratching, I bit the bullet and decided on CV’s. Not to everyone’s taste – but looking at the pros and cons of both for me the CV’s came out on top. Chose the Classic Driving Development (CDD) CV shafts and I am very pleased with the quality and fit and it was good to talk directly with Alasdair Southall at CDD; he left me feeling very confident of the support available if at a future date there is an issue. Note you need a hefty TQ wrench for the CDD CV shafts as they need to be tightened to 215 lbf ft.
Brakes: One of the cylinders had been weeping – nothing major – but nevertheless time to reseal. That’s when I found a mismatch on the size of cylinders fitted; on the NS I had a 0.875” (22.25mm) Girling cylinder and on the OS a 0.7” (17.8mm) Delph cylinder. I assume this would have resulted in a mismatch in braking efficiency so not sure why it never got picked up by MoT’s. New TRW GWC1154 cylinders have now been fitted and the old tendency of pulling to the NS on heavy braking is now but a memory!
Conclusion: The ride is significantly improved (no chattering of teeth) and it handles much better than before which shouldn’t be a surprise as the trailing arms were effectively acting as dampers, so the back end was pretty solid. Not sure if the poly bushes are better for ride than rubber, but they should outlast rubber and save me having to do them again.
With a combination of solid trailing arms, odd springs, dry splines and different size brake cylinders I’m amazed I have put 8K miles on it in the last 5-years without incident.
Looking forward to some COVID free touring in 2021 as 2020 has been a disaster.
-
For general degreasing try Screwfix NONSENSE HEAVY DUTY DEGREASER which come in a 5ltr container. Can be diluted or used neat; spray or brush on then hose/pressure wash off. It works really well and reminds me of the stuff we used to clean the oily crud off aircraft with.
-
On 7/2/2020 at 12:07 PM, SteveG said:
Just bought the airmax one. Thanks for the help.
Any feedback Steve? Assuming you've had time to fit and drive.
-
Talking about clogged injectors, yesterday I had a post lockdown run in my Six of 276 mile to Brecon and back to see my boy and his children On the way home slowing from 70mph I noticed a cough and backfire. Pulled over, left the engine running and felt the injector hoses for the Lucas pulse of life. #2 was not playing. Pulled the injector out of the manifold and then tried tapping injector with a spanner while holding it vertically which is what I have done previously to bleed it. No joy, so then still with the engine running I exercised the needle at the end of the injector with a pair of pliers. Nothing at first but then a few spurts of petrol. Tapped the injector again and a lovely cone of fuel was spaying forth. Back in the manifold, secured the plate and 120 mile home without further hiccup. Incidentally, Banjo O rings on 2 and 5 were new about two months ago.
-
Put the choke in as soon as the car starts; like immediately ;-) When I bought my 6 from TRGB about 6 years ago that was one thing that Gary kept reminding me - minimum choke and as soon as its fired push it in. I've stopped starting mine in the internal garage as Mrs S is pissed with the smell; so now I push it out first. To me the smell is wonderful - but each to their own. My 6 is very sooty also on start, but then I also burn oil at rate of 1Lt/1200 miles because I have a ring issue on #5 (Comp is 20 psi down versus #4 and # 6). One day I'll get around to fixing that - but it's not urgent - so until I have the dosh it is what it is.
-
I've just had my gearbox and OD rebuilt, and before I refitted it I replaced the clutch cover and drive plate even though the original was only 4 years old.
-
22 hours ago, cookie said:
Hi,
Hs anybody used the Limora starter motor, is it any good.
Thanks
Dave
No knowledge about Limora - but fitted a PowerLite Starter from Rimmers to my Six several years ago because the Bomb type was struggling to turn the engine over. The original failed within a matter of days but Rimmers replaced with no quibble. I like these over the Bomb type because they are smaller and lighter, and if it does have to be removed again I can do it without removing the extractor manifold. Note; I needed a shim with mine and thats an option with the Rimmers parts listing.
-
7 hours ago, Matt1969 said:
Morning all. Just got my gearbox out. It works, but it is very very ropey. Reverse a nightmare. Part of a tooth in the oil change. Very noisy in 1,2 and 3. Overdrive not working (not oil).
So, should I have it refurbed? Base price £ 1100 plus vat, plus plus plus. Or exchange. £ 1200 plus vat all in.
Any thoughts?
Matt
Have it overhauled by ORS Sheffield. Just had my GB and Type A overhauled by them and the service is first class. Very happy with the end result. Didn't want to go the exchange route; better the devil you know and ORS will talk you through what needs doing to your box.
-
22 hours ago, Z320 said:
Did you add a rubber hose over your gear shift leaver as Andy reported currently?
Had meant too - but no rattle from the rebuilt GB - so no need.
-
My solution would be to get it's value appraised properly. Speak to someone in your TR Group to see if they know of some specialist local to you.
Re the OD, it can be wiring or loose solenoid linkage (relatively simple and cheap), low oil or clogged filter (a bit more complicated but not expensive), or an OD unit overhaul (a lot more complicated and potential for a few hundreds of pounds)
Good luck
Adrian
-
Thx Andy. Planning to check the pressure. Re filter, its clear and the wiring was replaced 5 years ago when I fitted the new Bosch setup from Malcom at Prestige. Now all I need to figure out his how to keep peas frozen in the boot!
-
A little late to this topic, but having just experienced a Bosch pump overheat issue (it was 32C yesterday so probably much hotter in the boot) I just wanted to confirm that the Birds-Eye (other brands are available) frozen pea trick still works.
Car stuttered to a halt and refused to start and the wailing from the boot was reminiscent of having previously experienced a blocked filter. Slackened the inlet to the pump, gush of fuel came out so not the filter. Let it cool for 30 minutes, started it and managed 3 miles to the village of Waddeson before it conked again.
Post Office & Convenience Store opposite from where I conked sold me a bag of frozen peas and some ice to wrap around the pump. With a now very happy and chilled pump final the 10 miles was no issue; and yes, we had peas for dinner!
Long term fix, at least before Italy trip next year, is to mount the pump in the wheel arch.
-
I have this week just fitted the overhauled box and O/D (type A) back in my Six and got a chance yesterday to take it out for some sun. Sooooooo pleased with the smoothness of the change and how quiet it is without the moaning layshaft.
If you're looking for a quality overhaul for gearbox and/or O/D, then I can highly recommend Overdrive Repair Services in Sheffield. Tel 0114 2482632
-
A late addition to this post based on my recent experience. Fitting a full Super Pro Polybush set to the front of my TR6 and the damper bush is too small. Its ~22mm when the shock is ~30mm. The bush kit was bought from Moss-Europe and the damper bush is the right size for OEM shock. The shocks on the car are a few years old and are aftermarket "standard" replacements from Rimmers with larger diameter than the OEM spec.
Rimmers has the oversize bushes for these (both rubber and Poly) and hoping Moss-Europe will be able to source same.
Adrian
-
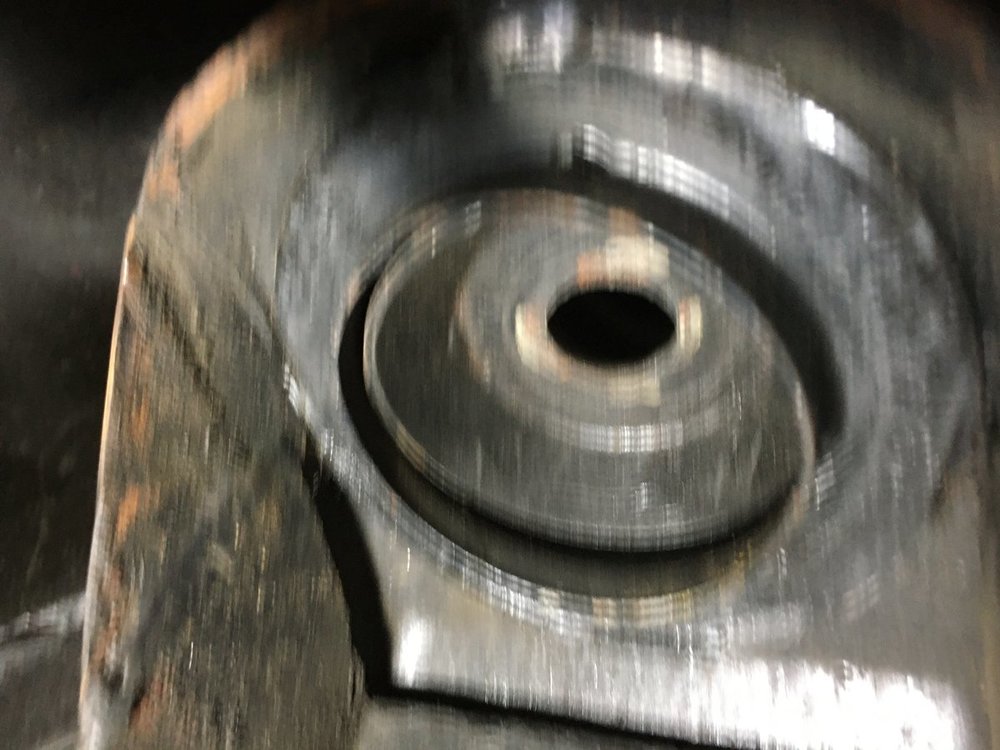
Thought I'd post an update on the mystery turret spacer now that I've ripped the LH side apart. The LH side has one also, but this spacer seems to be tacked to the inside of the turret when the the RH side is loose.
I'm going to tack the RH side in place also.
Rods
Adrian
-
Thx Stuart
The picture you sent is how I expected it to be ;-)
It shows no sign of ever being welded within the turret - but as its too large to come out it must have been there since build. I'll see what the LH side is like - probably another week until that - and then I may have to drop the RH shock and spot weld the mystery spacer to the top of the turret if that's how the LH side is.
Adrian
-
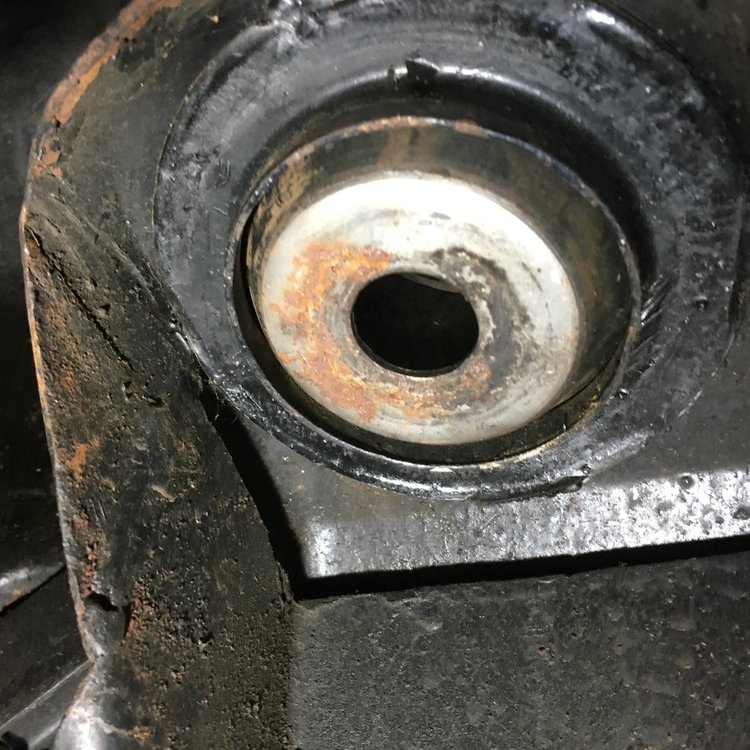
Roger/John
Thx for the notes and the welcome. These are not what I'm seeing. It's a cupped spacer that fits inside the turret between the top of the shock and the lower face of the turret top. Its made of steel and seems to be there to spread the load of the shock within the turret.
The chassis was made in 1992 by TR Chassis Centre of Bromsgrove. I'm guessing it may have been a modification so was curious if anyone has seen it before. I've yet to look at the LH side (can't do that yet as its close to the garage wall) so it will have to wait until the RH is back together.
Just hoping there is the same on the LH turret!
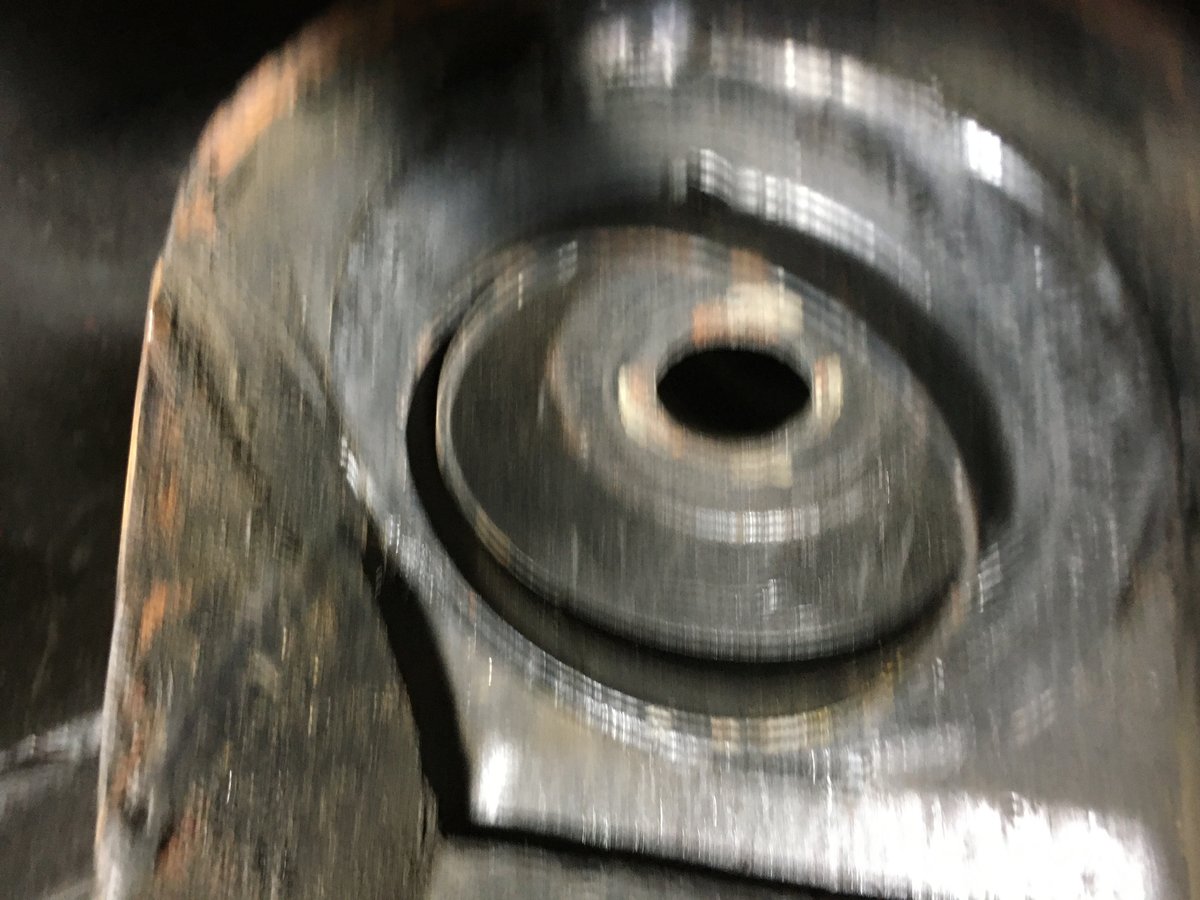
IMG 2686 shows the top of the spacer (its turned through 180deg in the picture) and this is the face that abuts against the inside of the top of the turret.
IMG 2683 shows the bottom of the spacer where the shock would be. Installed this is pushed into the top of the turret.
Rgds
Adrian


cyl. 5&6 spark plugs sooty.
in TR6 Forum
Posted
I met a German, or might have been Dutch TR6 owner a couple of years ago in deepest West Wales (middle of nowhere) and being nosey I had to have a look at his car; he also had a second air mixture screw which he’d fettled and swore by it’s effectiveness. Surprised that TR Trader or other hasn’t started marketing such an upgrade.