

Emrys Parry
-
Content Count
33 -
Joined
-
Last visited
Content Type
Profiles
Forums
Calendar
Posts posted by Emrys Parry
-
-
19 hours ago, HowardB said:
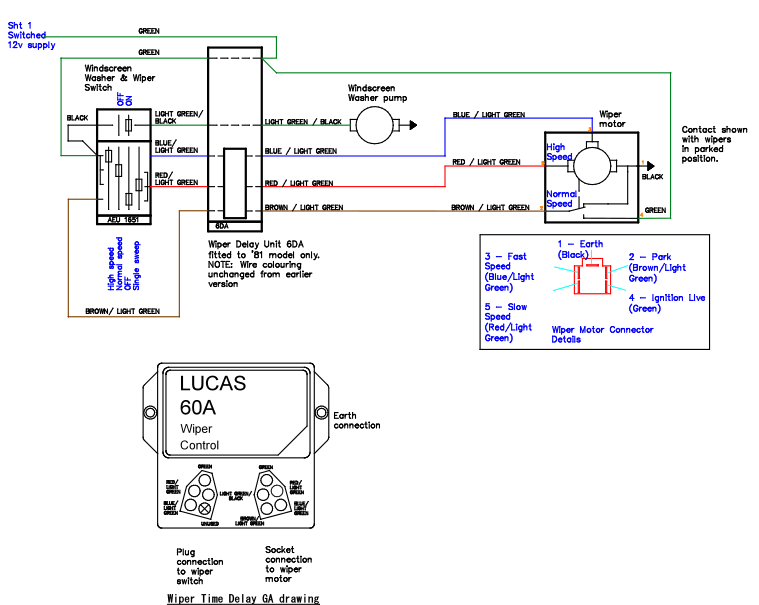
You may find the attached drawing helps with your fault finding. Colours shown are for the 80/81 TR7 model.
The most likely cause is the limit switch in the motor is wrongly adjusted (disconnect either the brown/light green or the green connections to the motor) to check if the wipers stop immediately the column switch is moved to the "off" position as this will remove the feed from the brown/light green line.
If this doesn't work probably the column switch has failed in the "on" position - measure the voltage between the red/light green connection to the motor ( a small 12v bulb wired to the red/light green motor connection and earth will do the job) If the bulb remains alight when the column switch is in the "off" position, it probably has failed, but to complete the checks try the following.
A failure in the 6DA unit can be checked by simply unplugging it and then plugging the two connectors directly together. (The possible absence of the brown/light green wire between the connector and the column switch will only effect the self parking aspect) but the wipers should work normally aside from this & stop when the column switch is in the off position.
Many thanks Howard, I'll try your suggestions when I get back out to the garage; probably not today as it's my wifes birthday and I would like to stay in her good books.
-
On 4/15/2024 at 1:04 PM, BlueTR3A-5EKT said:
Please could you post the dimensions you used so those that come later will benefit?
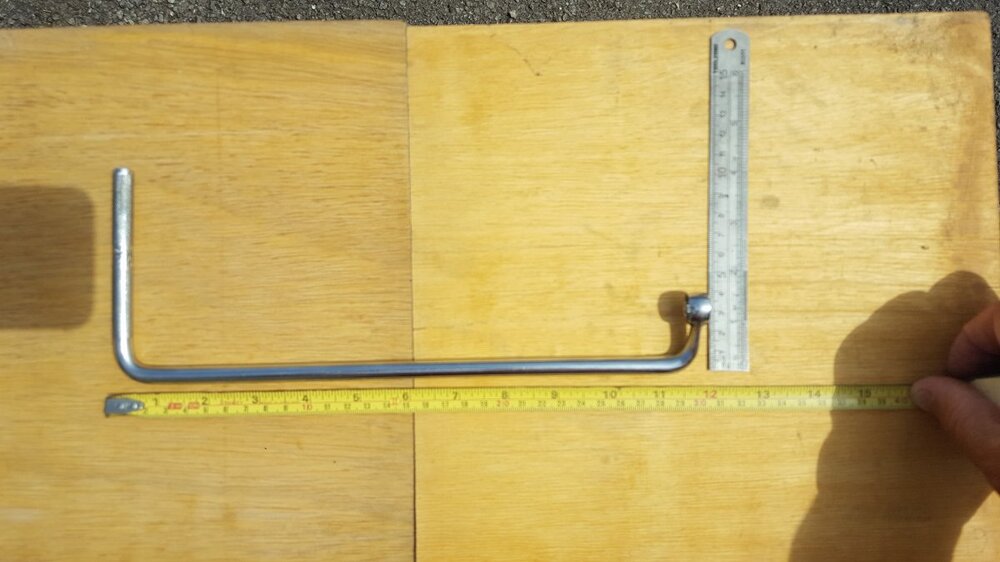
I cut off the end of a spare 7/16 ring spanner plus a length of 10mm steel rod (WICKES) and welded the rod to the spanner (scarfe joint) then measured the clearance distance from dizzy bolt to clear obstructions approx 40mm from bend to end of spanner, bent at rt angle , the vertical is approx 300mm before the leverage bend. The top handle is now covered with a rubber hose as protection.
-
Many thanks to all who have offered advice. The good news is that I visited Robsport and have to compliment them on their customer service, a replacement wiper motor was provided with no problems and has since been fitted.
Now for the bad news, the same problem has raised its ugly head, the wiper motor still won't turn off. A quick call to Robsport resulted is a suggestion that, as the old motor worked, then maybe swapping the old wiper control switch for the one on the recon motor would solve the problem. Robsport duly sent me the old switch and I have fitted it to the motor.
Yet more bad news, it didn't cure the problem!
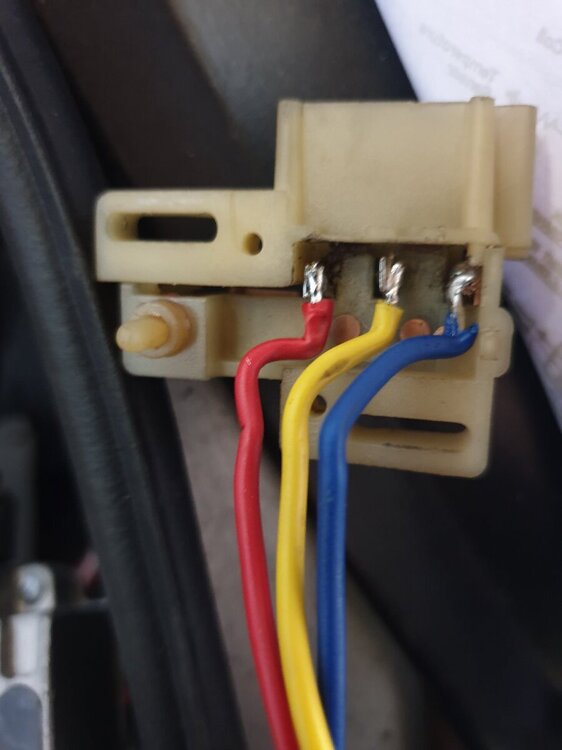
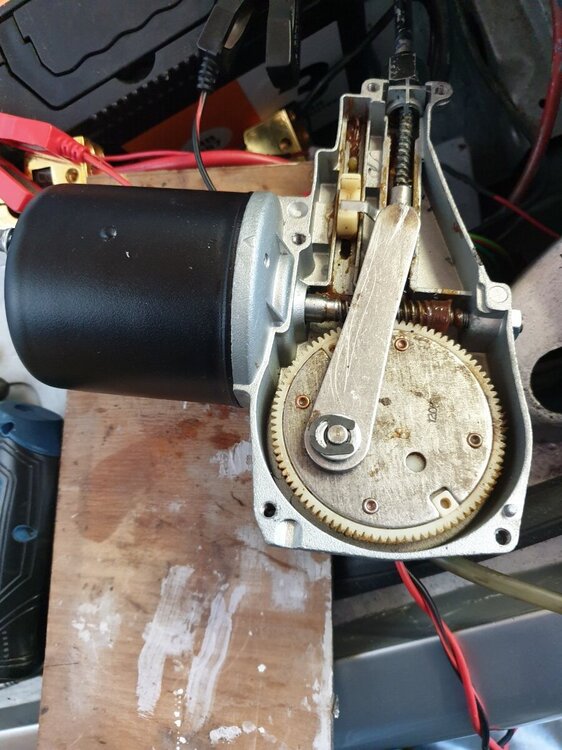
I am now seriously considering the probability of an electrical problem either with the column switch or the Lucas wiper control unit inder the dashboard. Or even the unlikely event that the wiring of the recon motor is wrongly connected. Unlikely I know, but I am at my wits end.
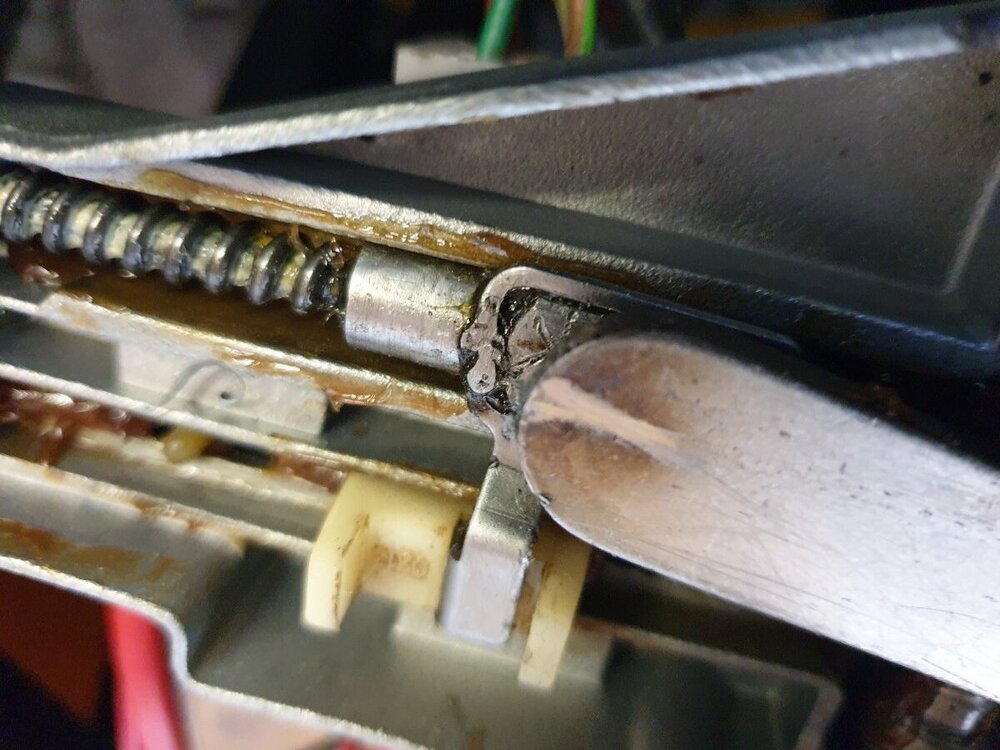
I have attached some photographs of the unit in situ, including the internal mechanical connections to assist anyone with some experience of these units.
-
4 hours ago, John Morrison said:
Hi Emrys,
I have altered the title of your thread to, hopefully find you better targeted replies, and
to help other posters in the future.
I do hope this is OK with yourself?
Regards
John.
Hi John, Any way of getting moe replies is welcome. Thanks for the input.
Regards
Emrys.
-
I made my own version of the Ops Manual spanner, details and dimensions from a post on face book. Thankfully it works !!!
-
Hi Peter, thanks for the response, however I have already got a copy of the RR forum print out and the oldtonewrestorations video appears to be the same as the YouTube video done by Reds Garage, which I have also followed. I do appreciate your response as I am on the verge of returning the unit to Robsport and asking for a replacement.
-
I have just bought a recon wiper motor and wheel boxes, from Robsport, for my '81 TR7 DHC as the old motor was so slow and unreliable. Fitting the unit was a bit fiddly but relatively straight forward. However, when testing the unit I found that the motor started but would not stop until I switched off the ignition!!!
I have removed the motor again and found that the black supply wire was abraded, leading me to think that it was shorting out; I duly repaired the abrasion and now find that whilst I have 'normal' speed and 'high' speed on the wheel box drive shafts, the da****d thing still won't switch off, neither will it park.
I wonder if I should slacken the switch unit and move it further back towards the rer of the unit, i.e. closer to the drive motor, on the premise that this would engage the stop and single wipe function. Does anyone have any experience with Lucas wiper motors for the TR7?
-
Thanks Andy, appreciate your input but my 'bodge' as per the photographs seems to have worked quite well.
Emrys.
-
Som
e photo;s of my 'bodge' job.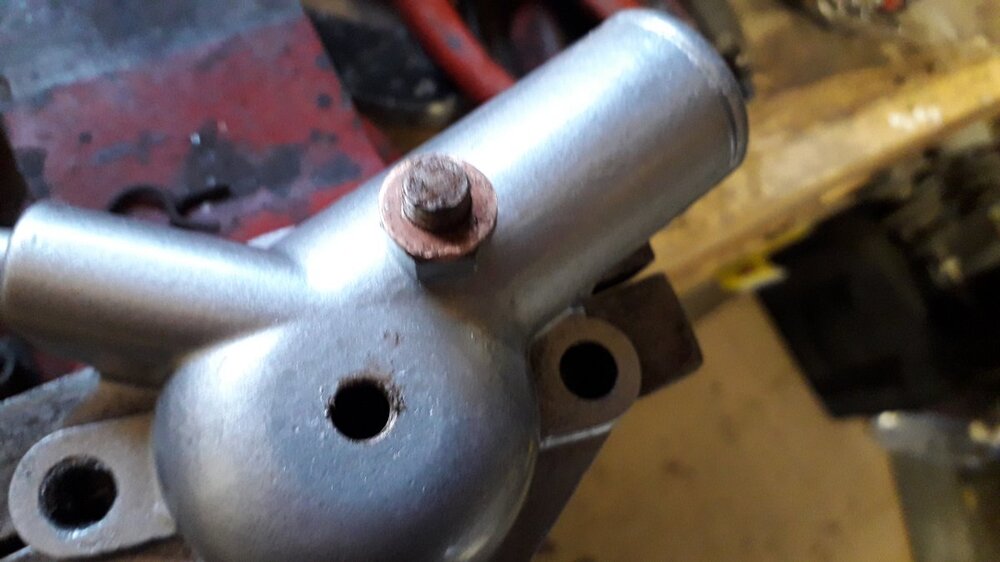

-
I've just bought a 3 switch fascia panel from Jonathan. Very easy transaction. photos supplied prior to purchase and delivery included in the very reasonable price.
-
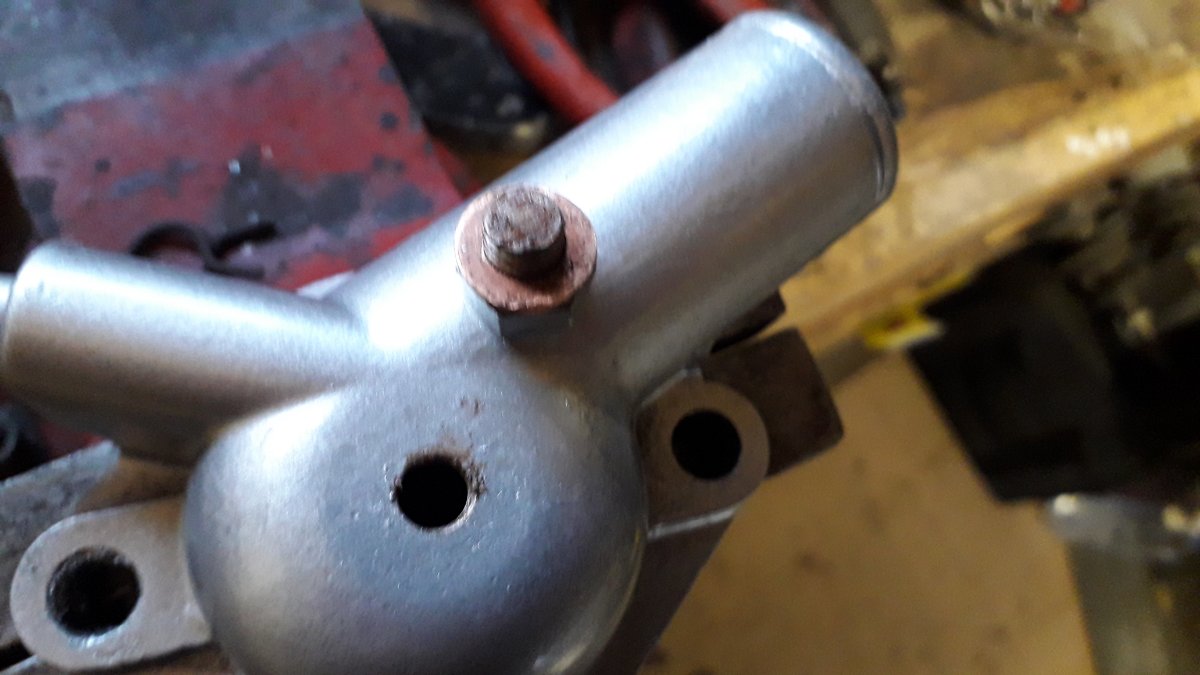
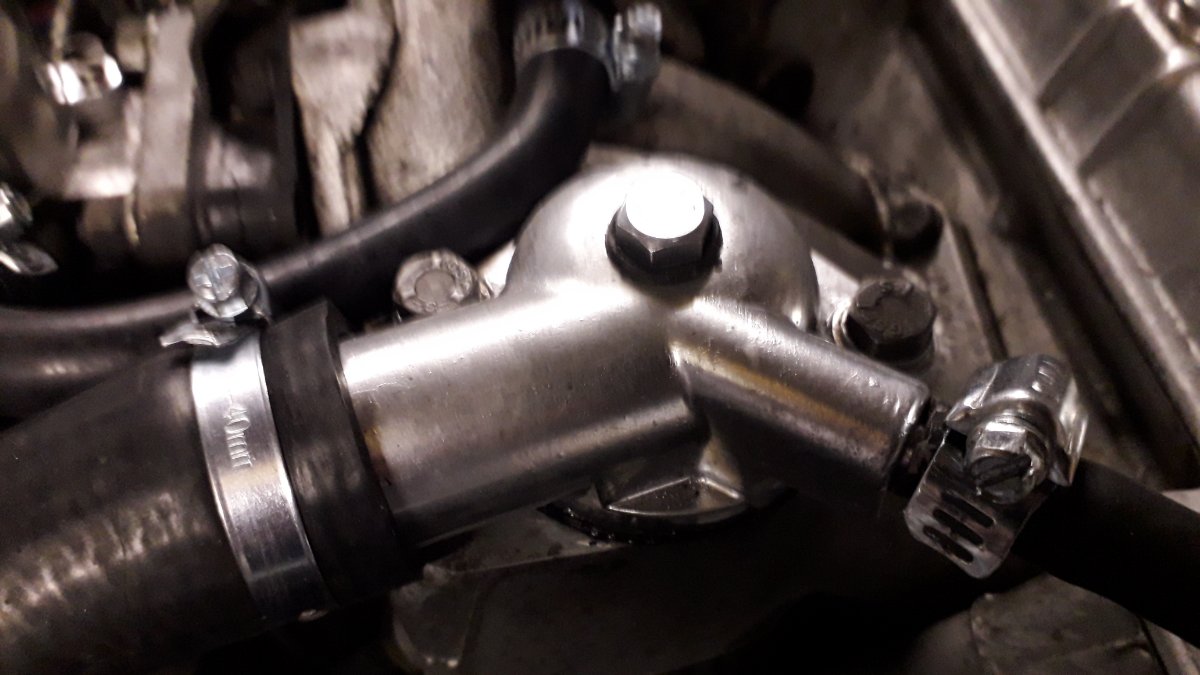
Gents, thanks for your suggestions; I eventually driled and tapped a M8 hole in the top of the thermostat housing, cut down a M8 bolt and, along with a copper seal, inserted that into the tapped hole, I also replaced the thermostat. I then started the car from cold, removed the expansion tank cap and slackened the M8 bolt; when I saw coolant start to seep out of the tapped hole, I tightened the bolt and squeezed the top hose several times. The expansion tank level dropped a little and the temperature gauge showed just over the half way mark, the electric fan cut in and the gauge remained stable when the engine ran for about 5 - 10 minutes. I'm happy that my 'bodge' appears to have worked.
-
5 hours ago, jerrytr5 said:
Sounds like an airlock. Make sure the heater control is on hot to open the valve. Start it from cold and leave the radiator cap off. You could try squeezing the rad hoses to make it 'burp', but watch your hands on rotating components. Put the rad cap back on as it warms and the level rises.
Jerry
Thanks Jerry, I'll try that and, hopefully, it'll do the trick.
-
I have just replaced the headlight panel on my '81 TR7 DHC, I have also replaced the radiator whilst I was at it. I refilled the system with Prestone coolant and
now find that, when the engine is running, the temperature gauge rises to high level and the low coolant light is constatnly on. I have filled the system with the recommended volume of coolant so I suspect that either (a) the thermostat has packed up or (b) there is an airlock somewhere in the system. My particular model does not have the filler system on the top of the thermostat housing. Can someone please give me some advice as to the best way to check and remedy the problem.
-
Thank you so much. Managed to download and rint off the dwell / tacho manual.
-
I am in the process of refurbishing a 1980 2.0litre DHC Tr7 and have recently been given a set of ‘tuning’ items by a friend and colleague; the items are manufactured by Rite Autotronics Corporation of Los Angeles, California. The case consists of a Dwell Tachometer Tester (549), Vacuum & Fuel Pump Tester ( 536/546) and an Ignition Timing Light (1503). All items would appear to be in operating condition, however the Instruction manuals (sheets) are photocopies of the originals and extremely faint.
Does anyone have any experience of using these items, or indeed any information regarding Rite Autotronics, such as contact details (email address) as I would like to try to obtain originals of the instruction documentation.
I have tried the internet, however I cannot find the address or contact details.
-
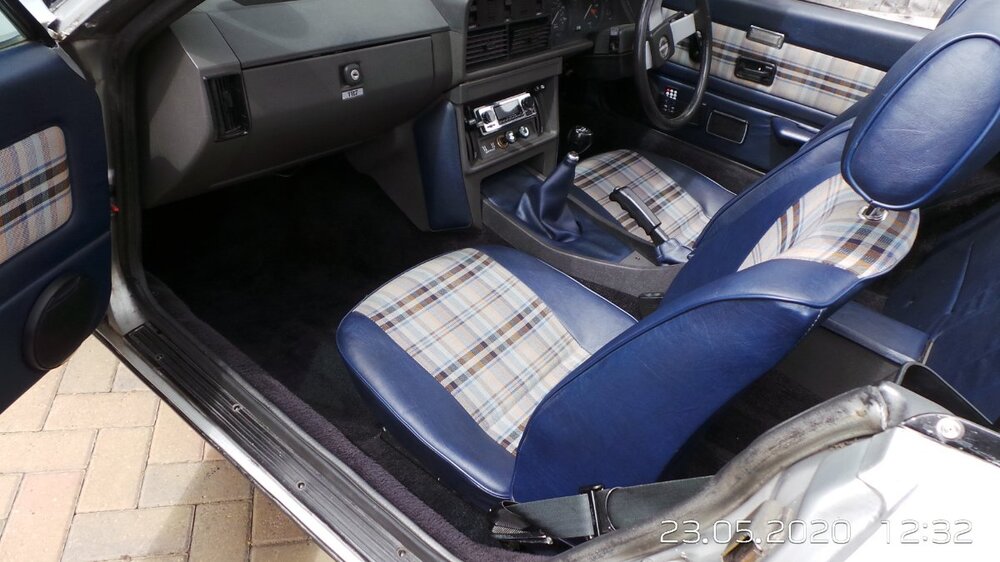
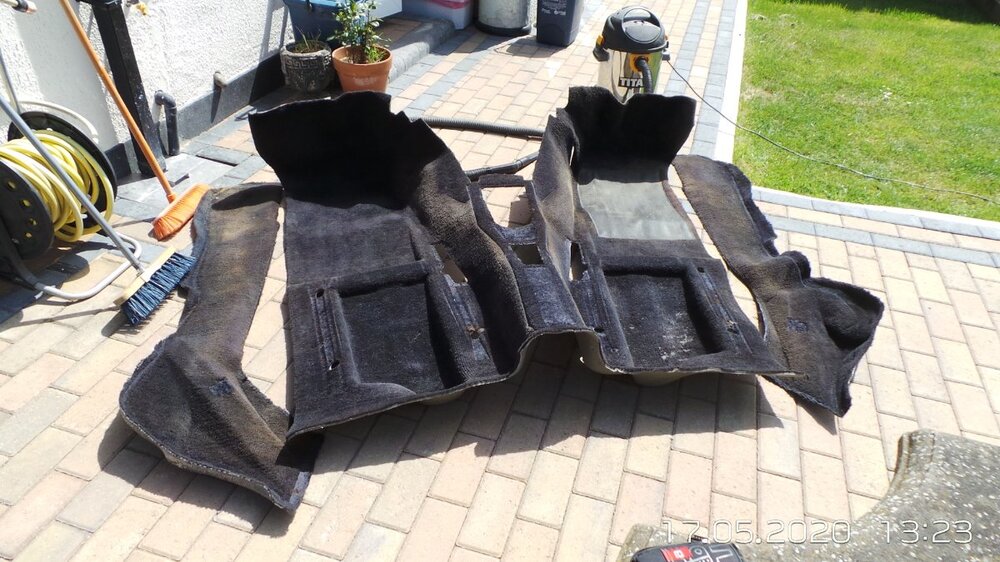
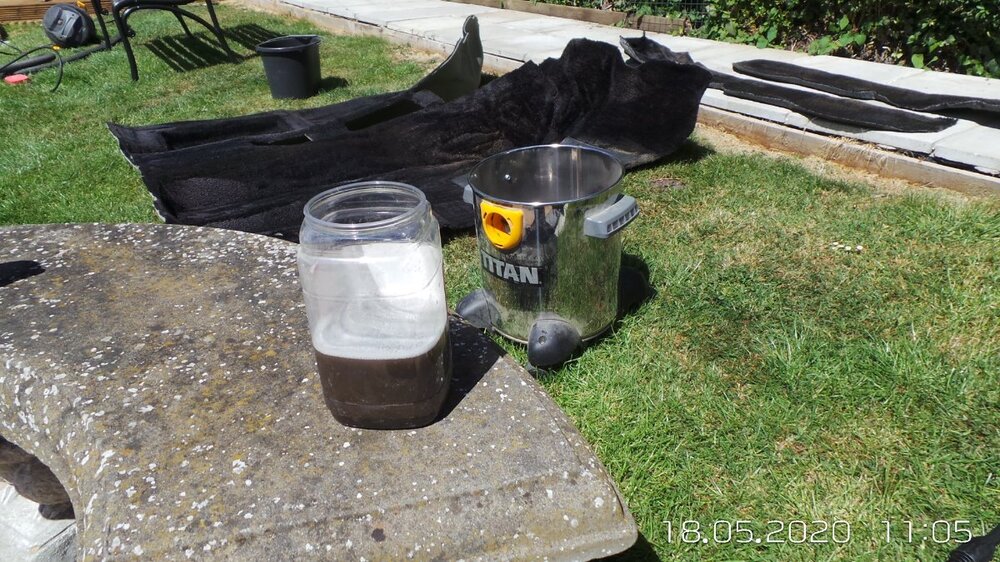
The dye used was water based, powdered ye by RIT, quite inexpensive but very good. The more dye you use the darker the colour, so start with a small quantity initially and build up the colour to match your new carpets.
-
I have dyed the carpets of my '81 DHC, also whilst the seats were out. I used RIT Navy Blue dye, bought on e-bay,. I you need any advice / photo's, then pm me and I'll send them on to you. One point, as the carpets are likely to have ground-in dirt, they need to be very thoroughly brushed and vacuumed, followed by a heavy wash using a pressure washer; the amount of muck removed was startling. Then dried thoroughly, I used a wet & dry vac and left them over the line to dry in the sun. The dye was mixed and applied using a brush and sponge (don't forget some rubber gloves) to make sure that the dye penetrated to the base of the fibres. The results were quite pleasing as per the photo.
Emrys
-
Thanks for the advice I appreciate it. I shall be doing just that. I had considered that the brushes might need replacing and, whilst I was at it, lubricating the wheel box / gear box; my problem is obtaining the equivalent of the grease / lubricant specified in the workshop manual.
-
I have started the relacement of the headlight panel and, whilst I was at it, I thought that I'd check out the windscreen motor. I'd found that the wipers are either very slow or just slow, depending on the position of the wiper stalk; also the 'parking' position is such that it is in my line of sight. Before starting I have checked out the WM and found that two forms of lubricant are needed, namely RLG Ragostine Listate Grease and ST41O Shell Turbo 41 Oil. I can't seem to find these either online or locally, can any more experienced owners suggest alternatives?
-
Gentlemen; thank you so much for your advice. I have now successfully removed the badge with no damage to either the badge or the panel. i used a thin blade to gently lift one edge of the badge and gradually worked arond the rim, lifting lightly as I went. The badge then came off easily.
-
I agree, the panel looks good from the outside but...... underneath the frame is B...dy rotten!! FYI The panel was originally bought directly from John Clancy, shipped to Robsport, etch primed and stored for me until I could collect it; however due to Covid restrictions, I had it delivered. Robsport were great and I'm really impressed with the panel.
-
I currently run a 1981 2.0L DHC which, to my surprise, I have to remove and replace the front headlight panel. I have already taken delivery of the replacement panel supplied by Robsport Int'l. However, before removing the old panel, I want to remove and store the 'Triumph' badge from the panel. My question is; does anyone have any experience of removing this badge and, if so, how did they do it without damaging the badge as I want to place it on the new panel after spraying.
-
I'm also in, money paid and Robsport Int'l have my headlamp panel, which is being etch primed. Just waiting to collect (or have it delivered).
Purchase was so simple and very fast.
My current TR7 looks great from the outside; however when I checked the underside of the panel I was horrified.

-
I am in the process of renewing all the brake components on my '81 DHC, so far this is going well (UNTIL NOW).I am in the process of replacing the rear brake cylinders; the new cylinders fit quite nicely, however the securing to the rear of the back plate is by a 'C' clip. My problem is how to fix the clip. Is there a knack to fitting the clip or is there a tool available for purchase/rent which will allow the clip to fit with the back plate in situ?


TR7 Wiper Motor issues
in TR7/8 Forum
Posted
Howard, my grateful thanks for your advice, I followed your instructions and discovered that the 6DA unit was at fault. I have bypassed the unit as you advised and now have operating wipers, which also switch off. As you said, I don't have the 'park' function but that is not a problem as I don't envisage taking my 7 out in the rain. Once again, many thanks.