


Ocheye
-
Content Count
358 -
Joined
-
Last visited
Content Type
Profiles
Forums
Calendar
Posts posted by Ocheye
-
-
Ah. That explains it. I will have to move the car if it is on the passenger side. I just assumed that it would be near to the indicator switch. I have very limited space to work on it so I took a calculated gamble that it would be on the driver's side. I should have known better. Thanks guys
Andy
-
That would make sense wiring codewise. Should it be there by the throttle? I must seem like a total idiot.
If it is the voltage stabiliser, where would the flasher unit be situated normally?
I really am hopeless at seeing under the dashboard -upside down. I should get a pair of Dennis Taylor specs.
Thanks
Andy
-
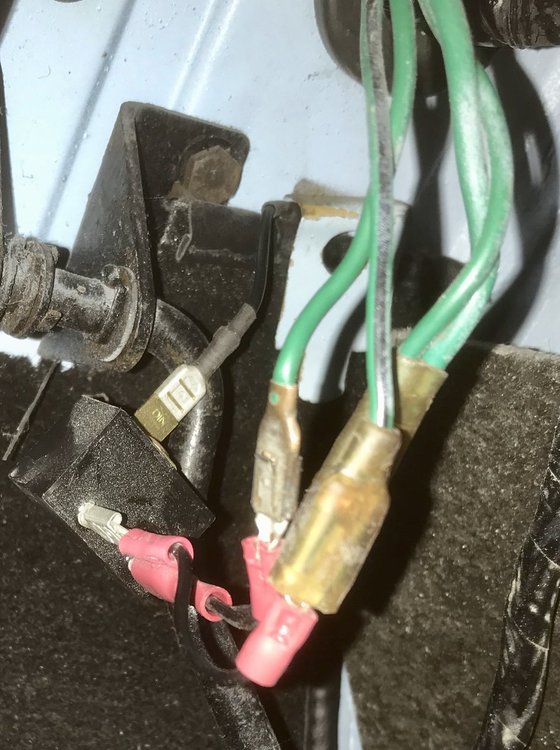
It is a squarish block (see photo). I am assuming that the black wire is an earth but as it disappears behind the pedal, I can't be sure. I remove it and check whether or not there are letters on the block but I worry that I will lose the original positions as it is so awkward to get at. I have to lie upside down which causes issues with my varifocals. It is difficult to see if there are any stripes on the wires.
I would have expected Green/White for the o/s and Green/Red for the n/s - That is the colours I have at the lamps and also on the wiring diagram though I think it should be a Green/Brown wire from the flasher unit to the direction indicator switch initially.
Andy
-
My bulbs and a flasher unit arrived today from Classic Car leds.
My existing flasher unit has 3 terminals one appears to be earth (black), one is connected to 3 green wires and one to a green/black wire.The new led flasher says:
X = Live in (49)
L = To switch (49a)
P = Dash warning (option)
Black fly lead = earth
Incorrect connection will damage the relay. Suppressed ignition recommended.
Obviously I am anxious not to damage the new flasher but I do want the dash warning lamp to function as I probably won’t be able to hear it as it is down by the throttle pedal. Can anyone advise as to how I should proceed.
-
7 hours ago, james christie said:
3M Acrylic Foam reference n° 4945 F. Comes in various widths.
I have seen that on my travels on the web but can't find it in 5-6mm thickness
Andy
-
I've decided to do away with the holder but am now looking to use double-sided foam (the type that doesn't hold water, can't recall the name). It needs to be 5-6 mm thick. I would like to run it all the way round the perimeter of the plate but can't find it on a roll and the sets of pads will leave gaps that will look unsightly. Has anyone done this please? If so can you point me in the right direction?
Andy
-
49 minutes ago, RobH said:
No problem Andy, you can just change the lot. The Rheostat won't do anything at all and will remain an on/off switch. Just make sure the LEDs you get are the right polarity for your car.
No probs. Ordered from Duncan at Classic Car LEDs and I had to specify polarity. Are the instruments easily removed?
-
As we’re locked down, I’m taking the opportunity to change my dashboard lights to led. I’m intending to keep my dynamo. Any words of warning or handy tips? For the record my rheostat acts more like an on/off switch and when on they are about as bright as a Toc H lamp - in other words, worse than useless. It is safer not to look at them in the dark to be honest.
Andy
-
Hi
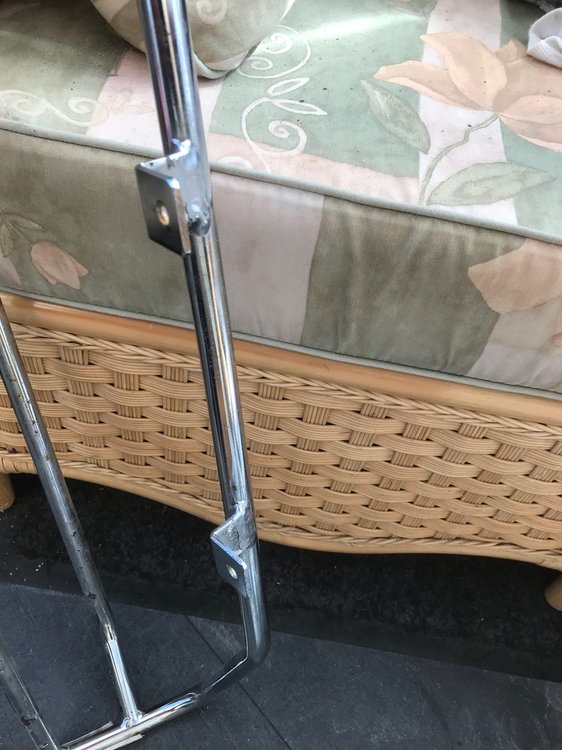
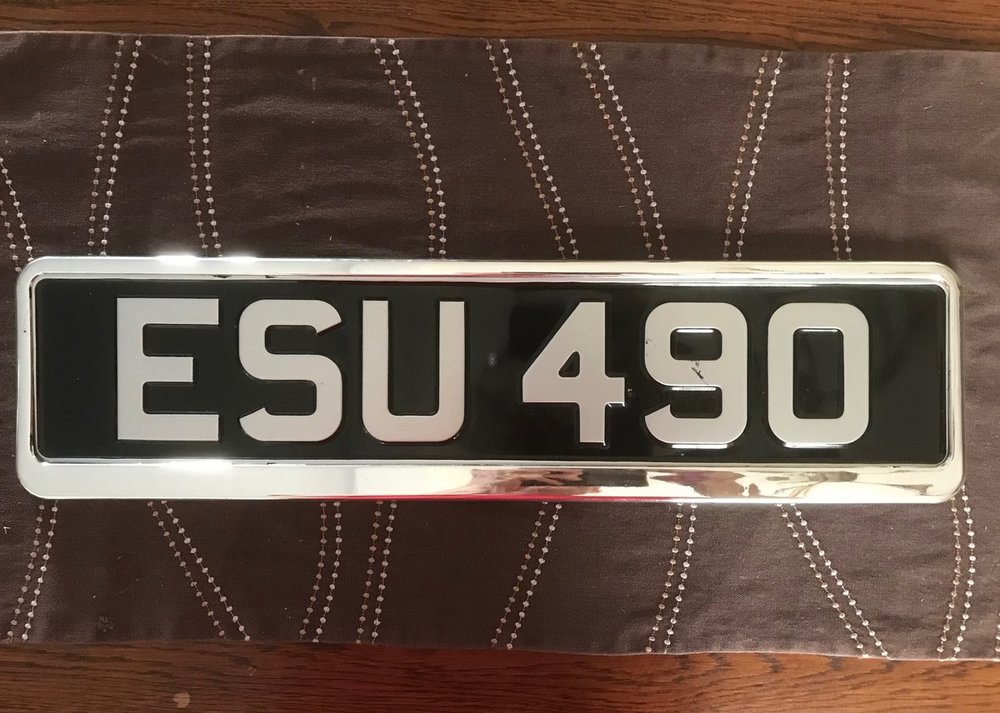
I'm in the process of fitting a boot rack to my TR4. It is the type that fits under the hinges and bolts to the boot under the licence plate.
Unfortunately my licence plate holder is chromed ABS and isn't hinged to remove the plate. There isn't any way that I can remove the plate without damage so I think I will need another holder.
The holder is necessary to hide the mounting tabs for the rack.
Has anyone done this recently? If so where did you get the holder from? Mine was fitted a tad too high up for the luggage rack which was why I had to remove it.
I can buy the same type on eBay but the quality isn't great and the lower edge is deeper than the top one and makes the whole a little deep for the space available.https://www.ebay.co.uk/i/310709533914?chn=ps&norover=1&mkevt=1&mkrid=710-134428-41853-0&mkcid=2&itemid=310709533914&targetid=879043638628&device=c&mktype=pla&googleloc=1006605&poi=&campaignid=9455575137&mkgroupid=94880575894&rlsatarget=pla-879043638628&abcId=1139576&merchantid=7427754&gclid=Cj0KCQjw4dr0BRCxARIsAKUNjWQu0-FLoSn3HHpHtT4e1g3jM1MAd5XryKwJuwjTfIa7sX-x01I6ceQaAkimEALw_wcB
Thoughts anyone?
Keep safe
Andy
-
5 hours ago, Lebro said:
The coloured crimp terminals (red, blue & yellow) are good if used with a good ratcheting crimper. The blue size of bullet crimp terminals fit the original bullet sockets well.
Bob.
In these times when we can’t inspect or try before we buy can you recommend a particular make of ratcheting crimper? They all claim to be excellent quality. I’m tempted to buy a kit so as not to run short of connectors. I don’t want to spend a fortune but equally don’t want to buy rubbish.
Andy -
I am about to modify my loom (bird’s nest) between the front lamps on my TR4 having recently fitted a stainless front rad shroud and converted my headlamps to led.
The existing bullet connectors are solder type. At the moment I only have crimp type connectors in stock and only the single tube type (cheapo).I would prefer to crimp as my soldering skills leave a lot to be desired and this article lists all the pros and cons https://millennialdiyer.com/articles/motorcycles/electrical-repair-crimp-or-solder/
Many of the wires are too long so I want to tidy them up and tape them in a loom or conduit. I would appreciate advice on what is the best system but please don’t ask me to solder.
I will probably need to order a decent crimping tool as mine is a multi tool type and fine for cutting and stripping.
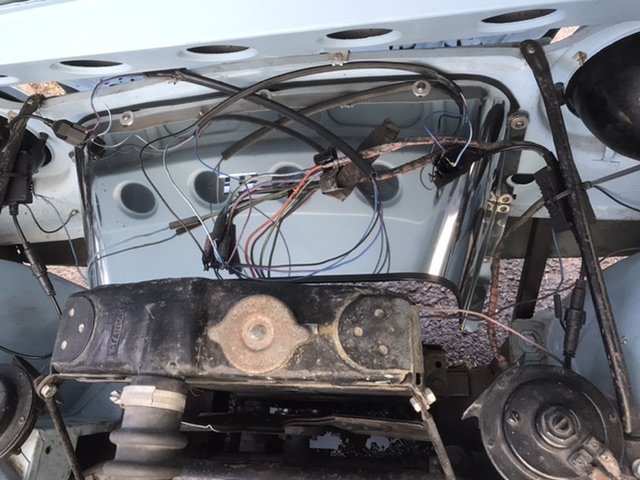 I’m also unsure of which size of fittings to order and where I measure them with my micrometer.
Any advice will be gratefully receivedAndy
-
I read this interesting article on the pros and cons of crimping v soldering of Bullet connectors https://millennialdiyer.com/articles/motorcycles/electrical-repair-crimp-or-solder/
-
I have made new plastic hoods(hope they don’t melt) and have ordered led bulbs to replace the BA9s. Hopefully they will arrive shortly and I can put it back together and tape up a loom to go over my new S/S cowl which is where this all began.
-
Thanks Richard. Yes, one of the spire nuts is missing though I probably have spares. I have checked the nearside lamp and it is pretty much the same story, certainly missing the hood
Andy
-
51 minutes ago, RAHTR4 said:
Andy,
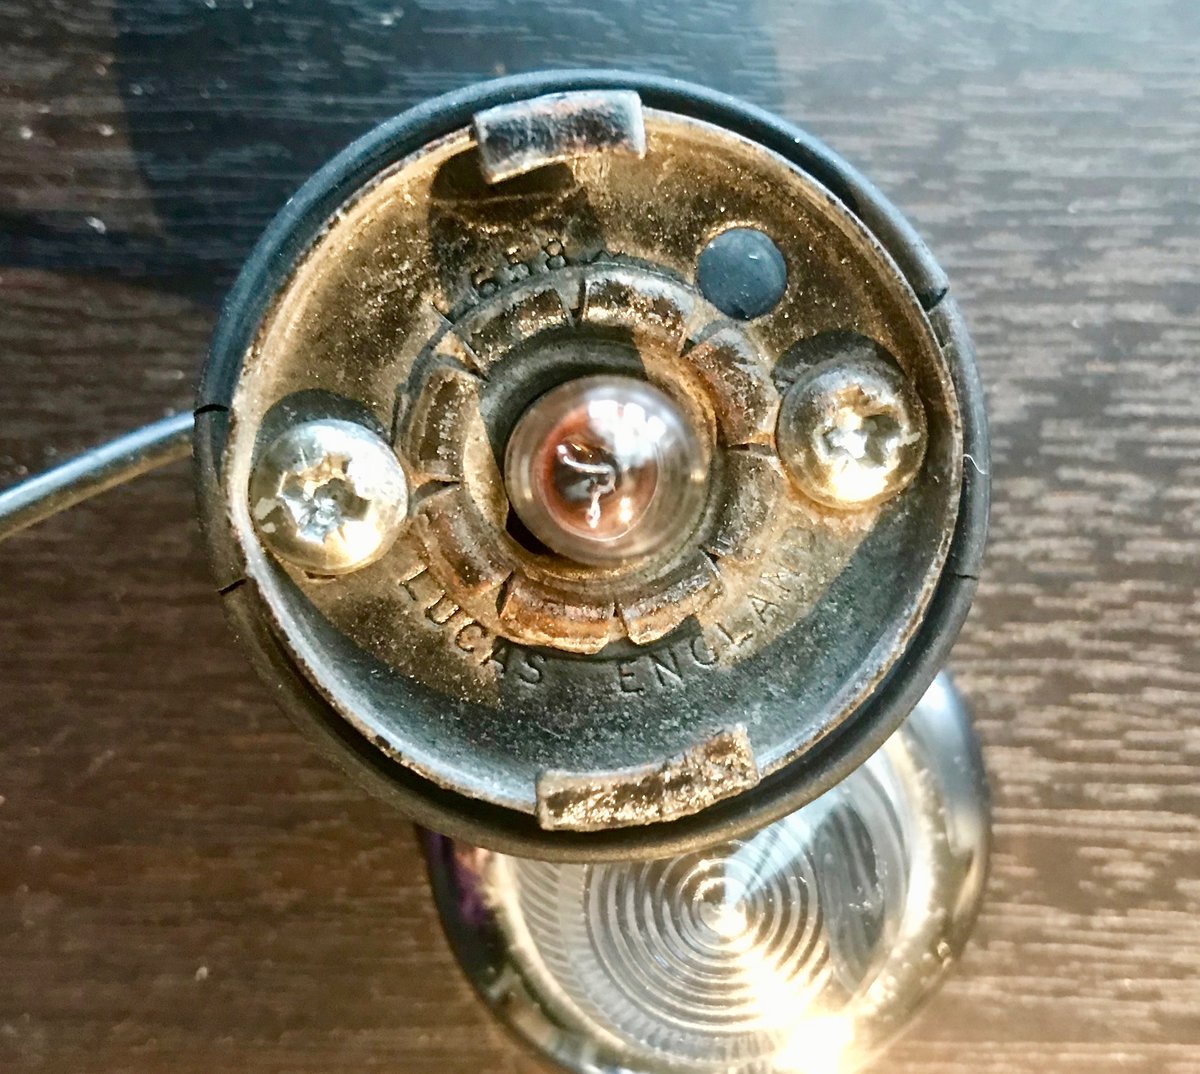
Photos of an original L658.
Regards, Richard


What a brilliant set of pics. Thank you. I can now see that mine has sustained damage/loss over the years. I'll check the other one and then make a decision. Andy
-
1 hour ago, rcreweread said:
Andy - If you look carefully at the photo on ebay, I think you can see the shade under the lens or better still contact them direct and ask:

Telephone: 01926 640055
E-mail: sales@autoelectricalspares.co.uk
Cheers Rich
I thought I could see something but wasn't sure.
-
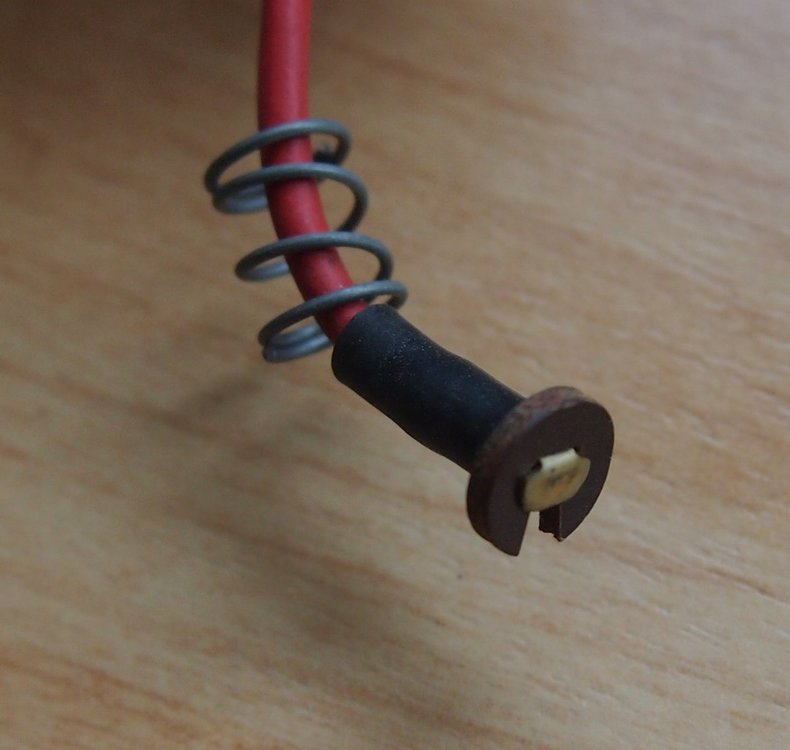
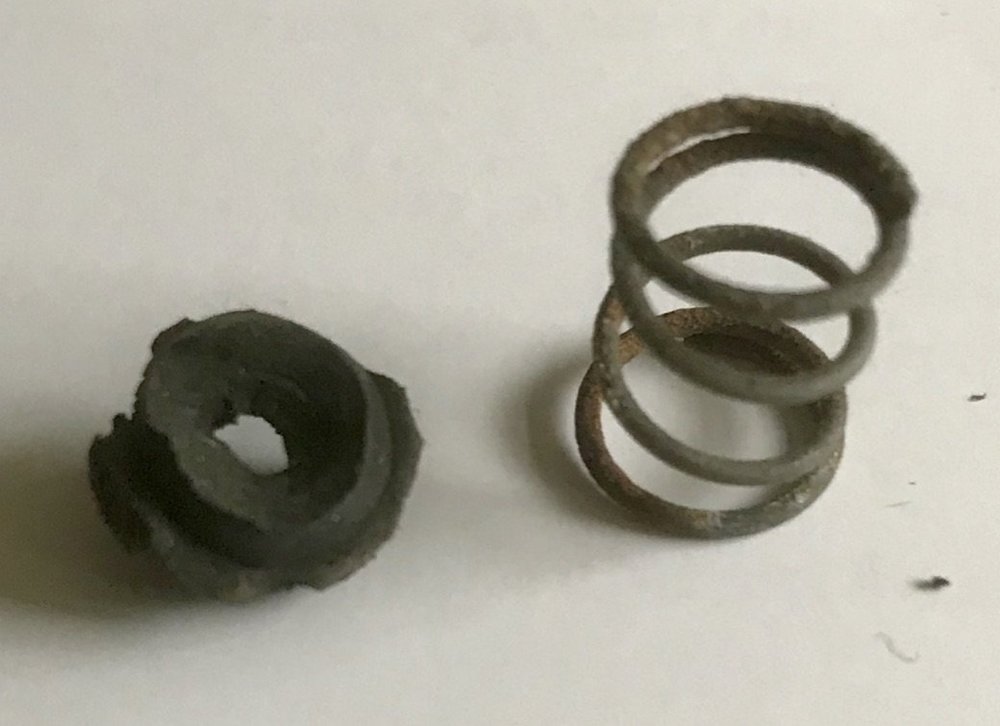
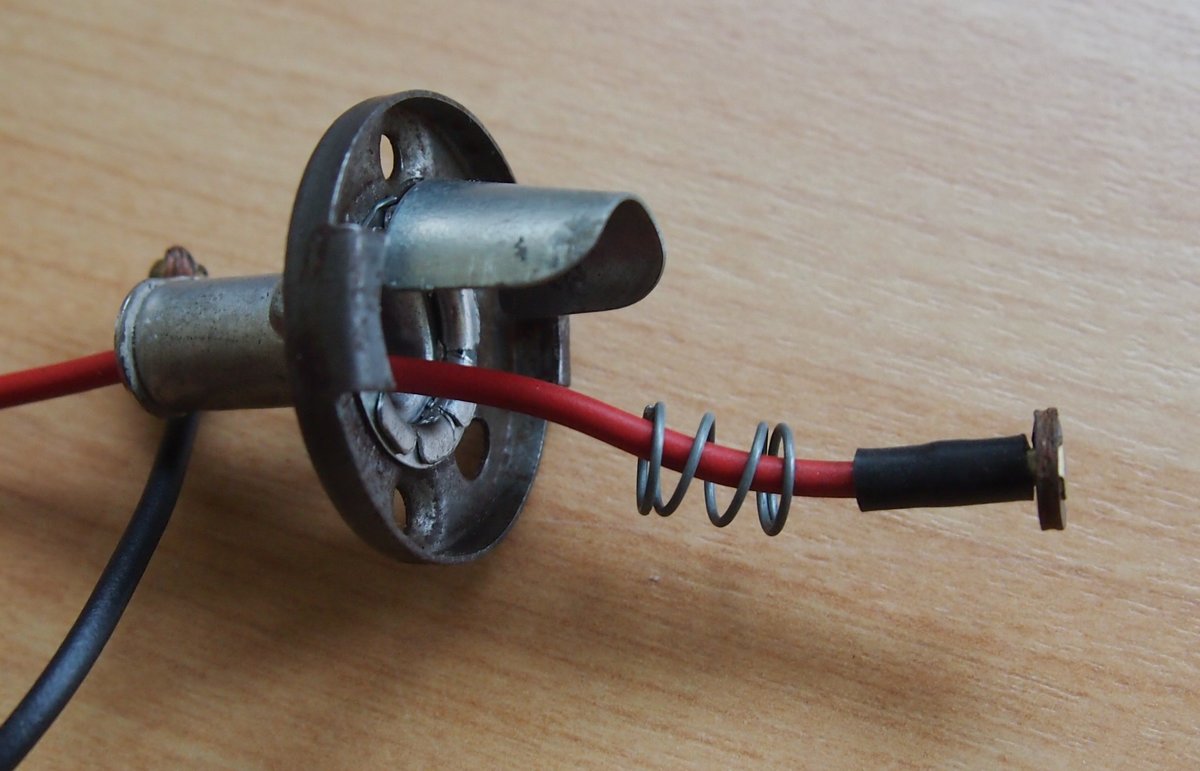
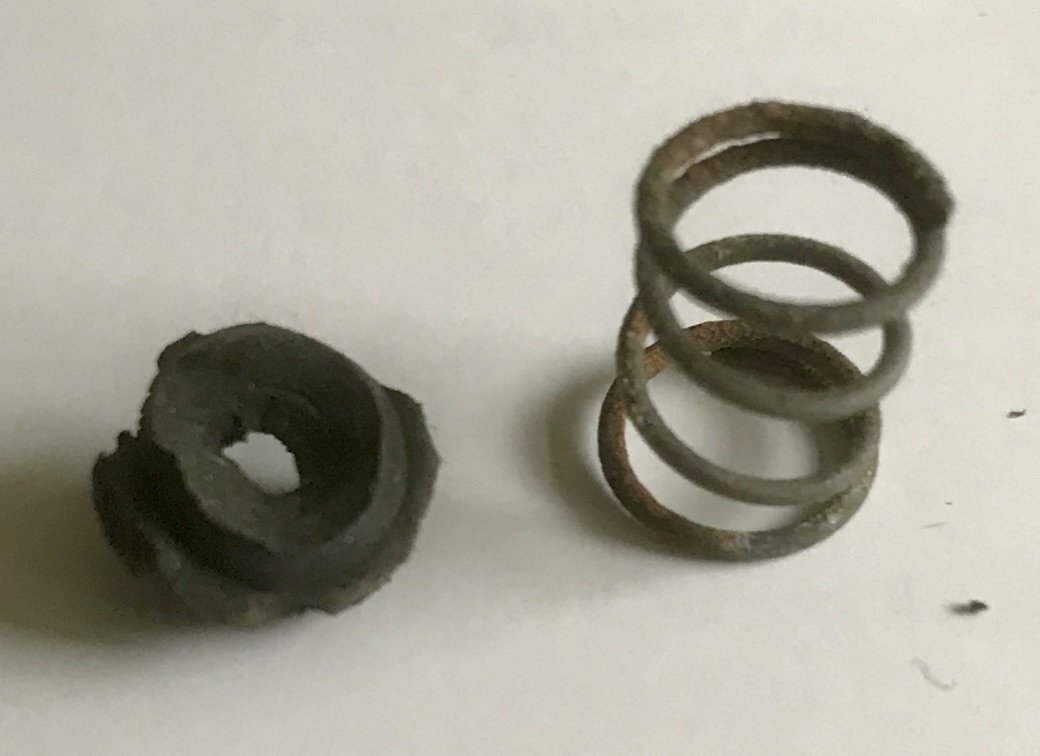
On further investigation I have removed the internal spring and washer (see pic). It doesn't appear to be bakelite or tufnal. Feels like hard rubber. I suspect that the live wire was just a push fit (bodge) through the hole and has pulled out when I was tidying up the loom and tensioned it a little so just as well I spotted it. Trouble is it is difficult to obtain silly little bits under the current circumstances.
I have also seen this advert for a complete new one on eBay but as it is a repro will it have the little projecting shade attached to the body? No internal photos to show.
Keep safe
Andy
-
Just a note for Rich to say how delighted I am with the stainless cowl for my TR4. Perfect fit and so easy to attach with pre-routed slots for the self-tappers
Andy
-
On 3/22/2020 at 11:22 AM, RAHTR4 said:
Andy,
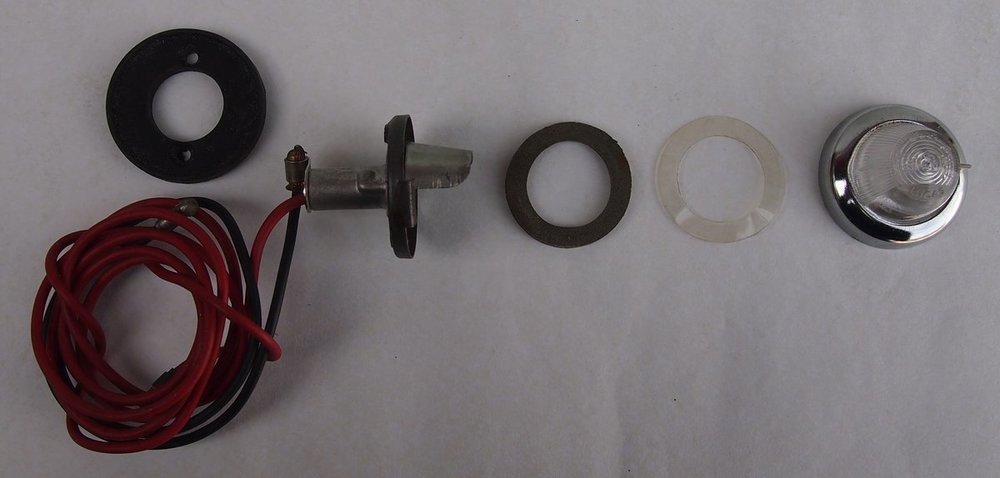
The Lucas L658 Side Light
Problematically the whole lamp unit can easily be mounted upside down; I have seen many cars with this mistake.The metal lamp body has a projecting shade and this must always be at the top, this ensures that the plastic lens is mounted correctly with its clear magnified area at the bottom, original lenses are externally marked “Lucas” across this part of the lens.
Regards, Richard
I notice that my lamp body doesn't have a shade as per the TR4 exploded diagram. I haven't checked the nearside one to see if it is the same. The body is stamped L658 but I can't see where it may have snapped off. The lens does have the magnified section.
-
Thanks John
As the car hasn't been anywhere I'll have a scout round to see if it has dropped off. I only appear to have the spring with the rubber washer(s). Is it like a tiny bakelight or tufnal washer with a steel centre that the cable is soldered to. There was nothing loose under the bulb
Andy
PS The earth wasn't attached anywhere!
-
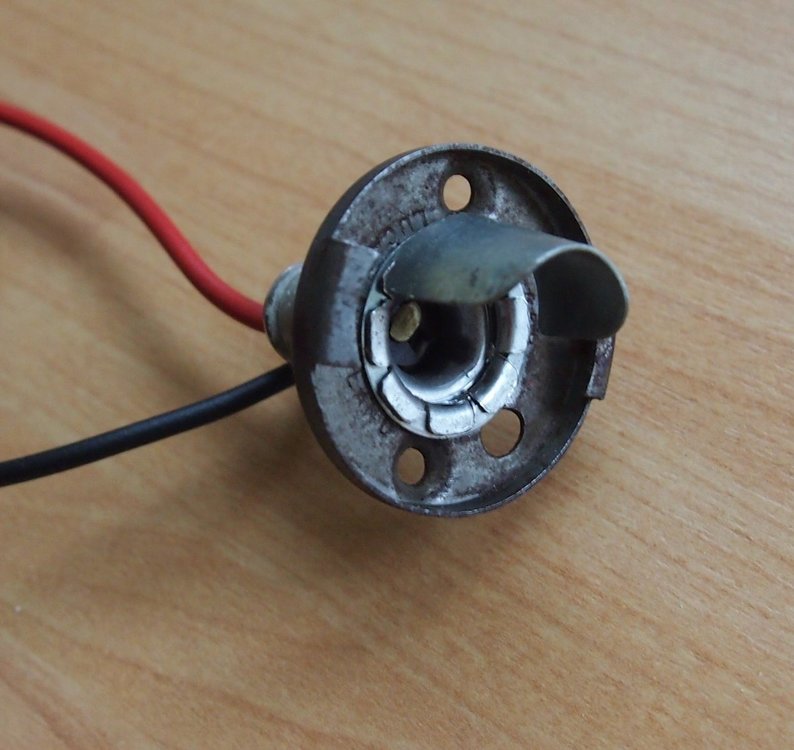
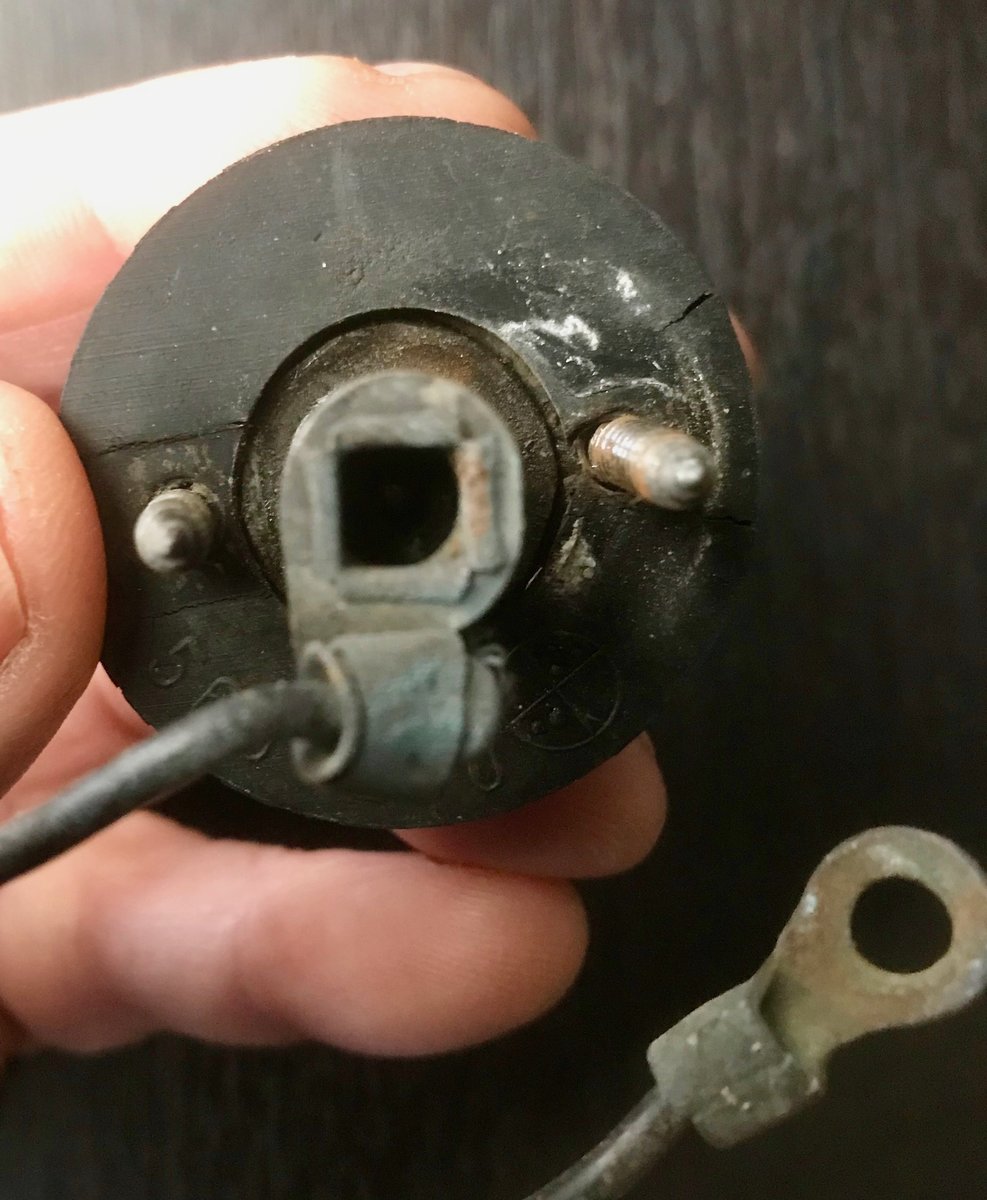
I've finally removed the side lamp from the car as there is no pressing rush to get the job done. I am curious to know what type of connector the wire should have. There is a spring with a rubber washer on it allowing the bayonet bulb to be pushed in and twisted, holding it in position. I'm assuming it is a bullet type fitting but it looks as if it is a 'round peg in a square hole' or is that just the end that is squared?. Do I need to order a particular size of connector (ref)?
I've attached a pic showing the back of the lamp holder.
Also should the inside of the lampholder be painted silver as mine is pretty much black as you can see? I had also intended fitting led bulbs (if I can get hold of any)
Thanks in anticipation
Stay safe
Andy


-
Thanks guys for all your helpful suggestions
Andy
-
This really is a long shot. I have one of these for an MGB which just about fits my TR4. I would like to swap it for a TR4 one. It’s pretty much perfect. Only been on once and is currently covering my 4 under a carport. If anyone can help it would be great though I appreciate that it is unlikely
Andy
-


Led flasher unit on TR4
in TR4/4A Forum
Posted
I'll have to borrow my GFs' reading glasses as we're self isolating so can't visit any shops. Boo hoo
Andy