

DesNoble
-
Content Count
108 -
Joined
-
Last visited
Content Type
Profiles
Forums
Calendar
Posts posted by DesNoble
-
-
Brian, That looks like a bolton rack & pinion. I have that on my car in case when I sell it the person who buys it wants to put the old drop arm steering back. However the turning circle is awful and I believe not as good as the one you weld into place. just a thought.
Des.
-
Just to add to my post where I said I use the wooden tool and hit it with a hammer. I've progressed from that to a couple of large jubilee clips attached to the arms of the wooden tool where I slide a long handle/ pipe to give me the extra leverage. The pipe is the width of the boot so is easily transported - doesn't damage the spinners either.
-
I have one of those Lucas batteries and so far have no problem with it. Just for info I'd keep your non smart charger as it will try to charge any battery no matter how low the voltage is. A smart charger has a cut off voltage which means if the battery voltage is too low it won't charge. A work around is to add another battery in parallel (as long as it has a decent charge) which will trick the charger into believing your battery is good enough. Leave them both together until they are both charged.
-
Those panels look an amazing fit. Good luck with the rest of it.
Des.
-
Thanks for the info and thanks to all who responded..
Regards.
Des.
-
Thanks for the replies so far. Peter your dipstick gaiter fits over the centre part of the original gaiter?
Des.
-
Does anyone know where I can get a good gaiter/grommet for my gearbox cover (gear leaver). The one I got supposedly from one of the regular suppliers was rigid and split after about eighteen months. Moss' number is 603065 although I didn't get it from Moss.
-
Do you know how many miles your pads have done. Sometimes when they are new they are a little tight, rub and get hot. I've had discs glowing before now with new pads. Not on the TR. Try driving a short distance without using the foot brake, and then stop gently, possibly with the hand brake, and see if the brake is getting hot. I would also test the brakes on an empty road or empty carpark by applying them progressively harder to see what happens. You don't have to be going fast you just need some space and no traffic. If they seem ok hit them as if you were doing an emergency stop just to satisfy yourself that if they were just sticky from being laid up that they were now clear. If they still pull to one side then I'd do as Ralph said above.
PS If they do get so hot that they glow drive slowly without touching them to cool them down otherwise they might warp the discs or even seize.
-
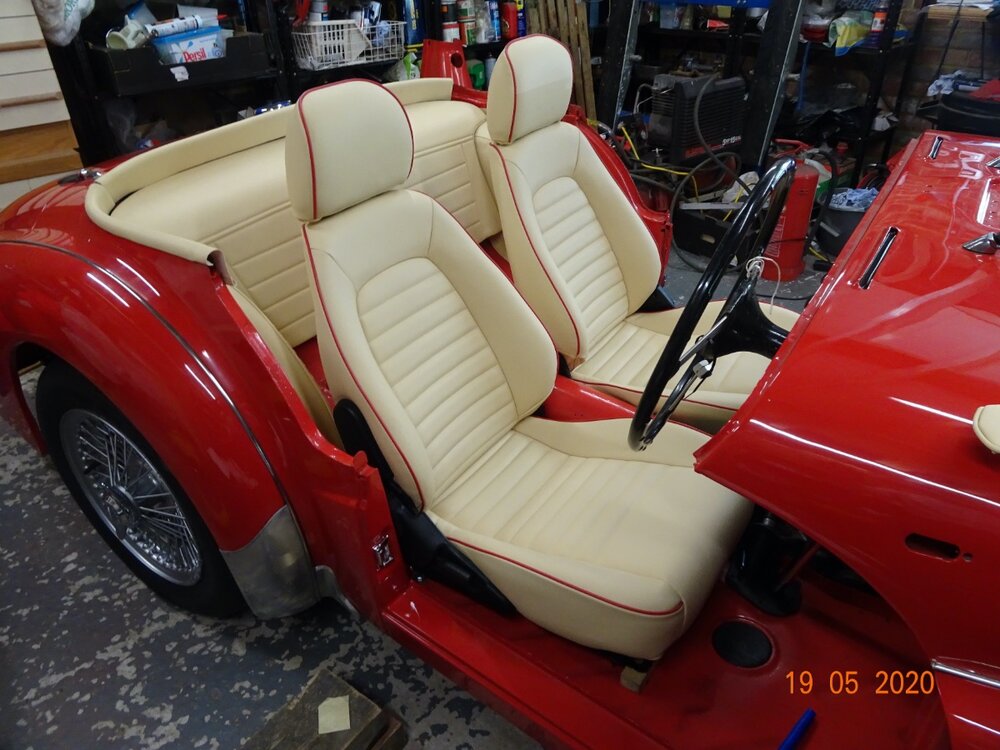
Yes MX5 seats can be used but they are a very tight fit. They are actually handed as the cushion is slightly wider on one side than the other and is made of one piece so difficult to reshape. I don't think anybody does that. Also the position of the back adjustment leaver is a decision you have to make. In the MX5 it's on the outside of the seat but most people swap the seats around so that it's on the inside, on the transmission side. I liked mine on the outside which also meant that the fatter seat swab over hung the transmission. Either way the rear wheel arch and or the rear seat, if you have one fitted, restrict the rearward movement of the seat. In addition I squeezed the transmission tunnel slightly to give me more width and even then the seat rubs on the side panelling.
Apart from that they are great seats and much more comfortable than the original. They are more like touring seats then rallying seats.
Regards.
Des.
-
I now use the wooden tool plus a mallet. I don't know how people can say that they tighten them up to 200 or 300 Nm. At my last MOT the tester pointed out that the spinners were not tight enough so I agree with the tight as you can or thereabouts.
-
Hi Billy,
Also just seen your Triumph Triumph TR2/3/3A by Bill Piggott which I would also like. I'll include it my PM.
Des.
-
Hi Billy,
Yes I'd like to buy the Triumph Sporting cars (Bill Pigott).
I'll send you a PM later today.
Des.
-
When I changed to a R&P steering I used the original clamp in preference to the new one at the bulkhead, no problem.
-
You can buy the carpet studs. The under felt makes a big difference to the sound and if it's from a TR supplier will have holes where the studs will be, otherwise use a hot socket or the like to burn the holes in the felt. This method of making holes also applies if you are making holes for mounting bolts to pass through.
-
Not a problem I was probably feeling a bit like a bit of shopping therapy!
-
Peter, I've just ordered a gauge and adaptor from Dave at O/D spares. Thanks for the offer of yours and conversely if you still have trouble sorting out yours when I've got mine sorted you are welcome to borrow mine.
Des.
-
I had an electronic kit but had terrible problems with timing and engine cutting out. Finally having checked everything from cam timing to carb jet rebuild I replaced the electronic ignition with a set of good points - bingo the car runs beautifully and the timing is spot on the curve.
-
The best way to set points is by using a dwell meter. It's cheap and easy to use. The easiest way is to remove the distributor cap and rotor arm, set the points roughly with a feeler gauge then connect 12v across the points with the dwell meter attached. For a 4 cylinder engine it's 60 deg. so you just motor the engine over and set the timing while you are doing that. Job done.
-
One thing. The cap on the gearbox where the plunger for the O/D selector is retains the spring. Will your adaptor retain the spring at the correct position.
Des.
-
Yes Peter I'm looking at the contact that Tom gave me above, but as yet I haven't bought anything, So yes I am interested in what you have. My aim is to have a tester which I can attach and use while driving the car or at least static with the prop disconnected.
Regards.
Des.
-
Thanks Tom. I'll give them a try. Des.
-
Does anyone have an oil filled pressure gauge with an extension adaptor so that the car can be driven with the gauge in position. It's an A-type overdrive for a TR3A.
Thanks.
Des.
-
Beautiful. Interesting to see what it goes for.
-
Miles. What indicator stalk is that and any chance you can photograph it.
Des.

TR3a spare wheel
in TR2/3/3A/3B Forum
Posted
I use one of my old 48 spoke tyres and it just fits fully inflated in my pre 6k model. What I do is use an old strap around the wheel rather than through the spokes as it gives me an extra bit of margin.