


RobinTR
-
Content Count
95 -
Joined
-
Last visited
Content Type
Profiles
Forums
Calendar
Posts posted by RobinTR
-
-
Hi Ed, thanks, but your inspirational website was one of the first places I had already checked for an answer, hence me trying to clean the gunge with paint thinners. This was pretty successful, but it is the presence of the baffle which is the problem at the moment; not only is it holding back the fudge (about 2" thick), but it is not possible to see inside to check my progress. I guess I'll keep adding solvent/reagent until I get a comparatively clear liquid to drain after the sloshing around. Then I can move on to the rust removal and stabilisation steps.
You used an endoscope for your videos... was this a professional model, or something readily available from the internet? Some more information would be a help.
-
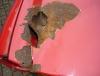
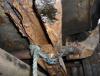
My TR6 project car sat unused for nearly 30 years and I have found an accumulation of really thick gunge on the bottom of the fuel tank. I ran a search on the Forum; read a number of threads and Ian Cornish's tank sloshing article from Technicalities (thanks Ian). These gave me hope, but they don't address my current problem, which is that the built-in baffle pot is full to the brim with a fudge-like material.
Repeated sloshing with paint thinners and blow-through of the off-take & PI return ports has removed the worst of the general gunge, but the inside of the baffle is being difficult due to the limited access. I have had a prod at the top via the sender hole, but cannot see enough to assess progress.
Questions:
Is the baffle simply an open-topped steel cylinder with nothing inside, just a small gap between it and the bottom of the tank... if so, then how wide is this gap?
Does the PI return dip-tube go vertically all the way to the bottom of the tank within the baffle?
The threads/article discussed fuel tank internal coatings (example Moss Sloshing or POR 15), but I have found no reference to doing this on a tank with a baffle. My observation is that the design and limited access would make it difficult to guarantee that the baffle is coated both inside and out; with the added risk of blockage to the return dip-tube and bottom gap. Can anyone describe their practical experience coating a baffled tank?
Final question; can anyone recommend a good endoscope that will allow me to see what is going on behind the baffle and in the tank corners? I bought one for a laptop a couple of years ago, but it turned out to have a very limited focal distance. A recent trawl of eBay produced dozens of options, so some practical feedback from a happy consumer would be welcome. Ideally an instrument suitable for the tank, chassis sections, cylinder via spark-plug hole etc.
-
There is a slight difference in the position of the threaded boss between the Moss illustration (on the end section, after the 45 deg bend) and those shown by Revington and DMG where it is on the central section. I assume that this is not an issue, or is the position critical because of potential interference with other items, or it is more difficult to gain access?
-
Pete, if I remember correctly I found/made a small strip of wood which fitted snugly inside the strip of staples. This gave some support so that the strip stayed in one piece. Using a Dremel may seem like a delicate way of going about it, but with the angle grinder the trimming was done in seconds and the thickness of the blade meant that it created a chamfer on the end of each staple, so punched in cleanly from the gun.
The door trims in question were actually on my Stag, but the design is basically the same. I stripped the vinyl and replaced the old warped cards with new items from one of the usual stockists. The old ones had lasted 40years, so I suppose that I shouldn't complain, but I treated the new cards to increase their life chances. I was using fibre-glass to repair the fibre-board parcel shelf at the time, so used some of the resin on the door cards... I mixed a batch with hardener and then diluted it with thinners so that it would brush out more evenly. After a couple of coats to both sides the boards looked more impervious to water, but took a week or so to fully harden and the odour to disappear. Only then did I complete the reassembly with the riveted metal support plates and vinyl (not sure if there are any similar metal plates in the TR's).
I suppose something like a marine varnish might be a more conventional sort of treatment, but I was hoping that the resin would be absorbed and so strengthen the card itself.
I don't think that I could get the rain curtains from the supplier, so I bought some damp proof membrane for a builder's merchant and used that.
Picture attached shows the inner side with curtain
-
Re Pete (stillp) point about short staples. When I did some door cards I bought too-long but suitable gauge/width staples, then held a strip carefully in a vice and the trimmed the length with an angle grinder fitted with a thin cutting blade. I think that one or two staples on the edge of the strip became dislodged, but enough remained "glued" so they could be used in a normal staple gun.
-
When I bought my 4A back in the '70s it had a manual pump mounted just behind the dashboard. I modified this so that the same dash button became a push switch linked to an electric pump. I recall cutting up the old aluminium pump body and adding a spring loaded switch on simple bracket; I must have taken a fused 12V feed from somewhere, but can't remember the details.
Maybe not so handy as a column mounted switch on a more modern car, but it is still working nearly 40 years later.
I am sure that many other cars must have had similar modifications.
-
Nail, thanks, but I am not looking for 6". The fact that you have 5 1/2+15+6 alloys with tubeless tyres is encouraging, but my question was: are both the 5 1/2J x 15H and 5.5J x 15 x 6 versions, in steel, suitable for tubeless tyres, or should they really have tubes and tubed tyres?
Incidentally, the 5 1/2J x 15H on my car are marked with the maker Sankey, and presumably are original to the 1971 production, whereas the 5.5J x 15 x 6 are said to date from 1973. So presumably both were "standard" at the time the respective cars were produced, or was there a difference due to factory/sales option of tube or tubeless tyre?
Does anyone know the significance of the last digit ( x 6 ) in the wheel reference?
-
I apologise for resurrecting this older thread, but there are a few already on the general topic of tyres out there, so did not want to start an new one.
My question relates to what is meant by the "standard" TR6 steel wheel as discussed earlier in this thread.
Some wheels on my project car are rusted beyond shot blast redemption, so need replacing. I have seen a set advertised as being "tube-tyre" type showing markings as: 5 1/2" x 15 x 6. The vendor has said that they were originally fitted with tube tyres.
The set of wheels on my '71 car are stamped on the inside as being 5 1/2" x 15H, and are fitted with 205/60 R15 89H - Pirelli and Firestone tubeless tyres (which I will replace with something less low-profile)
Looking at other websites I see that the H means that these wheels have a single "hump" on the outside rim (although this is not something I can detect visually), so presumably were designed for tubeless.
So would the 5 1/2" x 15 x 6 be ok for tubeless tyres, our would they need tubes and matching tube-tyres (presumably more limited in availability than tubeless)?
-
I have been saving up a similar question for my TR6 restoration, (although more related to material availability), but this thread has answered most of my questions. Prompted by Stuart's comments I rang around to find local steel stockists (Camberley area) and found one who was helpful and said that they could cut to any size and even help put in angles etc. Interestingly, they said that while they stock 18 gauge steel (CR4), with nominal 1.2 mm thickness, it is currently being supplied closer to 1.1mm.
I presume that the older cars where manufactured when things were still predominantly to imperial measurements, so SWG was based on so many thou, whereas the current sheet appears to be metric, with the SWG referenced as a legacy size. However, from my reading of the size tables, the metric equivalent tends to be slightly thinner than the SWG specification.
I had to prepare scores of weld-in patches when refurbishing my Stag a few years ago and found that the most effective material came from a steel shelf from some industrial racking and the section dividers from an office filing cabinet. This steel appeared to be slightly thicker than the usual metric/SWG purchased on the net and seemed to be of a higher grade steel (may have been just my subjectivity).
I was happy to work with this slightly thicker material on small patches as it allowed surface finishing without leaving a hollow needing to be filled.
When talking about thickness for original items like rogerowen's wings, then what allowance would have been made to compensate for the pressing process? I assume that there would have been some measurable thinning on the wheel arch lips etc. Does this result in requirement for different thickness material depending on the position of the repair?
-
Are the thicker plates used just like oversized washers, or is it necessary to weld them to the original wishbone boxes? Stuart mentioned that some applications may need wishbone brackets with longer studs, so just how thick are these strengthening plates? Are they something which anyone could make up with a bit of plate, grinder and pillar drill?
-
Thanks for all the replies, unfortunately I am going to be tied up this weekend, but BST is not far away, nor hopefully the brighter weather, so maybe an evening visit will be something that can be arranged before too long, if that is more convenient. I'll be in touch via PM
Regards
Robin
-
Steve & Robin, thanks for the very kind offers. Weybridge is certainly closer, so that might be easier to coordinate, and be of added interest as the mine is the same colour! However, I also appreciate the offer from Robin, although the name business could be very confusing !
I presume that sending a PM would be the best way of arranging a day & time? Normally I am pretty free, including during daytime, but I do currently have a few things booked and would not want to put you guys to any inconvenience.
I am very familiar with the Moss catalogue, as also with the Rimmers website. You have both mentioned the brown book. I have seen these advertised on ebay and also I think they are stocked by Moss. In the past I have found that some modern reproductions of old workshop manuals have not been very satisfactory as the spines have been weak and pages thin and flimsy, so they quickly fall to bits. Having a look your manuals will help me decide where to place my purchase.
-
I'll give them a call and hope they haven't sold off my reg.!
-
I have just taken on a TR6 refurbishment (see Forum Post "Optimistic Rebuilt"), but have no experience with this model, (although i have owned a 4A since 1978), so it would be a great help to be able to take a look at some other cars to see where various parts fit etc.
I live in Camberley, Surrey, so somewhere within a 10-20 mile radius would be ideal. Ordinarily I might get lucky to see a TR6 at the Windsor Forest group monthly meeting, but I know that I will not be able to make the April session, and don't want to have to wait until May.
My car is a 1971 model, so with a CP PI engine, and at some time in the past it was fitted with a tubular exhaust manifold, now very rusty, and what I think is a Triumph Tune twin-pipe stainless steel system. A car with something approaching that set-up would be a bonus, but any reference car will be a great help.
Also it would be good if anyone is mid way through a restoration with their car off the ground, so I can take a good look at things like the routing for the hydraulic and fuel lines. A fair bit of the front O/S structure on mine is missing, so a prospect of taking a few templates from a sound body might be interesting.
-
Hi Bruce, The car came with a reasonably comprehensive set of records from the '80s,including: hand-written service notes (covering a period of around 20k miles), MOT certificates, Tax discs and the current style V5c (in English and Welsh, due to its location).
The last tax disc dates from '88, which was a few years after the last change in keeper (shown as 11/85). Looking at the historical mileage records and comparing with the current odometer I am pretty sure that the car hasn't turned a wheel since '87/'88; it has just been parked-up, slowly rotting.
Obviously the lay-up predates the introduction of SORN; I was hoping that there won't be any problem when I send in the V5c indicating me as the new Registered Keeper and asking for a change in the tax classification to Historic. The only question in my mind was whether to do this before or after completing my re-commissioning and if the V890 should be sent in at the same time. Do you foresee any questions from DVLA... would it be best to give them a call first?
Robin
-
Tom, regarding doors, then that is one area where I had planned to source reasonable pre-used original items rather than new skins. When I find them the first thing I'll do is make some templates to compare to those on the car now, (and keep my fingers crossed that Triumph did not rely on too much hand fabrication, leading to significant differences)
-
The discussion about the options for proceeding with the body repairs is very interesting... it would be boring if there was a consensus! Not sure how it fits into the debate, but my plan would be to try to work on just one side at a time, so start with O/S, as the N/S seems to have reasonable shut lines and it is the O/S that has more of the body structure missing.
Talking of straight frames... how straight does it have to be to be classed as such? Is this 1mm over the length, or what? Can that be assessed while the body is on the car using spirit level and wire-lines? The current chassis is rotten, so can it be jacked up in various places until it is straight; then use it as a jig for the rebuild (piece by piece while most to the wings/bonnet etc. are on the car). When the body is finished, then lift it off onto the new frame and shim out where necessary.
OK fire away.
-
I am going to look at a used chassis tomorrow, apparently on reasonable condition, but needing some repairs. One issue is that I don't know how to tell the difference between one from an A-type overdrive and the later J-type. I believe that the mounting plates are different. Can the J-type chassis be back converted to suit my A-Type?
-
Hi Calum, I beat you with the launch of my own TR6 restoration just a few days before yours, but I figure that I will still be working on mine well after you have finished. If you have not seen it already, then look at my post "Optimistic Restoration".
As openroad has said, it is good to see a newer generation enthusiastic about TRs and taking on a restoration project.
Space does look tight, but it is remarkable what can be achieved in restricted conditions.
There are some excellent videos on YouTube... if you have not seen them already, then do a search on "jademuttley". He has posted a series of inspirational videos starting with https://www.youtube.com/watch?v=C-mqvxSuLJk&list=PLj9GWtoWPbyAxXxbp5PPrwKA9HpJLX4BC&index=1
He works on the Triumph Vitesse, not TR6, but the principles should be the same, although the body components for his cars may be lighter! For TR6 specific restoration then search YouTube for Elin Yakov. He has posted a series of videos showing his progress with a couple of different cars.
I blame these two guys for the resurgence of my interest in car restoration, which then prompted me to take on my rusty wreck; in the knowledge that it can be done. Although when I look at the pictures of you Dad's old car, then I almost wish that mine was in that condition already.
My main caveat is to always think safety before you do anything, every time you do anything. I still remember a scare I had many years ago while working on the outriggers of a Triumph Herald. The close-up view of a rusty floor pan could have easily been the last thing I saw in this life. Sorry if I am preaching to the already converted, but since then I never rely on a single jack, try to avoid single axle stands, but look to have multiple protective systems. For example I have securely located axle stands, plus solid wood blocks wide enough to tolerate some sideways slippage of the car.
Good luck and I'll be following your progress with interest.
-
Roger, thanks again. Sorry for seeming a bit slow on the uptake, but where can I find my user settings? Also I can't see any box at top right; does it only appear then a PM is received?
-
Roger thanks for the instructions.
Graham, I'll give the TR Shop a call
-
Now navigated my way to the Attach Files:
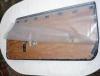
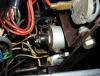
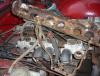
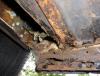
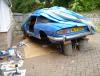
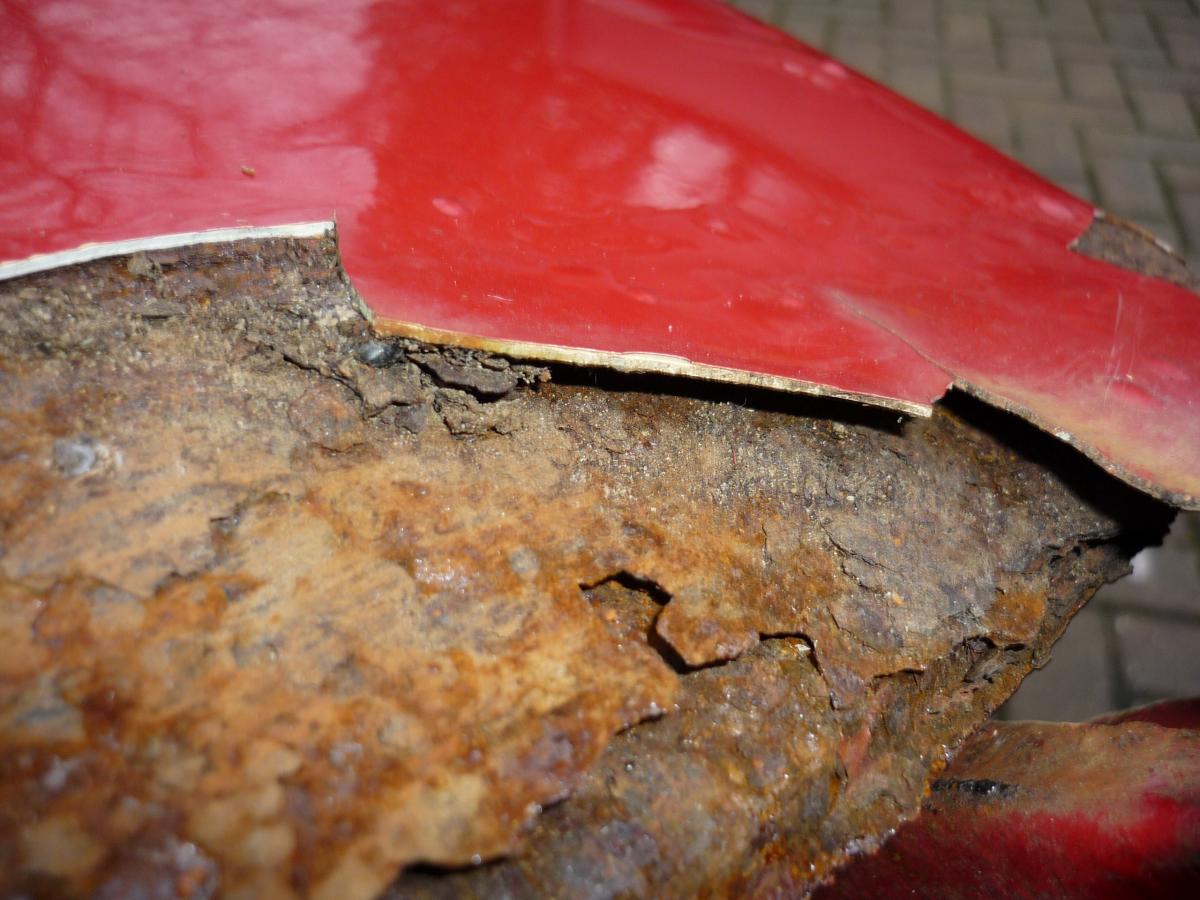
Examples giving an indication of the condition of my rusty TR6. I'm sure that these are nothing new to you hardened restorers out there. The pictures of the Stag show my anticipated workshop environment and an example of what I had to deal with on that vehicle.


-
Steve, would love to PM, but my use of the Forum has mainly been to ask simple questions and I have only sent one PM before... I recall that there was some button or some special place, but can't remember now.
I really need someone to give me a brief Forum tutorial for PM, attaching pictures, etc. Is there the equivalent of a Forum help-desk?
I have just found the Attach files under the options, but PM still evades me
-
There have been some requests for pictures, but I can't see how to attach them. There must be a button somewhere; can someone give me a brief Forum tutorial !


TR6 Tank Cleaning
in General TR Technical
Posted
Alec, did your tank have the internal baffle? If so, then how did you make sure that this was treated on all surfaces and prevent blockage of gaps and dip tube?