


mleadbeater
-
Content Count
323 -
Joined
-
Last visited
Content Type
Profiles
Forums
Calendar
Posts posted by mleadbeater
-
-
-
intriguing, a complete mystery.
been watching some of his other vids, very informative.
Mike
-
Welcome Geoff,
I’m just in the process of doing this, and have completely removed the two brown wires from the ammeter, one of which connected back to the battery lead spur point, and the return to two browns entering the loom just inside the engine bay near the steering column. I then connected the two browns together and then on to the spur point, effectively eliminating the feed/return to the ammeter.
I decided there was no point in leaving in place the redundant loop of wires. My car has numerous wiring “mods” carried out by previous owners, of dubious quality, which I am slowly replacing or upgrading.
As Rob suggests, you just need to connect the voltmeter to a white wire from the ignition switch, and then to earth, which I have yet to do.
If you look at my post re fitting a vacuum gauge, one reply gives a link to all the wiring diagrams of ‘6’s over their evolution, you can see both ammeter and voltmeter diagrams.
Hope this helps.
n.b. sorry for mentioning this, but please change your font to a simpler one, as yours is difficult to read.
Cheers
Mike
Ps, NZ is my favourite country, except Uk of course, I visited several times, for work, near Auckland.
Where are you?
-
as Waldi suggests, it could also be possibly the rotor arm or condenser.
you can check the rotor arm by removing the cap, remove the central lead , and hold the end near to the rotor arm, then crank the engine with ignition on, if the spark jumps to the arm it must be shorting to earth under the high tension.
ive had this happen to a midget some years ago, instantly fixed with a new better quality arm
good luck
Mike
-
sounds like coil on the way out.
Mike
-
hi
gotchya, easy enough to remove the gear and fit to new drive.
Just fit it as your photo, it stops wherever you set the park switch contact.
Roger
i live near York.
Cheers
Mike
-
not sure what you mean by “final gear” , looks complete to me, please explain.
Mike
-
Gents,
brilliant info, the diagrams are very clear, and progress the evolution of the car’s controls and other features.
The vacuum info also fascinating, and certainly should be in any toolkit, particularly where PI is involved. To permanently fit one or not?
….still to decide.
Cheers
Mike
-
Thanks, Peter
only had this car a couple of months.
Im not sure of the history and mods to this car over its 50 year or so. Still finding extra and unconnected wires from previous owners.
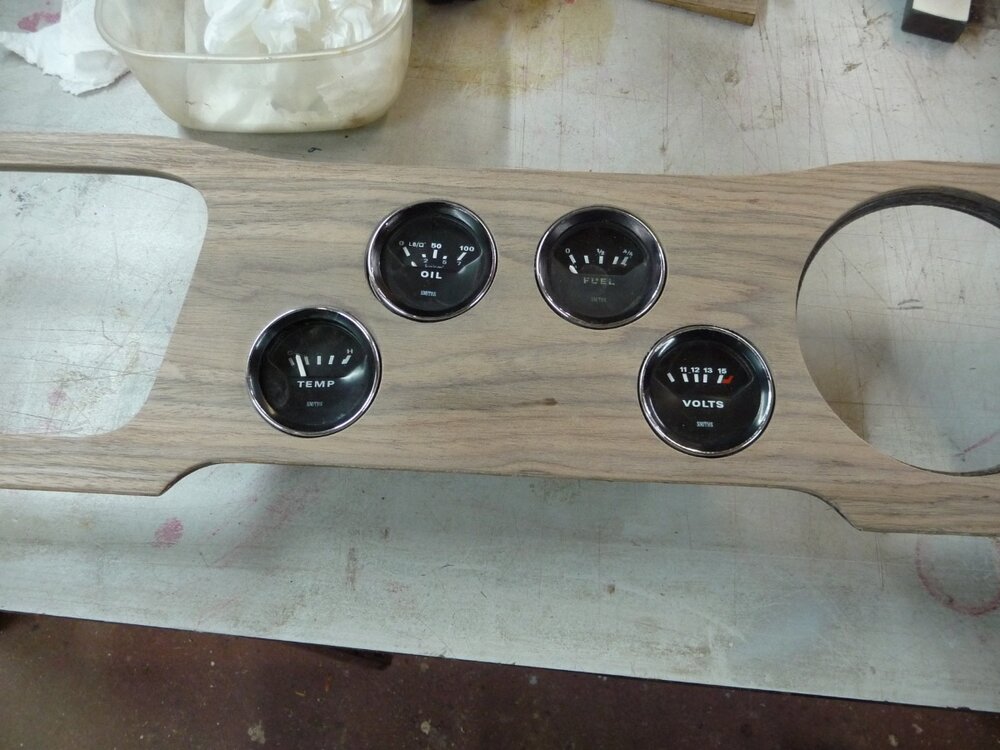
Its a mid 73 UK car, half the instruments are black rimmed, speedo and tach are chrome. im making all chrome ones, and need to rewire the voltmeter as ammeter removed. Not difficult but Id like to see the correct wiring.
Is there a diagram for later voltmeter cars?
your diagram is equally illegible as both of mine, wire colours particularly .
Is a workshop manual version any better? or is this the source of yours.?
Cheers
Mike
-
Shaun,
the “Classic and Sportscar Centre” near York, who have sold cars for me on their brokerage arrangement always include their warranty as part of the deal.
Check out their website, they had several ‘6s for sale when i last looked, good for a comparison if nothing else.
Mike
-
If buying from a dealer, they are legally obliged to to provide an accurate description, and, unless stated otherwise, the car mush be roadworthy. A good dealer will provide a warranty, maybe 1 to 3 months.
However, you will pay quite dearly for this .
Privately is more of a minefield, you're judging the seller as well as the car, with no comeback.
As well as the many checks you can do, for a car of this age I would insist on a good look underneath, using a pair of ramps which you should take with you. Use a good light, and a tapper (ie screwdriver handle) and look for any rot, both body and , more critically, chassis. Take some overalls, gloves, and old rug to lie on.
Take a knowledgeable pal with you if possible , and try not too get carried away with excitement, as I usually do myself.
Just my twopenneth, hope you get a goodun, they are a joy to drive.
Mike
-
Andy,
to me thats the whole point, if the car’s performance becomes suspect , then a good tool to help determine the cause is the vacuum gauge, just as is the ammeter or voltmeter, oil pressure, etc.
I will think hard and sharpen my calving knife before “butchering” my newly veneered dash.


All part of the fun of the discussion
Cheers
Mike
-
7 minutes ago, BlueTR3A-5EKT said:
It has an override wired with the starter motor, bit like the ballast bypass for the ignition coil.. When it is cranking the fuel pump is set to run.
cant see any override on the wiring diagram, (which is a non-ballast diagram) the pump is fed off the same supply , via the ignition switch, terminal 2, and fuse terminal 1 , as the dizzy.
Im still trying to find a correct wiring diagram for my ‘73 car, does such a thing exist ?
Anyway, car electrics are getting far too complex for me, they’ll be fitting automatic steering and brake application device’s to moderns…oh, they already do !
Rant over, cheers
Mike
-
a fuel cutout switch/ relay sounds good, but how would you start the engine?
it would require an override or timer, and what happens when you stall?
ill stick to a decent warning light.
Mike
-
An air/fuel gauge…hmmm.
I bought one awhile ago for my MG, but it seemed very unstable, probably because I stuck the sensor up the exhaust.
I do have a spare exhaust front pipe ( it came fitted with a horrid exhaust sports silencer, sounded like a bad day at Santa Pod)
which is offered free to anyone near York to collect, otherwise soon to go in the skip.
Need to decide soon, just milled the keyhole slot for the glovebox lock.
All part of the fun
Mike
-
with you there, Andy, Ill be fitting a 13 mm red led for oil pressure, and a green one for indicator, between the tach and speedo, for the very reason you suggest, and , oil pressure warning at a much higher pressure than the nominal 6 psi or whatever, using the adjustable pressure switch Ive installed.
Its easy to get transfixed on the engine oil pressure gauge, as long as it’s adequate and not very low that’s good enough for me.
Mike
-
will do, Mike.
-
thanks, gents, for much food for thought, USB supply is a distinct possibility.
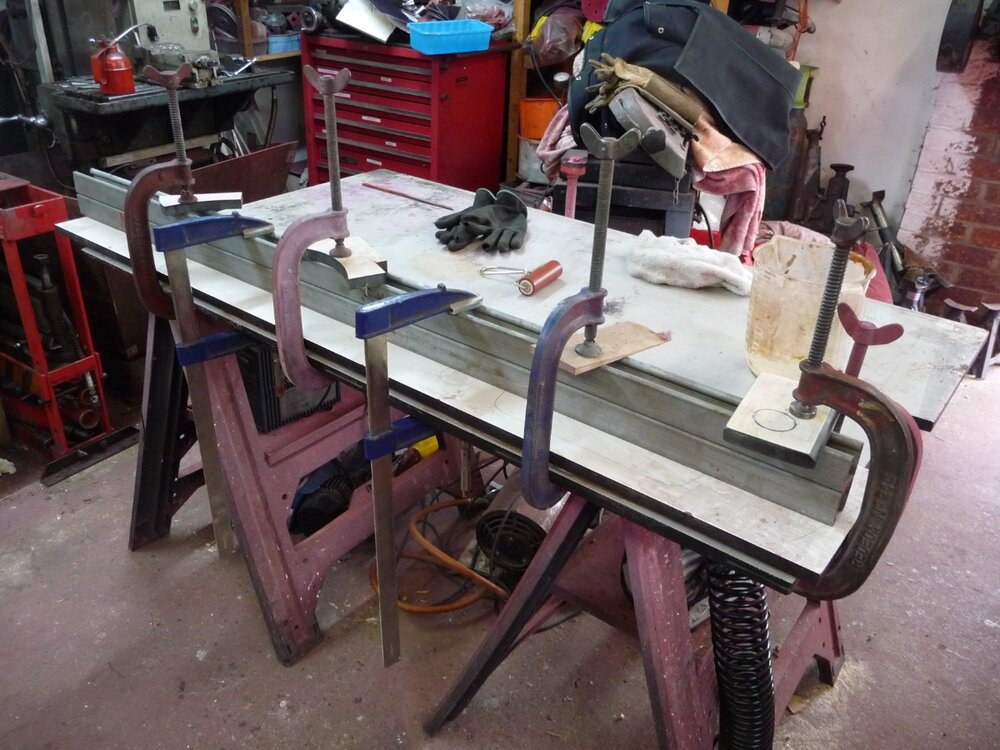
Roger, the sheet plastic is, I guess, phenol-formaldehyde resin, or Bakelite as we know it, it came from a laboratory at work which was being stripped out.
its great stuff for worktops, and machines well, and is dead flat, so ideal for clamping veneer.
I guess you might get some from a laboratory fitting company, or recycler.
Good luck
Cheers
Mike
-
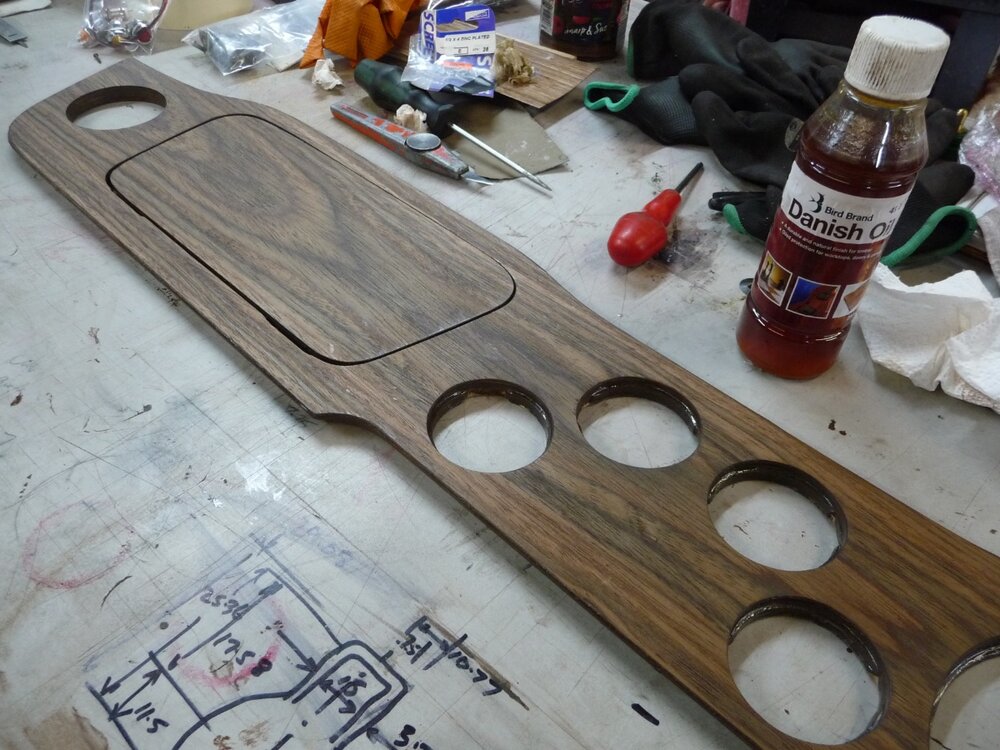
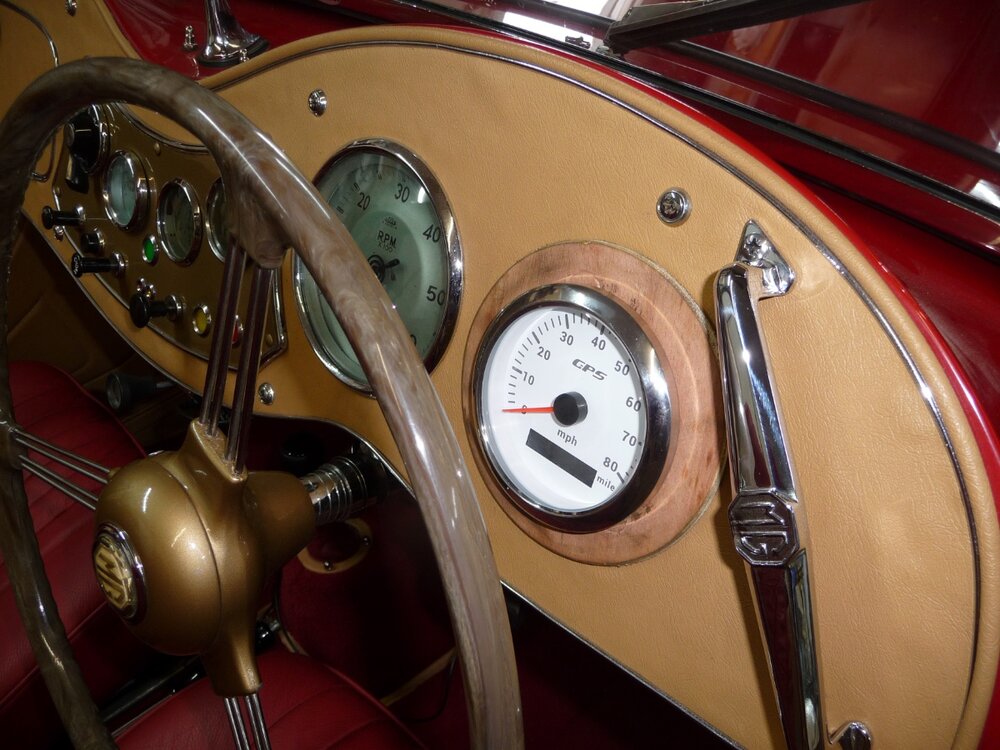
Hi
Just in the process of re-veneering the dash in my ‘6, and, having moved / eliminated the instrument light dimmer, I am thinking of a better use of this “vacant “ dash position, and am thinking of fitting a vacuum gauge. It seems engine vacuum is critical for good running of the PI system.
Your comments would be most welcome.
Also considering alternatives of a clock, or starter push, and will also fit larger led warning lights to replace the low oil pressure and indicator warning lights, both of which are ineffective their present position. I have fitted an adjustable oil pressure switch which can be set to a higher and more realistic low pressure warning.
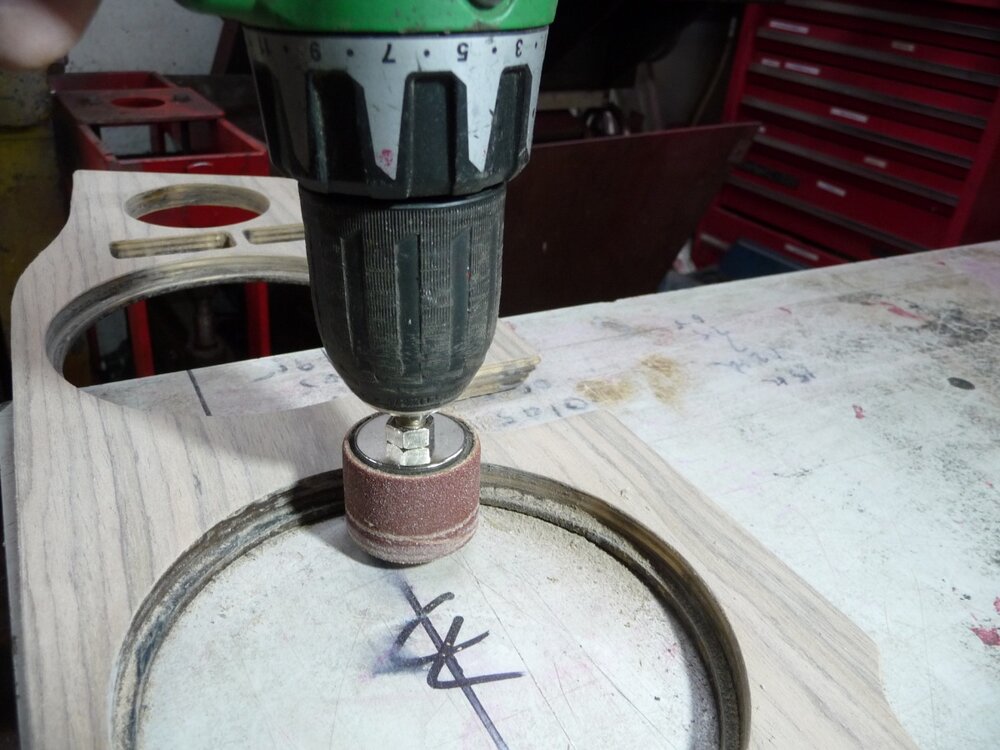
Dash refurb generally going well, and enjoying the challenge of sorting the numerous dodgy wiring mods from previous owners.
Some pics below of progress, hope these are of interest.
Cheers
Mike
-
A way to check the rotor arm is to remove the central ht lead from the coil at the cap, remove the cap,
then hold the lead end near the rotor arm and crank the engine , ignition on.
If there is a spark from the lead to the rotor arm, then the arm is shorting earth and therefore failing.
An RAC mechanic showed me this when my Midget had this fault, a new arm cured this.
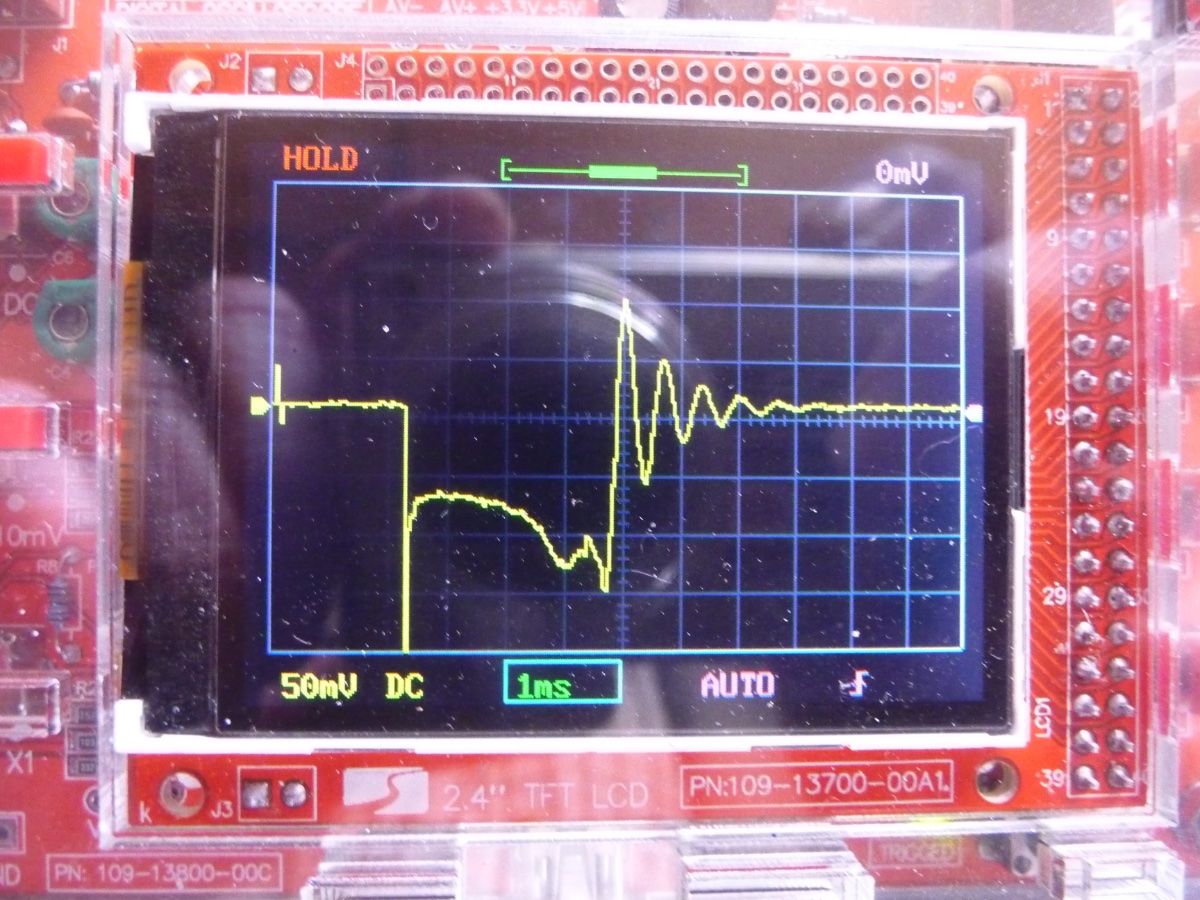
Another device which can analyse the ht performance is an oscilloscope, with a pickup on a plug lead. The resulting trace has characteristic stages of the ht voltage, which can pinpoint a specific fault in the ignition system.
Plenty on youtube on this.
The photo shows a trace from a cheepo oscilloscope bought on ebay for about £20 or so, the trace shows a healthy system from a BMW I used to own.
Hope this helps, good luck.

Mike
-
my recommendation is to get yourself a colortune , which will instantly show the state of the combustion flame, basically its a window into the combustion chamber, as the engine is running.
Simplest and most reliable mixture tuning device ever made, use mine for 40+ years.
The photo shows a good blue flame, yellow is too rich, white too weak.
Remember the bunsen burner you did in your first science lesson at school.
Mike

-
Plenty of black hides on ebay, and other colours.
Mike
-
Paul,
check this link
I recon the tr6 is easy to wrap, compared to this.
I have wrapped early tr cockpit trims, as well as MGA ones , not too difficult.
Mike
-
this was an early test mounting.


Rust, not your friend!
in TR6 Forum
Posted
Steve,
tin worm is the curse of cars of this era, in my recent post regarding the drains for the heater plenum, I was told these discharge into the cavity between inner cill and outer wing panel, ie just where you found this rot.
Many have rerouted the drain, its something I’ll be checking with trepidation over the winter.
Mike