


Chilp3
-
Content Count
170 -
Joined
-
Last visited
Content Type
Profiles
Forums
Calendar
Posts posted by Chilp3
-
-
Hello Paul,
Just in case the file format doesn't allow you to download.
-
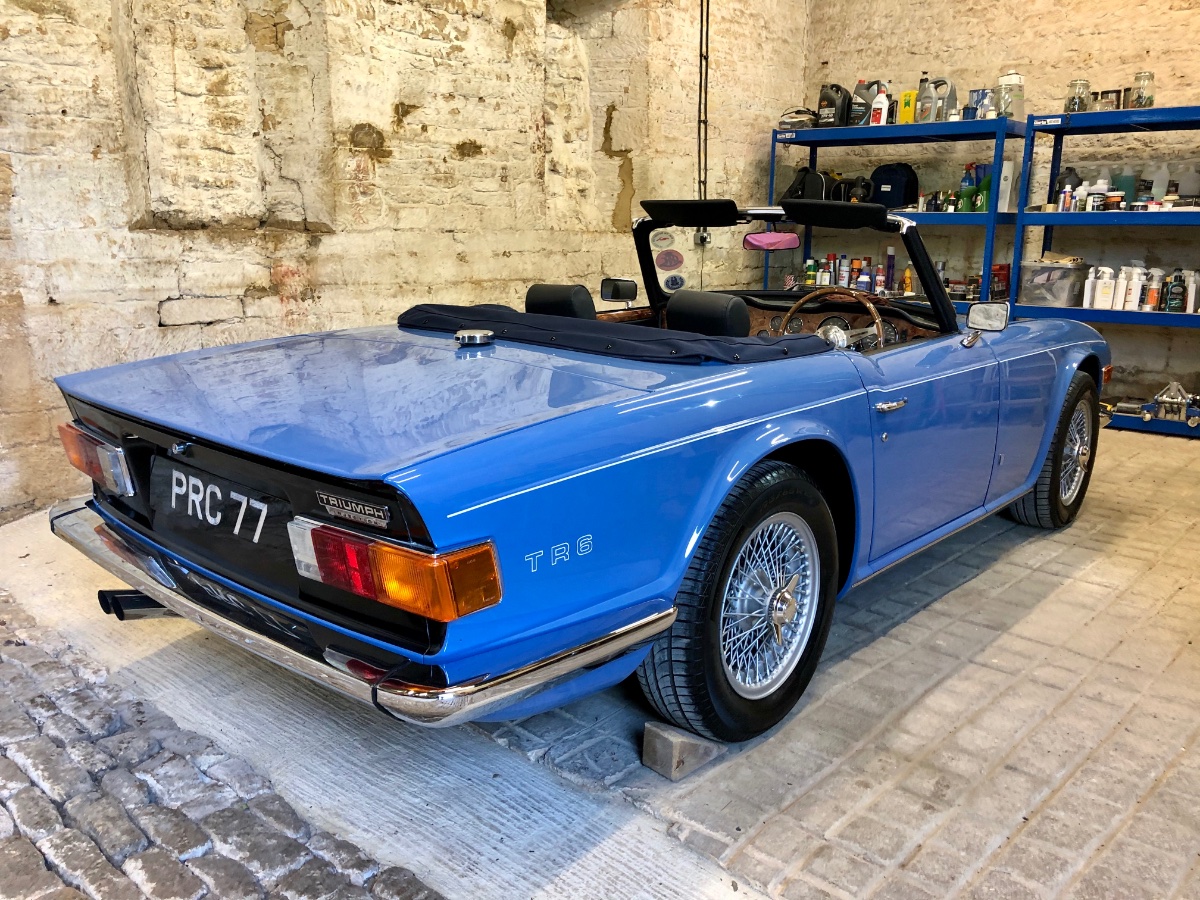
Here are a couple of pictures of my TR6 with wires fitted. The wheels were supplied by MWS.


-
497B3851-7D72-42EF-A6C3-F61011C17253.heic
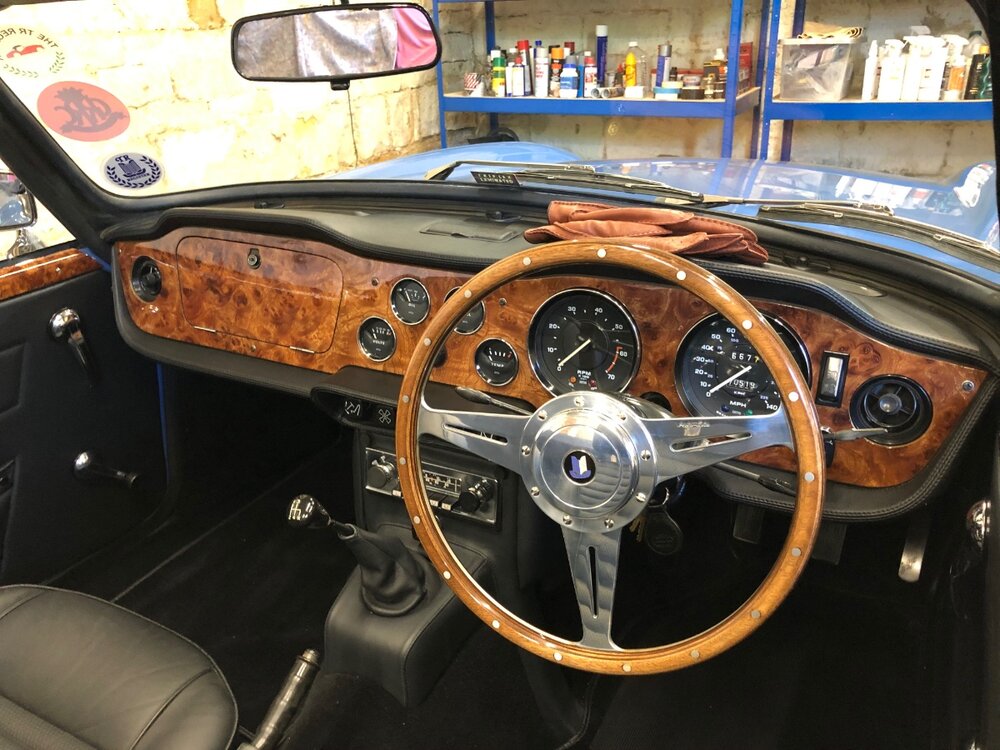
Hello Paul,
Attached photograph of my TR6 dashboard which may be helpful. You will note the crash pads are stitched at the edges which of course isn't how they were originally supplied when new. However, as with everything its down to personal choice.
Best Regards, Peter
-
EP Services also rebuilt my TR6 water pump, excellent service and very reasonable considering the work and high standard.
-
Hi Guy,
I would endorse Nigel's post for ACF Howell in Walsall. The quality of the work and service was excellent. You may have to be patient as they are normally very busy although it was worth the wait!
Thanks, Peter
-
Hello Mike,
Many thanks for your detailed reply which was hugely helpful.
I'm pleased to confirm that I have now re-aligned the steering column through 90deg by removing at the connection to the steering rack. It took me a while to realise but all other connections can only go 'one way' determined by the position of the pinch-bolts. The splined shaft of the steering rack of course has a machined section the circumference of the shaft diameter.
I was also able to repair the original indicator stalk which now appears to be working well and self-cancelling again.
Best Regards, Peter
-
Good morning,
This I believe may be a common problem which may have been discussed previously so apologies if I'm covering old ground. My TR6 indicators are not self canceling the reason being that the collar cam on the inner steering column is positioned at 6o'clock rather than 3o'clock. I need to re-align the upper inner column on the splines as the collar cam can only be fitted n one location via two recesses depressions. I believe I am correct so far!
I believe I can separate the column via the flex joint at the bulkhead (fire wall) by undoing the pinch bolt and rotating the shaft. I believe I will also need to cut and replace the lock-wire if the column is seized at the pinch bolt. Again happy to be corrected if this is wrong.
What else do I need to loosen and/or remove to allow me to complete re-alignment of the inner column and to re-instate the self-cancelling operation of my indicators? Should someone have the time to share a step by step process to help me I would be hugely grateful. I have attached some pictures which show how far I've got which should hopefully be helpful. You will also see that the indicator stalk is broken but I plan to effect a repair using an aluminium tubular rivet. I suspect this failed as a result of the collar cam being in the wrong position.
Thanks for reading this post and as always every reply is much appreciated.
Best Regards, Peter
B7F96BD4-65FC-4599-9FAD-1900220F038A.heic 08FB10B9-46E7-461C-8E63-C965A5D9D6FE.heic E11D8050-A208-4D37-B3D0-DC6C1ED032ED.heic
-
Hello Guy,
Suggest you give Rob a call at TRGB who will offer you a correct rated BOSCH battery for your TR6. They can of course supply you with any replacement support brackets and/or leads should they require replacement at the same time.
Best Regards, Peter
-
Hi Keith,
We managed to find and fit an original Blaupunkt FM radio which had been refurbished complete with an i-pod cable if required.
Best Regards, Peter
-
Hi Mark,
Further to my earlier post regarding the vibration issue I am pleased to confirm that TRGB have now discovered the problem. Having changed the prop-shaft this made no discernible difference. The diff was then changed for a known sound unit previously rebuilt by Pete Cox. Following the test drive all traces of the previous vibration have now thankfully gone. We can only assume the problem was with a bearing or other diff related issue. We're now looking forward to collecting the car which has also now had the CV drive-shafts fitted. Hopefully the car should now be a lot smoother, we shall see.
I hope that you successfully get your car sorted as this kind of problem can be hugely frustrating as well as ruining the driving experience of these great cars.
Best Regards, Peter
-
Hi, we have fitted the Phoenix manifold, exhaust system plus a cross-box large bore rear silencer. We're very happy with the results as it looks factory standard and sounds great without being too loud.
-
Hi, to reply to your questions related to the Phoenix system;
We opted to fit the Revington overhead throttle linkage kit which has proved excellent. Once set-up correctly we were able to achieve full opening of all butterflies.
So far we have not experienced any issues with under-bonnet temperatures with the Phoenix extractor manifold being unwrapped and no coating applied. I asked TRGB about this prior to fitment and they said that in their opinion it would not be necessary.
We had the exhaust fitted by TRGB as part of an overall program of work. I'm not aware that they experienced any issues with fitting.
Best Regards, Peter
-
We have fitted the Phoenix system including the manifold in stainless steel. The system has a single transverse rear silence so looks completely factory standard. The sound is of course very personal but from our perspective we're very pleased with the result. It's considerably quieter than the previous 'wheel barrow' silencers that came with the car that's for sure! The quality and fit of the system was also very good and I believe popular with other members. I hope this might be helpful in arriving at your decision.
Good luck
Best Regards, Peter
-
Hi Mark,
My 73 TR6 also has a vibration albeit at motorway speeds. It's more noticeable as you press on and then let the power off. However dipping the clutch suggests it's a balancing issue somewhere. The car is presently at TRGB and the next step will be for them to replace the prop-shaft and at the same time inspect the diff and bearings. The diff mounts have been recently strengthened with new standard bushes which will of course make everything more rigid. This may contribute to the vibration but hopefully it will be clearer when everything is off the car.
I will post a further update in due course as potentially the findings from the team at TRGB might be helpful for you and your TR6.
Best Regards, Peter
-
Hi John,
The easiest way is indeed to remove the two as a single unit but the down-side is that you have to remove the tunnel as you have identified. It is possible to remove the engine as a separate unit which is how TRGB worked on my TR6 when they rebuilt the engine. I'm sure there will be a wealth of experiences shared on this forum but for now thought this may at least give you some options.
Best regards, Peter
-
When you drained and flushed the block did you remove the drain plug from the block at the back closest to the bulkhead? I believe I am right that there is another plug here and this is often also clogged up. I believe there have been other threads on the forum related to this so it might be useful to perform a search.
Also might be worth checking the water pump is in good health? Mine had a rumbling bearing which whist not stopping it working completely didn't help! It was the original water pump which I managed to get rebuilt by EP Pumps who did an excellent job for a very reasonable price.
My1973 CR TR6 tends to sit just under halfway on the gauge and rise to just over halfway in traffic. The engine has been fully rebuilt by TRGB to 'fast road' spec with a high capacity radiator and standard fan set-up.The block was chemically dipped and cleaned as part of the rebuild which I understand removed quite a lot of accumulated silt. I hope this and my earlier thoughts might be helpful.
Best Regards, Peter
-
Hi Matt,
+1 to inspect and change the clutch assembly whilst the gearbox is removed from the car. If you haven't covered as part of your gearbox rebuild I would also recommend carefully inspecting the cross-shaft, release bearing carrier and wired retaining pin which may be broken. Mine looked OK visually but when I removed the wired bolt it was in fact broken. Also worth checking the bearings in the gearbox bell bellhousing where the cross shaft fits. There is a multitude of threads and really helpful information on this forum related to these topics which you may find useful. Again, without teaching you to 'suck eggs' also pay close attention to the position of the dowel bolts when reinstating the gearbox to ensure correct alignment. This is also very well covered on previous threads with useful pictures so worth taking a look perhaps?
Good luck and let us know how you get on.
Best Regards, Peter
-
-
Good morning Mark,
The 'push type' clips are to fit the B-post interior trim and should slide into the cardboard backing and then push fit into the holes in the B-Post.
The rear section of the trim connecting to the deck area by the screws and cup washers shown in the picture you have attached. The holes in the picture I believe have a slide-on clip with a screen hole that the self-tappers will screw into. You will of course need to cut the holes into the trim panel(s) to allow you to scream through into the clips. I can't see the clips in the pictures you have attached so you may need to oder a set of these.
Hope this helps
Best Regards, Peter
-
Hi Robert,
They certainly look like MGB headrests1970 to 1974 era but certainly not TR6. I believe the union jacks were fitted to the export cars with the UK PI cars having the 'TR6' logo instead.
Hope this helps, Peter
-
Hi Kevo,
Correct, the Moss windscreen seals fits the windscreen aperture whilst also offering the correct depth and profile for the trim strip to insert. I went through screen rubbers from Rimmers and TR Shop which simply didn't work. I believe this topic has been discussed previously on this forum if you would like to search for the discussion at that time.
Best Regards, Peter
-
Good morning and Seasons Greetings,
I have a question regarding whether it's possible to fit the later CR type door pulls (screwed to door frame) to a CP door. My car CR358 was built in December 1972 so has a number of features from the earlier cars although it's a CR series. One such feature are the doors which differ in terms of the internal structure. The later cars have a flat section of steel where the door pull is screwed into. The earlier cars (like mine) have an open recess here which upon first inspection suggests you cannot fit the later door pulls. Furthermore the door release rod appears to be a different design between the two series allowing for the void. Obviously the earlier cars had the door pull integrated into the top door finisher which had a habit of letting go on a regular basis! I have fitted wooden door mappings to my car which are smooth with no 'pull' feature. Another option would of course be to fit the TR4 style door pull but I'm trying to stay 'TR6' if possible.
So the question is has anyone come across this before and if so what was the outcome? The other challenge of course its that the later CR door pull assembly is NLA although second hand examples are available. I've attached a picture of one of the doors from my car which hopefully illustrates what I'm trying to explain.
Thanks for taking the time to read this and hopefully share some ideas.
Best regards, Peter

-
Hi Paul,
Around eighteen months now but limited to dry days and 3,000 miles a year. Having said that it's worked perfectly even in heavy traffic during the summer. The benefit with TRGB is they stand by their products if you have an issue.
Hope this helps
Best Regards, Peter
-
Hi Paul,
I had an increased efficiency (capacity) radiator fitted to my TR6 by TRGB as part of an engine rebuild and other work. I was very pleased with the quality of the replacement radiator which has performed without fault since installation.
Best Regards, Peter


Leather crash pad - how does it compare to the original vinyl?
in TR6 Forum
Posted
The crash pads and as top is vinyl and was trimmed by TRGB, very pleased with the service and results.
The A-Frame and the rest of the interior was supplied by John Skinner in English hide.