


rcreweread
-
Content Count
2,072 -
Joined
-
Last visited
Content Type
Profiles
Forums
Calendar
Posts posted by rcreweread
-
-
Alan - have you seen this on ebay?
cheers Rich Crewe-Read
-
1 hour ago, Nick Seber said:
Hi Rich, will you be offering these on an exchange basis or straight sale?
Nick - probably on an outright straight sale basis as I've got a small stock of sets and they take up a lot of space
4 hours ago, John Mellor said:That looks impressive Richard, did you have failures before finally cracking it. What glue did you use? Adhesive and my limited talent don't blend well judging by my attempts with boot rubber
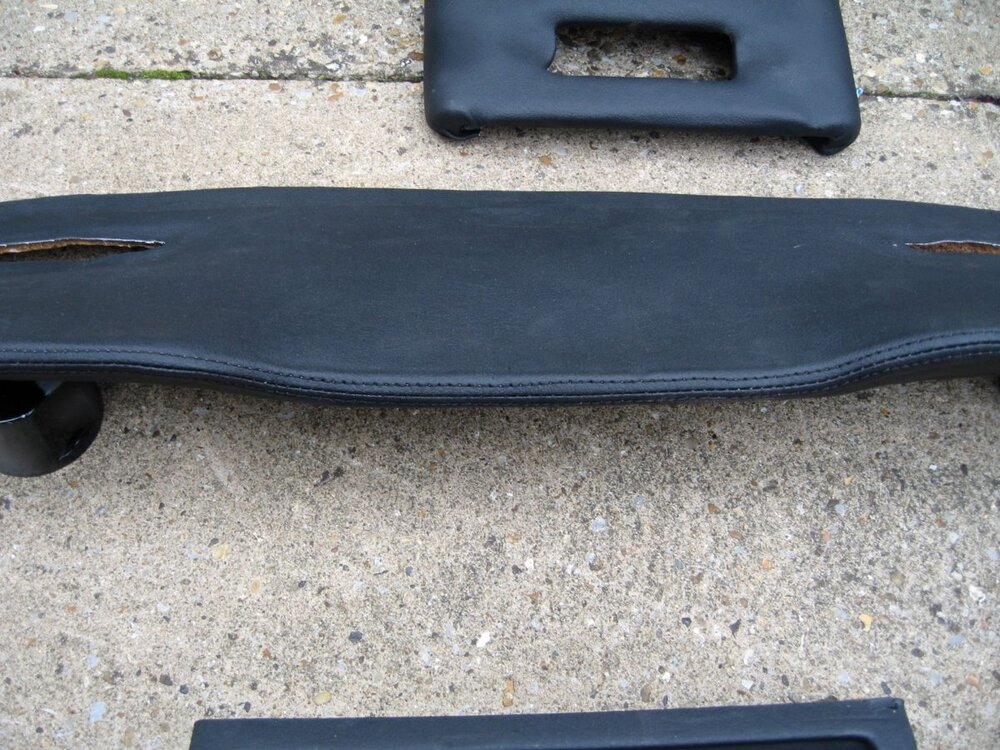
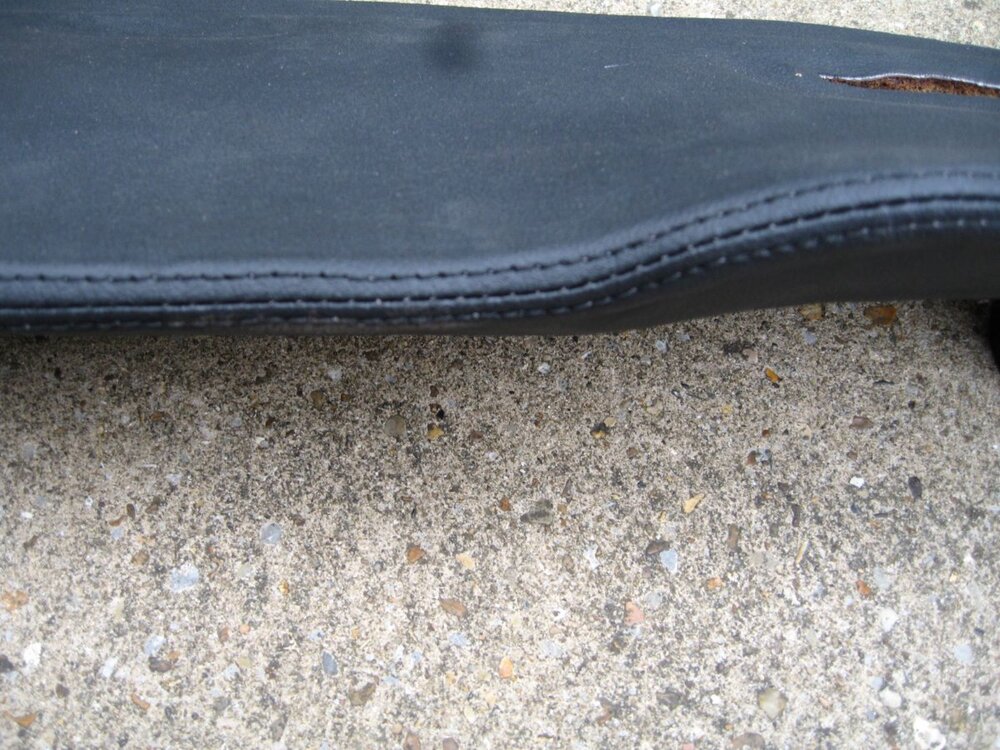
John - it took a while to work out a method to restore the original vinyl/foam - this is what takes a lot of time and quite honestly I doubt if it would be viable/cost effective on a commercial basis as with age, as there is usually so much vinyl/foam damage which needs stabilising before covering. Putting a thin foam over the whole item before covering just doesn't look right as it makes it bulkier so the finish on the part has to be totally smooth before gluing the covers.
I don't make or glue the covers - I used to have a local trimmer do this but he gave up and I've only recently found another trimmer who may be able to do them so fingers crossed. The glue I supplied in the end was Alfa 178 which is a heat resistant contact adhesive recommended by Stuart on here
Hope this helps
Cheers Rich Crewe-Read
-
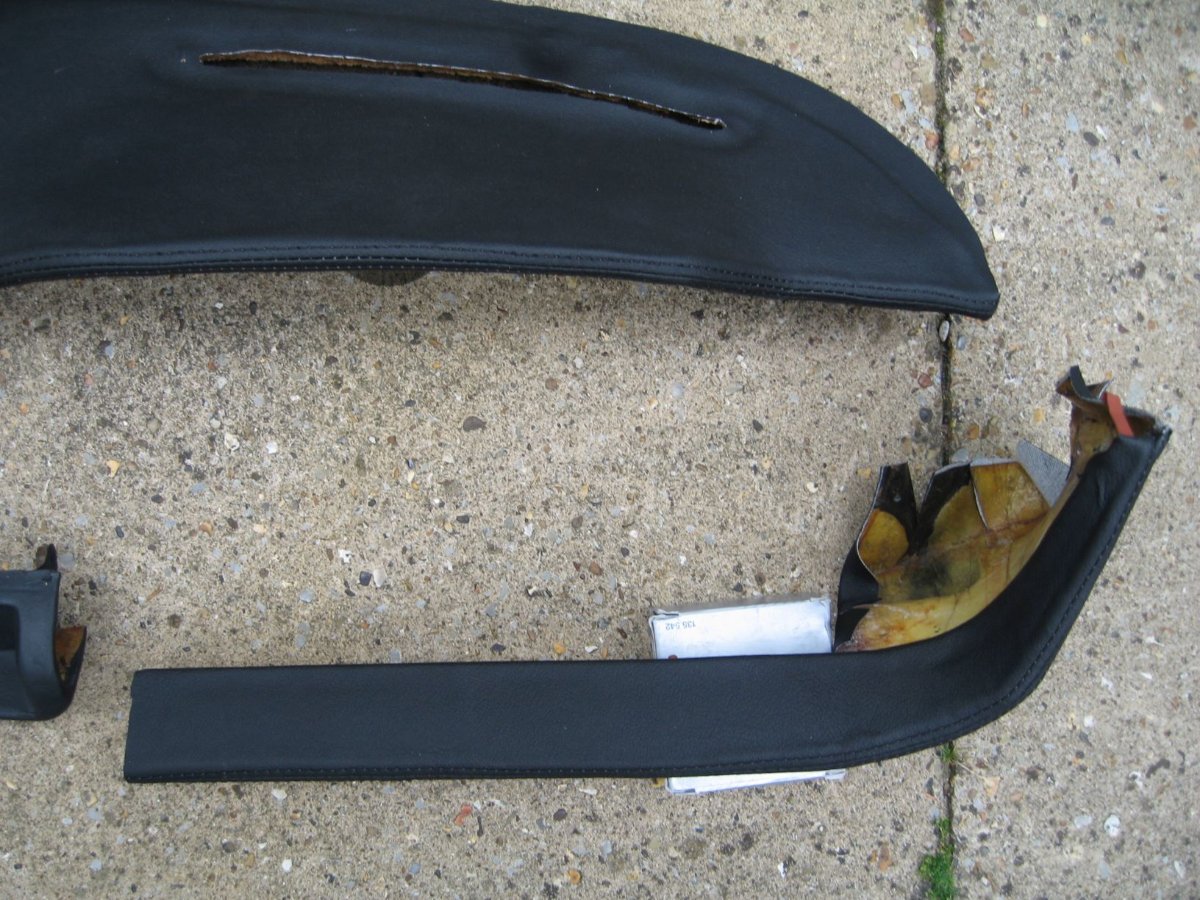
Guys - my understanding is that the trimmer TRGB employed to do these parts retired a few years ago and they haven't been able to replace him - hence they haven't been able to provide this service for quite some time. I have been regularly checking with them and that was still the case when I last checked fairly recently so maybe that has just changed. Be good if it has.
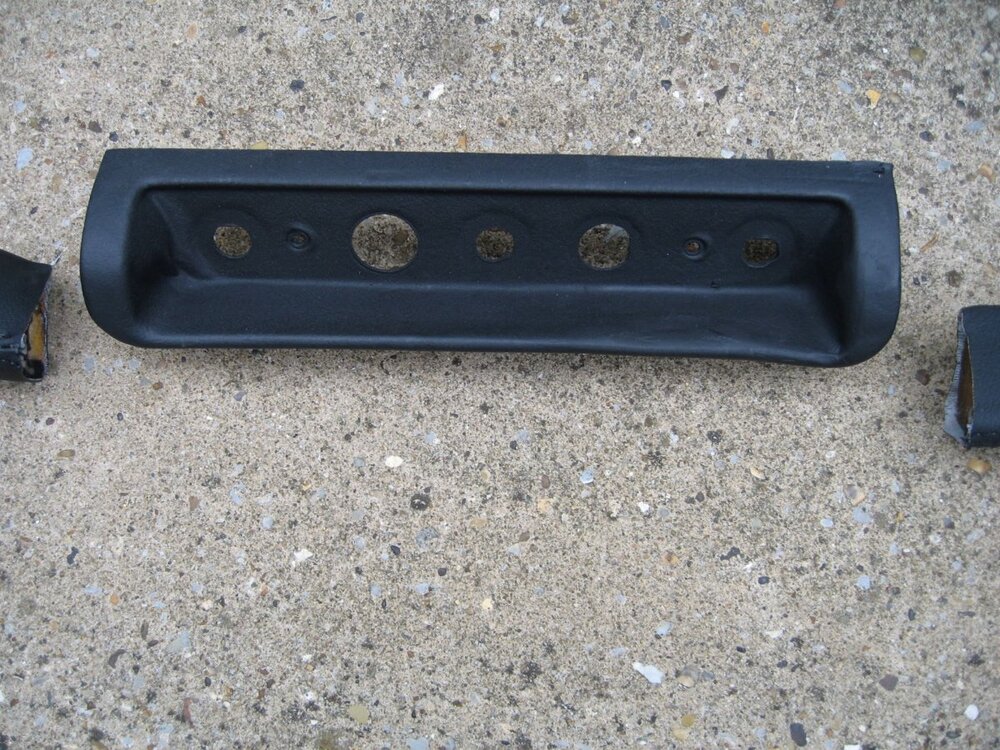
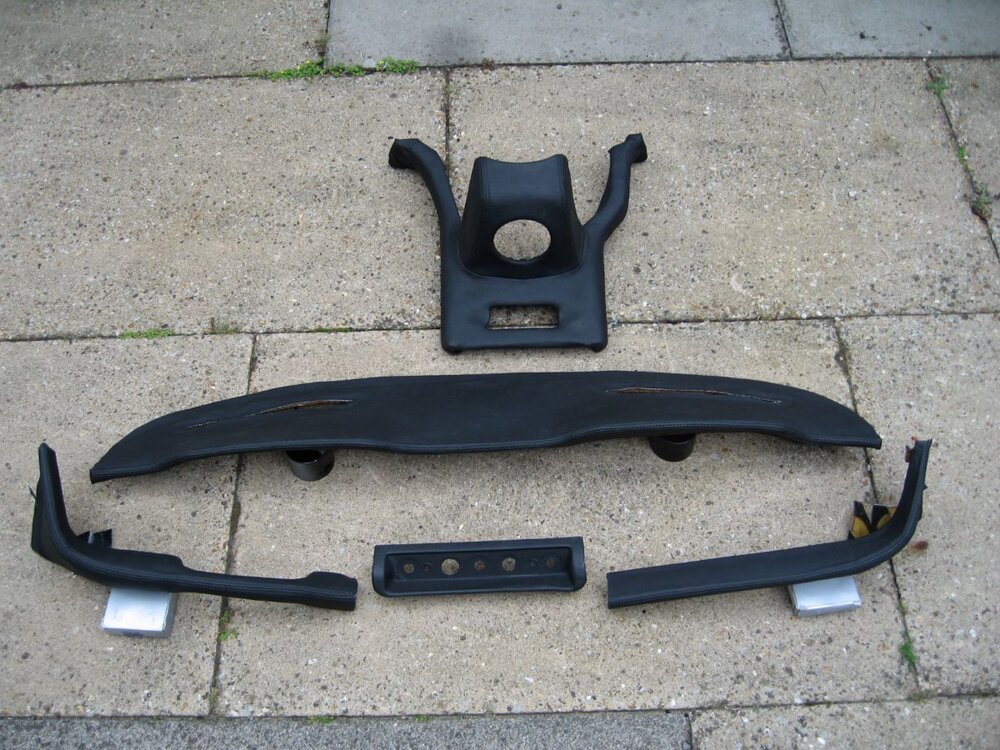
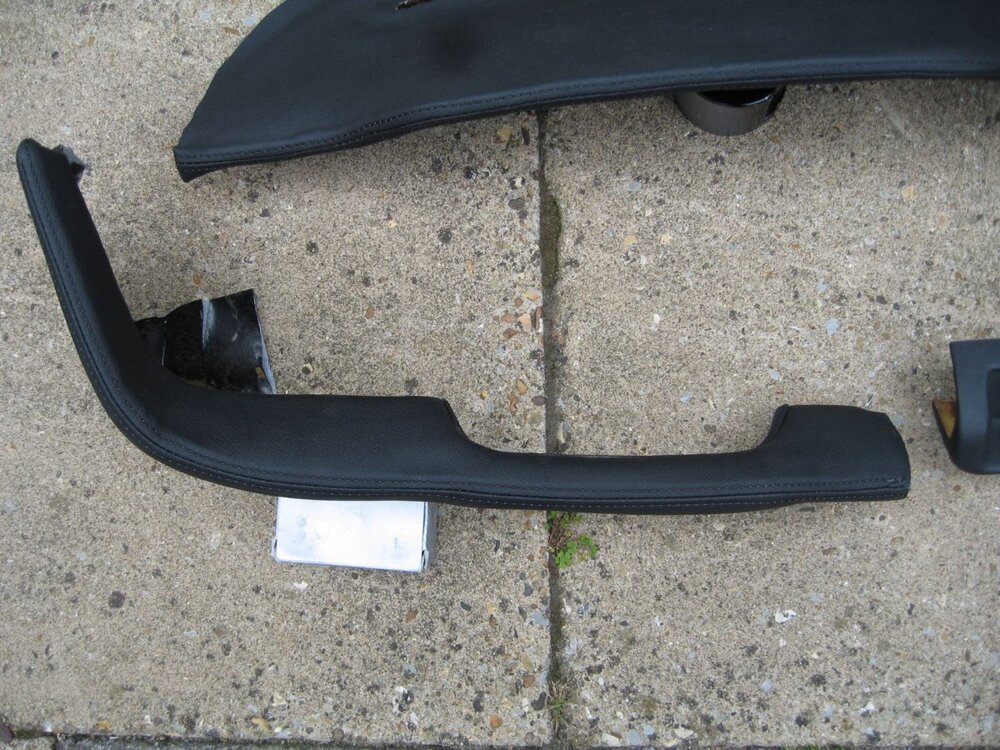
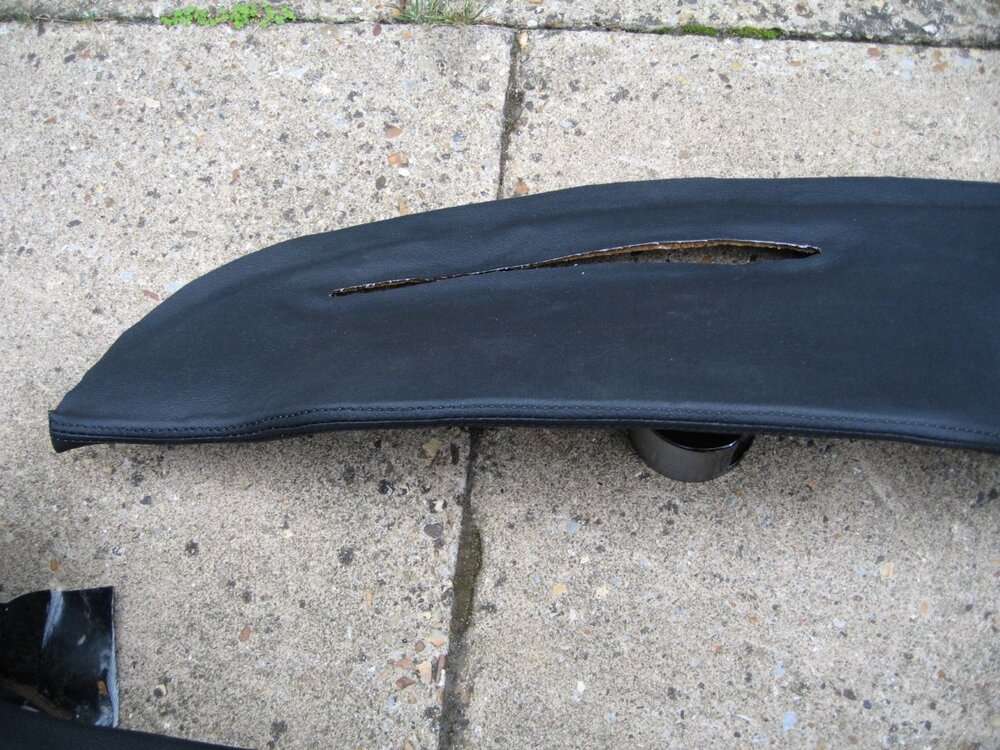
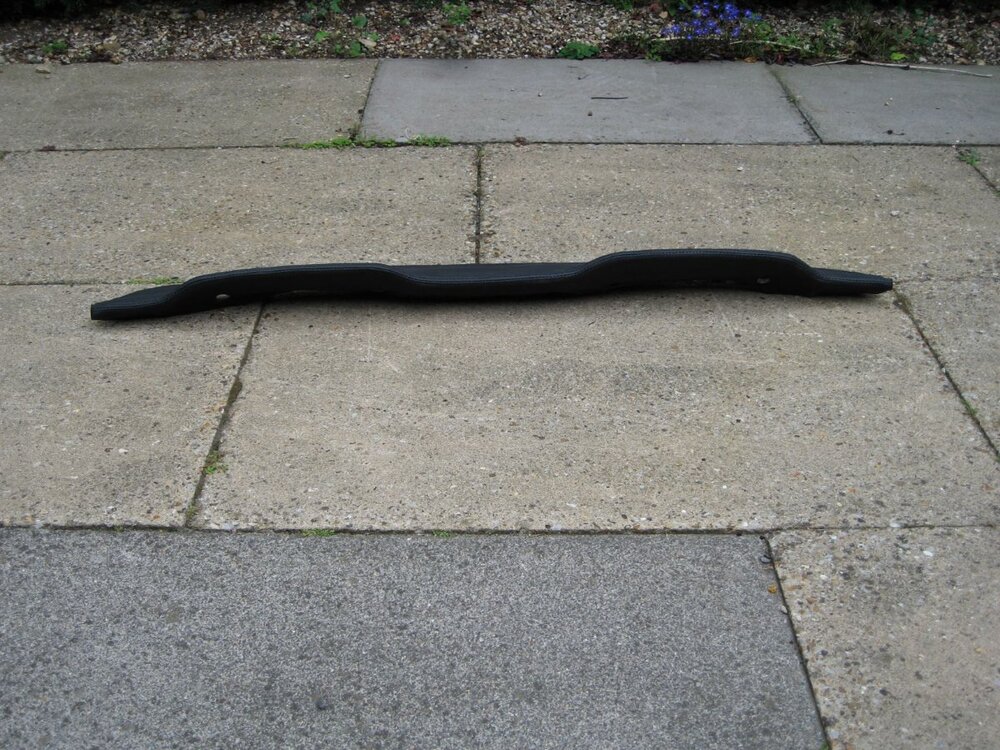
In the meantime, I'm working on doing some complete sets of these myself which would include the dash top, the switch plinth, the left hand grab handle and right hand crash pads, and the H frame, but it is a very time consuming exercise - I am hoping to have them ready for Malvern but I'm not sure they are going to be ready at this rate
Attached are some photos of a previous batch I did a few years ago, but I did have some problems with the glue used which caused a few issues - these have now been resolved - the photos are an example of what I am hoping to do, whereas the new batch will have some minor changes to switch plinth
Cheers Rich Crewe-Read


-
Great day and weather excellent - too busy to see much of the racing but some incredible sounds coming from the track - Gordon Murrays new car was pretty amazing and also sounded it.
My highlight though was spending 45 mins with John Watson taking him around various parts of the site for interviews etc and then having him sit next to me in the buggy to take him to his car park - chatted as if we were good friends and talked at length about his terrifying Monza crash in the McLaren!
Brilliant!
Cheers Rich Crewe-Read
PS Didn't see any TR old farts so they must all be fit!
-
Dave et all - I'll be on site for my usual buggy driving for those with mobility issues ( most of us old farts now
 ), so if you see me, start limping and I'll give you a lift!
I'm on the PM shift so hopefully I will bump into some of you
Cheers Rich Crewe-Read
-
I thought I'd read somewhere that it's flammable - I wouldn't want to drive around with a gallon of petrol strapped to the front of my rad, if it's true! I don't think they allow it in race cars, maybe for that reason.
Cheers Rich C-R
-
28% A types are not standard in any Triumph models as far as I am aware, but are sourced from other models of the period like Jags, Jensens, Rovers etc .
Quite a few Stag based TR boxes have had this upgrade done, and indeed my TR4 has just this set up.
John - do you mean just the OD unit or a gearbox and OD unit combined - typically when rebuilt, I would expect a Stag/TR OD unit to be worth a premium of around £300 over standard TR OD unit and maybe £100-150 for the 28% upgrade to the OD unit - these are newly rebuilt prices. Once used, then values fall quite a lot compared to newly rebuilt, but if in excellent condition, I would think £1200- 1500
I understand the 28% gear sets are not very common and I don't think they are being remanufactured, but I stand to be corrected, so they were getting quite difficult to track down
Hope this helps
Cheers Rich C-R
-
Aldy- it would be worth investigating why the blockage occurred in the first place, because if it's happened once, it could easily happen again. Possibly rust debris which will need dealing with - have a look in the tank and see whats there!
cheers Rich C-R
-
6 hours ago, Chris Fiddes said:
Thanks
i have sent you a message
Chris - no message received - I have an original black with white piping seat which I think is a passenger one which is in fair condition and a drivers seat which was red and has been vinyl coloured black so the piping is also black , the covers of which are pretty poor so I don't suppose these will be any good
PM me again if of any interest
cheers Rich
-
What colour are you looking for or doesn't it matter?
Cheers Rich
-
I thought Pete Burgess specifically stated not to use waterless coolant with his engines/heads but I might have been dreaming it!
Cheers Rich C-R ( Crewe-Read)
-
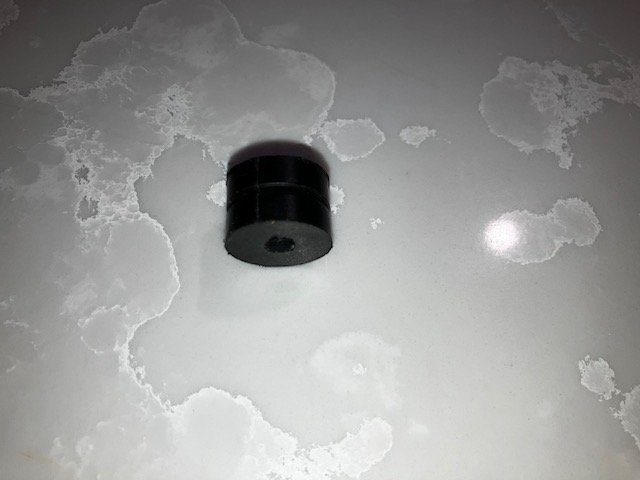
Hi all - I need to source some wiper motor rubber mounts( as in photos below) which are part number 17H5431 - I thought this would be straight forward but it appears these are very difficult to find on their own - there are plenty of kits about which include the rubber mount, the stud, 2 heavy duty washers and 2 nuts, but I only need the rubber mounts.
Anyone know a source or have some lying around for just the rubber mounts?
I've done a batch of nice powder coated metal bulkhead motor brackets which I thought I would make complete by adding the rubber mounts but my plans are stalled! I don't need the metal bits so any help much appreciated
Cheers Rich


-
16 minutes ago, John Morrison said:
A type overdrive rear tail casing, please.
John.
John - presumably for a TR, not a saloon?
Cheers Rich
-
If you grab the driveshaft each side of the rubber gaiter and twist in opposite directions and can feel “ play” in the splines, you will almost certainly get a clonk when you set off
cheers Rich
-
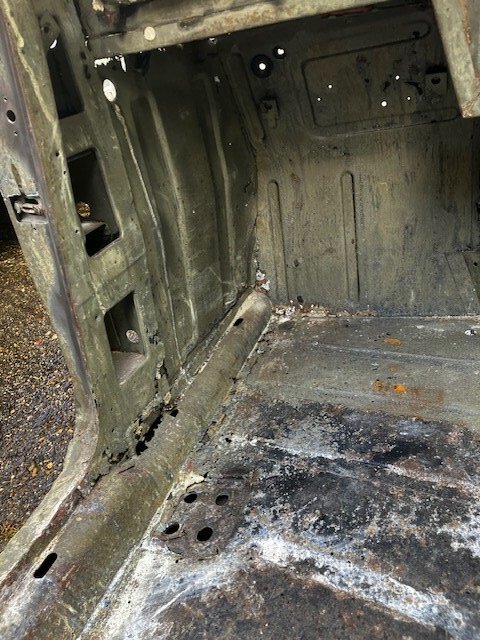
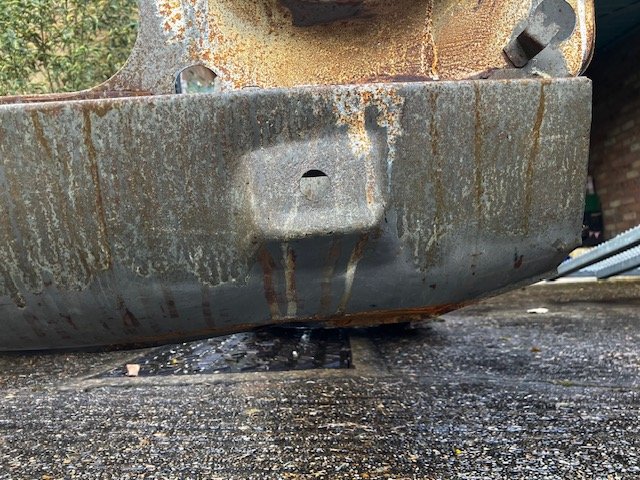
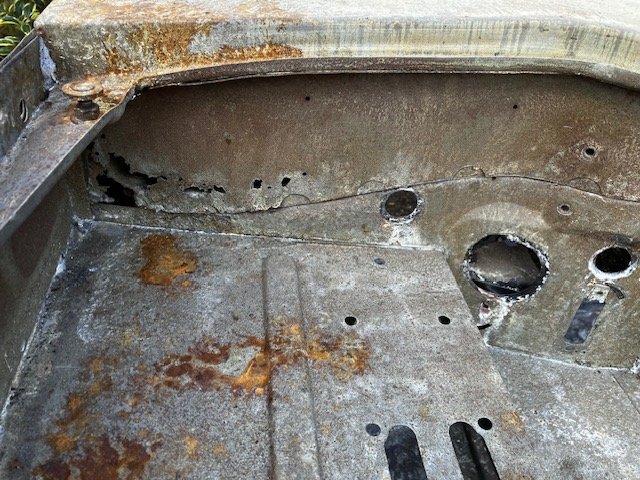
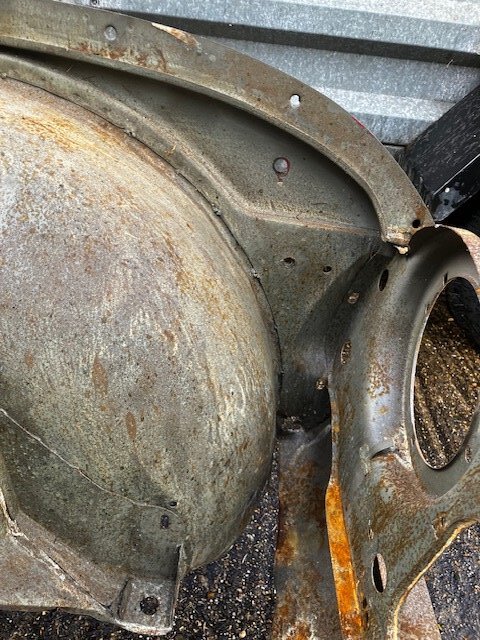
Hi all - just a quick heads up that I have just listed for sale a TR4 front inner body tub in Classifieds.
It is a bit of an oddball in as much it appears to have been fitted with replacement inner wings and a front panel at some point in it's former life which look like TR5 panels.
The whole thing was sand blasted and then treated to an anti rust protective coat - I'm not sure what it was but it looks like a Jenolite type phosphoric acid treatment - I've had this for many years during which it has been dry stored - don't now need it so it has to go for space reasons.
Could only put 5 photos on Classifieds but here are a few more below.
Due to size and bulk, it will need to be collected from here in Colchester Essex - any queries, please feel free to contact me - will happily consider sensible offers but asking £500
Cheers Rich
.jpg.bba178afcb2f7bbb4a4b4cd3925e5cc8.jpg)
.jpg.c0df06105fa97f50f23ea7e0cd55d10b.jpg)
.jpg.5e4c9b82e40f78a0f3ed953defcc1d77.jpg)


.jpg.c8754d08188082cbc5eabf0667ad488c.jpg)
.jpg.fcfcffd75f6d49a635cba580ae06ceba.jpg)


.jpg.6130d6e478572e22bbe28181e463d6c4.jpg)
-
John
I agree with Nigel - cellulose thinners will shift all the brown staining etc - then if you want a really good finish, have the parts vapour blasted
cheers Rich
-
I've never understood why the TR250/5 never had a proper rad cowl like the cars before it and after it. It doesn't look finished to me and all the mounting holes are already in place.
If you want to make it look "finished", these cowls are really well made and finish the engine bay off, although admittedly not for the purists.
No connection other than I made the original prototype for Tony using a local members car as a template - if you want to contact Tony direct, PM me and I will forward his contact details
Cheers Rich
-
3 hours ago, phil Dean said:
Very nice Rich a credit to you
Phil - thanks but sorry for the thread drift!
cheers Rich
-
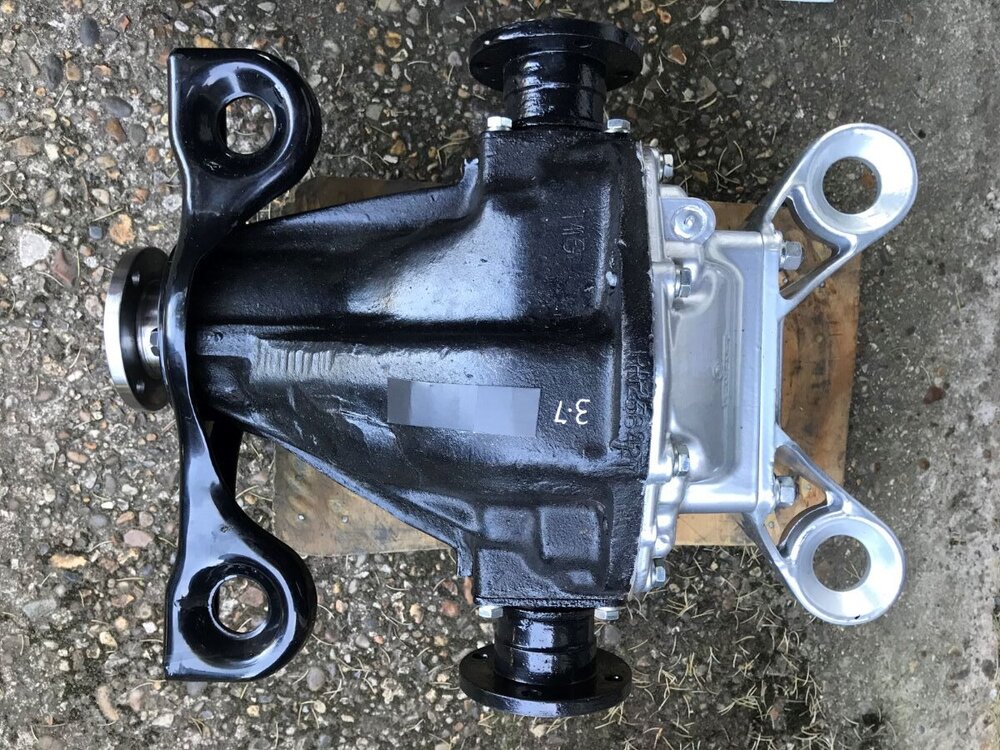
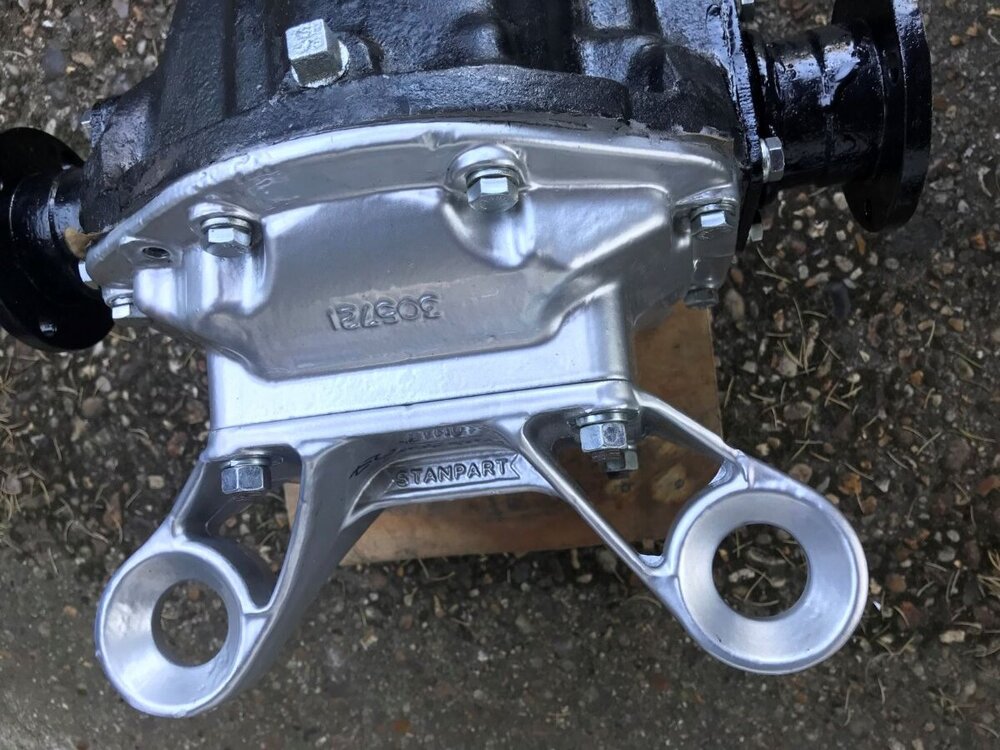
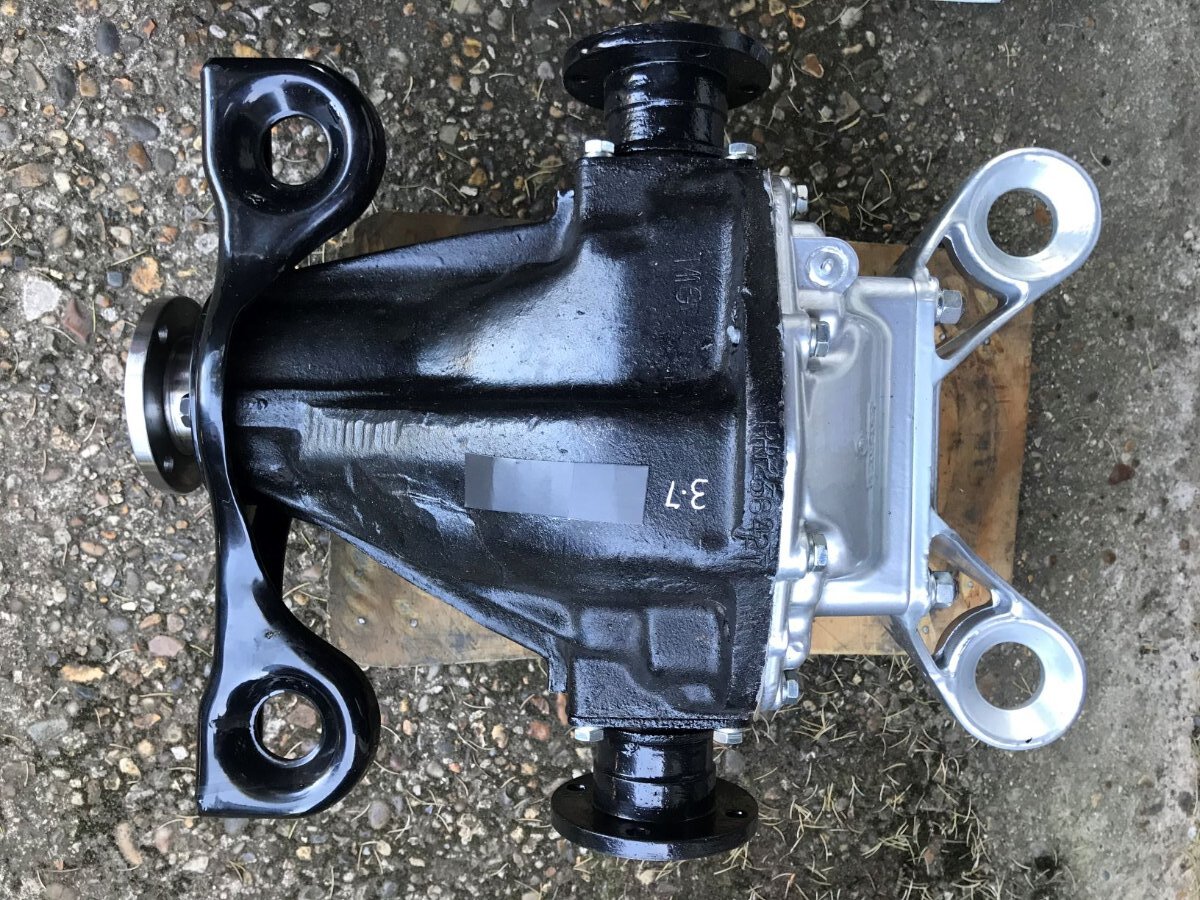
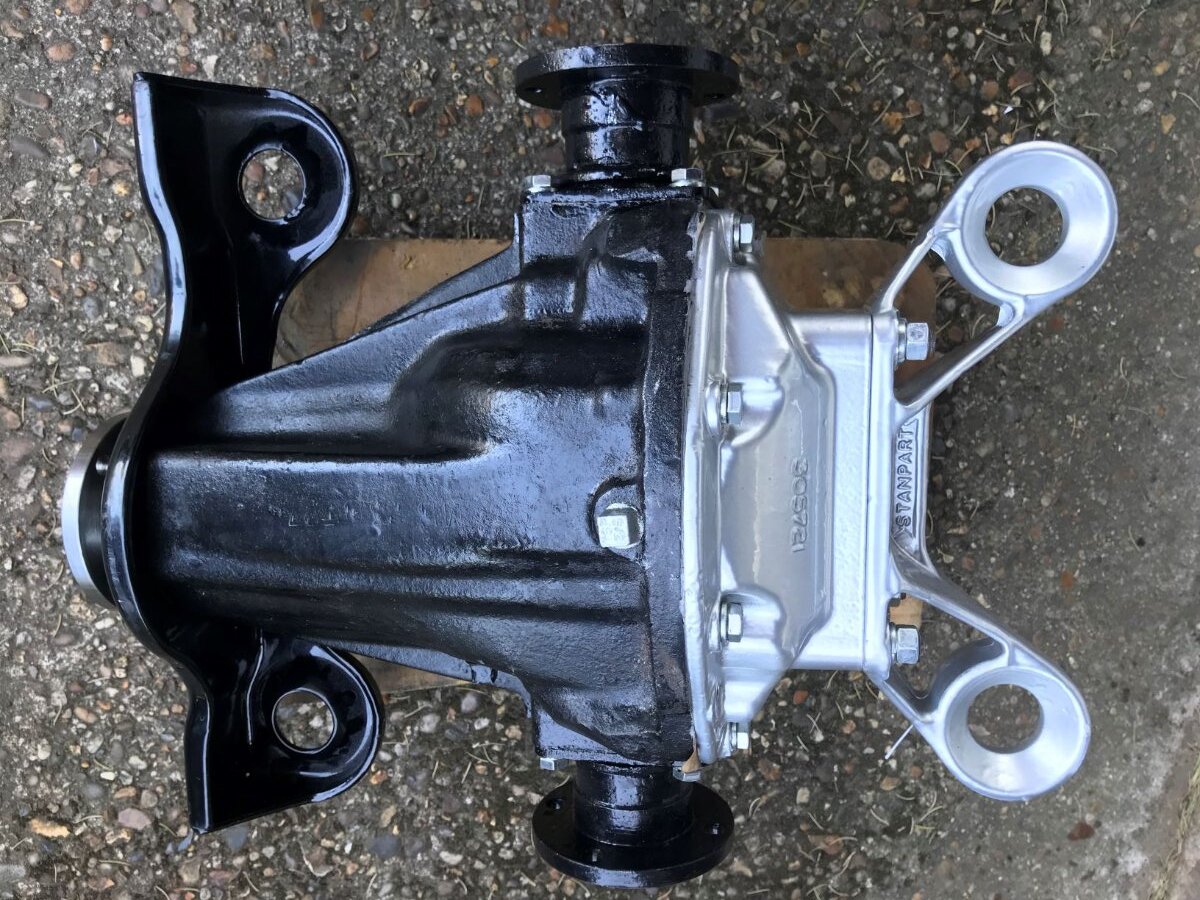
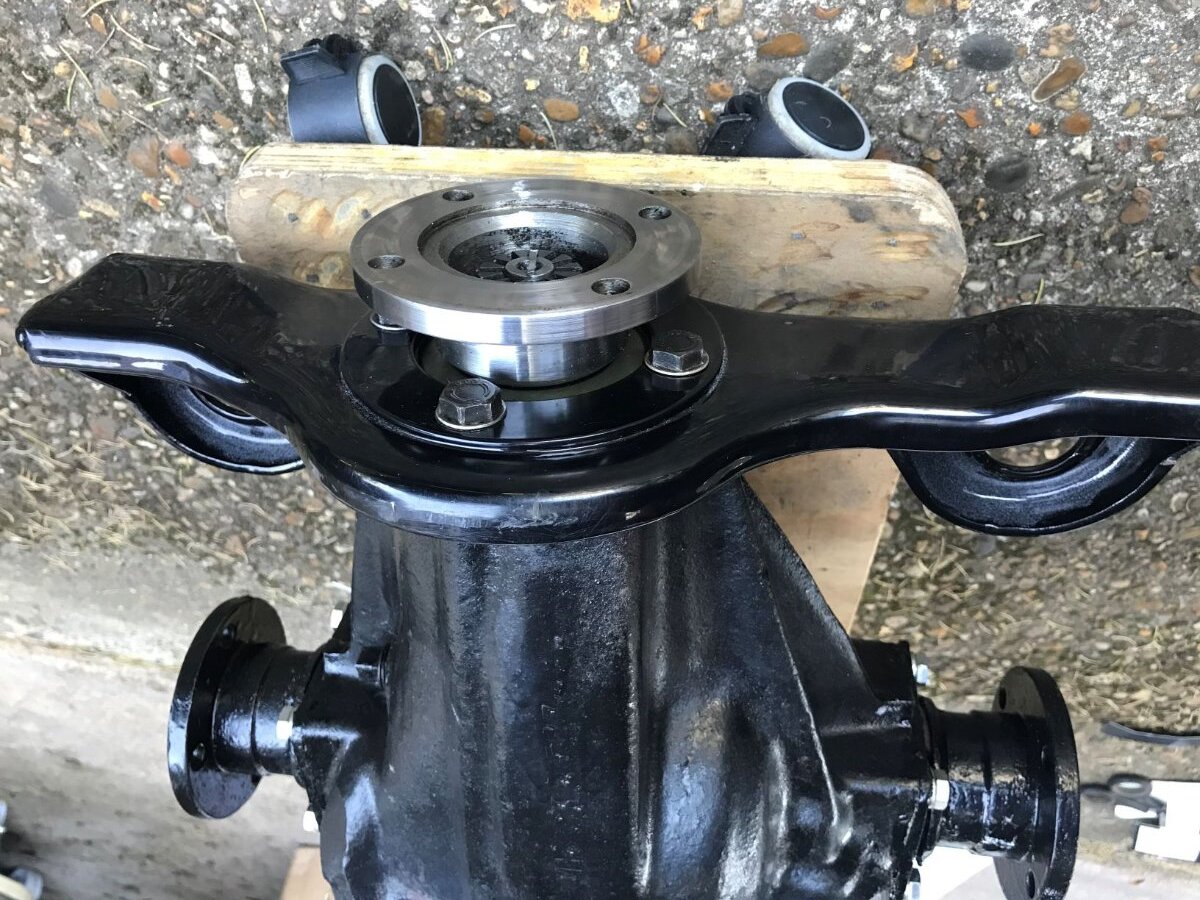
Mick - the black paint on the main body is Lidl metal protection gloss black - I do however go over the main casing with twist knot wire wheel in a angle grinder to remove all rust and scale - you can then read the serial numbers which are often too faint to read under years of crud and rust
The front mounting bracket is powder coated black and the rear one powder coated silver
Cheers Rich
-
Phil - I always use petrol but be careful not to cause a spark and use a stiff brush/old toothbrush/small flat bladed scraper to shift the really hard crusted stuff, a lot of which is often around the diff. Once cleaned off of oil, I then go over the steel bits with an angle grinder with cup brush to get all the rust off and provide a nice base for a coat of paint. If the Coxes are rebuilding your diff, get them to put a drain plug in the bottom of the casing - if you want it to look the dos do-dahs, get then to powder coat the front and rear mountings to get it looking like the one in the photos below
Cheers Rich


-
David - I would be interested but it would have to be posted which I'm more than happy to pay for
Cheers Rich
-
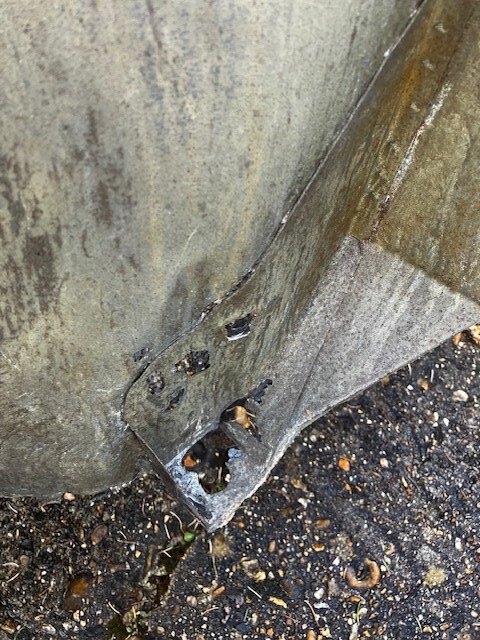
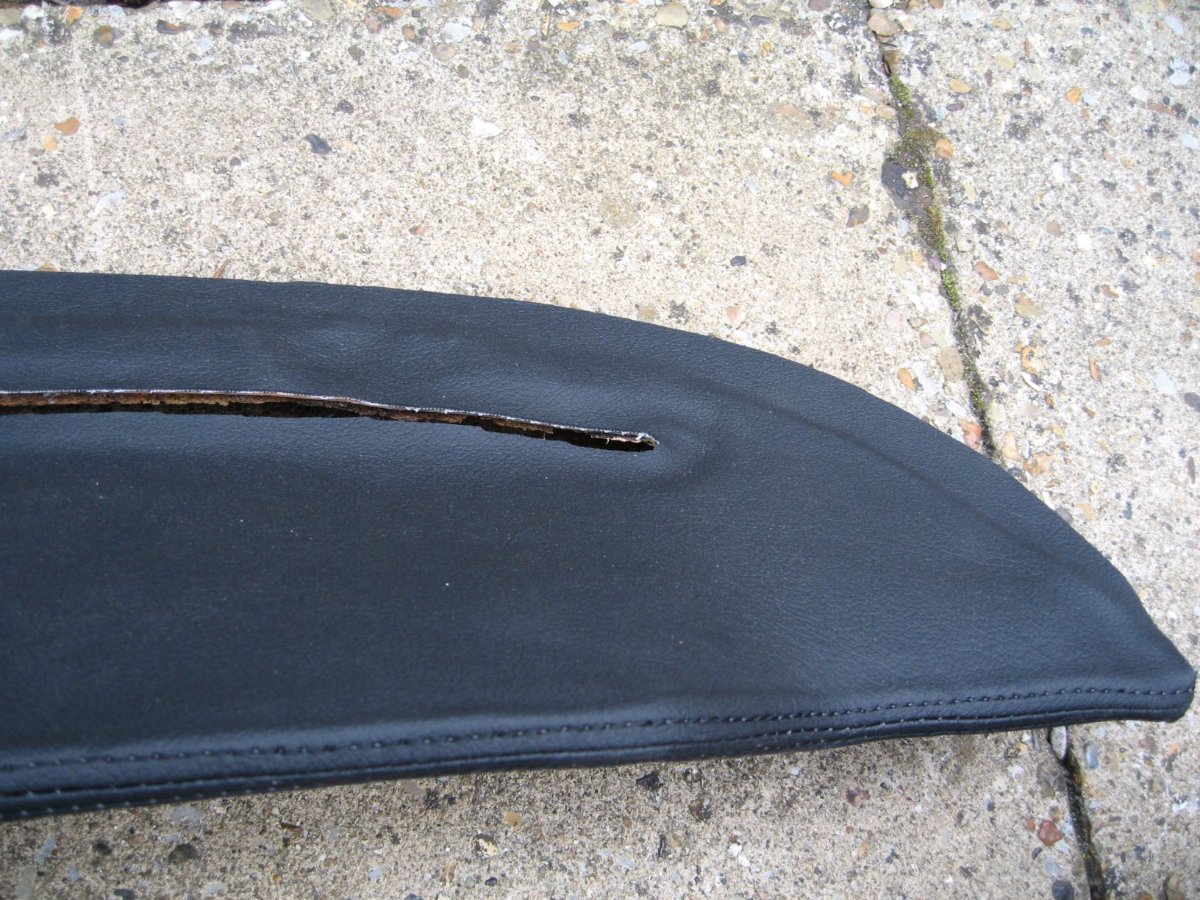
Hi everyone - got this part with a job lot of others thinking it was a TR part but now I'm not so sure!
Anyone recognise it and know what car it's from?
Any help much appreciated
Cheers Rich


-
Hi - do you have a name - unfortunately we know all about this rogue as he has ripped off many innocent members - if you go to the Social Sceme Forum further down the page here, you will see many of his fraudulent exploits highlighted= its a shame you disnt see this before you embarked on trusting him.
Your parts were either spirited away and sold, or sold by the liquidators
So sorry to hear all this but like all these things, it is so important to due due diligence and get good advice
I'm sure so of the sufferers will be able to help you a bit
Good Luck
Cheers Rich
-
Gavin - it could be cross threaded in it's captive nut, so rather than try and force it in further, I would take it out and you will be able to see if it's cross threaded - rather than put a new bolt in and risk the same problem, I would cut say an 1/8" off the bolt and put it back in as it will have cut it's own thread, and hopefully it will tighten up to the washer - but don't overtighten it.
Cheers Rich


TR6 3.45-1 differential needed quickly!
in TR6 Forum
Posted
Guys - I haven’t got any diffs left , certainly not any 3.45 ones - I may at a push be able to spare a 3.7 4A diff which was rebuilt by the Coxes with a new CWP - I’m not posting it so it will have to be collected from Colchester or can take to Malvern.
Im sure Tom Cox will be able to sort you out if Mike cant
cheers Rich Crewe-Read