


DJF
-
Content Count
63 -
Joined
-
Last visited
Content Type
Profiles
Forums
Calendar
Posts posted by DJF
-
-
Hi,
I replaced mine a while .
Details here.
http://tr4a.weebly.com/body-repair-fit-and-paint.html
I needed getting a Stanpart panel from Remington - the last they had at the time.
I did cut the differential bump out of mine as it was in good condition and Conrad bought it as part of a load of my left over parts.
Conrad may still have it and if you are fabricating a panel having the diff cover bump in the seat panel will save hours an hours of work.
Best.
Paul
PM me if you need the contact details for Conrad
-
Don't suppose anyone knows where (or who ) I might source a rear seat pan from.
Not available from usual TR parts suppliers!
-
Roger
Thanks for the info, that could be really useful; I'll try and track him down and enquire about progress.
Big fan of your posts!
Paul
Yes managed to salvage the 'bulge' thankfully.
Kevin
Good point, although it sounds like Steve T might have made the tool to manufacture the panel.
Thanks once again for your responses.
Dave
-
Hi All
I'm looking for a rear seat pan (910065)..... the panel isn't available as 'new', just wondered on the off chance if anyone had a decent one lurking in a corner somewhere, although I know its highly unlikely.
Otherwise it looks like I'll be putting the sheet metalworker hat on!
Thanks
Dave
-
Just about to order floor panels from Moss, but came across Bastuk. Decent price at mo, although I can't click far enough yet to get a price including delivery.
Anyone any experience re fit, quality, delivery etc
-
Hi Dave,
if you mean hose as in rubber then there should be only two or three very short pieces - not the whole run.
Automec do a kit in copper and it works well that include the rubber sections.
Roger
Hi Roger
Decided to buy the Automec kit... this time I'll try and uncoil in a straight line! Did manage to avoid kinks when doing the brake lines. Suppose I should buy one of those pipe straighteners but I'm trying to avoid the expenditure cos I seem to be spending as much on tools/equipment as I am n parts!
Many thanks .... I'm an avid reader of your posts, humorous and informative!
David
-
Hi Dave
www.moss-europe.co.uk , if you search their website for TR4A and Fuel Tank,Pipe and Pump you will see the standard set up for the fuel line.
You'd need 1 x clip, pipe to hose bracket No 130882 and 4 x clip ,pipe to chassis frame No 059191. 1x clip, pipe to frame either 611793 or 616312,1 x clip No 133072, 1 x insulator No 1330083 , 2x grommet No CD23720 where the fuel goes through the chassis.
Double check what you have already , what you'd get in the Automec kit ,etc and then purchase the missing bits.
One other thought , I'd wished I 'd thought of , incorporating an " in line fuel cut off switch " close to the tank end of the line .When working on the replacement of the fuel pump , it would save draining down the fuel tank. Of course , it's possible to just partially drain down the tank and jack the front end up high but a turn of the tap is a lot simpler. Admittedly not original if you are going down the Concours route.
Bob
Hi Bob
Took both yours and Rogers advice and bought the Automec kit; thanks for spending time highlighting the clips and hoses. Good point re the cut-off switch.. I'll certainly be fitting one.
Thanks once again.
David
-
Hi All
I'm renewing the pipe runs along the chassis, have sorted the brake line and now pondering about the fuel line.
Any thoughts/advice as to what to use for the fuel line i.e copper or hose and what diameter?
The existing is 'rubber' hose that would presumably have replaced the original steel pipe. If hose, what is the proper method of attaching to the chassis member.
Thanks
Dave
-
Hi Steve
Just going back to the radiator repair, any chance of divulging the name of the firm who carried out the repair?
I also need a rad repair and struggling as to know where to send it.
David
-
Peejay4A, Stuart, MichaelH
Thanks for your comments, compressed the spring..all is well!
David
-
Sorry Stuart... I meant to say cleaned and put back together!
-
Hi All
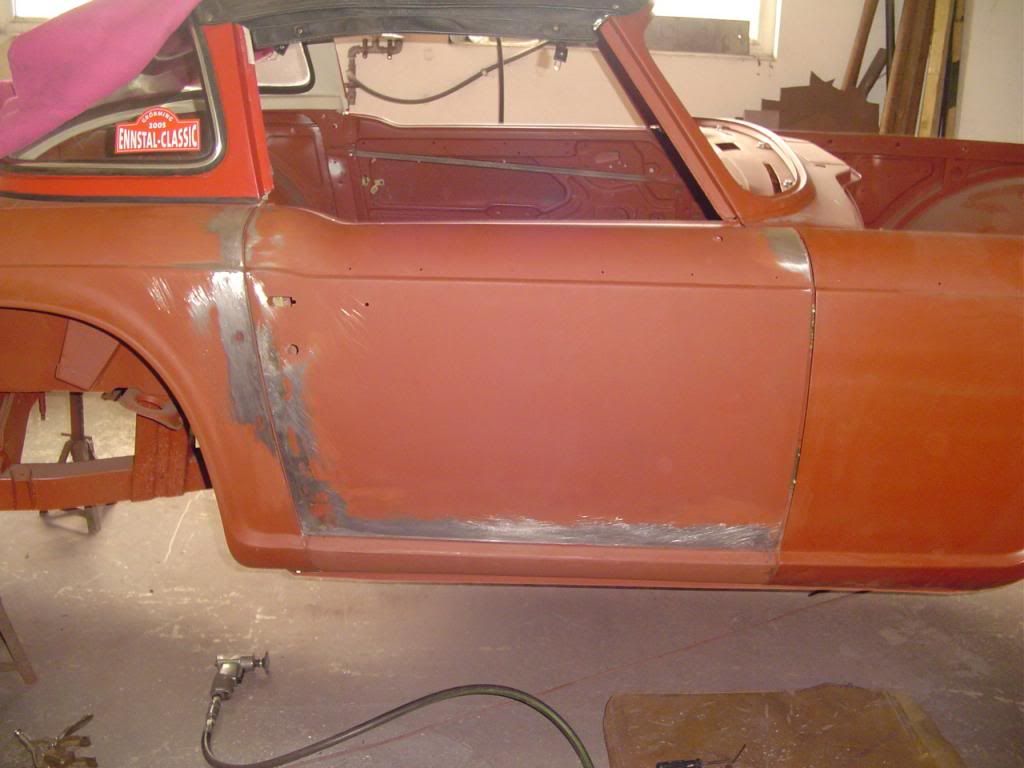
I'm part way through what appears to be a long, slow, body off rebuild.
Story so far:-
Car totally stripped, parts bagged and labelled in boxes... hope I can find the boxes later! Had the chassis shot blasted/primed expecting a bit more welding... ended up having to have a new chassis from CTM (not in budget!).
Body; paintwork removed and etch primed by Enviro Strip in Tamworth, currently sat on a wooden cradle awaiting repair and gathering dust
Gearbox/diff re-built by Mike Papworth.
All suspension/brake components shot blasted primed and painted.... took me forever.
Front and rear suspension rebuilt, diff and prop fitted, new front brake discs and calipers, rear brakes all ready to fit.
Today I fitted the refurb'd steering rack c/w new bushes but not connected the track rods ends.
Q. The nearside front hub assembly is easily moved from side to side, almost with the flick of the wrist;
the offside front is really stiff... I need two hands to move it. So I can't understand what I might have
done wrong. The chassis is on jacks; when I compress the coil spring (slightly) then there is 'free'
movement. Trunnions have been refur'd and new top ball joints.
I'm expect to be told its something really obvious but I've got to the stage where pride
definitely takes a back seat.
I'm sure this won't be the last dumb question that I'll be posting!!
-
I had my chassis shot blasted and then primed. I knew it would need a few repairs but when it came back I realised how bad it really was, plates everywhere, thin metal etc. Bit the bullet and ordered a new chassis from CTM
Received chassis (4A) a couple of months ago and really is the dogs ....cks. Now painted it looks even better.
Can't wait to start re-assembling the running gear on a sound chassis, will also make the task of aligning doors etc far easier (i hope)
Agreement was that I sent both turrets and hump from the old chassis; Colin then assesses condition and if OK returns the £500 surcharge.
-
Just had my CTM chassis delivered (with primer) and itching to get it painted.
I've read so much about various products and now can't make a decision!
Can anyone recommend a particular product.
Also what paint do you guys use for the suspension/brake components etc...... already been shotblasted and primed, now ready for painting.
Thanks Dave
-
Hi Roger
Would be interested to know where you sourced the Teal Green paint when you eventually get it..... just started a body off restoration so not not quite ready yet!
Dave
-
Hi Stuart,
google found it quickly http://www.tr-register.co.uk/forums/index.php?/topic/44252-oil-filter-bowl/ it sounds like Teal Green - courtesy of Don.
Roger
-
New Hacksaw blade between the panels and carefully cut the bolt
Cheers
Alan[
Thanks Alan job done. Sometimes the obvious is not so obvious!!
-
I'm removing the body panels from the tub, rear wing in particular.
I've managed, after a long struggle to release most of the fixing bolts but the one at the top of the wing (near lamp housing) is proving difficult. Both nut and bolt are seized and turning together.... I can't reach the bolt head in the tight area (within the wing/tub void) to hold it whilst I try to undo the nut.
Has anyone come across this problem and got any bright ideas?
-
Jim, loads of pictures on their way to you and with the greatest respect Alan thats cobblers you need to do all the trial fitting of the wings and doors together and the screenframe and the Surrey if fitted.Also especially with the current crop of sills you will need to do something with the gap between the door bottom and the sill as it will be too big otherwise.
Stuart.
Hi Stuart
The air tool laying on the floor.......think I'm going to need one of those, can you tell me make etc.
Regards
Dave
-
Once shotblasted prepare the bare metal for primer then I recommend a 2k etch/wash primer.
Lechler 'fix-o-dur ec' is a very good product.
Obviously with it being a 2k product only use under correct conditions.
Tom
Thanks Tom i'll look into this product
-
Bondarust http://www.autopaint-pro.co.uk/1l-bonda-rust-primer-121-p.asp everytime.
Stuart.
Thanks Stuart. I thought Bonda Primer might be a candidate.
How many coats would you suggest at this stage.....got all bodywork repairs to sort first
I notice in the blurb it talks about applying the finishing coat within 6-24 hours or after 7 days.....
I'm certainly going to miss that date.
Regards
David
-
In the process of removing the underseal prior to having the tub shotblasted.
I'd welcome opinions/advice from members as to what is the best primer to use.
Thanks
Dave
-
Hi Ray
Would love a copy.
email:david@djfarmery.co.uk
Thanks
Dave
-
Unless your name is Colin Matthews (CTM Engineering http://www.ctmengine...M-homepage.html ) DO NOT even think about doing that.
First of all you need to establish if your chassis is indeed straight to start with. Get the car up on to stands (Preferably on a level floor) and then level the chassis up fore and aft and side to side by shimming the stands and using a magnetic spirit level. Then check that the shell is level in relation to the chassis. (This is corrected by adding or subtracting body mounting shims from the mounting points. Once you are satisfied that everything is level then and only then can you get the panel alignments correct.
Its no good trying to just add some shims in one place to correct a single panel as you will then upset another part of the shell.
(You should only be able to see about a maximum of 3/4" of the rear chassis rails below the back panel)
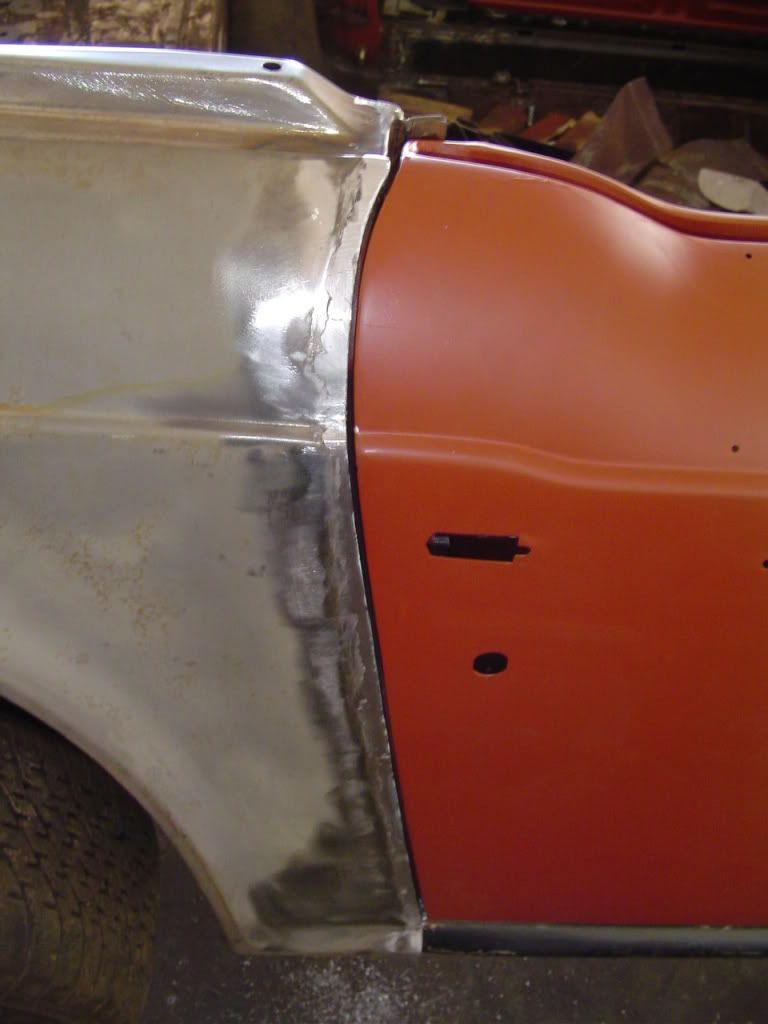
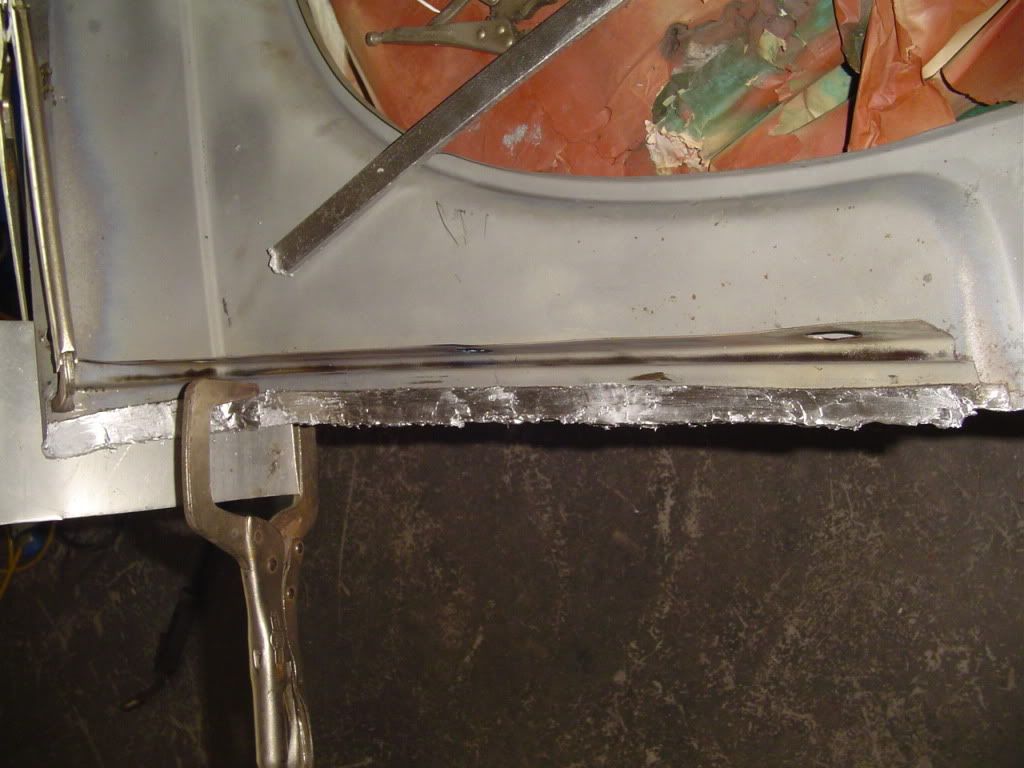
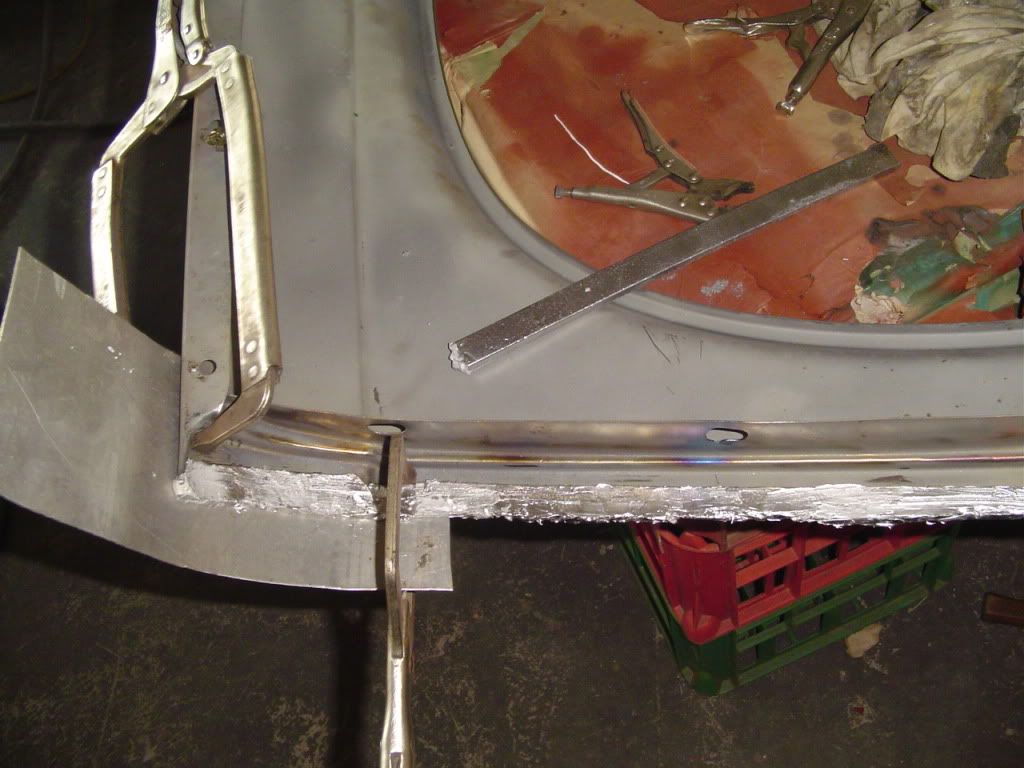
If the gaps go from thick to thin then your best bet would be to lead fill the edge to correct this. Welding a bit on can cause more problems than it solves as you run the risk of distortion and also the amount of grinding required after often means that you end up with some very thin spots indeed.
I will be doing my Lead filling demo at Malvern International again this year for anyone who wants to learn the technique.
Pictures below show a wing line being leaded and the bottom of a door and a boot lid corrected to fit .
Stuart.


Stuart
You are a fountain of knowledge!
Thanks for the advice and taking the trouble to send the pics of lead loading.
I'll do what you suggest and set the chassis up and body up accurately. Seems that lead loading is the way to go. I've read-up on it but never attempted it. I'll try and get down to the IWE (what day is your demo).
While I'm on...... the rear chassis rails, whats acceptable re whats visible below the valance.?
Thanks once again
Dave
TR4A Rear Bump Stop/Bracket
in TR4/4A Forum
Posted
I'm currently working my way through a body-off restoration. The rear rubber bump stop is missing and the bracket, which had been repaired (butchered), is in a bit of a state and needs replacing. Strangely the captive nut which would receive the rubber bump stop has been blanked by a screw. I've read somewhere that the bracket length was extended on some models. Daft question... is this particular bump stop necessary? If so, and if it was extended, does anyone have the dimensions and out of curiosity what is the distance from the end of the bump stop to the striking point on the lever arm.