


Horse
-
Content Count
61 -
Joined
-
Last visited
Content Type
Profiles
Forums
Calendar
Posts posted by Horse
-
-
Roger,
I don't know whether you have now sorted your clonk- I have come a little late to your query. However, I had the same (or a similar?) problem a couple of years ago, that sounded as if a flange was insufficiently tight on a shaft and moving under torque . It first began when starting from rest on full lock, but got gradually worse with time, until it occurred on hard acceleration and on the overrun but importantly, initially it required significant torque for it to occur, to my mind ruling out worn splines. Having checked the tightness of the input and output flanges, in desperation I had the diff overhauled, and that cured the problem initially, but it is back with me now after about 3000 miles, starting in the same way of initially requiring significant torgue for it to occur. The company that did the overhaul diagnosed an input flange moving on the tapered portion of the inner half shaft, the clonk being the flange hitting the key in the inner half shaft. I was told it was a fairly common problem with the 4A and the only solution was to have the two items separated (for which a press is required) cleaned, a new key fitted and reassembled with the correct torque loading. I have assumed that this diagnosis is correct and have decided to live with the clonk, certainly until it gets really worrying! Hope this helps!
Geoff
-
I have a 4A and had the diff overhauled last year. When refitting it I used poly bushes - and the prop shaft u/j knocked on the offside in corners. Refitting the earlier fitted rubber bushes cured the problem. I have always assumed that the reason the prop shaft was offset in the tunnel was because the body was misaligned when fitted to the chassis - by whom and when I know not, as I have only had the car about 12 years, but it was restored in 1992. However, I did wonder whether it implied a bent chassis or whether whoever last fitted the body decided near enough was good enough..
Geoff
-
David,
In addition to checking the prop shaft and drive shaft U/Js, if you can, also check for obvious play at the diff input and output flanges; note that the input shaft/flange is splined. One can easily check for excessive backlash in the diff itself by turning the input flange (prop shaft) and seeing how much play there is before the drive shafts move.
I had a very similar problem, which proved to be an drive shaft flange moving on the diff output shaft. Mine first started when driving off in first with the steering on full lock, and got gradually worse until it happened on taking up the drive in any gear or on the overrun. I had the diff professionally overhauled and was told that this is a known problem; the diff was in good condition requiring only bearings, seals and shims. The diff output shafts are tapered with a woodruff key for location and drive should be transmitted essentially by friction between the tapered sections of shaft and flange. The clonk was the flange keyway hitting the key, in spite of the retaining nut being fully tight and a press having been necessary to split the shafts and flanges during overhaul. After the overhaul the clonk had gone - for about 2500 miles, when it came back again, although currently much reduced! I have decided to live with it.
If the backlash in the diff is not too great and the diff is not too noisy, personally I would not worry unless the 'clonk' really becomes excessive. If you decide to get your diff overhauled. I was very please with the work of Hardy Engineering Transmissions Ltd of Leatherhead (www.hardyengineering.co.uk).
Geoff
-
Try giving Burlem Fuel Sytems a ring on 01722 412500 or email them at info@burlem.co.uk. I get all my Stromburg spares from them and they are very knowledgeable. I am sure they will be able to give you the correct figure.
Geoff
-
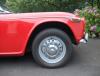
Mine is the same as Roger's - bolted to the n/s inner wing. It is shown in the Rimmer catalogue, Item 86 page 40. However, this is described as a replacement item. Also shown is item 85, as your photograph and described as original. It states that this fits to the radiator mounting bolt. It is shown with the mounting bracket facing downwards.
Geoff
-
You asked where to go to get your diff overhauled. I can recommend without reservation Hardy Engineering Transmissions Ltd, 262 Kingston Road, Leatherhead, KT22 7QA, telephone 01372 378927, email: enquiry@hardyengineering.co.uk. I had mine stripped, new bearings, seals and shims fitted for £480 at the beginning of August. Since then I have done about 1000 miles, including 600 in northern Spain and it made not a sound. You can either take the diff in or the whole car and they will remove and refit the diff. I took my diff in and the turnround was one week.
One word of warning - if you decide to change the mounting insulators, do not buy rubber ones from Rimmers, as they are too soft. When the car is 2 up, loaded with luggage and full of fuel, they can allow the diff to move so that the prop shaft U/J touches the transmission tunnel if driven vigourously. I am about to go elsewhere to get replacements.
Geoff
-
Simon,
The springs are fine thanks and the ride height is correct. Having just done 700 miles touring in Spain I am more than happy. Apropos the spacers, apart from original fit, these can be used to replace the standard insulators and are available in various thicknesses of polythene to adjust ride height as the springs weaken - I bought some from Revington three or four years ago which did the job very well. With your springs I used the standard insulators from Rimmers which gave the correct ride height straight away.
Geoff
-
I have just had a similar dilemma following the failure of a front spring on my 4A. I fitted replacements from Rimmer, only to find that the front of the car was unacceptably high. In a subsequent conversation with Moss, I was told that there was no specification for the front springs for the 4A, and consequently they sold those to the 5 and 6 spec for the 4A, both of which have a heavier engine. I was most fortunate as a fellow 4A owner has just fitted lowered springs and sold me his old front springs. The alternative, if you don't want your car to look as if something has startled it, would appear to be to fit lowered springs, with which my contact was quite satisfied.
-
Simon, it is a cable tie.
-
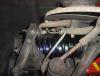
Bob, I don't think so when viewed in the flesh, so to speak. The photo was taken on full lock, and it is a braided hose, which is probably a bit misleading as well. Many thanks for your interest and your note, none the less.
Geoff
-
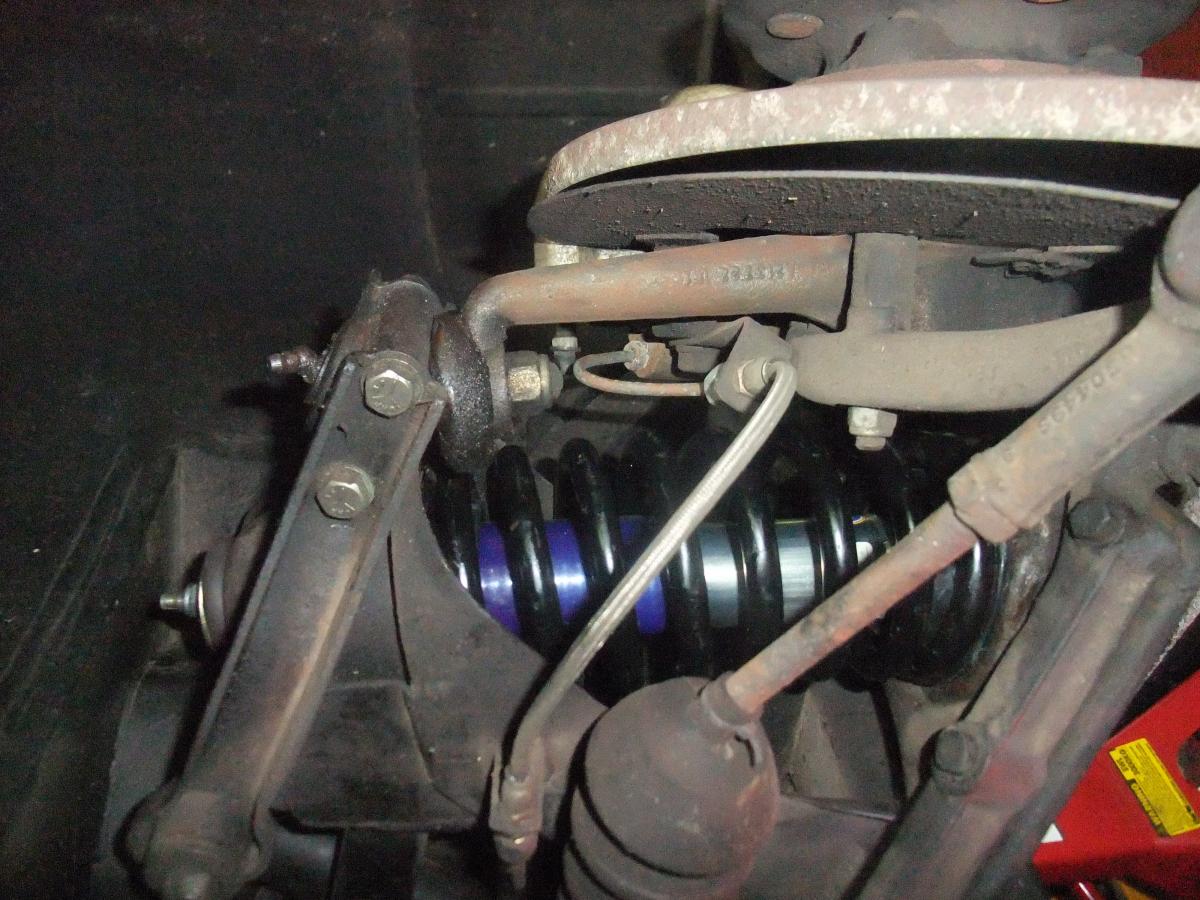
Many thanks to all for your helpful and prompt replies to my query, particularly to Peter W, who's comprehensive response was very informative. As requested, I attach a photo of the front suspension with the Rimmer sourced spring fitted. As the photo shows, the spring is correctly seated, although I apologise for being unable to get the photo correctly orientated. I bounced the front after I brought the car home and the response appeared normal. As far as I know, no work was done on the front suspension save changing the springs, but the mechanic who did the work is on holiday so I cannot check.
Simon, Many thanks for your kind offers. I am content with my steel wheels. Regarding your springs, I found an older post on the subject of rear springs from someone who had purchased front springs Part 213165PR from Moss and these were satisfactory, so perhaps I have a pair that are out of spec. Current thoughts are to try a pair of Part 213165PR from Moss; if these prove unsatisfactory also I will send you a PM.
Geoff G
-
I wold be grateful for some advice. My 4A broke a front spring and I decided to change all the springs. I ordered a replacement set of standard front and rear springs from Rimmers. These were fitted by a local garage that I use whilst the diff was removed for overhaul. When I got the car back, the ground clearance unloaded was 6.5 inches just forward of the rear wheels, and at the front, just aft of the front wheels, was 7.4 inches. It had been driven approximately 8 miles from the garage to home. According to the workshop manual the ground clearance should be a linear 6 inches with a static loading of 150lbs per side. The increased height at the front has increased the the toe-in markedly, rendering the self-centering almost non existent.
To confirm that the correct front spring was supplied I removed it and the details are: free length 10.5 inches, Coils (including each end) 9, wire diameter 0.525 inches. The new front springs are rated at 320 lbs/inch. Rimmers confirm this is the correct spring for the 4A to their Pt No 213165. The undamaged front spring that was removed has, by way on contrast, a free length of 9.75 inches, 7 coils and a wire diameter of 0.475. The corresponding figures for the rear springs are 11.375 inches 7 coils and 0.475 wire diameter. The car had and approximate ground clearance of 5 inches after I had fitted thicker spring cushions. From the length of the front spring it would appear that my car actually had early TR4 springs fitted, but without the aluminium spacers at the front. However, it still sat slightly rear down. My car has a build number of CTC52365-O and was produced on 18th March 1965.
Where do I go from here? Before I removed the spring to check its free length, the car looked as though it was on steroids at the front and is unacceptable in its present configuration (see photgraph). At the same time I do not wish to go to uprated and lowered springs as the ride on local roads is quite harsh enough as it is. My inclination is to go for springs Pt No 210903 being sold for the TR4. Is there any reason why these would not be suitable? From this experience, it would appear those springs advertised as being suitable for the 4A, 5 and 6 are actually unsuitable for the 4A (unless I have been sent a pair from a rogue batch). Indeed one suspects they are really designed to cater for the extra weight of the six cylinder engine.
Any advice or comment would be gratefully received.
-
Mike,
I suggest you contact Burlen Fuel Systems - their details are on the web.
-
One thing is worth looking out for, as I discovered at the cost of a lost wiper arm and blade. I had fitted replacement boxes to my 4A about 4 years ago and they worked correctly when run dry on test. However, the first time I used them in rain, the nearside wiper flew off after about five minutes, to be lost forever. Investigation showed the the rubber seal around the shaft had worked a little way out, and this had disengaged the wiper arm retention clip. Removing the protruding rubber with a very sharp knife cured the problem, and the wipers have been fine ever since.
-
I come a bit late to this topic, but I had a similar problem a few years ago with the overdrive cutting in when not selected. Turned out to be the negative connection on the switch shorting on the indicator switch, The circuit diagram shows that a short to earth at the switch will bring the overdrive in. My switch is now wrapped in insulating tape! Worth a check.
-
Beware of fuel vaporisation if you do route the fuel pipe behind the block. This was originally the installation but Triumph changed it so that the pipe ran ahead of the block because of vapour lock. It was know to Triumph employees as 'The cake shop syndrome' so I was told by an ex Triumph pass off test driver told me (drive to the local shop to buy a snack and the car would refuse to restart). My fuel pipe runs behind the block and I did originally have vapour lock problems. Rather than re-route the pipe I fitted insulation to the pipe and since then it has been vapour lock free.
-
Alec,
Do you have a contact number or address for the two gentlemen you have recommended please?
Regards,
Geoff (Horse)
-
I am planning to buy a 3.7 replacement diff on exchange. Grateful for any advice on who to buy from.
Horse
-
As some will realize from my previous post, I have been busy changing the timing chain tensioner and chain on my 4A. The sprockets were in excellent condition with no evidence of any wear.
In so doing, I met with a puzzle. Advice from others and in the official workshop manual is to set the tappets of valves 7 and 8 to 40 thou. so one can confirm the correct position of the camshaft should it be moved inadvertently. This I did, only to find the with the crank at TDC I could not get a feeler in between the rockers and valve stem. I had to increase the tappet clearance to over 50 thou to be able to confirm the valves 7 and 8 were in the "rocking" position. Not only that, but the correct positioning of the camshaft was critical and left no margin at all; it had to be absolutely spot on to get the same clearance on each valve. Incidentally, the quality of the tensioner, which came from a reputable source, was not a patch on the one that had broken in any respect (except that it was still whole!). I am not optimistic that it will not fail again.
I have had the car 9 years (in which I have done about 16,000 miles) and have been unable to contact the previous owner, who had the car rebuilt in 1992 and which has done less than 20,000 miles since then. Do you think I have a non standard camshaft fitted and if so, what, if anything, is the implication? The engine does not idle happily below 950-1000 rpm, but the cause of that may be something completely different.
I shall be grateful for any views members may have.
-
Gentlemen,
My grateful thanks for your very helpful advice. I an sure that others who face the same task will appreciate the opportunity to exploit your experience.
I did have a helper, but in fact we did not have to remove the bonnet to get the job done. But I knew how to do it should I have had to.
Many thanks.
-
I wonder if a member or two would be good enough to provide me with some advice? I am planning to remove the bonnet of my 4A to provide better access for work on the timing gear. There appear to be two options; remove the grill and either undo the hinge bolts on the bonnet or alternatively those at the inner wings. Which is easier, and which preferable with respect to getting the bonnet back into the correct position. I intend to mark the current position of the hinges with masking tape to aid re-fitting.
Regarding the replacement of the bonnet, any wrinkles that members use to aid the process would be much appreciated.
-
Many thanks to all for your help. I shall pursue your suggestions.
-
I fear the timing chain tensioner on my 4A has failed - not the best way to start the New Year!. I have yet to begin stripping down to gain access,and so do not know the condition of the timing chain, but I suspect that it would be prudent to renew this at the same time as the tensioner unless its stretch is still within the limits quoted in the w/s manual. I am assuming that the sprockets will be servicable.
I wondered whether anyone could advise me on which supplier I should go to get a replacement tensioner and chain that can be relied upon to last? I gather that tensioners in particular do not last long if sourced from the wrong supplier. I approach the task of replacement without enthusiasm and would hate to have to repeat it in the foreseeable future because of an inadequate replacement tensioner or chain.
Any further advice would be welcome.
-
I may be a bit late with this comment but some may find it useful.
My 4A's wipers were very sluggish and occasionally stopped altogether. In going through a series of checks and fixes to see if I could improve matters, I found that there was excessive end float with the wiper spindles that was allowing the drive wire to come partially out of engagement with the wiper shaft wheel, so increasing the friction in the wheel box. The spiral on the wire exacerbates this. The back of the wheel box has a "V" shaped tongue in the centre for adjusting the shaft end float by bending this in or out. One still has to gain access to the wheel box to do this, but having made the adjustment to remove virtually all of the end float my wipers are now a lot better and are no longer prone to stopping. And it is easily done seated in the driver's or passenger seat once the glove locker and speedometer and tacho have been removed.
Stale Petrol - is it a myth!!!
in General TR Technical
Posted
As a motor boat owner for many years, I seem to recall that, for winter layup, the rule for petrol was "leave the tank full" and for diesel "leave the tank empty". This worked for me with a layup period of about 6 months. Consequently I leave the the tank on my 4A full, and although I do take the car out in the winter if the sun shines and the roads are dry, starting is no more of a problem than usual.
Geoff