


StevecTR4
-
Content Count
16 -
Joined
-
Last visited
Content Type
Profiles
Forums
Calendar
Posts posted by StevecTR4
-
-
Hi Simon
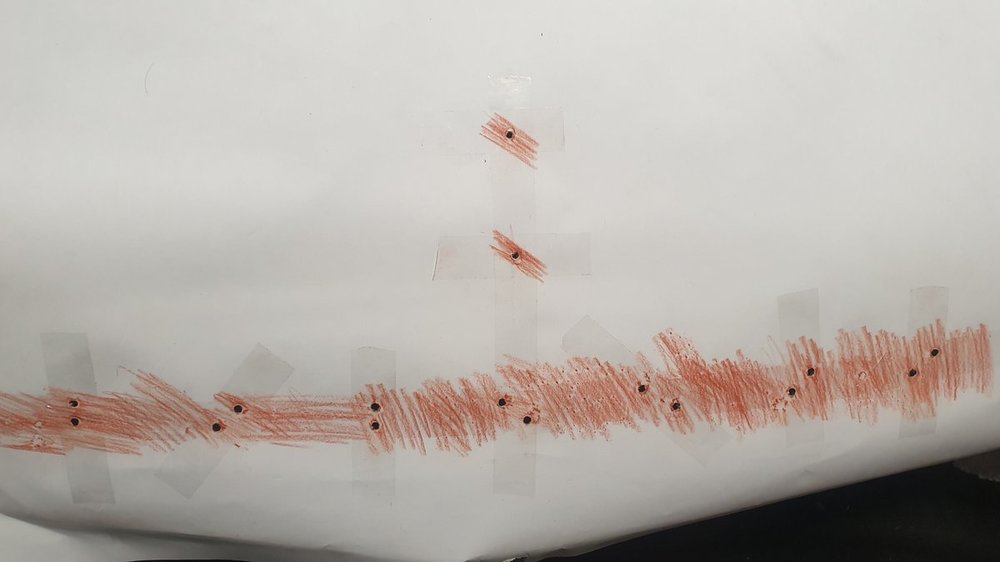
I've made a template off my bonnet, if it is any help to you.
The back of the template has been trimmed along the sharper fold at the rear edge of the bonnet. The leading edge is not sufficiently defined to use as a reference.
I have made a centre mark near the rear edge which combined with central main badge holes and shaped back, it should be possible to position the template quite accurately.
The badge holes have been reinforced with sellotape and punched out.
I can post the template over to you FOC, if you want to private message me an address.
I would recommend a trial on a some spare sheet steel before drilling your bonnet but I'm sure I don't really need to say that.
This bonnet is the standard TR4 version off a 1962 USA car. Looking at the early short bulge UK bonnet I also have, the holes seem the same.
I have measured the hole diameters with a vernier and will write them on the template. If the template is of use I'll also take some check measurements of the hole positions with the vernier.
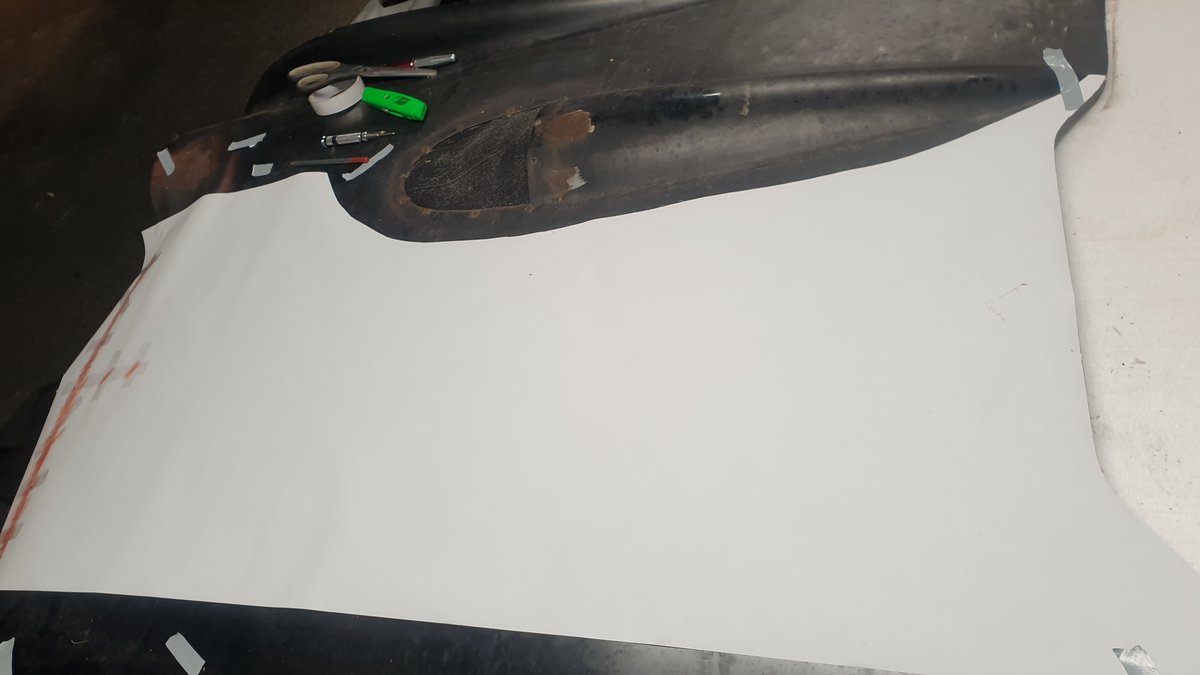
At least your not facing my job of reconstructing the hot rod air vent on this bonnet.
Best regards
Steve

-
Hi Simon
I have a good unmolested bonnet in my garage with the badges removed. I'll have a look tonight to see if I can take an accurate rubbing or simular record of the hole positions.
If it works, happy to post you the results.
Regards
Steve
-
Hi Dave
Try this link. There are over 20 videos covering a range of body work jobs.
Hope it works
Steve
-
Hi, Dave
Trev's blog on you tube has a wealth of tips and tricks for body work repairs and paint finishing.
I would recommend looking at a few of these videos.
Trev is a professional classic vehicle body work technician who explains how to carry out many of these skills and techniques in the home garage environment.
Simple tips like using a thin film of body filler to protect surrounding paintwork while rubbing down a paint run are priceless.
There is a video that goes through the whole process from rubbing down new paint to the final polish with great results.
Best wishes
Steve
-
I have a pair of the Moss version to fit, but not yet used. They don't look bad but seem a little thinner than the original.
There is a video on YouTube showing how to fit them which may be of some interest.
Steve
-
Hi
Child car seats will tend to be quite universal fit for three point seat belts so there should be a good selection. Many of the better suppliers will have a seat fitting service which will allow you to take your car to the shop in order to test fit different models (even if you are not ready to buy). This may be the best route because child seats continue to improve. Choosing a later design test fitted may be preferable to an earlier example.
Best Regards
Steve
-
Hi Rich
Many thanks for taking the time to send the additional information. Very valid point about the plywood bulkheads substituting removed structural elements. I was planning to bolt steel brackets to existing floor holes etc. which would not have offered the required diagonal stability your solution provides.
Regards
Steve
-
Hi
I'm in the process of planning to construct something simular for a TR4 with the central pole, so it would be useful if you are able to post a couple of additional shots of the front and rear body mountings.
Amongst the jobs I need to do is replace the floors and sills. My concern is the body sagging on the jig during this process. I'm proposing to do the work panel by panel with door braces in place.
Have you carried out any work like this on you jig and have you had any issues.
Any pointers or lessons learnt greatfully received.
Best Regards
Steve
-
Hi
I would suggest using a six sided socket so it grips the flat of the nut rather than the points of the nut as seems to have been done before with a 12point socket. The nuts are quite slim so with most sockets having a chamfer you will loose grip. To overcome this I would grind off the leading edge of the socket to ensure the socket has maximum surface contact. At this point you can give it some welly with whatever lever, hammer of pneumatic tool you have at hand. Holding the hub is key. With the stud being ground off so close to the face of the nut I would expect this to offer only limited resistance. I often cut threaded bar with a nut fitted, so the nut reshapes the thread on removal.
If you have a nice matched set of sockets, Perhaps buying an extra socket of the correct size may be worth while to protect the look of your set from having an odd ground down one.
In the time it has taken to type this I see there have been a few other replies, so sorry if this is just a repeat of what has already been said.
Best of luck
Steve
-
This car is possibly fine, but. I've seen a chassis for sale recently which was clearly cut away in places to make way for a non standard gearbox bell housing. So I would suggest a good inspection of the chassis is in order. Would hate to see the car fold in half between the A posts.
Steve
-
Hi all,
To maintain some order with recording the spares I need to service, replace or find during my TR4 restoration and possibly more scary the cost. I'm keen to track down a suitable spreadsheet for the task.
May I ask if anyone has done something simular and could possibly point me in the right direction to obtaining one.
Many thanks
Steve
-
The seller listed a tr4a bonnet and a pair of wings which sold as buy it now for £75 and £50 each respectively.
https://rover.ebay.com/rover/0/0/0?mpre=https%3A%2F%2Fwww.ebay.co.uk%2Fulk%2Fitm%2F401729314987
https://rover.ebay.com/rover/0/0/0?mpre=https%3A%2F%2Fwww.ebay.co.uk%2Fulk%2Fitm%2F401729313119
https://rover.ebay.com/rover/0/0/0?mpre=https%3A%2F%2Fwww.ebay.co.uk%2Fulk%2Fitm%2F401729277748
Nearly bid myself but Bristol is a bit too far to collect. One of the listings showed the photo from the outside of a front wing and the inside of a rear.
Jury is out on the credibility of the listing. The two buyers will be the best judge.
-
Hi,
I'm looking for the centre switch panel for a TR4. Plastic body bit and oval facia.
If you have any body panels I would be interested in the strengthening part with horn mounting off a TR4 inner wing. Would consider a pair of good ones to fit direct or a single side (even rusty) that could be used as a template. The previous usa owner seems to have cut them off, possibly as the first stage of fitting a V8 or to aid engine bay cooling.
The retaining brackets that sit each side of battery are also missing so again looking for these.
Many thanks
Steve
-
Hi, A self recoiling extension lead would possibly work quite well to supply your lift with power and offer some flexibility for other power requirements in the centre of the garage depending where you fitted it. (Up and over door permitting?). Adding a loop to the end of the wire would allow you to reach up and pull down the wire with a pole (sweeping brush) fitted with a hook.
Curly cables tend to soon sag on their own but may work with the pulley you showed to give a tidy solution by feeding a cord down the centre of the curls.
Its difficult to tell from the lift data but the way you seem to want the move the hydraulic control box appears to rely on being able to unplug the hoses and control cables in order to store it away without the need to move the rest of it about.
Cannot say with confidence, not knowing the layout of your garage. However an alternative way to protect the cables/hoses would be to raise the floor level with a concrete screed or slabs around your lift. This also reduces the profile of the lift which may help if you are regularly driving in and out.
I've installed a few x-ray machines using steel trunking cut into floor in a way Waldi describes protected with a 3mm steel removable lids so I'm sure it would work in your case dependant on floor construction for hoses and cables. Galvanised 20mm conduit with a floor socket again cut into the floor is also an option for the power cable.
Steve
-
Hi Rich
I'm currently planning to go to Stoneleigh. I'm also planning to go to the AGM on Monday as well as being in Lincoln during the day on business. I'll try to send you a pm.
Steve

Early TR4 door straps
in TR4/4A Forum
Posted
Hi,
The early type TR4 door strap is listed for left and right handed.
However, when looking at pictures, the only difference I have noticed are the two pins than sandwich the sliding strap part.
When installed on the correct side of the car. The two pins appear to drop down from the top with retaining clips underneath.
Unfortunately I don't have the real thing. So may I ask if it is possible to install these on either side of the car, accepting the pins may be upside down. Or possibly corrected with the pins reinserted.
I may be able to purchase two of the same side, due to lack of availability for both. However I didn't want to do this if there are other clear differences I have not noticed.
Many thanks
Steve