


Efuentes
-
Content Count
107 -
Joined
-
Last visited
Content Type
Profiles
Forums
Calendar
Posts posted by Efuentes
-
-
Many thanks to all of you... I guess that I will have to apply force,pp as everyone's responses seem to confirm that the screw goes through but is not screwed in the damper arm (which would not make sense).
By the way, forgot to introduce myself. My name is Enrique and I live in Madrid. Many thanks again
-
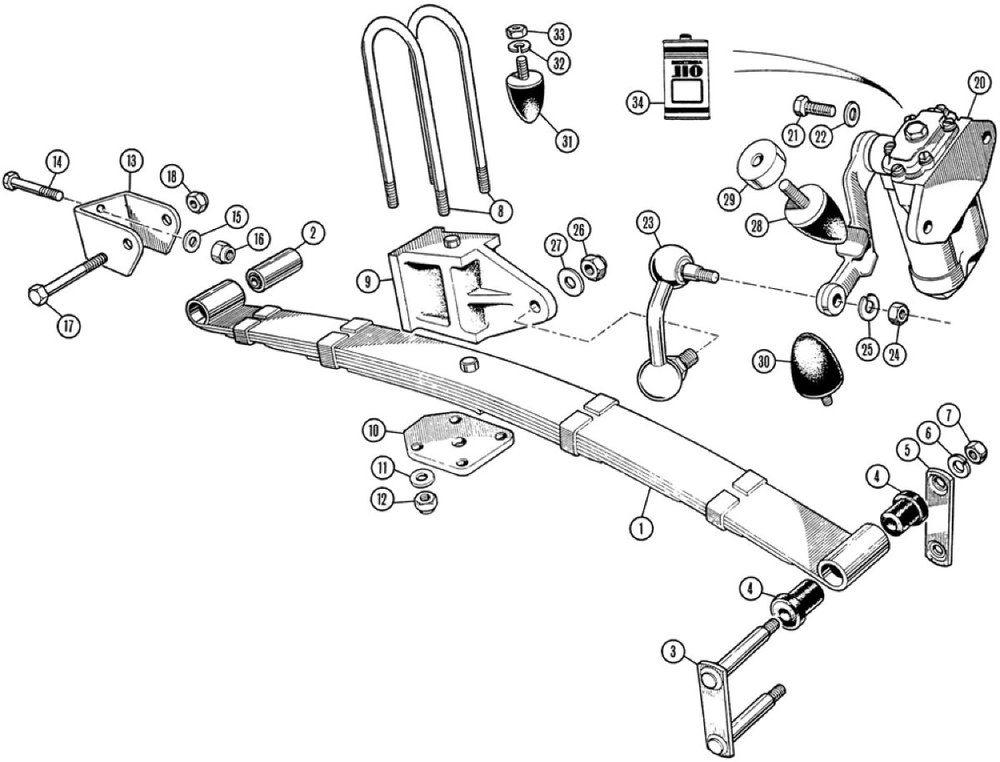
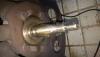
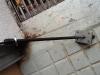
The link is #23 in the attached moss Europe chart and the screw that is stuck is the upper one
-
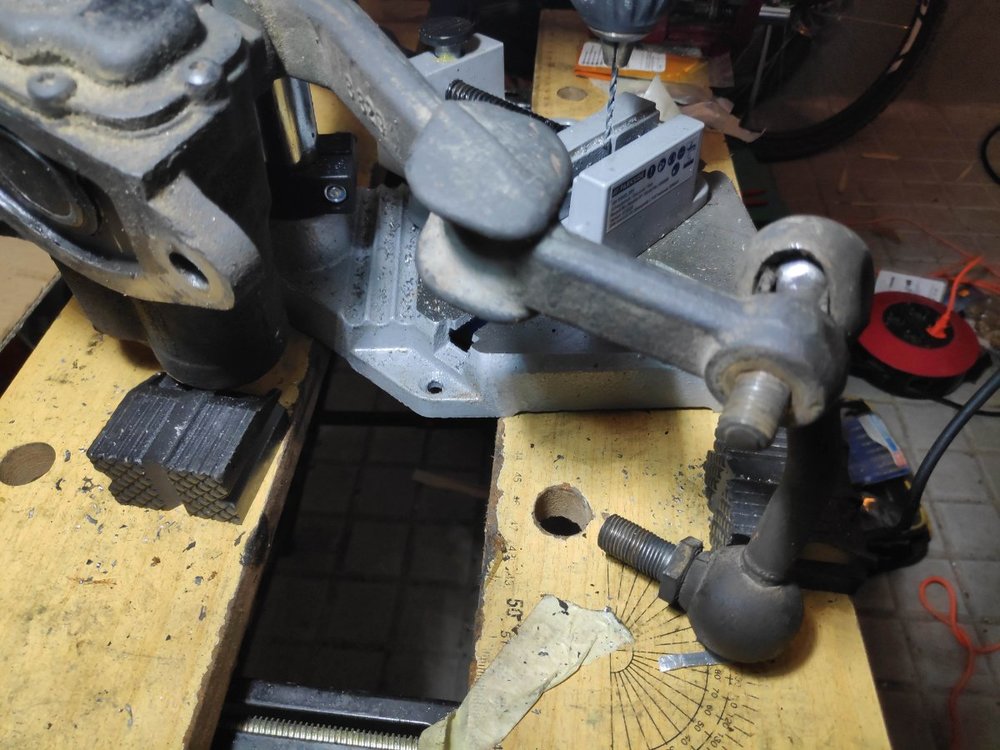
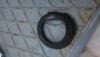
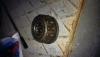
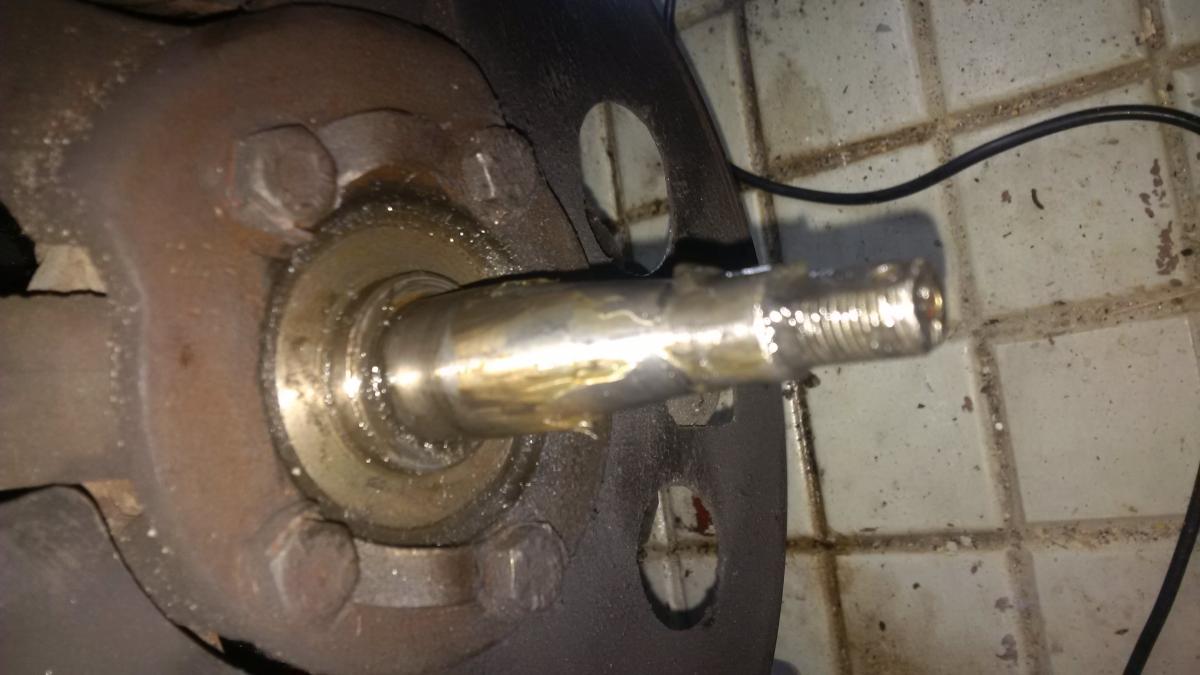
Dear members, I own a 1966 TR4A with solid rear axle. The rubber bushing that holds the screw that links the rear damper arm to the rear axle is worn and makes a clunking noise when driving. I ordered a new link (the bushing cannot be ordered separately) but, when I tried to remove the old one, the screw would not come out from the damper arm. I hit it with a mallet, but it does not move. I did not insist, as I got concerned that it may be threaded into the damper arm (which would not make a lot of sense, but you never know and I want to avoid damage to the damper lever. I tried to see if there is a way to unscrew it but it does not have anywhere to adjust a spanner (it is round) and the link does turn 360 degrees on the bolt, so I cannot use it to turn the screw. I even tried tonuse two bolts on the threaded side to turn the screw, but the length of the screw is insufficient to fit two bolts... I was wondering if anyone with a similar car has ever dissembled this and could provide guidance... I attach pictures (I disassembled the damper from the chassis to inspect the link more closely)
-
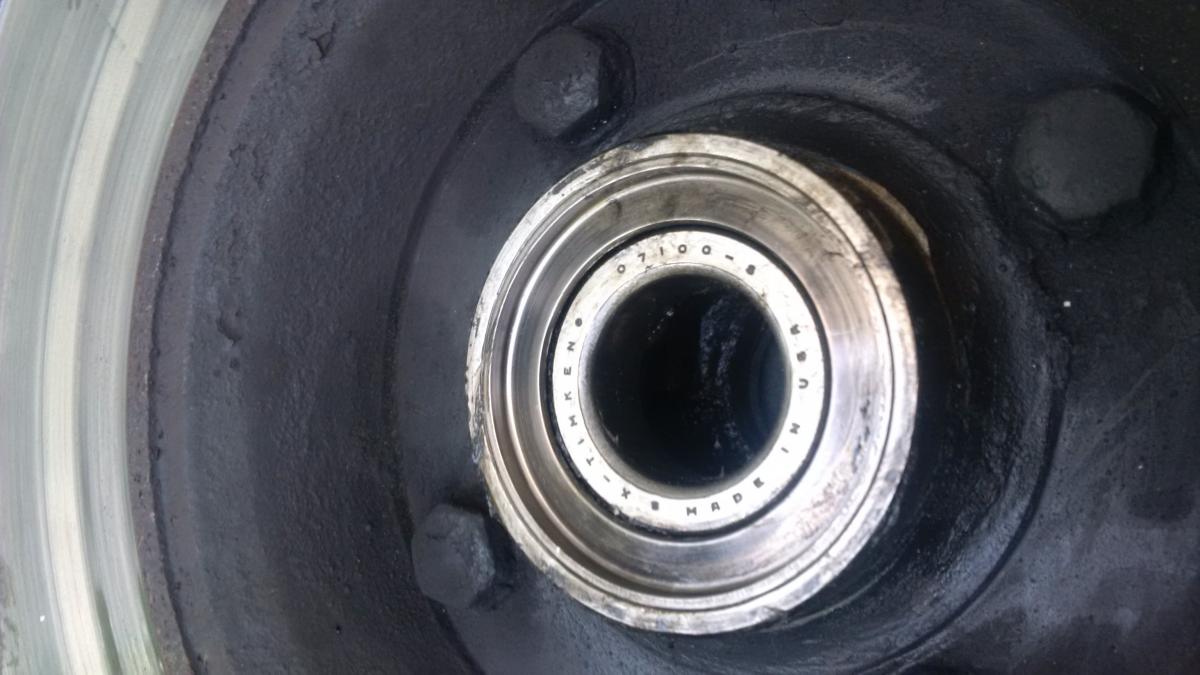
Many thanks for the info. The bearing itself is a Timken, and it looks it is in good condition. I will try to find a felt seal without the metal ring, as I prefer not to dismantle the bearing. In case I have to extract it, I presume the direction it goes out is towards the interior (ie car side) side of the hub. Is that right?
Many thanks: Enrique
-
Not sure if the picture attachment worked

-
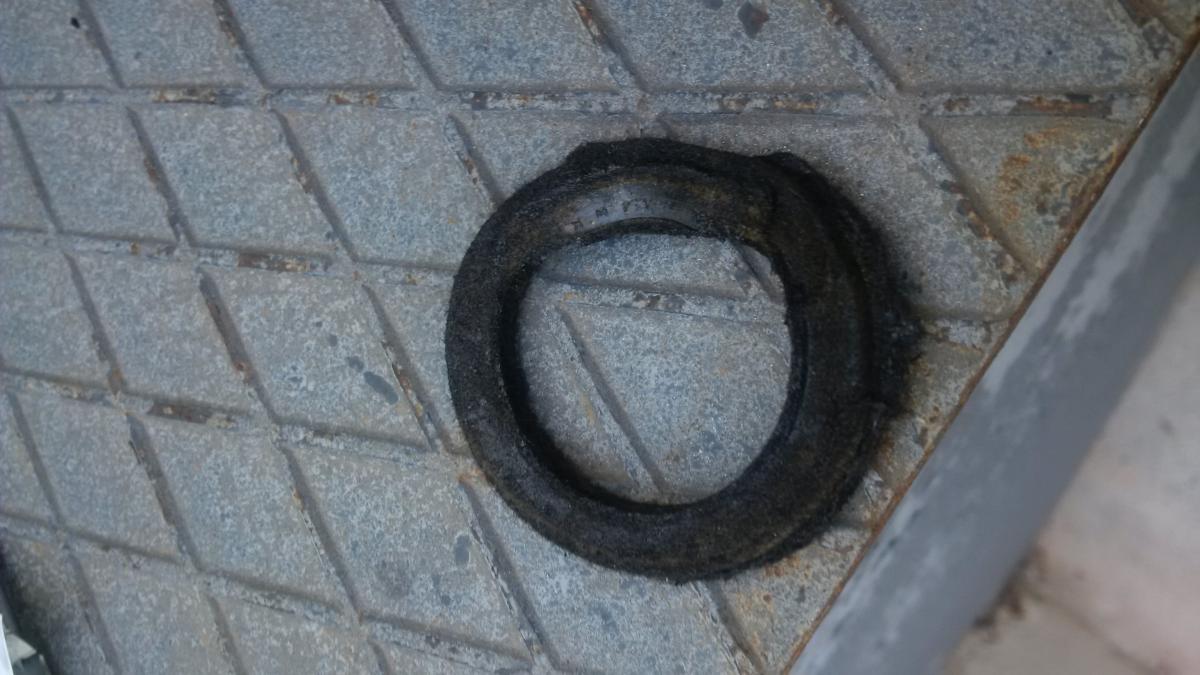
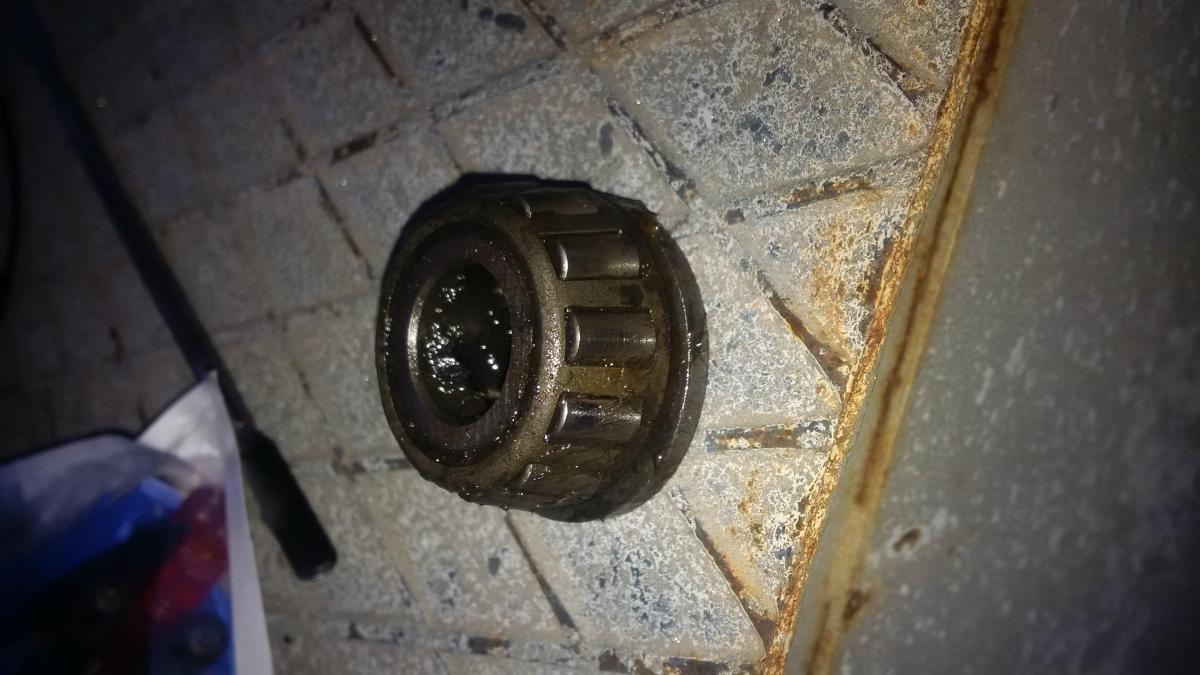
Hello to all. I noticed some play in my front left wheel and could see the castellated nut at the end of the stub axle was way too lose. I adjusted the hub bearing by torqueing to 10 lb ft and then releasing one flat to.insert the pin. Play was gone and wheel rotated well. However, I noticed a rumbling nose when I would be in a curve and loaded the front wheel. I disassembled the hub and could see that, while the outer bearing and stub axle looked good, the felt ring in the inner washer was loose (ie: not sticking to the metal washer), and deformed. To my surprise, when I tried to extract the inner washer, it is sticking to the hub and, therefore, I cannot extract the inner bearing. Is this normal?. I thought that the inner washer should go out easily. I attach a of the hub with the inner washer. I was thinking on replacing the felt, but it may be better to replace the washer and felt assembly. Any advice on how to extract the washer and what to replace?
-
I had the same doubt and ended up tightening the nut to TR6 specifications. This was the thread
https://www.tr-register.co.uk/forums/index.php?/topic/64508-outer-lower-fulcrum-bolt-torque/
-
...I mean, even if you have used the rubber bushings sold by Moss and others, which don,t have a shoulder, the protrusion at the outer end should prevent the A arm to move
-
I agree with Roger. When the rubber bushing is inserted, it should come out on the other end and expand, with a shoulder being formed. Such shoulder is tall enough to prevent it going inside the arm again. Could it be that, when they installed them, they did not push them in all the way?. I think it shouldn't be an issue as long as the arm is not touching the U bracket and both arms are displaced in the same direction
-
I have just seen the picture I posted. Two comments: (i) the rest of the washers (6 in pairs of 2, growing sizes) are hidden under the aluminum plate, and (ii) before anyone jumps in, the gray area in the lower part of the thread is not the threads being worn, it is just an optical effect, threads are perfect, as the rod is hardened high carbon steel
-
I did mine with a 14 mm hardened steel threaded rod, 6 nuts, 4 wide washers plus 2 pairs of growing size washers and a thick aluminum plate that I drilled to fit on the spring pan. If you go this route, make sure the whole in the plate through which the rod goes is quite larger than the diameter of the rod, so as to be able to swing the spring pan to align the bolt holes with the suspension arm, which is a bit tricky. It worked like a wonder. To be fair, I manufactured the tool more for the fun and pride of it, as, while the material costs were minimal (20 EUR), the time I devoted was probably worth much more than the cost of having bought it from Moss. Unfortunately, I am not in London... Regarding rubber vs poly, I think the key driver is precision and durability (rubber gives a less precise swing movement but, above all, is less durable, at least the modern bushings they now sell), as the ride... well, I wish that the only factor making our TR4s ride harsh were the bushings... These cars tend to be harsh
-
Cold and with lots of salt on the roads down in Madrid. Repair/ refurbishment time...
Enrique
-
I was thinking about adding a fuel tap, too. Definitely useful to clean sediment bowl... just have to remember to turn it on before driving. Alec, thank you for the offer, but everything's fine, so far. And then, Chris, thank you for your tip. Unfortunately I only read it after dismantling the pump, but now " check flow before dismantling pump" will be on the whiteboard alongside "prime your pump after leaving car on standa"
-
Mr Ian Cornish, you are definitely a master TR4er... After dismantling the fuel pump and seeing (to my surprise) that everything was fine, y reassembled, filled up with gas, removed the stands and leveled the car, and I tried with your Funnel method. In my case, I had a large O ring from some plumbing job I did long ago in my sink, which fitted perfectly over the rim of the fuel cap assembly and against the Funnel. I did the solo version, blowing like crazy and then rushing to the pump manual lever. In almost no time, fuel was flowing into the glass bowl. Once glass bowl was full, I then took out the fuel hose into the first carburettor and suctioned while at the same time pressing the lever of the pump, until I had the gas flowing. I then reconnected the hose and did the same with the second carburettor. Car started at the first attempt and runs fine. So, after writing 100 times in my whiteboard "you HAVE to prime the fuel pump if the front of your car has been on stands for days", I am now heading to a Christmas dinner that will be merrier knowing that there is nothing wrong with my fuel system.
Thank you all. Merry Christmas
Enrique
-
Phil, the stands were placed under the front cross member, so no piping there, but good point.
Harry, I am not sure if the pump is original or replica it looks original to me and was perfectly fine to date, hence my suspicion that the failure is related to sludge in the tank having got into the tubes and pump due to the front of car being on stands for some time.
Rob, I already checked that the pump is not sending fuel by operating the lever and seeing that there is no fuel getting to the transparent online filter that is before the carburettors, but I will check again disconnecting the pipe from carburettor.
I have drained the fuel tank as much as I could and will put the car on stands again (front end), so I can clean the sediment bowl and dismantle the pump to check it with, hopefully, a minimum spill (if a lot of fuel is spilled in the garage I may not need to drink tonight to get high...).
If the pump is good, then it has to be the tubes from the fuel tank. I can use your suggestion, Ian, but I was wondering if it may be easier to do it the other way round (ie: blow from the pipe that goes to the pump, so that any sludge than.may be blocking the pipe goes back to the tank).
Thank you all for your replies. I will.keep you posted.
If anyone has ever dismantled the fuel pump, his experience and do's and don'ts will come in handy. My idea was to try to check the membrane on site (ie: without detaching it from the engine block, which I have read is tricky, as the inner bolt is a b... to get to) by undoing the top screws...
Merry Christmas to all TR4ers!
-
I went for 14 mm high tensile steel, plus washers and then a thick (1 cm) aluminum plate that fits on the pan studs. I think the larger diameter makes it easier to turn the nut, and will be more durable, as the load is spread over a larger surface..Worked very well. You have to have a bit of faith the first time you use it and you see that mighty spring compressing more and more...
-
Hi, guys. Here I'm going again. So, after successfully changing the lower inner suspension bushings, with the pride of an accomplished job, I hop on the car for a test drive. As it had been some weeks since I last started the car, I primed the fuel pump by pressing upwards on the small lever it has. I am surprised, as the lever goes up but, rather than feeling some resistance as the fuel is pumped, it goes up. And I don't see any fuel coming into the inline fuel filter. I then try to start the car and it doesn't (my TR4A has always started on the first attempt). I checked there was spark, just in case, and everything seemed fine on the ignition department. I then checked the carburettor fuel bowls and the second one was empty, with the first one half full. Pipes to.the fuel bowls unobstructed. I poured fuel in the bowls and car starts immediately, dying after less than a minute. Fuel bowl empty again. I think the issue can be traced to the fuel pump or the fuel hoses from the tank. Now, the front of the car has been for almost a week on axle stands, for the suspension job. Can this be related?. Maybe sludge from.the tank has obstructed the pipes due to the car being with the front up?.the transparent fuel bowl in the pump is full of fuel, with a sediment of sludge, but when I try to open it I get fuel dripping, suggesting that the fuel is getting there from the tank. Can the pump have been damaged fro being dry?. How can I check the pump without filling my garage floor with fuel?
-
Hi, Roger... too late, I am afraid... I must say, though, that I never felt the suspension being too hard (at least with the old (shot) inner lower bushings... let's see how it goes... BTW, getting the spring pan aligned with the lower arms is a pain in certain part... I was lucky the first time, but then I had to undo to insert the inner studs correctly (see above, only 50% successful, but I managed to sort it out putting three washers) and the 2nd time it took a lot of time and forceful but careful persuasion with levers and plastic face hammer
-
By the way, just when I thought I was done, I saw that the inner nuts of the spring pan were not tight enough (the washer could move). Upon closer inspection and after undoing some of the hard work I had done to assemble the suspension, I realized that a previous owner had fitted the studs the wrong way in. I managed to take one out and insert it correctly, but the other one was stuck, so I ended up putting three washers...
-
Hi, Marco. The bushings are Nylatron (presumably fitted by prior owner and you can see the steel tube in the inside. The washers and very thin (they look like they are designed to slide on the nylatron), but they are, indeed, steel. I agree with you that the 5 lb ft torque seems to be OK for the TR 3, but the TR4A assembly looks like it needs more torque
-
Hi, Roger, sorry for the delayed response. Too much work. That is the one : #92 (and also #98, which is the nut that bolts on #92)
Thank you
Enrique
-
Dear colleagues, I have completed the change of lower inner suspension arm bushings. When reassembling, I have not been able to find the torque setting for the bolt that acts as the lower outer fulcrum. I have both Haynes and Bentley manuals, but they refer to Section 4 and there you only have the reference to the TR4 and earlier system, where the trunnion had two studs, rather than the tr4a system with a single bolt. The manual indicates 5 lb ft (which seems low), and a certain play. But then, the TR6 manual, the TR6 having a similar arrangement to the TR4 (with a Through bolt and a single castellated nut), indicates 50 lb ft... I have seen this question.in this and other forums, with no clear answer. Your views would be much appreciated.
-
Update: I made the left hand side. As I thought, only the inner lower bushes were bad. It looks like the other ones had been replaced, as they looked new. I ended doing my own spring compressor, for the fun of it, and it worked great. The most difficult bits were accessing the inner spring pan bolts and, particularly, the suspension bracket bolts that link it to the chassis. Getting the bushing into the suspension arm was also tricky . Now, a question. The fit of the bush inside the U of the bracket that links the arm to the chassis is pretty tight, this meaning that the upward and downward rotation of the suspension arm is sticky (ie: requires some force). Is this normal?


TR4A solid axle damper from link removal
in TR4/4A Forum
Posted
I will try, carefully, with a mallet. Should it not come out I may try a workshop. I was also thinking that with two bolts and penetrating oil, even if the second one does not fully thread in, I may be able to apply sufficient twist force to break the bond... Will let you know about progress