Efuentes
-
Content Count
107 -
Joined
-
Last visited
Content Type
Profiles
Forums
Calendar
Posts posted by Efuentes
-
-
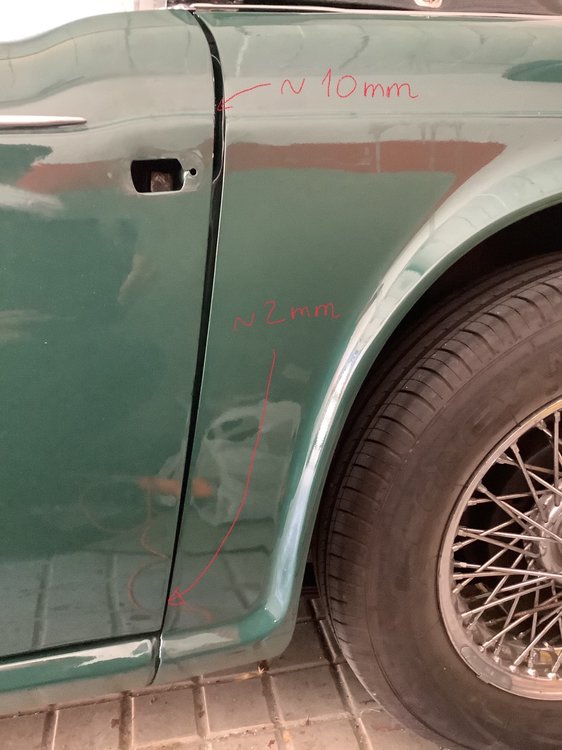
Hi everyone. On my list of “things in my car that bug me of my TR4A but I have been too lazy to address”, I decided to give some attention to the driver side door (left, This is a LHD car). I am changing window weather strips and touching up some scratches just below the outer handle and plan to try to correct some uneven gaps. As you can see, the back gap is wider above than below, with the front gap slightly wider below than above. I was therefore wondering how could I slightly move the door towards the front in the lower side and / or slightly towards the back in the upper side. I presume that must be done by shimming the hinges. Would I have to adjust the bolts that link the hinge to the door, or the ones that attach the hinge to the A pillar?. Off the top of my head, I would think that the ones in the door... As you can see in the pictures, the bolts in the door have already been shimmed in the lower hinge. I presume that, If I remove the shims, that would move the lower part of the door forward, correct?. Door closes relatively well and gaps on the right side are reasonably good. Help most appreciated
-
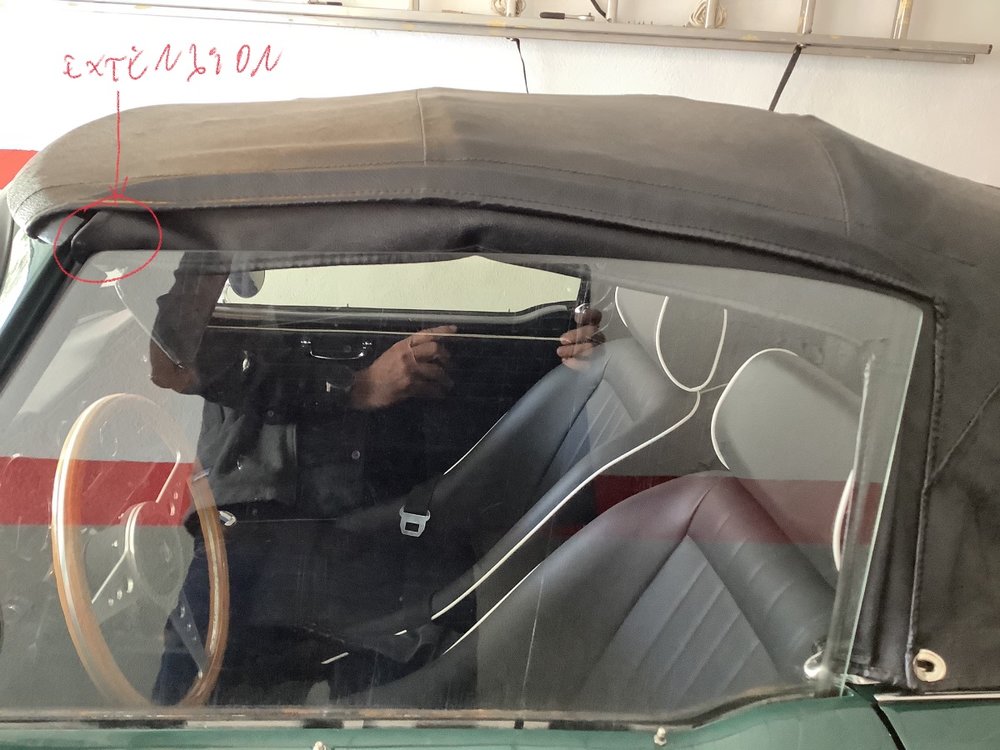
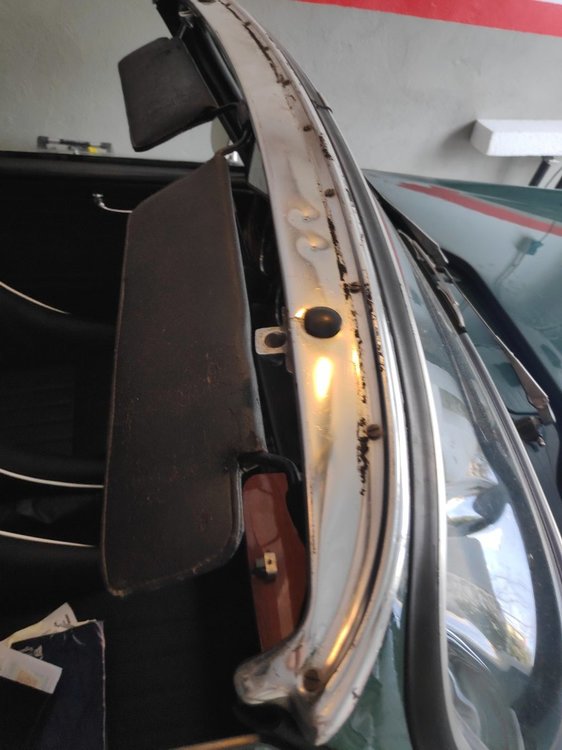
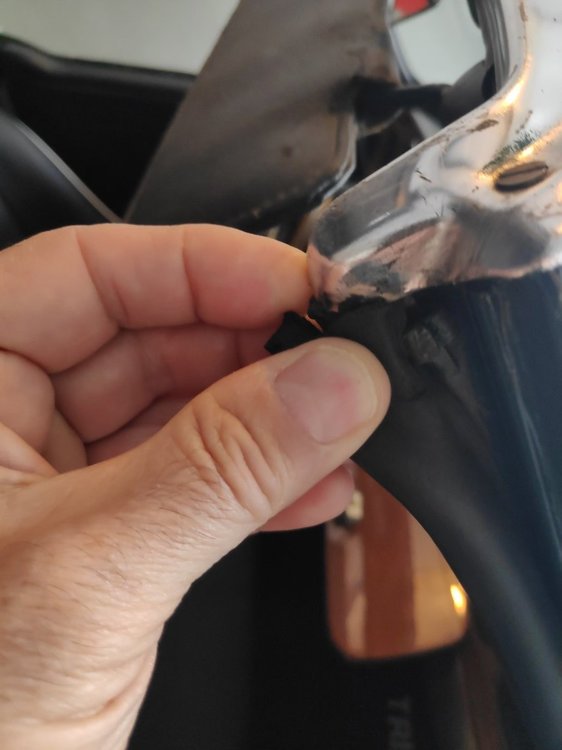
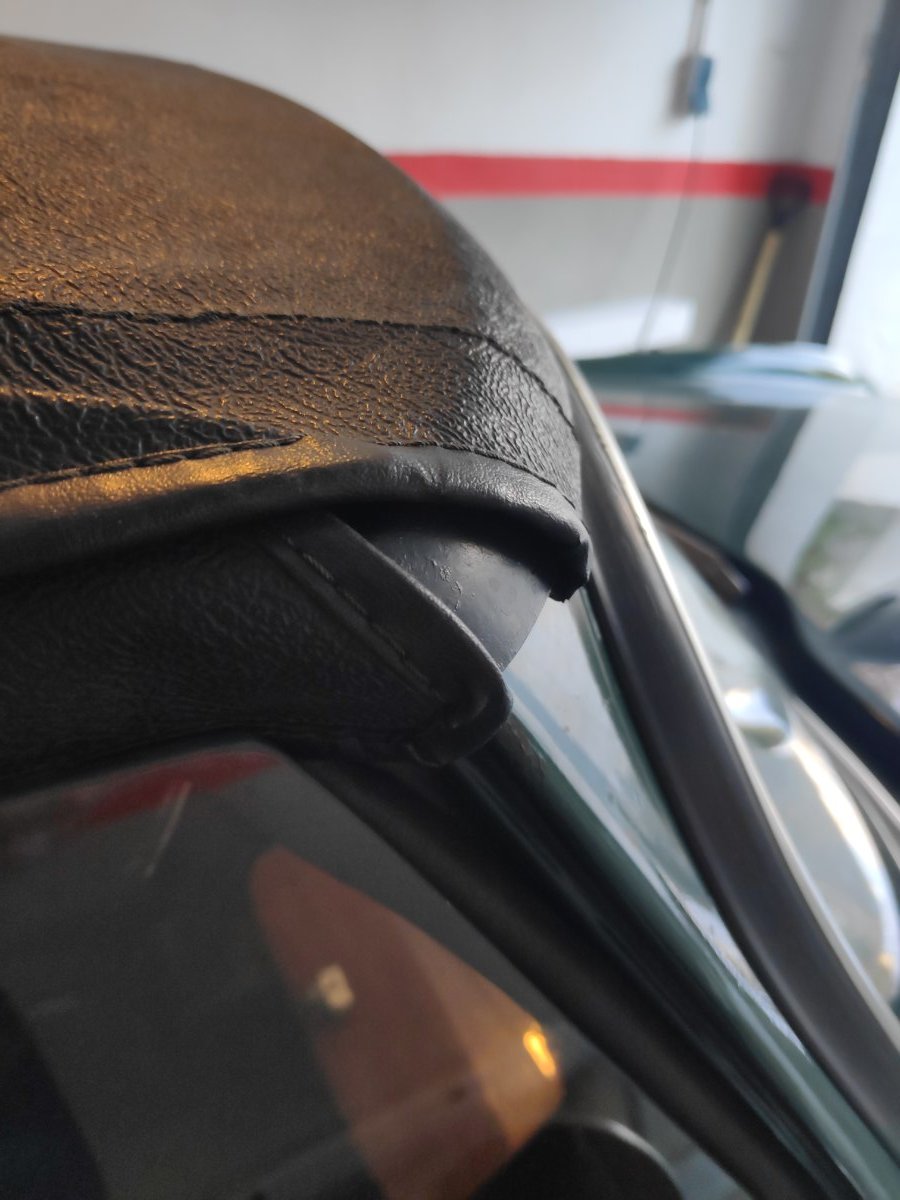
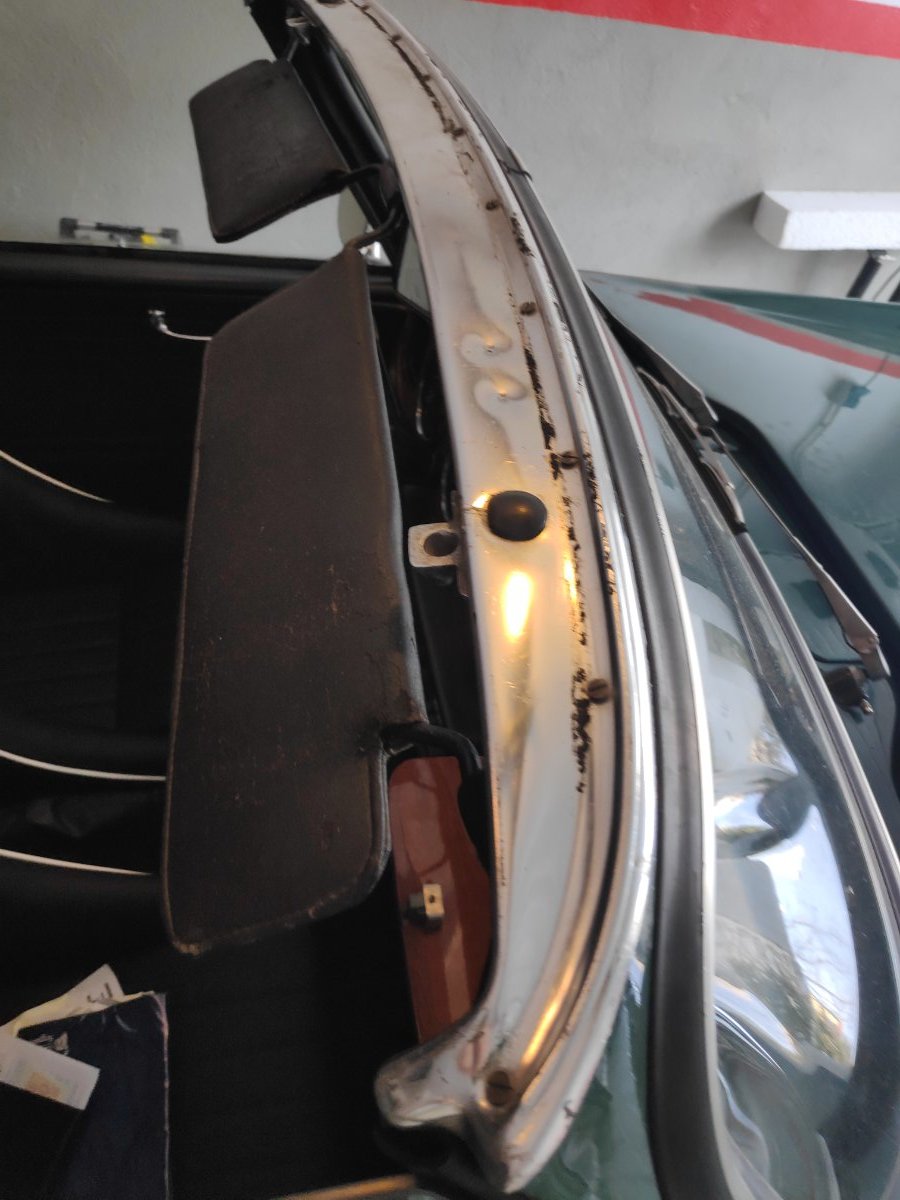
See below some pictures. Don’t worry with the excess rubber seal sticking out. I fitted a new one a couple of days ago and, following advice from this great forum, I am waiting before cutting it to allow for some shrinking. As a side question, If I want to close my doors with the window up, the glass goes above the hood, which looks a bit odd. What bugs me, as you point out, is that I can see the frame at the end of both sides of the hood, and that I have this funny extension of the hood sticking out on both sides. That extension is where I think there may be a popper missing, but, upon closer examination, there is no way it would fit where the side holes in the frame are located... maybe that is why you have a strap?

-
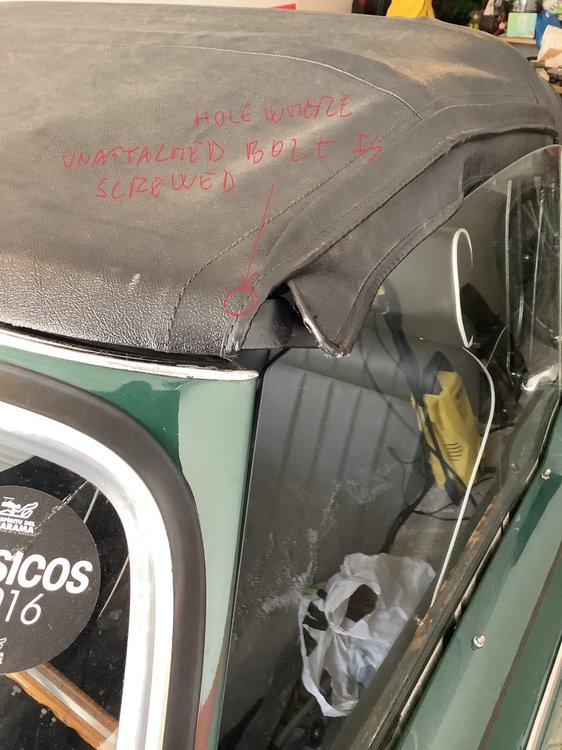
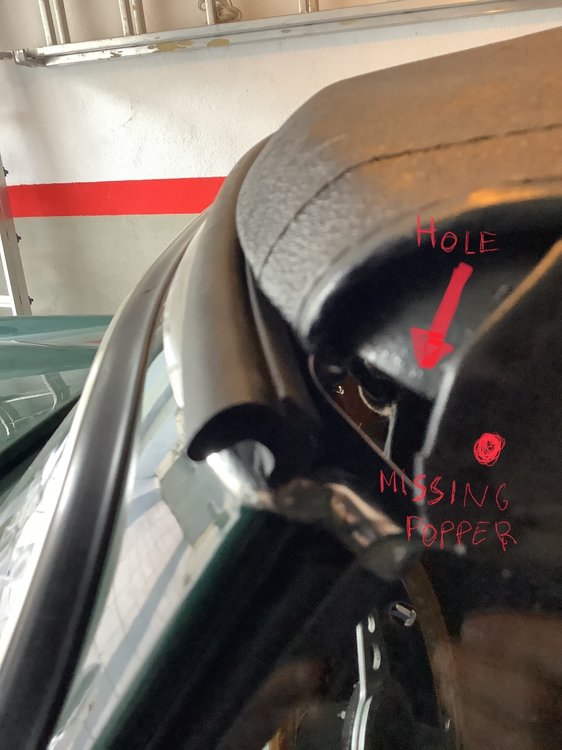
Looking at my hood, I do not have that strap. I would have thought that that the outermost hole is indeed for attaching a popper but that it would fix to the side of the hood, which has a “leg” that extends to the front, but seems to be missing the button popper
-
I have exactly the same question as Marco. Mine has two bolts in the side holes, but they are not attached to anything, just to the corners of the front bar if the frame..
-
The straps in my hood broke a couple of months ago. Their role seems to be to keep in position the arch just above the transparent “window”, as without them it goes a bit low and pushes on the transparent plastic rather than on the vinyl. I am replacing with normal straps that you can buy off eBay and will buy in black or grey (I never liked the white straps, they look like bandages and get dirty very easily)
-
Many thanks. So, clearly, not sliding, but pressing it in, but still a pain... I guess lots of patience and the eventual cup of tea or Scotch, depending on the mood, to calm things down when it gets to your nerves... looking at the seal and its shape, I think it should go with the thicker side fwd, as shown in the picture

-
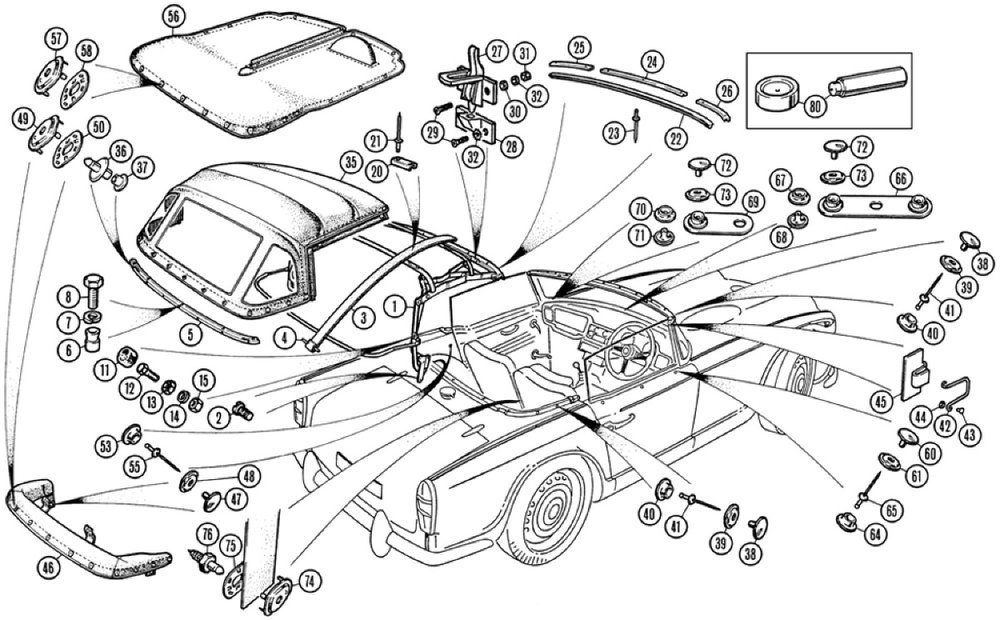
Hi all, again. Given I had to orden parts for a faulty back suspension damper link, I decided to order some other stuff for repairing tiny bits and pieces that annoy you, even though you are the only one that notices them... one of those was the hood front seal (that is, the one that seals windscreen against the front of the hood frame), that was very worn out, if still semi functional in the dry Spanish weather. I ordered a new seal and (#22 in the attached diagram from Moss) and now I am scratching my head as to how to fit it inside the retainer channel that is attached to the front of the hood frame. I am trying to slide it in but, even with generous use of soap, I am finding it so difficult that I am thinking this must be done some other way. Is it supposed to be pressed in with some type of tool, rather than sliding it from one end?, do I have to open up the lips of the retaining channel and close them again after installing the seal?. To make things more entertaining, my retainer channel is one piece, not the three pieces shown in Moss’s as #26, 24 and 25, and is fitted to the hood frame and to the hood with screws rather than rivets (which is also an issue, as the heads of the screws make it even more difficult to fit the seal inside the retainer channel) but, even if I would change those by rivets, the rivet head would also be an issue and I can see no way I would be able to slide all the length of the seal in the channel... I am missing something?
-
Are you sure that the problem are the needles?. In my TR4A (with TR4 H6 carburetors), I had the same problem and I found out that the issues were the choke arms that pull the jets out not going back to the fully closed position due to jet sticking to the seals and a faulty choke mechanism (some previous owner changed the way the choke opens), and air leak due to worn throttle spindles. I changed the throttle spindles, jet seals and repaired the choke mechanism and was pleased to see that, for the first time since I own this car, I had to enrich the mixture by unscrewing the jet adjustment nuts.
-
Uff... many thanks... A diff rebuild is a major PITA, specially down here, where there are less shops with the know how to do that...
-
Hello to everyone. Today, after the parts were stuck in customs for a month, I finally was able to replace the arms that link the damper lever with the spring leaf in my TR4A solid axle (By the way, in case it can be useful for someone, at some point, tired of waiting and wanting to use the car, I filled the ball joint holding the tapered bolt that connects with the damper lever in the old link with polyurethane and it worked pretty well: the bolt would feel very firm ando the rattle was gone).
Anyway, while doing that, with the two rear wheels off the ground, and in neutral, I noticed that I could turn either wheel approx 1 inch before the driveshaft or the other wheel would start turning. Is that a normal free play, or is there something wrong with my diff?
-
Many thanks.
-
Many thanks to all of you. I will do as advised. I may give a try to Stuart’s self made clamps as a temporary solution, for the fun of the project ...and it may not be surprising if the temporary solution becomes a permanent reinforcement...
Regarding U bolts, apologies for taking for granted that they had to be replaced. In many US pages, which, given their love for rigid axles, are a large source of articles for leaf springs, they said that, given the torque required to righten, the recommendation was to change them... maybe applicable to trucks, but not needed for our cars...
BTW, Stuart, are your clamps just press fitted, or have you some time of locating pin in the lower plate of the clamp and drilled the lower leaf in the spring to keep the clamp in place?. What is the effect if adding these clamps, do they stiffen the suspension, or are they just to make sure everything remains in place if you drive your car in a “spirited” mode?... that picture seems from a TR4A with rigid axle, similar to mine (well, your bump stop looks much better than mine, I admit).
On a different chord, I am intrigued as to why the link between the lever arm and the axle has a 1/2 nyloc nut on the bolt that links with the axle and a normal 7/16 nut with a spring washer on the tapered bolt that links to the damper lever.
-
Tried to find the aftermarket clips in Europe but I have only found them in US shops and price does not make sense with shipping costs. I hope the spring shop can fix this in a couple of hours rather than having to leave the car there. A concern I have is that, if they have to disassemble the U clamps that link the axle to the spring leaf, the general advice is that the U clamps should not be re used, and getting spares here after Brexit is a PITA...
-
Never heard about the tyres you mention. I use Nankangs. Apart from the name, they are OK. Less noisy and more economical than the Michelin classics that I had before. Performance wise, I cannot compare, as the Michelin’s had been there for too long and they were very degraded, so these were a big improvement, but not sure how the would have done against another brand of new tyres. On the dry they go well, very predictable and reasonably good grip. I really don’t drive a lot on the wet, as weather in Spain is generally dry and I can therefore pick my driving days, but in the occasional storm, they were OK... not that I was ripping it in those circumstances, though...
-
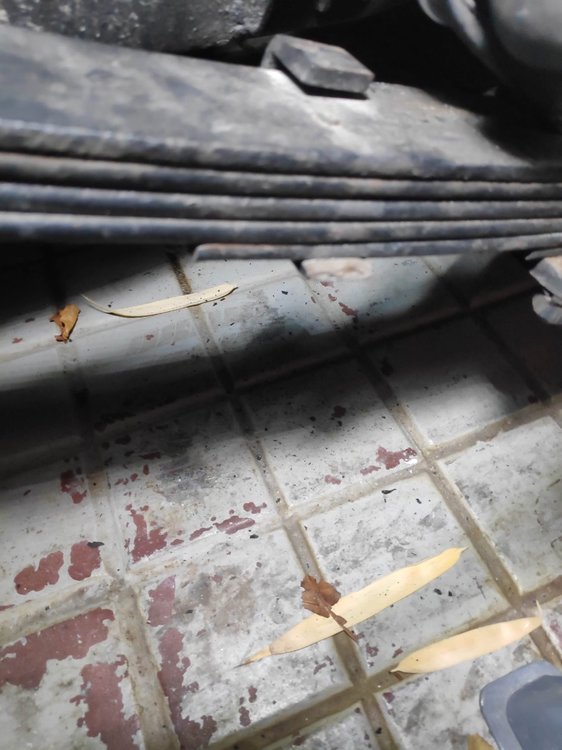
Hi all. When I assembled the damper lever in my 66 TR4A live axle (thanks for all the useful tips on how to remove what I now, thanks to you all, know is a tapered joint) I noticed that the rebound clip in the LH side spring leaf was broken (see picture).
This is most likely the fault of the shop were some time ago they repaired the leaf springs, which had sagged unevenly, and I have already got in touch with them. Having said that, it is a pain in a certain part of the body to drive to the workshop, which is some miles away from my home, specially in this season, where the roads are still with a lot of salt.
I was wondering if it is possible and safe to drive the car like that (there was certainly nothing wrong with the handling when I drove the car home from the workshop), if I should be in a hurry to get it repaired ASAP and /or if I can replace that with an after market bracket, which seems available for certain brands and looks easy to replace (the issue being to find one of the right dimensions), and then asking the workshop for a refund of the cost, rather than driving there.
Any thoughts would be most appreciated. Best regards and, above all, lots of health...
-
Many thanks for the suggestion. It seems like my parts are finally on their way, so I will hopefully be putting your teaching in practice
-
A quick question: (if and) when I get the new links (I haven't received them even though I ordered them on Feb 4th...), I presume the tapered joint is a dry fit (ir: no anti seize). I presume I should clean the "eye" of the damper lever where the tapered part of the bolt fits but that would be it. Correct?
-
I got a set from eBay in Sep 2020 from a vendor called chart one automotive for 100 GBP. They fitted ressonably well and look good but, obviously, I cannot talk about their durability, as I have barely used them...
-
Mine (TR4A) already came with a primer lever. Is that a different one (TR4)?
-
Since the workshop in which they did it is in a picturesque town in the mountains close to Madrid, a number of friends with classic cars is thinking about a "tapered link removal weekend" in which we would go to the shop to repeatedly disassemble and assemble the tapered joints, one beer for each removal and assembling....

-
I tried again today with the two hammer method, unsuccessfully... I finally took it to a nearby car shop where they used a ball joint remover and disassembled it in no time... They didn't charge me, so I invited the guy to a beer... Iooking forward to removing the other damper
")
-
Hi all. Today I tried a hammer, but, upon reviewing your suggestions and looking at the video, I think I did it the wrong way. What I did was putting the lever arm on top of an open vice, with the screw looking up and the ball joint and link hanging down between the two sides of the vice, then wacking the top of the bolt down with the hammer, but nothing happened. From what I have now interpreted from your posts and the video, it looks like I have to whack the end of the lever arm (or: the "eye" where the tapered bolt is inserted) on the sides... I will try that. A heat gun is also on its way... I would prefer not to cut off the tapered pin as the replacement parts I have ordered are having issues at customs (...Brexit...) So I am thinking about trying to repair the ball joint by pouring some polyurethane in it, at least until the parts arrive, which may take some time. Will keep you posted and thanks again to all of you
-
Another picture with hood closed

-
The windscreen top does definitely look different to my TR4A. I am not really sure if the bracket in the side of the windscreen is supposed to be attached to the hood side flap. It looks to me like the hood flap should have an attachment for that, which mine does not, but this will surely be also a replacement hood, so not really sure...


How to (slightly) adjust door
in TR4/4A Forum
Posted
Forgot to attach pics.
Enrique