

JPD
-
Content Count
79 -
Joined
-
Last visited
Content Type
Profiles
Forums
Calendar
Posts posted by JPD
-
-
After further close inspection I've decided to keep my existing shelf in place. It is pitted but pretty solid. There was corrosion on lower inch or so of the bulkhead, so I've undone the lip and welded in a new piece to the bulkhead, folded the lip back up and plug welded the 2 together. It now all feels good and solid.
Jeff
-
I'm no expert, but this looks like a 4A tub to me - it has the handbrake bracket on the tunnel and the bump stop brackets under the wheel arches.
If it was available 12 months ago I'd have been interested, but I've now rebuilt my front end and just looking for a 4A replacement back end.
-
Thanks for the advice. This weekend I'll look more closely at my existing shelf to see if I can repair it. I successfully did some swages in my footwell repairs, so I'll give it a go!!
-
It looks like I need to replace the bulkhead shelf that the battery sits on. The outer shelves that the master cylinders and wiper motor attach to look ok.
Has anyone replaced theirs and if so do you have any advice on the supply of a repair panel? Rimmer have one and so do SC; but there is quite a price difference, so any advice on quality/fit would be welcome.
Jeff
-
It's an easy DIY using milliput putty. There is good advice on this forum on how to do it; search this forum for 'steering wheel' and you'll be able to find a post titled 'restoring original TR4A steering wheel' started by Westy 19 May 2013. in there is a post by Stuart on 09 September 2013 - 09:16 PM, which tells you exactly how to do it. I've recently finished mine and it looks good as new!
Jeff
-
Chassis numbers (actually called Commission numbers) are a CT prefix for TR4 and CTC prefix for the 4A. The commission number is a car build number and is stamped on a plate fixed to the shelf in the engine bay near the wiper motor (at least on RHD UK cars, not sure about others). The number with the CT suffix is actually the body number (usually on an alumnium tag on the bulkhead). These are in numerical sequence, roughly equating to the commision number. The engine number you quote is the correct format.
Judging by the numbers you quote, I would guess yours is a 1967 TR4A ?
Bill Piggott's 'Original TR' book has a detailed section on numbers.
The reason I know a bit about this is that my commsision number plate was missing when I bought the car so I had to do a lot of investigation through the DVLA with Bill Piggott's help to get mine identified.
Hope that helps
Jeff
-
I've now got the heritage certicate for the car. It confirms date of build as August 1967 and date of despatch 5 Sept 67. The dealer destination was Hollingdrake Auto Company in Stockport, which a quick internet search shows still exists, albeit as a Jaguar/ Land Rover dealer.
Commission number is CTC 78056 and engine number CT 78404E and it came with a heater
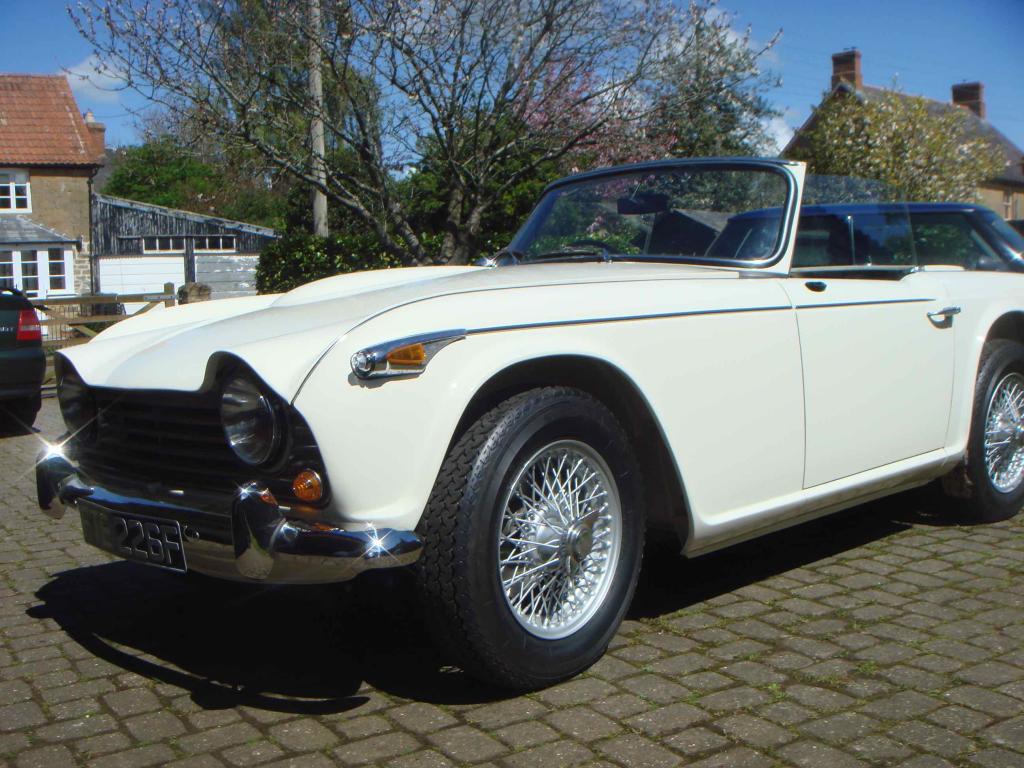
but no mention of the w/wheels and o/d, which are fitted now. To my amazement though, the original colour was New White, not Royal Blue. There are traces of white under the blue, but I'd thought this was primer. I've no idea when the colour was changed, but pictures I have from the PO back in the 90's show the car as blue.
I will be finishing the car in the original new white with black interior. Pictures I've seen of white ones look great; the body curves show up better than the darker colours (IMHO!)
-
I'd heard that primer will absorb moisture over time if it's not overpainted - may or not be true? Partly because of that, but mainly because my tub is so rusty that if I got it blasted it would probably disentegrate, I'm doing the major repairs first before blasting.
Once I've got some strength in it then I'll get it blasted and primed, then do any other minor repairs that are needed before final prep for paint.
I guess it just depends how bad the tub is to start with
Jeff
-
I agree with drilling it. I've been trying to get mine out with a drift and hammer but it won't budge. Drilling was my next course of action and then replacing it with a larger diameter pin or bolt - let us all know how you get on!
-
Things are becoming clearer. The first problem is that the parts are incorrectly marked; the one marked RH is acually the left and vice versa - thankyou Rimmer!! Once I tried it in the correct position at least I can see how it is supposed to fit. The second problem though is that the shape only loosely resembles the mating parts!
This is actually just part of a larger issue because the headlight curve on the new repro inner wing doesnt match the headlight panel (original), so I need to sort that out before I start modifying the filler panel. One thing at a time and I should get there in the end!!
-
Thanks Stuart, that should help. I'll look at it tonight to see if it fits
Jeff
-
Does anyone have any photos or info to show me how the filler panels (part numbers 850457 & 458) fit in the headlight area of the inner and outer front wings? I've bought new ones and the curve doesnt match either my repro inner wing or the stanpart outer wing and the bolt holes also dont seem to line up. I've tried them both ways up and swapped the RH one to the left side of the car and still cant seem to make them fit.
Once I know which way up they go then I can probably cut and shape to fit, but don't want to do that till I know I have them in the right place and orientation. Seems a simple little panel - how hard can it be!!
-
Any primer needed, or just straight on top of the existing black finish after a bit of sanding?
-
does anyone know what the original steering wheel rims are made of (looks like bakolite?) and what the best paint and preparation would be? I've filled the cracks with milliput (looks great) and now need to get the painting done - DIY if possible.
-
I agree with most of the posts. Although carbon fibre might fit better and may be a bit cheaper, in the long run I think I would be disappointed. I'm not doing the restoration for 100% originaility, but this 'improvement' is going in the wrong direction.
I will try to repair my font wings, although the may be too far gone for my level of skill. The rears are way too far gone and definately need replaing.
I'll be scouring ebay and other second hand sources for good steel originals that I can use as replacements - along with rear inners, boot floor, top deck etc etc. The consequence of a car being sat around unloved for more than 30 years!!
Thanks for all your comments.
Jeff
-
I've spoken with Rimmer on this, the say that the 'pressed' version is made with new tooling, hence they are more expensive to cover the tooling investment. The didn't say if consequently they will be a better fit. I bought one of the previous tooling standard ones for the RH side a few months ago, which is an awful fit. I still need a LH one and, due to lack of availability, may need to go the expensive route. Lets hope it is better!
Similarly for rear inners - they have 'hand made' versions of these, which they do say are a better fit. Who knows!! I need 2 new ones so may end up buying 2 of them - the hand made ones are actually cheaper and as the others seemingly aren't available anyway, it's probably the only option.
-
I'd be interested to hear views people have of carbon fibre wings that are now available. I'm rebuilding my TR4A and have been offered these instead of steel ones.
The advantages seem to be that they're cheaper, they're more readily available and (apparently) they are a much better fit than the new steel ones. But I'm sure there are disadvatages too - what are they like in a crash, is paint adhesion ok, will they devalue the car?
The situation I'm in is that my existing front wings MAY be saveable, but my rear ones definately need replacing. I guess my options are new steel, second hand steel, or new carbon fibre.
Any views welcome!!
-
thanks, the advice will be taken!!
I'll finish off the door frame repairs and re-skinning, then get the front, doors and back end aligned and then concentrate on the A & B posts with some bracing in place, then move on to the rest of the tub. I'll try to repair as much as I can as aside from the cost, new panels do seem to be in short supply at the moment.
Jeff
-
So, given that thios is my first major restoration, it sounds like I should get the doors finished and aligned before doing much with the A posts. My concern was that if I get everything aligned around the A post, dont I risk undoing it all if subsequently I replace it?
-
I'm part way through a 2 piece rebuild of my 4A. The front is loosely mounted on the chassis whilst I'm repairing the doors and doing repairs to the driver side bulkhead end panel and inner wing. The A post is very rotten at the top and bottom (both inner and outer) and at least half of the front face of the outer also needs replacing.
Given that the A post is pretty rotten, would it be better to repair it or replace it? Factors would be how good a fit the replacements are and how easy it will be to get the alignment right.
A follow on question is, is it better to get the existing A post aligned and the front body welded to the floors & sills (new ones fitted) before repairing/replacing the A post?
My gut feel is to replace it and to do it before finalising the front alignment, using the scuttle, end panel and sill as references - But I'm looking for some good advice from anyone who has already been there before I start removing the old one!
Thanks
Jeff
-
Thanks for the advice. The black primer is certainly difficult to remove - I can vouch for that after cleaning the edges of the floor panels off where I'll be welding!! The inner wings have red oxide primer so I'll clean that off, but the floor panels and the inner/outer sills all have the black stuff.
-
I have bought a few replacement panels for my 4A tub. Most of them (sills, floors) have black primer and the inner wing has red. I'm removing this where I'll be welding and replacing it with a weld through primer.
Question is, before paint do I need to remove the remainder of the existing primer so it can be sprayed with a good zinc based primer, or is the existing primer good enough to leave on? I will be getting a professional paint job, not doing it myself.
-
Mine is CTC 78056. must have sat around for a while before being registered. The engine number is what looks like CT C78404E. I've only ever come across CT xxxxxE, any ideas what the extra C indicates? It doesn"t seem to match the format according to Bill Piggots book.
Jeff
-
Thanks for the tips.
New floors are nearly ready to fit, just getting the black primer off the areas that will be welded and replacing it with weld thru primer. Hoping to get front and back both on at the weekend - just loosely fitted whilst I repair the doors and can get them on the A posts. then I'll start trying to get things aligned (front first!!).
Meanwhile I've now got the commission number; luckily Lancashire archive Office had a copy of the original registration entry. First registered 1 Oct 1967 - must have been one of the last produced.
Polybush or Superpro
in TR4/4A Forum
Posted
I've recently bought (naively by the sound of it) the complete front suspension rebuild kit from Rimmer, with Polybush. I maybe stupidly assumed these were Superpro, but it sounds like not!
I've rebuilt one side but not the other yet.
From the comments, and looking back at previous posts, when the time comes it looks like I should do the rear with Superpro. Would any one go as far as suggesting I redo the front with Superpro as well before I complete the rebuild with what I have? Sounds a bit drastic!! Surely I would notice the difference between rubber and polybush is greater than the difference between polybush and Superpro? I've never driven the car with rubber bushes, so I won't have anything to compare it to.
Jeff