


JPD
-
Content Count
79 -
Joined
-
Last visited
Content Type
Profiles
Forums
Calendar
Posts posted by JPD
-
-
Hi Rich,
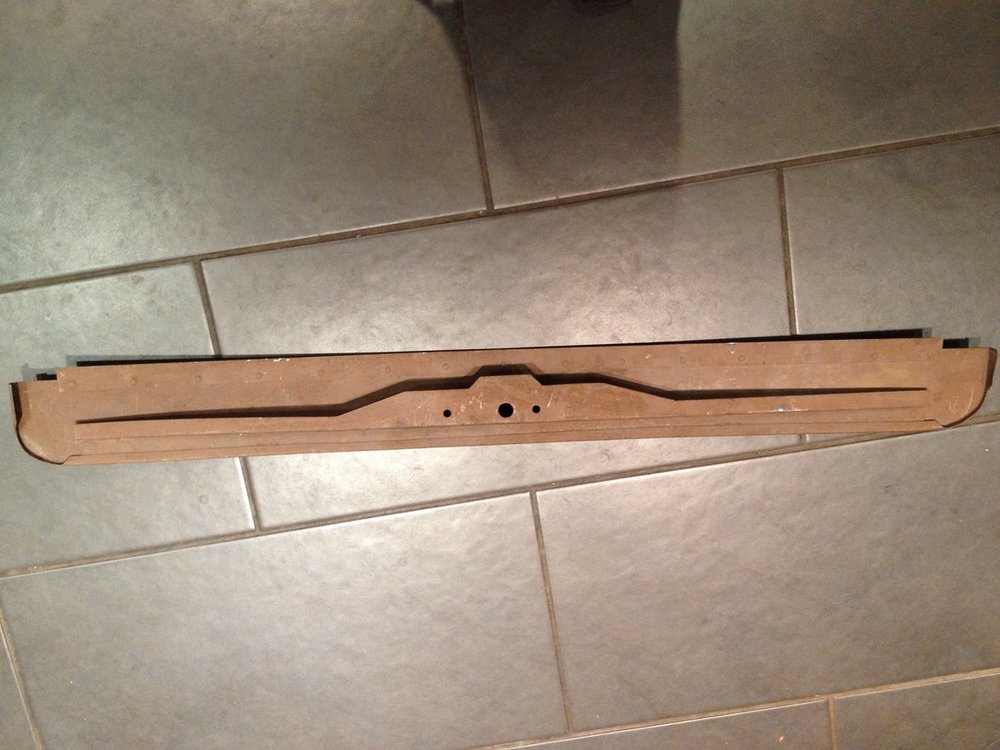
I went through the same thought process when I restored my 4A. My original boot lid was sort of ok, but had bad rust on the lower lip. I bought an original Stanpart repair panel (from Walter Petchey) to replace the lower section. When it actually came to it though, the guy who did my respray advised me to get a replacement boot lid as there were rust spots elsewhere too. I couldn't find an original so I bought a new one from Bastuck in Germany. This fitted really well, but the downside is that it is a thinner gauge steel than original.
I do still have the unused Stanpart repair section which I was planning to sell - you can DM me if you're interested in going down that route.
Jeff
-
My advice would be to get the original one refurbished. Past Parts can do it, they ream them, put a stainless steel sleeve in and then new seals - would be much better than buying a new repro one.
Jeff
-
I'm using DOT 4 fluid Steve, - I'd read too many bad reports about the silicon fluid that it put me off! All the front suspension is standard.
I'd read on the forum about the rubber seal problem Roger, and did try jamming the pedal down for 24 hours, using old pads that were a bit thinner than my newer ones. It worked for a short while, but the pedal soon went back to its old tricks again, so didn't solve the problem. In my mind I've certainly put the problem down to the rubber seals - it's could be the smaller circlip type seals that are the problem, may be in conjunction with the type of rubber used on the repro calipers
Jeff
-
At my last MOT I had an informal advisory that my brake pedal travel was too long. I'd finished a complete restoration of the car in 2016, during which I'd fitted new brake pipes, new repro calipers and cylinders. I also fitted new discs, pads and shoes. To try to sort out the pedal travel over the last few months I've:
- bled and re-bled the brakes several times
- taken some slack out of the m/cyl push rod
- swapped the repro m/cyl for my original, now fully remanufactured
- re-checked the rear brakes and re-adjusted them
- tightened the wheel bearings one flat per side
All this helped, but the pedal was still variable - sometimes it had short travel and was firm, sometimes it had a longer travel and felt soggy.
My last resort was the brake calipers. I had always noticed that the LH pads had a bit more slack against the discs that the RH side, and also the LH side often squeaked when driving, which I could stop by pressing the pedal, but it would come back again a while later. Even though mine were new repro ones, I decided to send my original calipers away for complete remanufacture.
I fitted the LH one first, as that was the one that I suspected was causing the problem. Hey presto, the pedal is now consistently firm with a consistent short travel. I'll fit the RH one as well, as that may improve things even further.
Just thought I'd post this for interest, and see if anyone else has had similar experiences with the repro ones? Note that the repro ones had the circlip holding the piston seal in place, the remanufactured ones have the larger push fit seals with no circlip. The car is a 67 4A
Jeff
-
Mike
I also got mine from TR Shop and can confirm they are a good fit and although they have only been in the car for 3 years, seem to be wearing well. You might also try John Skinner. At the time I did mine he was a well respected supplier. I got my leather seat covers from there and he was good to deal with. He may be a bit more expensive than TR Shop, but it may be an alternative if you can't wait for TR Shop to have them back in stock
Jeff
-
Willie
Last year my driver wiper slipped on the splines when the screen was a bit too dry, even though I had new wipers and new wheel boxes. I pu it down to poor quality components and replaced the wiper with one that screw tightens, as Roger described. It still slipped! I then realised that it wasn't slipping on the splines, it was the wire rack that was slipping in the wheel box! A morning under the dash got it sorted - the rack just wasn't engaged properly; it's been fine since. Not sure if you've had your wheel boxes & rack apart recently, but if so it might be worth checking.
Jeff
-
Graham
If you run in to problems and the rust turns out to be worse than you expected, I have a stanpart repair panel that replaces the lower 4" or so of the boot lid, including the strengthening rib that runs along the bottom edge. I bought it from Walter Petchey when I was doing my 4A restoration, but actually ended up using a complete replacement boot lid as mine was worse that I originally thought. It's rust free and I was soon going to advertise it in the buy/sell area, but DM me if you're interested
Jeff
-
Thats interesting Roger, my arms don't have screw for tightening them, they are a simple push fit with the sprung wedge that is supposed to hold them in place. Did the originals on the 4A have these screws and are they available anywhere?
Edit - just saw Chris' post just after I replied. Sounds like they are a home made fix?
Jeff
-
From Somerset to the Goodwood Revival on Saturday. Lots of other TRs in the car park
-
Drove from Somerset to the Goodwood Revival on Saturday. Fab day out and the TR performed perfectly on the 240 mile round trip.
Only minor problem was the wipers playing up in the rain on the way home - not parking and the two arms getting out of sync a bit. Looking at it today, the parking was easily fixed (the earth cable had come off the from the motor). Also found that the driver wiper arm is not tight on the the wheel box spindle so it can slip when the screen gets a bit too dry, hence the loss of sync between the arms.
The wheel boxes and arms were both new 3 years ago, so I don't think it is wear, I think the arm is just not a good fit on the spindle - there is a bit of play of the arm up & down on the spindle and I can make it slip over the splines by hand. The passenger arm doesn't move on the splines and feels much more solidly fixed. Might try another replacement arm unless anyone has other suggestions?
jeff
-
The main improvements I made during my 4A restoration were:
All the chassis strengthening improvements
Poly bush suspension
Alternator & narrow fan belt conversion
Revotec electric fan
Reversing lights wired to an extra gearbox switch
Improved heater ( Clayton internals in the original housing)
Revington suspension conversion.
In retrospect lever arm dampers would probably be ok for a standard road spec car. All the others come highly recommended though!
Jeff
-
Tried the simpler thing first and checked the isolator switch was tight - and it was. While I was there though I noticed that the spade connectors were very loose. I squeezed the spades tighter with pliers and refitted them, went for a test drive and hey presto, now goes into od on 2nd with no chattering of the solenoid. Still worked in 3/4th as well so I reckon that is now fixed. it must have been the vibration whilst driving that was making & breaking the voltage to the solenoid.
I gave the spades on the 3/4th switch and the reversing light switch a squeeze with the pliers as well for good measure to make sure they were tight while the gearbox cover was off. Whilst I was doing this I also noticed that one of the earth lead connections was hanging on by just a few strands and wiggling it would cut the solenoid in/out. So I also redid that connection with a new spade.
Thanks Pete & Chris for the pointer to the switch.
Jeff
-
I've had a few od problems recently and read this old thread with interest. My od has worked fine on 3/4th since I rebuilt the car (4A) 3 years ago. On 2nd the solenoid (new at rebuild) 'chatters' in and out. Sometimes the od will engage, but it soon drops out and the solenoid starts chattering again. The od has always reliably engaged and disengaged on 3/4th, until yesterday when the solenoid started chattering in those gears as well.
That's when I did a bit of research and came across this thread. I decided to remove the interior and check the lever and shaft position. It wasn't set up as per the WM - the setting lever was past the hole in the gb case by about 1mm, so I set it as per the WM, with the holes aligned when the solenoid was lifted. Went for a drive and the solenoid lifted with a good solid click, but no sign of the od engaging on any gear. I noticed that there was very little movement of the setting lever when the solenoid lifted. With the solenoid powered, I could manually push the lever well past hole, by about 4-5mm.
I then re-adjusted the setting lever so it went about 2mm past the hole in the gb case with the solenoid lifted. Went for a test drive and the od worked fine on 3/4th, but the solenoid chattered on 2nd. Back to how it was before.
So now I could refit the interior now and be happy with 3/4th working like I have for the last 3 years, or is it worth setting up the lever further past the hole to see if that gets 2nd working as well?
I don't know the operation of the system well enough to know why it won't work on 2nd but does on the others, or why it won't work with the lever set up as per the WM.
The gb has not been rebuilt and has Penrite GB40 in it. The level is good, in fact it was slightly over full when I checked it, so I allowed it to drain out of the refill plug.
Any suggestions welcomed.
Jeff
-
Could well have been a false plate - G reg is very late for a 4A
-
Thanks Sean. I've been out and about in it today and now have now covered about 60 miles. No major problems to report, but the jet on the rear carb is sticking down when the choke is pushed in and throttle linkage is very stiff, which makes it very interesting trying to drive around town!!
I've done a bit of oiling and tweaking tonight so hopefully should be better tomorrow.
It's a great feeling after 3 1/2 years of restoration to be driving it at last.
-
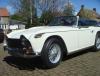
MOT passed today and now taxed for the first time since Sept 1977

Did 30 miles today as a bit of a shakedown. A few niggles that need sorting but I was generally very pleased with how the car feels. This was the first time I've ever driven a TR and the experience didn't disappoint !!
There are still some big jobs to finish, particularly the interior and to get a soft top for it, but at least I can now get it out and about when the sun is shining. My weekends and summer evenings will now revolve around the weather forecast.
-
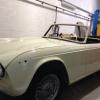
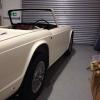
Well, everything has gone really well over the last few months and the car has now left to go for steering and suspension set up and then from there for it's MOT.
I've driven it up and down the drive a few times and so far as I can tell everything seems to works ok. Fingers crossed!!
Hopefully next weekend another TR will be back on the road.
A few pics are attached
-
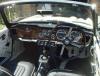
Mine was also brown originally ('67 4A) and I painted it new white, as per the body colour.
As others have said a darker colour may have been better as once it's all assembled you can see the white coming through the gaps between the wood and the crash pads. If I was doing it again I would go for black so it was lost against the crash pads. But then again, when you're trying to sort out all the wiring with your head in the footwell, white does mean you can see what your doing!
jeff
-
Thanks Sean, it still feels like there is a lot to do, but yes, on the home straight. I've got the rear brake drums and backplates to clean up and rebuild, and also finish off the front brakes, but apart from that it's lots of smallish jobs (lights, wiring etc) to get it finished and ready for the MOT. Trouble is many of the 'smallish' jobs can easily turn into 'biggish' jobs because of the problems that always arise.
I'm hoping to get the MOT sorted by the end of April........ But who knows!!!!!!
-
The car is now back at the body shop having the loose panels fitted. Saw it today for the first time with the panels on - WOW - it looks like a TR again!!
Couple of pics attached
-
Thanks for everybody's suggestions on this. I've spoken with Rimmers and they are sending me 2 replacement ball joints. I'll also buy some new rubber boots from http://www.balljointboots.co.uk/ and put these on before fitting to the car.
Jeff
-
They supply the boots, but if the boot has perished this quickly I'd rather replace the complete ball joint.
Jeff
-
Regular occurrence especially with cheap items.
Stuart.
Is there a supplier you'd recommend that can supply a better quality one?
-
Thanks for the advice. I'll talk with Rimmer to see if they were experiencing problems at the time I bought these and try to understand if the ones they have now are any better. I find it amazing that this one split so easily. It didn't even have the weight of the engine on it until just before Christmas.


Brake pedal travel
in General TR Technical
Posted · Edited by JPD
Just to close this one out, I ended up sending both my original callipers to Past Parts for re-manufacture. They got out the seized pistons, gave the caliper bodies a complete clean up, new pistons, seals etc. These have been on the car for 4 months/ 1500 miles and the pedal has always been firm with consistent short travel.
The moral or the story is, as ever, always refurbish original items rather than buying repro parts
The repro ones will go in the spares bin. If I rebuild them with better rubbers they might be ok.
Jeff