In the Garage - Autumn Edition
Welcome to the latest 'In the Garage' newsletter. Our fifth of the year and again, filled with lots of news about what's going on behind those garage doors.
We didn't produce a summer edition as we've all been out driving our cars but there will have been a few little niggles that need sorting out in the Autumn and Winter, so please do keep you're articles coming and share a little bit of what we're doing to keep our cars on the road or in some cases, making them even better. I hope you enjoy this edition..
Andrew Willmott – TR3A and TR4
The summer has seen a few repairs, improvements and modifications to the both cars, some long overdue.
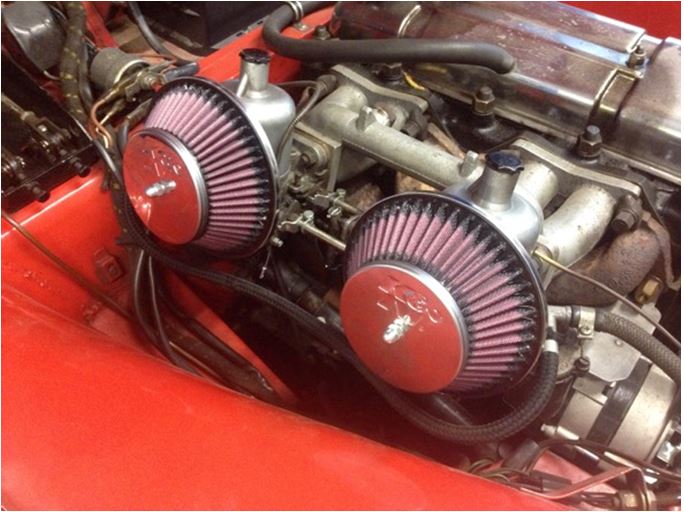
The 3A has run for the past 35 years without any air cleaners on the carburettors. A neighbour who was a touring car engineer when the cars were only producing about 150bhp told me that air cleaners used to lose them 3 or 4 bhp but when raced without them the car could lose up to 7 bhp over a race weekend just through ingress of track dust and detritus. Now that the annual mileage has increased significantly I thought that it was about time I got some fitted.
Some K&N cone type filters were sourced from eBay at around half the price that I could purchase them elsewhere and ten minutes work saw them fitted.
They look cool but apart from that I've yet to notice any difference at all….good news.
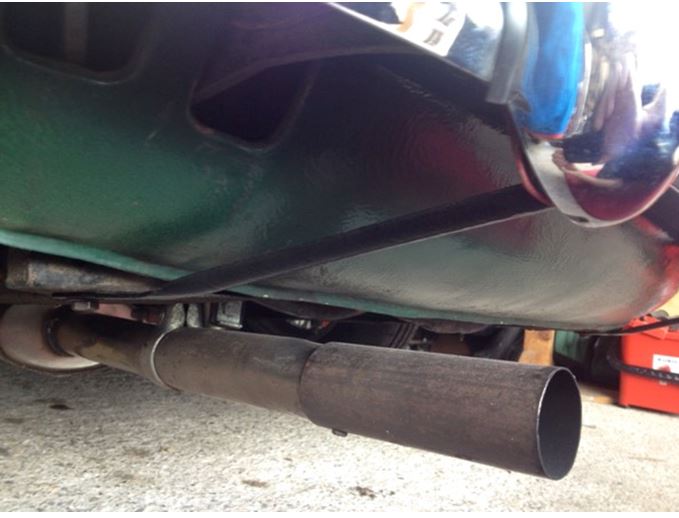
Those who attended the IWE this year may have seen me sneaking a second hand four branch manifold found at the auto-jumble into Chris's van for transportation home. On the trip home I wondered what had happened to the matching big bore system. A pm to the seller through the TR Forum revealed that it was in his shed with a small hole worn in it where it had fretted on the chassis and that I could have it for the price of the postage.…winner. A trip to Croyde saw the hole quickly welded up thanks to Paul Gibson.
The single box, big bore (read "very little clearance") system was fitted and removed many times with a good deal of bashing, bending, use of expletives and fabrication of new mountings in between but eventually settled into place reinforcing my adage that if it's non-standard it will be a pain in the butt. The engine now seems to pick up a little quicker and definitely goes a bit better once the revs come up above about 3500rpm.
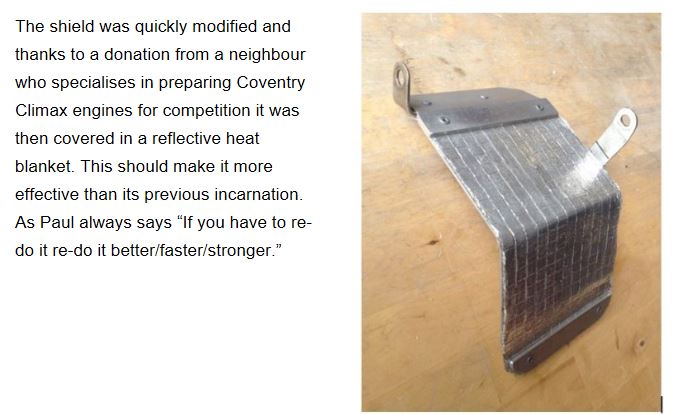
The pain in the butt continued to manifest itself in that now the alternator heat shield didn't fit and the hydraulic brake light switch was uncomfortably close to the very hot manifold.
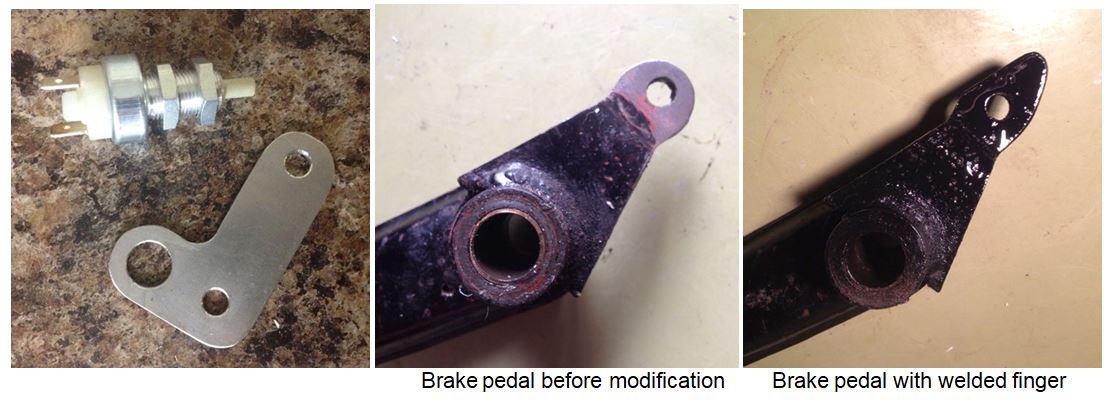
Readers of In the Garage may remember that my TR4 brake light switch was changed from a hydraulic switch to a mechanical unit fitted on the pedal box and just required a new fabricated bracket; not quite so easy on the TR3. The pedal box screw adjusters get in the way and the switch ends up too high to locate on the brake pedal.
A suitable bracket was fabricated from stainless steel and the brake pedal was removed so that a finger could be welded on the top to operate the new mechanical switch.

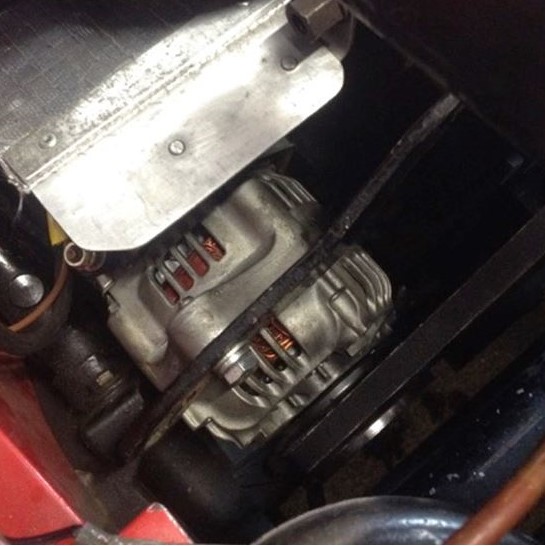
Some years ago I had fitted a Lucas alternator in place of the original dynamo but although still charging as expected an internal fault had been causing a slight glow from the ignition warning light at all engine speeds. I gave up trying to sort out the fault and sourced a new Denso alternator similar to the one already in service on the TR4. An hours' work saw a suitable spacer turned up on the lathe, the alternator installed and working.
TR4
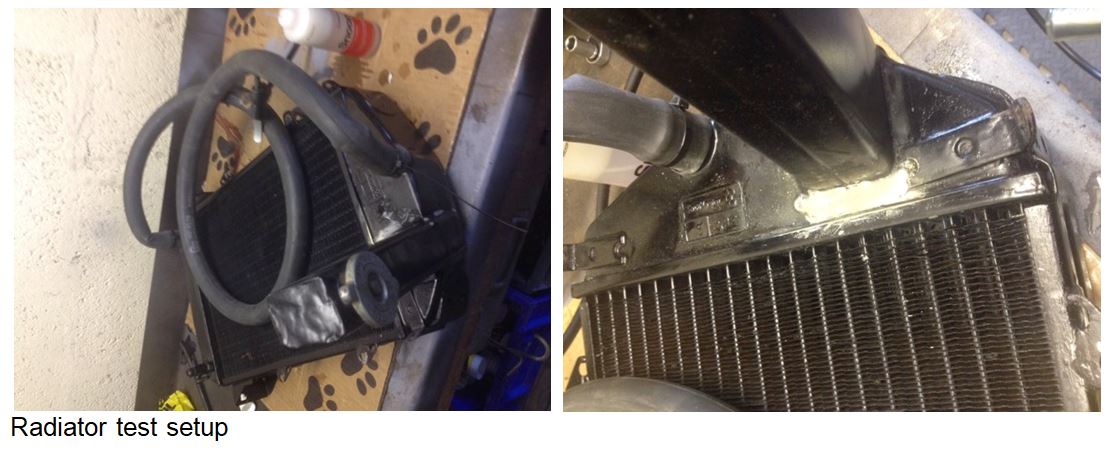
The TR4 has been suffering with a slight water loss for some time evidenced by a coolant drip from the header tank neck.
The radiator on the TR4 comes out easily compared with the TR3 so a few minutes work and a wet arm later saw the offending item on the bench. The area showing the leakage was cleaned up with a Dremel and some wire wool and was soon soldered up. I wanted to pressure test the repair prior to replacement in the car and was looking for rubber bungs and the like to seal it up when I noticed that a mountain bike inner tube was close to the same size as the inlet and outlet stubs on the radiator.
A spare tube was cut through opposite the valve and the two ends stretched over the radiator stubs and secured with tie-wraps. A bicycle track pump with its integral gauge was connected to the inner tube valve to complete the setup. A few pumps on the handle saw the pressure up to 5 psi or so and the application of Snoop (expensive soapy water) saw bubbles from a couple of spots around the repair! To cut a long story short I'm not too proud to admit that it took a further 3 or 4 attempts to ensure a bubble free test before the radiator could be re-fitted.
While the cooling system was drained I took the opportunity improve the things a bit and fit a bypass restrictor. A nylon plug with a 6mm orifice was turned up on the lathe and pushed into the bypass hose.
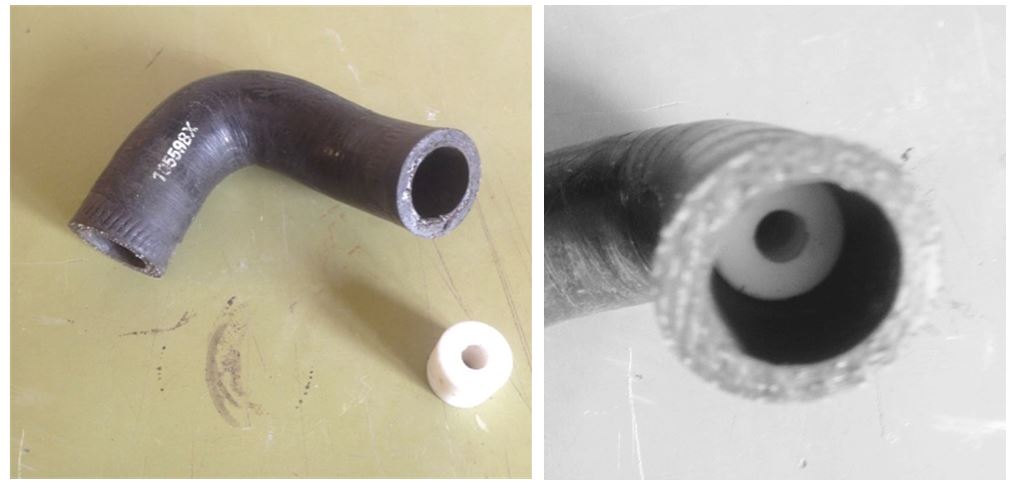
There is no evidence of any difference to the cooling now that the restrictor has been fitted but the cognoscenti recommend it and it wont do any harm.
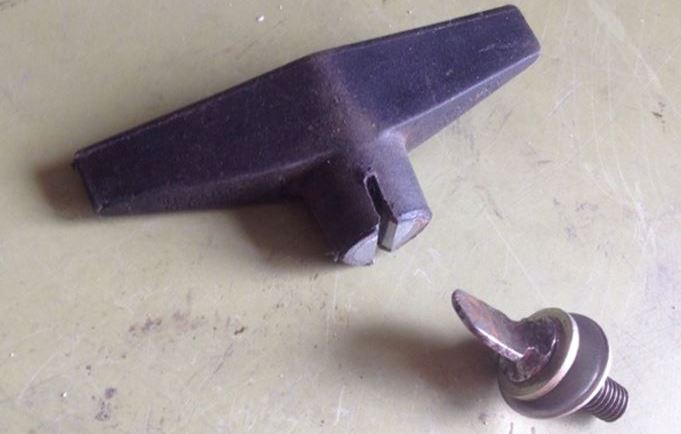
The Surrey top rear thumbscrews are fiddly to fit and once done up tightly by hand tend to be difficult to loosen off so a tool was in order. A spare chuck key was emasculated with a hacksaw and soon had a slot cut and filed to suit the screws. It now sits in the glove box ready to deal with tight screws.
The TR4 came to me with its rear over rider stays missing and I resisted the temptation to buy a couple of modern replacements or pay £15 each for rusty originals at Lincoln last year safe in the knowledge that there must be a few good original ones kicking around in a box somewhere. I found that box at the IWE this year and bought two for £2. JB kindly took them home with him and not only shot blasted them but primed them too - thanks John.
A quick application of the black rattle can and they bolted in place between the over rider and the chassis ensuring that wonky over riders are a thing of the past.
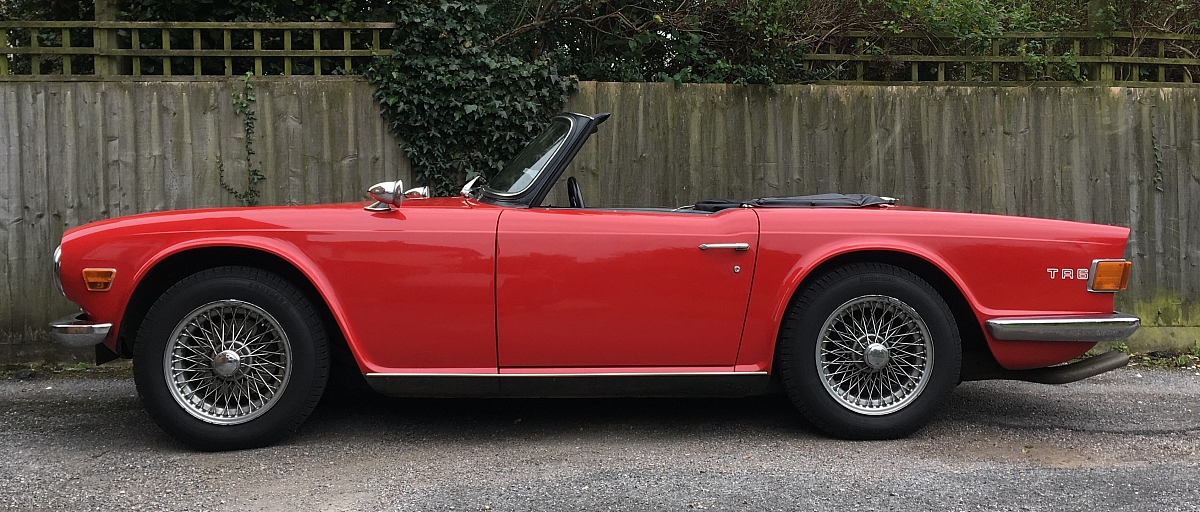
Alan Burgess – TR6
It's often said that if it ain't broke, don't fix it... well this is the story of my experiences replacing the tyres on my TR6.
I'd only covered some 12,000 miles over the 7 years they'd been on the car but they were already 8 years old having been bought earlier and put on my project TR6. These Pirelli P6000's were running fine but I'm not one to skimp on having a good quality contact with the road; and being 15 years old, a plan was hatched to spend some money on some new tyres.
The next thing, and there's always plenty of debate on the forums about this, is what size to fit... my P6000's were 185/65 x 15's and they maybe looked slightly small in the wheel arches. So I decided to go for 195/65 x 15's, a very common fitment. I selected some Goodyear 'Efficient Grip' at a reasonable £50 each but then it took me three attempts to find a local company who would put tubeless tyres, with inner tubes onto wire wheels.
I did get these fitted and all seemed good until a trip down the A30 on Drive it Day when I actually pulled into a lay-by to check that nothing was falling off, the wheel wobble was horrendous! All was secure so I carried on to enjoy the great day out but only when at slower speeds on A roads.
So the next weekend, I decided to have a closer look and maybe I should be addressing the MOT advisories of 'slight wheel bearing play' and 'slight play on steering rack inner ball joint'. I did the wheels bearings but didn't have time to look at the rack job so that was put on hold whilst I investigated further. I was also running out of time as we were due to take the TR to France the following week, so I asked my garage owning mate, Martin, to do the rack job for me. I dropped the car off at his garage and caught the train into to work and back. The car was there for me to pick up except the play wasn't in the inner ball joint with the removable shims after all; it was wear in the offside, rack tube sleeve, so it wasn't fixed. I located the part and obtained a replacement part, which I duly passed to Martin with the car for another go. This was the day before we were going to France, however, Martin then called me to say that I had play in one of my track rod ends and would I like him to do this whilst the car was there? Certainly, and I have a pair of new ones in my garage at home but by the time I got home, picked these up and got down to him, it was too late to finish that night – never mind, there's still Tuesday and our ferry doesn't sail until the evening.
I left work on Tuesday to pick up the car, ready to go home and pack, it was raining too but it'll be all right. Well, Martin had finished, all had been balanced and aligned and the front end was 'nice and tight'. On driving home though, I found that the horn no longer worked and neither did the overdrive – very strange and I was suspecting an earth problem, but given the weather a last minute, sensible, change to take the Boxster was made!
Having shared my problems at one of our Friday night meetings, Andrew suggested that I tried running a higher pressure, so I went up from 26 to 30 psi. I thought it made a difference but I was concerned that I had standard size inner tubes in wider tyres and I suspected there to be some movement when cornering – I would be alright on a straight then after going around a bend, the wobble returned, so, I decided to cut my losses and buy another, correct size, set of tyres! - I did 'need' the 195's for my project as it has 6" Wolfrace wheels anyway.
So, a new set of Continental 165/80 x 15s were procured, again at a very reasonable £54 each and fitted. The car certainly handles differently and there's much more awareness of 'drifting' around corners - but I still had a wobble at 65-70 mph, so I went back and had them all rebalanced again, even trying Andrew's special hub for fitting to the balancing machine and this was when I was shown that there was some 5mm or so run-out on the rim edge. All 4 are like it and the car is now fitted with the best on the front. But it's still not right!
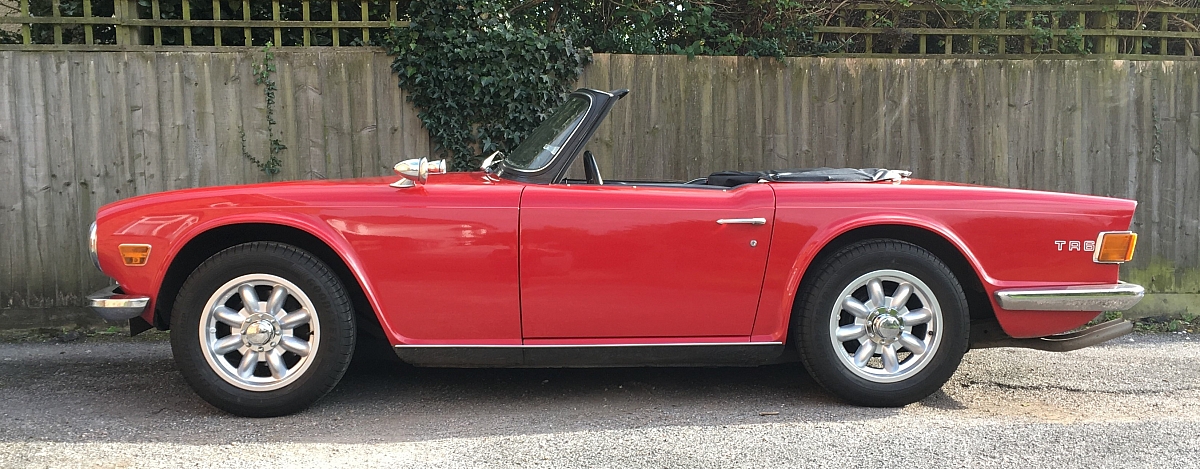
Whilst keen to maintain the originality of the car, being fitted from new with these wire wheels, I did consider a few other options, particularly as wire wheel specialists seem to be few and far between, certainly, not down this way and typically charging £60 per wheel plus postage etc. I didn't want to make any rash decisions.
Then, it came to me, and whilst on holiday, browsing eBay, as you do, I came across TR Bitz offering for sale a set of Minilite knock off wheels for a bargain price – these are due to arrive today and I'll get my 195's fitted asap . At least this will allow me time to continue to enjoy my TR whilst I consider my options for what to do to my original wires, as I will be keeping these on the car – eventually!
Well after I'd written this, unfortunately, the lorry bringing my wheels down the M5 had a nasty accident in the early hours of the Tuesday morning. No one was hurt but my parcels were 'location unknown' and the vehicle had been placed in quarantine pending investigation so I might have to wait if they were to delivered at all! Thankfully, 3 days later they have actually arrived. Now it'll be next weekend at the earliest before I can get to the tyre fitters to have the tyres swapped over
I should conclude by adding that my Pirellis were swapped onto my project and within weeks the walls had cracked and perished, so this was a bit of fixing that needed to be done!
John Blake TR4
In a never ending quest to make it run better & squeeze an extra horse out of my four pot tractor engine I thought I'd build a bespoke radiator cowl that was a better fit than the off the shelf model, and at the same time build an air box for the Webers.
The cowl was fairly straight forward after I'd made a number of cardboard templates to get the angles I needed and this was going well until it came to fitting the outlet tube to the offside flank.
Being aluminium I had naively thought I would just solder the two bits together so cleaned it all to within an inch of it life and added some flux, then applied heat followed by the solder which I was expecting to see drawn into the joint only to watch it form beads that then ran in the opposite direction!
So after a rethink I opted for brazing instead but that was a case of learning on the job having never done it before.
I practised with a couple of offcuts to start with which I managed to join very firmly but applied too much heat on the same spot which started to melt the alloy, and I soon learnt that unlike any other metal I've heated the aluminium doesn't change colour at all no matter how hot it gets so you have no visible warning.
What I needed was a means of getting the whole thing hot to start with rather than rely on running the mapp gas back and forward – now, the current Mrs Blake is very tolerant of my car tinkering but putting engine parts in her cooking range wasn't really an option, so off to the BBQ at the bottom of the garden:

20 mins at gas mark 5! – sat on top of an old flywheel as a heat plate worked a treat, I just needed to add the Mapp gas for a few minutes and I was able to create a passable brazed joint. I was using 18 gauge aluminium sheet which when hot is very prone to warping, if I did another I'd use something a little thicker.
Next to assemble the component parts and fit to the car …Oh yes and some paint…!
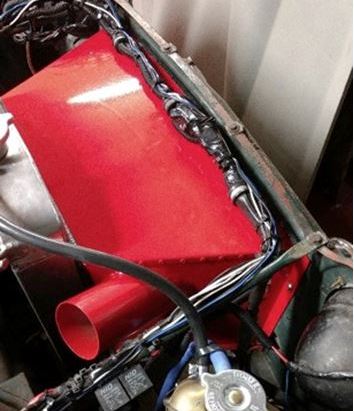
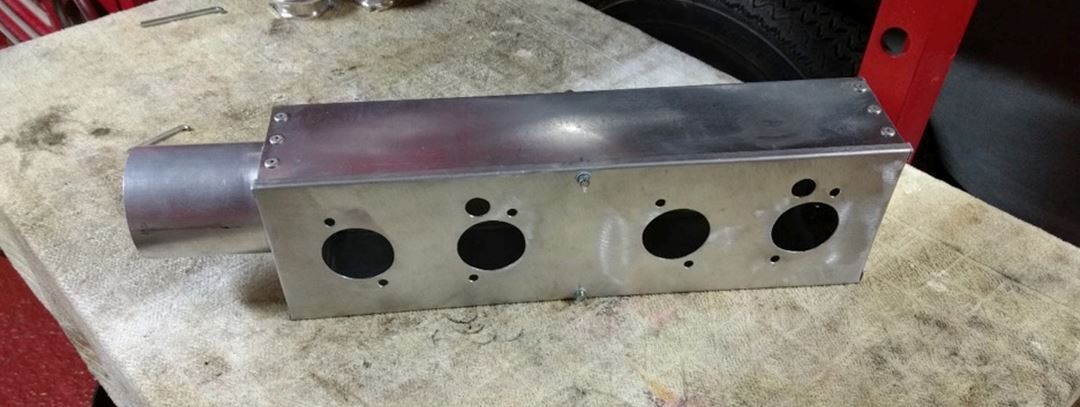
Next job was the air box, which again involved a number of cardboard templates.
This time when it came to braze the pipe (back to the BBQ again!) to the end plate I used a piece of 3 mil aluminium and that worked very well and I got a nice clean joint straight away without any distortion:
Next job was to make room for it on the car, which involved much measuring and a disc cutter - So for those of you with pretty cars that get polished a lot please look away now!

This was followed by the fabrication of a section of steel to set into the gaping hole I'd just made in the inner wing

And tacked into place:
I'm not going to do a full seam weld yet – I'm going to run it first for a few miles to make sure there are no problems with clearances due to engine rock etc. I'm pretty sure it will be okay but I'd be a tad miffed if I do all the work now to find it needs tweaking.
Next job was to move my fuel inertia switch which was in the way and then fit the box back plate & trumpets, I couldn't use the original M6 studs that were fitted for the trumpets so I removed those and used stainless cap head screws instead:
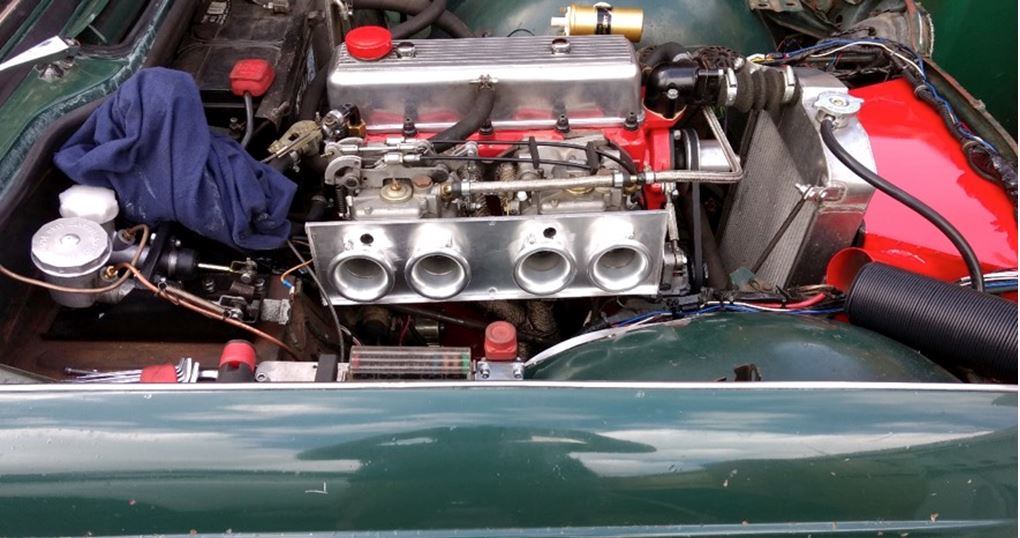
As part of my planning for this little project I'd done a lot of reading about the airflow characteristics and trumpet design used on side draught carbs and decided to swap my old spun steel ones that had the tea strainer gauzes fitted for a nice set of fully radiused alloy jobbies which I had to 'relieve' quite a bit in order to be able to fit them.
Next was the main case and flexi ducting:
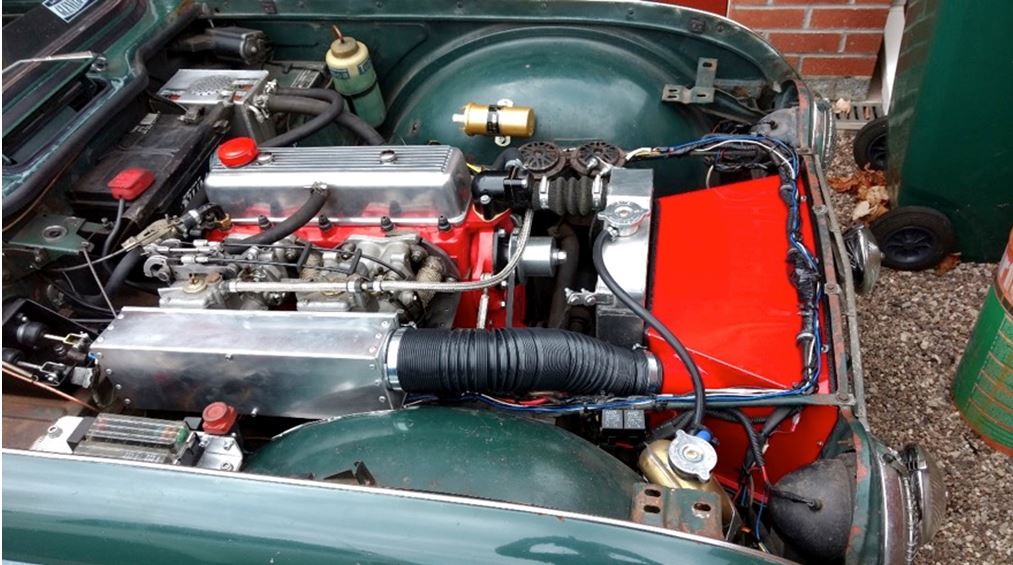
Very pleased with the result although I have already realised I need to relocate my solenoid starter switch, which I now can't reach!
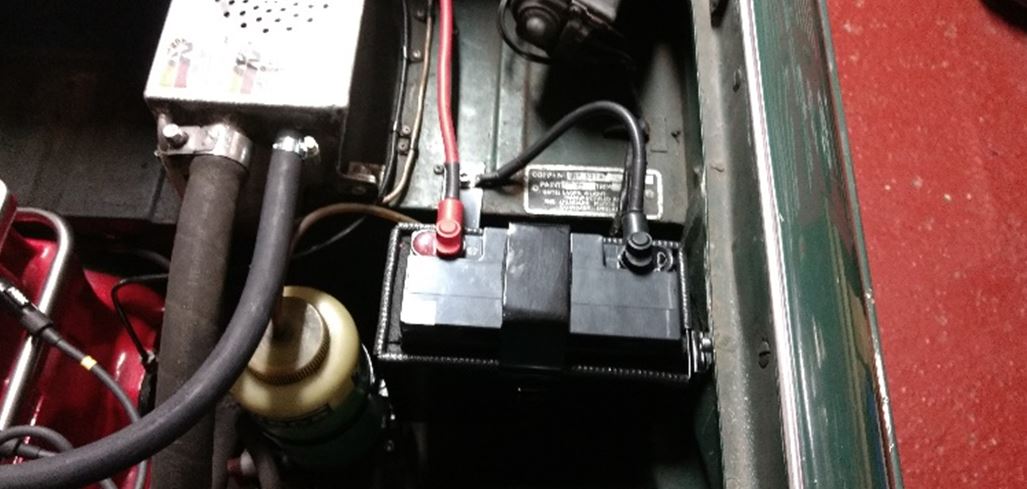
Since I finishing the air box installation I've done a load of stuff as normal starting with a change of battery - which doesn't sound much of a job but I did go from a monster sized conventional lead acid battery to a very small and lightweight racing battery which because I didn't want to waste all the space on the bulkhead, involved fabricating a suitable holder and mountings for it on the nearside wing which has then freed up all the space on the bulkhead behind the engine which I intend to use for a bespoke tool box for touring…I'll cover that next year sometime…. anyway pics to explain….
The old v the new batteries:
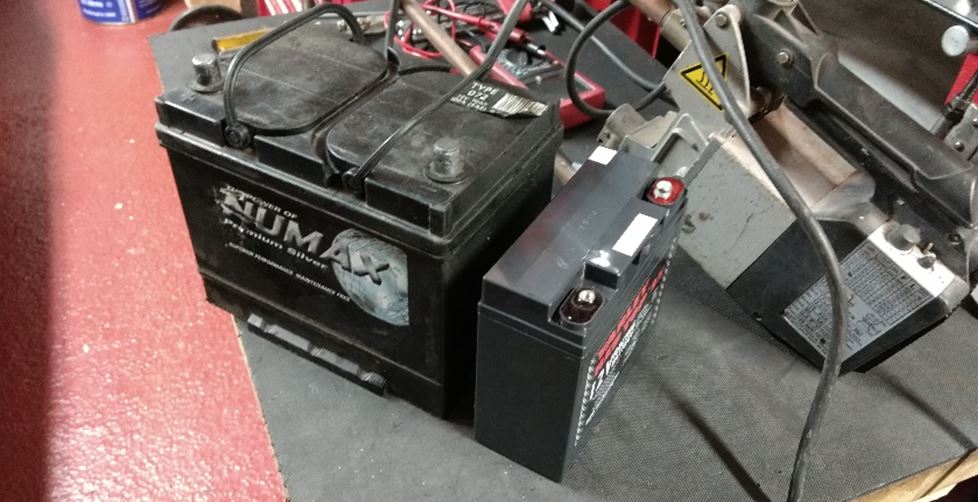
The new battery has a number of benefits including - very obviously a fraction of the weight and size but produces the same CCA (cold cranking amps) – It can also be fitted at any angle as well as upright (n.b – upside down is not recommended!) and if punctured following an accident will not leak acid unlike all the conventional battery models, so in all ways perfect for motorsport.
The new battery box involved some basic sheet metal work with some 18 gauge steel & a whole load of spot welds…..
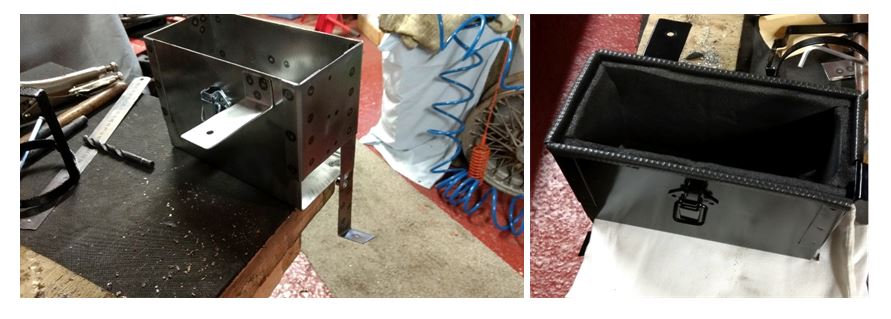
Followed by paint and some 10mm closed cell foam to provide a good safe & secure housing:
And fitted with a metal strap & a couple of quick release spring loaded clamps holding the battery firmly in the holder:
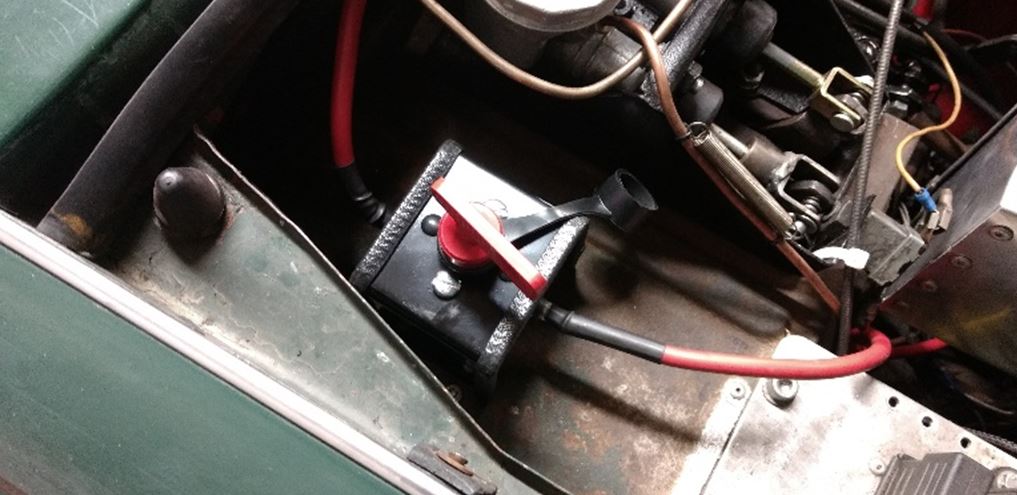
On the down side, due to the nature of the battery terminals I now had no quick means of disconnecting all the vehicle electrics which I like to do for safety when working on her. So, I had to add a basic kill switch which I chose to fit on the drivers side by the master cylinders as this is the side of the car and general area I normally work from when tweaking the engine and made everything close to hand if needed.
More 18 gauge steel sheet required, along with some rivnuts & caphead screws:
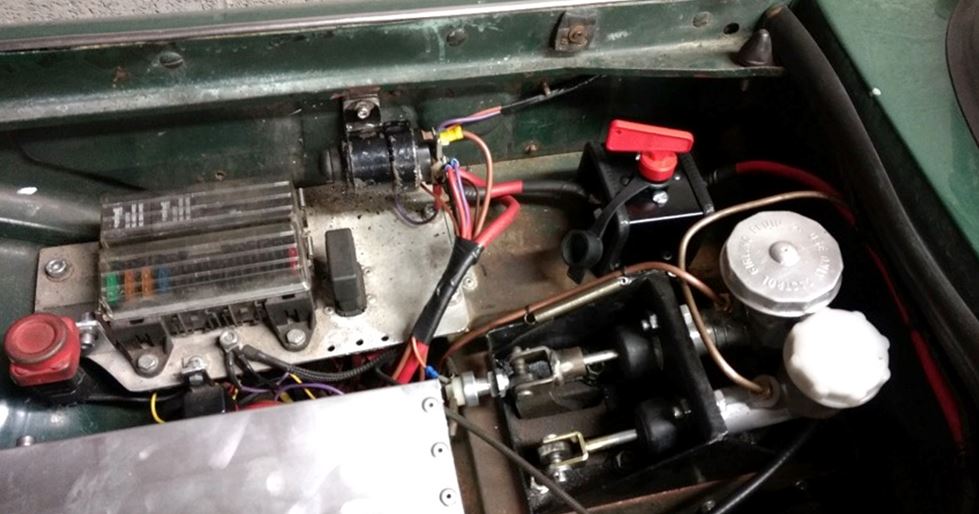
I then set about the task of relocating the solenoid starter switch (the fitting of the air box last month precluded its access & use)
….and what a pain of a job that was as well, as I started to remove the wires from the solenoid I encountered problems due to the age of the wiring loom, one soldered lug fell off straight away and two wires fell apart – well at least the insulation cracked and fell off exposing the conductor. I ended up having to construct a small section of loom with new thin wall cable to extend everything to the new solenoid mounting position – a lot of work for a very minor alteration but at least I have the requisite controls all in the same place for when I'm working on the engine tuning…which is fairly frequently!
A few of the other jobs this month were:
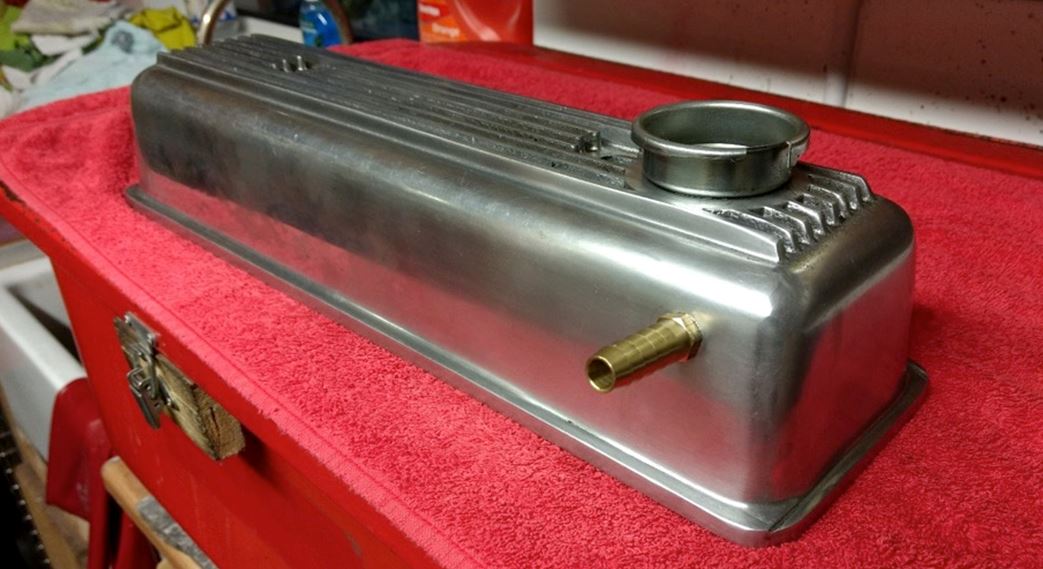
- Re-routing the breather pipe from the rocker box.
- Having moved the battery, I was in the garage (nothing new there) complaining to Tristan about the route taken by the pipe from the rocker box to the catch tank:
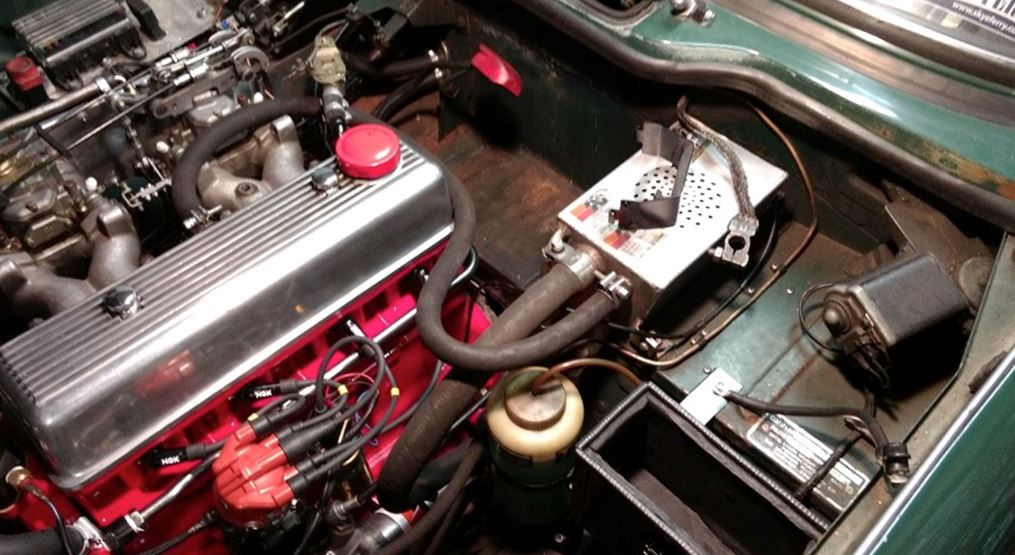
That conversation resulted in the comment from Tris 'well why not make a new outlet this side of the cover?' Which to be honest was so obvious yet I'd just overlooked it and gone with the 'off the shelf' approach.
So 24hrs later and thanks to Andrew for the loan of the appropriate BSP tap & drill I'd pressed out the old alloy pipe – drilled tapped & fitted a blanking plug on the carb side and then drilled tapped & fitted a new tail the opposite side, followed by a much shorter run of breather pipe and Bob's your uncle…a much tidier and efficient breather system from the top end:


I was so pleased with the result I did something similar for my other car as well, only this time I fitted the tail to the back of the rocker box so I can add a breather pipe down alongside the crankcase breather (it won't need an oil catch tank fitted on this one):
I've done a load more recently including fitting a 123 bluetooth dizzy and sorting an overdrive problem & oil leak but they can wait until next time….
Cheers folks
John.
STOP PRESS: John's engine is now out of the car and in bits again!
Charles Marten TR4 and TR4 V8
The progress on Charles' V8 project has not been matching Charles ambitious timescale so he decided to bite the bullet and pass it over to the boys at NDM to do the hard graft while Charles himself managed and directed the project in between specifying and sourcing the myriad of parts that make up a bespoke car.
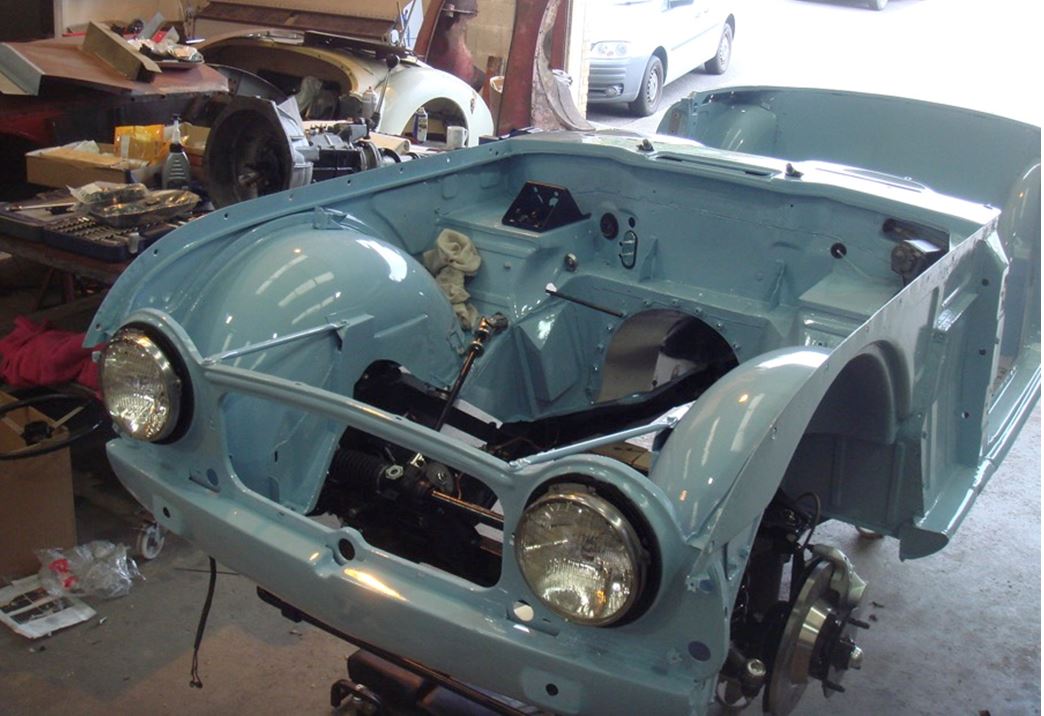
With at least one man working on the project eight hours a day the project is coming on in leaps and bounds. The chassis quickly became a rolling chassis with suspension and brakes fitted and the painted body was soon dropped into place and bolted down.

There is plenty to see in this picture. Sharp eyes will spot the box showing under the inner wing and over the rear spring to take the boot-mounted battery on Charles' car and the gearbox with it's oversize bell-housing on a bench behind the car. Paul from NDM has started work on his TR2 and the chassis can be seen in the foreground while an all-aluminium TR2 body is nearing completion in the background.
Here you can see the convoluted steering column route required to avoid the cylinder heads on the Daimler V8 together with a number of engine bay bodywork modifications. The steering column required a scalloped out section under the master cylinder bracket with a ball joint steady just above it. The bulkhead has been cut back in the battery tray area to clear the large gearbox flange and a box has been added to the left side of the driver's foot-well to clear the clutch pedal.
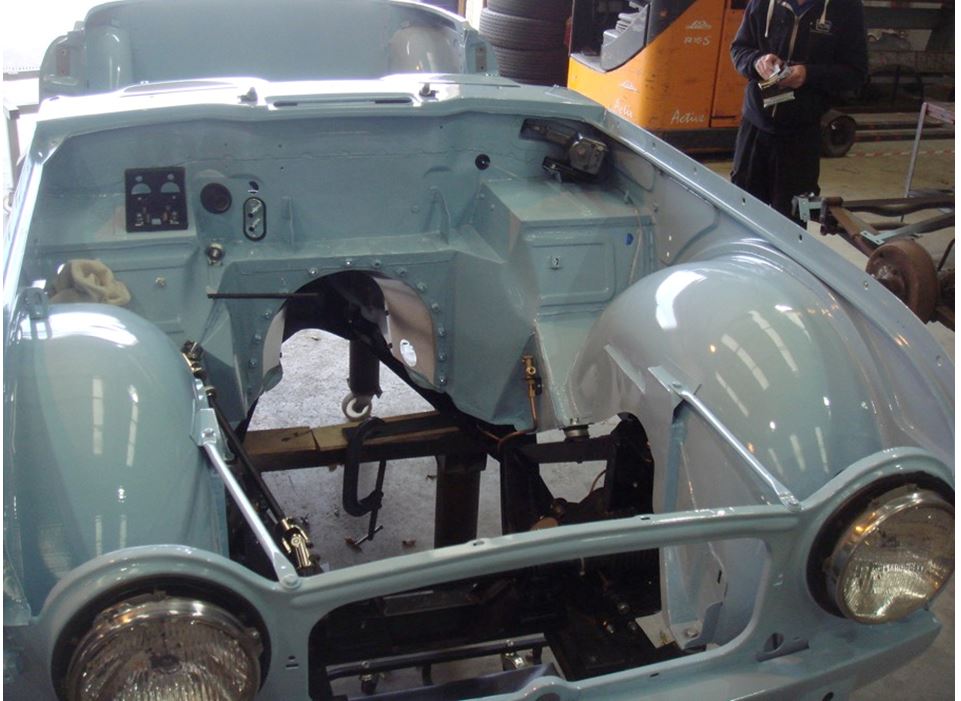
The suspension tower cover boxes on the inner wings have been cut back to allow the engine to be fitted and removed without having to remove the body and are now just wide enough to locate the rear of the front panel steady bars.

Charles doesn't intend to get chilly with this monster heater assembly. A bespoke gearbox tunnel was required to clear the larger gearbox and overdrive unit.
Paul Gibson - TR6
Paul has been busy building an overdrive 'Logic Circuit' and writes:
To clarify, I can't take credit for the circuit, which came from an article on the forum. If I like using the logic switch I will adapt it and modify the operating switch to work momentarily.
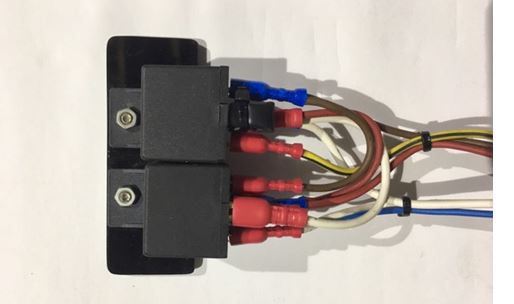
The O/D logic circuit uses the original switch. If I forget to take the car out of O/D before changing down, then O/D is inhibited when I go up through the gears. When I come to select O/D it is second nature when my finger finds the switch already in the ON position to select OFF-ON to engage. No change to the switch seems necessary and it all looks original. I have considered a momentary switch but I'm happy with the system as it is for now.
You – Your Car
Thanks to all our contributors to this issue.
Contributions and feedback (positive or negative) are always welcome.
What's happening in your garage?
Please make a few notes about your garage exploits and email them to me for the next issue.
Contributions are best managed by sending in plain text with attached photos or in Word format.
Mail your notes and pictures to: andrewawillmott@gmail.com
I am happy to hone rough notes (or even quite eloquent submissions) prior to publication.
Andrew W