Easy right? Yeah, sure… back to that small issue of my inability to weld. Again, referring to Bill's blog, I knew what I needed to fabricate, I just didn't have the expertise to be able to do it. Out with the Yellow Pages (OK maybe I'm showing my age here)... sorry, the Internet! Trying to find someone to weld a tubular frame in-situ proved to be more challenging than I had expected, but persistence paid off and I managed to find a local welder who was willing to come to mine and do it. A word of advice here again… don't weld the frame to the bodyshell. Obviously weld the frame itself together, but make it such that it bolts into the bodyshell to provide rigidity. When the bodyshell goes off to be prepared and sprayed, they'll need to remove the frame as part of the spray process and refit it afterwards, and that's a lot easier to do when you can just unbolt it.
Splitting the chassis from the bodyshell wasn't actually that difficult, just look for any bolts left that go through the bodyshell and into the chassis. I made the mistake of leaving the bumper mounting brackets which attach to the chassis in place and trying to lift the bodyshell off, but they extend into the shell and therefore need removing in order to lift the bodyshell out of the way.
So the bodyshell went off to Envirostrip to be dipped and etch primed. Alan, who came to pick up the shell couldn't have been more accommodating or helpful. He didn't once call me a numpty even though it was pretty obvious to him, I'm sure, that he was dealing with a complete amateur!
First stage of dipping...

Fully stripped...
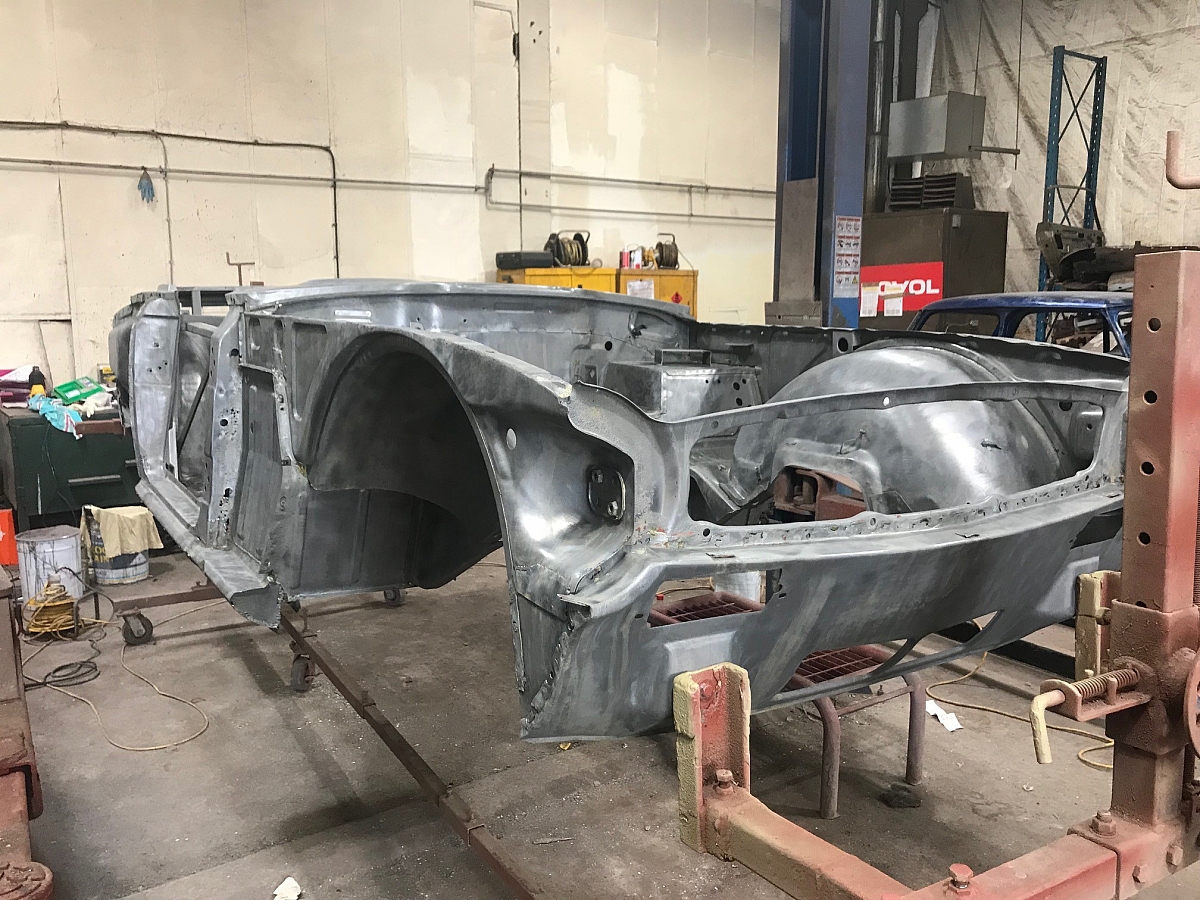
…and etch primed and ready to be returned back to me. Envirostrip offer two types of etch primer, the normal stuff, and weld-through primer, which is a little more expensive, but well worth it if you've got any welding to do and you are on a longer-term project as it will provide longer-lasting protection it seems.
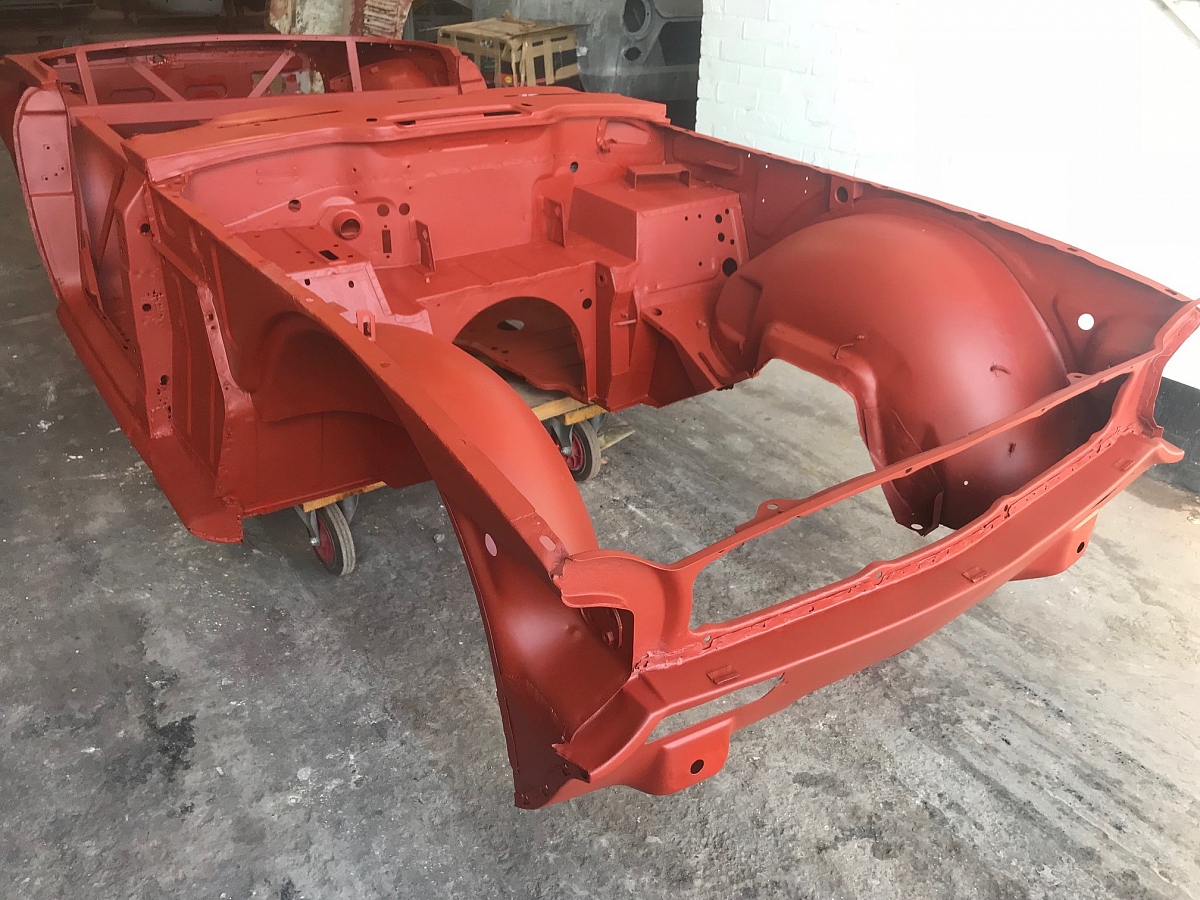
We were all rather pleasantly surprised at how good the bodyshell looked after the dipping and etching process. Having heard horror stories about tubs coming back riddled with holes, on the face of it, this one looked surprisingly good.
So back it came to my garage ready for the next stage of preparation.
This is where things take a rather downward turn from the perspective of myself continuing with the project. For various reasons which I will not bore you with, I lost (in the context of 'was no longer able to use' rather than physically misplaced) my garage facility which I was using as my workshop. Having hunted extensively locally to find an alternative, and coming up with nothing, I made the decision that I had to outsource the remainder of the rebuild to a professional to complete.
I spent a fair amount of time talking to various companies, many of whom, interestingly, just wouldn't even take on the project as they were either 'too busy', just not interested in taking it on from the stage I was at, or wanted to charge so much that I would need to sell both kidneys and at least one other vital organ to fund the project! I finally came across Glen and Chris at Protek Engineering in Wallingford (I think they advertise in TR Action incidentally). They were both great to deal with from the outset and seemed to be on the same page as me with regards to what I wanted and what I was reasonably willing to pay to complete the car. So Glen came along with his rather cool trailer (cool for a total gadget freak like me anyhow), which had a motor that just moved the trailer around by remote control. He loaded up the bodyshell, chassis, engine, gearbox and all the bits to take back to their workshop in Wallingford for closer examination.