In the Garage - April '20
April 2020
Welcome to the latest Issue of In The Garage. We are always looking for content so please let us know what is going on in your garage now that we all have plenty of fettling time on our hands. Contributions don’t need to be a novel about major project; simple hints and tips or a picture and a few words of explanation are welcome. This issue features some smaller jobs as an example. Your feedback on format and content will also be welcome.
Andrew Willmott – TR3
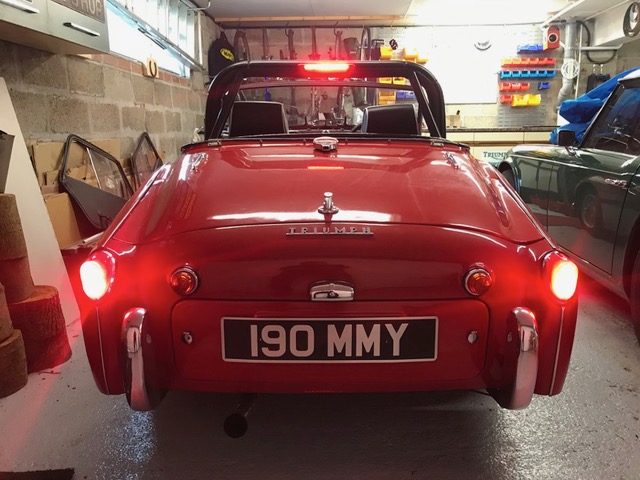
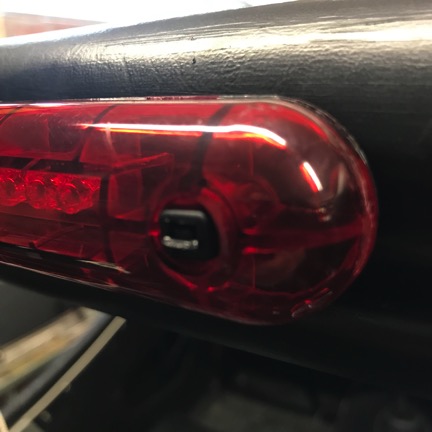
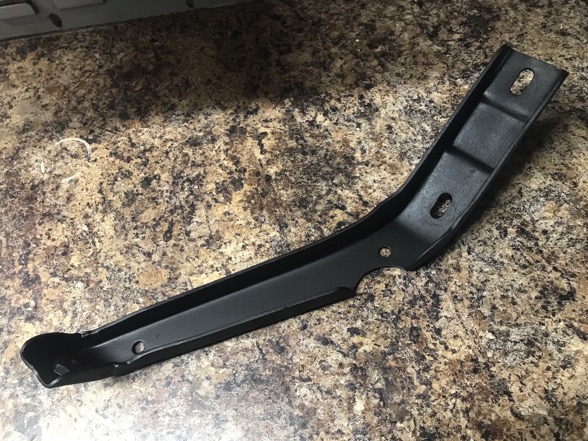
High Level Brake Light
Prompted by John Blake, who had just completed a similar addition as part of his marathon rebuild, an eBay click saw a LED brake light on its way to Devon. After a moment of “design time” the simplest and quickest method of fitting won the day. Two tie-wraps were secured around the roll bar and the loose tails were fed through the mounting holes on the brake light. The ratchet ends were cut from two more tie-wraps, fed onto the tails and pulled tight to secure the light. The brake light is supplied with a long captive lead which was fed inside the roll bar cover and the ¾ trim where it was connected to a plug spliced into the brake light cable on the front to rear leg of the standard loom.
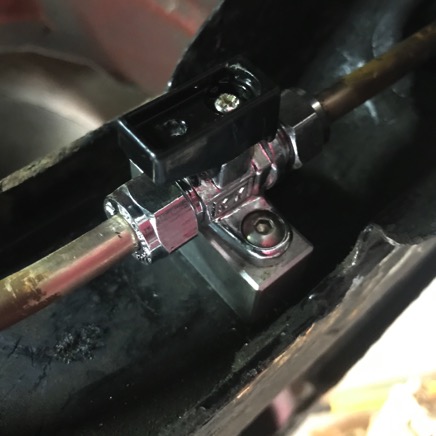
Petrol Tap
Every time I’ve worked on the fuel pump, tank or filter in the past 35 years I’ve cursed the fact that I didn’t fit a petrol tap all those years ago. There wasn’t much fuel left in the tank so now seemed a good time to make amends.
The remaining fuel was syphoned out and transferred into the TR4. A small ball valve with a two bolt base and 8mm compression fittings was purchased from the local Toolstation. The 8mm compression olives are only 0.0025” bigger than the 5/16” petrol pipe; more than close enough to form a good seal.
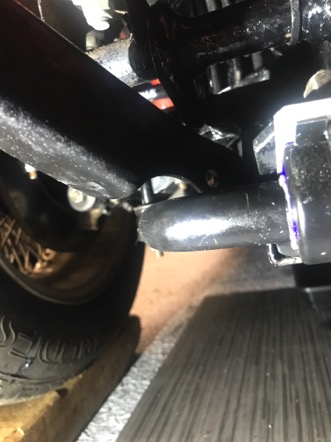
Half an hour saw an aluminium spacer block made with two holes drilled and tapped to accept the petrol tap. The block was fitted inside of the chassis rail just ahead of the rear wheel where the tap can be reached from the kerbside and the fuel isolated for a bit of extra security. The tap was screwed to the block and connected to the existing fuel line before a few litres of fuel were decanted back into the tank to test for leaks. A couple of weeks later and no leaks are apparent.
Heater/Demister
Although an original heater assembly came with the TR3 all those years ago it had never been fitted on the basis that if it weren’t fitted it wouldn’t go wrong.
The warm wet weather in Ireland last year highlighted the requirement for an effective demisting system and a bit of research revealed that T7 Designs in Exeter supply a compact unit that not only outperforms the original but also takes up a lot less valuable space behind the dash.
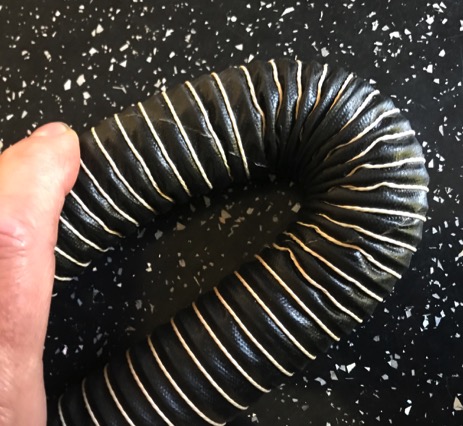
A length of angle iron was all that was needed to make an effective bracket to mount the heater onto the TR3 dash support struts and some excellent ducting supplied by T7 made connection to the demisting nozzles simple. It can be bent double and still doesn’t collapse on itself to restrict the airflow.
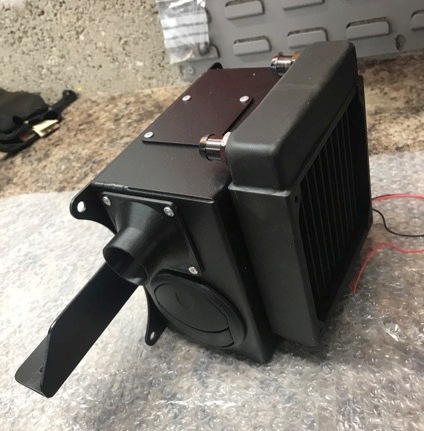
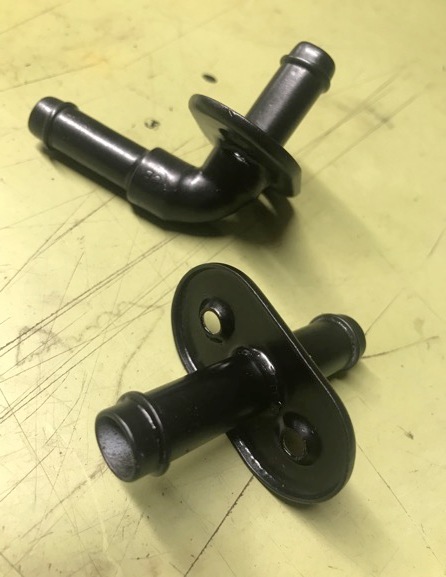
The hot water connections were made from the heater to the bulkheads with standard pattern TR3 heater hoses manufactured in a modern silicone material. The bulkheads were modified with longer spigots to give a bit of extra location and the driver’s side bulkhead was remade with a 90-degree elbow on the engine side as the non-standard HS6 carburettors had taken up the previously vacant space.
A hot water valve from an auto-jumble together with two more standard pattern silicone hoses and a stainless steel return pipe completed the connection.
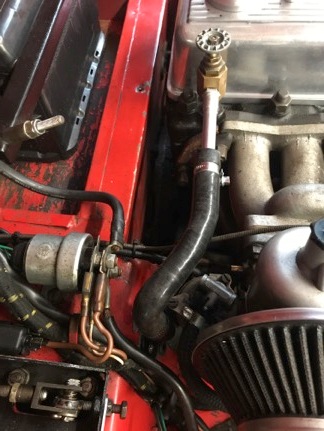
The stainless steel heater return pipe was a bit of a trial. I ordered one from a supplier I don’t normally use; they were the only ones with silicone heater hoses in stock so I had added the pipe to the order.
When I attempted to fit it I learned that every dimension on the component was incorrect!
The pipe was too big in diameter, the bracket was too long and welded (poorly) in the wrong position, and the set in the pipe was incorrect and bent out of true. It was quickly returned and I paid a bit extra for a similar looking pipe from Revington TR that fitted perfectly.
The Instrument light dimmer has always been redundant in my ownership, as it tends to adjust the illumination from “very dim” to “even dimmer” so the wires were spliced behind the dash and the rheostat was replaced with a TR4 windscreen wiper pull switch to operate the heater fan. The standard “Panel” knob was fitted so it still looks standard.
A quick engine run got the hot water flowing and I soon had toasty feet and warm air flowing over the inside of the screen. I’m looking forward to a cold damp evening now to try it out.
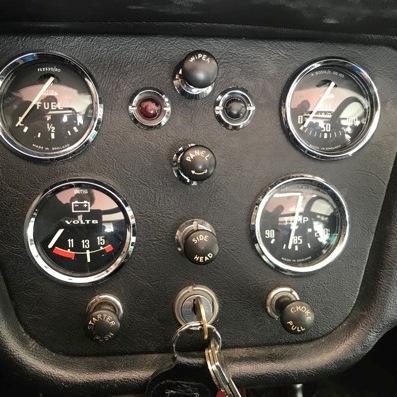
Wiring and Instrument Panel
While scrabbling around under the dash fitting the heater I noticed that there was scope for the wiring to be improved. There had been a few ad hoc additions over the years so I set to and rewired a number of ancillary items. The windscreen washers, indicator warning beeper, power supply sockets, CB radio and engine fan override were all rewired and repositioned in the hope of making them all more convenient to use and more reliable. The standard ammeter was replaced with a voltmeter, as with an alternator fitted and the headlights and engine cooling fan fed direct from the battery it wasn’t telling me much of value. The voltmeter came from a TR6 and was modified by fitting a TR3 chrome bezel and domed glass to at least partially match it to the other auxiliary gauges.
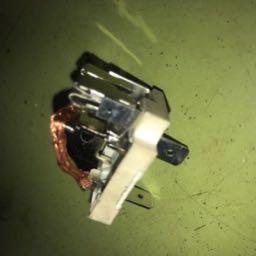
The newly positioned double ‘cigarette lighter’ type socket needed a fused feed direct from the battery. As it was mounted close to the existing relay bank for the headlights and cooling fan it was connected to an extra relay base clipped onto the end of the row. No relay switching was required so I cut open a fused relay and soldered a braid across the power and output terminals leaving the integral fuse in place. When plugged in to the base it acts as an energised relay without needing a switch voltage. As it sits next to the other relays it could be useful as a fault finding/get you home override for the other functioning relays. I’ve marked its cover with a white spot so that it doesn’t get mixed up with the others.
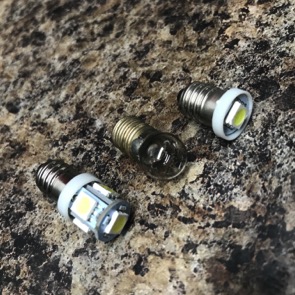
All the instrument lights and warning lights were replaced with LED equivalents. Two types of LED were required. Instrument illumination requires LEDs on the periphery of the “bulb” but this type of unit is slightly too long to fit the warning lamp housings. Shorter units with a single front facing chip were sourced for the ignition, indicator and high beam warning lights.
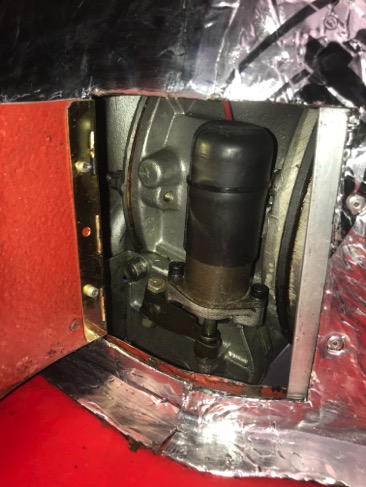
Spare HT Coil
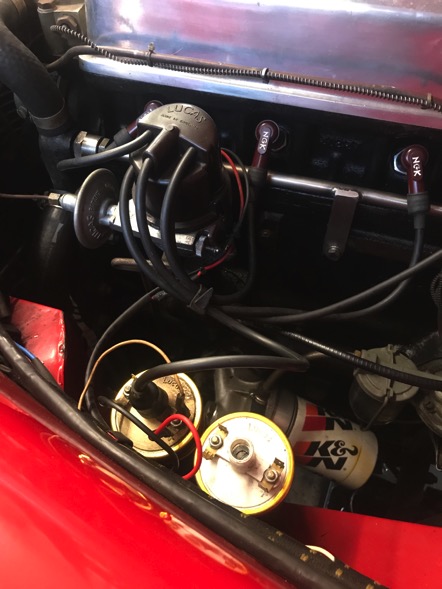
I had removed the HT coil from its position on the side of the engine block to provide better access whilst fitting the heater return pipe and decided that it would be better positioned on the inner wing away from the heat and vibration of the engine. I’ve seen a few coils fail over the years so I always carry a spare in the car. The two coils were mounted side by side and the wires extended so that they would reach either coil and be swapped over in a few seconds. The next job will be to source a coil cover to protect the spare from engine bay grime.
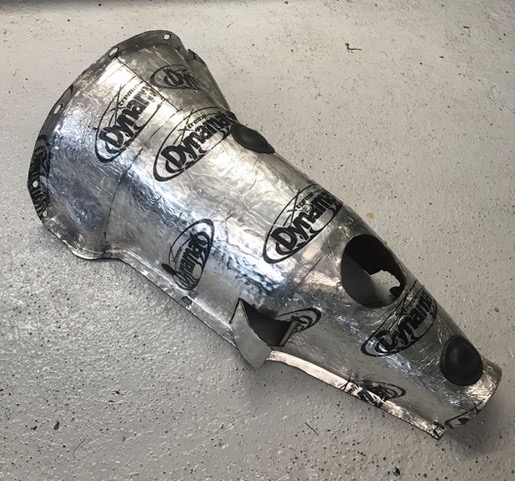
Transmission Tunnel Mods
As a previous owner of a TR4a I missed the small panel on the later car affording access to the overdrive solenoid. I considered cutting the tunnel in half so that the rear section could be easily removed but the steel tunnel on a side-screen car considerably strengthens the longitudinal stiffness of the body so any new holes should be minimised. The later cars with cardboard tunnels benefit from considerable stiffening from the hefty doors with wedge locks.
I’d removed the seats and carpets to improve the access and reduce the contortions required to work on under the dash so five minutes work with an impact driver removed the transmission tunnel. Half an hour later, after some careful measuring, and a few sparks from the disc cutter, I had an access port and a panel that fit the hole. I re-attached the panel with a piano hinge and made an aluminium stop to prevent the door swinging inwards. Pop rivets secured it all together quickly and effectively.
There was a pack of Dynamat Extreme left over from Chris’s campervan conversion so it seemed like a good idea to cover the tunnel while it was out. It just needed cutting out, sticking down and trimming; how hard could it be? Don’t bother asking me to do yours for you as expletives often offend!
I got there in the end. Will it make any difference? I suspect that the difference will be undetectable over the combined din made by the other mechanicals.
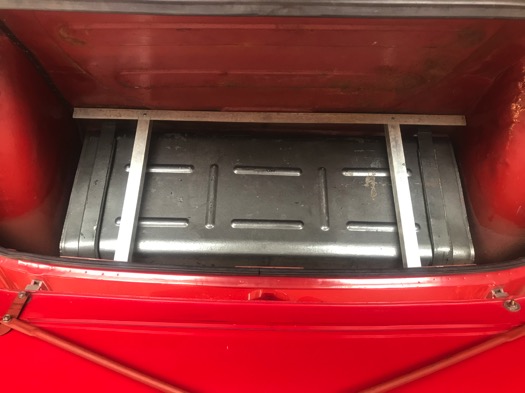
Boot Millboard Support
I had replaced the boot millboard some time ago; it’s the bit that makes the boot look neat and stops the contents from floating around the fuel tank. However it had developed a wavy profile due to the lack of underlying support. A quick call to John B procured a length of aluminium angle ideal to provide the additional support required. One piece was riveted to the boot floor to provide a continuous stop in place of the two one inch wide stops provided by Triumph. Two further sections were fitted vertically and riveted to the new angle at the bottom and the tonneau deck tabs at the top.
Jennie’s steam iron soon flattened the millboard (shhh!). The fit is much improved now that it is nicely supported.
Uprated Front Anti Roll Bar
I’d fitted a TR6 anti roll bar to the front of the TR3 some years ago and although it had made a good improvement to the turn in the car had always suffered from snap over-steer in “hooligan mode”.
A GoPro strapped to the chassis recorded the axle behaviour and revealed that snap oversteer was the result of the chassis rising to the bump stop and lifting the inside rear wheel. I needed to reduce roll and improve the articulation of the rear axle.
The 5/8” TR6 bar was replaced with a Revington TR 22mm bar that they were happy to sell as a bare bar without the fitting kit, which I preferred to manufacture myself. It doesn’t sound like a big difference in diameter but torsion in a bar increases with diameter to the power of four! A few hours in the garage saw the new bar fitted without too much trouble although it did require some sizeable clearance cutting into the bumper supports to mount it in the ideal position, out of the way above the chassis and horizontal when at rest.
Road testing revealed that the bump stops were now just kissing the chassis and the snap over steer was replaced by huge understeer. Some 6mm spacers made from old spring leaves fitted between the axle and the springs provided bump stop clearance on the cornering limit and increasing the front tyre pressures provided enough extra grip to counteract the excessive understeer. In the longer term the planned adjustable rear ARB should sort the understeer and enable the car to be balanced to my requirements.
TR4 Rear Axle Input Flange Seal
The TR4 had been losing a bit of oil from the axle input flange seal for some time and a new seal had been sitting in my spares drawer for some time too. After getting the car up on axle stands and removing the prop-shaft bolts I prepared to do battle with the flange nut. The split pin was removed and after slipping the correct sized socket over the nut I was surprised to feel the nut move and find that I could remove it by hand!
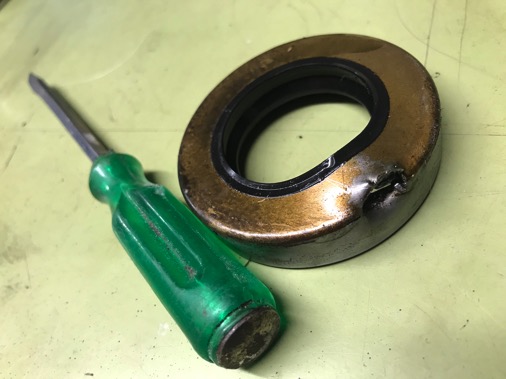
The flange was pulled from the pinion shaft revealing the steel cased seal and allowing the oil to drain out into the waiting drain tray. A ‘through shaft’ screwdriver was hammered into the exposed edge of the seal and it was levered out of its recess. The new seal was tapped into position, the flange refitted, the nut tightened to the correct torque (plus a bit to get the new split pin in) and the oil topped up to the correct level.
Bonus - With the pinion nut now tight the backlash in the crown wheel and pinion is halved!
Drain Plug Tool
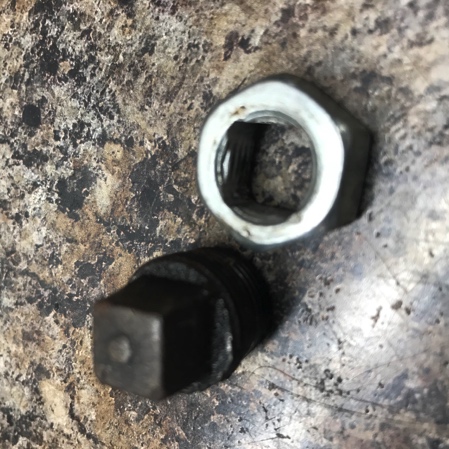
I have a proper drain plug spanner in the workshop but don’t carry it in the car. This simple tool made from a suitable sized nut filed square to suit the 7/16” four point drain plugs wont take up much room or add a lot of weight to the on board tool kit.
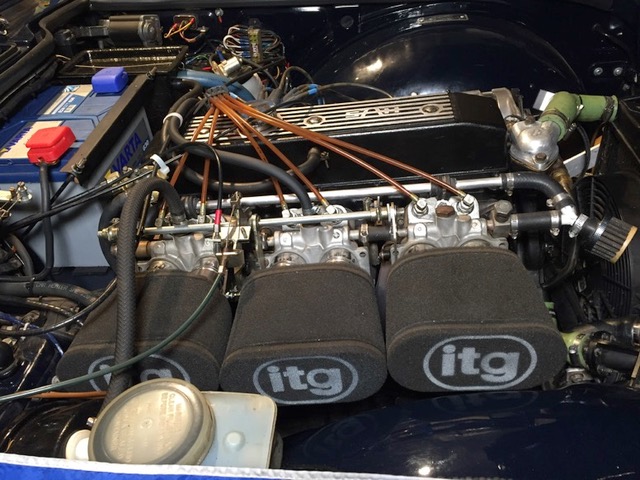
Dennis Hobbs TR5 – Wrong Fuel
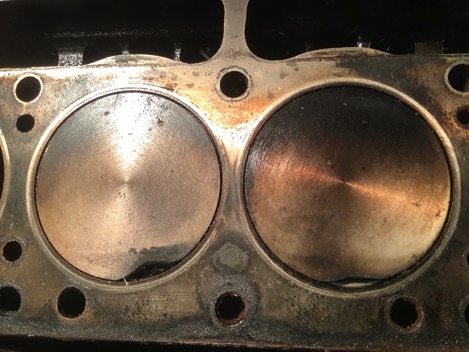
Well where do I start? Probably by calling myself a Dip Stick! On a sunny day about seven weeks ago I drove my TR5 to Exmouth to top up with my preferred Shell V Power fuel, I put 36 litres in. On the way back over Woodbury Common near the quarry, I experienced a sudden noise followed by a lot of white smoke from the exhaust. Before I could find a spot to pull over the engine cut out with increased white smoke. A motorist that could not get past helped me to push my car into a driveway. At that time my impression was I had blown a piston as when I lifted the bonnet oil had blown out the breather pipes that go into the oil catch tank. I phoned the breakdown company that covers all three of our vehicles requesting recovery. I had to wait about 90 minutes so not too long. In the meantime a van stopped and offered to help, the driver told me that he owned a TR6. At that time I was not aware he is one of our Devon group new members Chas Gurry; thanks for that Chas. To get my car onto the breakdown truck I only had to remove the front number plate. (Having found myself in a similar situation I found things very close when getting the TR4 onto a recovery truck without damaging the lower valance. Its worth fitting a tow eye before you need it - Andrew) At that time I was convinced it was an engine failure. On reflection the next morning I was sure I had filled up with V Power but on checking the receipt found that it was for V Power diesel. You can imagine how stupid I felt. I phoned Rod who came over with empty containers and a pump and together we emptied the tank of diesel and poured in a small quantity of petrol. I removed the spark plugs, fitted a hose to the metering unit pressure port and pumped fuel through to purge the system. With a pressure gauge fitted to the hose all six injectors were removed and placed in a large jam jar before I hit the starter to further purge them. After replacing plugs and injectors I turned the key to start the engine. It eventually started but emitted white smoke and misfired. Next a compression test. You can imagine the results when looking at the photos of the pistons.

Head off, sump down and pull the pistons and rods. I found no marking or damage to the bores or bottom end. With the engine being zero decked the new pistons had to be machined to the correct crown heights. The machining was carried out by Hamlings of Bridgwater who I can recommend most highly having used them regularly for some 60 years. With all the parts acquired, the head cleaned and valves lapped I reassembled the engine. I have since covered 120 miles, retightened the manifold bolts and after some more mileage will change the oil and filter and re-torque the head but that will be on hold until the Coronaviris stay at home restrictions are removed.
Buttoned up neat and tidy waiting for the opportunity to get back on the road.
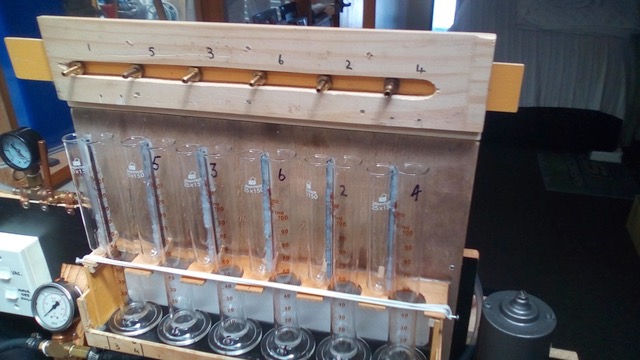
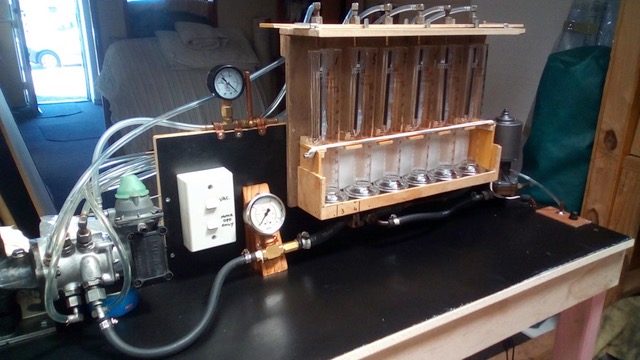
More from Dennis Hobbs – Interesting Metering Unit Calibration Equipment in New Zealand
Some of you may not be aware that I had immigrated to New Zealand in1966 returning in 1973. I made many friends during that time and have remained in contact with lots of them including John and Joan Parker. Owning a TR6 they inaugurated the Triumph Stag Club NZ. When visiting with Jenny and our girls in 1996 I set up John's PI injection manifolds. Specialising in the Triumph marque John supplied parts for Stags and TRs and set up a workshop that among its activities included the reconditioning of injectors and metering units. John has since retired. John still keeps in touch with many of the members of the Stag Club including Ken Pfeffer who is the Technicalities contact for TRansmission the NZ part of our own TR Register. (A Google search will find the online magazine). I have had some input regarding Ken's home produced metering unit calibration system shown in the photos. Some of you may be interested, as it is a replacement for the Hartrige test rig equipment used when I was trained as a mechanic during the 1960's. Ken has given his approval to share the photos with you.
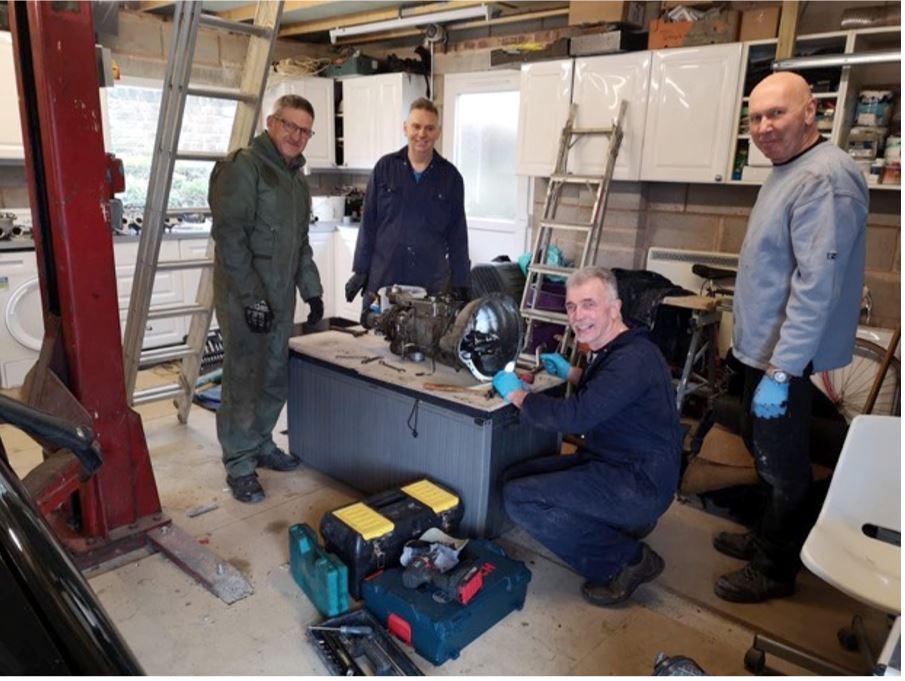
Mark Radford TR6 - Overdrive Obituary
Having decided to enter the tarmac class of this years Lands End Trial (now unfortunately cancelled) I thought I better sort out my A type overdrive which had been playing up for some time and had finally refused to engage at all. I told myself "it's just a clogged up filter" and when the filter was removed it certainly was very dirty! I was hopeful that all would be ok it was given after a good clean. A short road test revealed that the overdrive did engage but it was obvious that all was not well. On engagement it almost felt like I had engine braking! With options running out the decision was made to remove the transmission for further investigation and repair. As the picture shows the Devon Group community spirit prevailed and many hands made light work.
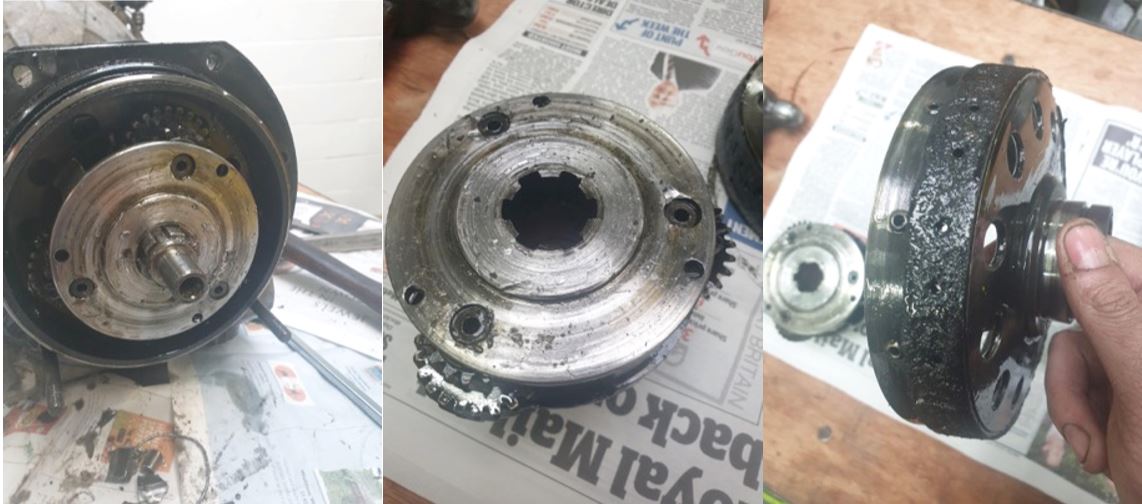
With the transmission on the bench we set to and attempted to split the overdrive from the gearbox to identify the nature of the failure. The overdrive moved about 10mm and stuck fast so rather than risk further damage it was handed over to the TR transmission specialists, Pete Cox and Son Sports Cars in Redditch. Once stripped Tom Cox sent pictures of the overdrive internals, it was a wonder it ran at all! The uni-directional clutch had disintegrated and the debris had badly damaged the annulus and epicyclic gears. Continued use had wrecked the cone clutch; it was about as bad as it gets.
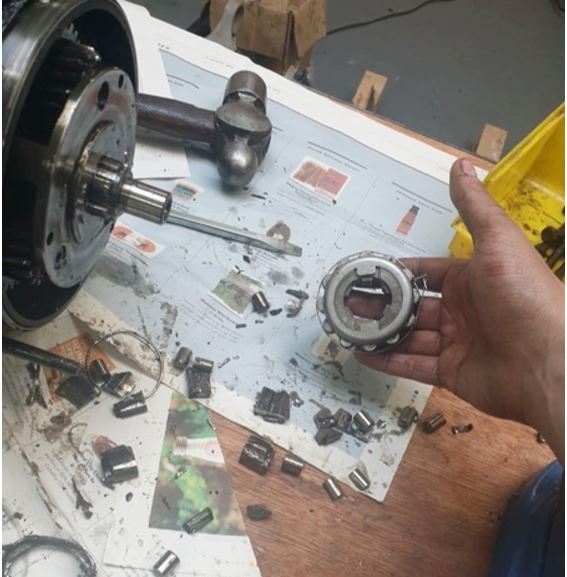
The root cause – a disintegrated uni-directional clutch. This is usually caused by reversing with the overdrive stuck in the engaged position.
Luckily none of this fazed Pete Cox and the rebuilt gearbox and overdrive was ready for collection in a week or so. I took the opportunity to have overdrive ratio upgraded from 22% to 28%. The upgrade will provide longer legs and perhaps a slight improvement in fuel consumption. Thanks to Chris, Paul and Andrew for their help, Jo for veggie/vegan sausage rolls, Louse and Alan for moral support and drinking tea! (I will be interested to hear from Mark once the car is back on the road; I’m sure that the new transmission will make a big difference to the driving experience – Andrew)
Steve Williams TR5 - Stop and Go
I'd been having issues with intermittent faults for some time; miss firing, loss of power and two complete brake downs. I’d investigated the usual culprits including the rotor arm, plug leads and fuel filter. I’d measured the fuel pressure at the metering unit and checked the tank for debris but no faults were evident. The car would behave for a while then the problems would return, resulting in a loss of confidence in its reliability. I finally tracked the fault down to a 60-year-old Lucas fuel pump. I liked the originality of the Lucas pump but above all the car needs to be reliable so the decision was made to upgrade to a modern Bosch pump and filter. I found that buying the pump, filter, bracket, tap and fittings separately made quite a saving compared with kits sold by some of the specialists. Fitting was quite straightforward and I have since covered over a 100 miles with no re-occurrence of the previous problems.
You – Your Car
Thanks to all our contributors to this issue. Contributions and feedback (positive or negative) are always welcome.
What’s happening in your garage? Please make a few notes about your garage exploits and email them to me for the next issue. Contributions are best managed by sending in plain text with attached photos or in Word format.
Mail your notes and pictures to: andrewawillmott@gmail.com
I am happy to hone rough notes (or even quite eloquent submissions) prior to publication.
Andrew W