In the Garage - Easter 2018
Andrew Willmott – TR3a and TR4
The winter has seen the Willmott Man Cave busier than usual with some long over due fettling on the TR3 in particular.
Improved Lighting
The new LED rear lights have worked well and following drivers tell me that the LEDs are not too bright but compare well with a new modern car; the front sidelights and white indicators are a different story.
I looked on 'the bay of plenty' to see if any combined sidelight/amber indicator LEDs were available and found some from China for £5 the pair. At that price they were worth a try so I pressed the button and waited for a few weeks for the booty to arrive.
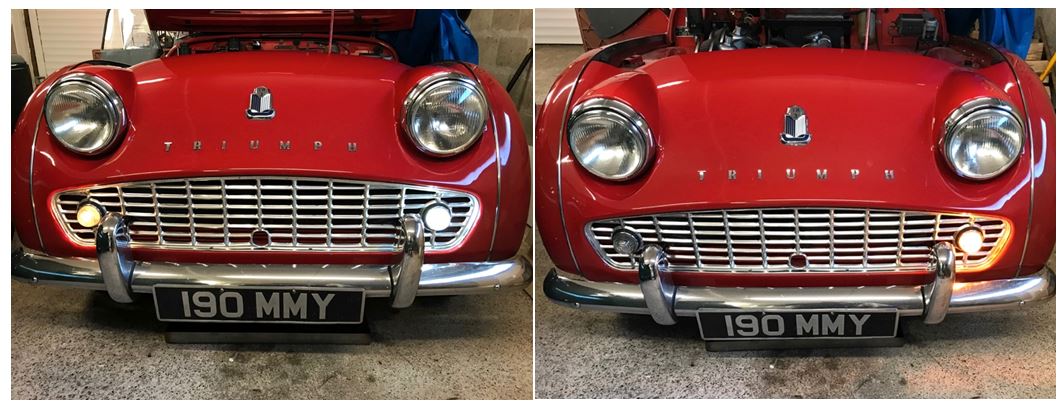
They were quickly fitted and tested. The bright white sidelights are a big improvement on the feeble standard offering and the indicator section is equally bright with amber colour being what approaching drivers expect to see when a car is turning.
The standard sidelight on the offside with the replacement LED on the nearside and Nearside LED Indicator
The LEDs don't draw as much current as the incandescent bulbs so they give the switches and loom an easier time but don't draw enough current to operate the flasher unit, which required an electronic replacement.
The other slight downside is that although each function is much improved individually the bright white sidelight tends to wash out the amber turn signal so that when using both the effect is of a pulsating white light much the same as the standard setup. Ill stick with it until a better solution comes up.
Rear Axle Fettling
The offside half-shaft has been leaking oil onto the brake drum for some time so I bit the bullet stripped out the shaft and changed the seals. No dramas ensued and if you are interested in how it went read the workshop manual…unusually the job went to plan…no hints or tips here…..move along.
The rear brake shoes were replaced while I was about it.
Clutch Replacement
Meanwhile the clutch has been slipping when provoked for some time and given that it was used when I fitted it 'temporarily' 35 years ago a replacement seemed due.
The older coil spring clutches seem to provider a better action and demonstrably better longevity and reliability than the newer lightweight diaphragm clutches so I elected to have the old unit refurbished by Precision Clutch at Henstridge on the advice of long time Register member Alec Pringle.
A mornings work saw the gearbox out and the tired looking worn clutch on the bench. I packed up the dirty bits and Hermes saw them delivered to Henstridge a day or so later. I phoned Precision Clutch and spoke to their frontman Simon to see if there was any opportunity to upgrade the clutch given that the engine was now hiding more horses than it was born with and I don't tend to pussyfoot about when given the chance. Simon suggested that a modern friction material with slightly heavier springs would do the job with no noticeable extra pedal effort or cash outlay……sold!
The clutch arrived back with me at the end of the same week and I couldn't tell it from a new unit at a cost less than a nasty new friction plate. Precision Clutch had come up trumps.
Refurbished Borg and Beck Clutch Cover and Refurbished Borg and Beck Friction Plate

Further Clutch Mods
The TR clutch cross shaft tends to be problematic so while it was all in pieces I resolved to improve the reliability before reassembling it.
The standard split cross shaft bearings are only about ½" wide and tend to wear the shaft so I sourced some wider Oilite bushes and pressed them into the gearbox casing.
The early TRs have grease nipples and galleries in both ends of the shaft to grease the bearings and although the Oilite bushes shouldn't strictly require additional lubrication I figured that it wouldn't do any harm. An hour's work saw the galleries drilled and grease nipples fitted.
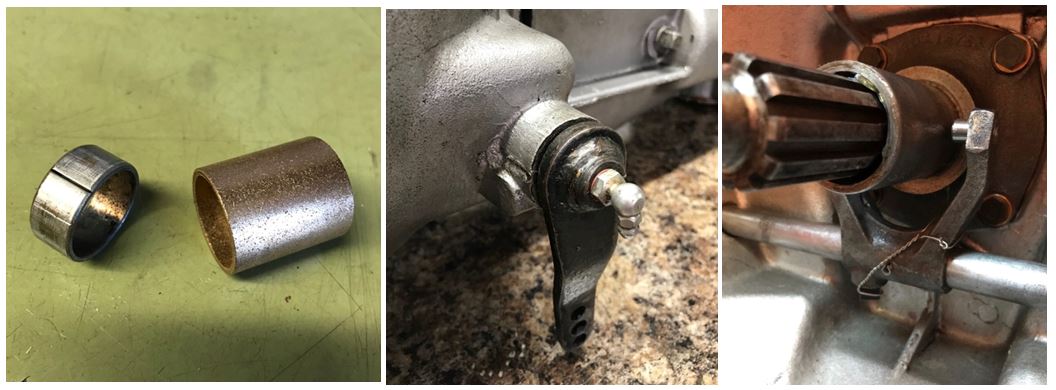
Another weak point is the actuating fork tapered pin. The pin tends to break in its blind hole and can subsequently be found extremely difficult to remove. The first mod here is to drill a small hole through the fork from behind the pin allowing access for a punch to drift out the remnants of a broken pin.
The next step is to replace the standard pin with a tougher version in this case purchased from Revington TR. I then drilled through the fork and shaft and fitted a hard spring steel roll pin to augment the taper pin.
The taper pin was Loctited in place and then wire locked as standard. Remember that while Loctite, spring washers and split pins stop things from coming loose. Wire locking doesn't stop things from coming loose, it just stops the loose bits becoming detached and flailing around and should always be augmented by and additional locking method.
Gearbox and Overdrive Rebuild
While the gearbox was on the bench I thought that it would be a good opportunity to investigate the overdrive action which had become a bit slow and sort out a couple of oil leaks so I dropped the oil and found that a hedgehog was living on my magnetic drain plug…..!
This resulted in the complete gearbox and overdrive being spread around the garage in its component parts……..
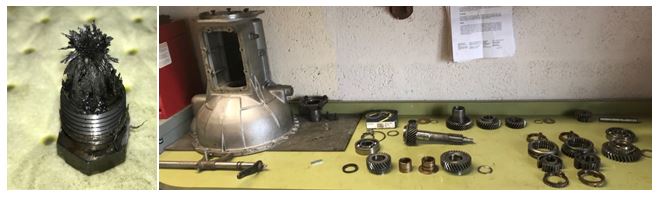
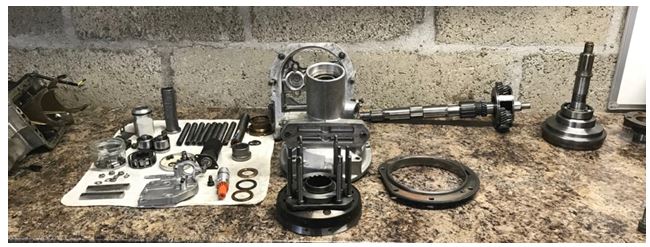
The biggest job was cleaning up all the parts for inspection to reveal a worn lay shaft and lay gear bearings, broken lay shaft retainer, damaged main shaft, hardened seals and worn bearings.
The source of the debris seemed to be the worn lay shaft, a common fault with Triumph gearboxes. I sourced some new cased crowded needle roller bearings which will take a much higher load than the standard caged rollers and thanks to Devon member John Vincent the lay gear was machined to take two bearings at the 1st gear end in place of the standard single bearing. I now don't expect to remove the lay shaft again……although the TR4 box is a bit noisy…..
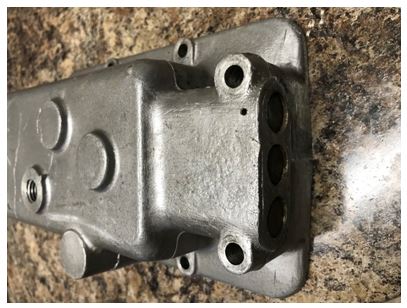
As the gearbox had been dripping a bit of oil I investigated the breathing and discovered that the overdrive breather had been replaced with a blanking plug and the gearbox itself had no breather! The blank was drilled up from its base with a 6mm drill and then in through the side with a 3/32" drill to make an effective breather. The gearbox selector housing was drilled through into a selector shaft gallery adjacent the front mounting bolt to provide a breather well out of the splash lubrication area. Hopefully the improved breathing will minimise internal pressure and reduce leakage.
Gearbox and Overdrive Testing
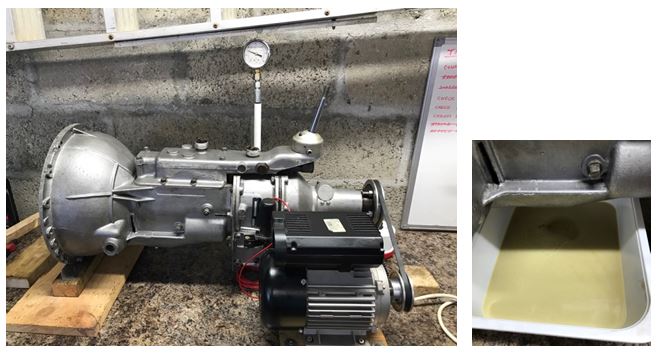
A big shopping list and a few days of careful work saw the unit back together and ready for bench testing.
I filled the gearbox with Penrite GB40 and ran it for about 20 minutes. All seemed well at first but the overdrive pressure became slow to recover and a bit erratic. I drained the oil and found that it had foamed into a creamy mess.
The oil had recovered its normal appearance by morning so I refilled the box and ran it for 5 minutes. When the oil was drained it had foamed up again.
I replaced the oil with some Halfords Classic 20/50 and ran it again. The 20/50 foamed a bit but not as badly. I refilled the box with 20/50 and ran it and the oil looked good when it was drained.
John B let me have some of the EP 90 that he has used for some years so I filled the box with that and ran it for 30 minutes hoping that if all was well I could get the box back in the car but draining the box again revealed the creamy tray of foamy oil.
I spoke with Pete Cox, Overdrive Repair Services, and e-mailed Penrite technical bods without any real success although Pete did say that he had noticed aeration before when bench running.
I thought about the fact that the thinner 20/50 seemed to fare better and looked at running temperatures. Bench testing until the temperatures stabilised took about an hour and saw temperatures of 25 to 30 degrees C; much lower than expected in service temperatures.
I ran the unit from cold with a paint-stripping gun aimed at the gearbox sump and didn't notice any of the fluctuating overdrive pressure previously observed after extended running. After running for half an hour the temperature had reached nearly 40 degrees C and everything seemed in order. I drained the oil and found minor aeration with zero foaming.
I expect that in service the box will run hotter and aeration will be further reduced when the oil viscosity is reduced.
Had I refitted the gearbox without bench testing the perceived problem would never have surfaced but on the plus side I wouldn't have learned anything about gearbox lubrication.
Hopefully all will be well when the unit is road tested.
Perhaps all those years as an aerospace development test engineer have left me tending to look at things a bit too closely.
The important lesson here is that, regardless of the grade, gearbox oil will aerate and foam when cold causing cavitation of the overdrive pump and reduced lubrication properties. So take it easy until things are warmed up properly as you are likely to cause excessive wear in the gearbox as much as the engine.
TR4
In common with most TRs the body on my TR4 suffered from a small offset relative to the chassis which becomes more obvious with wider than standard wheels fitted as the tyres then come flush to the arches.
The offset in my case was only about 6mm but this resulted in a 12mm difference side to side the rear tyre being outside the arch on one side and inside on the other and my eye was always drawn to it.
It sounds like a big job but a morning's work saw the body fixings removed, the body moved over to remove the offset, and the fixings replaced.
Don't get too paranoid when you notice an offset on your car as most are like it to one degree or another but it's not obvious and usually needs a critical eye or some careful measurements to identify.
I know of a number of cars using wheel spacers on one side only to redress the balance!
Andrew
Paul Gibson – TR6
Paul has been busy over the winter months and writes: -
Fuel System Mods
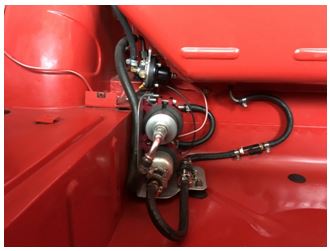
I fitted a fuel tap in the line from the tank to isolate the supply for maintenance purposes and made a neater mounting bracket.
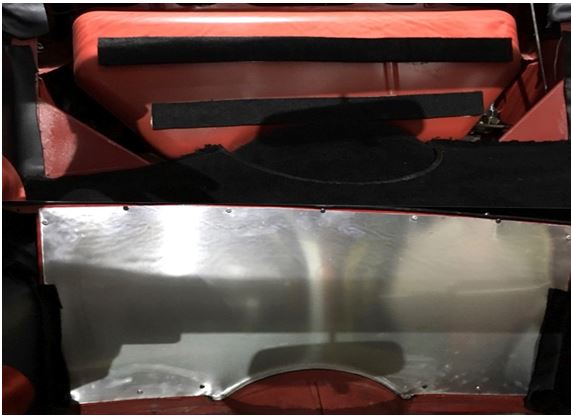
Fitting a Rear Firewall
I used the "Willmott" template as a starting point and it proved to be a good timesaver!
The template comprises a central section and two wing sections, which are a pretty close match to most cars and just need minor trimming or addition to suit the individual car. There is also a two-piece wooden block used to form the flange running over the diff hump. The aluminium sheet was pop riveted in place over a bead of Tigerseal
Note: The templates and formers are available for loan to all group members.
Contact Andrew W.
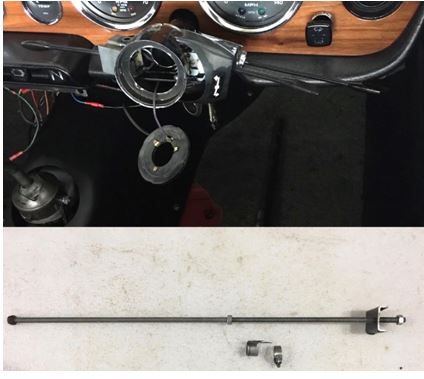
Replacing Steering Column Bushes.
I used up-rated bushes. After reading all the horror stories on the forum about what a B@3tad of job this can be I found it quite simple.
My method -
Remove steering wheel and the horn brass ring and the indicator-cancelling clip. Then remove the bushes. I made up a removal / inserter tool from a length of threaded bar (which doubles as my front spring compressor!!) This is used to drift out the lower bush.
If you have a steering lock you can use this as a slide hammer to remove the top bush, if not use the threaded bar to pull the top bush out.
To insert the bushes I used some thin aluminium strip and a jubilee clip to compress the locating pips. On the top bush there was no room for the jubilee clip so I used some strong steel wire.
Top tip: - clean the inner column and check the fit of the new bushes, as one of mine needed a little sanding with some 600 grit. Use plenty of silicon lube!!
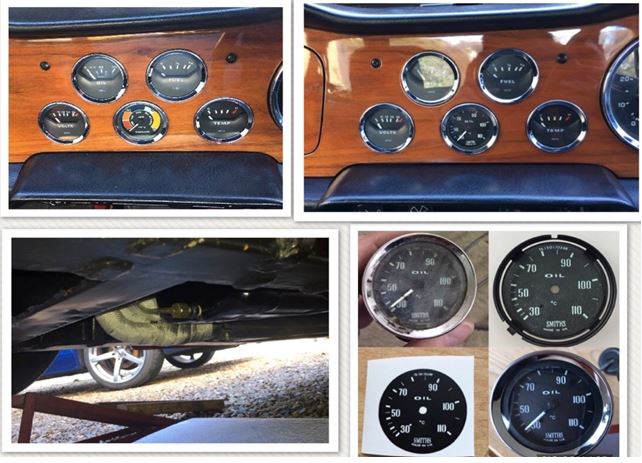
Fitting An Oil Temperature Gauge
Having already modified my dash to remove the panel light dimmer (I've never heard anyone say OMG I must dim my panel lights they are blinding me!!) and replaced it with a vacuum gauge I thought an oil temp would be more useful. These retail for around £120 so I bought a scruffy mechanical one off eBay the spent A LOT of time refurbishing it. What to do about the sender? Not wanting to remove my sump at this time to weld in a fitting I made an adaptor to replace the drain plug.
Gearbox Tunnel Replacement
I spent some time changing my very tired cardboard gearbox tunnel for a plastic version purchased at the 2017 IWE.
All pretty straightforward bit fiddly marking and drilling the fixing holes. I omitted the fixings around the top at the forward end of the tunnel, as the radius of the new tunnel is greater than the old cardboard one. I just fitted a rubber seal.

Fitting Intermittent Wipers
I had previously installed the Maplin's kit. This works but didn't seem a very robust solution. So I came up with an idea using the VW / Audi relay as found on early Golfs, Passat, T4 Transporters etc. This provides a variable wipe delay from 1 to 20 seconds and is much smaller to mount and is a more professional solution. My car uses the round 2-speed wiper motor similar to modern units, so after a little head scratching to work out the wiring it proved very simple to wire with no modifications to the triumph loom and is totally reversible.
Overdrive Logic Unit
I had previously fitted my cheap logic unit cribbed from the forum and made with 2 relays and reported in an earlier edition of In The Garage.
It worked Ok but I didn't get on with it and removed it, preferring to have manual control. My main criticism was that when changing up the difference between 3rd O/D and 4th was too small and therefore I didn't think that it was worth the faff!!
Paul
John Blake TR4 x 2
We left John "In The Garage" at the end of last year taking his engine apart yet again to investigate a tapping noise at tick-over. It turned out that a worn cam and follower was to blame and in true JB the offending parts were soon replaced and the Green Meanie was soon back on the road with a new 'high torque' cam………..for a bit.
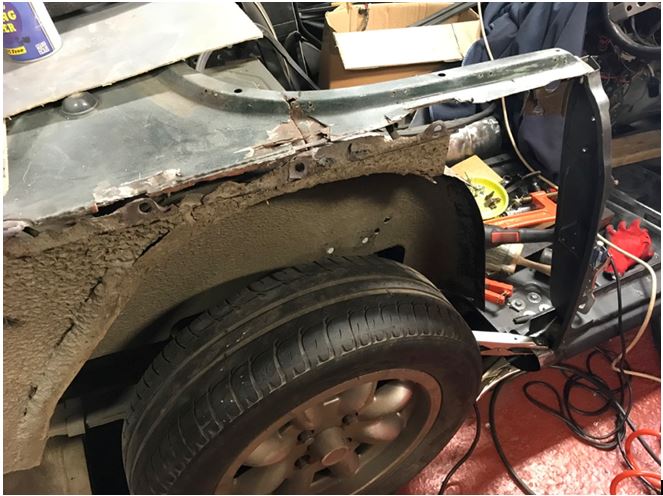
The front wing had parted company from the sill and tended to flap a bit at speed forcing the following North Devon crew to drop back some distance to avoid any stray detached bits!
Investigation revealed that there wasn't anything left of the outer sill to support the wing and that there was precious little left of the floor, inner wings and most of the other sheet steel giblets normally hidden by the outer panels!
None of this was news to John and he has been collecting panels for some time ready for the body rebuild, so the bullet was bitten and the body repairs are now well underway. The current plan is to repair the offside and return the car to service for the summer before continuing with the nearside. Bodywork is notoriously time consuming so don't be surprised if you see John driving my TR4 for the early season lunches!
JB getting down to work.
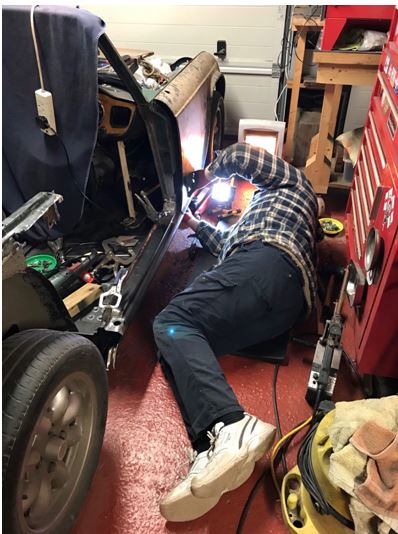
The new inner wing need a lot of attention to get it fitting this well…….it may have been easier to make one from scratch!

This rear quarter is typical of what was revealed when the outer panels were removed!
Frank Summers TR4a, TR7 and…….
Frank has been beavering away in the depths of the North Devon countryside improving his TR7 ready for the summer months.
The new stainless steel exhaust system was fitted first and followed by new engine mounts and new standard springs and dampers all round. No radical changes but the car now handles as it did when it was new which is a bit of a blow as I thought I was hanging on quite well in the 3a on a brisk autumn run home. It turns out that the TR7 was on sloppy suspension!
The car has also grown a roll over bar which Frank is understandably not keen to test.
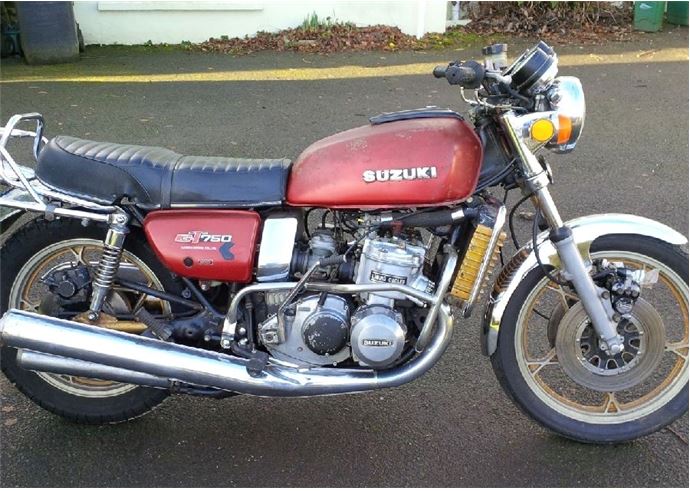
Frank has joined Steve in failing to resist the call back to two wheels. To that end he has picked up a Suzuki GT750 project. The water-cooled, two stroke triple runs, and now that Frank has rebuilt the brakes it rides too. The bike may see an MOT soon and then be ridden for a bit "as is" prior to the planned full rebuild.
The 'Kettle"
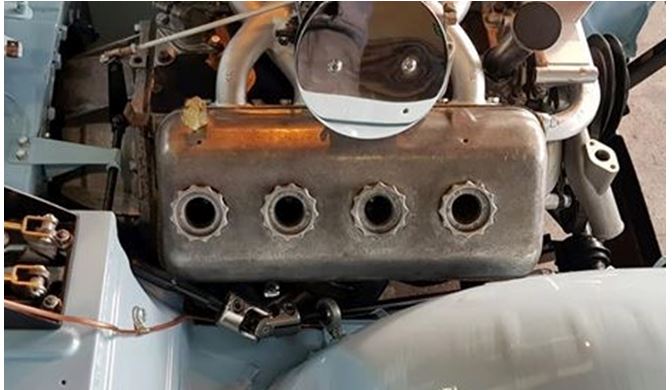
Charles Marten - TR4 V8
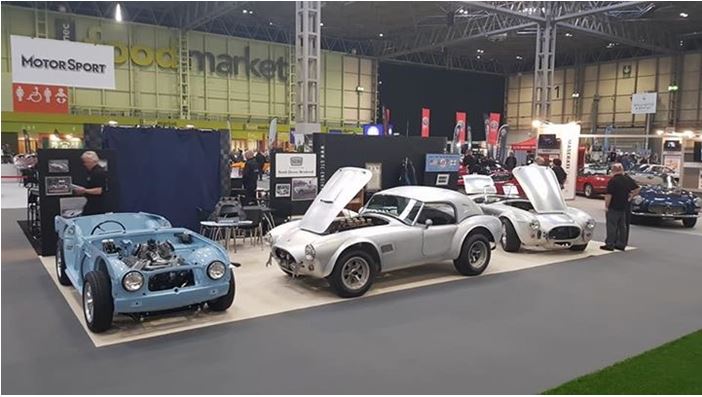
Last year saw Charles' red TR4 off to a new home and the V8 project coffers replenished but not before the V8 saw it's first outing to the Classic Motor Show at the NEC, where the part finished project drew a lot of attention on the North Devon Metalcraft stand.
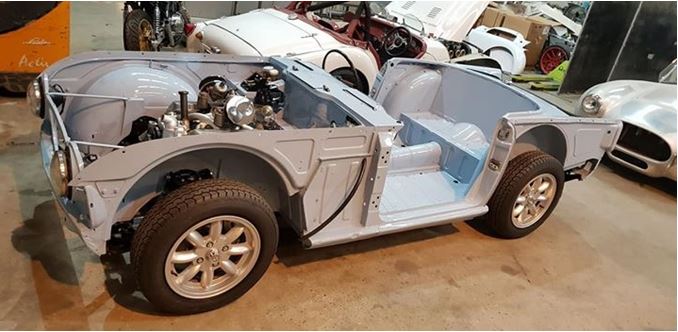
Progress slowed over the Christmas period but it's full steam ahead now that the car has returned from the exhaust specialists with its bespoke headers and exhaust system completed.
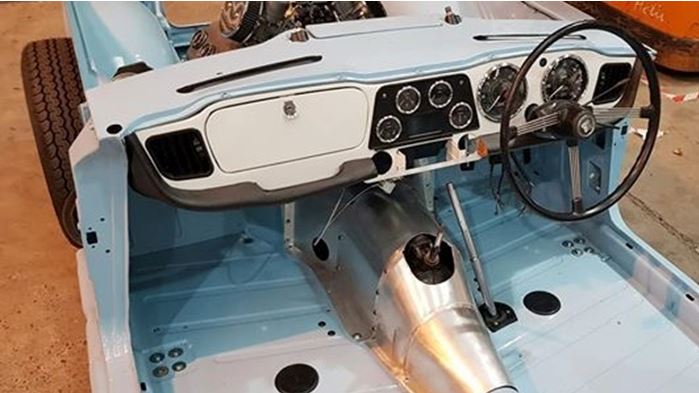
The dashboard and instruments are now in place ready for the loom installation and the cooling and ancillary components are fast filling up what used to look like plenty of space in the engine bay.
5 ½" wheels with 165 Vredestein Classic tyres should keep the handling period and predictable.
The steering column nicely clears the dipstick. Rod operated throttle has been retained.
The ubiquitous white TR4 dashboard has been retained and with the blue interior fitted the car will appear fairly standard until the motor is fired up.

The ubiquitous white TR4 dashboard has been retained and with the blue interior fitted the car will appear fairly standard until the motor is fired up.
The engine is fitted well down in the chassis to keep the centre of gravity low and avoid having extra bulges in the bonnet to clear the twin SU carburettors.
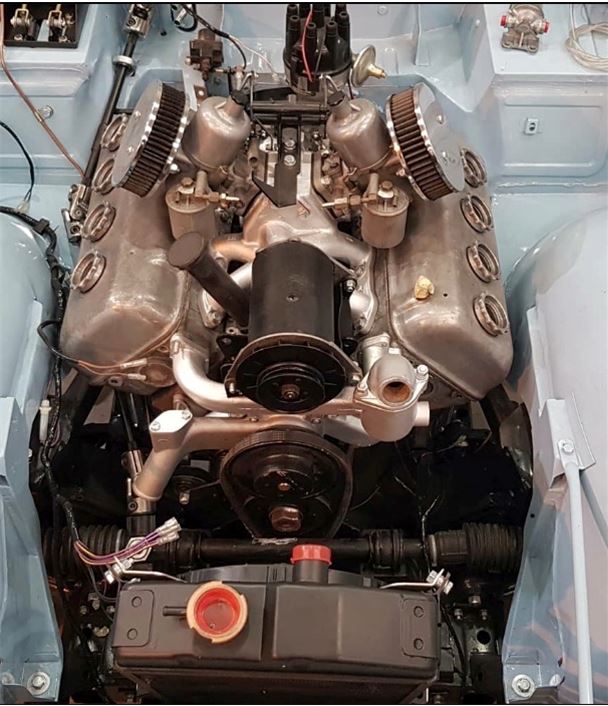
The engine is now very close to being started prior to the fitting of outer panels and interior trim.
Keep your ears open for the rumble…
Pete Robinson – TR4 (not 4a despite the repeaters)
I've been enjoying my recently acquired TR4 this winter. It was exported new to France in November 1963 and came back to stage UK in 1974. The TR4A indicator/light units have been on it since at least '74. I bought it at the end of last year from a chap on the Dorset coast - he and his late brother owned it from 1974.
Other than driving it, I've done a few maintenance and cosmetic jobs - fixed the overdrive which the last owner didn't know existed (just a new column switch thankfully) - plus collecting period French/Triumph memorabilia.
Hopefully heading to France this year, but first plan to do an alternator and narrow belt conversion.
See you around, Pete Robinson (Braunton)
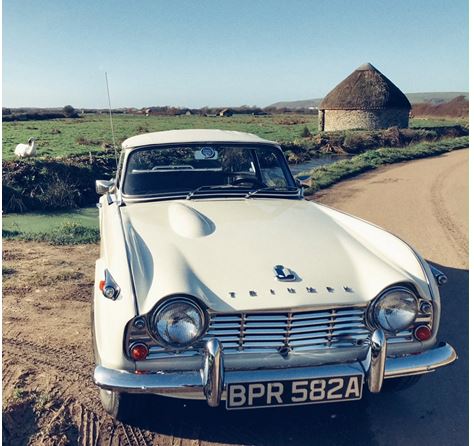
Pete is a new Register member and addition to the North Devon crew being based in Braunton. He is not new to the classic car community having owned split screen VW vans and a rare Vitesse Estate which served as his daily driver. His TR4 is very presentable and boasts lots of original features. The sharp-eyed will have noticed that the controls are in front of the wrong chair so that the passenger will have to drive. Its part of the cars history so Pete intends to keep it that way.
Welcome to the fold Pete.
Andrew
Alan Burgess – TR6 project
In the Garage?– well behind the garage is more correct and not going anywhere anytime soon!
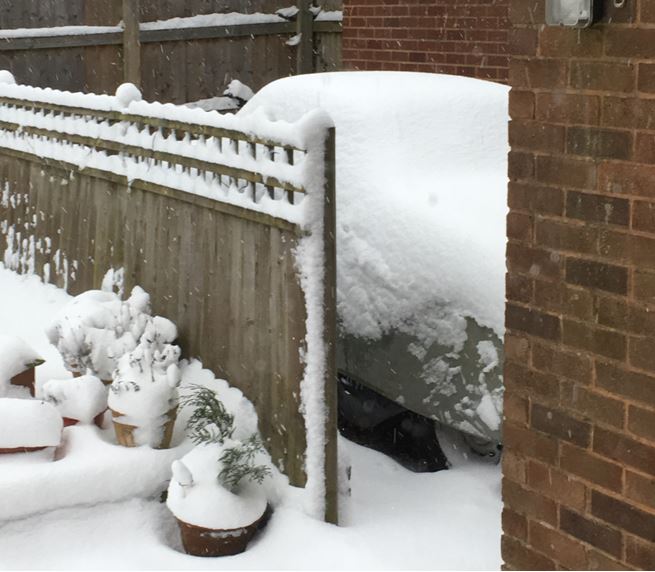
This is my project TR6, LUY224N and it has been nicely covered over for a while (many years actually..)with waterproof sheet and car cover – and more recently – an additional blanket of snow. However, as I contemplate not working full time in the near future, my thoughts have turned to making some progress on my project (before I start too much decorating) and I've been shopping!
So far, I've managed to bag two bargains from the TR Register 'for sales' the first being a Phoenix 6-3-1 stainless manifold, which will go nicely with the single straight though exhaust I bought a couple of years back, and I've also bought a spax rear shock absorber conversion kit, both items being in nice condition too. So, maybe this is the start of some regular updates from me for our 'In the Garage' newsletter? We'll just have to wait and see.. Alan
You – Your Car
Thanks to all our contributors to this issue.
Contributions and feedback (positive or negative) are always welcome.
What's happening in your garage?
Please make a few notes about your garage exploits and email them to me for the next issue.
Contributions are best managed by sending in plain text with attached photos or in Word format.
Mail your notes and pictures to: andrewawillmott@gmail.com
I am happy to hone rough notes (or even quite eloquent submissions) prior to publication.
Andrew W